How to Can Food at Home – Quick Guide to Safe Home Canning
This post may contain affiliate links. Read my full disclosure here.
To can food at home, you combine canning safe glass jars, lids with rubber gaskets, food that’s safe for canning and the right heat processing. Home canning allows you to preserve almost any food – even entire meals – but you need to follow the rules.
In this post I’ll discuss how to can food at home safely, basic equipment for home canning, canning tips and recipes.
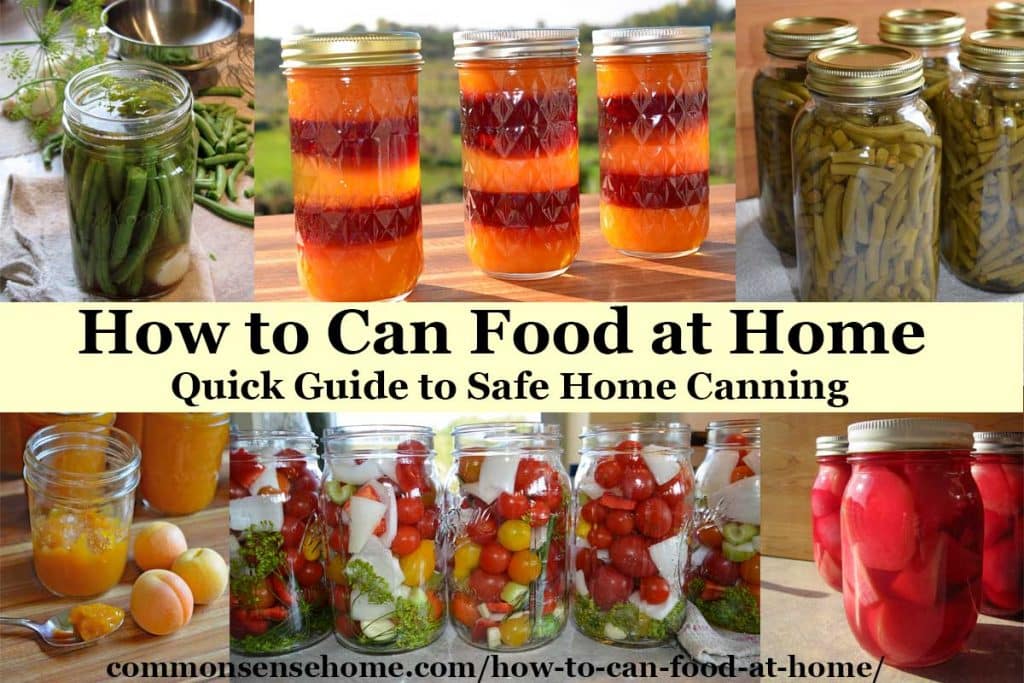
Once your jars are sealed, all you need is a cool, dark space to stash your bounty. No electricity is required for storage (unlike freezing) and no water is needed to serve (unlike dehydrating).
This makes home canned goods an excellent storage food for times when the power is out or water service is interrupted. If you can cook basic recipes, you should be able to can food at home.
How to Can Food at Home – Quick Guide
- Decide what food you want to can.
- Find a safe canning recipe for that food.
- Assemble your canning supplies such as a water bath or pressure canner, jars, lids, funnel, jar lifter, etc. (See full list below.)
- Gather your produce and other ingredients and prepare according to safe canning guidelines.
- Process your home canned goods in a boiling water bath canner, steam canner or steam pressure canner for recommended processing time and rest time.
- Remove jars from canner and place on a towel to cool (12-24 hours). Try to avoid tipping jars too much as you remove them from the canner so you don’t get food in the jar seal.
- Check seals on jars. If jar has not sealed properly, refrigerate and consume within a couple of days. Remove rings for storage, wipe any spills or drips.
- Store jars in a cool, dry location, out of direct sunlight. Use within 1-2 years for best quality.
Recommended Resources:
- Ball Blue Book Guide to Preserving
- Ball Complete Book of Home Preserving
- The Organic Canner
- Food in Jars: Preserving in Small Batches Year Round
- Simply Canning: Survival Guide to Safe Home Canning
How Does Home Canning Work?
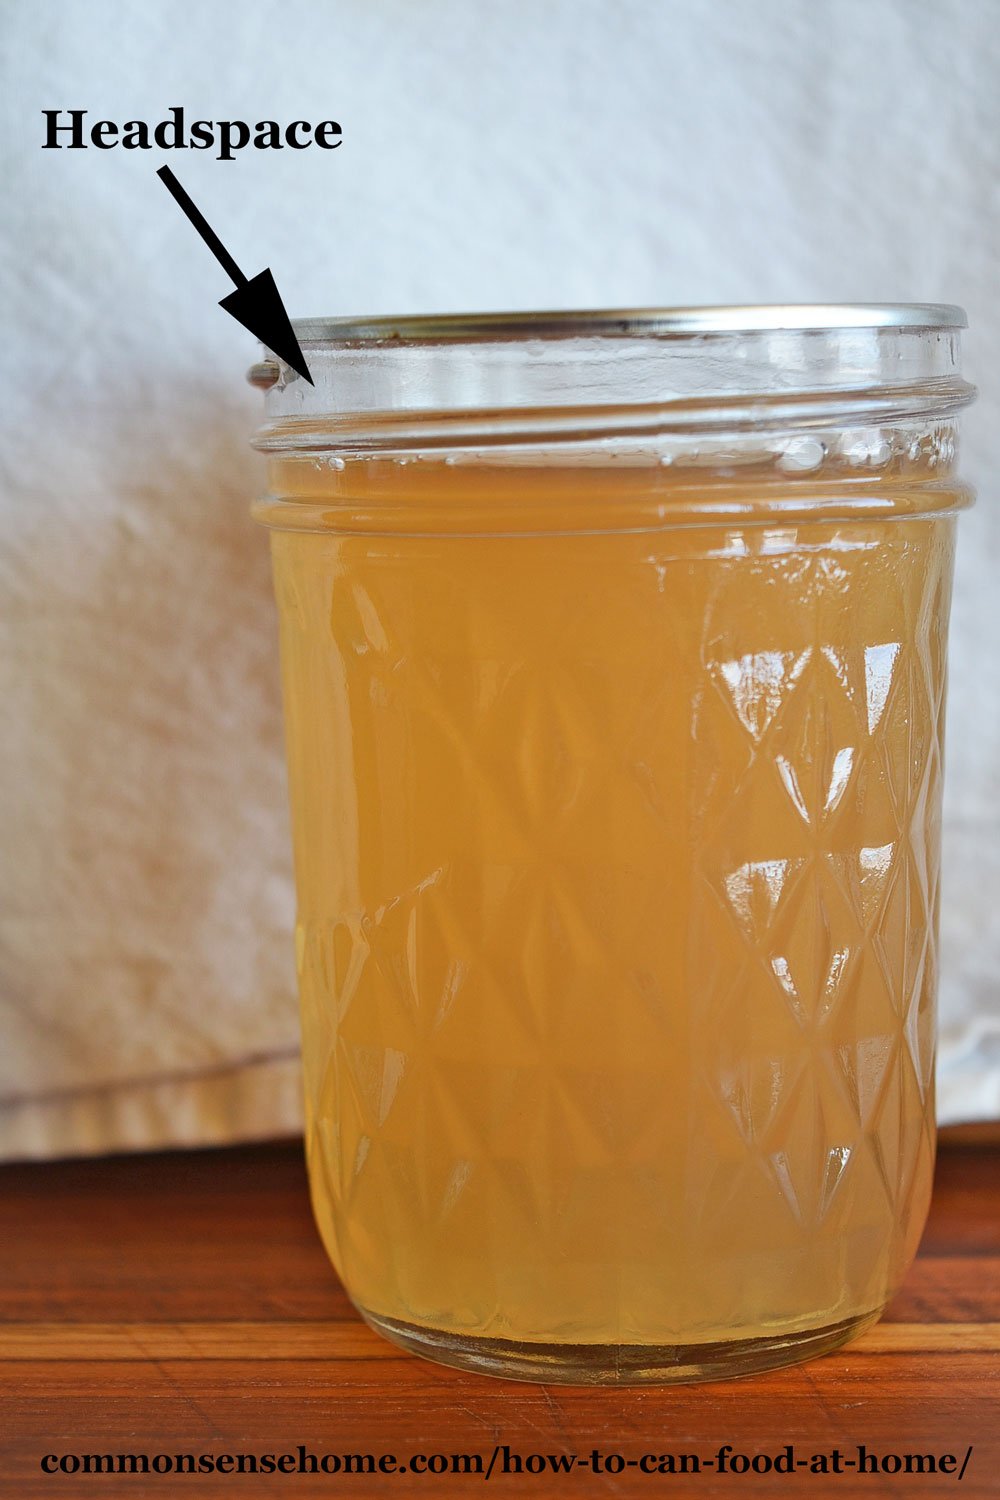
In simplest terms, you put food in a jar and heat treat for a certain amount of time to kill off microbes that will spoil it. When processed correctly, air is driven out from the headspace (the area between the top of the food and the jar lid), and a partial vacuum is formed.
Cooling completes the seal (the “plink” sound when the lid pulls down). No air + no microbes = preserved food.
The acid in foods that are safe to water bath can also inhibit the growth of bad microbes. Some microbes are really tough – like botulism spores – and require heat AND pressure to kill. (More on this below in the pressure canning section.)
Originally, this type of preservation was done with tin cans, thus the term, “canning” versus “jarring”. The Mason jar was introduced in 1858.
There are three types of home canning – water bath canning. steam canning and pressure canning.
Water Bath Canning
What foods can be canned in a water bath?
Use water bath canning for canning high acid foods (foods that have a pH of 4.6 or lower). This includes:
- Fruits
- Most soft spreads
- Tomatoes (with added lemon or citric acid)
- Pickles and other high acid foods
Do I need a special canner for water bath canning?
For water bath canning, you can use a commercial water bath canner or any large pot, as long as you have enough room in the pot to cover the jars with at least one inch of water.
You must not allow jars to sit directly on the bottom of the pot, or they will be more likely to break. (One option to keep jars off of the bottom of the pot is to make a “rack” of canning rings.) You can use your pressure canner for water bath canning – just leave the vent open.
If you plan to do any amount of canning, a standard water bath canner is fairly inexpensive and well worth the investment.
Steam Canning
Steam canning is another option for preserving high acid foods. This should not be confused with pressure canning. Steam canning was re-approved for home food processing in 2018, after being out of favor for some years.
In a steam canner, jars are processed in pure steam at 210-212 °F, but they are not under increased pressure. Water is placed in the bottom of the canner to generate steam. The jars are not submersed in water.
Processing times must be limited to 45 minutes or less, to avoid the canner boiling dry. Use the processing time and headspace specified for water bath canning for steam canning.
See full safety guidelines at “Safe Preserving: Using a Steam Canner“.
Pressure Canning
What foods can be canned in a pressure canner?
Use pressure canning for low acid foods (foods with a pH higher than 4.6). This includes:
- Meats
- Seafood
- Poultry
- Dairy products* (Canning dairy is not generally recommended. Try freeze drying instead.)
- Vegetables
- Soups and Meals
Why do we need to pressure can these foods? We pressure can because of Clostiridum botulinum – otherwise known as botulism toxin – which can be deadly. This bacteria lives in soils and sediments, so it’s everywhere, but most of the time it doesn’t cause trouble, because it lives with lots of other bacteria.
Here’s the problem – botulism grows at temperatures between 40-120°F (5-49ºC) and oxygen levels below 2 percent – like the inside of a sealed canning jar. High acid foods (pH ≤ 4.6) keep botulism spores from germinating into live cells.
To destroy the botulism spores, process low acid foods at 240-250°F (116-121°C) under pressure of 10-15 pounds per square inch (psi) at sea level. Always follow a tested recipe when canning low acid foods.
What Vegetables can be Canned?
Remember, vegetables are low in acid and must be processed in a pressure canner, unless they are pickled with added acid. The National Center for Home Food Preservation notes that that following vegetables can be canned in a pressure canner:
- Asparagus, Spear or Pieces
- Shelled, Dried Beans or Peas – All Varieties
- Baked Beans
- Dry Beans With Tomato or Molasses
- Fresh Lima Beans – Shelled
- Beans, Snap and Italian – Pieces, Green and Wax
- Beets – Whole, Cubed, or Sliced
- Carrots – Sliced or Diced
- Corn – Cream Style
- Corn – Whole Kernel
- Mixed Vegetables
- Mushrooms – Whole or Sliced
- Okra
- Peas, Green or English – Shelled
- Peppers
- Potatoes, Sweet – Pieces or Whole
- Potatoes, White – Cubed or Whole
- Pumpkins and Winter Squash – Cubed
- Soups
- Spinach and Other Greens
- Succotash
- Tomatillos
Note that pumpkins and other winter squash can only be canned as cubes, not as puree. Although you may purchase canned pumpkin puree, we can’t ensure uniform heat transfer to puree in a home kitchen. When ready to used canned pumpkin cubes, simply drain, mash and proceed with your recipe.
How long do you boil a jar to seal it?
Although boiling a jar in a water bath canner does seal it, that’s not the only reason we boil our canning jars during the canning process.
We determine the processing time (time to boil a jar during canning, or time to process at the required pressure) based on the type of food and the head space.
Head space is the distance from the top of the food to the jar lid.
During processing, we want to drive the air out of the jar headspace. This creates a partial vacuum in the top of the jar, and a tight, long lasting seal.
A typical processing time for jams and jellies is 10 minutes. You begin timing when your canner is at full boil. When using a pressure canner, processing time begins when the required pressure is reached.
Heating the food also kills off harmful microbes. Some foods require heat and high pressure. (See Pressure Canning, above.) Always follow tested recipes and use full processing times.
Many people swear by simply screwing the canning lids onto hot jars with hot contents. This will often seal the jars, but it does not create a vacuum, which increases risk of spoilage. There is also an increased risk of seals failing during storage.
Can you reuse lids for canning?
It depends on the lid. Basic metal lids with a rubber gasket are meant for only one use. During the home canning process, the rubber gets deformed, and it’s unlikely to make a good seal if reused.
Tattlers reusable canning lids are plastic and have a separate rubber ring gasket. Tattler lids are intended for reuse, although some users report higher levels of seal failure. I don’t find them to be quite as reliable as single use lids.
See “Comparison of Jarden Metal Lids and Tattler Reusable Canning Lids” for more information.
Weck canning jars come with a glass lid and separate rubber gasket. Their lids are also intended for reuse.
Below I cover some basic canning equipment that you can buy online or in most hardware stores. You may also be able to find some of it used.
How long does home canned food last?
The quality of home canned food is best within one year of processing. As more time passes, the color and flavor of the food will fade, and the food will get softer over time.
People have eaten home canned food that was 5 or even 10 years old or more, but I wouldn’t recommend it.
Always check to make sure the lid is on tight, and that there is no mold or other signs of spoilage. When in doubt, throw it out.
Would you like to save this?
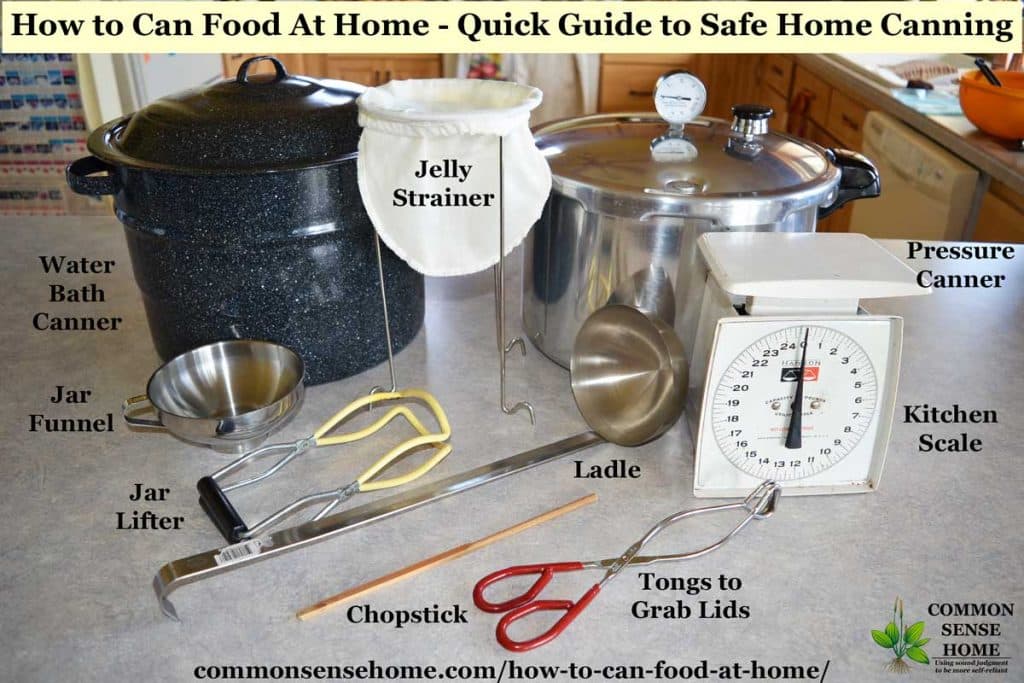
Basic Equipment Needed for Home Canning
Starting at top left in the above photo and working clockwise.
Water Bath Canner
Water Bath Canners are used for canning high acid foods (having a pH of 4.6 or lower). They are a large pot with a lid and a rack in the bottom to keep the jars off the bottom of the canner.
Jelly Strainer Bag
The white baggie thing in the middle of the photo is a jelly strainer bag. I love this thing. Not only to I use it for straining jellies, I also use it for straining stocks and herbal infusions.
Pressure Canner/Steam Pressure Canner
A steam pressure canner is required for all low-acid foods, such as veggies, meat, soups and stews. I don’t recommend canning things like bread, pumpkin butter or chocolate syrup at home. Botulism can be deadly.
If I had a nickel for every time I’ve heard someone say, “Well I know so-and-so who has done it this way for years and they never got sick”, I could retire early.
One batch of bad food can kill or make you sick. What’s your family’s health worth to you? Get your canner tested every 3-5 years at a local extension office to make sure it is holding pressure properly.
Kitchen Scale
Kitchen scales are a necessity when you get into recipes like salsas or sauces, but they also come in handy for gauging how many jars you’ll need for the amount of produce you have, for knowing how much syrup to make to cover your fruit or for measuring sugar for jams and jellies.
The scale I have used to be my grandmother’s. It’s been around a while (okay, it’s much older than my kids), but it still works just fine.
Canning Ladle
A big, stainless steel ladle that holds at least 1 1/2 to two cups of product will allow you to fill jars much faster than a standard kitchen ladle.
Chopstick or thin non-metal spatula
You need some sort of long, thin object to run around the outside of jars to remove air bubbles. We have chopsticks on hand, so I just use one of those.
Don’t use a knife or other metal object, as you may scratch the inside of the jar and damage it.
Kitchen tongs or a magnetic jar lid lifter
Again, since I have kitchen tongs on hand, I just use those, but magnetic jar lid lifters can also be used. You want to hold your lids in nice hot water (not boiling) to get them ready to seal. It’s a little hot to stick your fingers into.
Jar lifter
Another must have – canning jars get wicked hot, so you really need a proper jar lifter to move them about.
Jar Funnel
A good jar funnel will make it MUCH easier to fill jars, even wide mouth ones. Big ladle + big funnel = fast jar filling.
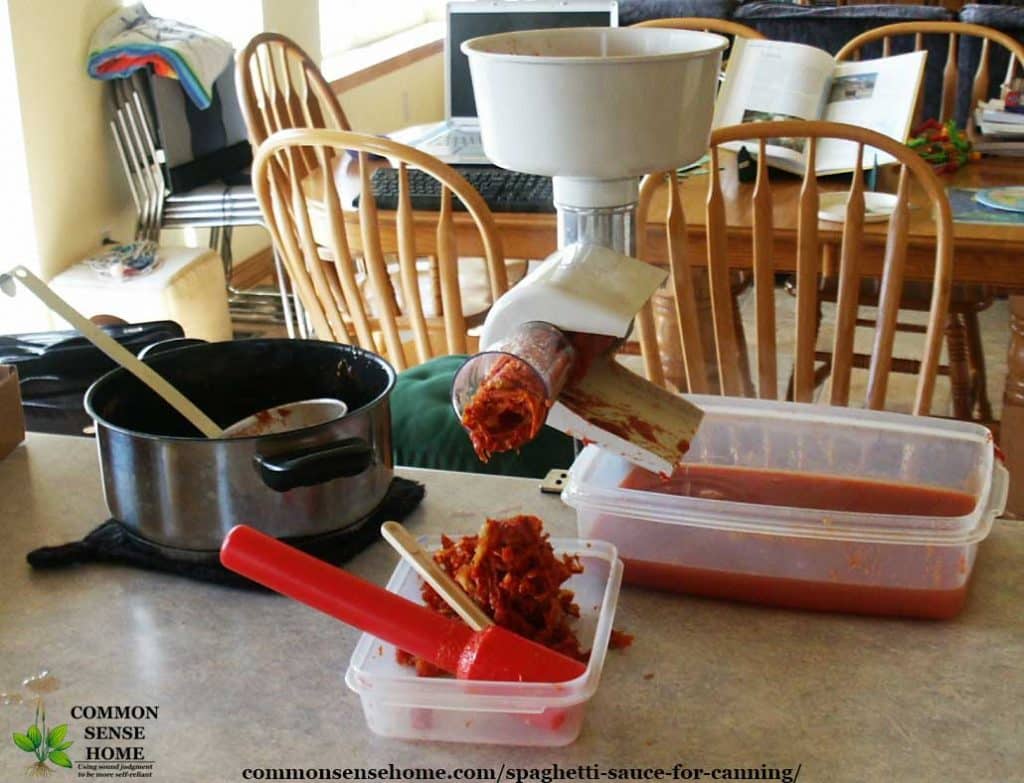
Food strainer
Food strainers are useful for making sauces. I use mine mostly for marinara sauce and apple sauce, and store it in the box to keep the parts together.
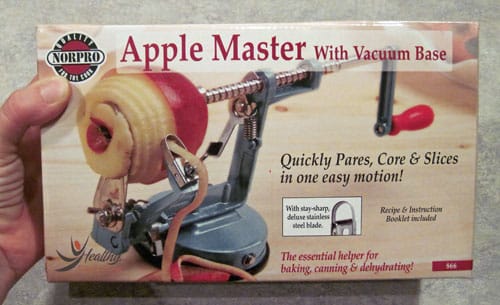
Apple Peeler/Corer/slicer
I use my apple slicer mostly for dehydrating, but it would be great for canning apple pie filling, too. (Norpro Apple Master).
Steam Canner – There are not many steam canners on the market at this time, but the Victorio Aluminum Steam Canner is well rated and available.
What Foods Are Easiest to Can?
Full sugar jams and jellies are probably the easiest foods to start with, because they process for only short amounts of time in a water bath canner and are really hard to screw up. Low sugar versions are only a bit trickier. Plain tomatoes or tomato juice is also very simple, as are fruits and fruit juices.
I do the bulk of my home canning during harvest season, but it’s okay to delay until cooler weather – if you have freezer space. Simply toss whole fruit (like tomatoes) or fruit puree into the freezer, and then finish processing when the weather has cooled.
General Canning Tips
- Prepare your jars, lids and all your equipment before you prepare your food.
- Work from one direction to the other. Don’t cross back and forth – it gets messy.
- Keep everything hot. You’ll remember this tip very quickly if you lower a cold jar into boiling water, or ladle hot syrup into a cold jar. Jars break rather impressively and make a huge mess.
- Always check and double check the edges of your jars and your lids. Any imperfection along the edge of a jar, and it is unlikely to seal properly. Put it in the recycling bin.
- Keep everything clean. You’ll have drips and spills, sure, but remember this is food prep, so try to keep your work space clear of outside contaminants such as hair or dirt.
For additional information on canning and other home food preservation methods, see “Home Food Preservation – 10 Ways to Preserve Food at Home“. Also, “The Natural Canning Resource Book” answers nearly every question I’ve ever had about canning.
Home canning and other home food preservation allows you to stock your pantry with quality food at affordable prices – with no mystery ingredients.
If you have canning questions, just ask, and I’ll do my best to help. I’ve been canning ever since I was a little girl (many decades ago), and keep op to date on the latest canning safety guidelines.
Canning Recipes
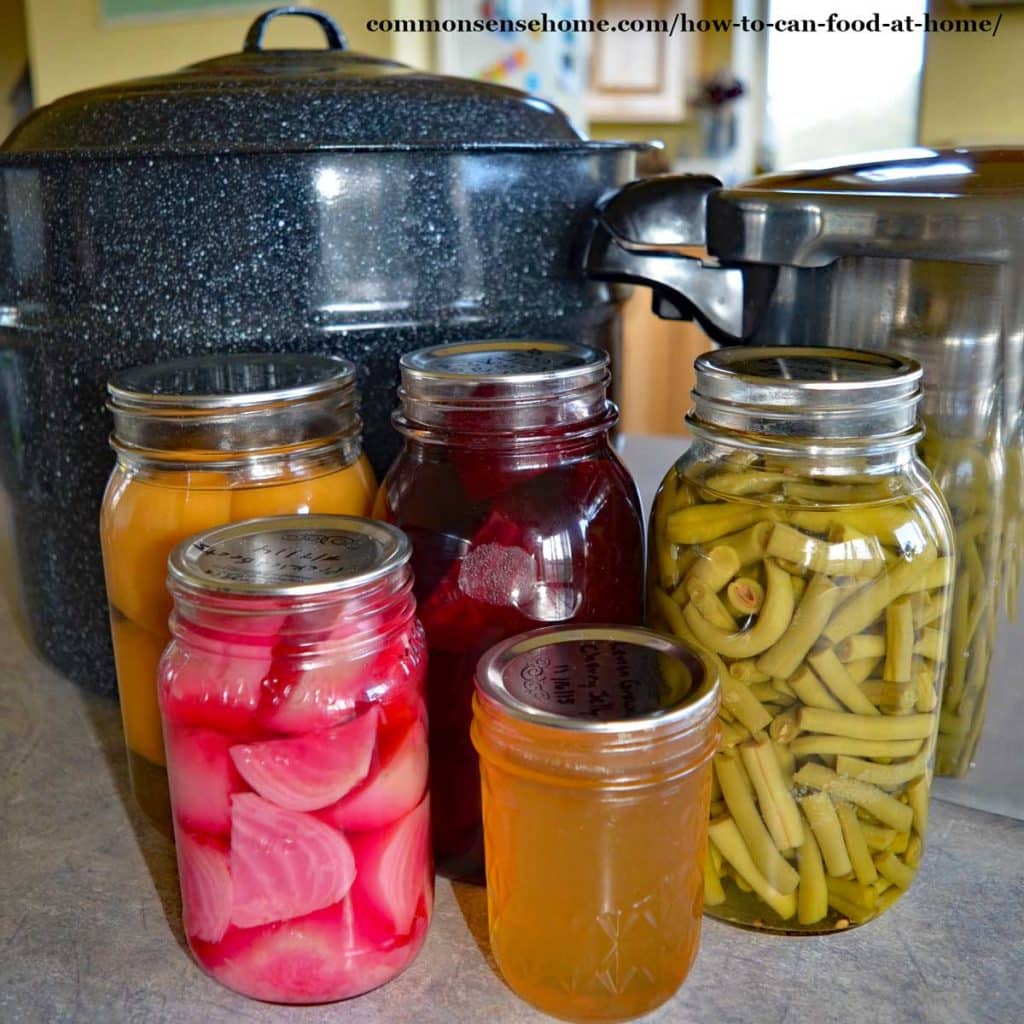
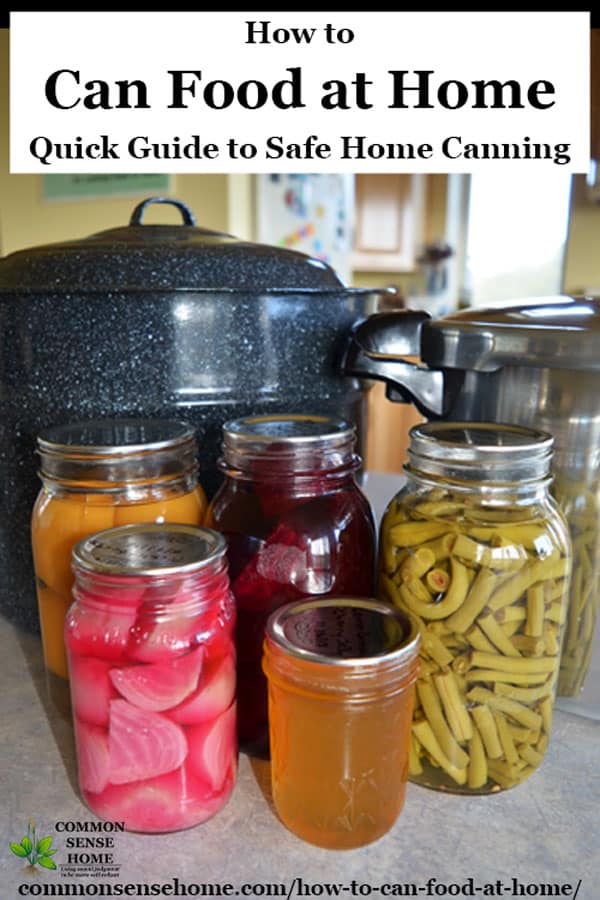
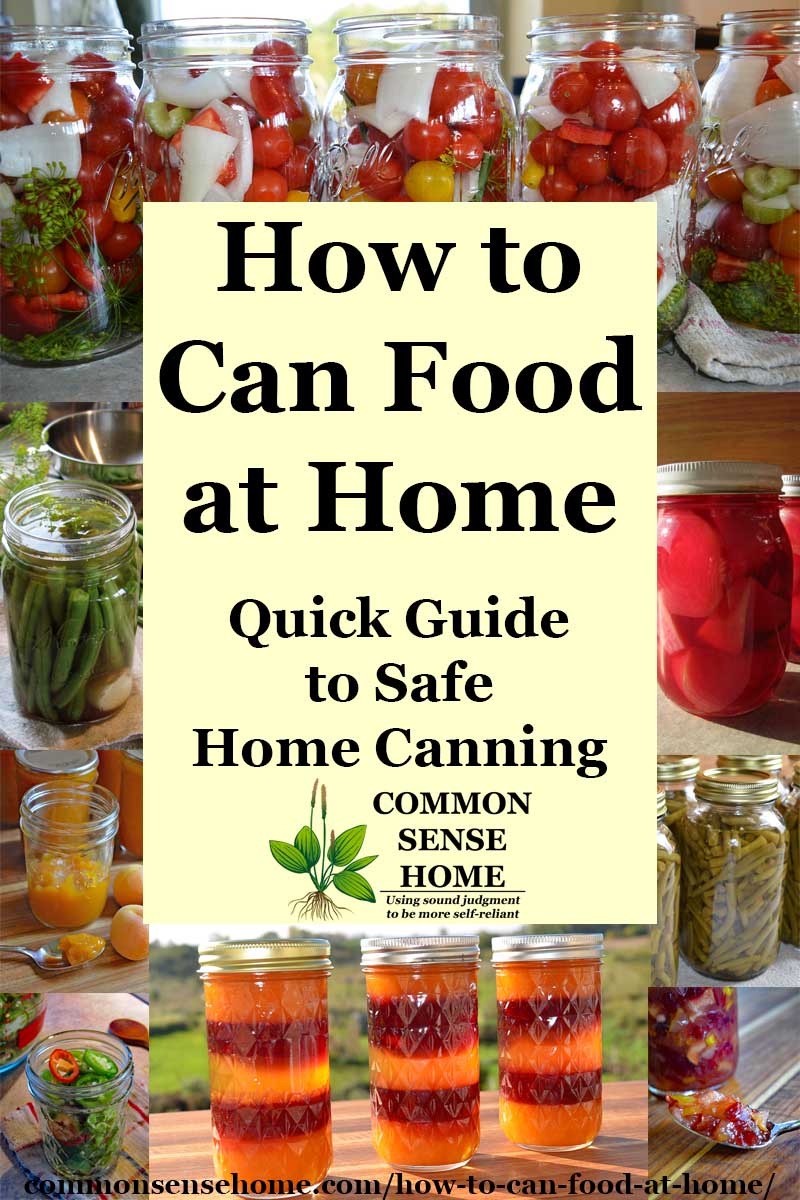
Pictured in the horizontal photo above, starting at top left and moving clockwise:
- Pickled Dilly Beans with Garlic and Cayenne Pepper
- Striped Jelly – Makes a One of a Kind Homemade Gift
- Home Canned Green Beans
- Gram Irene’s Pickled Beets
- Pickled Cherry Tomatoes for Canning, Plus More Cherry Tomato Ideas
- Low Sugar Apricot Jam Recipe – Sweeten with Sugar or Honey
Photo at top of post also includes:
- Pickled Peppers (bottom left corner)
- Cranberry-Pear Jam – Traditional and Low-Sugar (bottom right corner)
Vegetables and Condiments
- Green Tomato Pickles
- Spaghetti Sauce from Fresh Tomatoes
- Salsa for Canning – Plus 10 Tips for Safe Salsa Canning
- Homemade Ketchup – Canned
- Tomato Soup – Tastes Like a National Brand, Except Better
- How to Can Tomatoes in a Canner or Large Pot
- Pickle Relish Sweetened With Honey
- How to Can Green Beans
- Pickled Dilly Beans with Garlic and Cayenne Pepper
- Pickled Cherry Tomatoes for Canning, Plus More Cherry Tomato Ideas
- Gram Irene’s Pickled Beets
- Rhubarb-B-Q Sauce and Rhubarb-Orange Compote
- Pickled Peppers
Fruit
- Home Canned Peaches
- How to Can Pears in a Water Bath Canner
- Almond Pears
- Spiced Crabapples and Honey Cinnamon Crabapples
Jams and Jellies
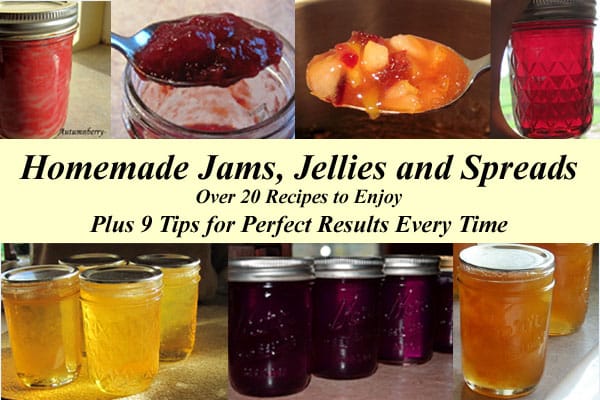
Full Listing of All Our Jam, Jelly and Spread Recipes with Photos
See “Common Sense Homesteading Recipes and Kitchen Tips” for more home food preservation recipes and tips.
You can download a set of pdf instructions for making and creating your own low and no-sugar jams and jellies with Pomona’s Pectin (my favorite low sugar pectin) by clicking on the image or text below. Shared with permission from Pomona’s Pectin.
You may also enjoy:
- Home Freeze Drying – The Good, The Bad and The Ugly
- Home Food Drying – 6 Things You Need to Know to Dehydrate Food at Home
- Canning Questions Answered – Q&A session answering reader questions
Originally published in 2012, last updated in 2019.


So my wife is the gardener and I am the cook. I have a traditional mother sauce tomato recipe that I use from canned San Marzano tomatoes and my wife is growing San Marzano tomatoes. Can I use this recipe and follow the pressure canning procedure you have listed on your recipe. I’ve looked all over the internet and they all seem to say I have to add lemon juice or some sort of acid, but I don’t want to have the acid flavor in my sauce. And the canned tomatoes I used to buy have no acid added. My recipe only uses tomatoes, double concentrated tomato paste, onions, garlic, and fresh basil. And if I could use it, would headspace be the same? And I also have a salsa verde recipe from fresh tomatillos, Serrano peppers and onions. Could I pressure can this recipe as well without the added acid? And if it would be fine, what would the headspace measurement be? I will be using an All American weighted gauge pressure canner.
Hi Brandon.
The added acid is needed if you are doing water bath canning – BUT – if you don’t want to screw with the flavor, get some citric acid to replace the lemon juice or vinegar. You can substitute 1 teaspoon citric acid for 1/4 cup lemon juice.
Officially, you’re only supposed to use tested recipes. Unofficially, as long as your sauce isn’t so thick it won’t move in the jar, it’s probably safe to pressure can it. The sauce we can (and canning instructions) are here – https://commonsensehome.com/spaghetti-sauce-for-canning/
For your tomatillo salsa, I’d opt for citric acid and water bath canning. I think the flavor and texture will be better. We have a recipe with canning instructions here – https://commonsensehome.com/tomatillo-salsa/
is this guide available as a PDF file?
No, but you could copy and paste into a word processing program for personal use.
I am 76 years old! As a child our family garden took up 1/4 of the city block my folks owned. Needless to say,..harvesting, and canning was always a plus! My job was to work the soil, lay-out, and plant, making sure plants that required the most Sun, got plenty, and. provided shade for other plants that do bust in partial sun or shade! Also helped mom in canning! Now I plan to introduce my Daughter-inl-law, and Grand-daughter to canning? Their generation is (Just go to the store!) …Wish me luck!.. I will keep you posted on their success? Love your post’s.
That’s great that they have you as a resource.
Hi Laurie,
I always read all of your articles and want to stay on your email list please
Double checked, and you are good to go.
So excited!
Pretty good article. Few clarifications.
1. The main purpose of both the water bath and pressure canners is to heat the product to a certain temperature for a certain time. In the case of pressure canning that is what kills off the botulism causing bacteria.
2. The heating also causes steam and air expansion to drive out much of the air in the head space area of the jar. Cooling then leads to a partial but not complete vacuum.
I would like to know what is in the jars in the picture. Is that layered jelly? And what about the jars with the grape tomatoes and such?
Thanks for asking, Martha. I’ve added a note in the post describing what’s in the photos and linking to their recipes on the site. There is indeed layered jelly, which was a project I did with my sister. (They did great at her granddaughter’s bake sale fundraiser.) The cherry tomatoes and other veggies are for pickled cherry tomatoes.
Laurie, It probably seems a bit strange for a man to get involved with canning food. However, I used to help my mother can tomatoes,fruit etc. over the years. I especially remember a “chili sauce” that I hope to duplicate. My mother was a great cook and I now wish I had paid more attention. I won’t be canning this year but hopefully next year as I am just buying that house in Northern Mi. that I told you about.
I suppose the first thing I should do is start a compost pile as it is very sandy soil.
thank you for another great article. You are so appreciated….Jerry
I’m sure you’ll have plenty of projects to keep you busy after the move (and getting ready for it), but a compost pile is never a bad thing. All of kids used to work with mom canning – boys and girls, and my boys work by my side on our homestead. Food preservation is a very useful skill. It is a little different when you tackle it on your own for the first time, but I’m sure you’ll get teh hang of it.
My only comment would be to contact the local extension office with any questions or concerns. The Home Economists can answer nearly every possible question & help to source equipment locally.
Good to note.
I have all the tools and have used the pressure canner….it’s been a few years since the last time….I have purchased new stoves…one is a regular glass top and the other is an induction glass top….it is fear of wrecking my new expensive stoves……..have you used the pressure canner on a glass to or induction……wrote the mfg of both…..they could not give an answer other than if I break it they won’t cover the warranty. I so want to use the pressure canner again………….. Has anyone out there tried this? Thank you.
ps….if you don’t have a pressure canner….you will NOT REGRET purchasing one!!!!!! I love mine.
The response you’ve gotten from the manufacturer is basically what I’ve heard. They won’t say you can or can’t do it, but you void your warranty if something goes wrong while you do it. The big problem with the glass top stoves is that they don’t necessarily maintain a steady, even heat to the entire bottom of the canner, like a conventional heating element. They tend to have more of a pulsed and concentrated heat. This creates hot spots, which are more prone to damage, on the stove, and may result in processing issues with your canner. That said, I have read about people using pressure canners on glass tops – I just can’t recommend it without reservations.
Love the info. Also love the comment by your mother about grandmother canning a “mess” of chicken and pork. My mom and grandmother also use that term in cooking. They’re from Arkansas.
It may be a universal term. 😉
To can a ‘mess’ of meat, means you canned a lot of meat. More than just enough to get by. To cook a ‘mess’ of taters at supper means you cooked a generous or more than usual amount of taters and those at table can eat as much as they want without wishing they could have more or being embarrassed about eating too much.
It is a very old term. Also, as with all old words and phrases, it has a lot of duality in meanings. The texting generation is cheating itself. Written words cannot express everything.
Anyway, I can and I can a lot! Messes!!! (Ha Ha Ha) I canned chicken thighs last week. Yesterday, I sectioned leg quarters and canned them. I am going to do 14 qts more today. I can all year. We have an 18 yr old dog with dental problems. Canned meat served with veggies and rice is a life saver for him.
My grandmother canned up all their chicken and pork for the year (before freezing and refrigeration). I know many friends rave about the convenience of canned meat, and I’m sure your dog is much appreciative of having real food that he can eat.
Thanks for linking your great post to FAT TUESDAY. This was very interesting! Hope to see you next week!
Be sure to visit RealFoodForager.com on Sunday for Sunday Snippets – your post from Fat Tuesday may be featured there!
http://realfoodforager.com/fat-tuesday-february-7-2012/
I would like to add my encouragement to those who are interested but are intimidated by the pressure canner. Get started! Once you do you will discover how wonderful it is to have healthy, quick meals on your pantry shelves. I love to have pinto and other beans ready to go. Soups can be a lifesaver on those crazy weeknights when you have no time to cook but have to feed them anyway. Heat and eat chili and spaghetti sauce – who wouldn’t love that? Veggies at the ready. Just heat them up. My newest discovery is that kids absolutely LOVE canned boneless skinless chicken breast. It is so easy to do and can be made into any number of different meals. This is real convenience food!
Thanks for sharing you experience, Grace. 🙂 It is wonderful to be able to open a meal – ready to go!
Thanks, Molly.
As for figuring out how much to plant, there are quite a number of ways to plan out your garden, most of which involve x number of feet of row per person per vegetable. To be honest, I looked over the calculations and just shook my head – too much fussing for me. Besides, how is some formula going to know what you and your family like to eat?
What I do is to map out my garden each year and keep a rough sketch of how much of what I planted where. We eat fresh and preserve excess. During winter, I make a note of when/if things run out. Over a couple of seasons you get a feel for how much of everything your family will use.
For instance, I usually plant around 30-something tomato plants, and aim to can at least two batches of marinara sauce, two batches of salsa, one or more batches of stewed tomatoes, and possibly dry a few tomatoes. In a good year, I’ll be able to do this and more, and probably have excess to sell or give away. In a bad year, I’ll be lucky to cover the basics. We eat a lot of green beans. I know I need two fairly long double rows of green pole beans, and I need to can around 30 quarts (roughly one per week for the non-harvest season).
I haven’t heard of any real lulus as far as canners go. Weighted gauge canners are supposed to be more reliable long term, dial canners may loose accuracy as they age. All-American canners are the “Cadillac” of canners. They have a metal on metal seal and bolt closed, so there is no gasket to wear out.
I’ve been happy with my Presto. Just make sure that whatever you buy you can lift it (they are heavy), and that you can fit in whatever size jars you plan to use. The Natural Canning Resource Book has a detailed discussion of canner options. Note- pressure canners cannot be used on most smooth top ranges without an adapter because the range will automatically turn the heat on and off to avoid overheating the ceramic top.
Also any tips on what size or brand pressure cooker to get? I just looked online and realized there a few options. Thanks !
I love your site, I have been thinking about trying this for a few years. My husband and I have a plot at our community garden and have been pretty successful thus far. I remember my mom made the best homemade tomatoe sauce as a kid. My Great aunt made beach plum jellie and rose hip jelly. I am planning my garden but how do you figure out how much to plan for both the summer and winter ?
Rebecca – home canned spaghetti sauce is one of my “go to” meals that the boys can prepare themselves. It’s so handy to send one boy inside to make supper while the other helps me finish in the garden.
I give away quite a few jams, jellies, pickles and conserves for Christmas, too. I make up gift baskets (I find the baskets at thrift stores) for friends and neighbors. Even those who can enjoy the unusual flavors that I normally include, like lemon-ground cherry jelly and plum-rum-nutty conserve.
Thanks for the tips!
My favorite thing to can is chicken stock! I use my pressure canner as my stock pot, its the biggest thing I own in the kitchen. My deep freeze is so full of healthy meats and butter, fruit and things like spinach and zuchinni which don’t can well, it saves me tons of room to have the stock canned.
Pressure canning just allows you to do so much more in the kitchen, like caning spaghetti sauce with other veggies in it, not just tomato sauce. Those things save me tons of time for weeknight meals.
And I always give jams and apple butter away as christmas gifts to my husb’s coworkers and all of my sons’ therapists and support staff at school. I can hand out 50 to 75 beautiful, gourmet gifts at a fraction of what it would have cost to buy them, and my stuff tastes way better.
My biggest hint for newbies. Advertise for things like jars and canners on Craigs’ List. I offer to pay 20cents a quart jar, 15 cents for pints, and get tons of offers. I have never had trouble finding people cleaning out their basements and wanting to get rid of their old stuff like that. And once you get into it, buying lids in bulk on Amazon is much cheaper than those small packs you find in the stores.
Oh, I would love to see anything and everything in your “Getting Started…” series. I learn a lot. I really would like to try canning fresh produce and things like that. My family budget is super tight right now. However, I’m saving all these blog posts, so I’ll know exactly what to do when funds are available 😉 🙂 thanks for all of the good, detailed information 🙂 🙂 Love and hugs from the ocean shores of California, Heather 🙂
Hi Heather! I caught some flak from my local friends about not covering the basics, so I decided I’d better run a series that was targeted for folks who are new to all of this. It’s wonderful to see people asking so many questions and being so interested in learning.
I’ll try to regularly update the Homesteading 101 page at the top of the blog as new “Getting Started” posts go live. My plan is to try and get a new post live every Thursday – fingers crossed. Sometimes life gets a little crazy! Also, if you’d like an invite to Pinterest to be able to sort your pages online in a visual library, let me know. Or, if you’re already on, you can follow me.
Thanks for your enthusiastic comments. 🙂
I have canned in the past and I like the idea that I can what I like to eat (same with the garden, plant what I like!). I have this next week off and plan to can “Refried Beans”. I did them last year and did not can enough (11 quarts). I really like them for breakfast with eggs!
Will return here offten to check out recipes!
Tom – oy! I’d better start publishing more recipes. I do the bulk of my canning during the growing season, but the site SB Canning posts recipes year round.
Home made refried beans are so much better than the prepackaged ones!
This was an excellent article! I’m new to all of this and will be trying to start a garden this year. I’d love to hear anything you know about composting. I can’t seem to wrap my mind around it. I’m so concerned with attracting critters or with it smelling bad and we are in a slightly urban environment.
So glad I found this web site!! Thank you!
Hi Rose! Nice to “meet” you. I’m a messy composter. Living out in the country, I’ve got one main bin of compost going, but other piles tend to pop up here and there.
I can put your question out on the Facebook group and see what folks suggest. If you’re on Facebook, I suggest stopping by (https://www.facebook.com/CommonSenseHome) – we get a lot of interesting conversations going.
Worm bins might be a “neater” option, depending on your space and volume of compost.
Thanks for your kind words. 🙂
Excellent article. I’ve canned for years using my mother’s equipment. Two years ago we moved across country and I had to leave her equipment with her (boo hoo). I’m planning a LARGE garden this year for the purpose of canning and this will serve as my list.
My two cents (or is it twenty now?) worth: if money is tight, skip the water bath canner and just acquire a pressure canner. You can use it like a water bath canner if you want, so no need for an extra pot. Plus it is FASTER. Way faster–I could can 2-3 batches with a pressure canner in the time it took 1 for the water bath canner.
If you are nervous about doing this for the first time, ask around to find someone to help. You spend a day helping them, giving labor and LEARNING how to do it! Maybe they will even help you in return.
Canning is a lot more fun if you do it with a friend. My boys help me out, but there’s just a certain something about sharing the kitchen with a mother, sister, or girlfriend.
I suspect my big pressure canner gets up to pressure significantly slower than the smaller models. If I had to buy one again, I’d pick a shorter model. When I was buying, I just wanted to make sure it was big enough.
Thank you so much for this post. I’ve been thinking about starting to can this year if I can get my garden in order, but I’ve always been so intimidated by the thought of it! Not sure why . . . but your post has me excited to give it a try now!
Jean – you can do it! It’s really not that hard, it just takes time. If you can cook a simple meal, you got the skills for the the job.
Thank you for posting this. My mom passed on her Presto canner to me some years back, she had gotten it in the ’70’s, so I think it should still be good, but I’ve been nervous to use it as our ‘local extension office’ doesn’t test canners or gauges anymore. I ordered a new rubber gasket and the little top that goes ‘thwikthwikthwik’ as the old one is lost, but I’m still too scared to use it without having the gauge checked. I suppose I should count my lucky stars that the Presto company is only a 2 hour trip from me, but I’ve been too lazy to go over there. I’ve been really wanting to take this up, and your article is a good kick in the pants. So I suppose I should plan a day trip to Eau Claire for when the snow melts. Thanks.
BTW, I have this very poster in my kitchen next to my ‘pantry shelving’. I love it!
Paula – now’s the perfect time to get everything ready before canning season hits, instead of when your in the middle of a mountain of produce. 🙂