Preparedness Storage – Finding Room and Keeping it Safe and Sound
With ongoing economic uncertainty and erratic weather conditions, investing in food and general preparedness storage makes sense and can provide a very good return on time and money spent. Food prices keep creeping up and packages keep getting smaller, so what you can stash now will almost certainly cost more in the future. Also the ingredients increasingly sound more like a chemistry exam instead of food.
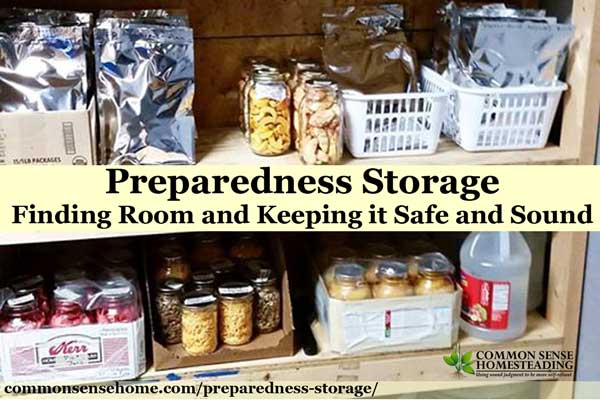
The challenge is finding room for additional storage and keeping food and other items accessible and in good condition. If you can’t find what you need when you need it and/or it gets spoiled or damaged, you’re wasting money. In this post we’ll cover some ideas for where to stash your preparedness storage (and general food storage), and tips for keeping it usable.
Finding Space for Preparedness Storage
1. Optimize Existing Storage Areas
Clean and organize existing storage areas such as kitchen cupboards, pantries, closets and garages. Get rid of badly out of date food items. Take a hard look at what you have and decide if you *really* need it. If not, re-home it and make more room for the things you do need. Clutter is a daily time eater and the enemy of functional storage.
Look for ways to maximize storage through well-thought use of dividers, shelving and other organizers. Can you place boxes or bins in a closet under hanging clothes? Would additional shelving fit high on a garage wall or in a closet? Can kitchen shelves be subdivided with stacking organizers? (They have these for drawers now, too.)
If you’re handy you can build your own, or you can visit your local home improvement store and do some ogling of the latest options for pre-made storage helpers. There are some really creative solutions now available.
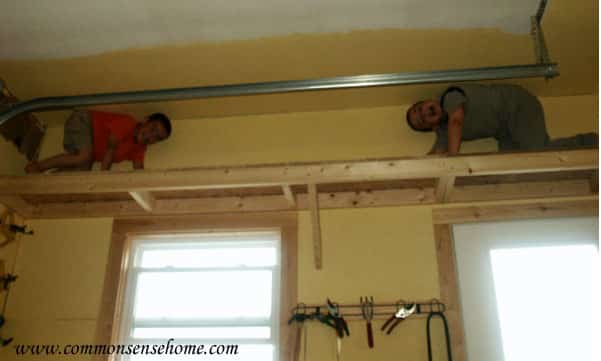
My husband put in sturdy storage shelf around the perimeter of our garage that works great for spare lumber, extra charcoal bags for an emergency and seasonal items (and occasionally small boys). Cabinets or simple shelves along the ceiling give you storage options also.
2. Utilize Space Under the Stairs
It doesn’t take mad skills to build some simple under stair storage. A little box framing and some plywood and you’ve got shelving.
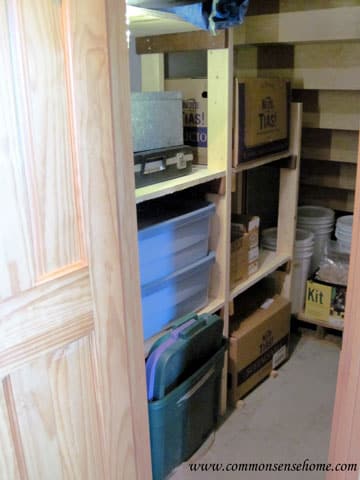
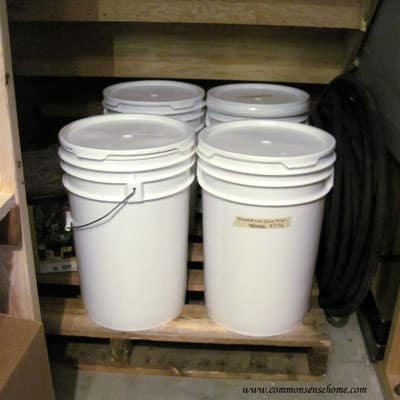
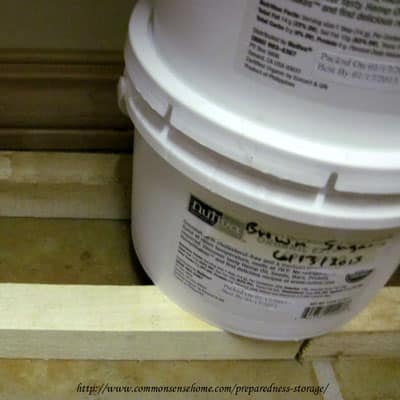
Slip in a pallet and you’ve got an out of the way spot for bulk storage of food and water. I don’t suggest storing anything directly on concrete or dirt floors. Both could potentially interact with and damage your containers. I always use a pallet or wood blocks underneath my containers.
#3 – Look for Low Traffic Areas or Underused Corners
If you have an unfinished or partially finished basement, grab a corner and frame out a storage area. Stick a decorative screen in the corner of a living room and hide some storage buckets behind it.
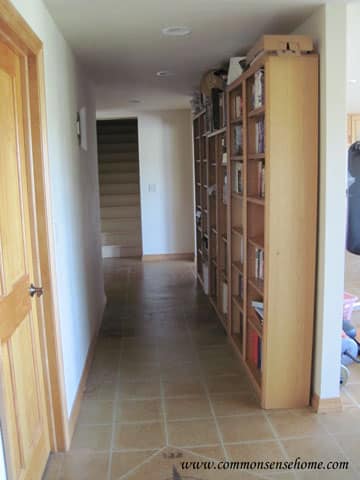
Look for spots in utility areas or hallways that are low traffic that may be able to perform double duty, such as a wall of bookshelves along one side of a hallway, or additional pegboards or hanging areas.
You could be the most popular person on the block if you have a few extra 100 foot extension cords available to hook up to portable generators when the power goes out.
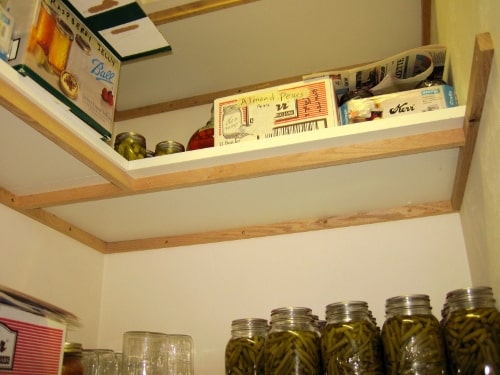
When framing shelving, make sure that your shelves are adequately supported along all four edges to prevent bowing under heavy loads. We like to do a box frame under the shelf and set the shelf loose on top of the frame. That way if it ever does manage to warp over time, we can simply flip it over and let it work back the other direction.
Note: If you live in an earthquake prone area, make sure you put a lip on your shelving to keep jars and other items on the shelf. Another option is the JarBox Protector for Canning jars, which is an impact resistant molded box specifically designed for canning jar storage. They come in pint and quart sizes.
#4 – Use Furniture with Built in Storage or Room for Storage Underneath
There are many cool built-in storage furniture options available, but you can keep it simple and use storage that slides under your existing furniture, such as tables or beds. If you have some basic carpentry skills or a nice tablecloth, you can even fashion tables that are storage themselves. For example, stacking a row of 5-6 gallon buckets two high and three behind a couch, cover with a piece of plywood cut to size and a nice heavy tablecloth that drapes to the ground, and you’ve got extra bulk storage. We purchased these adjustable risers to use in our home. They can be used to lift a bed, desk or other square footed piece of furniture to create more storage space underneath.
You can even store long term items inside (under) a couch, chair or cabinet that has large open spaces inside it. Another idea is to slide a shelf behind a couch along a wall as a display with storage underneath that would not be visible unless you move the couch.
#5 – Don’t Skip the Small Stuff
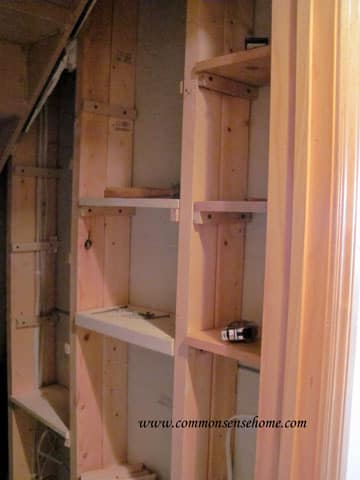
Even small areas can provide needed storage. We tucked in 2×4 shelves between some open stud walls to create extra space for small items such as nails and screws. You could use them for canned goods or ammunition, too, depending on your storage needs.
You can also buy ready made cabinets that fit between wall studs. This one comes with a lock to protect your valuables. This same idea can be used in any wall cavity in a home. A 2×4 stud wall gives you about 3.5″ of storage which is enough for canned goods. Add a cabinet door in the front and a wall becomes storage.
Would you like to save this?
#6 – Store Items in Garages, Outbuildings and Porches
These areas can be used for storage of durable goods, and limited food storage. Remember, when it comes to food – temperature swings (especially high temps) and moisture are the enemies of long term, quality storage.
There is also a much higher incidence of rodent and bug infestations, so plan accordingly. Mice and bugs can’t generally get through heavy plastic (such as 5 gallon storage buckets), but they can and will chew through light plastic and cardboard.
Rats can get through just about everything except metal. Rodents and bugs may not only eat your stash, but also contaminate what they leave behind and the entire area.
Good organization and keeping areas clean is critical. Clean up any spilled foods immediately. For more information on dealing with mice, see “The Best Ways to Get Rid of Mice in Your House and Garage“.
Avoid attics for anything that is temperature sensitive. The temperature swings are not good for any food. Instead store items that are not temperature sensitive in attics. Move durable items out of temperature controlled areas, to the attic, leaving more room for food storage.
#7 – Store Items under Beds
The space under a bed is significant. You can fit 24 to 30 five gallon buckets under a queen bed if you raise the bed. You will need a sheet of plywood to support the box-spring. You can store stuff under twin beds also.

If you significantly raise the bed (requiring a ladder) you can double stack the 5gal buckets, resulting in 48 to 60 buckets of storage space under a platform raised queen bed.
If you want to keep your king, queen or twin beds lower there are numerous sliding storage units or rolling storage systems that fit under beds.
How to Store Food for Best Shelf Life
Store what you eat, eat what you store. What you store will depend on what you eat. Don’t buy up a whole bunch of “emergency food” that you think you will eat “if things get bad enough”. Sure, you can have some things like canned goods, dehydrated meals or MREs on hand, but I wouldn’t want it for the bulk of my storage. I’ve read the ingredients lists, and most of those prepackaged foods are just plain nasty.
The big things you want to avoid for food storage are:
- Heat
- Moisture
- Light
- Oxygen
- Odors
- Dirt/Dust
- Pests
Cool, dark, dry storage will make your food last the longest. Unless you’re dealing with root cellar storage, which requires some moisture. Check out Root Cellars 101 for more information.
Remember, in earthquake prone areas, you want to make sure that storage is secure. A safe room might also double for more emergency storage. More info on safe rooms https://commonsensehome.com/safe-rooms/
Using a vacuum sealer is a great idea to improve the shelf life of items – possibly with oxygen absorbers also. You can also put dried food items like beans and rice in mylar bags with an oxygen absorber and increase the shelf life of the dried goods you are storing. You can seal the mylar bags with a hair straightening iron. See 5 Uses for a Vacuum Sealer Everyone Should Know for related info.
Ensure your storage area is free of pests, from mice to ants to larger raiding mammals. Using up your stock, oldest first is a sure way to make sure pests are not infesting your food.
Weight Matters
Make sure you pack things in containers you can lift, or at least open to access. I can tell you from experience that six gallon buckets full or sugar or grain are very heavy. The storage under a bed can get really heavy which is why rolling or at least sliding storage is good.
5Gal Bucket Lids
The bucket lids for 5 gallon buckets are notoriously hard to open. Buy a bucket lid wrench and save your fingers and damaged lids.
Another bucket lid option is the Gamma Lid. It is a screw on lid that can be added to standard mouth 3.5, 5 or 7 gallon buckets. It converts a bucket with a pull off lid to a bucket with a screw top lid. I invested in a color coded six pack of gamma lids. My fingertips are much happier.
What’s your best food storage tip? Which food storage method do you prefer? Leave a comment below.
You may also find helpful:
- Home Freeze Drying – The Good, The Bad and The Ugly
- How to Can Food at Home – 8 Steps for Safe Canning
- Prepping Food Storage – Top 10 Foods to Stockpile


Very good idea for using the small spaces….would never have thought about the stud space. As I read, I kept thinking that maybe I could make a shoe organizer that I could hang on the back of a closet door. I think a bag of rice or beans or even a quart jar would fit in each slot. Thanks for the inspiration.
Thank you for reminding us to use our vacuum sealer for berries and produce in the freezer that we want to last longer (like till Christmas or February) I’ve had berries get the frost taste and after all that work become inedible. I portioned them for pie and crisps and look forward to enjoying them this winter.
Ps I really enjoy your newsletters and appreciate the time you took to share.
Thanks for your kindness, Toni. I wouldn’t be without my vacuum sealer for freezing. It makes such a difference in food quality. Everything gets iced up so fast without it.
Have you had any problems with your multicolored Gamma lids cracking? your article is dated in 2016 so hoping they are long lasting. thank you!
Yes, some (but not all) of them have cracked over time, which was disappointing. I sealed the cracks with a hot melt glue gun and the seals are holding, but I do normally pack in Mylar or vacuum sealed bags inside the buckets.
Given how much easier the gamma lids are to open than standard lids, I still recommend them for items you need to access regularly.
Mark the date bought on the item. Rotate and use the oldest first. That way nothing is ever to old and wasted.
We store home canned foods under the beds. Guest room can handle pints and store bought height canned veggies and fruits. We can fit quart size height under our bed. We put them in those short boxes that canned foods come in at the store and slide them under the beds. They slide in and out easier that way.
I use the jars (54 oz.) that my coconut oil comes in to store dry goods in my little pantry( I live in an apt. So I have one upper cabinet that is designated as “the pantry” , works well as they are all the same size and clear so I can see what is there. Hope you head feels better soon!
I’ve never canned anything. I just started saving some can items like store soup, chili, corn etc. They have dates.
Why do glass canned last longer than metal can items.?
Products in glass last longer because glass in inert, i.e., the food doesn’t interact with the glass. Metal cans are sprayed with some sort of lining to protect the metal, and that starts to break down over time.
I utilise storage in multiple places. My one easy and cheap tip is to utilise clean empty jars (from the likes of jam) to dry store meal size lots of rice or soup mix or even sugar or …….. whatever. I put an oxygen absorber in each one. So easy and painless on the budget. I have built up 3 months worth of dry goods this way.
Thanks for sharing your experience.
I love all of those ideas! We’re planning on revamping our storage space once the weather cools, and I’m gonna show those ideas off!!
Great post – thanks. We are NOT handy so your “easy peasy” stuff is enough of a challenge for us, but we will try. I have a question, though – we saw some great heavy duty shelving at Costco. They had a chrome option but it does have wheels. Is that a good idea? We were wondering if the wheels would make in unstable. Thanks!
It really depends on the shelf. If well built and properly framed, it should be fine, wheels or not. You’re not in an earthquake zone (at least, not normally), so that shouldn’t be a concern. Do they have some assembled that you can test in the store?