Pickled Cherry Tomatoes, Plus More Cherry Tomato Ideas
This post may contain affiliate links. Read my full disclosure here.
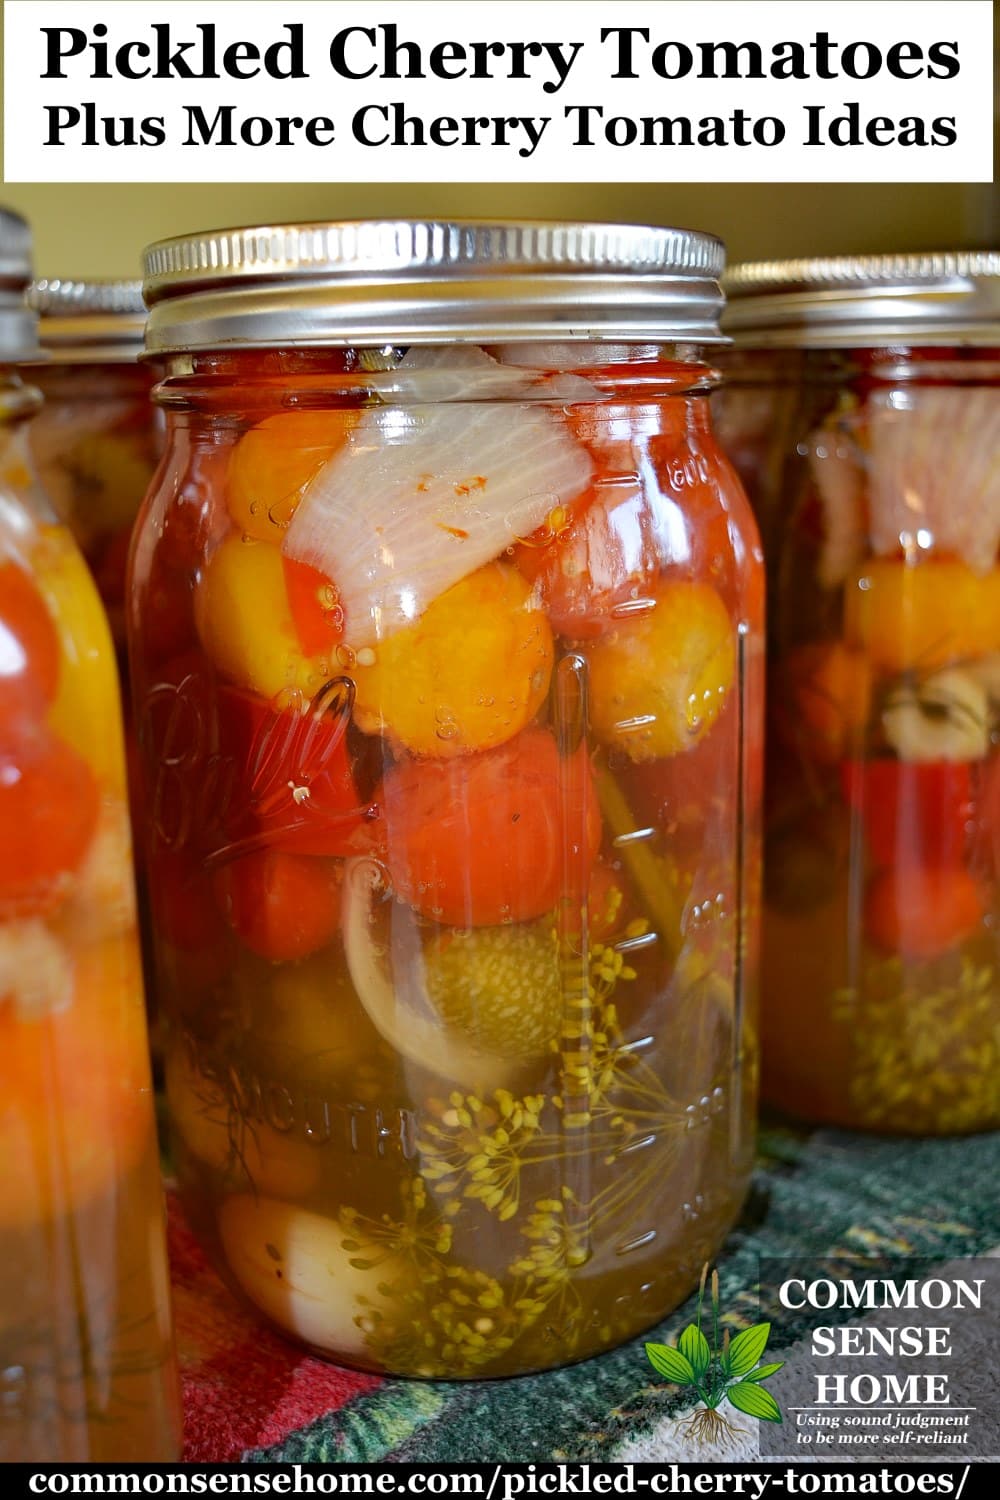
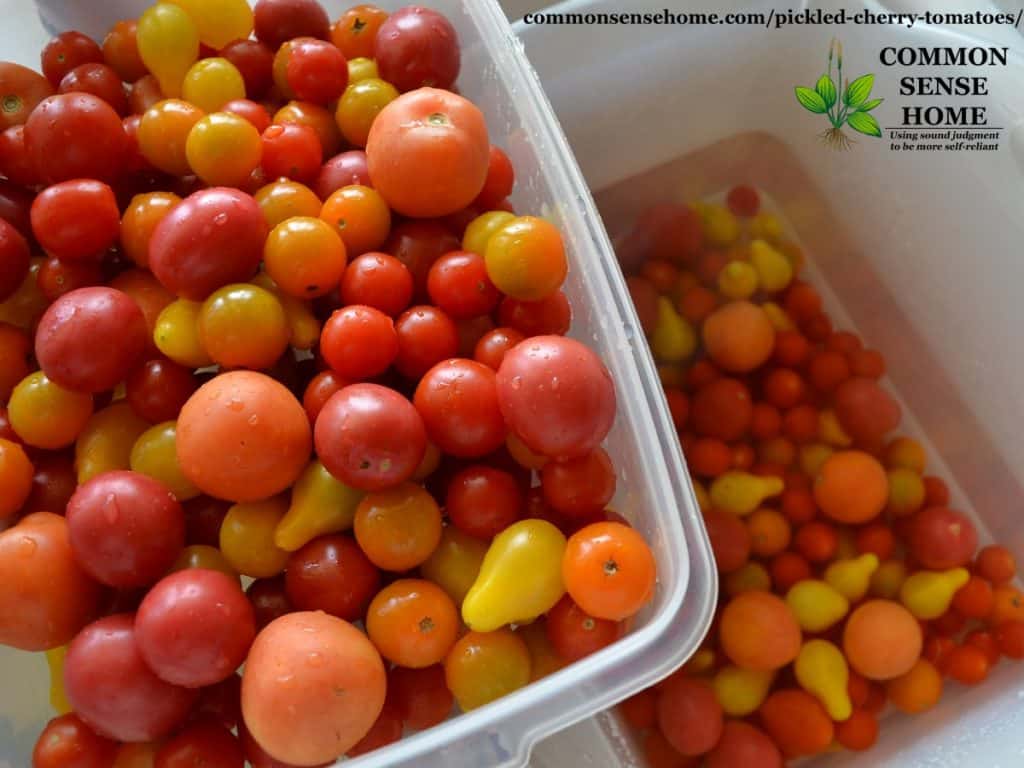
This recipe for pickled cherry tomatoes came about as a way of preserving the huge harvest of cherry tomatoes we had last year. The cherry tomatoes and an assortment of vegetables are cold packed and covered in hot brine. Vinegar lowers the pH, making it safe for water bath canning. Added salt and sugar tie up free water, inhibiting bacteria growth. Our neighbor (who loves pickled foods) can eat a whole jar in one sitting. Below the pickled cherry tomato recipe, you’ll find more ideas for what to do with cherry tomatoes
.
Pickled Cherry Tomatoes Recipe
Ingredients
- 8 cups cherry tomatoes
- 2 cups celery, coarsely chopped
- 4 cups onion, coarsely chopped
- 2 cups sweet pepper, coarsely chopped
- 1 cups cucamelon, optional
- 6-7 cloves garlic (one per jar)
- 6-7 heads of dill (one per jar)
- 6 tablespoons canning salt
- 4 1/2 cups water
- 4 cups vinegar
- 1 cup sugar
Directions
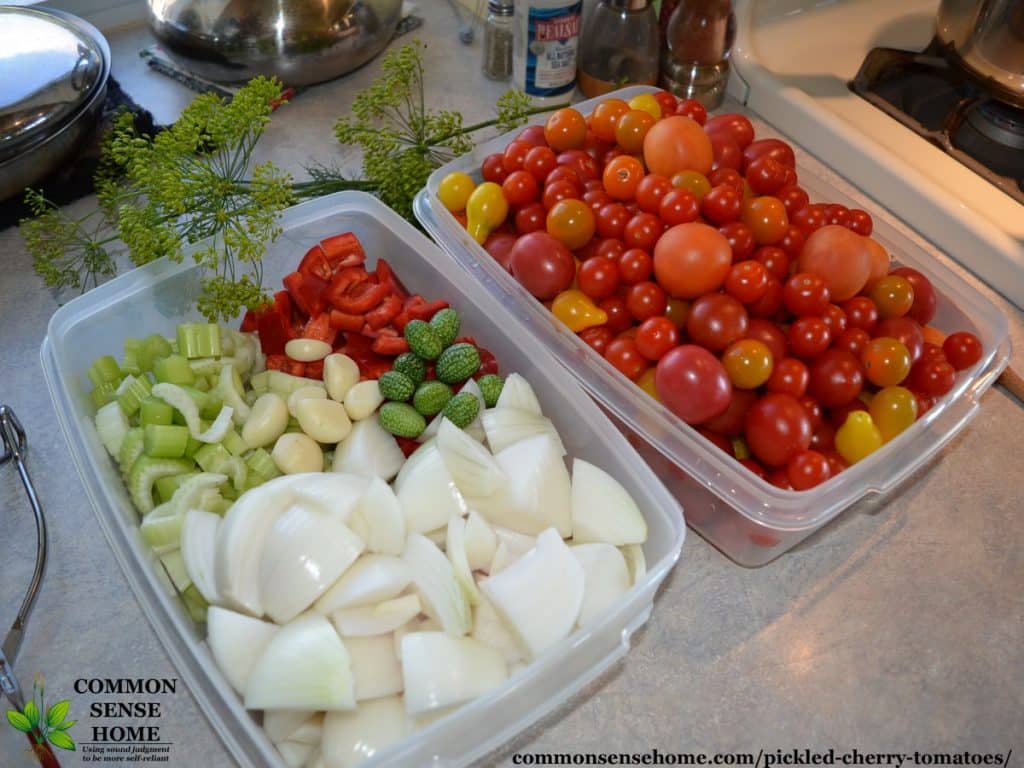
Prepare vegetables, water bath canner, jars and lids. I kept my veggie piles separate so I could make sure to get some of each veggie in every jar.
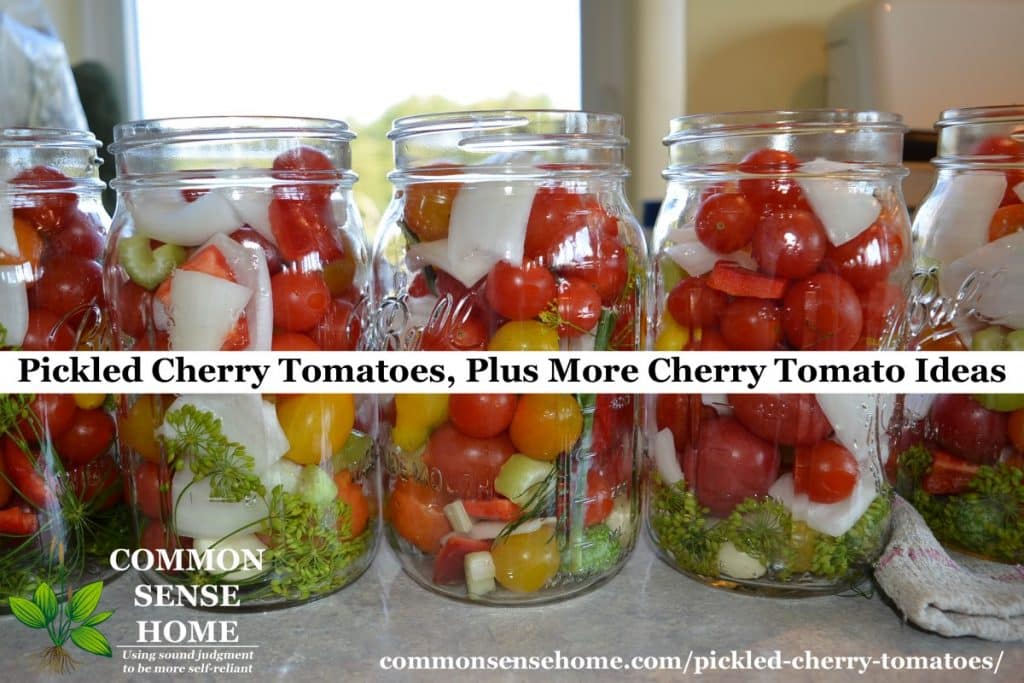
In large saucepot, combine salt, water, vinegar and sugar and bring to a boil. Pack vegetables into hot jars, leaving 1/4 inch headspace. Add one head of dill and one garlic clove to each jar.
Ladle hot liquid over vegetables, leaving 1/4 inch headspace. Remove air bubbles and double check headspace. Wipe rims and cover with two piece caps. Process for 15 minutes in a boiling water bath canner.
Remove to a towel on the counter to cool for 8-12 hours. Remove rings and check seals. Store any unsealed jars in the refrigerator and use within a month. Label jars and store in a cool, dry location out of direct light. Best if used within 12-18 months.
What to Do with Cherry Tomatoes
I grow a few different types of cherry tomatoes each year because I enjoy the different flavors and colors. (See How to Grow Tomatoes Organically for tomato growing tips.) So what do you do with cherry tomatoes when they’re coming out of your ears?
Of course, we can only eat so many fresh tomatoes (and pickled cherry tomatoes). I share some with friends and family, but we also use them in cooking and canning. Although they don’t work so well for home canned salsa, they can be added to spaghetti sauce and home canned tomato soup.
Cherry tomatoes can also be frozen, dehydrated and freeze dried. (They keep their color amazingly well during freeze drying, as you can see in the bottom photo of this post.)
Would you like to save this?
Instead of eating the cherry tomatoes fresh, you can also saute them gently in the oil of your choice until the skins begin to wrinkle. Finish with a sprinkle of salt and the herbs of your choice. Add minced garlic and onion while cooking, if desired.
Stuffed Cherry Tomatoes
Cherry tomatoes are great for stuffing as appetizers or snacks. Simply slice off a bit of the top of the tomato and a sliver from the bottom (so it sits flat). Tip upside-down and squeeze gently to remove seeds and juice. Stuff with the filling of your choice, such as:
- Guacamole
- Tuna salad
- chicken salad
- Liver spread
- Bacon bits crumbled into cream cheese
- Spinach dip (featured in my book Never Buy Bread Again)
- Smoked Oysters
For even more ideas, check out the book “Too Many Tomatoes, Squash, Beans, and Other Good Things: A Cookbook for When Your Garden Explodes“.
Print Friendly Recipe
PrintPickled Cherry Tomatoes
This easy recipe for pickled cherry tomatoes combines tomatoes with other garden veggies for long term storage.
- Prep Time: 30 minutes
- Cook Time: 15 minutes
- Total Time: 45 minutes
- Yield: 7 quarts
- Category: Condiment
- Method: Canning
- Cuisine: American
Ingredients
- 8 cups cherry tomatoes
- 2 cups celery, coarsely chopped
- 4 cups onion, coarsely chopped
- 2 cups sweet pepper, coarsely chopped
- 1 cups cucamelon, optional
- 6–7 cloves garlic (one per jar)
- 6–7 heads of dill (one per jar)
- 6 tablespoons canning salt
- 4 1/2 cups water
- 4 cups vinegar
- 1 cup sugar
Instructions
Prepare vegetables, water bath canner, jars and lids. I kept my veggie piles separate so I could make sure to get some of each veggie in every jar.
In large saucepot, combine salt, water, vinegar and sugar and bring to a boil. Pack vegetables into hot jars, leaving 1/4 inch headspace. Add one head of dill and one garlic clove to each jar.
Ladle hot liquid over vegetables, leaving 1/4 inch headspace. Remove air bubbles and double check headspace. Wipe rims and cover with two piece caps. Process for 15 minutes in a boiling water bath canner.
Remove to a towel on the counter to cool for 8-12 hours. Remove rings and check seals. Store any unsealed jars in the refrigerator and use within a month. Label jars and store in a cool, dry location out of direct light. Best if used within 12-18 months.
Notes
The nutrition information is an estimate only, including the brine, making the sodium count very high. If you eat the tomatoes and other veggies and don’t drink the brine, the sodium count per serving would be much lower.
More Pickling Recipes
Do you love pickled foods and preserving? We have a great list of canning and preserving recipes and guides on the site, including:
- Betty’s No Can Dill Pickles
- Homemade Ketchup
- Pickled Dilly Beans with Garlic and Cayenne Pepper
- Gram Irene’s Pickled Beets
- Pickle Relish Sweetened With Honey
- Pickled Peppers
- Green Tomato Pickles
Originally published in 2017, updated in 2018.

Thank you for this recipe. I initially made it with tomatoes but found that making it without gives me an amazing jar of pickled peppers. The brine is delightful and jars of these peppers are now requested by friends near and far!
I filled my jars full like yours but when I was finished I only have two thirds of tomatoes. It’s like it shrunk. ?
The tomatoes do shrink up some during the canning process, and they float. If you look at the top photo, you can see some liquid at the bottom of the jars.
Can you use green cherry tomatoes in this recipe, say at the end of the season, picked before frost? I had so many last year and would like to do something different with them. I have heard people say they make green tomatoes pickles with the harvest before frost.
I enjoy your weekly postings.
Thanks!
Martha
Yes, that should be fine. I also have a green tomato pickle recipe on the site at https://commonsensehome.com/green-tomato-pickles/.
Laurie, thank you for taking the time to refer me to your green tomato dill recipe. I have saved it and will see what my harvest brings me. If you have the green tomato mincemeat recipe around, I would love to see that also. I actually used a lot of green tomatoes last fall and made mincemeat pie filling. It has apples and raisins in and a ton of sugar. No meat at all. We love it. I made so much of it that I won’t need to make it again for quite awhile.
Thanks,
Martha
I’ve looked at mincemeat recipes, but I’m not sure I could convince the guys that they are yummy. We don’t usually do a lot with green tomatoes, as I set aside all that are at or near full growth in bins to ripen at the end of the season, and the duckies get them as treats as they ripen. We also feed them winter squash, especially when there’s not much to forage, but tomatoes are their favorite treat.
Can you use a sugar substitute such as erythritol?
It won’t give the same results, but it would be edible. Part of what sugar does is to bind free water, which helps maintain the texture of the pickled vegetables. With sugar substitutes like erythritol, the vegetables will tend to get mushy and may develop off flavors.
Could the sugar be omitted to achieve a more classic pickled taste rather than a sweet pickle? Thanks you for the tomato recipe. I’ve been trying to figure out what to do with them all!
Because of the level of acidity in this recipe, it doesn’t taste like a sweet pickle at all. The sugar just helps to balance out the acid.
Thank you for the pickles tomato recipe
You’re welcome.
Would grape tomatoes work just as well? If so, I plan to try this.
Sure, any small fruited tomatoes would be fine.
Not a big fan of dill, what other herb/herbs do you think could be subsistuted? I would imagine the brine is the most important part of the recipe, for the acidity level. I just started water bath canning this year, with home made violet jelly, and looking forward to canning lots of tomatoes this year.
How about a general pickling spice blend?
I’ll have to try that! I was leaning towards a more ‘italian’ type blend. <3 you guys and your blog!
Make a few jars of each and see what you prefer?
You can use cherry tomatoes in salsa, just oven-roast them, let them cool a bit, then puree them in your food processor. Proceed as with your favorite salsa recipe.
We have a family of supertasters, so large amounts of skins and seeds in the salsa or tomato sauce are a no go for us, but if you like them, enjoy!
Sounds great ! Plan on making some this week. Can I use other vegetables with the cherry tomatoes safely, such as sliced carrots , cucumbers or sliced jalapeño ?
This recipe has a lot of vinegar and salt to keep the pH down and draw the water out of the veggies, so that should be fine. Just cut up in chunks as shown in the photos.
I can’t wait to try this out later this evening! Thanks for the recipe, and thanks for answering folks’ questions, some of which I’d have had, too!
Thank you for stopping by, Ed, and enjoy the tomatoes.
Thanks.
You’re welcome.
I am planning to make these today, are the processing times the same no matter the jar size? I want to put these in quart sized jars bit want to make sure I process long enough. These sound delicious, I can’t wait to try them!!
The listed processing time is for quarts.
I made this today…it took at least twice as many tomatoes as called for and I had to make more brine for the last 2 jars. Hoping the taste is good later! I did try the brine and it was delicious. Had to use dry dill weed as I had no fresh.
There’s a lot of variation in tomato sizes, so the proportions do tend to vary a bit from batch to batch.
I have no fresh celery. Can I use celery seeds and if so, how much? Thanks.
You could add a teaspoon of celery seed for flavoring if you like, but there’s not a one for one swap. You could substitute more of the other vegetables listed or more tomatoes and add the celery seed for flavor.
Most of my tomatoes popped/split…..is that typical?
Yes, it’s not unusual. The top photo in the post is jars after processing, and if you look closely, you will see some splitting. You’re boiling them inside their skins during processing, so the liquid needs somewhere to go. You may be able to reduce splitting by poking holes in them so they can vent in a more orderly fashion, but it’s not a guarantee.
The recipe at the top on the page and the printer friendly version are different. Which is correct?
Oh nuts! I suspect the boys were updating more than one recipe at the same time and the lists got mixed. The end proportions are pretty similar, but the one in the print friendly version should eliminate leftover brine.
Wow wow those all look wow those all look delicious. All the colors in the colors in the Jars…I can’t wait to give this recipe a try
Are you using white vinegar? This looks delicious. I’ll be making it this summer. Thanks for the recipe!
Either cider vinegar or white vinegar will work. If you want the color to be brighter, use white vinegar. If you like the flavor profile and ingredients in apple cider vinegar, go for that option, but the finished product will be a bit darker.
I don’t have dill heads can I substitute dill seed? If so, how much?
About a tablespoon of dill seed per quart should the trick. You can use 4 teaspoons if you want a stronger dill flavor.
Thank you so much, Laurie! I have a ton of cherry tomatoes this year and can’t wait to try this!
You’re welcome, Sheryl.
have no fresh dill could dill seeds be used and about how much per quart thanks
About a tablespoon of dill seed per quart should the trick. You can use 4 teaspoons if you want a stronger dill flavor.
It looks delicius. I will try it this summer. Thank you.
You’re welcome.