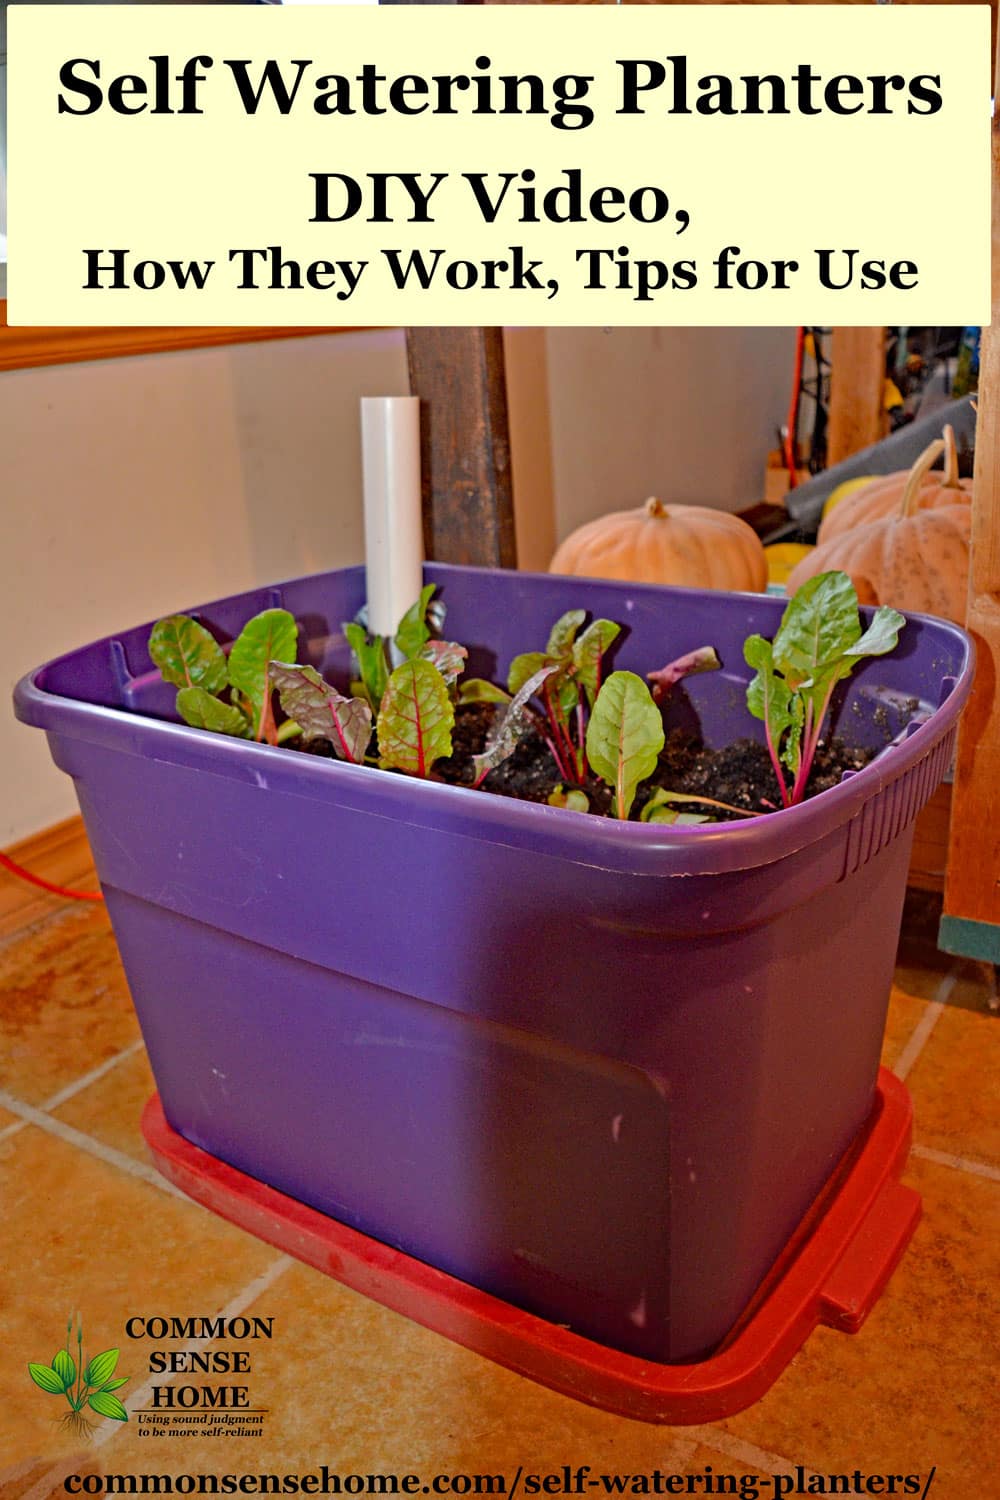
Self Watering Planters – DIY Demo, How They Work, Tips for Use
This post may contain affiliate links. Read my full disclosure here.
Self watering planters make growing any potted plant easier. In this post, we’ll explain how they work and answer some common questions. We’ll also show you how to make them, and share tips for using the planters. Don’t have time to make your own? We also list some popular ready made planter options. Let’s get started!
Do Self Watering Planters Really Work?
Yes – but you have to use them correctly.
A “self watering” container doesn’t actually water itself. It is a watering system using planters that contain a reservoir of water at the bottom. This reservoir connects to the area where the plant is with a soil “foot” or a fabric “wick”.
With a soil foot system, the plants send roots down into the foot, and draw up as much water as needed. In a wick system, water is drawn up the wick via capillary action into the soil of the main pot. Either way, if there’s water in the reservoir, the plants have access to water. This allows you water less frequently and still have healthy plants.
When you first fill your planter, make sure the soil is evenly moist. Water from above until plants have a chance to establish a strong root system. With larger containers (especially outside), adding mulch prevents the soil surface from drying out too quickly. This improves planter performance.
After your plant is settled in, simply add water as needed to keep the water level in the reservoir topped off and you should be good to go.

Are Self Watering Planters Good?
I’m a fan! Self watering planters are good for a wide variety of plants – from a vigorously growing tomato plant in a patio garden to petite house plants. Just find the right size and style for your expected plant growth, and you’re set. With a growing interest in urban agriculture, these pots offer a great “first gardening experience” for new growers.
There’s no chance of accidentally drowning a plant, unlike with closed pots or containers that sit in a drip tray. If you accidentally add too much water, it comes out the overflow drain. (You may want to add a drip tray if you have a habit of adding too much water, or set your container outside when you water.)
Are Self Watering Pots Good for Succulents?
Maybe. If you want to use a wicking self-watering container, it’s not a great fit, because they rely on keeping the soil moist. If you want to use a soil foot type, that will work. Just make sure to let it dry out between waterings. It’s also helpful to limit the size of the soil foot to reduce soil moisture. (See below.)
DIY Self Watering Planters
I prefer the soil foot design, so that’s what we’ll cover here. To make your own self watering planter, you need:
- container(s), such as a plastic storage tub, or set of 5 gallon buckets
- small basket, pot, or strainer for the soil “foot”
- watering pipe
- wood blocks or other supports
- burlap, mesh or landscape fabric to screen the watering pipe
- screws and duck tape
- a drill, a utility knife, and possibly a saw
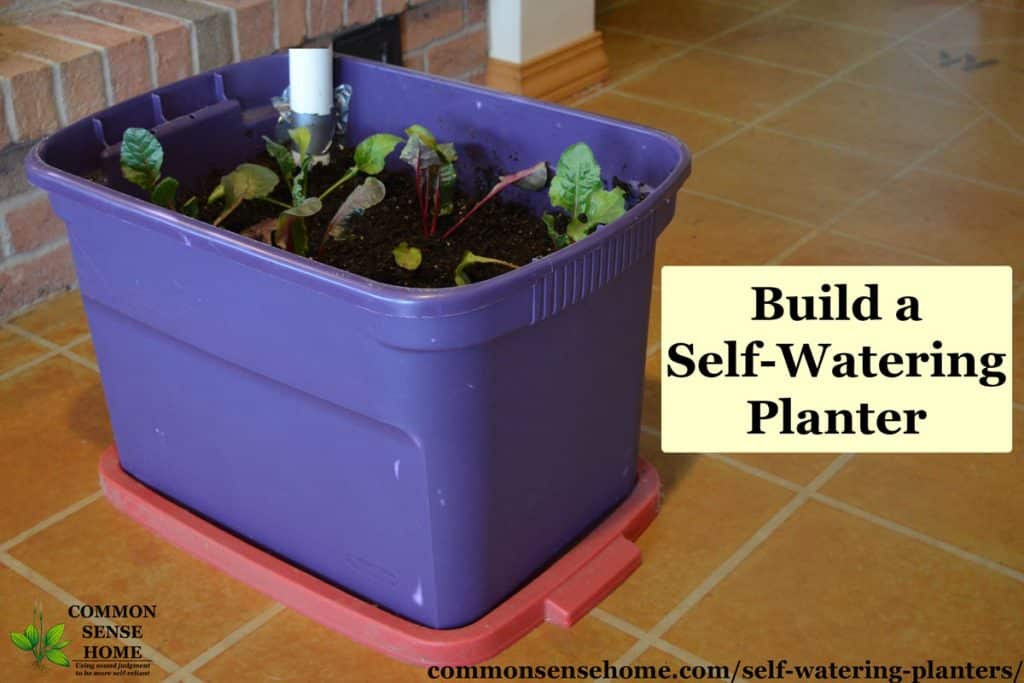
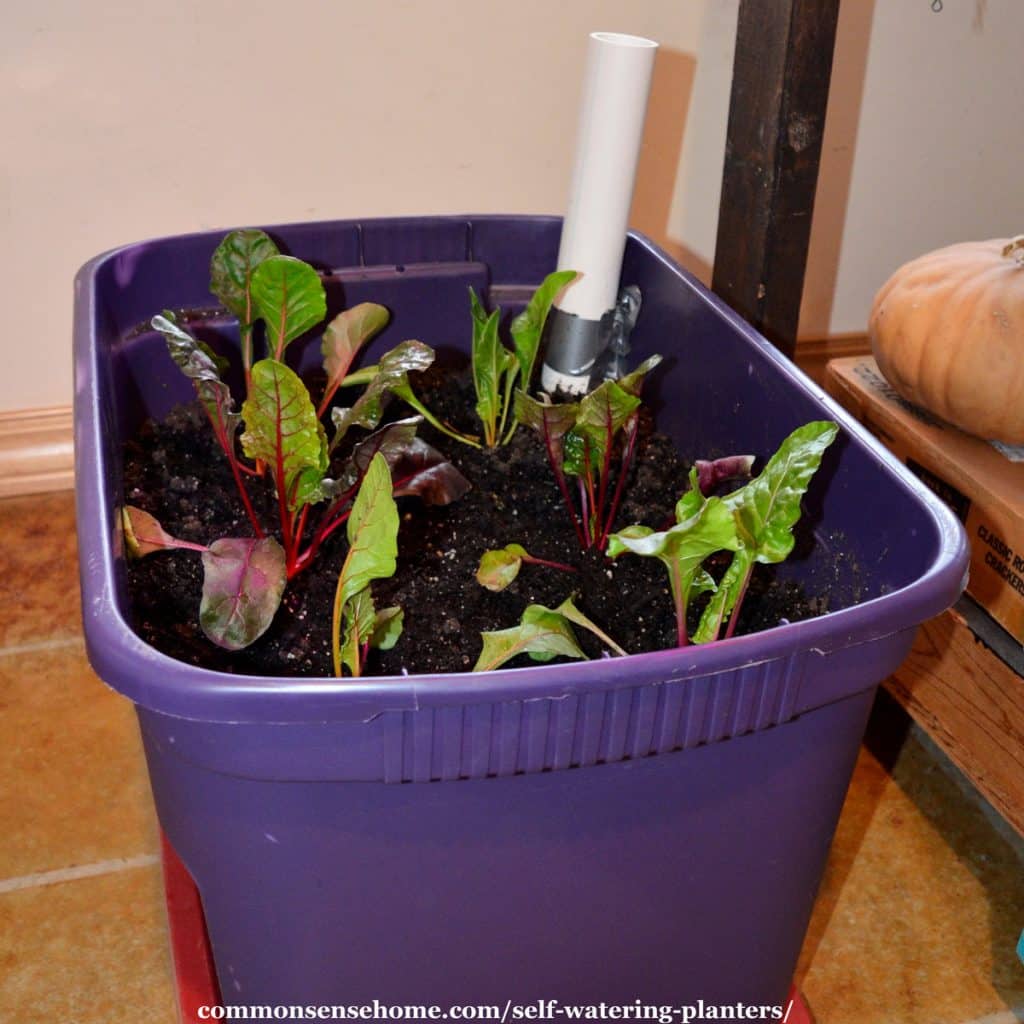
I found a used storage bin at the thrift store for $3. After the holidays is also a great time to look for deals on containers. You need a container with a lid, or two identical containers to nest one inside the other. Remember, our goal is a built in reservoir under the soil that the plant is in, with a soil foot down into the reservoir.
For the soil foot, we used an old nursery pot with drainage holes, trimmed so that about an inch stuck out above the bottom of the plant chamber. Whatever you choose, make sure it has holes so the water gets in.
Our watering pipe is a 2″ diameter PVC pipe. If you prefer not to use PVC, substitute your tube of choice. The tube diameter needs to be wide enough for you to pour water in.
The video below demonstrates assembly. If video doesn’t load, make sure you are not running an adblocker.
Container Assembly
- Cut the lid so it fits snugly inside the container at the width of your blocks. If you use 2×4 lumber on its side, this is 3.5 inches. Next, cut the hole for the soil foot and a spot in one corner for the watering pipe.
- Attach wood blocks to the underside of the lid with screws.
- Cut watering pipe to fit. Remember, it needs to stick up past the level of soil and mulch. Cover both ends of the pipe with burlap to keep out bugs and soil. (Slip off cover for watering, if needed.) Secure watering pipe into corner with duck tape to hold it in place until you are ready to fill the planter.
- Set the lid into place in the bottom of the self-watering container. Fit the pot (or basket) for the soil foot in place. Close any gaps around edges with duck tape or wadded burlap. We want to keep the soil above the lid and in the soil foot, not leaking into the water reservoir.
- Drill or punch two drainage holes in the side of the container, just above the level of the reservoir. This allows for drainage in case of overwatering or heavy rains.
- Fill the foot with damp soil, packing it in tightly. Fill the rest of the container with good potting soil. Note that most garden soil is too heavy for container plantings, so soil mixes work best.
- Plant veggies, flowers or herbs, or a mix, and water well from the top. Top dress with organic fertilizer or compost, if desired. Cover soil with mulch to retain moisture.
- Give plants a week or two to get established in their new home by watering from above. Once they are settled in, water using the watering pipe.
Would you like to save this?
Tips for Root Veggies, Potatoes and Other Plants That Prefer Drier Soil
Some plants have more issues with disease problems if the soil is too wet, including root vegetables like carrots and tubers, like potatoes. Succulents kept in wet soil will develop root rot in short order. You can still use a self-watering planter with these plants, but there are a few things you should keep in mind.
- Limit the size of the soil foot to 10-15% of the base to reduce water flow to the plants.
- Used a lighter soil mix, or add a little sand to your base mix, to limit wicking action.
- Allow the reservoir to to dry out between waterings.
Popular Self-Watering Planter Options
From smallest to largest, here are some of the top rated self-watering containers from Amazon.
Lucca Self-Watering Planter, 12-Inch
I have a couple of these planters. They’re light and easy to move, plus you can see the water level via the overflow port. The twelve inch size is great for smaller flowers, herbs or veggies.
Vegetable Planter Box with Trellis
Large enough for several mid sized plants or a combination of short and vining plants. This would make a great patio planter for those with a protected growing area. It includes wheels, so you can relocate if needed without lifting.
CedarCraft Self-Watering Elevated Cedar Planter (23″ X 49″ X 30″)
For those who prefer a raised bed growing system, this CedarCraft self-watering planter is naturally rot resistant and minimizes back and knee strain. It has a 6 gallon reservoir with water level indicator.


Whichever planter you choose, remember that plants like to have at least as much area to grow below ground as above ground. It’s easy to stuff a container too full, and then end up with overcrowded plants as they mature. Our garden planner kit has recommended spacings for common garden vegetables.
What’s Your Favorite Way to Grow in Containers?
I love self watering containers. We used purchased containers for years, but our homemade version is a fraction of the cost and is working just fine. The Swiss chard we planted in it is taking off.
With our winds, self watering containers are the best option to keep plants for drying out. They also help keep my houseplants alive when it goes a wee bit too long between waterings. (I confess, we have plants all over the house and I sometimes forget the ones tucked in the out of the way corners.
Do you use container gardening? If so, I’d love to here your stories or tips about what works best for you.
More Gardening Tips
We have over 100 gardening articles on the site, listed and sorted by category on the Common Sense Gardening page. They include:
Did the how-to video disappear? This sounds like a great project.
Double checked. It’s still there, but might be getting blocked by your browser. It should appear right below the text “The video below demonstrates assembly. If video doesn’t load, make sure you are not running an adblocker.”
Thanks guys. Can you add liquid fertilizer, or other nutrients for that matter, to the water in the base?
Yes, you can if you like, just don’t overdo it. Feedings every couple of weeks is plenty. Too many nutrients, and it may be prone to get a little smelly.
I really like this idea; have plenty of tubs and areas around my backyard in which to place them to grow veggies. I live in southwest Oklahoma where it is hot and dry, bordering the dessert. I was wondering what to do at the end of the growing season to the tubs? Is all plant material and/or soil is removed and containers cleaned?
Ideally, you should probably replace the soil each season and clean the pots. We usually dump the soil into a garden bed or the compost pile, hose out the containers, and leave them to air dry before stacking.
What size totes are recommended? Last season I used food grade 55 gallon drums cut in half long ways. The problem was with holes drilled in the bottom it made them traditional containers and not self watering. In the VA heat it was almost impossible to keep them watered enough and as a result we had small, slow growing plants with limited production. This seems like the perfect solution!
Hi Ashley.
You can use the same concept on any size tote or container. Keep in mind that healthy plants will spread roots below ground as far or farther than their foliage spread above ground, and plan (and plant) accordingly. I think the one we used in the video was 18 gallons, but you could adapt the concept to gallon buckets to grow out single plants.
General self watering quesiton: When we leave town for the weekend, is there any harm in filling the reservoir AND soaking the soil from above? I wouldn’t make a habit of it, but for the occasional trip out of town, the reservoir alone isn’t cutting it and we have retrurned to limp and parched veggies.
Sure, that’s no problem. As you noted, you don’t want the plants to sit soggy for an extended period, but when you know conditions are such that they will dry out quickly, water accordingly.
Would be it be helpful to use a clear tub so you can see how much water is in the reservoir? Thanks
If you would like to use a clear tub, that shouldn’t be an issue. Another option would be to make an overflow hole large enough that you can peek into it.
Hi, I’ve been making and using these for almost 20 years for growing tomatoes. I have grown my largest 2 pound 11 oz tomato this way in a small unheated greenhouse. Starting with and still using 7 gallon sized ones but this year I started making 17 gallon ones. PVC pipe fastened an inch off the bottom and 4 equally spaced 3/8th inch holes 4 inches up. I use a potting mix with added pearlite and vermiculite and add the mix right on the bottom. Usually my transplant tomato will be planted deeply by the drain holes and I then backfill and finally mulch after watering in. No other wicking material other than the friable soil mix. When it is wqrm the larger plants really suck up the water and I usually water through the pipe each day then. Big, strong, productive plants.
Thanks! This was so helpful.
I was wondering if you could tell me, why the burlap was necessary at the top and bottom of the pipe? Is there any other material you would recommend as a substitute?
You’re welcome.
The burlap keeps the soil out of the bottom and the bugs (like mosquitoes) out of the top. If you don’t have burlap, any porous, non-toxic material will do, like a section of an old cotton t-shirt.
I’m gonna play devil’s advocate here, please bear with me. I love container gardening, but I’m just wondering about something. As the sun heats up a plastic container, do you think it’s possible that chemicals from the plastic could leach into the soil, and then be taken up by the plants? I’ve been thinking about stuff like this since I was diagnosed with leukemia, and no one can tell me what caused it. Just curious about anyone else’s thoughts on this.
I won’t say it’s impossible, but it’s unlikely. Storage totes are typically made of polyethylene. If we look at a Material Safety Data Sheet for polyethylene, specifically Section 10. Stability and Reactivity, we see:
And sections 11 Toxicological Information:
Now we need to come up with a better way to recycle these items when they reach the end of their useful lives.
Regarding the leukemia, allopathic medicine rarely has an answer for “why”, and most alternative healing therapies look at detoxifying and other general remedies. (Also not addressing a specific “why”.) I came across something recently that a friend recommended that got me thinking. It’s called New German Medicine, and it’s based on the work of a German doctor who starting looking at life events in himself and his patients that acted as a trigger for what we normally call “disease”. (He developed cancer after the death of his son, and that’s what triggered his initial interest.) He found specific patterns of illness associated with specific events or feelings, and these patterns were very consistent. I don’t know if this would be something you’d care to look into more, but I know that the correlation associated with Hashimoto’s thyroiditis was a match for me. (I was hit when my husband lost his job, and it’s typically associated with feeling helpless.) Here’s an article about leukemia in a NGM context: https://cdn.shopify.com/s/files/1/0783/4779/files/GNM_SBS_Leukemia_4p.pdf
Maybe you’ll see something of your situation in it, maybe not, but I always find it interesting to explore new ideas. It’s the first healing modality that I’ve encountered that addresses “why” on so many different diseases.
OK: but “oxidizing materials” are simply materials that give off oxygen. (Oxidizing materials are liquids or solids that readily give off oxygen). So, PLANTS are considered oxidizing materials, which this specifically says may be incompatible with:
“Incompatibility with Various Substances: May react or be incompatible with oxidizing materials.
Hazardous Decomposition Products: Hazardous decomposition products are carbon monoxide, carbon dioxide”
So, PLANTS should not be in contact with plastics.
I have had the same concern ever since getting into health issues and the materials that most products we use are made from, particularly those made from petroleum and the plastics industry, in particular.
Just another food for thought: You TRUST any information given by the government to be totally factual and true? MSDS information my not be complete in order for governmental agencies to use those products. Otherwise, they would have to go totally organic and use no chemicals.
Yes, I know I may sound like a bit of a “whacko”, but after all, this blog and others similar are bent toward not completely trusting all standard, conventional information that pertains to good health, using organic, natural and less traditional, older methods of doing things. Plastics just simply do not fit into that criteria.
And, Thank you Cathy, for voicing a concern I have had for a long time regarding the use of any type of plastics in anything we use.
Yes, plants give off oxygen – but not from their roots, from their leaves. As explained on the National Science Foundation website:
I’m not saying it’s impossible for the plastic to react with the plants, or with the mycorrhizal fungi or bacteria in the soil, but I do think the containers would take more damage from sun exposure than they would take from underground activities.
Ideally, my preference is to put plants directly in the soil as part of a long term permaculture planting with diverse flora and fauna polyculture – but that’s not always possible.
To the best of my knowledge, there isn’t another material option that is well suited to home crafting a self-watering container, but if you are aware of something, I’d love to hear about it.
I don’t have much luck with container gardening but I think using this system my plants will have a good chance. They thank you in advance 🙂
I have tried so many different containers over the years – ones I bought, and ones that were gifted to me. Out of everything, the self watering containers work the best by far. They’re a game changer.
Can you use potting mix instead of potting soil in foot and the container??
Yes, you should fill the container with a potting mix that’s recommended for container use, not straight garden soil.
Great tutorial, Laurie! And your son did an awesome job making the self waterer. Thanks for ALL your instructional posts!
Thank you, Diane. I’ll let my construction and camera crew know. This week we’ll be putting a tutorial up for repairing loose backs on wooden kitchen chairs, with my youngest (Duncan) in front of the camera. Two of our chairs were getting pretty wiggly, so I told the boys they might as well record the repairs in case someone else would find it useful.