Composting 101 – Easy Compost Making and Troubleshooting Tips
This post may contain affiliate links. Read my full disclosure here.
Composting breaks down organic material to rich, dark soil. If it rots, it can compost, although some materials require special handling, which we’ll cover later in the post.
The simplest way to compost is to stack everything in a pile and leave it for a couple of years, but there are methods you can use to keep things tidier and make compost faster.
Composting does not have to be messy or stinky or too much work. In this article we’ll cover how to compost, what to compost, compost bins and troubleshooting tips for common compost problems.
Why Compost?
We generate 26 million tons of food scraps each year. Our landfills are overloaded, and 20-30% of what goes into landfills is food scraps and yard waste. Meanwhile, food growers often fork out serious cash for fertilizer and other soil improvements. Composting reduces the load on landfills and turns garbage into awesome, deep rich soil. If you pay extra for yard waste pickup, you could save money on fertilizer and hauling fees. Composting also reduces transport costs (less waste hauling), reduces methane emissions (properly built compost piles don’t outgas like landfills) and lowers your carbon footprint.
Compost is like black gold for your soil. The worms, bacteria and fungi break down your composting materials to create humus. Adding humus to regular soil enriches its ability to retain moisture. Humus also adds nutrients, which reduce or eliminate the need for other fertilizers. Humus rich soil makes your crops more resilient and productive. If you aren’t composting, you should be.
Simple Compost Pile Ingredients
Whether you are in town, in the suburbs or in the country, you can compost. To make a home compost pile, you only need three things: browns, greens and moisture.
- Browns = High carbon ingredients, such as: Leaves, branches, sawdust. Your browns are the base that absorbs the ooze (and odors) as the green squishy bits breakdown. Think of it like bedding in an animal stall. Browns also add bulk to the pile, and make a good chow for helpful fungi.
- Greens – High nitrogen ingredients, such as: grass clippings, vegetable waste, fruit scraps and coffee grounds. These are the jam in your jelly roll, the catalyst that gets your pile hot and steamy. Too much, and your pile can get slimy or moldy. (Think mounded grass clippings.) Get the right amount and it will keep your compost pile rotting at high speed.
- Moisture (just the right amount) – You’re aiming for damp sponge consistency to the pile. Too much water, and it can get anaerobic and stinky, too little, and the material won’t break down.
Turning your compost pile gets oxygen into the whole pile and ensures your browns and greens are well mixed. If you want compost fast, turning helps. If composting speed is not an issue, don’t worry about it.
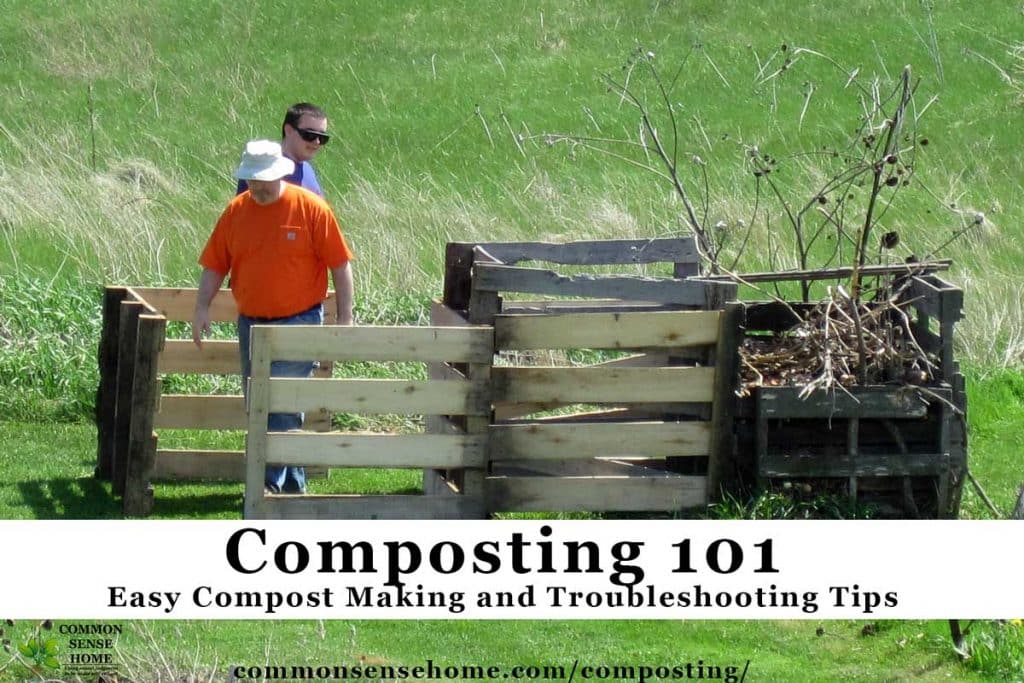
Note: If you set up a system of three bins (like ours shown below), you can stockpile browns in one of the bins. Use another bin as your “active” bin, filling it with greens as they become available and browns from your stash. The third bin can be left to age.
Planet Natural has a handy chart that list the carbon to nitrogen ratio of many common compost ingredients here.
What do I need to start composting?
The simplest compost pile you can make is just a pile. All you need is a container to gather kitchen scraps for composting inside, and a fork and rake to keep your pile turned and tidy outside. Heep some leaves or other dry yard waste, and bury your scraps in the pile. Add water with a garden hose or bucket if it seems too dry. (Remember, we’re looking for damp sponge consistency.) Shoot for roughly equal amounts of browns and greens, and use your fork to turn it every 1-2 weeks. Aim to get your pile at least 3ft x 3ft x 3ft, so there’s enough material for it to heat up in the middle and not dry out right away.
You can cover your compost bin with a tarp to keep it moist in dry areas or keep a bit more dry if it rains too much. Making finished compost takes anywhere between two months to two years. Two months is possible with frequent turning and the right mix of material. Two years is more likely if you simply build your pile and let it sit.
One of readers also noted on Facebook that it’s a good idea to place your pile where you can easily mow around it. All those nutrients in the compost can also spark rampant grass and weed growth around the pile. Another option is to mulch heavily around the pile, or set it up on a hard surface such as pavement.
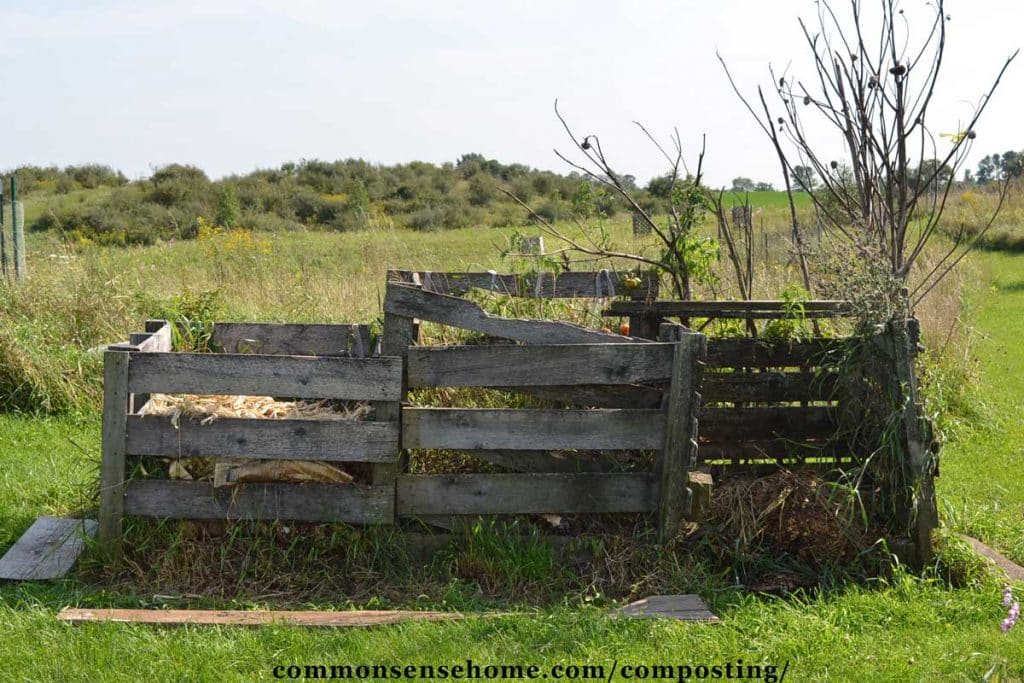
You may have noticed old sunflower stalk sticking out of our compost bins. We keep these around for the birds to perch on (there aren’t many trees in the yard yet). We also use them as a stash of browns, and for cleaning out our compost buckets when empty them in the compost bins.
10 Easy Steps to Making Compost at Home
- Pick a dry, shady spot outside that’s big enough for your compost bin. If you live in colder regions, full sun is fine, but in warmer areas it may cause your pile to dry out too fast. If you can reach your pile with a garden hose, so much the better, since you may need to add water.
- Get a good shovel and garden fork for turning.
- Build a compost bin using old pallets or scrap lumber, or purchase a ready-made compost bin and place it outside.
- Purchase or repurpose an indoor compost container to gather food waste. We keep an old yogurt container in a corner of the kitchen sink, and dump that into a 5 gallon bucket on the porch. We place shredded newspaper, dry leaves, or other browns in the bottom of the big bucket to soak up the liquid from the greens.
- Outside – put a layer of browns in the bottom of your bins. Inside – start gathering kitchen scraps for greens.
- When your inside bin gets full, carry your scraps out and put them in your compost bin/pile. Bury your greens 10 inches into your browns to avoid odors, or layer your greens and brown, finishing with a brown layer.
- Fork or mix the pile periodically. Continue adding to the pile. If possible, add in layers (green/brown).
- Add water to keep the pile moist if needed.
- When the compost is black and looks mostly like soil, it’s ready to be used in your garden!
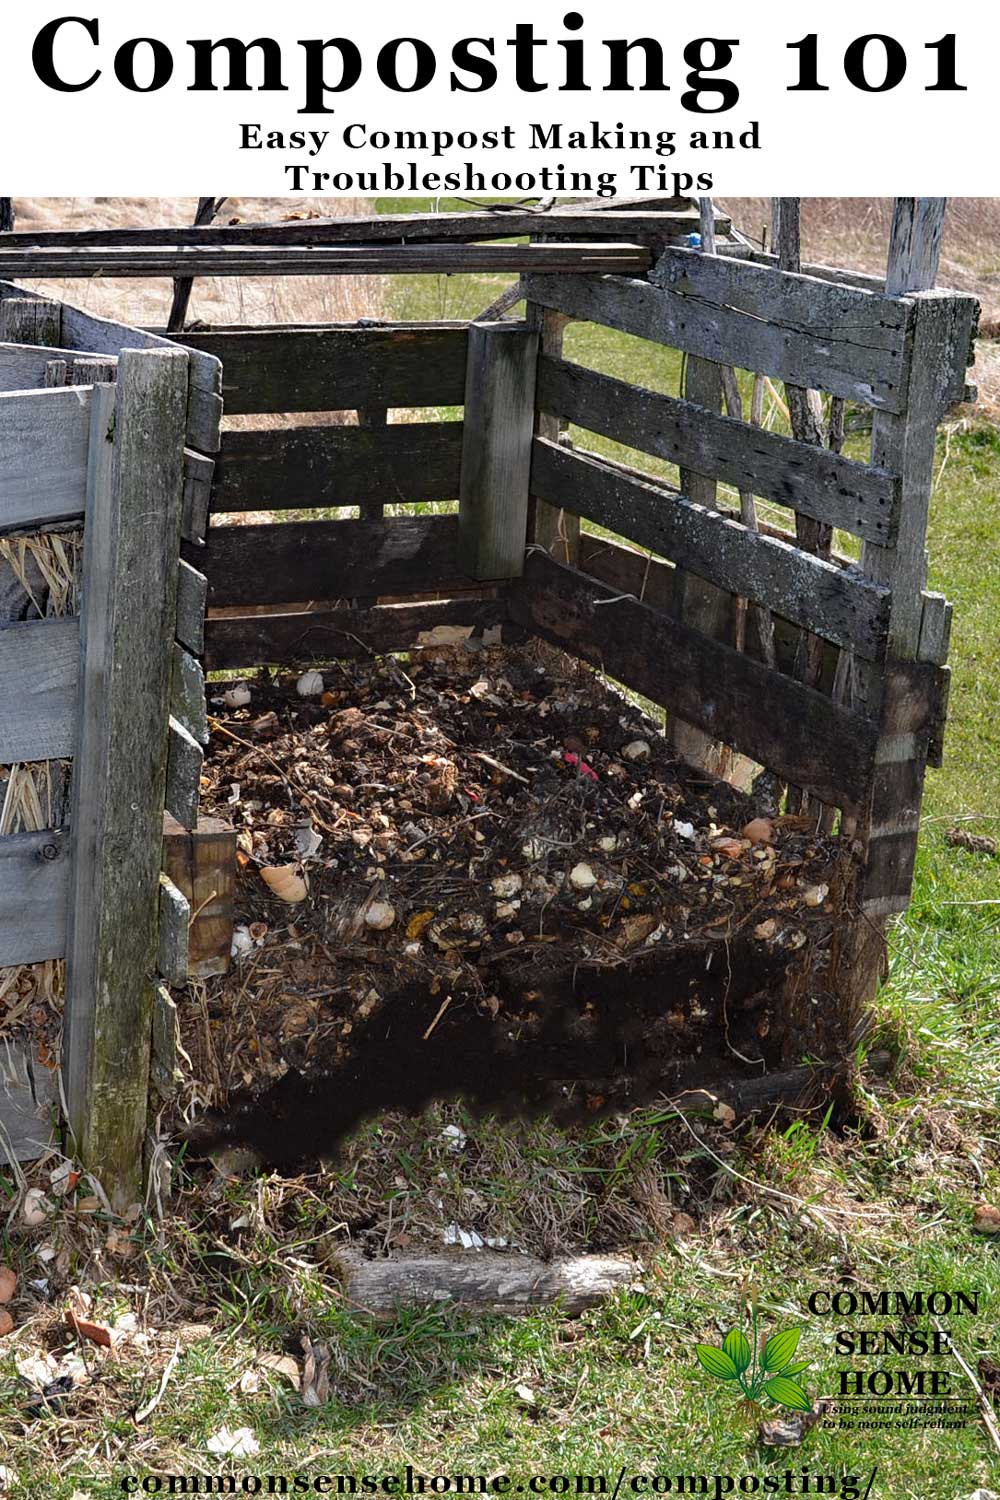
Building a Pallet Compost bin
For a single bin, use 4 pallets to make the sides, and screw them into pieces of 2×4 or 4×4 to stabilize the corners. If you like, you can attach the pallet designated as the “front” so that it is removable. If you plan on regularly turning the pile, drive a sturdy fence post in at each front corner of your bin, leaving just enough room between the fence post and the bin for your front cover pallet. With this setup, you can slide the front pallet out of the way to turn the pile instead of unscrewing it.
If you have more waste and lots of room, you can create 3 bins with 10 pallets. As mentioned above, this give you the option to keep one bin for browns storage, one active bin, and one aging bin.
Premade Compost Bins or Barrels
You can also purchase bins and tanks for residential backyards where an open compost bin would be a problem. These ensure the materials mix well and hides the mess. Some of the top rated composters on amazon.com are:
65-Gallon Compost Tumbler with Cart
Dual Body Tumbling Composter by HOTFROG
Can I Compost Indoors?
Yes, you can compost inside. There are specialized products that help speed composting and control odors, but one of the easiest ways to compost inside is with vermicomposting. Vermicomposting (composting with a worm bin) is well suited to indoor composting because the worms need controlled temperatures to stay active. They chow down on the same types of food that are safe to put in regular compost. See “Vermicomposting – How to Start an Earthworm Bin for Composting” for more information.
What is Safe to Compost?
Green
Would you like to save this?
- Vegetable and fruit leftovers, scraps and peelings
- Tea leaves and coffee grounds, including tea bags and coffee filters
- Crushed egg shells
- Grass cuttings and weeds (avoid weed seeds unless you know your compost pile will get hot enough to make them sterile (120-170°F, 49-77°C) for at least three days
- Houseplants
- Hair and fur
- Manure* (see below)
Brown
- Paper, including paper towels and newspaper
- Cardboard
- Leaves from maples, oak and other trees (not evergreens)
- Woody prunings
- Straw, hay, wool, sawdust and pets’ bedding
- Wood ash (not too much as it can mess up the PH of the compost)
Liquid
- Greywater – waste water from non-toilet use may be added to a compost pile, provided non-toxic, biodegradable cleaners are used (No bleach!)
- Urine (also acts as a Green to stimulate your compost)
Don’t Compost
- Any metals- steel, iron, aluminum, etc
- Plastics (Even if they are fully biodegradable, we don’t recommend them for compost that will be used in your food garden.)
- Dust and debris from vacuums
- Medications of any kind
- Any chemicals or fuel
- Pet wastes, such as dog and cat poop, which may contain parasites or pathogens that could transfer to humans
- Meat, dairy, fats and oil, fish – may smell and attract unwanted pests
- Coal or charcoal ash – may have residues that are harmful to plants
- Yard trimmings, hay or other agricultural products contaminated with herbicides or pesticides
- Black walnut leaves and twigs, which contain a chemical that suppresses plant growth
- Diseases or insect infested plants
Note that some of these items may be safely composted in small amounts in a hot compost pile (such as meat or pet wastes), but are best avoided by the beginning composter.
Compost with Caution
Compost these organic materials with caution.
- Evergreen needles – Because of their acidity, evergreen needles can throw off the pH of your compost pile. It’s better to leave them as mulch under the trees, or use them as mulch around acid loving plants like blueberries.
- Animal manure – Animal manures can harbor pathogenic bacteria like e coli, so hot composting with a two bin composting system is best. One bin is active, the other is curing. See “Composting in home gardens” and “Composting Chicken Manure” for more information. Use deep bedding methods to begin composting manure in the animal shelter.
- Human waste – Like animal manures, human wastes can harbor pathogens. The Humanure Handbook is an excellent resource for those who wish to capture and reuse this waste stream.
- Dead animals and/or animal parts, bones – Hot composting of carcasses is now the recommended disposal methods for animal mortalities, as proper hot composting poses less risk to water supplies than burying. Dead animals attract maggots and other scavenging animals, and will smell horrible if not properly composted, so please make sure to follow recommended procedures.
- Blackwater (toilet waste water) – Like other human waste, blackwater requires hot composting or more extensive natural filtration, as viruses, bacteria and medications go through our systems and could be present in the water.
Composting Questions and Answers
How long does it take to make compost?
A compost pile or bin could be ready to use is as little as 4-6 weeks with regular turning and the right mix of greens and browns. Layered piles that are left without turning may take up to two years or more.
How do I know my compost is done?
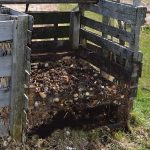
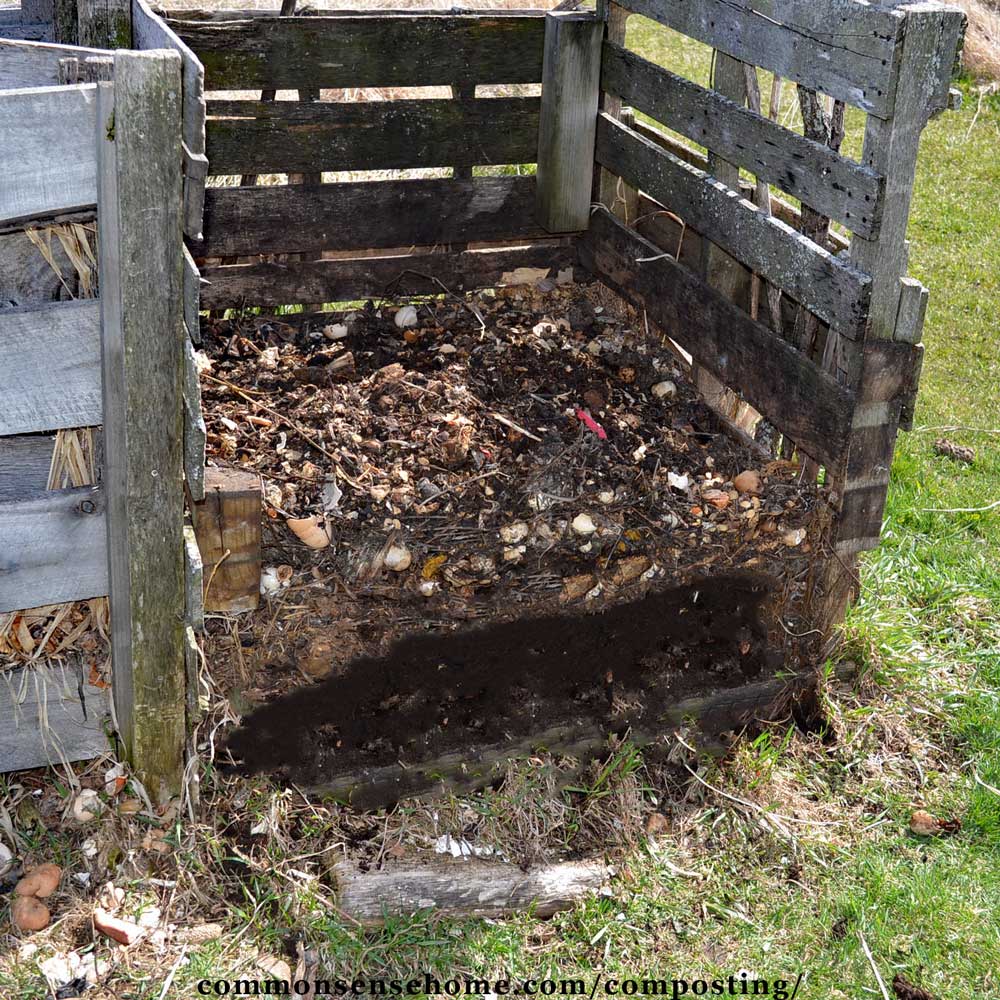
The compost is done when the compost material at the bottom (the “humus”) is a dark rich color. (In a tumbling composter or well turned pile, all or most of the material may be humus.) The unfinished top layers can be put back in the pile or added to another bin as the bottom layer. Note the black layers in the bottom of the compost in the picture below.
Watch out for steam! If your compost is still steaming and actively heating, the compost can burn your plants. It’s best to wait until compost has aged enough to stop steaming before applying it to your garden, even if the color is dark and most of the material is broken down. This is where a two or three bin system is handy. We keep one bin active, and allow the other(s) to age.
The compost smells. Is that normal?
It is normal for compost to have some odor. After all, it is decomposing. The odor of a healthy compost pile should be earthy, like the damp musty odor of a pile of rotting leaves. If your compost pile stinks, you need an intervention. First, make sure you have enough browns to soak up excess moisture and balance out your greens. Lack of browns is the number one reason for stinky compost. Next, do some turning, to make sure your greens and browns are well mixed and you don’t have pockets of rotting ooze. Check your moisture levels. Too dry (unlikely if it’s stinky, but possible) – add water. Too wet – turn more frequently and add dry browns if needed.
There is some mold in my compost. Is that ok?
Mold is completely normal in compost bin, and is especially helpful in the breakdown of woody materials like wood chips and tough plant stalks. The less you turn your compost, the more likely you are to see large spans of spreading mold. If you are sensitive to mold, wear a mask when turning your compost, or enlist a friend to turn it for you. To reduce the mold bloom, turn your pile more frequently, and make sure the moisture levels don’t get too high. Don’t forget to aim for a good balance of greens and browns.
Can I keep adding things to the same compost barrel?
Yes. It even has a name. It’s called layering. Ideally, we want to build up alternating layers of greens and browns as we build our pile. If you don’t turn your pile, the bottom layers will finish first. At that point you can peel back the top layers, remove the finished compost (humus) from the bottom, and then return the rest of the pile to continue composting.
In a compost tumbler, you’ll probably want to rake or sift out the less finished pieces when you harvest your compost. The same goes for a pile that is frequently turned. If something isn’t broken down, put it back in the pile for another round of composting.
Ideally, it’s best to have a system of two or more bins, so you can let one pile age while the other one is active.
There are a lot of ants or other insects in the compost. Is that ok?
A healthy compost pile is teaming with life, including bugs of various types such as sowbugs, pillbugs, millipedes, slugs, earwigs, beetles, centipedes and more. It’s like a high rise bug hotel. When you dig in to turn your compost, you should see a wide variety of small critters running for cover.
If your pile gets dominated by one species, such as ants taking over and turning the pile into a giant farm, odds are that something is out of balance. For instance, an abundance of ants means your pile is too dry. Try turning your pile more frequently to disrupt their nesting habits, and keep a closer watch on moisture levels and your balance of greens and browns. If you have chickens, allowing your chickens access to your compost pile will take down the bug population and provide some great high-protein chicken chow.
Are you ready to get composting?
I hope this guide helps you to understand the basics of home composting. It’s time for more people to start using the resources at hand to build better soil and grow healthier crops. If you have any composting tips you’d like to share or questions you’d like to ask, please leave a comment and let us know.
You may also find useful:
My plastic compost bin is full of oozing blackness that actually moves like the surface is covered with centipedes. It’s gotten too heavy to rotate the bin and some of the ooze is dripping out of the tiny openings. Help please. I’m a novice. Built and began using this bin 8 months ago
You need to empty the bin.
Without rotation, odds are you’re seeing some anaerobic decomposition. The black ooze is just material breaking down and rotting – but I’m guessing the smell is none too pleasant. It sounds like you may have gotten too many “green” (high nitrogen) components and not enough “browns” (high carbon) to help give the mix bulk and balance. Too much green leads to slimy. If you been getting excess rain, that compounds the problem.
Do you have a garden bed that’s not being used at the moment where you could move the mess to finish decomposing, or maybe in an out of the way corner under some trees or shrubs? It’s probably a little too active to safely move it near growing garden plants.
Our compost bin is full of tiny roots making it l ost impossible to get the compost out of the bin. What should we do? What is it? Thanks for your help. Our bin has been in use for about two years.
The good news is that your compost is helping plants to grow. The bad news is that they don’t seem to be the plants that you want to grow.
Once roots are established in the compost pile, they’ve going to be a hassle to deal with no matter how you tackle them. You can try solarizing the pile by covering it with clear plastic to cook them so they loosen up, but this may or may not help much, depending on the size of the pile and the degree of root infestation. Solarizing will also kill off some of the happy, helpful microbes in the pile. At some point you’ll simply need to go in and break it up. I suggest sharpening your shovel well to make sure they cut through the weeds with less force required from you – https://commonsensehome.com/cleaning-and-sharpening-garden-tools/
Next time around, try to disturb your compost before it’s two years old, and if the roots are growing up from below from nearby trees or shrubs, a different local might be less hassle.