Soil Testing – 5 Easy Tests for Your Yard and Garden
This post may contain affiliate links. Read my full disclosure here.
Soil testing is helpful for new or existing yards or gardens. In this article, we’ll explain five simple soil test options for home gardeners.
How is soil testing done?
To test the soil from your yard or garden, start with a soil sample from your test area. If you use a professional testing service, follow their guidelines for gathering the soil into sample boxes. Fill out the required forms and send it all in. Some common soil analysis tests include soil nutrients and pH, organic matter and soluble salts (indicating excessive fertilizer use).
For home soil testing, proceed as indicated below. The first two test focus on soil structure, the last three focus on nutrients and soil pH.
#1 – Testing Soil Structure with the Squeeze Test
It doesn’t get much simpler than this. When soil is moist (not soggy), grab a handful and give it a squeeze. (If testing in the yard, dig below the sod.) Then, open your hand, poke the dirt ball and look at the soil texture.
- If it’s a sticky lump that won’t easily break apart, you have a lot of clay.
- Soil that crumbles easily and won’t hold the shape of the fist has excess sand (or gravel).
- If the contents of your hand look like crumbly chocolate cake, and falls apart with gentle prodding, you have loam – a balanced mix of sand and clay with organic matter.
Too much clay means poor drainage, and excess sand means soil that drains quickly. #3 is our “sweet spot” for most gardening locations. Loam holds enough moisture (but not too much), and the organic matter (humus) feeds the plants and acts as great habitat for healthy soil critters.
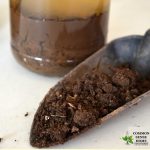
#2 – Testing Soil Structure with the Jar Test
If you’d like more information about how much of what type of soil you have, the jar test is another easy option. All you need is soil, clear water and a clear jar. You can use a quart or pint canning jar, but I prefer other empty food jars. It would be a shame to scratch the inside of a canning jar with a random piece of gravel.
Gather enough soil to fill your jar half full. Fill the jar to about an inch from the top with water. Seal and shake well. Allow the jar to sit and settle until the water is mostly clear and layers are visible in the soil. I let mine sit overnight and look it over the next day.
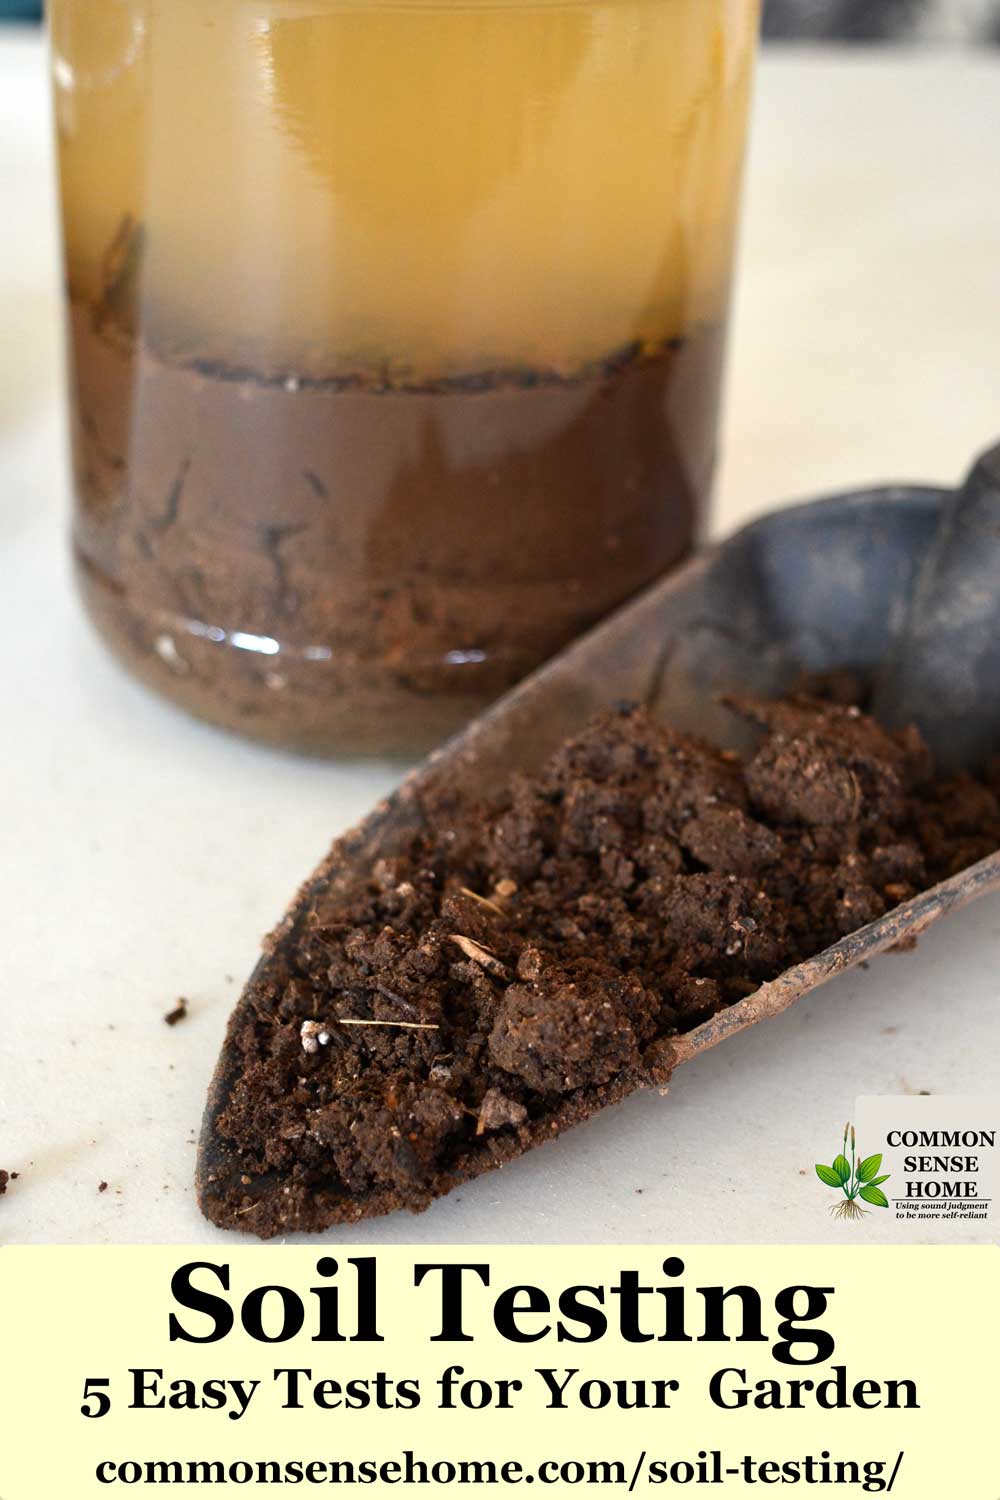
The bottom layer is sand, which has the largest particle size. (Rocks will also settle to the bottom.) Above that is silt, with mid-sized grains, and above that, clay, with the smallest grain size. Organic matter may form a layer on top of the clay and/or on top of the water.
Ideally, we want around 20% clay, 40% silt and 40% sand with a nice, dark color – a mixed sand and clay loam. (Darker color typically indicates more organic matter.) That said, almost any soil can still be productive. It may just take a little more time and effort.
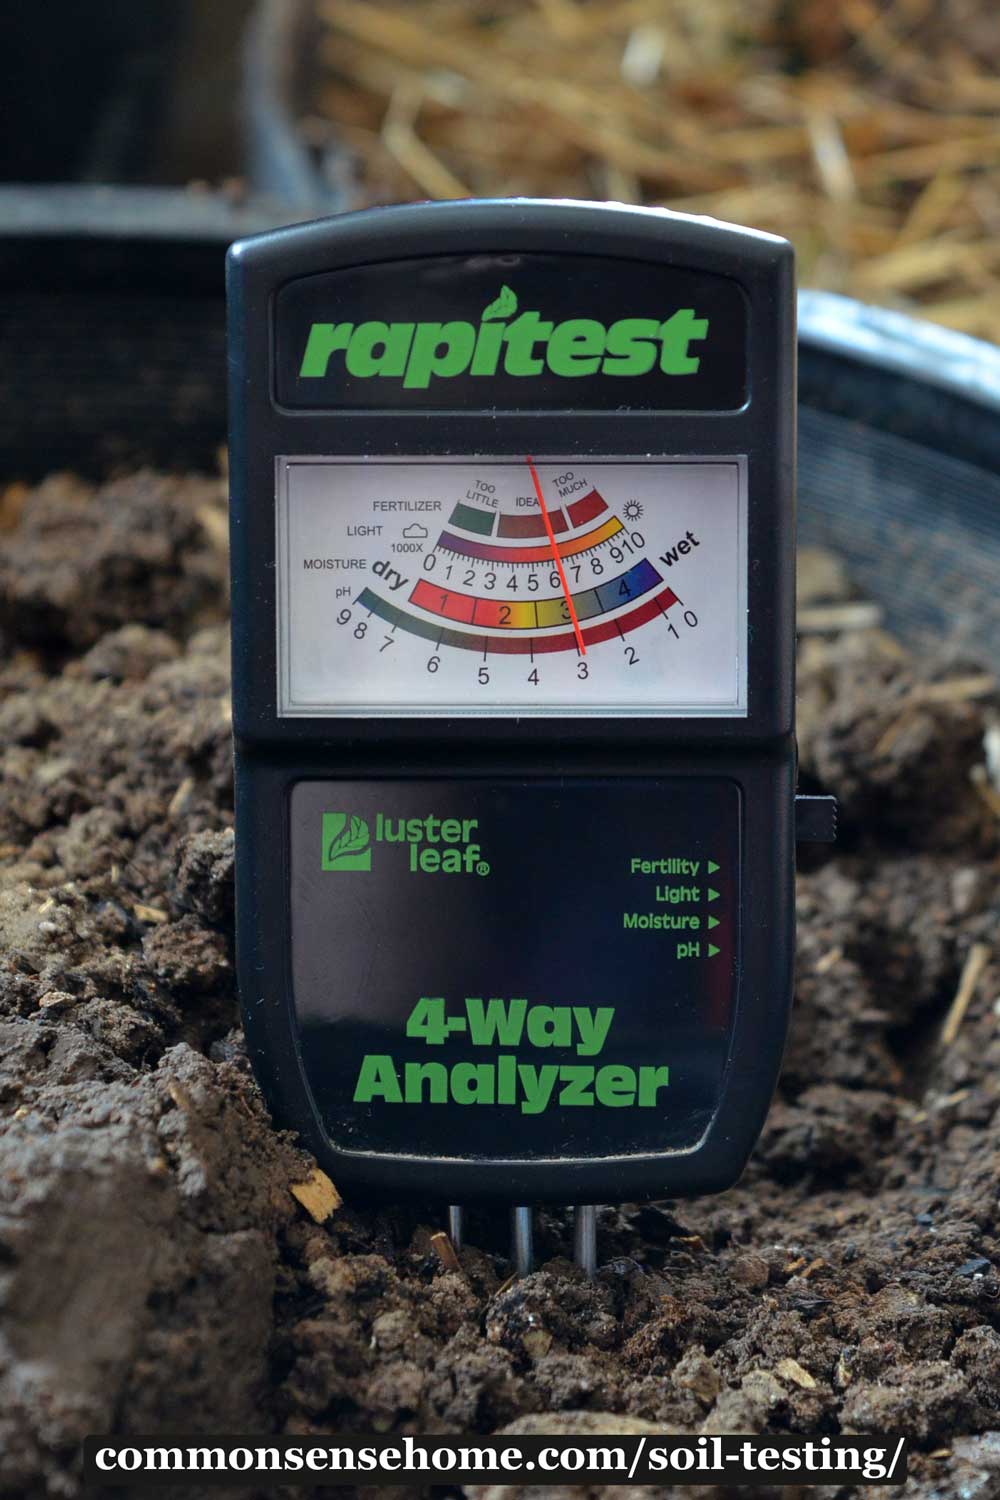
#3 – Soil Test Meters
Soil test meters show up in garden centers every spring. I never paid much attention to them, but this year we tried one out. I was not impressed.
In theory, you clean the prongs off, stick the meter in the dirt, take a reading and you’re done. The meter we tested has options for pH, moisture, soil fertility and light levels.
The pH from the meter was close to the results from the soil test kit. As for moisture and light, I can poke my finger in the dirt or look up at the sky to check those. When we attempted to check the nutrient levels by sticking the probe in water soil, the results changed when we wiggled the probe. The results only show “low”, “adequate”, or “too much” – but not what nutrient is lacking or excessive.
I’d suggest leaving the meters at the store, unless you want a simple soil thermometer.
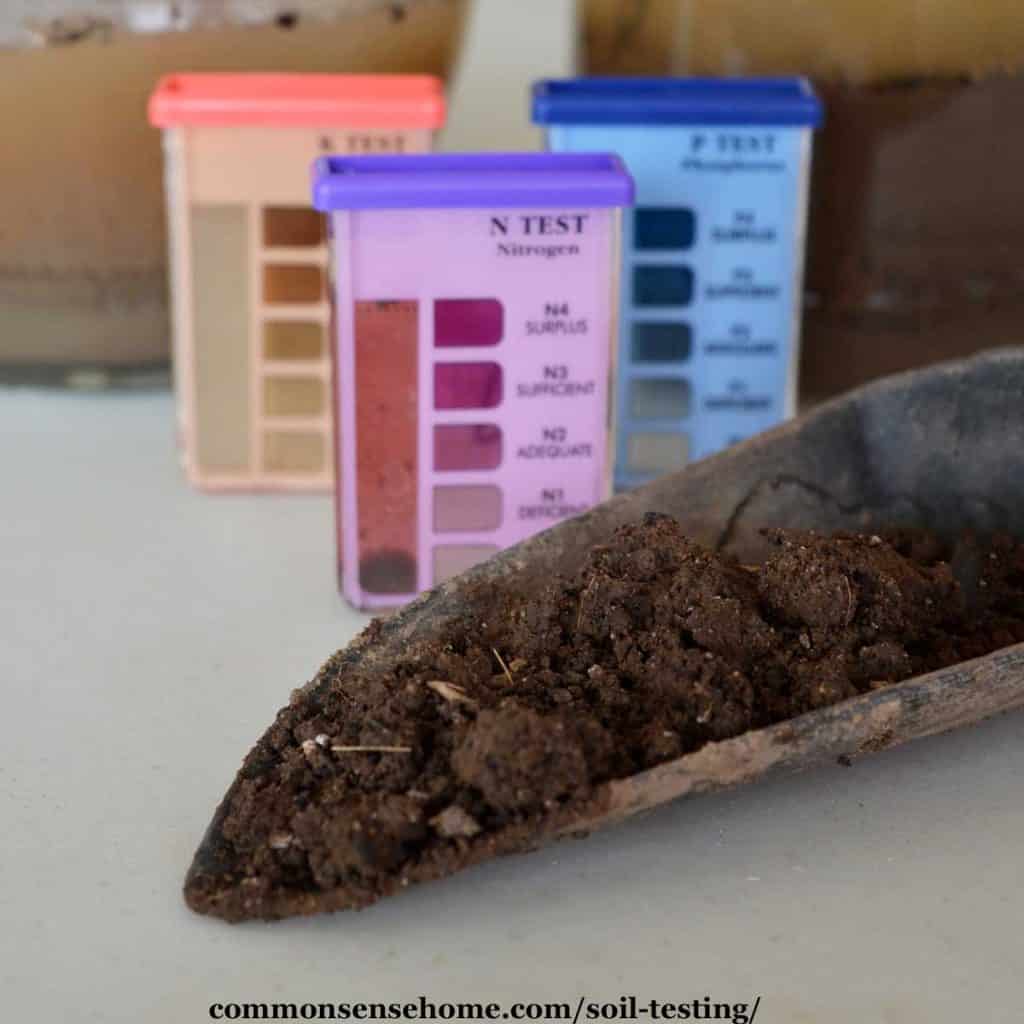
#4 – Home Soil Test Kits
Rapitest also makes home soil test kits. These test pH, nitrogen, phosphorus, and potassium (N, P, and K) with powdered reagents. You prep a sample, add the powder, shake and wait for color.
Would you like to save this?
For the pH test, you add soil, then water, then reagent. For the other tests, you mix a soil slurry with excess water, and then test the water with the reagents.
These tests are simple and easy to use, but may not be the most accurate. I take them as a “ball park estimate”, and fun experiment for the kids.
We do a demonstration of these tests in the video below. (If the video doesn’t display, make sure all ad blockers are off.)
#5 – Look at What’s Growing in Your Garden
Looking at what is growing and how it’s growing in your garden is one of the best indicators of soil health.
If plants have abundant green growth but little or no fruit set, you may have too much nitrogen. Hairy root vegetables are another sign of excess nitrogen. (See “Tomato Flowers But No Fruit, or No Tomato Flowers – 9 Troubleshooting Tips” for more on proper fertilization for fruiting.)
If plants have reddish-purple leaves (when they shouldn’t), it could be a sign of low phosphorus. (Note that cold soil can tie up phosphorous in spring.) Plants may also be stunted.
Potassium deficiency may show up as crinkled, rolled leaves, or yellowing on older leaves. Yields are often reduced.
For a more detailed listing of common symptoms of low nutrient levels and ways to nourish your soil, see “Organic Fertilizer – Feed Your Plants, Soil and Microbes“.
Weeds
Different weeds show up in different soils. For instance, abundant dandelions indicate soil low in available calcium. Common plantain and pineapple weed show up to heal compacted soils. Nettles love soil with excess nitrogen.
Know your weeds and you will know your soil. Bring a soil into balance, and many weed problems simply disappear. you can learn more about weeds and their uses in the Weekly Weeder series. A good book for linking weeds to their underlying soil conditions is “Weeds: Control Without Poisons“.
Professional Soil Testing
If you feel the need for serious soil testing, your local cooperative extension office may offer testing. There are many different labs with mail in soil testing services, such as:
University of Minnesota – Lawn And Garden Soil Testing
A&L Great Lakes Laboratories, Inc.
Larger scale organic growers may find the Alternative Soil Testing Laboratories Database helpful. Some labs offer suggestions for fertilizers based on soil test results.
More Gardening Information
I hope you’ve found this article helpful. If you have any soil testing questions or tips that you’d like to share, please leave a comment below.
We have over 100 gardening articles on the site to help you with everything from planting to harvest, all sorted by category on the Common Sense Gardening page.
They include:
I’ve been an organic gardener for 50 years, since I was ten
Always nice to find more info to read during the winter months.
Thank you.
Thank you, Mark. After 50 years, I’m sure you have plenty of stories to share, too. Each year is different, isn’t it, no matter how many years we do this.