Easy Homemade Sloppy Joes (Plus Homemade Buns!)
This post may contain affiliate links. Read my full disclosure here.

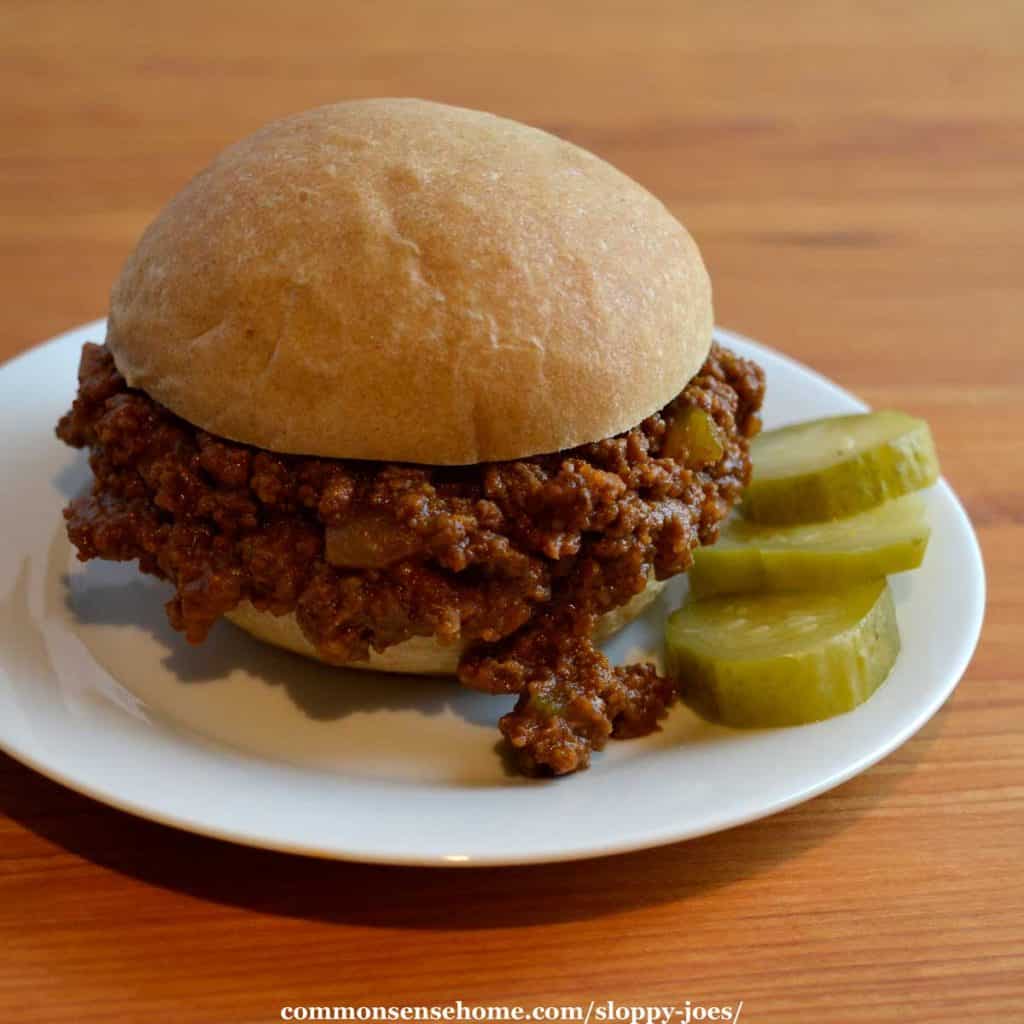
This easy homemade sloppy joe recipe is a hit at family gatherings. Even the picky eaters enjoy it. I make it for Christmas Eve every year. It uses common ingredients from the fridge and pantry – no high fructose corn syrup required.
The flavor improves the next day, so it’s a great recipe to make a day ahead and reheat in a crock pot. It also freezes and freeze dries well. Try some of Betty’s No Can Dill Pickles on the side for an extra treat.
Sloppy Joes are a Classic
Our homemade sloppy joes are adapted from the Betty Crocker’s New Picture Cook Book from 1961. (I love this cook book. They use lard.) They call it “barbeque hamburger mix”. The recipe calls for four pounds of ground beef and makes 30-40 sandwiches.
Sometimes I make a whole batch, sometimes I cut it in half. If you prefer, you can substitute ground turkey or ground venison for the ground beef. We use homemade ketchup or non-HFCS ketchup.
This is a good recipe to introduce kids to cooking. My boys have been making it by themselves since they were around 10 and 8. One would brown the beef and chop the veggies while the other measured the rest of the ingredients.
PrintEasy Homemade Sloppy Joe Recipe
- Prep Time: 10 minutes
- Cook Time: 30 minutes
- Total Time: 40 minutes
- Yield: 30–40 sandwiches 1x
- Category: sandwich
- Method: stove top
- Cuisine: American
Ingredients
- 1 cup chopped onion
- 2 tablespoons butter
- 4 pounds ground beef
- 14 oz ketchup
- 1 cup water
- 1/2 cup chopped celery
- 1/4 cup lemon juice
- 2 tablespoons brown sugar
- 1 tablespoon salt
- 2 teaspoons vinegar
- 1 teaspoon Lawry’s Salt
- 1/2 teaspoon dry mustard
Instructions
Saute onion in butter. Add ground beef; brown lightly. Drain off excess fat, if needed. Add rest of ingredients and simmer covered 30 minutes. Use to fill 30 to 40 hamburger buns.
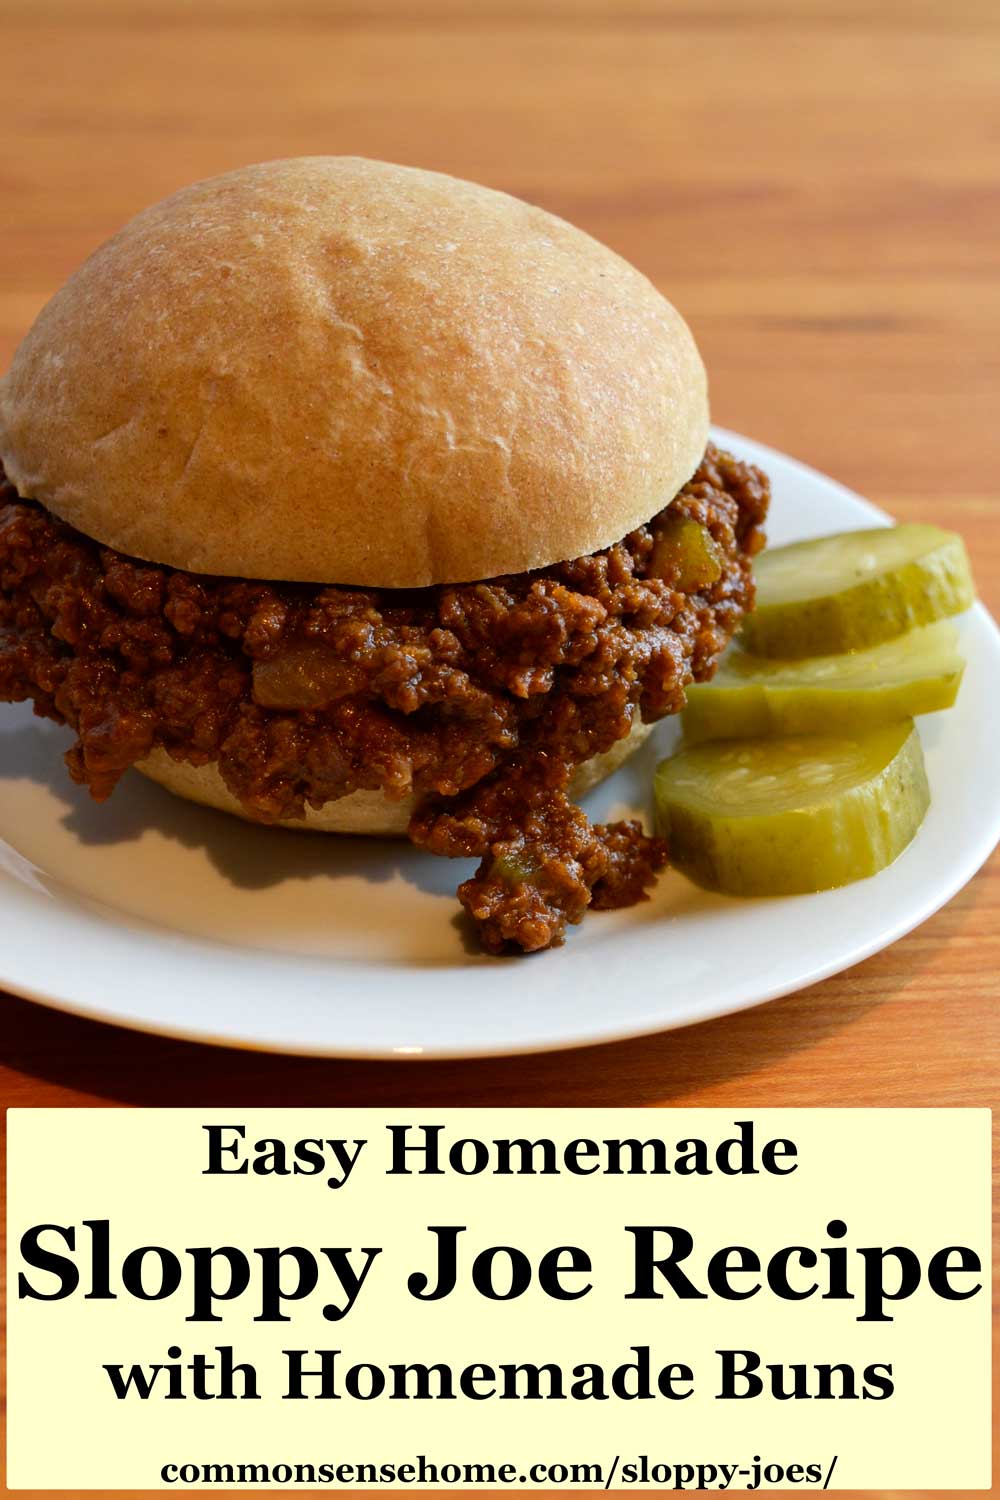
Homemade Buns Make Sloppy Joes Better!
If you want, you can pair your sloppy joe meat with store bought buns, but if you have a little extra time, I highly recommend homemade. I usually start the buns in the early afternoon and they’re done by supper time.
Visit the article “Easy Bread Recipe” for a step by step video showing how to make and shape buns and bread. Or scroll down the page to get the printable recipe without the video.
With the bread machine or mixer I can multi-task more easily, but it’s not that much more work to do it by hand if needed.
A single batch of the bun dough will fit in most bread machines, so you can use the “dough” cycle for mixing. I normally use my Bosch Universal Plus Kitchen Machine and mix up a double batch at one time. That way I have enough dough to make two loaves of bread plus one dozen medium sized hamburger buns, or 30-40 smaller buns.
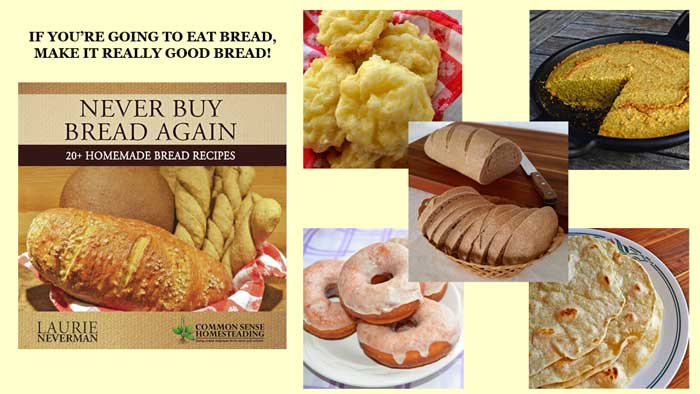
If you want to get fancy, you can team up your homemade sloppy joe meat with the homemade pretzel buns featured in my book, Never Buy Bread Again. Those will take a bit longer to prepare, but are sure to wow your guests.
Would you like to save this?
Easy Hamburger Buns
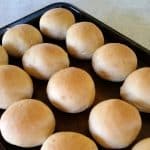
Easy “no fail” recipe for homemade hamburger buns.
- Prep Time: 1 hour
- Cook Time: 15 minutes
- Total Time: 1 hour 15 minutes
- Yield: 15 buns 1x
- Category: Bread
- Method: Baking
- Cuisine: American
Ingredients
- 1 egg plus enough warm water to equal 1 1/3 cups
- 1/4 cup melted butter
- 1/4 cup sugar
- 1 1/2 teaspoon salt
- 4 cups bread flour
- 1 1/2 teaspoon instant yeast/bread machine yeast or 2 teaspoons active dry yeast
Instructions
- Place all ingredients in mixer or bread machine and mix for 6-8 minutes, until ingredients are well mixed and gluten has had a chance to develop.
- If mixing by hand, blend all ingredients except flour. Add flour one cup at a time, mixing well after each addition. (You may need to adjust the amount of flour based on humidity conditions.) When dough is stiff enough to mix by hand, dump onto a well-floured counter and knead for 5-10 minutes. Continue as below.
- Cover and let rise for 20 minutes. Punch down dough, let rise until double in size.
- Divide dough into desired number of buns and loaves and shape accordingly. Remember, the bread will rise again and double in size, so small buns will get much larger.
- Cover with a clean dish cloth and place in a warm location until buns double in size. Preheat oven to 375 °F while buns are rising.
- Bake buns around 15 minutes at 375 °F, until lightly browned.
- Cool on wire rack before slicing.
Notes
If using active dry yeast, add the yeast to the warm water and allow it to warm and dissolve following directions on yeast package before adding the rest of the ingredients.
To freeze the buns. Make sure they have cooled completely, otherwise you’ll have condensation and soggy buns when they thaw. (No one likes soggy buns.) Place the cooled buns into a gallon zipper bag, and remove as much air as possible. Label with date and contents. Use within a month for best quality.
Recommended Kitchen Tools
The right tools make cooking and baking a little easier. I like to prep our sloppy joes in a heavy bottomed stock pot. We always make sure to keep our knives sharp for chopping veggies, and use wooden cutting boards. You can prep directly in a slow cooker if you prefer, but I like the flavor that’s added by browning the onions before you brown the beef.
When making the buns, I suggest either a large bowl and a sturdy wooden spoon to mix by hand, or a solidly built mixer like the KitchenAid or Bosch Universal Stand Mixer.
I like stainless steel baking sheets, and line them with reusable parchment paper as needed. The reusable parchment paper works so much better than silicone baking mats. It doesn’t get stinky and tacky like silicone.
My preferred cooling rack is a 16×20 inch with a grid pattern, because it’s large enough to hold a double batch of buns for sloppy joes, but the grid pattern keeps small cookies and such from falling through.
More Homemade Bread Recipes and Baking Tips
I hope you and your family enjoy this sloppy joe recipe as much as we do. Don’t forget to check out the other posts in the Bread Recipes Roundup. We also have over 100 recipes, sorted by category, on the Common Sense Recipes and Kitchen Tips page.
If you’ve struggled with bread baking in the past, be sure to check out “Troubleshooting Tips to Help You Make the Perfect Loaf of Bread“.
I also have a book out featuring over 20 bread recipes, including quick breads, plus tips for par-baking and freezing, high altitude adjustments and more. You can read all about it at “Never Buy Bread Again – The Bread Book for Beginning Bakers“.
Originally published in 2011, last updated in 2019.
I have this cookbook! We used it as the text in my highschool sophmore year Home Ec class. Since I started cooking & eating more real food & especially meat in 2010 I have been using this cookbook more & more. I have made barbecue sauce & barbecue beef from this book but had not seen the barbecue hamburger meat recipe. I will try it! Most likely will cut it in half (just 2 of us now).
Your comment ‘they use lard’! resonates with me. I now use lard from pasture raised pigs. There is a recipe for Richer Waffles which I make & use lard – they are THE BEST waffles. Crispy & wonderful. Also their biscuit & pie dough recipes; again use LARD rather than shortening, or AS your shortening. Really good real food!
I was disappointed when I found a later edition of the same book and they switched to shortening. Lard is so much better – as long as you work with it properly. It makes a very delicate pastry crust, so proper chilling is a must.
I’ll have to check out that waffle recipe.
If you have leftovers, the sloppy joe mix does freeze and reheat very well, too.
I think I wrote to you previously, but did not know how to look for your reply. I made this recipe and it turned out dry and too crumbly. After eating it for dinner, I had to throw the rest out. It was just too crumbly to try to cut for sandwiches. Any pointers on where I went wrong?
I would guess too much flour. As noted in the post, you may need to adjust the amount of flour based on humidity conditions. If your flour is very dry, or the air is very dry, it’s likely that less than 4 cups will be required. If you add the flour one cup at a time, mixing after each addition, you can better judge the elasticity and “doneness” of the dough. When there’s enough flour, it’ll start pulling away from the sides of the bowl, but still be a little bit sticky. The dough has a certain feel to it that you’ll become more familiar with as you work with bread, an almost silky texture as the gluten is developed.
Can you recommend a good bread machine? I have been considering a purchase but there’s so many options to choose from! I love your website!
Glad you like the site!
The Zojirushi BB-PAC20 Home Bakery Virtuoso Breadmaker with Gluten Free Menu setting is generally considered the top of the line, and now comes with a gluten free baking setting, which is handy since gluten free breads normally require special handling.
The Oster CKSTBRTW20 2-Pound Expressbake Breadmaker is at the lower end of the price range, but still has great reviews. I had an Oster in the past and it worked well before I mixed up one too many loaves of whole wheat bread and stripped the gears.
The Conair Cuisinart CBK-100 2 LB Bread Maker is between the two in price and features, and has also gotten good reviews.
After killing three bread machines, I invested in a Bosch Universal Plus Kitchen Machine which mixes the dough but does not bake it. I mix double batches of dough and freeze some so I can bake less frequently. We have a fair amount of cool or cold weather here in Wisconsin, so I don’t mind turning on the oven.
I want to make couple loaves . I do everything by hand but have yet to make a bread that is not to heavy. I use all white flour is that the problem? any pointers would be great ty 🙂
Make sure your yeast is fresh and your ingredients are room temp or warmer (liquid). Use a double rise = mix dough, let rise, punch down, let rise again, then form loaves and let rise again. This makes for a more tender loaf.
When letting the bread rise, make sure the area it’s rising is warm and that it has enough time to rise (but not too much). You want the loaves to roughly double in size.
I do recommend a good quality bread flour like the ones mentioned in the post. Good quality flour makes a world of difference in the texture and taste. Just like you can’t make proper cheese with ultra high temperature pasteurized milk, you can’t make the best quality homemade bread with over processed bleached and bromated flour.
Thank you sooooo much for this! I have tried so many different recipes for making sandwich bread with little success. I can’t believe how good this Basic Bun Dough is for a loaf and buns. My family actually thinks it is Breadsmith bread! You really have saved us a lot of money. Thank you so much! I will make a note and say that I did discover that bread flour made a difference after trying Einkorn flour (which I love but it didn’t perform the same), and a real bakery loaf pan made a difference for me.
I’m so glad that it worked out well for you. I absolutely agree that bread flour is the easiest to work with and makes the most consistent loaves. For baking, I’m partial to my stoneware loaf pans.
I’ve had this recipe bookmarked forever and I finally made it tonight, although I couldn’t help making some modifications: I cut it in quarters cause it was for just two of us, I used beer instead of water and green pepper instead of celery (my girlfriend hates celery), and I threw in a little paprika.
It was delicious.
And that’s what recipes are for – a starting off point. Glad it turned out well. 🙂
So well that I’m making a full batch to take to a family gathering this Saturday. 🙂 Happy Holidays!
I have never, ever made bread before. Ever. I found your recipe and was determined to do it and even though I have my mother-in-law’s original kitchenaid with the dough hook I decided to do it all by hand like my grandma did (I even have my great-grandmother’s 1800’s era dough bowl that I totally used). It wasn’t hard at all and I’m excited to say it turned out awesome! I’m hooked!! Thanks so much for showing me it’s nothing to be afraid of and that expensive machines aren’t actually necessary to accomplish awesome bread.
That’s wonderful! It really is pretty straightforward once you’ve done it a few times, and the taste of fresh baked bread knocks the socks off of the standard commercial loaves with the semi-infinite shelf life.
Ok so I’m hoping to try this tomorrow, but I’m a little confused. When you say one egg plus enough warm water, does that mean break the egg in a measuring cup and add water until it reaches the 1 1/3 cups? Also since I’m going to be using active yeast do I add it to the egg and water mixture…..or am I just confusing things? Help please!!
What I usually do is to warm up the first cup of water nice and toasty, then add that to the mixer. If you’re using active yeast, you could warm up one cup of water and proof your yeast in it, then add it to the mixer. For the additional 1/3 cup of water, I do indeed add the egg to the measuring cup and then add additional water until the 1/3 cup mark is reached. Make sense? It’s a little weird, but that’s the way the original recipe was written and it works well, especially since I use a variety of egg sizes from the neighbor.
just one quick question. If I wanted to make this several loaves in one day you said it will freeze safely for about a month. Would you advise that sealing it with a food sealer would keep it longer? or do you think it would squish the loaf? I’m just curious. Sometimes we eat a lot of bread and sometimes we can have 3 loaves of store bought for a month. same thing with the buns… Thanks!
If you wanted to seal it with a vacuum sealer for longer storage, I’d try freezing the bread first before vacuum sealing. This should keep the loaf from being squashed by the sealer.
Laura,
I thank you for the recipe for the sandwich bread, very delicious! There were two differences in your recipe from my standard bread recipe: you had an egg and an extra cup of flour. I was wondering if the extra cup of flour would allow for the bread dough recipe to actually make two loaves as I have glass bakeware (loaves). From an economical stand point, I think 4 cups is alot of flour for one loaf. If you have time, please give me feedback as you have used this recipe more than I have.
Have a blessed day,
Lynn 🙂
Sure you can divide it into two smaller loaves, or shape it into buns or twists or however you like. 🙂
This bread recipe has been a BIG HIT in my home. I also notice it doesn’t dry out as fast as my previous sandwich bread recipe… probably the egg ingredient. Going to try to split it into two tonights’ batch. Let you know how it comes out 🙂
So love this blog!!! Thank you Laura!
It freezes well, too, in case you want to do a double batch. I’m glad you like it.