Dutch Oven Cooking – How to Use a Cast Iron Dutch Oven
This post may contain affiliate links. Read my full disclosure here.
This is a guest post by Jennifer Osuch.
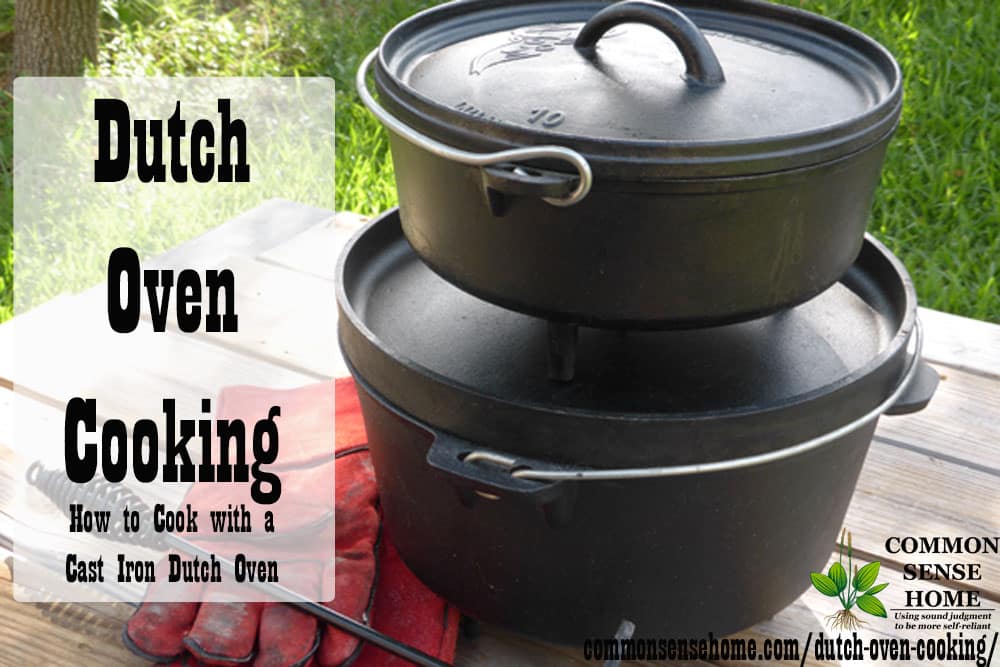
I love cooking with cast iron – especially Dutch oven cooking. Dutch ovens are durable and versatile. They allow you to cook a wide variety of foods under many different conditions. In this post, we’ll talk about different types of Dutch ovens and how they are used, plus I share a couple of our favorite Dutch oven recipes.
Getting Started with Dutch Oven Cooking
Dutch ovens can be made of ceramic, clay, or cast iron. I will be focusing on cast iron dutch ovens in this post as they are the most common and most versatile dutch ovens.
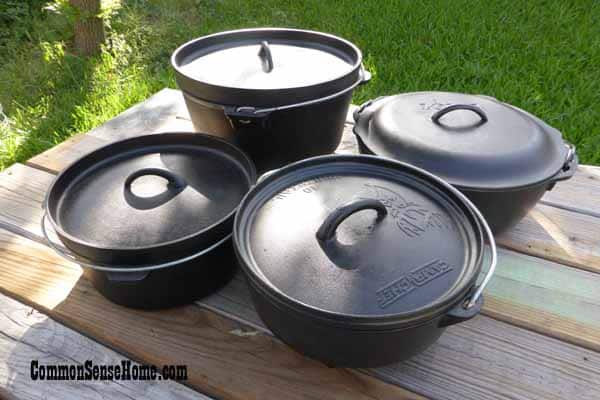
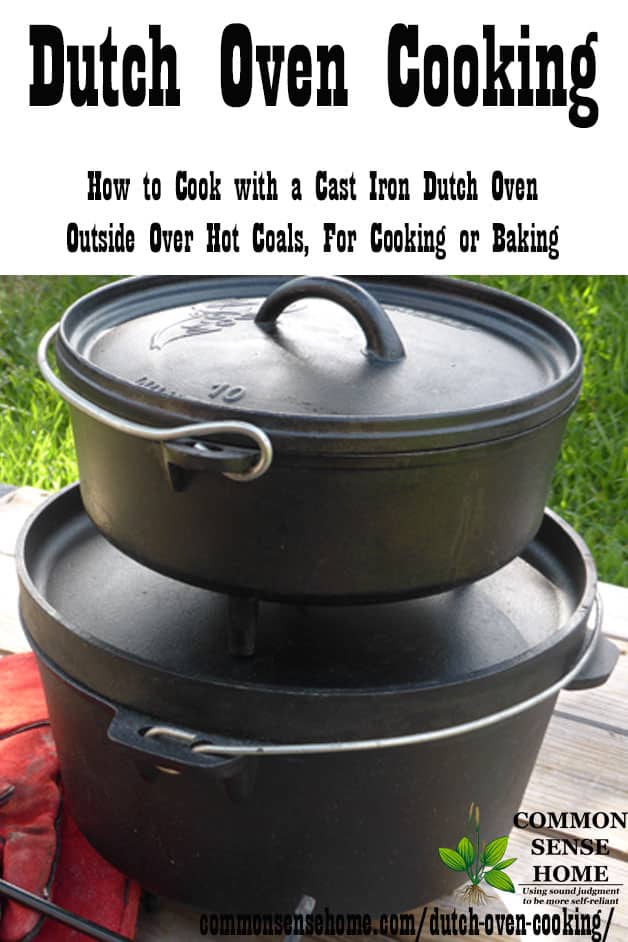
Cast iron dutch ovens come in a variety of shapes, styles and sizes. The reason for different sizes is pretty obvious, you can cook different amounts of food. However the reasons for the different styles and shapes might not be as obvious, at least they weren’t obvious to me when I first started using them. Let me run through them for you.
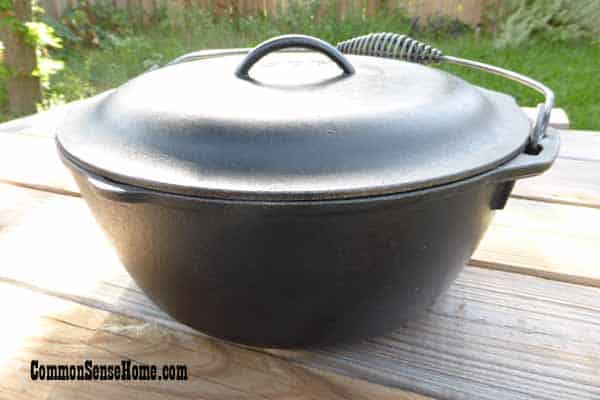
Dutch Oven Cooking with a Campfire – Look for Lips and Feet
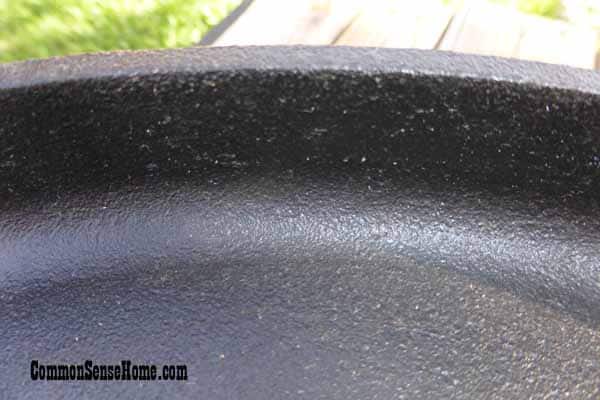
This dutch oven has a lid with a lip.
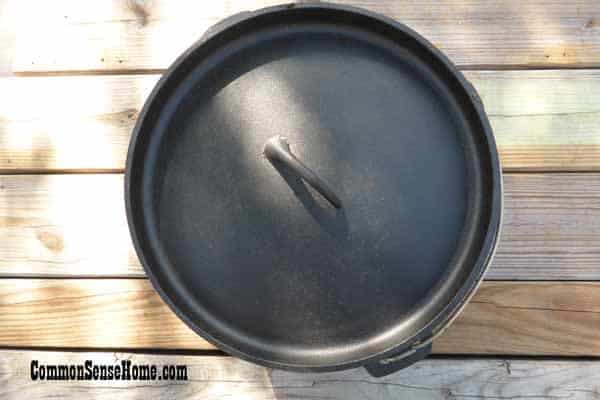
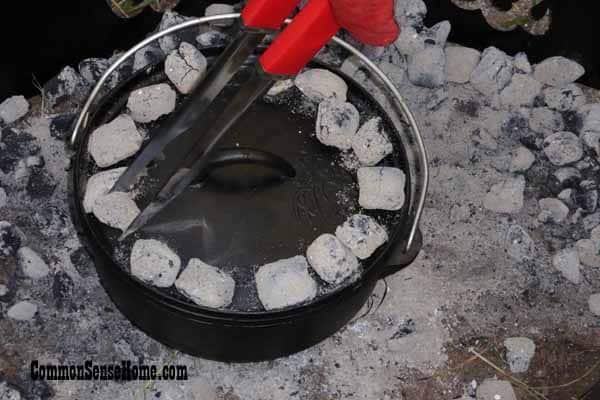
Here is a close up of it. The lip is designed to hold charcoal so that when you cook in a dutch oven you can actually turn it into an oven with heat radiating from the bottom and the top. Placing charcoal on the top of the lid is used to accomplish this and is what allows you to bake in a dutch oven.
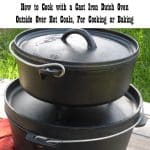
Some dutch ovens also have feet. They are designed to help you place the dutch oven in a bed of hot coals without the coals touching the bottom of the pot, which helps prevent burning. Also they make dutch ovens easy to stack so that you can cook multiple dishes with minimum heat. (See the first picture in this post to see how they might stack.) The feet make this style of dutch oven really hard to put inside a conventional oven.
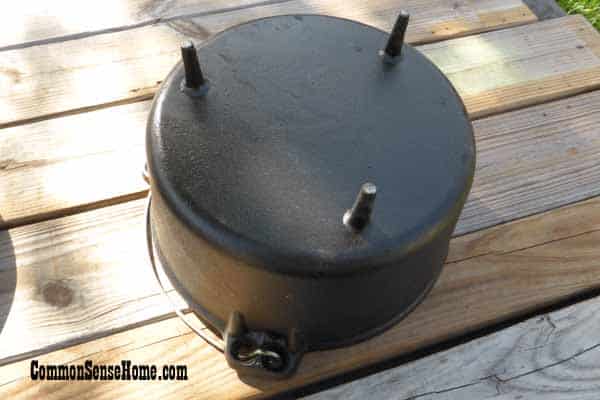
Here is a side view of the dutch oven with the lip on the lid and the feet on the bottom. These dutch oven are really designed for off-grid cooking and don’t do well in conventional ovens, as I’ve already mentioned, but also they won’t work on conventional stoves either.
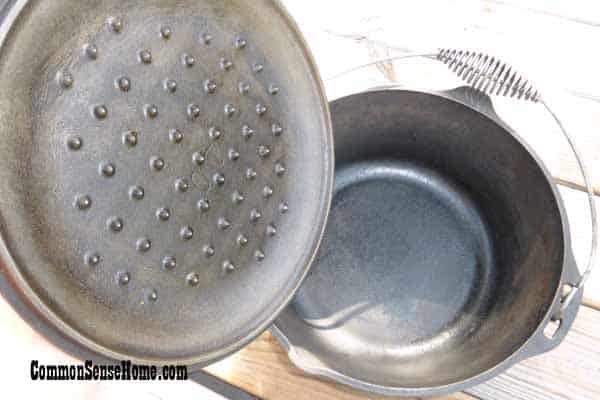
Dutch Ovens that Cook Indoors or Out – No Feet and No Lid Lip
Here is a dutch oven without a lip on the lid. It’s also my favorite because I cook with it outside and inside. You can put coals on the top but it’s more difficult to get them to stay. You can use a metal pie crust shield to help the charcoal stay on top in a pinch.
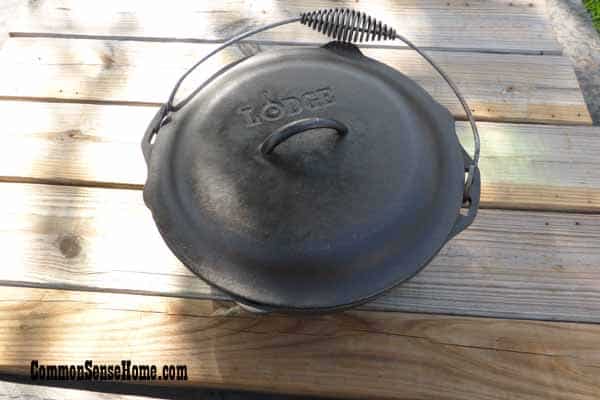
You’ll notice this dutch oven does not have feet, so I can place it on my stove, too.
This is the inside of the same dutch oven. As you can see from the picture it needs to be re-seasoned.
I will say that if you cook outdoors with any cast iron it’s harder to keep them in tip top working order, at least it always has been for me. When I use them outdoors I am often camping away from home with less than an ideal kitchen, so by the time I can give them the attention they need many times the damage has already set-in. That’s not to discourage you from cooking in a dutch oven, but I would recommend starting out cooking at home with them and cast iron in general where you can easily take care of them in your home before venturing out into the great outdoors.
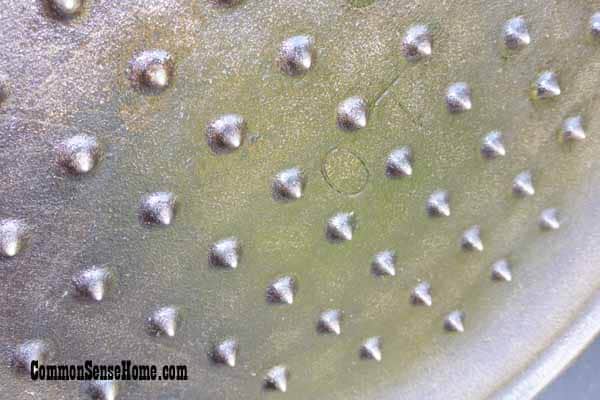
Notice these spikes on the top of the lid. Those have a purpose, too. They are there so the condensation will drip back down and not stay on the lid because water will rust cast iron.
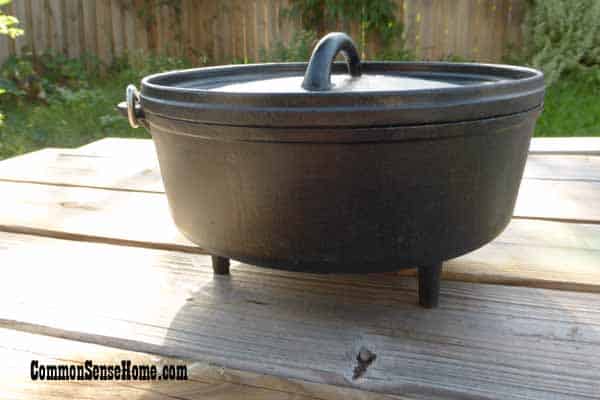
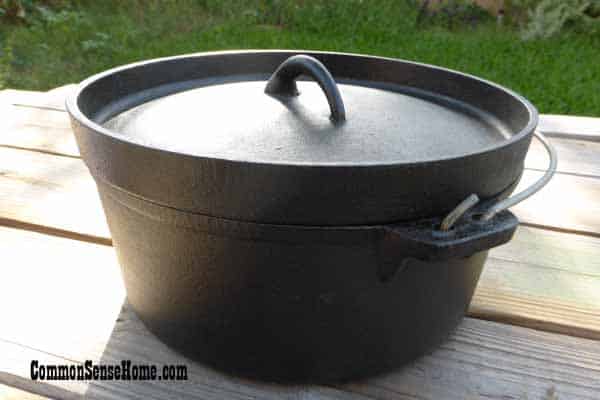
Here is a dutch oven with no feet but it has a lid with a lip. You can cook outdoors with this oven, but it wouldn’t easily stack onto another dutch oven. The trade off is that it will easily fit in a conventional stove and/or oven.
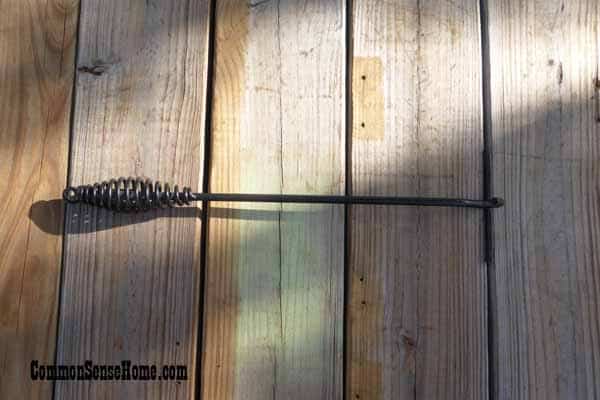
This is a lid lifter, and is a must have if you cook outdoors – at least it makes it much, much easier. Hang on, and I’ll show you what I mean.
Preparing Your Coals for Dutch Oven Cooking
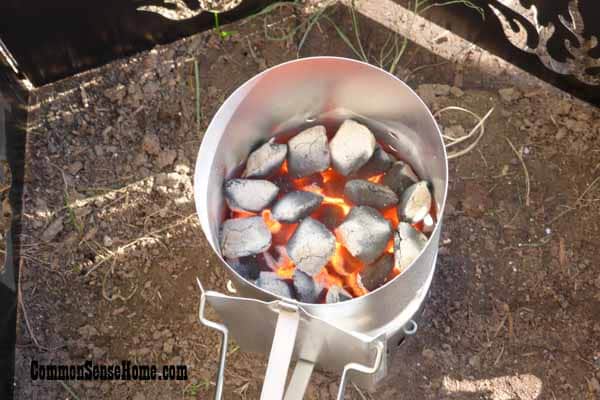
I love using a chimney to light charcoal because we only use all natural charcoal and I’m not a fan of lighter fluid.
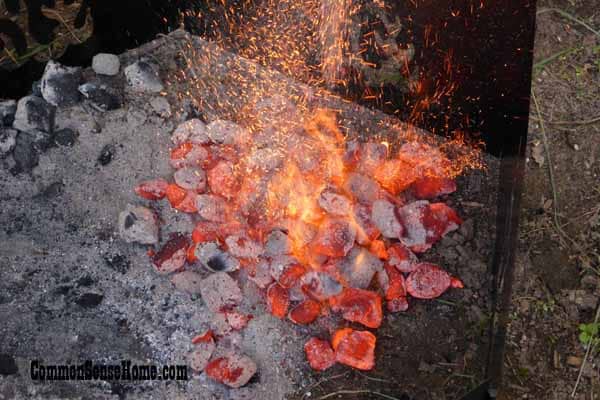
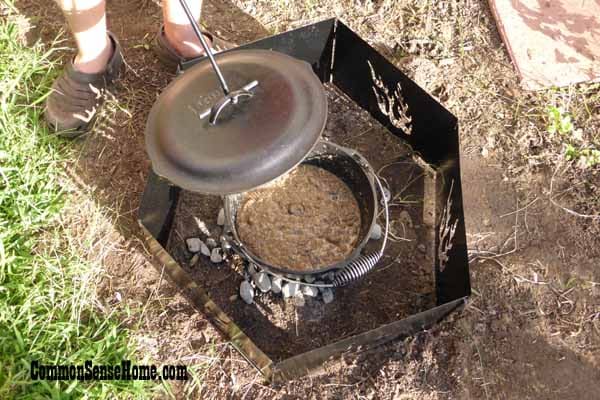
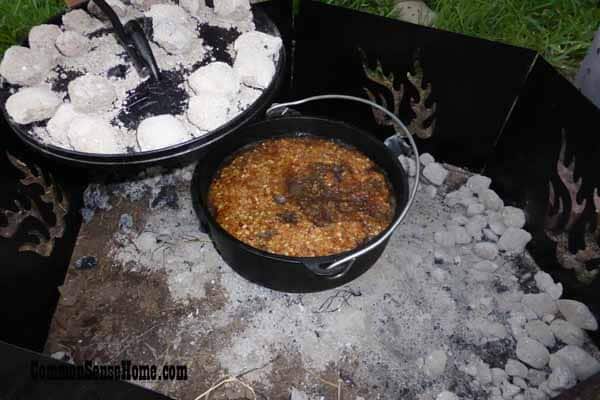
I’m about to cook “Beef” Stroganoff and a Peach Crumble here. Be careful when you dump the charcoals out. This charcoal was probably dumped out a little too soon, if it had been close to someone the wind could have sent those sparks into their face or clothes.
Would you like to save this?
Here is how you want your charcoal to look before you place your dutch oven in on top. You’ll notice that they are mostly grey, not red hot.

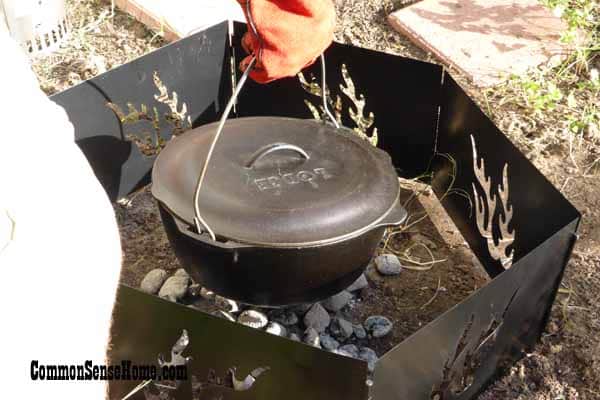
For the “Beef” Stroganoff I didn’t need any top coals so I used my indoor/outdoor dutch oven. I simple set it on the hot coals.
Now, let me show you how that lid lifter works. Simply hook it onto the lid.
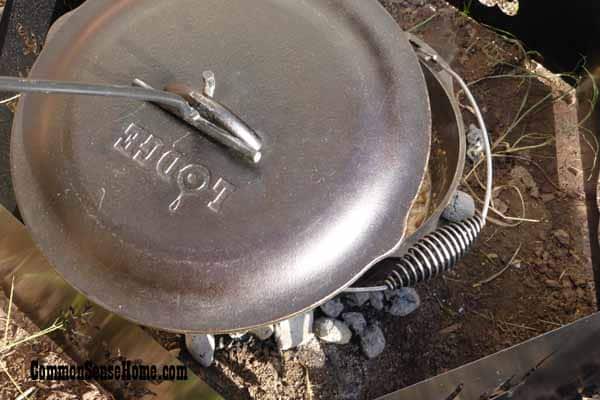
And lift the lid off. Yeah, you could do that with a glove but I’ll show you why the lid lifter is so much better in a minute.
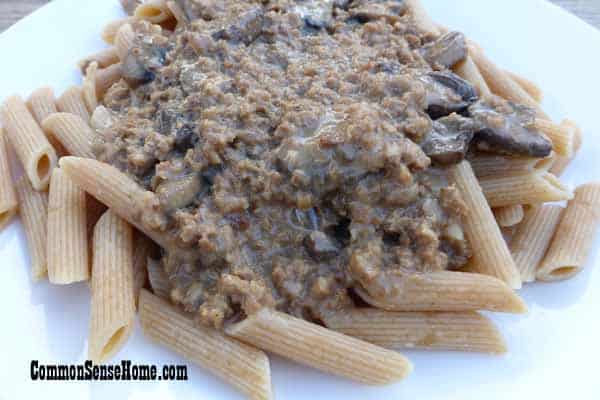
Dutch Oven Recipes – “Beef” Stroganoff
Here is a shot of the “Beef” Stroganoff. I’m not sure I’ve mentioned that my family and I are vegetarians so this is a mock Beef Stroganoff, but don’t let that scare you. I suggest a substitution for meat lovers.
Easy “Beef” Stroganoff for the Dutch Oven
Ingredients
- 2lb tofu crumbles (you can use ground beef)
- 1 medium onion diced
- 2 cans organic mushroom soup
- 1 pint organic sour cream
- 32 oz mushrooms
- 2 packages whole wheat pasta
Instructions
- Saute diced onion and mushrooms in a pan.
- Place onion, mushrooms, soup, and tofu crumbles (or beef) in the dutch oven.
- Place oven over 15 to 20 hot coals for about 45 minutes. Add sour cream 15 minutes before severing.
- Serve over whole wheat pasta.
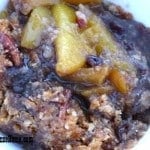
Dutch Oven Recipes – Peach Cobbler
To make the peach cobbler I needed to create an “oven effect” with heat on the top for the crust. So I placed charcoal on top of the dutch oven.
See why that lid lifter comes in handy? Even with a glove that would be dangerous to lift up to check the cobbler.
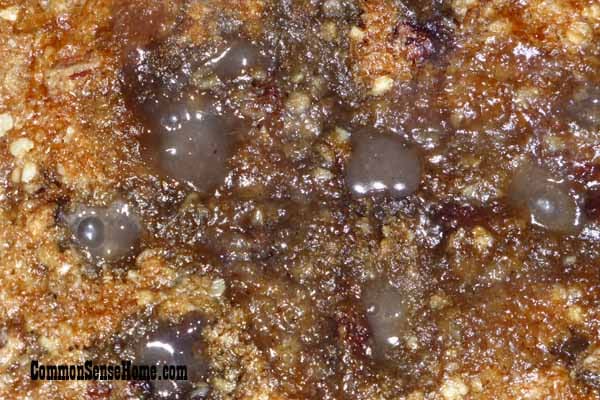
You can see the cobbler bubbling through the crust.
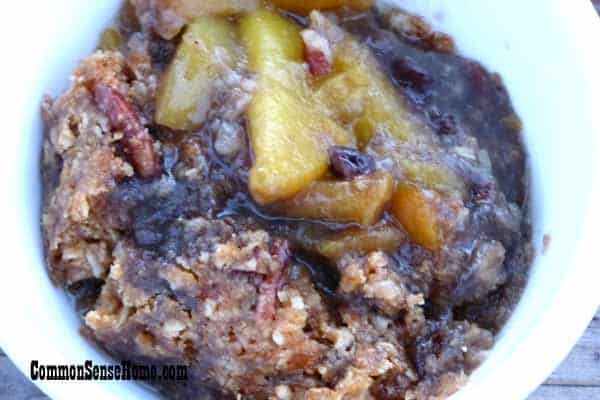
I know this turned out really good because there were no left overs! The cobbler looks a little dark for two reasons. First, I used home canned spiced peaches which contained dark cloves and cinnamon that turned the peaches a little dark and also cooking in cast iron can often turn your food a little dark.
PrintPeach Cobbler Crumble Dessert for the Dutch Oven
Delicious campfire peach cobbler cooked in a cast iron Dutch oven.
Ingredients
- 3 quart jars of home canned peaches (you can use store bought)
- 1 1/2 C fresh ground soft white wheat (you can use cake flour)
- 1/2 C quick oats
- 1/4 t salt
- 1/2 C brown sugar
- 1 1/2 C coconut oil
- 1/2 t baking soda
- 1/2 C chopped pecans
- 1/2 t nutmeg
Instructions
- Place peaches in dutch oven.
- Mix together coconut oil, salt, soda, brown sugar, and nutmeg.
- In a separate bowl mix together oats, flour and pecans.
- Mix coconut oil mixture with the four mixture.
- Spread mixture over the peaches. Place dutch oven over 6 hot coals and place 15-16 on the lid. Cook for about 45 minutes or until bubbly.
Once you master Dutch oven cooking, you can cook anywhere and anyplace–literally and figuratively. You can cook indoors and outdoors, in a stove, over a fire, in a hearth, on a wood stove, even in a sun oven, which is pretty amazing.
But there is something about that knowledge that spills into other parts of your culinary life. Maybe, it’s the nostalgic images of our ancestors cooking over an open flame in a dutch oven that gives you confidence that the way has been paved. Perhaps it’s simply the knowledge that if you can’t get it to work the way you want with one method you can find another. Maybe it’s just the attitude of if they’re hungry they’ll eat it as people have done for centuries because what is cooking in the dutch oven is what’s for dinner. Whatever the case, dutch oven cooking is a very useful skill.
More Information on Cast Iron and Off Grid Cooking
Other posts in this series:
- Cast Iron Cooking – What You Need to Know – Care and Cooking Tips
- How to Season Cast Iron Cookware – Step by Step Seasoning Instructions with Photos
- How to Restore Cast Iron Cookware – Cleaning and Restoring Cast Iron
Other Related Posts:
- Emergency Cooking – 10 Ways to Have a Hot Meal when the Power Goes Out
- Getting Started with Solar Cooking – DIY Solar Cooker Ideas, Printable Cooking Guide
This is a guest post by Jennifer Osuch. Jennifer has been prepping, homesteading (suburban style) and pursuing a self-reliant lifestyle for over 12 years.
She is the mother of three very active and wonderful boys, but insists that as many of her possessions as possible be the color pink to remind her house full of boys there is a lady a living among them.
Jennifer enjoys writing, gardening, and the outdoors. She blogs with her husband at the Seed to Pantry School about urban homesteading and becoming self-reliant. You can also find her on Facebook, Pinterest, and Instagram
Originally posted in 2014, updated in 2018.
Thank you for this information. I have a dutch oven, but never used it for fear of burning the food. I will definitely try it now. I am particularly interested in that charcoal enclosure, gate thingy that is pictured. That is a great idea. Where can I find one of those?
The round charcoal starter thingie is called a “chimney”. You can buy them online (this Chimney Charcoal Starter is inexpensive and well rated), or many hardware store and places they sell grills now stock them.
Very good info and pictures of dutch ovens, I never realised the lip on some of these were for charcoal, you learn some thing every day,
I have some Le Creuset ones that I use regularly for stews and casseroles at this time of year, they are great for a lovely warming meal,
Hi. I love cooking with cast iron. I recently bought a DO for indoor use and am having difficulty transitioning. Without the coals on top, I’m getting too much heat from below, causing the food to burn and not cook evenly. Any advice
Not sure if Jennifer is still watching these posts, so I’ll jump in. I don’t do much dutch oven cooking, but you might try lowering the oven temp and/or placing the unit higher in the oven.
I have a cast iron pot and lid. This lid has dimples in it instead if nubs. Are they for the same reason of letting condensation drip back onto the food?
Hi Tanya,
It’s hard to tell without a picture. However, I do know that a while back they did make cast iron with a hammered finish (so it would appear to have dimples). They did this to imitate the finer cookware of the time like brass or copper.
Hi there,
We were reading this post mostly because we were wondering what a Dutch oven is.
Since we are Dutch we should be able to recognise it, but i can now safely say there here in the Netherlands we do not use these “ovens” at all. Ofcourse we have cast iron pans we use on a regular stove, but never on an open fire. I will assume the name comes from the first Dutch settlers in North America and has persisted through the centuries.
Nevertheless, we think its a great post and if we can get our hands on one, we will try a Dutch oven for ourselves, maybe the first Dutch people to use one in a long time!
Thanks for letting me know about this. It’s always interesting to learn about how things have very different meanings/names in different locations, like American “French Fries”.
The article “A Brief History of Dutch Ovens” has several theories about the name and description of a Dutch oven:
The easiest way to get the years of crud off of a good old Griswald or Wagner cast iron frying pan is to place it in the coals of a camp fire, wood stove etc. Just leave it in there and hour or two. All of the crud has heated and popped or burned off. A friend of mine gets great old cast iron cookware for peanuts at yard sale.
My mother who is 92 years old moved and I got some of her old pans that were her mothers. Not sure if they will be used because my girlfriend has a glass top stove and I don’t cook. They pan could be used as a weapon and so could the matching lid.
I have always wanted to cook with cast iron. I’m sure I’ll be able to learn from this site .Thank you for this site and information.
Hi.. In South Africa we call this potjie and we cook like that all the time. Wether at home or out fishing or camping. Its a easy and versitile way to good such a huge variety of food. Yummy always.
Thanks for sharing, Bronwyn.
If your other readers need a helping tip about Dutch oven cooking and the amount of coals to use. Here is my tip: Your dutch oven has a manufacturing number on the lid 8,10, 12, 14 and so on. Take the pot with number 12 times 2 equals 24( the number of coal you will need ) . One third 8 will go on the bottom. The remainder will go on top. This number of coals will heat your pot to about 350 degrees. The coals will be good for about 35 to 45 minutes cooking time. If your food needs to cook longer that coal chimney should be ready when you need to add more. You will want to wisk sweep away the old ashes first before adding new coals. The old ash will reduce the heat effect.
Keep in mind is your dutch oven a bread oven? Most common. If you are using a number 12 deep dutch oven. This is best for doing large roast of meat. With a number 12 deep oven you will want to add three more coals to the top.
You can adjust your heat by adding more coals. How much? Start with the combination above. Then for each additional coal you will increase your pot temperature 15 degrees. And remember to turn your pot clockwise. Turn your lid counter clock wise every fifteen minutes. Happy cooking!
Thanks For sharing your blog.
Kenneth
Thanks for the inspiring piece about the Dutch oven, though I have one observation – and not because I happen to be Dutch – about the bumps on the inside of the lid. The article says it is to prevent water “hanging” on the lid so that it would not rust. The reason, however, is to let the steam coming from a roast, for instance, drops back into the oven, which helps keeping the meat suculent and tasty, it prevents it from getting dry.
Love your site and posts!
Gerard
ty for the receipts and the number of coals to use. Last time I burnt the bottom and have been afraid to try again.
Loved to read about cooking with dutch ovens! We cooked for our church on trial rides and for church events. I loved cooking out doors. I have family who run ranches and have a chuckwagon. They cook everyday in dutch ovens. If you can cook it in a stove or oven you can cook in a dutch oven. Just make sure to check your food and turn the oven a little each time. The off brands sometimes have cold spots in them and you have to turn it to even out the heat. The cast iron is thicker in some places. If you turn it, that evens it out. Keep stuff warm in your ice chest too. Put a towel down in there and some pans to hold the biscuits or meat you cook. Keep the lid ajar to keep condensation from forming on the lid. Do not put a dutch oven or other hot metal on the ice chest. Hope this will help you and Thanks again for the post.
Thanks for the tips, Jenni.
Hi Jennifer! Great post on dutch oven cooking! Thanks for sharing! Blessings from Bama!