What You Need to Know About Masonry Heaters for Radiant Heat
This post may contain affiliate links. Read my full disclosure here.
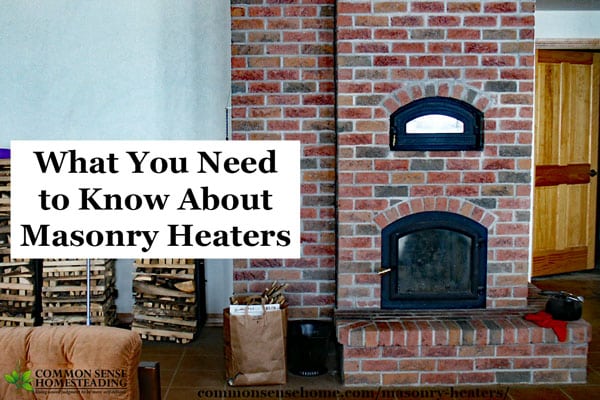
Masonry heaters store heat from wood, gas or electricity in brick, concrete, ceramics or stone, and releases the stored heat via radiant heat transfer over time. Our unit burns at over 1500°F, but the flue gases that go up the chimney are only around 300-350°F. That heat is absorbed by the thermal mass of the masonry stove, and then transferred to the house – not up the chimney.
This is an ancient heating technique used for thousands if not tens of thousands of years. Masonry heaters were used long before the Romans, with some underground and cave masonry heaters dating back well over 5000 years.
Masonry heaters include masonry stoves or masonry ovens and even the modern cousin the rocket mass heater. Larger masonry heaters can have benches or seats built into them. Some also include a baking oven or even a full cooking stove. We will focus on wood fired masonry heaters, but most of the concepts apply to other heat sources.
Masonry heaters tend to be large and heavy. The larger the weight/size (mass) the more heat it can store. It will weigh 1760 to 3000 lbs (750 to 1300 kg) or even larger.
Passive solar heat and masonry heaters are a good match. Even when there isn’t a fire, a masonry stove acts as thermal mass. If it gets up to temperature from any heat source – sun, geothermal, gas, wood or even electric heat – it will then radiate that heat back into the home. This extra thermal mass stabilizes the homes interior temperature.
Fast & Slow Masonry Heaters
There are basically two types of masonry heaters, fast and slow.
Fast burn wood fired or gas masonry heaters are normally fired 2 to 3 times a day. They burn very hot and fast, and then are allowed to go out. The heat soaks into the masonry, and is slowly released from the mass over the course of the day. Fast burn masonry heaters are more efficient, because the higher combustion temperatures use more of the fuel and burn the gasses. Most masonry stoves and masonry ovens sold today are fast burn systems.
Slow burn or constant burn or steady burn masonry heaters burn a small amount all, or most of the day. Traditional masonry heaters are fired or heated regularly throughout the day. These are generally less efficient.
Air for the Fire
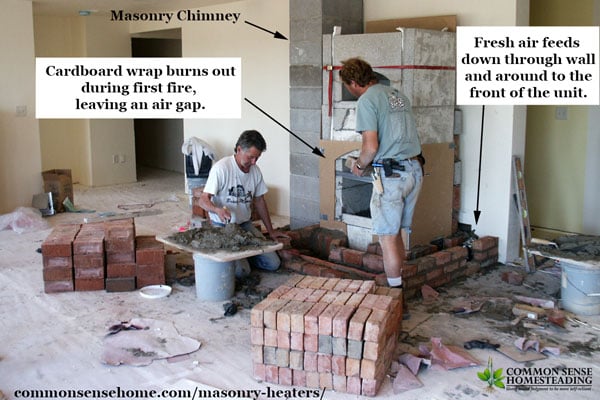
A fire requires oxygen for combustion. Feed more air to the fire and it will burn hotter, faster and more efficiently. (Think about bellows feeding the fire of a forge.) Our masonry stove has a dedicated fresh air feed from the exterior of the home to the front of primary combustion chamber. This avoids sending warm interior air up the chimney. When we’re ready to burn, we open the chimney flue PLUS the fresh air feed. When the burn is complete, we close the chimney and fresh air feed, trapping the heat in the masonry. Some masonry heaters meet strict California emissions requirements, because they burn super hot and therefore are very efficient.
Modern Masonry Stoves
Some of the vendors include:
- http://www.tulikivi.com/
- http://www.tempcast.com/
- http://www.greenstoneheat.com/
- http://masonryheater.com/
- https://mainewoodheat.com/masonry-heaters/
Masonry Heater Materials
All fast burn masonry heating systems must be made of materials that tolerate extremely high heat. A fast burn masonry heater will get very hot. (Our TempCast unit is designed to operate at 1500°F or higher.) Most prebuilt systems use refractory cement (stable up to 3000°F (1650°C)) or “high duty” fire-brick which can handle up to 2750°F (1500°C). In comparison, a normal fireplace only gets 700°F to 800°F. We have melted some low grade nails in our masonry fireplace because it gets so hot, and the iron grill in the burn chamber needed to be replaced, as it cracked from the heat.
Masonry heaters have extra mass using stone or brick outside the fire safe masonry or refractory cement. In our fast burn Masonry Heater (Masonry Stove) the vendor specified a layer of cardboard between the refractory cement core and the brick exterior. This cardboard burned out during the first fire, leaving a thin air gap between the interior and exterior materials. The gap is necessary because the refractory cement will expand and contract at a different rate than standard brick. Note: Some stone is not safe at high temperatures, be sure you are using stone that is appropriate for high temperature use.
Building a Masonry Heater
Before building a masonry heater, confirm local building codes, permits and other requirements. Select a contractor with experience building masonry heaters. The extra weight and mass of a masonry heater may require special footings and other construction considerations.
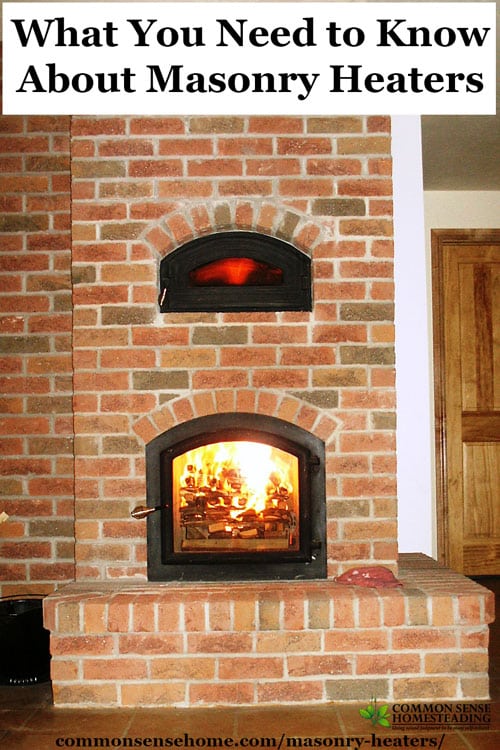
Our TempCast unit has a bake oven built into the secondary combustion chamber where the gases are burned. There is ash buildup in this chamber. This makes any baking or cooking extremely messy. If you want to have a bake oven in your masonry heater, I wouldn’t have it as part of the primary combustion chambers.
We also don’t have a very wide seat around the masonry stove. Were we to build again or modify the existing unit, I’d prefer additional seating.
Locating a Masonry Heater in Your Home
A masonry heater is normally placed in the center of a home away from an exterior wall of a building. This allows all the heat from the masonry heater to radiate into the home (none radiates outside). Our masonry stove is roughly in the center of our home.
Would you like to save this?
A masonry chimney for a masonry heater can also be used to store heat from the fire. It absorbs heat from the exhaust and then releases it back into the home, much like the main portion of the masonry heater. Many masonry heater kits include extra flues to direct air flow past extra brick. The heat from the exhaust is absorbed as it flows past more the brick, for instance, with a flue going through a bench seat. A zigzag flue pattern is sometimes used to increase heat transfer.
What is the difference between a Masonry Heater and “Normal” heaters?
A normal whole home heating system uses propane, natural gas, wood, electricity or even geothermal heat transfer to heat air or water/antifreeze mix. The warm air or liquid warms the home (convection heating). A masonry heater dumps heat to the mass of the heater, which slowly radiates the heat to the rest of the home, and feels warm to the touch (radiant and conduction heating).
Forced air heating blows warm air around the house. Because hot air rises, forced air systems tend to be inefficient, but are fast, inexpensive and allow for heating and cooling in the same forced air system. Some forced air systems use geothermal for both heating and cooling. In larger buildings, forced air systems also provide fresh air throughout the building.
Hydronic heating can be a radiator system or in floor radiant system. Modern systems use a heat exchanger in a boiler or even in a dual purpose hot water system such as a Combicor water heater. Nearly all modern system use a water and propylene glycol mix to deliver the heat. Radiant heated flooring/tile and or concrete acts as thermal mass and heat distribution system.
When remodeling you could apply masonry heater concepts to a more traditional system. You could run a hydronic system through a large brick, tile or stone mass to act as a heat sink and radiate that heat into your home. Some people create a large brick surround near a conventional wood stove. This is technically not a masonry heater, but the heat from the wood stove to heats the surround, and the surround heats the room.
Pros and Cons of Masonry Heaters
We’ve had our unit for over 12 years now, and overall it’s worked fairly well. That said, there have been some issues.
Cons:
Price – Masonry heaters are labor intensive to install, and the kits and materials are expensive. You could buy several regular wood stoves for the price of one masonry heater.
The wire used to open and close the chimney damper busted after only two years of use. Thankfully, at that time we were still able to contact the original masons who installed the stove, and they retrofitted a sturdier cable than the wire originally included with the TempCast kit. This did require removing a block from the chimney and adding a bigger metal conduit for the cable to move through.
The wood burned in the masonry heater should be very dry and relatively small diameter so it burns quickly. You must have dry wood (generally recommended for most wood stoves), and it needs to be split in most cases.
Pros:
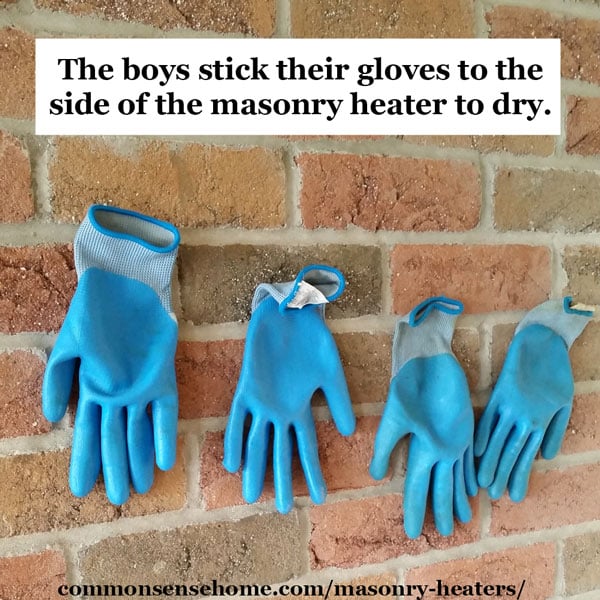
The unit burns hot, but stays safe to the touch. Because our unit is located in a family room, we were concerned about it being bumped into by the boys, especially when they were younger. Most of the unit stays comfortably warm, even when actively burning. The only parts you need to avoid touching are the doors. The rest of the unit radiates a gentle, soothing warmth.
Our masonry stove stays hot long after the fire is done. We typically build one to two fires per day, and the units retains heat for over 24 hours after a burn. In fall and spring when we need to add less heat to the house, the unit is only fired at night, and stays warm until the next night. In winter, it’s fired morning and night, but never cools completely in between.
It burns less wood than a regular wood stove. Because we’re not stoking the fire constantly, we burn less wood.
Would we do it again?
If we ended up building again, would we include a masonry heater? Maybe, maybe not. We love the way the heat slowly radiates out of the masonry, but the cooking option for the TempCast has turned out to be a mess.
A wood burning cook stove with a masonry surround might be a more practical and less expensive option. At the very least, if we did a masonry stove again, we wouldn’t have the bake oven as part of the primary combustion area, and we’d have a bigger seating area to sit and soak up the heat.
Other Green Building posts you may find interesting:
When you state flue temps of 300-350 are those temps measured internally or externally on the pipe? Thanks
Those temperatures are the estimated temperature range of the gases exiting up the flue, provided by the stove manufacturer.
Question for the group: I have a home made masonry heater with a glass door. There is a decorative screen behind the glass to keep wood from falling into the glass. I installed the heater many years ago and am looking to replace the protective decorative metal screen. It measures 12-1/4″ x 10″ and is mounted with a two-pin hinge (top and bottom of the door). Does anyone know where I can get a replacement? It seems my first vendor is out of business.
I’d contact a local company that does chimney cleaning and fireplace maintenance. They should be able to help you out.
I wouldn’t think there would be much to catch and release. After all, it’s supposed to be protecting the wood wall so you wouldn’t want it to get warm. I’m guessing there is a air gap between the two so you have a constant airflow taking the heat energy from the slate as it’s being absorbed. The setup is really not intended to store energy for slow release later. Cast iron stoves dump their energy into the room quickly. Masonry heaters are designed to release the energy slowly so as not to overheat the space. They also burn more efficiently so there is less smoke and more BTU’s harvested from the wood. Downside is they are pricey and are slow to respond if you are starting from cold.
I’m looking into building a masonry heater in the future, so I appreciate the thorough writeup.
I have a nice big cook stove that heats my kitchen all winter (we heat only with wood), with a roofing slate panel behind it to protect the wood wall. Even when the stove is running hard (baking a pie or roasting, etc ) the slate barely heats up. I imagine this is because the stoves cast iron really absorbs the heat and radiates it thru the cooktop and oven. The flue gas temp is not high, either.
I say this just as a response to your comment about having a cook stove with a masonry wall for radiating excess heat. Maybe it depends on the stove, but for me there isn’t much to catch and radiate later
Laurie,
Has Patrick gotten your stove ti function now, as it did in the beginning? Did he have suggestions for new Temp-Cast owners so that what happened to yours wouldn’t happen to them? Just curious, we are in MN and thinking of a masonry stove heater for a future cabin…
Hi Kathy.
I talked to Patrick, and he talked to our local stove repair/chimney sweep guy. We need to make arrangements for the sweep and potential repairs. Then next fall we fire it up and see if it works.
Kathy,
What happened to Laurie’s heater can happen to any masonry heater or any building. Laurie said the heater settled “Settling = to move to a lower level and stay there; to drop. The foundation was specifically reinforced to accommodate the weight of the masonry heater, but it still appears to have settled slightly, impacting the efficiency of the burn, as my husband noted.” As it settled, anything attached to it or that it contacts will try to bend or twist it and cause cracks. The heater didn’t settle because of a bad foundation. It settled because the soil underneath was not capable of supporting that much weight. Reinforcing a foundation is done by adding rebar, using stronger cement, making it thicker or any combination thereof. The reinforcement is to prevent foundation cracking. It won’t stop it from sinking if the soil below isn’t up to the task. Some types of soils are more stable than others to build on. If you don’t have capable soil for the project the builder will dig deeper or use pilings to get to solid bedrock. Even if you have a stable soil directly under the foundation you could still have weaker layers or voids below the stable layer. The ground below our feet is not always as solid as we think it is. Builders do their best based on the geology of the area. You could drill a test core close by your building site to give you more assurance or contact a soil engineer.
Actually, odds are I may have been mistaken about the cause of the problem, or at least, it’s only part of the problem.
When talking to Patrick, one of the things we discussed was wood diameter. In the original installation video (which we don’t have anymore because it was VHS and we ditched our VCR) they showed very small diameter fire wood being used – about 1-2 inches diameter. The instructions noted that wood should be below 4 inches in diameter, but smaller was good. People were even heating their homes with rolled up newspapers (so it claimed).
Since my brother-in-law owns a sawmill, we started buying his scrap wood, which is quite small diameter. (He runs mostly stakes and lath.) Patrick suspects that even with the dedicated air feed, using the very small diameter wood needs too much air, and we’re getting incomplete combustion because the stove can’t supply enough. Over time, even with annual cleanings, there’s likely been some build up in the flu, because certain spots are tough to clean. There may also be a small air leak in the back because of settling, causing additional trouble. Our cleaner tried to patch it before, but it’s tough to access because it’s under a stairway and partially covered in drywall.
Once we get the unit cleaned and repaired, Patrick suggested 2-4 inch diameter wood for the bulk of the fire, with some smaller pieces at the top being acceptable to get the fire started. (The burn is designed to be top down.) 4 inch diameter wood should be split, 2-3 inch diameter whole. We’ve started stockpiling larger diameter wood for next winter. My brother-in-law is thinking about retiring soon, so the sawmill scraps won’t be available much longer anyway.
Laurie, Your instructions are different than what I have. Mine is a model 2000 corner unit purchased in 2014 and the manual says “Split all cordwood (regardless of size) and all pieces thicker than 5 inches in diameter.” I checked the Tempcast website and they only have the planning guide and assembly manual available to download. Don’t know what the current owners manual says. The larger pieces do slow the fire down as they don’t have as much exposed surface area compared to a pile of many smaller pieces. I have a 5″ plywood circle that I use when splitting. If the ends fit in the circle it’s good to go. Split any cordwood over 3″. Splitting the ones less than 3″ is a challenge. Small target to hit and they don’t stand on end easily. Hoping that larger pieces solves your problem.
Our unit was installed in 2005, so a lot has changed in the intervening years, I’m sure. We’ll see how it goes.