Freezing Fresh Green Beans With or Without Blanching, Step by Step Instructions
This post may contain affiliate links. Read my full disclosure here.
Freezing fresh green beans is a quick and easy way to preserve them for later use. We’ll walk you through how to freeze green beans, step by step, with or without blanching.
Whether you’re freezing pole beans, bush beans, yellow beans or other snap beans, the method is the same. You need about 1-1/2- to 2-1/2 pounds of green beans per quart of frozen beans.

Why do you blanch beans?
Blanching green beans for freezing reduces enzyme action and helps to preserve vitamins in the beans. In the book Stocking Up III, the author notes a University of Illinois study that found:
“After nine months, the blanched beans had 1,300 percent more vitamin C than the unblanched ones.”
Blanching improves flavor, too, especially for longer storage. As an experiment, I vacuum sealed and froze both blanched and unblanched beans. The blanched beans had a much nicer texture, even after longer storage (over a year).
By two years, the unblanched beans were bitter and very chewy. The blanched beans had very little change in storage and were still tasty.
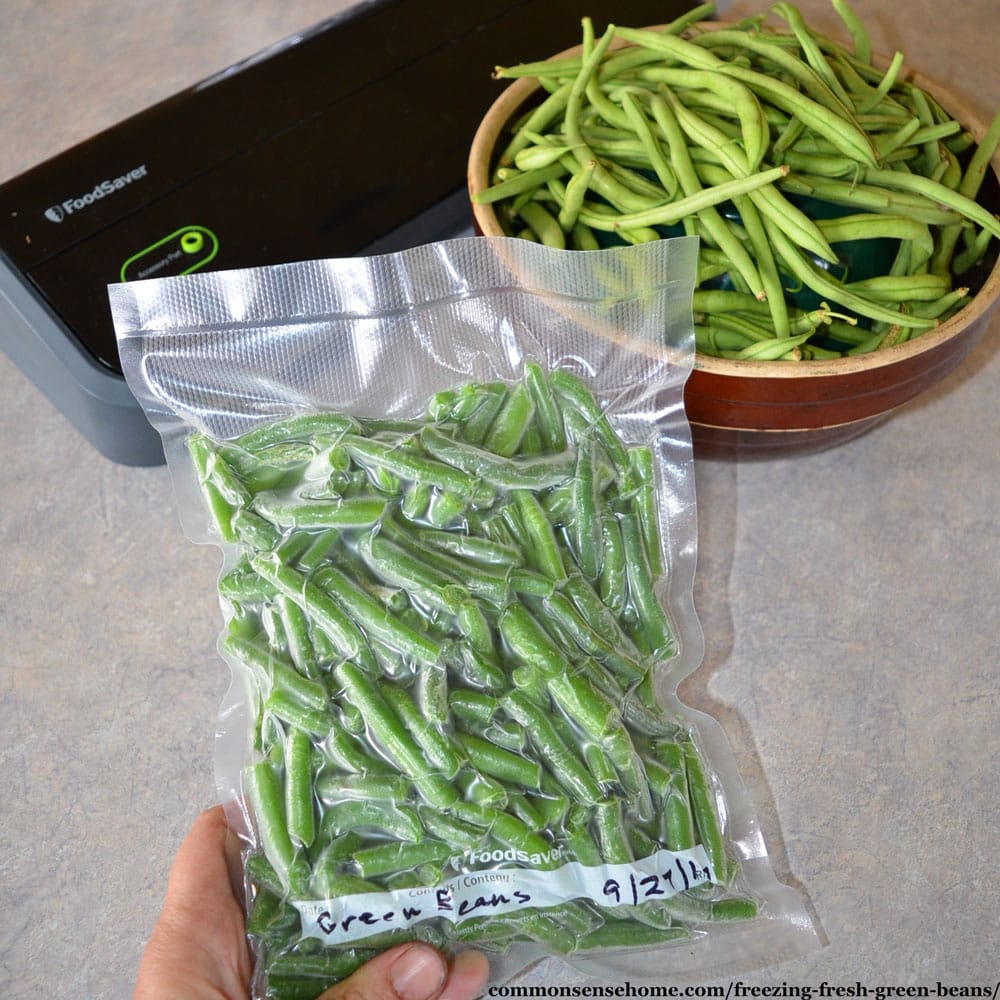
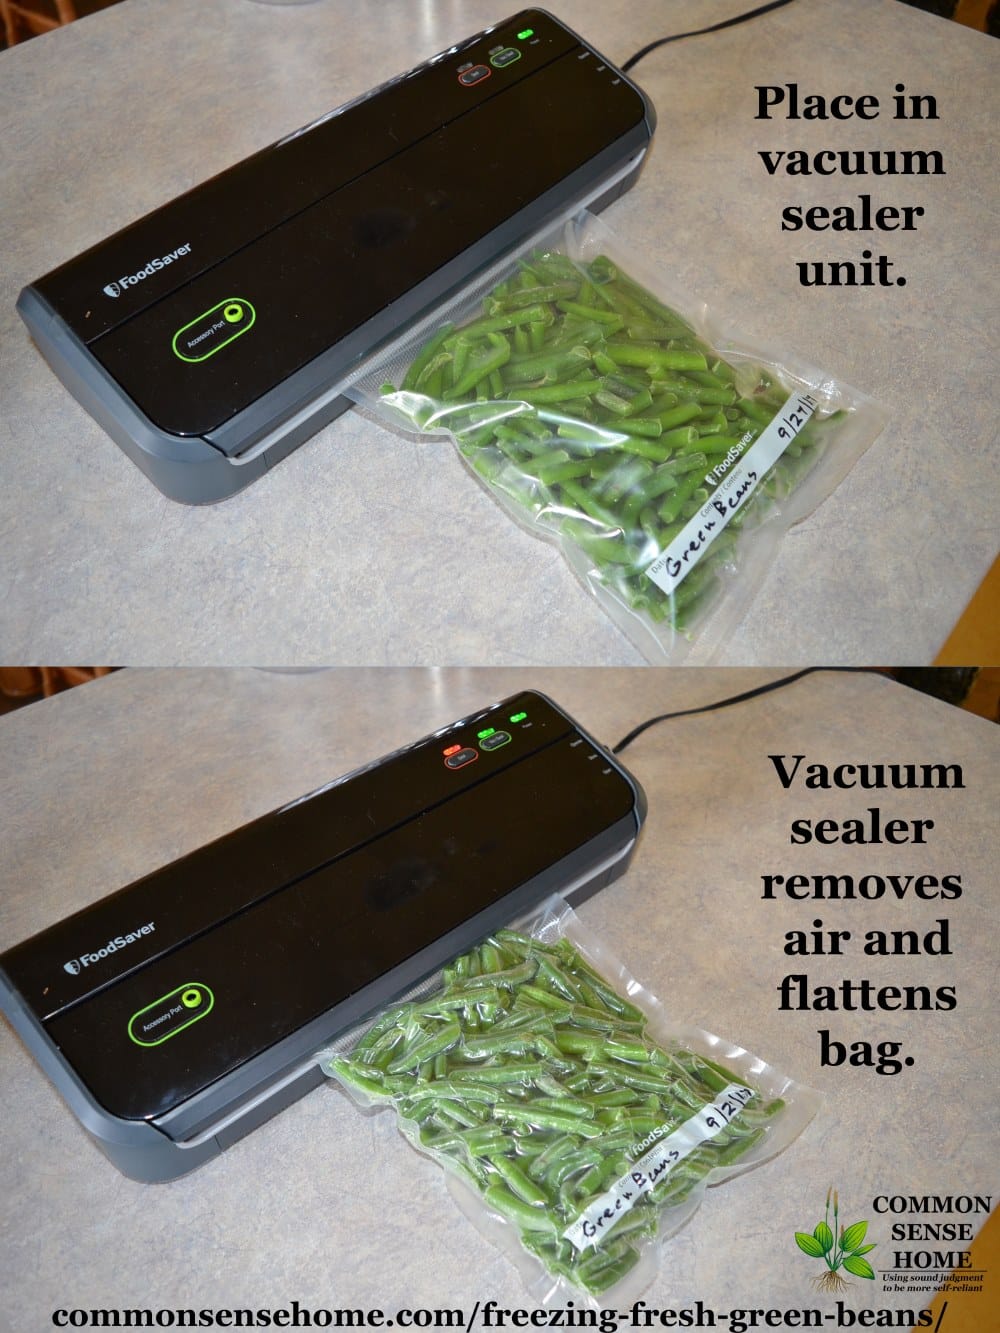
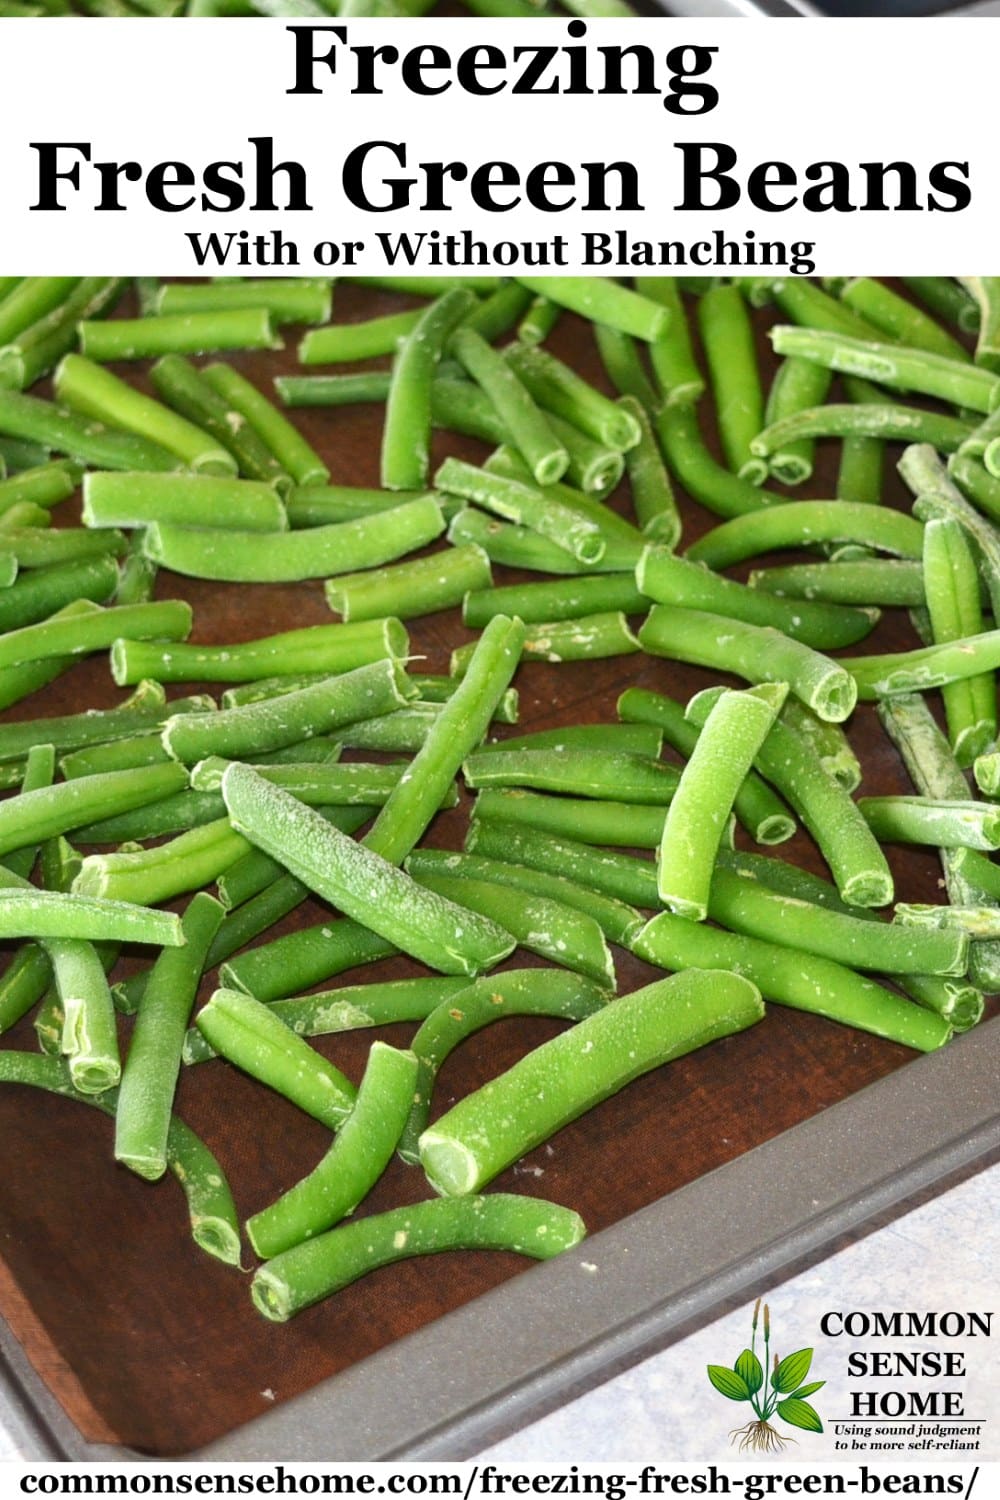
When I’m freezing green beans, I prefer to blanch them. Many people don’t bother to save time. I flash freeze and vacuum seal my green beans for ease of use and best storage quality.
If you flash freeze your beans (freeze them loose on a pan before packing them in a bag or container), they don’t stick together so much in the bag. This makes it easier to pour out only what you need. Even though I generally use a whole package at once, it’s nice to pour out loose beans instead of a “bean brick”.
Picking Green Beans
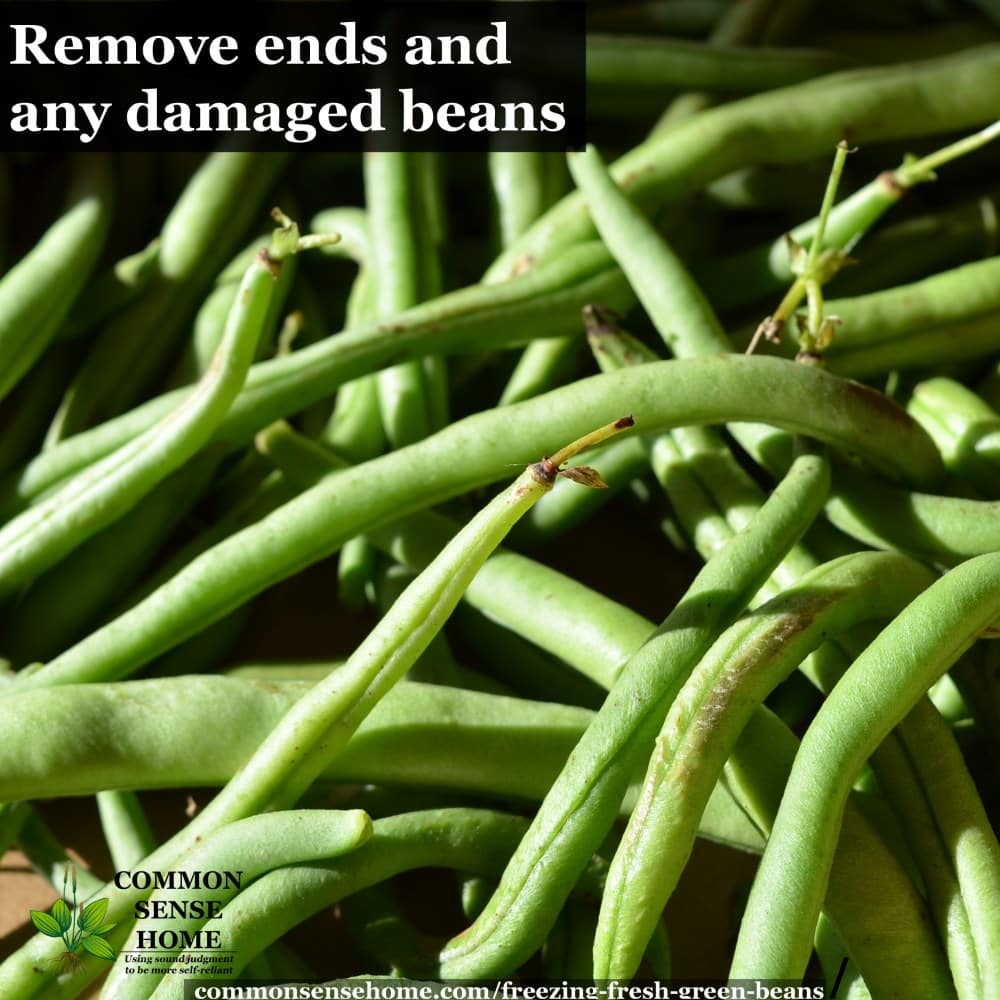
During the growing season, pick green beans every two to three days to keep them producing. Look for beans that are full sized but not overgrown. Runty green beans get limp, and overgrown green beans are stringy and tough.
How big is too big for freezing? When we have beans that we suspect are overripe, we snap them by hand instead of cutting. If they snap cleanly and easily with no strings, they’re good.
You can still eat the overgrown, stringy beans, but they are chewy. Ours go to the compost. (If you’re growing a variety of beans that has strings no matter what size they are, remove strings before cutting into pieces.)
I do recommend washing your beans before freezing. Even if you garden organically, contaminants drift in on the wind. After washing or blanching, make sure to dry your beans well. Excess water means more ice crystals in your beans. I spread my beans on a kitchen towel and pat dry, or use the salad spinner.
My sons prefer to cut the ends and beans with a knife on a cutting board. I prefer to snap the beans by hand. Either works just fine. For freezing green beans, you can leave the beans whole with the stem cut off, or cut/snap into bite size pieces.
See “How to Grow Lots of Pole Beans for Easy Picking and Preserving” for green bean growing tips.
Would you like to save this?
Recommended Tools for Freezing Green Beans
Vacuum sealer shown in the post – FoodSaver FM2000 – I’ve had some issues using the hose attachment for this unit, but for basic bag sealing it works just fine. It has a wide sealing surface and still seals even with damp foods. It’s a good basic unit for bag sealing.
FoodSaver 8″ roll, BPA free, cut to size – I’ve tried “bargain” brands of vacuum sealer bags and was not impressed – too many seal failures. I’ll stick with FoodSaver bags/rolls. The rolls let you cut to size, the bags are ready to go right out of the box.
FoodSaver Quart Bags, BPA free – Ready made bags for ease of use.
Freezing Green Beans Without Blanching (Freezing Green Beans Raw)
- Wash green beans in cool water. Drain well.
- Trim off ends of beans, snap or cut to desired length.
- Date and label freezer bags. (It’s easier to write on the bags before filling, if you know how many you will use.)
- Pack green beans into freezer bags and squeeze out as much air as possible.
- Lay bags flat in a single layer for quick freezing.
- Once frozen solid, you can back the bags into a bin or larger bag to keep your freezer organized.
- Use within a year for best quality.
Freezing Green Beans With Blanching
- Wash green beans in cool water.
- Trim ends and cut to desired length.
- Bring a large pot of water to boil and fill a large basin or bowl with ice water.
- Working in small batches, lower beans into boiling water using a large slotted scoop or wire blanching basket.
- Boil green beans for three minutes. The color of the beans will change to bright green. (Purple beans turn green when blanched.)
- Remove beans from boiling water and dump them into the ice water to stop cooking.
- Cool beans completely. Stir and add more ice if needed.
- Drain beans and dry well. I either run mine through our salad spinner or pat dry on a kitchen towel.
- Pack beans in freezer bags as above, or flash freeze green beans on a lined cookie sheet for a few hours or overnight. Pack flash frozen green beans into labeled vacuum sealer bags. Vacuum seal and store in freezer for up to two years.

Can You Freeze Cooked Green Beans?
Yes! Another option for freezing green beans is to cook them the same way you would normally serve them, and then cool, and freeze. You can flash freeze them and then pack them up, or put them straight into a freezer safe container. This also works well for home freeze drying. (Green beans are delicious freeze dried.)
Do you blanch your beans before freezing, or skip this step? I’ve always been a blancher, but I have friends who don’t blanch.
More Preserving Recipes
Did you know we have an extensive list of canning and preserving recipes and guides? You can see the entire list on the Recipes and Kitchen Tips page. We always follow safe food preserving guidelines. Sometimes it’s fine to take shortcuts, sometimes it’s not.
More info on green beans and vacuum sealers:
- How to Can Green Beans
- Pickled Dilly Beans with Garlic and Cayenne Pepper
- Vacuum Sealers – What You Need to Know Before You Buy
Originally posted in 2017, updated in 2018.
If I have large amounts of beans, I do blanch them before freezing. in a busy time of life, when I could only have a few plants, I would freeze the beans unblanched until I had enough for a meal. So they werent frozen long, maybe a week or two, and they were fine for eating. IMHO, blanch for longer term storage, taste and texture wise
Do you have to flash freeze if you are using a vacuum sealer or can you just blanch/dry/seal?
If you vacuum seal without flash freezing, you may have difficulty getting a good seal, as the vacuum sealer will suck residual moisture out of the beans and into the seal. If you are not vacuum sealing and just put the beans directly into zip top bags or other freezer containers, you don’t need to flash freeze.
I love my food saver. Bought my first one when my kids were young. Been freezing ever since. It extends my food. From mushrooms to berries and some new stuff. I am o e of those people that doesn’t like to blanch. I have fun with my food saver.
I’m wondering, can this be adapted to using pint Mason jars for green beans, corn, and other vegetables, sealing with the Food Saver adapter and storing on a shelf in the pantry and not having to freeze?
Hi Howard.
While vacuum sealing is handy for a number of things, simply vacuum sealing fresh food in jars to keep it shelf stable is not one of them.
Fresh food contains enzymes and microorganisms. Once the food leaves the vine, these enzymes and microbes begin their job and breaking down the food. Chilling slows down the process, freezing slows it down a lot more. The vacuum sealer helps keep frozen food in better condition because it greatly reduces the ice crystal build up on the food, but it doesn’t preserve the food. The blanching deactivates the enzymes, and the freezing puts the breakdown microbes in suspended animation.
If you take a bag of vacuum sealed produce out of the freezer and leave it sit out on a counter top, eventually it will turn into inedible goo.
If you put foods that are not acidic (those that have a pH above 4.6, like beans and most other vegetables) inside a glass jar and vacuum seal it, you haven’t deactivated the enzymes, but more importantly, you’ve created the perfect conditions for botulism spores to grow.
To thrive, botulism bacteria need:
Temperatures between 40-120°F/ 5-49°C
Anaerobic conditions (Oxygen below 2%)
Neutral pH
Moist conditions (Water activity level greater than 0.85)
A sealed jar of moist, low acid food provides excellent conditions for the growth of botulism bacteria. If food is not processed correctly, it’s possible for the toxins to build to dangerous levels within 3-4 days.
Botulism toxins can kill you or cripple you for life. You can’t see them or taste them.
I explain this in detail in the article, “Botulism – Causes, Symptoms, Treatment, Tips for Safe Home Canning”
For safe food storage, we have to heat, freeze, or dry to deactivate the mini critters that would get us sick. We can use our vacuum sealers to extend the shelf life of dry foods because they are dry, but fresh foods need to be processed for longer storage.
Laurie,
Thank you for the information. To make sure I understand correctly, blanching, then vacuum sealing in a mason jar will not be a good process to preserve green beans (or other vegetables like corn, for instance). Instead, the vegetables must first be blanched then vacuum sealed in bags then frozen for proper long term storage. Correct?
Thanks
Yes, vacuuming sealing does not make wet foods (like fresh vegetables) safe to store on a pantry shelf.
Vacuum sealing increases the storage life of frozen vegetables. When properly frozen and vacuum sealed, there will be very little ice crystal formation, and freezer burn is delayed.
I blanch my beans as explained in the article, freeze them on a baking sheet, and then vacuum seal them in packages after they are frozen. If you freeze them before you vacuum seal them, you won’t suck liquid from the beans into the vacuum sealer.
Thank you, Laurie!
You’re welcome, Howard.
I don’t know how I’ve missed this incredible site!!! I am grateful for all of the information posted on the variety of lessons you’ve learned on re: many topics. I have sooooo many pole beans and while we love them,( and our dogs love them), I know we need to find other ways to preserve them. Stumbling across your site was AMAZING!!! Thank you for sharing your expertise.
Thank you for your kindness, and I’m glad you find the site useful. This is our life.
Thank you for the why and how to blanch green beans and to freeze them so they are not a “block of beans”.
Happy harvesting!!
You’re welcome.
How do you prepare frozen green beans (blanched) so they do not end up mushy?
Frozen green beans are never going to have the same texture as fresh, and the freezing process damages the cell walls. It is what it is. Dehydrated, they get a little leathery. Canned, they are soft and bland. Freeze dried before adding water they are crispy, after adding water they’re close to canned.
Can you vacuum pack green beans without blanching? Just wash, dry and vacuum??
Yes, if you prefer. Be aware that some moisture clings to the beans, so if you don’t freeze them before vacuum sealing, that liquid will be pulled out and may interfere with the seal. Most newer machines have a wide seal strip, so a little moisture isn’t an issue, but some older sealers have a narrow sealing strip and moisture can cause a seal failure.
I’ve been doing green and yellow beans like this for years. Only difference is I will put them in the vacuum bags then put them in the freezer to freeze first, then vacuum seal when near frozen. Avoids issues with what little water might be left. Funny thing though is I do this all for my wife…I don’t eat green beans!! 🙂
That’s good of you to pack up beans for your wife.
I’ve tried the packing in bags and then sealing, but in our freeze space the trays work better for us.
overwhelmed with green beans this year, my husband does not like them blanched, ok to just freeze?
As discussed in the post, I prefer to blanch, but it’s not essential. If your husband eats them better not blanched, that seems like a reasonable choice.
I love yellow and green beans. I have blanched and flash frozen them and then vacuum sealed them with my Food Saver. I cook them from frozen in my steamer but find they just don”t taste as good as when cooked fresh. I would like to know if fresh beans can successfully be frozen in water, without blanching, for storage.
It’s not how they are normally done, but you can certainly try it and see if you prefer the results.
Try boiling your beans when it’s time to eat them. I find they often need a little bit of rehydrating, which steaming doesn’t provide.