
Home Freeze Drying – Read this Before You Buy a Freeze Dryer

This post may contain affiliate links. Read my full disclosure here.

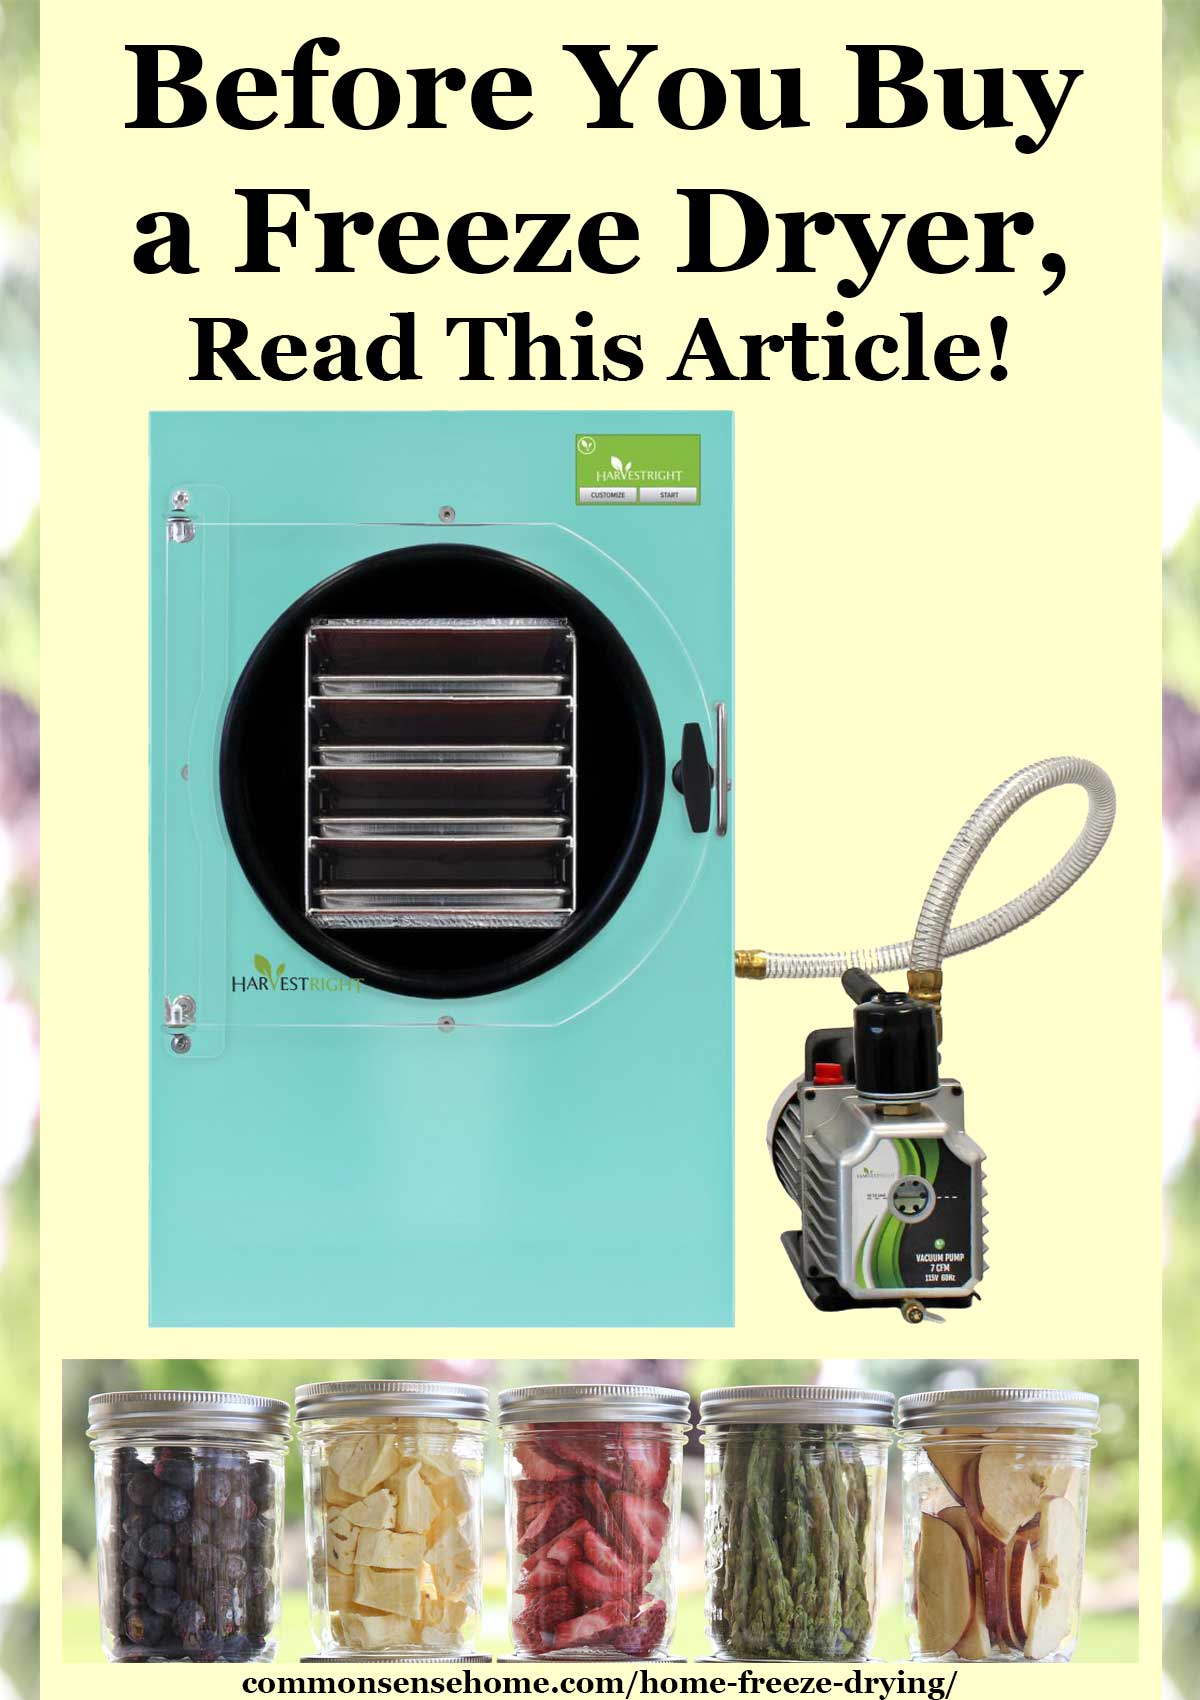
Thinking about getting a freeze dryer? We’ll explain how home freeze drying works, and answer questions about freeze dried food storage for emergencies and more.
Why get a freeze dryer?
I’ve been curious about home freeze drying ever since I did an interview with Dr. Prepper back in 2015. The doc raved about his home freeze dryer. He loved the quality of the food, how much money it saved him, and what a great addition it was to his preps.
In early 2016 Harvest Right home freeze dryers contacted me to do a review of their product. I could purchase it at a discount, as long as I did a review. My other option was to get it for free, if I committed to a series of endorsements.
Being the stubborn individual that I am, I didn’t want to commit to selling you something that was such a big investment without thoroughly testing it. I purchased a freeze dryer and have been using it since May 2016.
My conclusion – if you want long term food storage or portable food storage, check out freeze drying. Commercial freeze dried foods are pricey and often have questionable ingredients. Home freeze drying puts you in control.
How Does Freeze Drying Work?
Here’s the official definition of freeze drying (Lyophilization) from the FDA:
Lyophilization or freeze drying is a process in which water is removed from a product after it is frozen and placed under a vacuum, allowing the ice to change directly from solid to vapor without passing through a liquid phase.
The process consists of three separate, unique, and interdependent processes; freezing, primary drying (sublimation), and secondary drying (desorption).
So, how do we do that at home?
- First, you get a heavy duty freezer (the Harvest Right units drop to -30°F (-34°C) or colder).
- Second, you pair this up with a completely airtight chamber that can hold a vacuum (no oxygen) every single time you use it.
- Third, you tie in a high end vacuum pump strong enough to suck the stripes off a zebra.
- Fourth, you add a heater and thermostat, so you can cycle the temps up and down, repeating the sublimation process for hours on end.
- Fifth, tie in a humidity sensor to make sure the water is out, triggering the cycle completion.
There’s a reason the big commercial freeze drying units are priced from $5000 to over $100,000 – the freeze drying process is significantly more complicated than other home food preservation options.
If you’re wondering how freeze drying compares to dehydrating, you can read more about that in the post “What’s the Difference Between Dehydrating and Freeze Drying?“
Harvest Right Home Freeze Dryer Basic Information
Here’s some information everyone should know before buying a Harvest Right freeze drying machine. Since the time this review was originally posted, Harvest Right made a number of upgrades. They now have HR pumps in two different styles, slight design changes in the main units, and new software that speeds up freeze drying times.
Freeze Dryer Dimensions
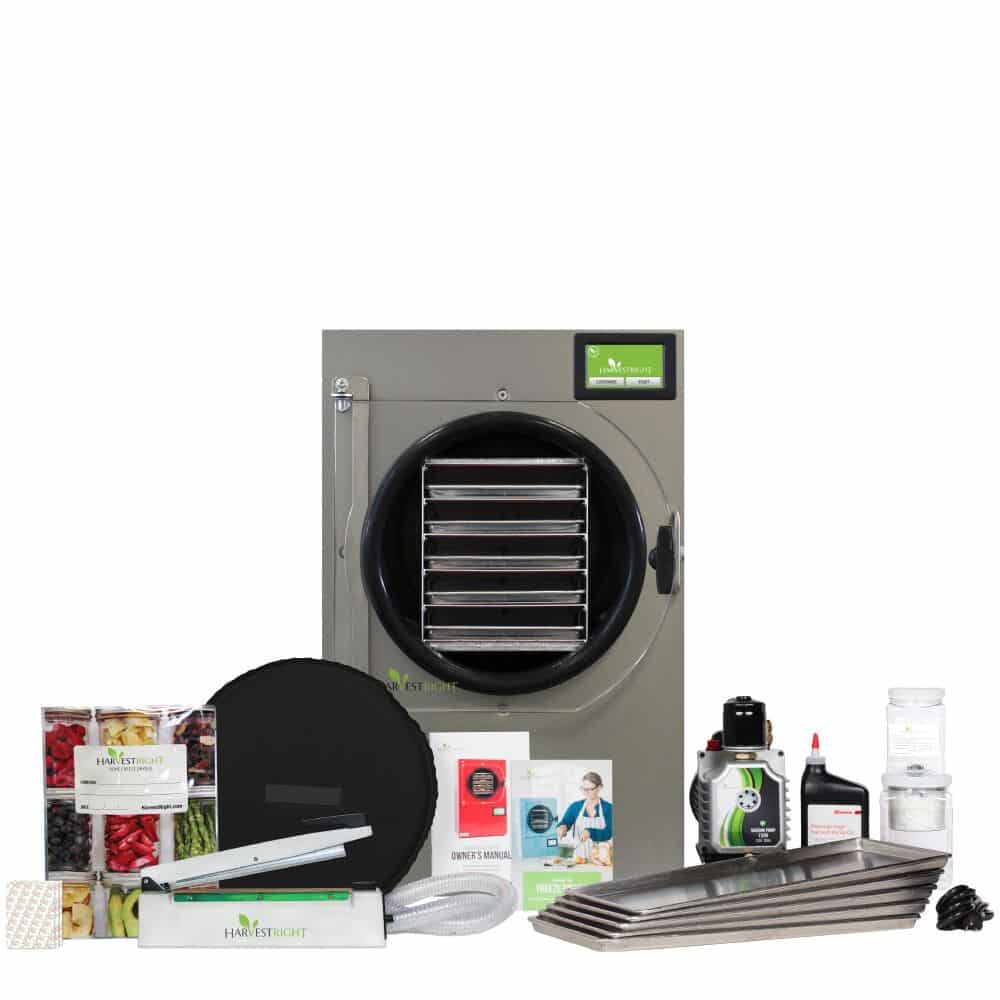
Harvest Right has three sizes of home freeze dryers – large, medium and small.
Each unit includes a detachable vacuum pump weighing 35 lbs that sits outside the freeze dryer. They also have a drain hose that routes below the unit. Oil free pumps are available at an additional cost. (More on this below.)
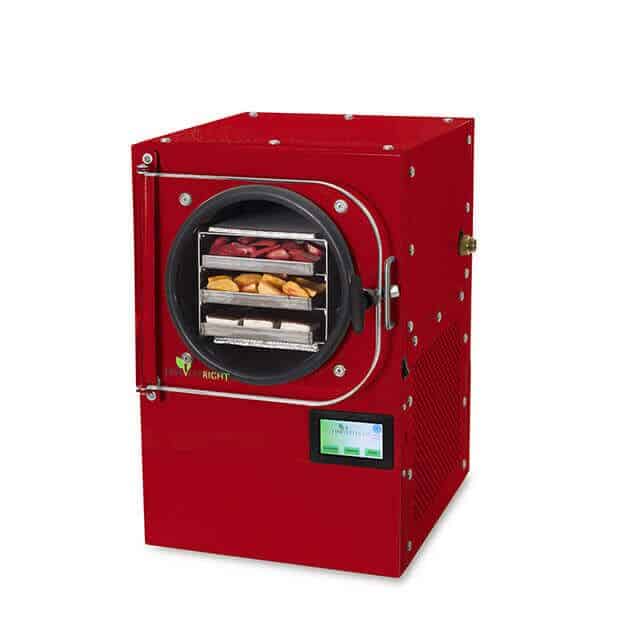
Small Freeze Dryer
- Overall product dimensions: 16.5″ W x 18.5″ D x 25″ H
- 3 trays (7.75″ W x 14″ L x 0.75″ H)
- 61 lbs.
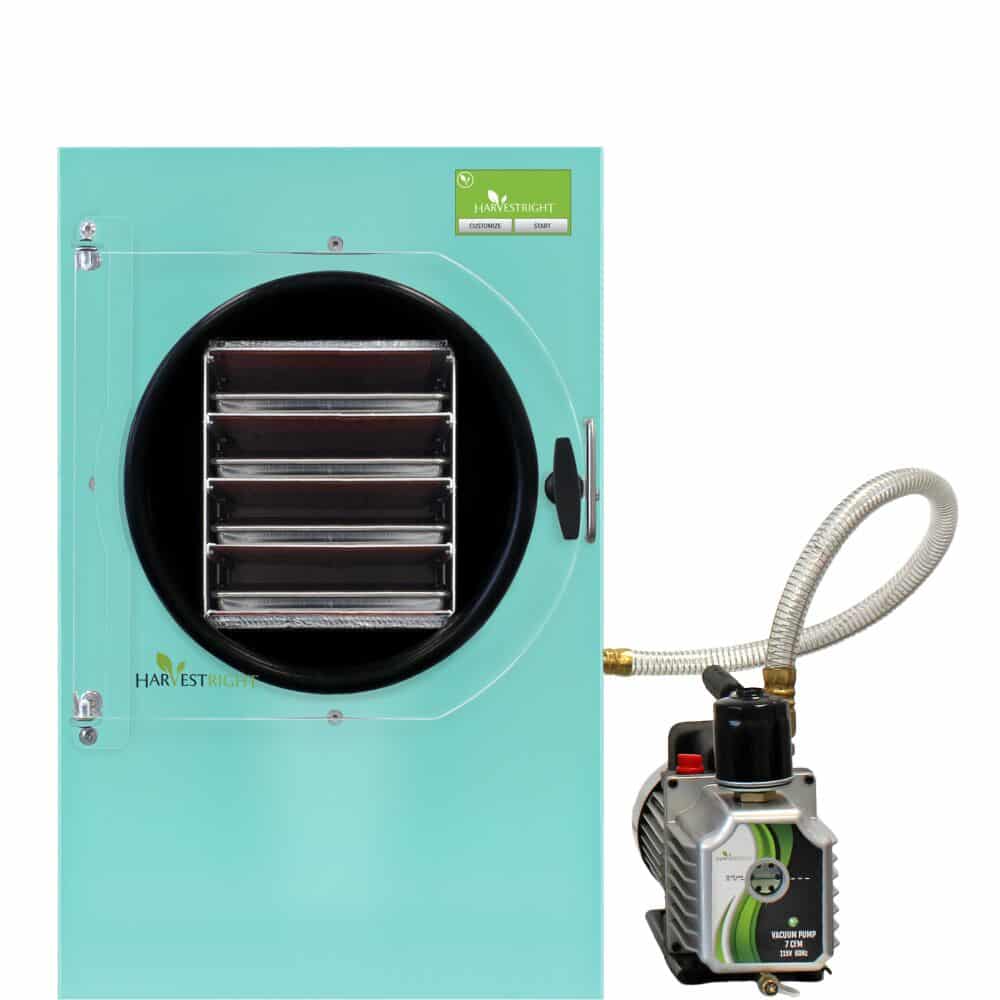
Medium Freeze Dryer
- Overall product dimensions: 18″ W x 21.25″ D x 28.5″ H
- 4 trays (7.5″ W x 18″ L x 0.75″ H)
- 112 lbs.
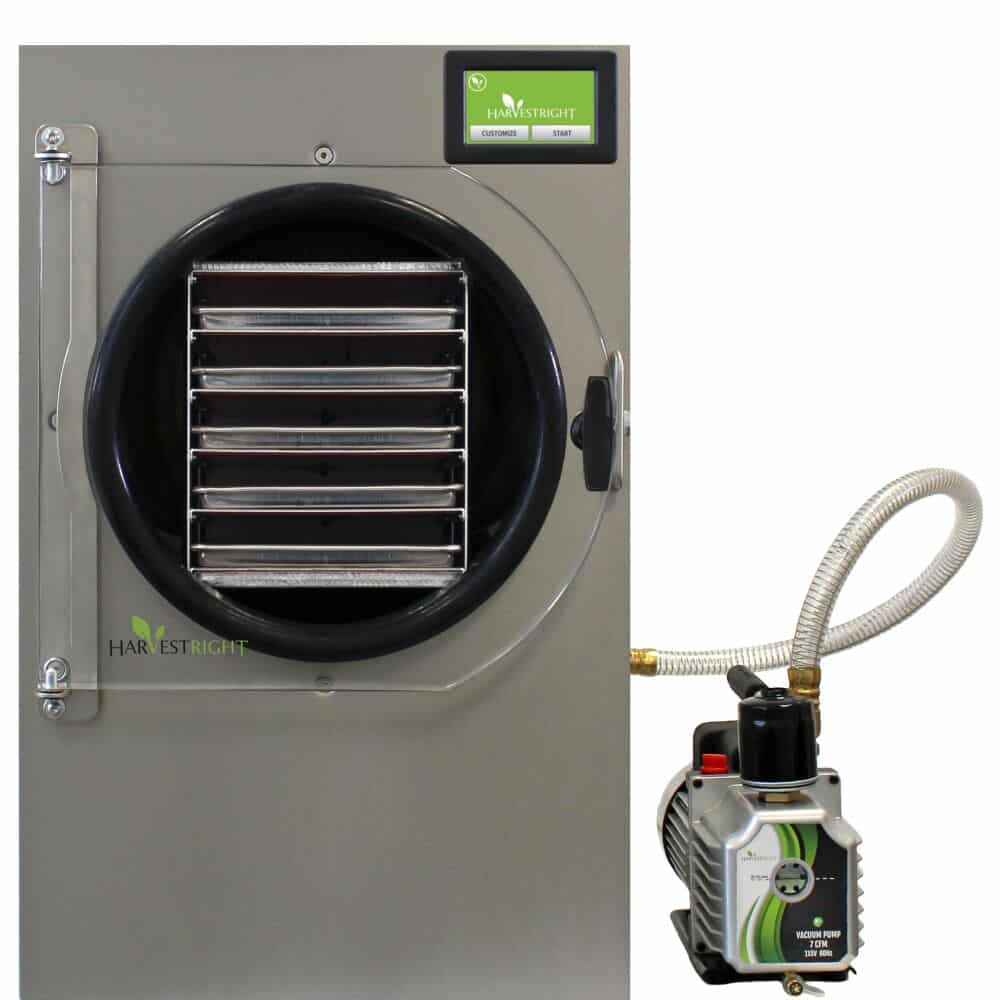
Large Freeze Dryer
- Overall product dimensions: 20.25 ” W x 23.75″ D x 30.75″ H
- Perfect for counter top, cart, or table.
- 5 trays (9″ W x 20.5″ x 0.75″ H)
- 138 lbs.
Moving these units is a two person job, unless you put it on a rolling cart, which many owners do.
I have a mid-sized unit of the old design, updated with new software.
How much food can you freeze dry?
Small Freeze Dryer
- Freeze dry 840 pounds of fresh food per year (4-7 pounds per batch).
- In a year’s time, you can freeze dry 195 gallons of food.
Medium Freeze Dryer
- Freeze dry 1,450 pounds of fresh food per year (7-10 pounds per batch, roughly equal to 1.5 to 2 #10 cans).
- In a year’s time, you can freeze dry 312 gallons of food.
Large Freeze dryer
- 2,500 pounds of fresh food per year (12-16 pounds per batch).
- In a year’s time, you can freeze dry 546 gallons of food.
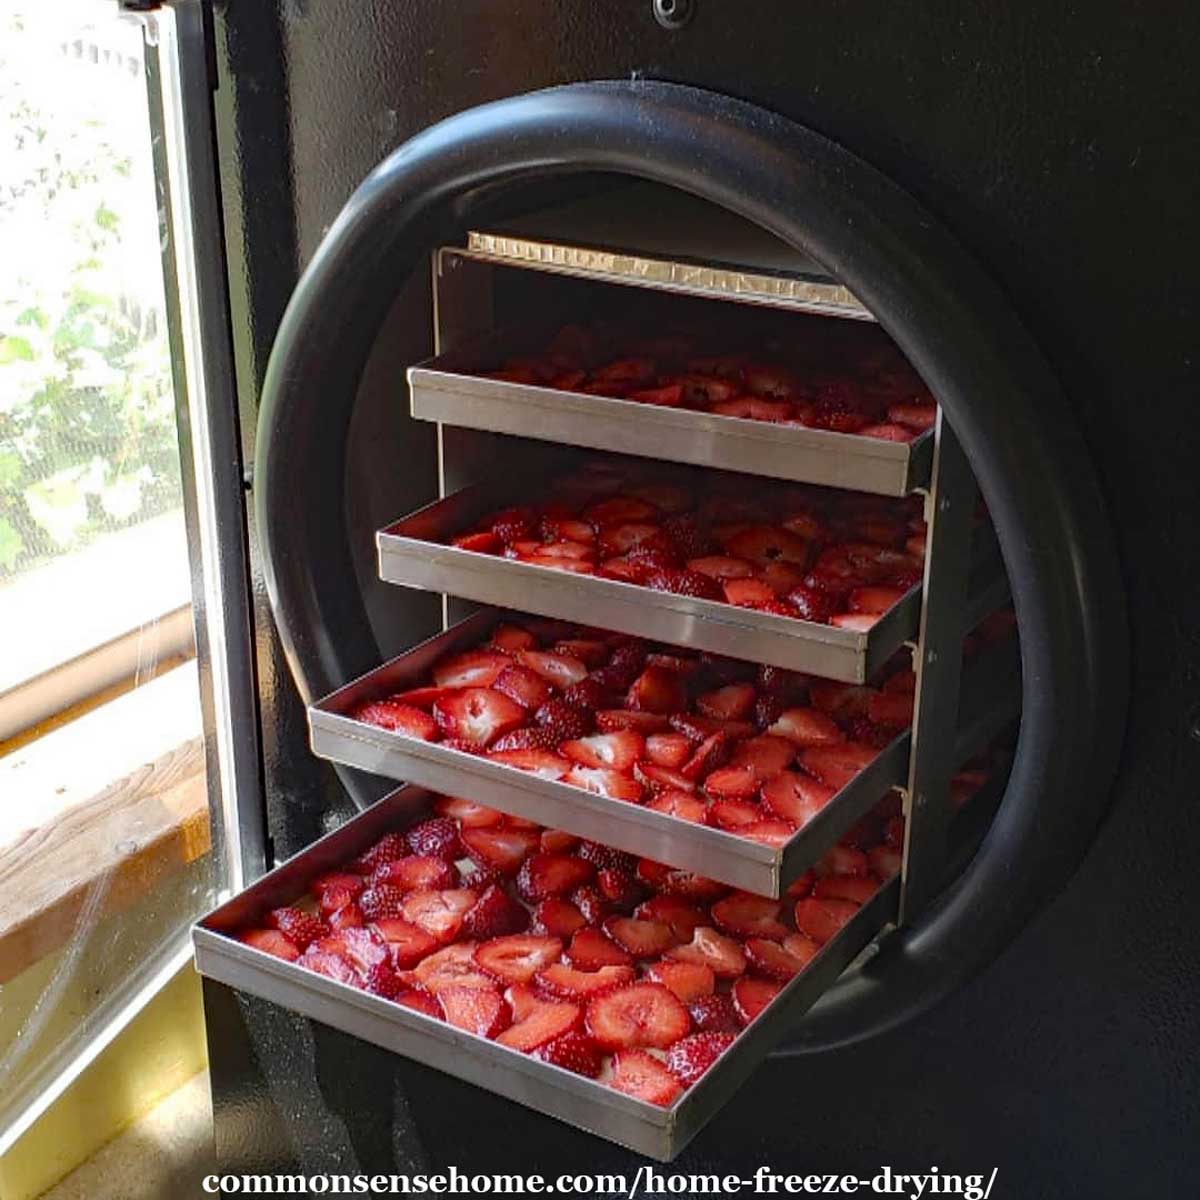
Why can’t I stuff more food in, and stack those trays fuller? During the freeze drying process, ice builds up on the walls of the freeze drying chamber. Add too much food, and the ice buildup will get too thick for the unit to work properly.
Freeze Dried Food Q&A
What foods can you freeze dry?
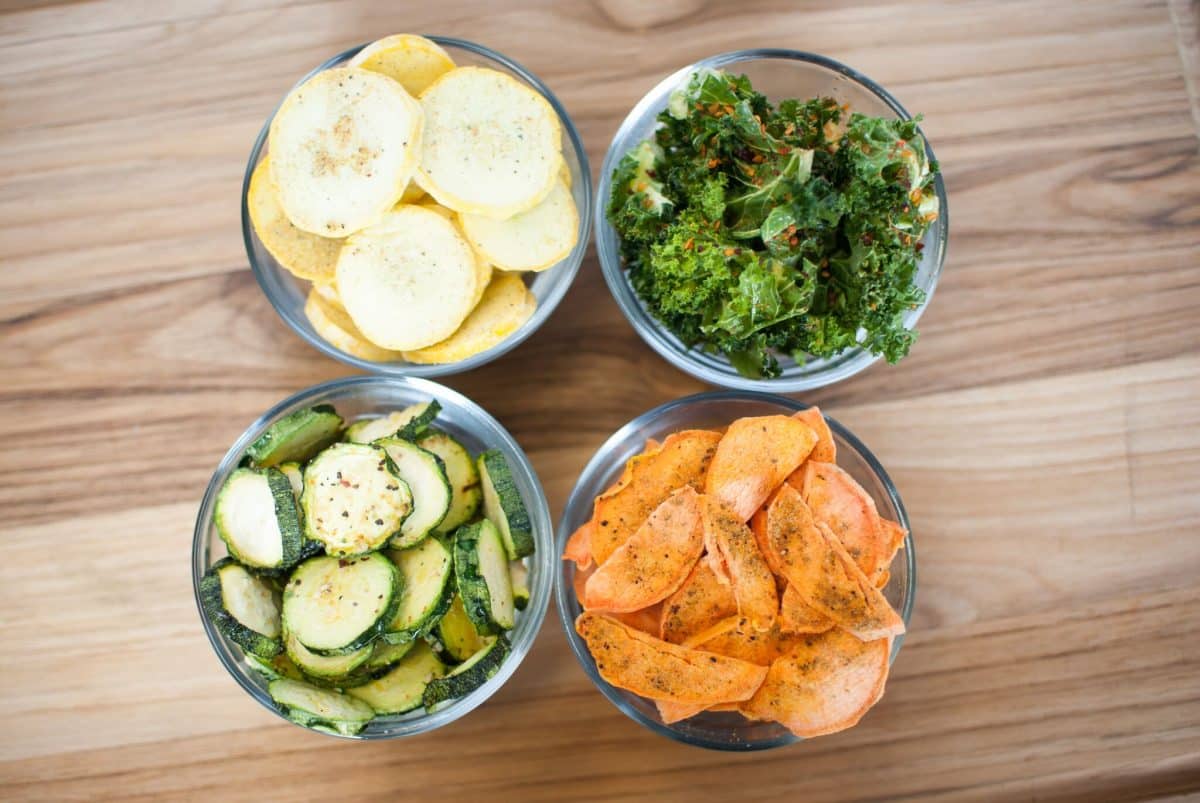
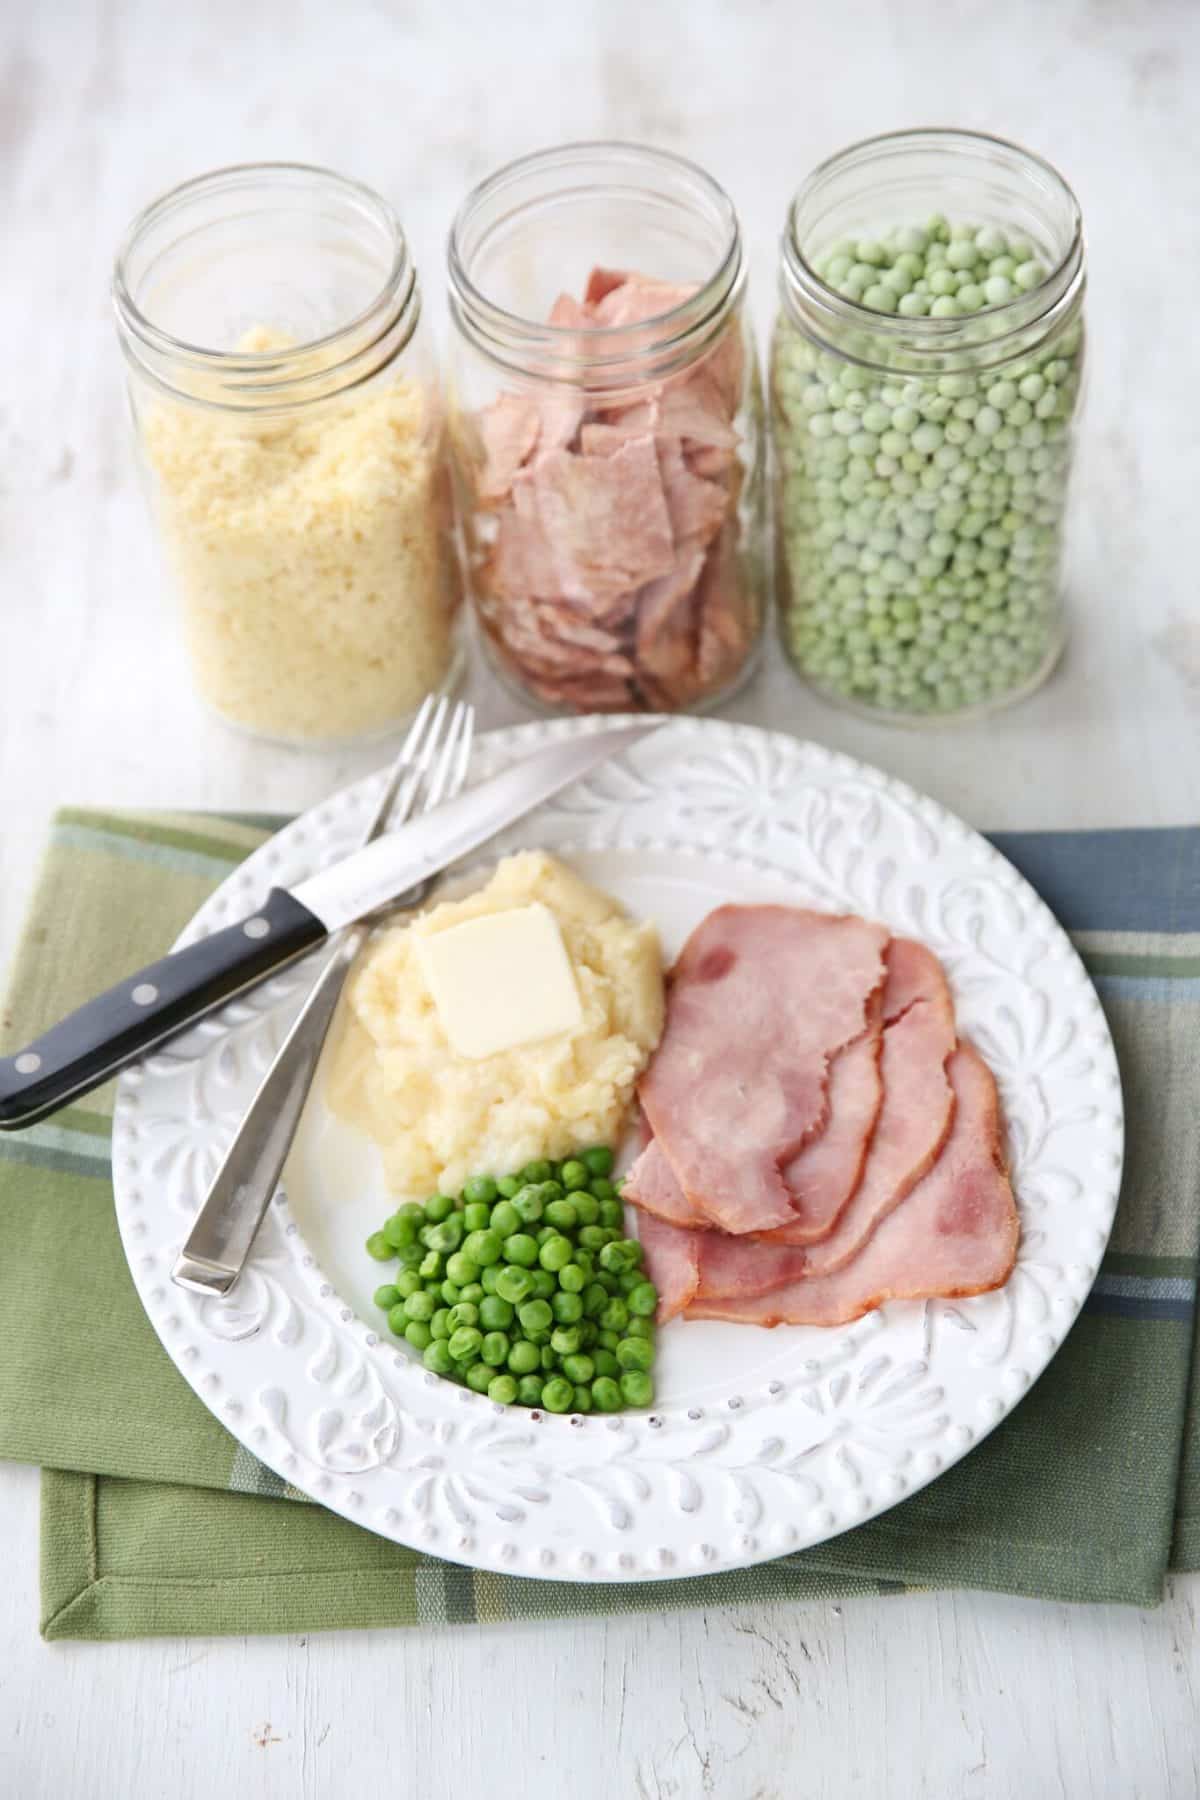
Fruits, vegetables, meats, dairy products, meals, desserts, and more. Freeze drying is safe for preserving cooked pasta and grains, unlike canning.
Those of you who follow me on Instagram know that I’ve freeze dried plenty of fruits and veggies, but I also tried some more interesting items like scrambled eggs and fajita filling.
What foods can’t you freeze dry?
Anything that’s mostly fat or mostly sugar will not freeze dry well. Fat won’t dry – but it can heat up and melt in the unit and coat every surface. When I tried pre-cooked pork sausage patties, they made a big mess.
Sugar binds to water, trapping it in the food. This is great for inhibiting bacteria growth, but it means you can’t freeze dry jams and jellies that are mostly sugar. Plain fruit and most desserts are fine.

How long does freeze drying take?
Around 24 hours was the estimated freeze drying time for an average load, but with the new software, I’ve freeze dried loads in as little as 13 hours. Warm, humid conditions increase drying time.
When you load up your home freeze dryer and hit “Start”, the unit takes you through a short menu. You select whether the food going in is already frozen (or not), and whether it is solid or liquid. Then the freeze dryer prompts you to close the drain valve and begin the cycle.
The new software is smart. The main differences between the old and new software are as follows:
- It measures the freezing temperatures (it used to only measure the warming temps)
- The vacuum pump is used as part of the freeze (when the temp of the food hits 0 degrees F, the pump turns on). This is important because the food gets colder faster.
- Once the food is frozen cold enough, it clicks immediately into drying (it doesn’t wait for the full freeze time to finish)
- The drying phase ramps up to the specified shelf temperature (this helps you get a better finished product)
- The final dry is the same
The biggest benefits occur if you put pre-frozen food it. However, there is still a decrease in the processing times for foods that aren’t pre-frozen. Anyone who gets a new freeze dryer also gets the new software.
The new software will be sold as an upgrade to older users, due to the customer service involved with it. Harvest Right has almost 50,000 freeze dryer customers. I received a copy of the new software to test and review.
Can you mix foods in the freeze dryer?
Yes, but watch placement. The website claims that flavors don’t mix, but we have found that they do. We ended up with freeze dried kiwis with a hint of green beans. Advice from the freeze drying groups suggests placing stronger flavored items on the upper shelves, milder items on the lower shelves.
As always, proper food safety rules should be observed. Avoid cross contamination, dry thoroughly, and package promptly.
How do I know the food is done freeze drying?
The freeze dryer senses the moisture content of the food and finishes the cycle automatically, but sometimes it’s a little off and you need to add extra time.
When you first remove food from the dryer, it will be a little cool from the ice buildup inside the chamber, but not “cold”. I always break open some larger pieces and check inside for cold spots. If you find cold spots, put the trays back in and add time to the drying cycle. Your freeze dryer will prompt you to check for dryness.
One of our readers, Rose, shares what she does to check dryness:
One thing I did choose to add to my arsenal for safety was a FLIR thermal imaging camera. With one easy picture, I can quickly identify areas on the tray that might not be completely dry, and pose an issue for long term storage. The image will show as being “cold” in the area that is not completely dry.
In the MANY loads I have done, I have only had one that didn’t pass (the pre-mashed potatoes) the very center of the tray was still cold. I was able to quickly extend the dry period for a couple more hours and produce a perfectly done product with no fear!
FLIR ONE IOS Thermal Imaging Camera for iPhone – works with the phone
FLIR C2 Compact Thermal Imaging System – standalone camera
How do I use freeze dried foods in recipes?
The book “Freeze-Drying the Harvest” provides detailed guidance for using your freeze dryer and rehydrating your freeze dried foods.
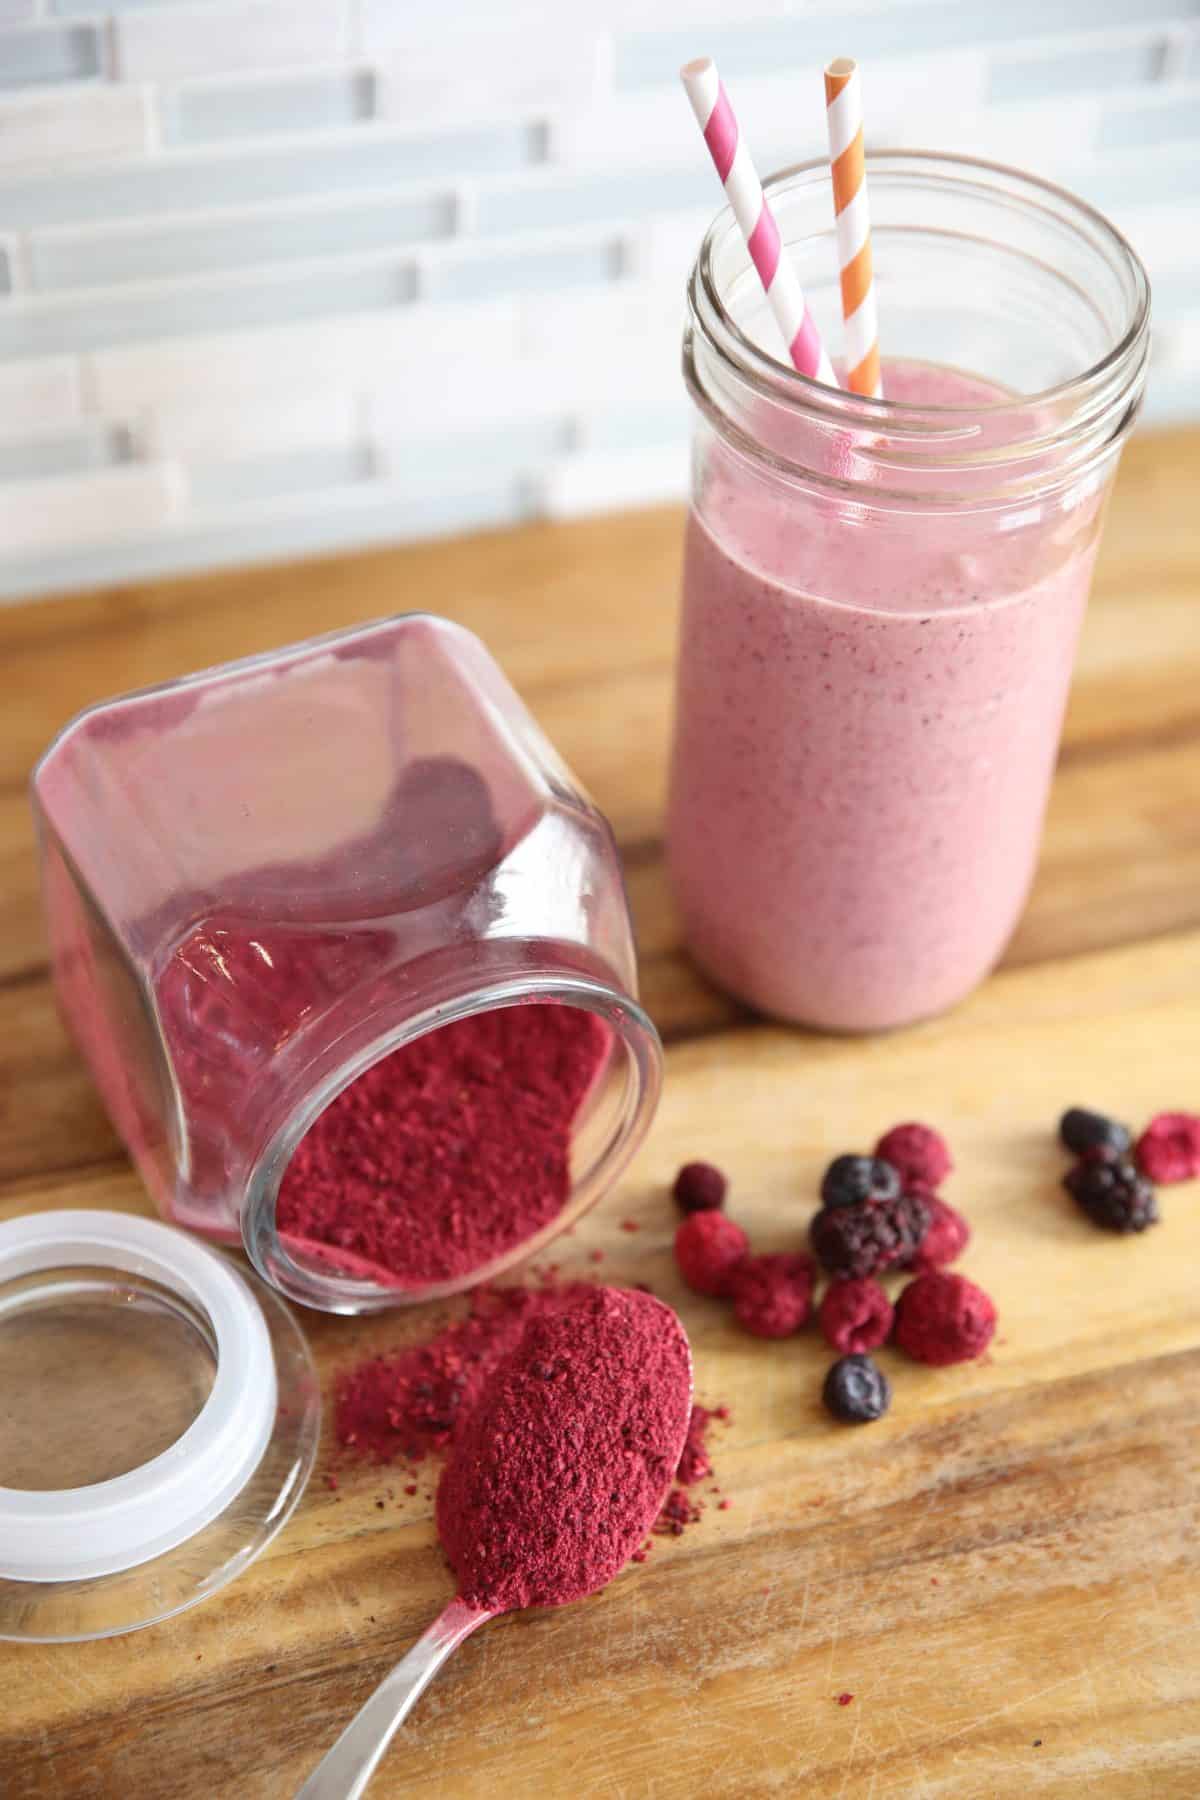
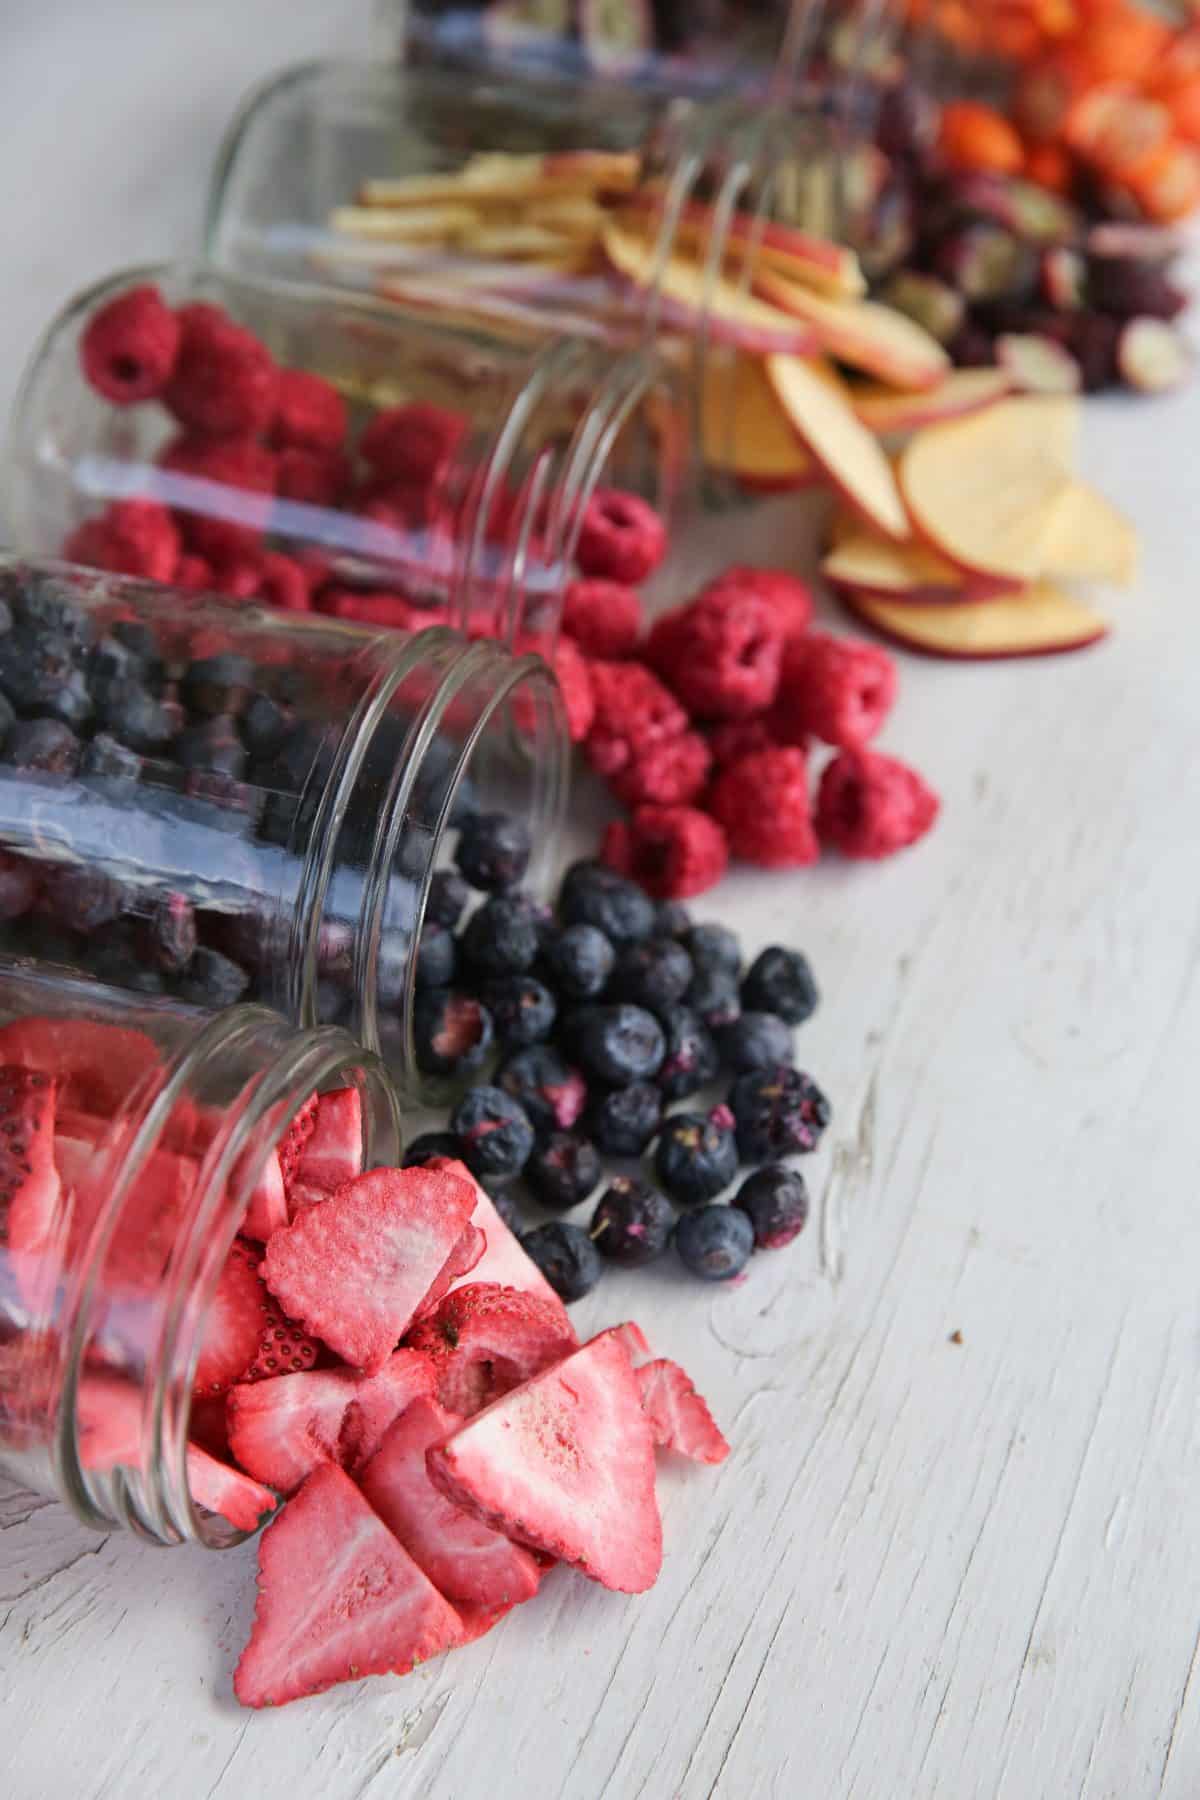
Freeze dried fruits and vegetables (those with less sugar) get so dry they are easily crushed into a powder in a blender or food processor. The resulting powder is bright in color and intensely flavored. You can use this powder in smoothies, or for flavoring. For instance, add strawberry powder to make strawberry flavored whipped cream.
How do I store the freeze dried food?
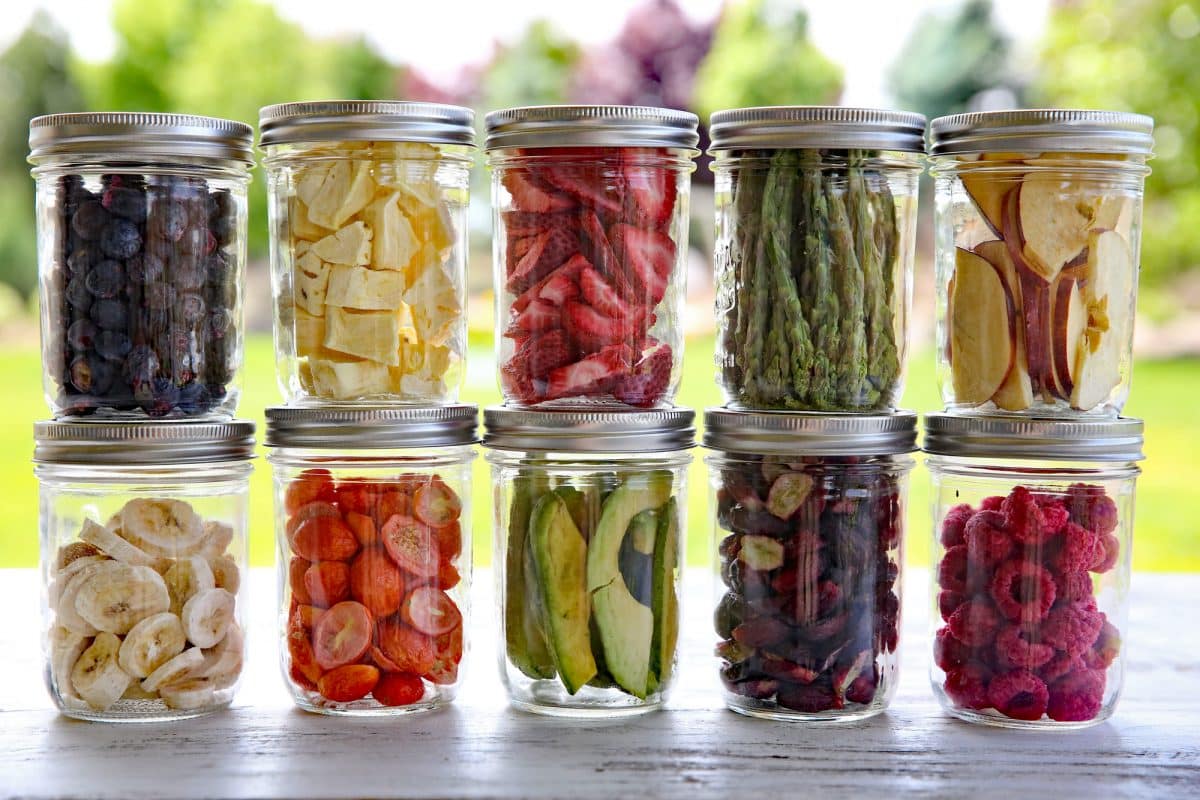
THIS IS VERY IMPORTANT! Once the freeze dry cycle is complete, you must package the food in containers that moisture and oxygen proof, such as Mylar, mason jars or cans. Adding an oxygen absorber helps to ensure freshness.
Meat with any amount of fat will go rancid in a matter of weeks if not properly sealed in an airtight container with oxygen absorber. Putting it in a mason jar and screwing on the lid won’t cut it. (We made that mistake only once.)
We use Mylar bags for most of our long term storage because they are light and durable. You can reuse Mylar, but of course the bag will be slightly smaller. Mylar is great for camping and travel.
Mason jars are a good choice if you:
- Aren’t concerned about the weight
- Have room for glass jars
- Don’t deal with tectonic disturbances or any type of disasters that might tip over your storage
You can use a Foodsaver attachment to vacuum seal jars, or remove the shelving from your Harvest Right freeze dryer and use the vacuum cycle. For long term storage, food is vacuum packed with oxygen absorbers in the jars. For short term storage, I vacuum seal without oxygen absorbers.
Can I use FoodSaver plastic bags for storing freeze dried foods?
No, not for long term.
Would you like to save this?
My friend Gale discusses the difference between Mylar and foodsaver bags in her post “Using Mylar Bags for Food Storage“:
First and foremost, the term “Mylar” is actually one of many trade names for a polyester film called BoPet film. For the technically inclined and the curious, that stands for “Biaxially-oriented polyethylene terephthalate”. This film was developed by DuPont in the 1950’s and was first used by NASA for mylar blankets and long term storage as it increases the shelf life of food by eliminating oxygen. Think superpowered aluminum foil.
Since then, many uses for Mylar have been embraced due to its high tensile strength and its moisture, light, gas and aroma barrier properties. Mylar is also a good insulator against electrical disturbances, which is why it is used for making emergency blankets.
For all of these reasons and more, Mylar bags are considered the gold standard when it comes to long-term food storage.
What about Vacuum Sealed Bags?
Vacuum seal bags, such as those for the FoodSaver are a wonderful convenience and easy to use. But alas, they do not have the thickness nor the strength of Mylar bags and they may start to leak after 3 or 4 years.
They are still a great alternative for your short-term and mid-term storage items, especially if you are diligent about rotating foods and using them for your normal meal preparation activities.
Your FoodSaver bags do not need to be improperly sealed to let air and moisture in. They are simply not as thick or as tough as Mylar.
Alternatives to the HarvestRight Freeze Dryer
There are knockoffs available from China. Based on reviews, they are inconsistent in quality and operations. Although they are cheaper we do not recommend them. We only recommend HarvestRight.
How much is a freeze dryer?
Home freeze dryers range in price from $1,995 to $3,495, depending on size and exterior finish. This cost includes the Freeze Dryer, Vacuum Pump, Vacuum Pump Oil, Oil Filter, Stainless Steel Trays, Mylar Bags (50 ct), Oxygen Absorbers (50 ct), Impulse Sealer, and HR Guide to Freeze Drying.
All units have a 3 year Limited Warranty, versus the one year warranty on many appliances.
Harvest Right also offers 0% interest financing, allowing you to lock in sale prices with a $250 minimum down payment. You pay as much as you want, when you want.
When you reach the designated down payment for the unit of your choice, they ship your unit. You then pay the remaining balance over 12 months with 0 interest.
Harvest Right also offers different accessories separately, such as extra trays, mats, Mylar bags and oxygen absorbers.
These units are a big investment. If you know you’re only going to use it a couple times per year (or not at all), spend the money on something else you know that you will use.
If you want more food security and food preservation options, read on. Home freeze drying is more affordable than ever.
Layaway Option
Harvest Right offers a layaway option so you can lock in sale prices or reserve your machine. (They are experiencing a backlog in orders right now.)
How the layaway works:
- Lock in your sale price with a downpayment ($250 minimum)*
- Pay as much as you want, when you want
- Receive 0% interest until paid in full. Your freeze dryer will ship after you’ve made your final payment.
Locating your Freeze Dryer
Freeze drying machines eat up a fair amount of real estate. This is not a toaster oven or blender. The main unit is about the size of a dorm fridge, plus it has a hose and vacuum pump. Many owners buy a heavy duty rolling table to hold the unit, but a counter top or table can get the job done.
I currently have mine on a counter in the garage, against a wall. The on/off switch is at the rear of the unit, plus the pump has its own on/off switch. You need to be able to access both of those and have clearance for power cords.
Power requirements: The small and medium units use a standard 110 volt outlet, but it’s best to have it on its own circuit if possible. If you try to pair it with another heavy load appliance, you’re likely to trip a breaker. (I found that out the hard way, and we installed a dedicated circuit.)
The large unit requires a 110 volt (NEMA 5-20) outlet and a dedicated 20 amp circuit.
Watch the temperature. The recommended temperature range for operation is 35-90°F. The most efficient temperature range is between 50-75°F.
Although safe, operating your freeze dryer in temperatures above 90°F will affect batch times and reduce the life of the condensing unit (freezer).
As the temperature rises where your freeze dryer operates, so does the length of time it takes to finish batches of food. This happens because with hotter operating temperatures it is harder to reach the extreme cold required by freeze drying.
Don’t operate the unit below freezing. You are likely to have water within the compressor, and it can freeze and destroy your compressor.
Home Freeze Dryer Noise
During the first part of the cycle, the refrigeration unit is running. During the second part of the cycle, the vacuum pump is running. The noise isn’t super loud – think vacuum cleaner, not jackhammer – but it is noticeable. I’d highly recommend planning to have it in an area where the door can be closed.
Freeze Dryer Maintenance
As I mentioned earlier, the freeze dryer does a complicated job, so there’s a little more to it than just flipping a switch.
Think lawn mower, not kitchen mixer. If you regularly abuse your power tools and don’t do basic maintenance, don’t get a freeze dryer. I know many of my readers fix and maintain not only their own things, but other’s people’s equipment, too, so I’m not too concerned about this.
We drain the oil after each use and refill the vacuum pump with clean oil. Oil is filtered and reused. Before filtering, we freeze the oil. After freezing, we pour the oil off the top of the container into the filter. The water (as ice) sits in the bottom of the container.
Visit “Harvest Right Freeze Dryer Oil Change and Filtering” to see a video of the oil change itself and the use of an inexpensive homemade oil filter that works.
Oil-Free Freeze Dryer Pumps Now Available
Harvest Right listened to customer feedback, and they’ve developed a premium oil-free pump. All new freeze dryers ship with standard Harvest Right brand pumps, but the oil-free pumps may be purchased at an additional cost.
If doing an oil change every time you’re freeze drying sounds like a bit of a hassle, the oil free pump may be right for you.
Note that the oil free pump does use slightly more electricity than the default vacuum pump.
Things I Love About the Harvest Right Freeze Dryer
Home Freeze Dried Food is Tasty
Hands down, my favorite thing about the Harvest Right freeze dryer is the quality of the food. The commercial freeze dried food I’ve tried has been okay, but our home freeze dried products are amazing. I mailed some to a friend recently as part of a gift exchange, and she wrote back, “Okay, Laurie, spill the beans on how you freeze dried the fruits. My kids are absolutely in love with them!”
The texture of freeze dried food is light and crisp – more like chips than jerky – even freeze dried meat. We freeze dried fajita meat strips, and they tasted like crunchy little meat flavored Cheetos, the boys called them Meatos.
When we prepped freeze dried fajita filling for dinner, all we did was add a little water to the pan with the food, cover and heat through. Dinner was ready in less than 5 minutes. (If you happen to have a Sun Oven, they work well for rehydrating freeze dried meals.)
The fruit is so good – absolutely, intensely fruity, light and crisp. You can also powder your freeze dried fruits and veggies and use them as natural food colors (and flavors), as noted above.
Home Freeze Dried Food is Easy to Make
Filling the unit is easy. For meals or other prepared food items, simply cook your food and let it cool. Cut into small piece, or thin slices (if needed). Load the food on the trays; place the trays in the unit.
For freeze drying fruits and vegetables, I prep them as I would for freezing or dehydrating. Blanching is recommended for vegetables, especially for cabbage family crops like broccoli. Without blanching, they may outgas during storage, potentially bursting the storage seal.
If you want to freeze dry soup or liquids (like milk), you can do that, too. It helps if you reduce the amount of water to cut drying time, but you can freeze dry “as is”.
You Can’t Beat Freeze Drying for Long Term Food Storage
The shelf life of properly stored freeze dried foods is amazing. Low fat content foods like fruits, vegetables, lean meat, rice, noodles, etc. have a shelf life of 20+ years when packaged properly. Higher fat foods have a 10-15 year shelf life. No other food supply compares for long term food storage.
Why bother with food storage that lasts so long? Because life happens. One year I might have an amazing crop of a particular item, then crop failures for several years. If there’s a job loss or an emergency, with my freeze dried food I know we’ll have a stash of food we actually like to eat.
Food prices keep creeping up, so why not preserve food now to take advantage of lower prices?
Freeze Drying at Home Can Be Allergy Friendly
Food allergies and sensitivities are becoming more and more common. Freeze drying allows you to safely preserve a wider variety of foods than any other food preservation technique. You know you’re only minutes from a safe meal. When traveling, you don’t need to keep food in a cooler.
I have a friend whose daughter has EoE (an allregic swallowing disorder). She found that freeze dried foods didn’t trigger her gag reflex, and was finally able to eat more of a variety of foods.
Home Freeze Drying is Cool
Pun or no pun, home freeze drying allows you to experiment with options you won’t see with commercial freeze dried foods – or other food preservation techniques.
One member of an online forum had his aging grandmother cook her favorite meals. He then freeze dried them to share with the family after she was gone. What an amazing gift to be able to taste a loved one’s cooking one more time.
Another couple was freeze drying some of their wedding cake and the bride’s bouquet. Still another took meal pouches to work and just added hot water to have a real meal while her co-workers were gnawing on granola bars as they worked through lunch.
My boys love crunchy snacks, so we’ve freeze dried things from sweet potato fries to pickled beet slices as chip and cracker alternatives. Freeze dried yogurt drops turn bulk yogurt into a special treat. Combining berries and yogurt into cute silicon molds makes a melt in your mouth dessert bursting with creamy berry flavor.

Are you ready to invest in a Home Freeze Dryer?
Do you:
- Want more options for long term, healthy food storage that your family will enjoy eating?
- Have someone with allergies who needs safe food options?
- Need ready made meals to go?
- Try to store abundant produce for when harvests aren’t so good?
- Get excited about trying new food options and preserving special memories?
If any of these sounds like a fit, take a closer look at freeze drying. I’m happy to answer any questions you may have. If I can’t answer them, I’ll find someone who can. Leave a comment and let me know your thoughts!

My referral link: https://affiliates.harvestright.com/115.html
If you choose to purchase a Harvest Right freeze dryer through my site, I receive a commission at no extra cost to you. (Thank you!)
You can watch the video below to see how I freeze dry strawberries. (These are the berries that had my friend’s kids raving about them.)
You may also find useful:
- The 5 Best Freeze Dried Foods
- Dehydrator Versus Freeze Dryer – What’s the Difference?
- 11 Freeze Drying Mistakes to Avoid for Best Storage Quality
- Harvest Right Freeze Dryer – Cost Analysis and Optimizing Load Size
- Home Food Preservation – 10 Ways to Preserve Food at Home
Originally published in 2016 with the title “Home Freeze Drying – The Good, the Bad and the Ugly”, updated in 2019 to current title. Harvest Right fixed “the ugly”, which was the original messy pump, so I took that out of the title. I’ve also added information based on reader feedback. Please scroll through the comments for more Q&A!
The filtering system that I got from Harvest Right Accessories has done a very good job of filtering the oil for us .The filter has a drain at the bottom,and when finished drying and defrosting we then open the valve on the vacuum line and that valve closes the vacuum from entering the dryer and recirculates the oil through the filter,and and it cleans the oil good,you only turn the vacuum on for 5 min.When through just close the drain valve and open the pump valve to the dryer and you are ready to put another load in the dryer. The only problem we have had is that the circuit board went out for the heater,and Harvest sent another and I replaced it.
That doesn’t sound like a filter offered by Harvest Right, but an add on provided by another vendor, which may void your warranty.
It is from another company,but It works real good and they do take care of the vacuum pump if it messes up the pump,they will replace it with a new one and the filters are good for 3 months and the sell a group of the 4 the filters that are good for a year,they also sell the racks/pans in a set of 4 with brackets to hold them off of the bottom pans so you can fill the next batch and put them in the freezer so they will be ready to put in the dryer for the next batch.I have nothing but good things to say about Harvest right and the came through the problem I had with the heat module going out,and in about 10min on the phone a new module was on the way.I did buy 8 of the pan mats from Harvest Right and if the had the flush kit I would have bought it from them also and the pan clips. I also bought the mid size green house from harvest right and the grow boxes from the Garden Patch and now have 13 grow boxes the the green house and got 2 1800 watt solar gen-sets and 3 100 watt solar Panels and use it to provide heat lamps to the green house when it is cold.
I also bought the wheeled cart that Harvest Right gave a link to and I also found the http://www.zorro.com sells a case of four gallons of the Robin air Hyd Oil for $79 dollars and free shipping.I also use one of my FLIR Scopes to ck to see if the batch is dry when done,works real good on whether it is dry or not.
I was also seeing that some were complaining about the noise from the pump and dryer,well there is hardly ant noise now,just a low hum that is not really noticeable at all,when we first got it there was loud noise,but now just a low hum coming from it and the pump.
Wow – that sounds like a serious set up. Amazon also has the Robinaire oil, a little bit less expensive than that price, with free prime shipping. Link – Robinair 13204 Premium High Vacuum Pump Oil – 4- one gallon jugs.
That is a good price at Amazon,but when I was looking for it,they did not have it at that price,and when I look for something I always look at Amazon first,but Zorro was the least expensive,have so far bought 2 4 gallon cases from zorro. Some might wonder why I bought so much,but I dont buy for the short term,I but for if it is not easy to get it,in other words long term,the same as for the black Berkley filters,I have bought 10 of them for stock,the same as ammo,I reload and continue to do so for the simple reason that If it is ever hard to get,or cant get,it will be there for getting meat on the table,and when ever I purchase,I not only do it for now but we never what the next day will bring and so I get extra for stock. I just want the people that I care about to have what they need to be comfortable as can be for the times at that time.
Just like the solar gen-sets,I do plan to add to them and daisy chain them together for steady power when needed,and to eventually have enough continuous wattage to be able to run the freeze dryer when there is no access to the grid. Call me paranoid if you want,but I do believe in being as prepared as I can for what ever comes down the pike,dont want to sit and say shoulda,coulda woulda when it happens.
We like to stock up, too, especially on shelf stable goods. Better to have it an not need it than need it and not have it. As you mentioned, the vacuum pump oil isn’t something you can casually pick up at the local hardware store. (I asked a few just to make sure.) Same thing with the Berkey filters.
We’ve been focusing on getting the long term plantings in first, then greenhouse, then outbuilding attached to greenhouse, and then the pond (which unfortunately was done incorrectly so needs to be redone before we can finish plantings in that area). I think next year we may add another small outbuilding for the ducks and put chickens where the ducks are now. (The current building was originally intended for chickens, but the slug population started booming so we switched to ducks to save the garden.) After that, hopefully solar and/or geothermal. We’ll see how far the budget stretches.
If you’d care to share, I’d love to see more of your greenhouse setup. You can email to laurie at commonsensehome dot com. If you really want to share, we could feature it on the site, but that’s optional. We’re just in the brainstorming stage for the next steps here, so it’s always good to have more ideas. One of the things we’re considering after several cool summers is putting in a bigger hoop house over the top of the existing greenhouse to extend the growing season even more and have more protected growing area.
By FAR the most info I have found on this subject. A lot of little questions answered(ie:the pump/oil problem). Have heard complaints but not fixes. Thanks. This puts it over the line for me. My wife and I want to eat foods that we are used to, seasoned the way that suits our body and have a safe long term food storage bank. Thank You
You’re welcome, Tim. It’s a good feeling to know that you have plenty of healthy food ready for when you need it.
I have had one of these dryers for over a year and have processed over 100 lots of food. The dryer works great when operated in a way to maximize performance. Being an engineer I keep track of all kinds of things related to the operation of the dryer. I have found:
1. Cycle time goes way up if the thickness of food goes up. The thinner the slices or size of cubes the faster it processes.
2. Cycle time goes way up if the temperature in the room is high. I live in Arizona and if I run it in the garage in the summertime it takes a lot longer
3. Clean oil is essential. I drain the oil out of the vacuum pump at the completion of each cycle when the pump and the oil are still hot. I built a stand for the pump so that I could slip a collection container (sold by pump company) to facilitate this. I pour the oil into a transparent container and let it sit 24 hours so that water collects in the bottom. I pour off the dirty oil to separate it from the small amount of water that collects in each cycle. The dirty oil I put thru a 20 micron filter. The small amount of oil/water that I couldn’t separate goes into another transparent container. When I have enough I freeze it. The water turns to ice and I can recover the remainder of the oil. High vacuum pump performance deteriorates with dirty oil.
4. Pump performance goes down if the pump is low on oil. I run my pump with an oil level that puts the oil 3/4 of the way up the sight glass. I have found that 22.5 oz of oil is what my pump takes to do this.
5. Forget the business of reusing the oil over and over without filtering and then purging the pump every dozen cycles or so. Drain the oil each cycle, get rid of the water, and filter the oil before reusing and the pump will love it. I think the new instructions from Harvest Right require this.
6. I have about 6 loads on the 4 gallons of oil that I have and it is starting to show signs that it has had it. This works out to about 35 loads of food per gallon of oil if used for 6 cycles. I am going to keep using the oil that I have to see if there is a point where performance starts to suffer.
7. I fill my dryer so that it has to remove about 80 oz of water. I keep track of weight into the dryer and weight when finished. You quickly figure out the moisture content of food so that you can determine how much food to put in so that 80 oz of water are removed. I have found that loads larger than containing 80 oz of water take proportionally longer to process.
8. I shut my dryer down for the summer in Arizona. It sat unused for 4 months. I refilled the pump with clean oil before shutting it down. When I started it up the oil was highly contaminated with rust and required extensive flushing to get rid of it. I don’t know why this occurred. Maybe I had some moisture trapped in the pump. Inside the pump cover there is a splash shield made out of steel that rusts. I removed it and replaced it with one that I made from aluminum and maybe I won’t have that problem next summer.
The vacuum pump and the oil do take a little work but once you get into the swing of it it doesn’t take that much time and the dryer runs great. I am very pleased with the dryer that I have and the support that I have received from Harvest Right.
Do you have the larger unit, Dennis? Thanks for sharing your experience.
No, I have the original medium sized unit. The large one wasn’t available when I purchased mine. If I had to do it over again I would buy the larger one.
Thanks. I asked because of the pump volume. I didn’t immediately do the conversion, but we’ve found 700 ml to be a good oil volume, which is a little more than you use. (I was thinking at first that you were using more oil.) From what I’ve seen in the groups so far, it looks like the new pump has far fewer issues with crud buildup and corrosion. We just got ours so we’ve only run a couple of loads, but so far, so good. I’m checking with Matt from Harvest Right on the availability of those. I know they’re including the new pumps with current orders, but I don’t yet see them listed on the Harvest Right website.
I love the idea of being able to freeze dry fresh produce for my family to use all year long! Each member has distinctly different dietary requirements and I think aging a freeze dryer would make snacks and meals a breeze!
I would freeze dry produce from our garden and berry canes.
Am seriously considering biting the financial bullet and purchasing the smaller unit. We are moving to a rural area on Big Island , HI.
We will have electric service (@ a higher rate than what we pay here in AZ. ). But, all in all it seems a good investment for our lifestyle. We are dairy, sugar, gluten, and soy free and I intend to take advantage of the abundant fresh organic fruits and vegetables there. However, I have so many other more interesting things to do with my day that I’m always on the lookout for convenient nourishing ways to feed us, without being “tied to the stove”.
If you can get bulk meats or seafood of any type on sale (except maybe Spam – I think that would be too fatty), freeze drying would allow you to do batch cooking of just the meat portions of your meal, which you could easily pair with fresh produce. I did a batch of gluten free banana bread for a “treat” item last week, and it freeze dried quite well. The texture was similar to biscotti.
I just contacted Harvest Right about the affiliate links again. I don’t know why it’s taking so long to fix, but right now my links only work in Internet Edge browser.
Hi Laurie
I can’t seem to find the last date for the Black Friday sale. I thought you mentioned it in your Facebook post but I can’t seem to find it now.
The email that I received from Harvest Right was as follows:
So it looks to me like the promotion runs for the whole month of November, but it usually does take a bit of time to ship the units. (They are hefty.)
Buyer beware! Harvest Right does not give you the whole picture before you order. Last week I excitedly went to get my Harvest Right standard size Freeze Dryer. I had carefully measured according to the specs listed to make sure it would fit in my kitchen. When I got it home the unit fit nicely on my shelf. There was an additional box that contained the pump which takes up a minimum of 8 inches of counter space. Then I read the instruction book. There is a hose underneath the unit that has to go into a 5-gallon bucket. The only space for it to come out of the unit is at the back. It is short enough that the bucket must be located at the back of the unit. I also discovered that you have to have access to the back to reach the power switch that is located to on the back of the unit just above the detachable power cords (one is like a pc’s power cord and the other is the pump’s power cord which plugs into the back of the unit). The specifications do not include the additional space required for the plugs, the pump or the 5-gallon bucket. It is not designed to be used in a kitchen unless you have space for a cart that can hold the 134 lb. machine. The other thing is that their videos all say it takes a day to freeze dry the foods. The truth is that most are 30 hours or more. Grapes can take 50 hours. It cost me $300.00 (15% restocking fee) even though I had not even full removed the plastic covering or taken the pump out of the box. I feel like the product was a bit misrepresented. As Nick from Harvest Right said, “Marketing tries to present the cleanest picture.”
Marketing does indeed try to present the cleanest picture. Even in the freeze drying groups, people show off their custom carts and dedicated freeze drying rooms, making it all look easy.
You’ll note in my review that I said that, “Second, the unit eats up a fair amount of real estate. This is not a toaster oven or blender. You need space. The freezing unit is about the size of a dorm fridge, plus it has a hose and vacuum pump.” and that it weighs over a hundred pounds. I also noted that we keep ours in the garage. I’ll modify the post a little to try and make this even more clear.
The drain hose normally routes out the back, but you can reach under and reroute it out either side. In our case, because we were using an existing shelf in the garage, we moved the drain hose so it comes out the same side as the pump hose. If I’m standing facing the side of the unit where the pump hose comes out, we have our wall outlet, the unit (with cord reaching around from behind to the plugin in front of the unit), and then the pump sits behind the unit and plugs into the unit. The bucket to catch the meltwater sits below the unit.
High sugar and high moisture foods do take longer, but I can do meat in less than 24 hours. Many foods do take longer than 24 hours, at least under the conditions that I use my unit in. (Not climate controlled, in northeast Wisconsin where the humidity is often high.) I’ve noticed that the ambient humidity levels impact drying times significantly. Given that HarvestRight is located in Utah (desert), I’d bet their ambient humidity levels are lower, so maybe their dry times are a little lower, too.
I absolutely LOVE my Harvest Right Freeze Dryer!!! Yes, it is a little big but I can’t believe you would return it without even trying it!!! OMG! I am having so much fun with it. The only problem I have is that it is parked right next to where I watch TV since I have an open floor plan. The drying cycle is a little loud. I just try to run it so that the dry cycle runs when I’m sleeping and if it’s a really long cycle (like when I did my bean soup) I just turn up the TV! LOL!! It is a little bigger than I imagined but I would NEVER have returned it because of that! I knew it was going to be big! Also, if you would have researched it a little you would have seen where it talks about the pump and the draining. I was prepared for that, I even bought a cart before my machine got here. Research, research, research!!!
I have purchased powdered peanut putter. Is it possible to freeze dry peanut butter and make my own? Is there too much fat in it? What about honey? I have seen powdered honey as well.
Peanut butter has a better chance of working. Honey will keep for years “as is” – no need to freeze dry.
Ok, I took the leap and just purchased the medium size freeze dryer. I really hope I get some use out of it and don’t find out it’s one of my impulse buys that just sits there. Too much money invested! Should I have purchased the silicone pads? I’m a firm believer in prepping for any emergencies that may arise. Or just the rising costs of food. Most items have doubled and even tripled in the last couple of years! Now I just need to know what all can I do with this thing?? Is there a good reference book or “cook book” that you could recommend? Can I freeze dry butter even though I know it’s mostly fat and won’t last 20 years? Can I use my Foodsaver and it’s bags instead of the mylar? I have too many questions! How do I use this for everyday living and not just for prepping??
I’m not sure what you mean by silicon pads? Do you mean pan liners? If so, I use them and recommend them, but the ones I use are not silicon but Teflon. (They should be stable at the temps seen in the freeze dryer.) I got four of these sheets and cut them to width.
I haven’t yet seen a great freeze drying cookbook. A basic one comes in pdf format with the unit. I’ve been considering putting something together, but I still have a bunch of bread books to sell and little free time. You can freeze dry a wide assortment of foods, but avoid high fat and high sugar foods.
No, you can’t freeze dry butter. It will end up coating the interior of your unit and making a huge mess. I read the reports from one blogger who tried it. HUGE mess.
No, I wouldn’t recommend Foodsaver bags for long term storage, although they would likely be fine for short term storage. (One year or less.) Foodsaver bags allow more air and moisture through than Mylar and are not suitable for extended storage.
How to use a freeze dryer for every day use and not just prepping. For us, when the fruit and veggie harvests come in, some gets freeze dried. A portion goes to long term storage, and a portion gets used sooner rather than later.
Freeze drying is also great for taking advantage of sales, especially sales on perishable food items. During or after the holidays, you can typically find ham or turkey cheap. Many delis will slice a boneless ham for you – and then you can freeze dry the slices and use them as needed. Roast up an extra turkey, chop and freeze dry. Use the freeze dried diced turkey in casseroles, soups and stews – or make a turkey casserole or soup and freeze dry that for a “fast food” meal down the road. Last weekend we roasted up two of our chickens to make more room in the freezer for the next batch that’s being processed this weekend. We ate chicken leftovers for a few days and still had enough to make up a triple batch of chicken and rice casserole to freeze dry.
Freeze dried foods make awesome snack foods, too. You get the “crunch” without frying. Veggie slices are great. Freeze dried fruit is amazing. Cheese slices (I get presliced packs at Costco so they are all nice and even) and pickled beet slices are salty and flavorful. (Freeze dried dill pickles were too salty for me.) You can do sweets, too, like ice cream or gummy bears or yogurt drops.
I have been busy with me new freeze dryer. I have done various fruits of which watermelon is my favorite! I have done spaghetti, spanish rice, bean soup with ham, potato soup, roast beef, various ice creams, (ice cream with chocolate chips and frozen snickers bars did not work because of the chocolate), yogurt drops, corn, bananas, apples, etc. I’ve been having a lot of fun posting my results on my facebook page to share with my friends.
Anyway, I was looking at my canned goods I have stashed and found that I have some canned salmon and some canned tuna that are at their best used by dates. Have you tried to freeze dry these? My tuna is packed with oil, should I rinse it after draining? Could I add mayonaise and pickle relish to make tuna salad before freeze drying? Thanks again.
How long did the cycle take on your watermelon? I’ve been thinking I should try it because people keep asking about watermelon extract and I think it would be a great way to concentrate the flavor, but was concerned by the high water and sugar content.
As for the fish, I would definitely try to get rid of as much oil as possible. I haven’t done fish because we don’t eat a ton of it, but others have in the online groups. Mayonnaise does not freeze dry well – too much oil. Pickle relish would probably be fine.
Sorry, I know I should keep track, maybe I’ll start. Watermelon is my favorite. One round personal watermelon fills 2 pans with a little leftover to munch. I always have to extend the dry time because it’s not quite dry. Have to make thin slices. Reminds me of cotton candy. Nice and sweet! You should try it! I can’t wait until summer to be able to get fresh watermelon for a lot cheaper. I only buy it when it’s on sale now. Still paid more for a small round watermelon than I will pay for a large one in the summer from the farmers market.
I even tried freeze drying peanut butter fudge and a frosted Christmas cookie just to see what would happen. The fudge was a no go, too hard. The cookie was really good and crispy but I wouldn’t trust the frosting to last as long. i’m thinking of trying a peanut butter cookie next!
As for the fish, I guess I’ll just try it! I think that I’ll drain the tuna and then rinse it to remove as much of the oil as I can. I think the salmon will be just fine as long as I blot off the excess water. Hmmm. Maybe I should dedicate a notebook for drying times and tips. Thanks
BTW, questions are not a problem, but more ideas for future posts. If you’re wondering, odds are other people are, too.
Are you talking about the oxygen absorbers? My Freeze Dryer came with a starter kit — mylar bags, oxygen absorbers, and a sealer.
Your Foodsaver bags are NOT the same as the Mylar! Those will not hold up as well or as long. You can buy both mylar bags and oxygen abosorbers on Amazon or other places on line for a reasonable price. I use much more of the small bags than the really large ones. I can get you links if you would like.
And I really, really, wished I had gotten the medium sized freezer and not the small… I am envious! 🙂
When I’m loading up my medium freeze dryer I sometimes wish that I had gotten the large one! LOL! As for the Foodsaver, I use this for things that are short term like my snacks. I also got the starter kit with my purchase and have already had to reorder more of the small bags. I wish they had even smaller bags for snacks. I also started my sealer on fire because I tried to reseal the absorbers and the plastic is thinner and I didn’t adjust the setting. So be careful of that.
I had to adjust my sealer as well because of a burn spot. BTW, I use mason jars with an O2 Absorber in it for snacks and things that will be used quickly. Seems to work really well. I have a vacuum sealer (mine is from Cabelas) with a vacuum-mason jar attachment so I can use that option as well for short-term, small volume freeze-dried stuff.
Are any discounts or coupons available?
No current special promotions above and beyond the new lower price. The units are about $500 cheaper than they were a year ago.
We are planning on buying a Harvestright freeze-dryer for food processing business in Africa . Would like to know what happens when there is an interruption in the power supply, would the process continue from where it stopped when power is restored or it will start all over? Also, when ground fresh maize is freeze-dried will it become powder?
For a short power outage, the unit will continue the cycle from where it stopped. (I’ve had this happen a few times.) I’m not sure how long it can sit with the power off and still continue from where it stopped.
I’m not sure what you mean by “ground fresh maize”. Are you talking about maize that is harvested wet, like sweet corn, or maize that is harvested dry like dent or flint corn? If a material is ground before freeze drying, it should be a dry powder after freeze drying, unless there is sugar or fat to make it sticky. When I cut sweet corn off the cob and freeze dry it, it dries as individual kernels with some powder. I have not tried freeze drying corn meal.
I ordered my freeze dryer from Harvest Right last week. I make a lot of chicken stock and can it…can it be freeze dried?
Yes, stock can be freeze dried. I had the best results when I chilled my stock in the fridge and then poured it into the freeze dryer trays in even layers.
I went digging and found an Instagram video of some broth I dried. You can see it here – https://www.instagram.com/p/BM9P8kch2Dj/?taken-by=commonsensehome
I have a question about the compressor oil. How much does it cost? What type do you use? You said that you filter it and reuse it, how many times can it be reused?
You can get a gallon of Robinaire vacuum pump oil for around $25. I reuse it indefinitely – as long as it filters clean. You lose a little with each load, so it doesn’t last forever, but it can last a long time.
Laurie,I also use Robinaire Hyd. oil and buy it by the case from Zorro for $79.00 and free shipping,and along with the quick flush filter system I purchased from Harvest Right Accessories,the flushing takes about 4 min,then drain the water out of the filter and then you are ready to do another batch,and the oil usage is almost nil,and you change the filter,every 3 months.
Hi Laurie-
We are planning on buying a Harvestrite Freeze Dryer. My 9 year old son and I went by the Harvestrite plant, and sampled the food, it was delicious. The employees were very helpful and knowledgeable.
If we were to buy frozen berries from Costco, do you have any idea how much the total cycle time would be reduced if we put the berries in the unit already frozen?
Thank you,
Tony
The cycle time really varies with ambient conditions, so it’s hard to estimate. The Harvest Right freeze dryer gets much colder than a normal freezer, so I typically just load the food in (fresh or already frozen) and hit the auto cycle. You might try running it on automatic, and then experimenting with different freeze times based on your initial results.
I have used pre-frozen berries in the freeze drier. They seem to take about 24 hours (depending on what type of berries). I have only used the auto setting. I have to admit, thought, that the fresh berries seemed to taste …well, fresher… than pre-frozen. Of course, they were my pre-frozen and they were a probably about a year old. The veggies I bought from Costco did fantastic (pre-frozen). I don’t have my notes here, but I allocate 24 hours as an estimated time the first time.
Hey Laurie,
Much thanks for your preparedness series. Great, well researched helpful info. EM pulse big deal to me.
Quick question if you have time.
Earlier, (08-31-17), you told someone not to cover trays with parchment paper during freeze drying process because it would interfere with sublimation during the lyophilization process. I have been drying banana chips and sliced strawberries two layers with parchment between the two. How do you do two layers without covering lower layer with parchment or is it okay to do so?
Much thanks again. Intellectual as well as well rounded knowledge on your site so useful and appreciated. Have a good septic tank day.
So far so good on the new septic pump.
Parchment is porous, so while it does interfere some with the freeze drying process, obviously it doesn’t stop it completely, as you’ve found. If I want to stack sticky food deeper on trays, I’ll usually prefreeze the food first before loading on the freeze dryer trays. Then in can be stacked without so much sticking together. I’ve also seen people stick banana slices on skewers, leaving just a bit of space between the slices, and then laying the skewers on the tray.
Our unit is in the garage, so in summer when local strawberries are ripe, humidity is higher and temps are up. As such, I usually stick to a single layer of fruit, which still requires a fairly long dry time in those conditions. In fall, spring and winter when temps and humidity are normally lower, I load the freeze dryer a little heavier.
Is there significant effect adjusting the heater temperatures – default is 125F – on food quality? I’ve tried freeze-drying kulolo (mashed taro, sugar, coconut milk) but ended up with a biscuit rather than a cheese puff consistency. Perhaps a lower temperature setting would help next time, say 100F?
Maybe one reason to consider lowering the heater temperature to say less than 110F is for those who are on a raw food diet (no cooking temperatures – above 118F).
I’d expect setting a lower heater temperature to prolong drying times but save food from melting or cooking. And a higher heater temperature to speed drying times. I haven’t checked but if the heater could go to 160F that could kill harmful bacteria.
Any comments?
Thanks for your great blog! I really learned a lot from you and your commenters.
I’ve never tried kulolo, but that sugar and fat don’t tend to freeze dry well, as mentioned. My fatty sausage patties were definitely dense and chewy, whereas the lean ground beef was light and crunchy. I thin teh food itself drives the finished texture of the product far more than attempting to adjust the temperature.
If you look at a pasteurization chart such as the one at http://www.milkfacts.info/Milk%20Processing/Heat%20Treatments%20and%20Pasteurization.htm, 161F for 3 seconds will kill most pathogenic bacteria in milk. Thicker products are pasteurized at a slightly lower temp (150 or 155F) for 30 minutes. So if the freeze drying process hits 160, odds are we’re clearing most pathogenic bacteria.
Thanks Laurie! It’d be great if HR provided a chart indicating the uses of adjusting the heater temperatures for different foods. Why even bother to allow us to adjust it? For now I’ll leave it at the default 125F for most foods except perhaps consideration for volatile foods such as coffee or aromatics like thyme or garlic. There’s something going on with the gas equation that impacts the food material under freeze-drying conditions that I’ve yet to understand.
Have you tried contacting Harvest Right directly? I think their general publications are meant to keep things as simple as possible to be more user friendly, but they may have additional available. I barely scratched the surface of organic chemistry in college, but if you’re curious, I bet there’s material online or in textbooks somewhere that discusses volatilization ranges for different food compounds and aromatics. I’m sure they need to know that sort of thing for products like freeze dried coffee. Heck, maybe commercial producers of freeze dried coffee discuss their methods on their websites?
Good idea, I just did today via their FAQ section!
Btw, I watched a Epicenter youtube on freeze-drying meatballs. They indicated that it created a greasy mess – coating everything within the chamber. Do you have such problems? I’m thinking that perhaps laying parchment paper on top of each tray might help. Say for oily foods only?
I ran into a similar issue when drying precooked pork sausage patties, as mentioned in the post. Greasy mess everywhere. It’s really best to avoid drying high fat foods. Covering the trays with parchment would work against the freeze drying process because it would interfere with sublimation during the lyophilization process.
Has anyone used this machine to dry herbs and to smoke later? being its legal now in many states.this would reduce drying time if it smoked ok might still need curing..
The machine only dries – very completely.
Hi Laurie. Thanks for all you do. Your experience and wisdom with the freeze dryer is important to me.
Please share your experience with the oil(s) for the unit. It seems to me that JB oil would be best for a JB vacuum pump. Harvest Right has offered two other brands over the last two years as alternatives, but both companies want me to buy 4 gallons at once. Where do you buy your pump oil?
You have written that you have only used one gallon in a year with careful filtering. How long will the filter last when you freeze the water to the bottom of a jar? I understand that it takes about 700 ml to change the oil. How much of the first quart (that comes with the pump) gets used for the initial fill-up?
The quart that comes with the unit is 946 ml, so you’ll have 246 ml leftover after the first fill – not enough to refill without filtering. You’ll lose some oil to filtering.
I purchased a gallon when I needed more oil to have plenty on hand, then I purchased a case of four gallons because it comes with free shipping. I ordered both through amazon. Initially, I bought the JB Liquid Gold, but Robinair Premium Pump Oil is significantly less expensive, and is still a high quality oil. I got the case of Robinair. I figure it’ll last for years, but it won’t spoil sitting in the garage, and then I have plenty on hand. Prices on things only tend to go up over the years. We cracked open our second gallon this summer.
Link to Robinair case of 4 gallons
Link to Robinair gallon
As to whether or not it’s best to use JB oil – I haven’t noticed any change in performance since switching to the less expensive oil. The Robinair oil is commonly recommended in many online groups.
For the filter, I’ve switched to an old Brita pitcher with a hunk of toilet paper tightly rolled up and tucked in a coffee filter. Works like a charm, and super cheap to replace. You may be able to find a used pitcher at a thrift store. We had one that was about 10 years old and starting to look a little grimy, so we replaced that with a new one for drinking water and co-opted the old one for oil filtering. I’m not familiar with the filters that Harvest Right is now including with units. I get quite a few uses per filter, and it only takes a small portion of the toilet paper roll to fill the drain area, so one roll will make a number of filters. It’s the only thing that I use cheap toilet paper for.
One thing I noticed was lacking in all the comments and review of this machine is how easy it is to store and transport freeze dried food. I am an avid hiker. When you put a backpack on your back filled with everything you need for a week in the mountains, I don’t want to have heavy, water packed, canned food with me. Pre-packaged meals are expensive and loaded with chemicals and preservatives. They are usually very high in sodium. Using the mylar bags, I can make a variety of meals that take up very little space and are light in weight.
Thanks for sharing your experience, Terri. I’m a homebody, so I don’t travel much, but you are absolutely right. The food is super light, and you control the ingredients.
Small and standard size run on 110 Volt. I think large freeze drier requires 240 volt. Something to consider
Also, they should have a dedicated circuit. The boys left the air compressor plugged into the same circuit as the freeze dryer. It kicked in during a freeze cycle and tripped the breaker.