How to Store Asparagus in the Refrigerator & Long Term
This post may contain affiliate links. Read my full disclosure here.

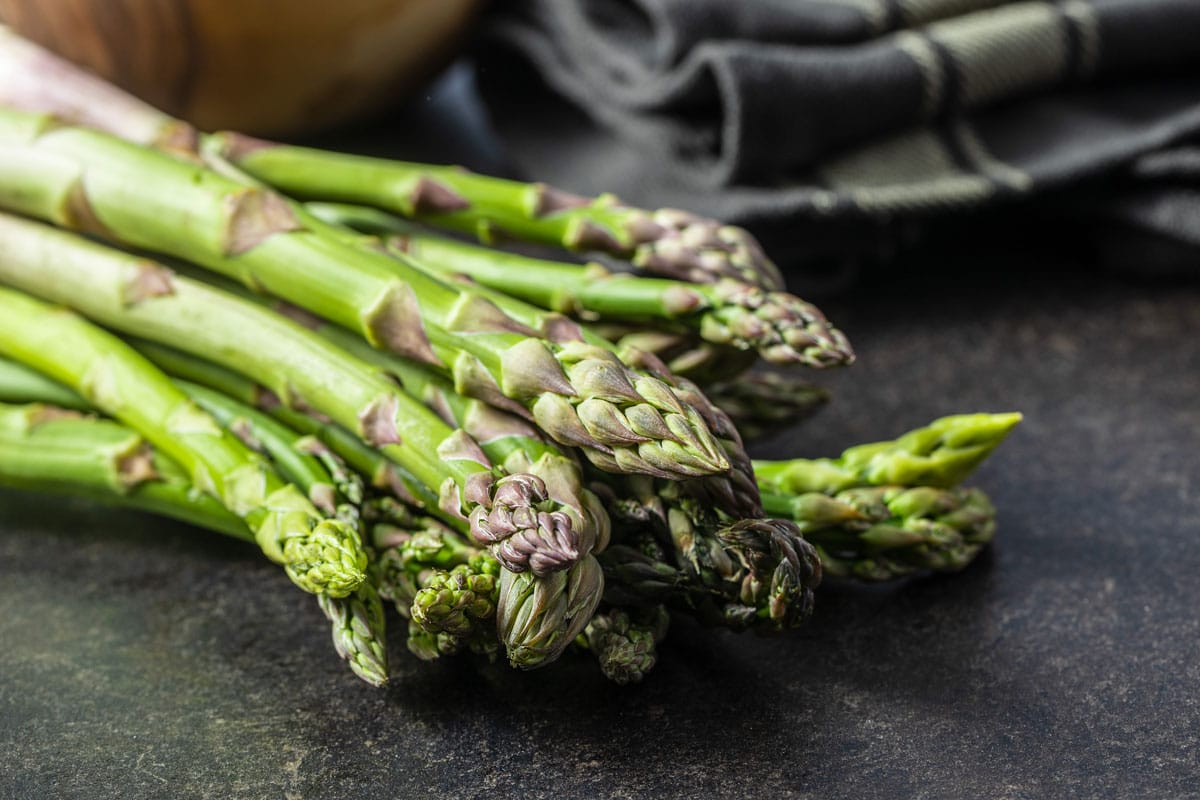
Spring asparagus is a wonderful blessing after a long winter. Those first tender stalks are absolutely delicious raw, straight out of the garden. We share how to store asparagus so it stays fresh in the refrigerator, plus long term storage options.
Asparagus season doesn’t last long, so use these options to take advantage of the seasonal abundance in stores and farm markets. If you want to raise your own, see, “Growing Asparagus in the Home Garden“.
How to Store Raw Asparagus in the Fridge
Storing fresh raw asparagus properly helps maintain its freshness and quality. Here’s how you can store fresh asparagus in the refrigerator.
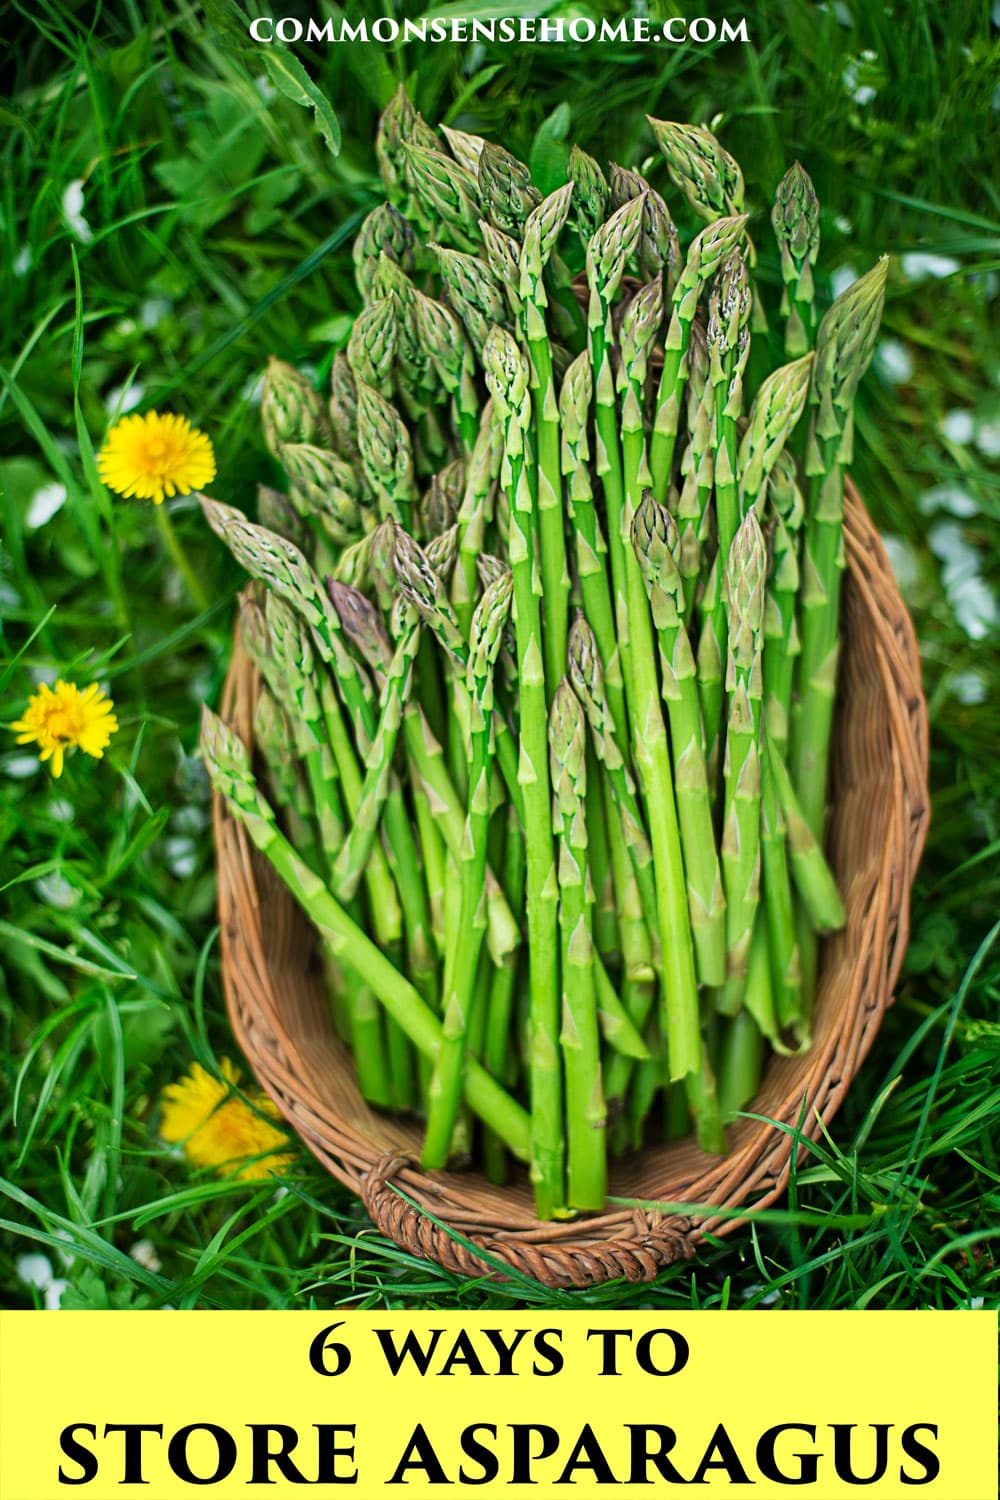
Rinse the asparagus under cold water to remove any dirt or debris. Trim about 1-2 inches off the woody ends of the asparagus spears. You can do this by gently bending the spear near the end; it will naturally snap where the tough part begins. See “How to Cut Asparagus” for more trimming tips.
Once your spears are clean and trimmed, you have several options. My preferred choice is to place about an inch of water in the bottom of a large glass. Then I place the asparagus spears in the glass, like flowers in a vase. If you like, you can tent the stalks with a plastic bag, but I don’t bother.
Trimming the stems allows the spears to soak up water and stay hydrated. Store the upright spears on the bottom shelf of the refrigerator for use in your favorite asparagus recipe.
Another option is to wrap the trimmed asparagus in a damp paper towel or cloth. This helps to keep the asparagus moist without being too wet.
One more option is to place the wrapped asparagus in a plastic bag or an airtight container. Leave the bg or container slightly open to allow for air circulation.
Store the towel wrapped or bagged asparagus in the vegetable crisper drawer of your refrigerator. The optimal temperature for storing asparagus is around 32°F to 36°F (0°C to 2°C).
How long does asparagus last in storage?
Consume fresh asparagus within 3-4 days of purchase for the best flavor and texture. Fresh picked asparagus will last longer, but store bought asparagus may have traveled a while to get to you.
Enjoy your asparagus raw in salads or with dip. Saute with butter or olive oil and a bit of salt as a side dish. Add the spears to stir fries, casseroles, or soups for that distinctive asparagus flavor.
Remember to Harvest Regularly!
If you have your own patch, remember to harvest spears every few days to keep the plants producing. If you don’t harvest them, the spears get large and tough, and the plants stop making more.
Note: While commercial asparagus tends to be similar in size, homegrown asparagus stalks vary more in thickness. I always went for the thinner stalks in the store, thinking they’d be more tender.
Would you like to save this?
I found out while picking that they emerge from the soil at the width they will be as they grow. Thinner stalks are not any younger than fat ones, and the fat ones were often more tender and juicy. Don’t fear the fat asparagus!
How to Store Cooked Asparagus
Allow the cooked asparagus to cool down to room temperature before storing it. You can spread pieces out on a plate or baking sheet to help them cool faster.
Once cooled, transfer the cooked asparagus to an airtight container or a resealable plastic bag. Make sure the container or bag is tightly sealed to prevent air from getting in, which can cause the asparagus to dry out and lose flavor.
Place the container or bag of cooked asparagus in the refrigerator. The optimal temperature for storing cooked vegetables is between 32°F to 40°F (0°C to 4°C).
Eat cooked asparagus within 3-4 days of cooking for the best flavor and texture. After this time, the asparagus may start to lose its freshness and become mushy.
When you’re ready to eat the cooked asparagus, reheat it gently in the microwave, oven, or on the stovetop until warmed through. Avoid overcooking the asparagus during reheating to prevent it from becoming too soft.
Long Term Asparagus Storage
For long term asparagus storage, you can freeze, dehydrate, freeze dry, pickle, or pressure can.
To freeze asparagus, wash, trim, and blanch the spears. Freeze in a single layer, then repack in an airtight container for storage. For best quality, use within 6-8 months. See “How to Freeze Asparagus” for detailed instructions.
For dehydrating, wash, trim, cut, and blanch the spears. Dry at 125°F (52°C) until leathery and brittle. For best quality, use within 3-5 years. See “Dehydrating Asparagus” for a step by step guide and oven drying instructions.
For freeze drying, wash, trim, cut, and blanch the spears. Use a home freeze dryer to dry until light and airy. Store in Mylar or glass with an oxygen absorber. For best quality, use within 5-10 years. See “How to Freeze Dry Asparagus” for full instructions.
Pickling adds unique flavor to your veggies. Our lacto-fermented asparagus is also probiotic, and makes a great addition to salads, snacks, and sandwiches.
Asparagus can also be pressure canned. You must use a pressure canner because it is a low acid food. I don’t can it because I don’t care for the mushy texture that canning produces.
For asparagus canning instructions, see “Canning Asparagus”.

This article is written by Laurie Neverman. Laurie grew up in the kitchen, learning baking and home cooking from her momma. At age 15, she and her mom and two sisters created Irene’s Custom Cakes & Catering, which was her summer job through most of high school and college.
Last updated in 2024.
Thanks for all the asparagus info. I grow lots of asparagus, but never liked the texture of frozen asparagus, until my sister- in- law gave me a recipe for asparagus soup which freezes beautifully. Takes more room in the freezer than asparagus, but to me it’s worth it.
Frozen is definitely not the same as fresh, no matter what some people claim. Of all the preserving methods, the texture of the pickled asparagus is my favorite, followed by the freeze dried. I like how small the dehydrated asparagus gets, because it takes up so little storage space. Soup is a good option, whether you’re freezing as soup, or making soup with the preserved vegetable.
Can u freeze asparagus soup ?
Yes, you should be able to freeze it, but if it’s a cream based soup the texture may not be quite the same once thawed.
Hi Laurie,
I was just thinking the other day about our new garden in our new place. We don’t have one this year (2016) because it was too much to do this spring when we moved. I was thinking I have to start a whole new asparagus bed. I have not had good luck at our last place. I would haunt the bed all spring and then after a few weeks of twice daily checks with no results, I would slack off and then when I would remember to go back…too late…they were too tall to be good tasting. I have committed to being more diligent.
I have a good recipe that I made up and it’s a nice casserole to tuck away in the freezer for early fall.
I may have to fudge on the exact amounts here….and I used canned asparagus….so adjustments would have to be made if using dehydrated or frozen.
Arroz con Asparago
2 cups leftover rice. (could be white, brown or wild)
SOS* or can of cream of asparagus soup
2 cups of leftover cooked, shredded chicken
1, 8 or 12 oz can of asparagus
1 cup of leftover Mexican beans…pinto or black
2-3 stalks of scallions or 1 cup dehydrated scallions
Cilantro, cumin, salt and pepper to taste
Roasted chopped Mexican (mild or hot) peppers, skinned and seeded, to taste
Milk to mix
Mexican cheese blend
Preheat oven to 350 F. Lightly grease a 2 qt casserole dish.
Combine all ingredients except cheese. Pour into casserole dish and sprinkle cheese on top. Bake for 40-50 mins.
Mix all ingredients in a big bowl except for cheese.
As I finish writing this I have a sense of deja vu….hope I haven’t already sent this to you…apologies if I have.
Thanks for a great article about asparagus. It’s one of our favorite veggies.
Cheers,
Pam
Oops, forgot to address the “SOS” asterisk.
* http://www.onegoodthingbyjillee.com/2012/03/soup-or-sauce-sos-mix.html
Pam
The only suggestion I have is when you boil or steam them, split the stock of each spear about half way up the length, so the tougher part will soften more or less at the same time as the tender tips.
Thanks for the tip. With fresh picked local it’s less of an issue, because they tend to be more tender from top to bottom (In my experience), but for store asparagus that have had to travel, this would be a good idea.
Or you can use a vegetable peeler on the bottom portion that makes it both quicker to cook and tender to eat!
I’ll try that. i have used the veg peeler at the bottom of tough ones but it doesn’t always work.
Thanks so much for including my recipe in the roundup. Love asparagus!
Thanks for contributing!
I take my broke off bottom parts dehydrate the grind them in my bullet machhine to make flour use that to make soup do lots of spices that way you can make a pumpkin pie from pumpkin flour love to dehydrate
That’s interesting. I’ve never seen a recipe for pumpkin pie made from pumpkin powder.
Glad this was helpful to you, Rachel. I'll take a peek at Healthy 2day 2morrow. 🙂
This is a very informative post for someone like me who hasn't learned these tricks from my mom or grandma's. I would love to invite you to share this and other articles that may fit to a recently new link up called Healthy 2day Wednesdays for sharing tips, suggestions, going “green” ideas, recipes, etc every week!
Thanks for stopping by, Debi. It sounds like you need to pick your neighbors brains and get all the hot tips. 😉
i love asparagus and have always wanted to grow it. My neighbors asparagus patch is so neat and I love investigating it and trying to figure out when and how to plant it. Thanks for all that info above. I'll keep that. debi
Hi! We are eagerly awaiting our first harvest. Takes 3 yrs from seed. If you can’t wait, buy some crowns.
Thanks, Cyn! I shared the asparagus at the real food and nutrition class I've been teaching, and everyone enjoyed it. Good luck on your class. 🙂
I am going to copy/paste this to try this week! I am teaching a class this fall at our CSA on lacto-fermenting and am trying to get as much variety under my belt as possible beforehand!
Tami – given that you and I are both still here, it can't be too bad. 😉 From what I've found, its' only the asparagus berries that are poisonous (http://www.asparagus-friends.com/asparagus-knowledge/poisonous-asparagus/)
"The berries contain several furostanol and spirostanol glycosides and the seeds the chemically not examined bitter substance spargine. Sulfur compounds have been detected in the shoot parts, which are considered partly responsible for the sometimes occurring skin reactions.
After the intake of larger amounts (more than 5-7) of the ripe berries, people have been diagnosed with vomiting and abdominal pain. After the peeling of asparagus or getting in contact with the plant, predisposed people may suffer from allergic reactions and an inflammation of skin, eyes, and allergic rhinitis. Some asthmatic attacks are recorded.
After the eating of smaller amounts of these berries, people should drink sufficient water or tee. When more than 7 berries have been eaten, one may consider administering charcoal tablets. Primary removal of toxins is recommended only after the intake of much larger amounts."
This site agrees: http://www.asparagus.org/maab/faq.html
"Can asparagus be eaten raw?
Although most people prefer asparagus cooked in some way, it is perfectly safe to eat asparagus raw. Just rinse it well in warm water to remove any sand and serve cold with a dip."
Oddity Acres Clan – the salt acts as a preservative, but you can reduce it somewhat, especially if you are storing it in the fridge, potentially by as much as half. Also, if you rinse the spears before eating, it will reduce the salty taste.
I have found with the pickling of some foods, using 2tbs of salt is far too strong for my familys tastes. Can I reduce the salt if using so much why?
A friend of mine recently told me that asparagus was poisonous to eat raw. I had never heard that before and had been happily munching away on raw asparagus for years. Have you ever heard that before?