
Root Cellars 101 – How to Build & Use One Successfully

This post may contain affiliate links. Read my full disclosure here.
A root cellar is one of the simplest and most reliable ways to keep food cool without electricity. Long before modern refrigeration, families used natural cooling to store vegetables and fruit through the winter.
I don’t know about your area, but we’ve had a lot more power outages in recent years. It makes me appreciate this type of food storage even more. A root cellar doesn’t replace every other preservation method, but it can keep a surprising amount of food in good condition without using any power at all.
When properly designed, a root cellar maintains cool temperatures, high humidity, darkness, and enough air circulation to slow spoilage and keep produce fresh for months.
Whether you want to build a root cellar, retrofit an existing storage area, or simply make better use of natural cold storage, we’ll walk through the basics—from vent pipe placement and humidity to the best root crops and other foods to store.
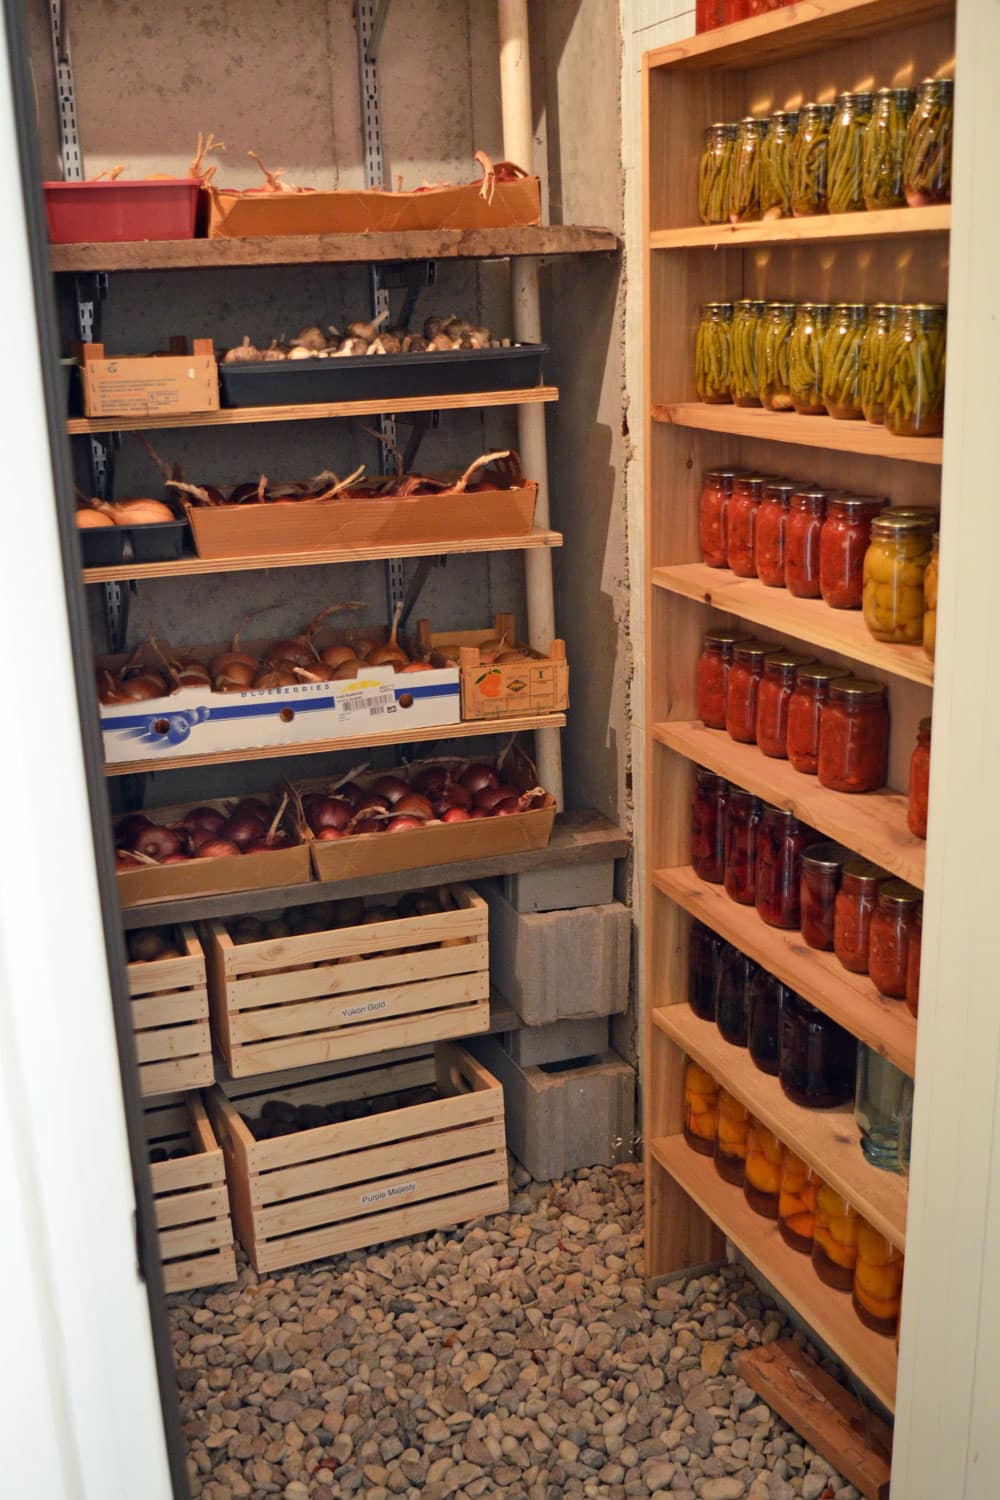
The photos in this article are from our root cellar in northeast Wisconsin. It’s under our front porch and accessible from the basement, but sits outside the heated envelope of the home. We use it to store vegetables, home canned goods, wine, and more.
Free Root Cellar Resource Pack
Planning a root cellar—or looking for ways to improve the one you already have?
Get our free Root Cellar Resource Pack, including:
- PowerPoint slides from my Homesteaders of America presentation, How to Design, Build, and Use a Root Cellar
- Printable Root Cellar Storage Requirements Chart
- Root Cellar Planning Checklist
Keep the resources handy as you plan your space, choose what to store, or troubleshoot an existing root cellar.
Get the Free Root Cellar Resources →
Table of Contents
What is a Root Cellar?
A traditional root cellar is an underground storage space for vegetables and fruits. They sometimes include storage for canned goods or other foods. Root cellars take advantage of cool, moist underground conditions to store food without electricity.
5 “Must Haves” for Building a Root Cellar
There are five major elements that a root cellar requires:
- Ventilation: Some fruits and vegetables give off ethylene gas, which can cause other produce to spoil. Also, a tightly sealed cellar increases mold risk. Make sure fresh air can get in, stale air can get out, and air can circulate around the produce.
- Earth-shelter: Soil insulates and maintains a cooler temperature. A packed earth floor or gravel floor is better than concrete for keeping moisture (humidity) levels higher. Avoid tree roots.
- Humidity: A high humidity level of 80-95% keeps produce from drying out. This may cause canning jar lids to rust, so be sure to check lids and rotate stock if you store canned goods in the root cellar. Build in well-drained soil, and avoid flood prone areas.
- Darkness: Light can trigger sprouting, so if you have a window in your root cellar, keep it covered, and don’t leave the lights on.
- Shelving/Storage bins: Wood shelving and bins are naturally antibacterial. Wood also conducts heat more slowly than metal, and doesn’t rust. Avoid treated wood, and stick to those that are naturally rot resistant.
How much does it cost to build a root cellar?
Root cellar costs vary tremendously depending on what you already have and how much work you do yourself. A simple basement conversion or DIY underground storage area might cost around $500. A larger purpose-built cellar can easily cost $2,500 to $5,000 or more.
If you’re trying to keep costs down, start by looking at the space you already have. Converting a suitable basement corner is generally less expensive than excavating and building a separate structure. Doing some or all of the labor yourself also reduces costs.
For new construction and retrofits, you may be able to design the space to serve more than one purpose. A reinforced root cellar may also function as a storm shelter or safe room. See our Safe Rooms Checklist for more information.
10 Tips for Root Cellar Fruit and Vegetable Storage
Key storage tips to remember:
- Choose varieties bred for storage. Late-maturing varieties often store better than early varieties. Healthy produce from healthy plants generally keeps longer, too.
- Store only sound produce. Set aside damaged or bruised vegetables for immediate use or other preservation methods. Check stored food regularly and remove anything that’s starting to spoil.
- Cure crops that need curing. Potatoes, sweet potatoes, onions, garlic, and winter squash all benefit from proper curing before long-term storage.
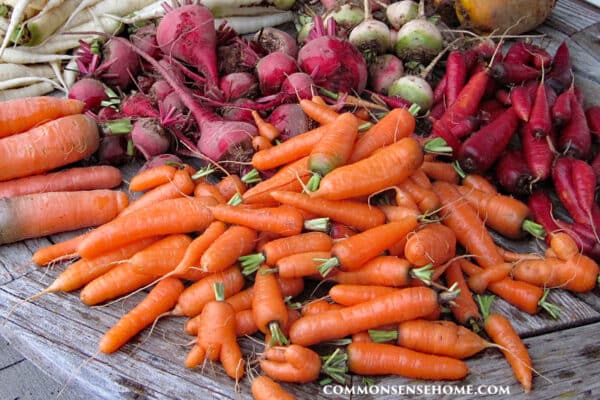
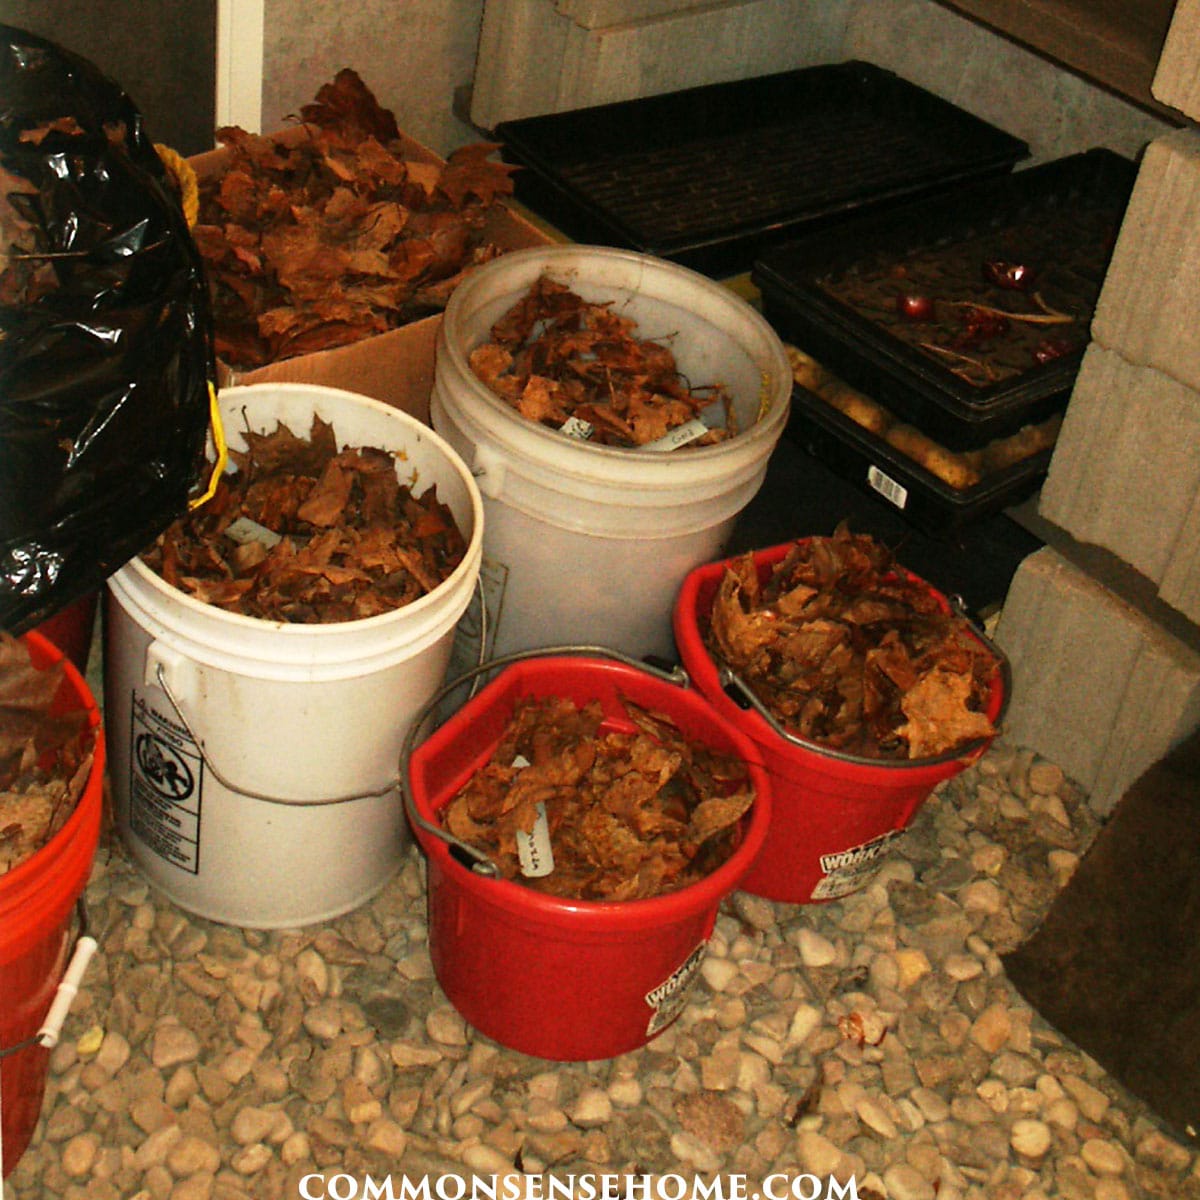
- Don’t scrub root vegetables clean. Brush or wipe off excess dirt. We pack many of our root vegetables in lightly dampened leaves. Fresh straw, sand, or sawdust may also be used, although sand and sawdust can be messier.
- If you wash produce, dry it well. Excess surface moisture encourages rot. Crops that require curing should still be properly cured before storage.
- Work with the conditions you have. Perfect conditions aren’t always possible. Use the microclimates within your storage area. Cooler air settles, so carrots may do better lower down while winter squash prefers a warmer location higher up.
- Separate ethylene producers from sensitive crops. Apples and pears release ethylene gas as they ripen. Good ventilation helps, but physical separation is even better when possible.
- Separate strong-smelling produce. Cabbage, turnips, and similar vegetables may transfer odors to other foods. Keep them away from produce that readily absorbs odors—and preferably somewhere the aroma won’t drift into your house.
- Don’t let produce freeze. Once most vegetables and fruit freeze and thaw, cell damage leaves them soft and prone to rot.
- Monitor your conditions. A thermometer and hygrometer take the guesswork out of root cellar management. Keep the door closed as much as practical so you don’t lose your cool, moist storage conditions.
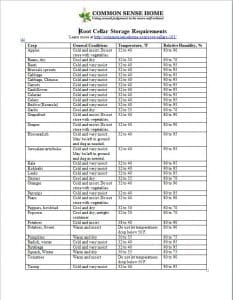
Root Cellar Fruit and Vegetable Storage Chart
Different crops prefer different storage conditions. Our printable Root Cellar Storage Requirements Chart gives recommended temperature and humidity ranges for a variety of vegetables and fruit.
Click HERE or on image below to download Printable PDF version of Root Cellar Storage Requirements.
For crop-specific storage tips, see:
- How to Store Potatoes Long Term
- Storing Onions so They Last
- How to Store Garlic
- When to Harvest Pumpkins (and the Best Ways to Store Them)
A root cellar is only one piece of a good food storage system. Some foods are best kept cool and moist, while others are better canned, frozen, dehydrated, fermented, or stored dry.
See Home Food Preservation – 11 Ways to Preserve Food at Home for more options.
Types of Root Cellars and Natural Cold Storage
Natural cold storage options include (click on any item in the list to jump to more information below):
- Basement or Under Porch Root Cellar – accessible from inside the home
- Traditional Root Cellar – buried below ground, accessible from outside
- Earth Berm – at ground level or partially above ground
- Above Ground Root Cellar – bermed, spring cooled or other above ground root cellars
- Barrel in the ground
Before you start digging, check your water table and soil depth. An underground root cellar is a poor choice if you’re likely to end up with an underground swimming pool.
Root Cellar in Warm Climates
Root cellars don’t work as well in warmer climates, because the soil temperature isn’t as cool.
That doesn’t mean natural or low-energy food storage is impossible. Southern gardeners also have the advantage of a longer growing season, which can reduce the need to store an entire winter’s supply at once.
See Above Ground Root Cellars & Other No-Dig Food Storage for more ideas. The article “Build Your Own Walk In Cooler with a CoolBot Controller and A/C Unit” shares how to build low cost cold storage.
Retrofitting a Root Cellar in an Existing Home
One of the easiest ways to build a root cellar is to section off part of an existing basement.
Old unheated basements with dirt floors are particularly well suited to food storage because they tend to stay cool and naturally maintain higher humidity.
If possible, choose a north-facing corner with a window. The window makes it easier to add ventilation. Replace or cover the window with exterior-grade plywood and run the vent pipes through the plywood. This also blocks unwanted light.
With a north-facing corner, you may have two exterior walls exposed to cool soil. Insulate the interior walls and ceiling to separate the root cellar from the heated part of the house.
The root cellar itself should not have standard heating or cooling. Insulate heating ducts, hot water pipes, or other heat sources that run through or near the space.
Add a Root Cellar to a New Home
If you’re building a home, look for spaces that can do double duty. Many houses have a small concrete exterior porch with foundation walls and dirt backfill underneath. Since the foundation is already there, that space may be converted into a root cellar instead of simply being filled.
That’s what we did with ours.
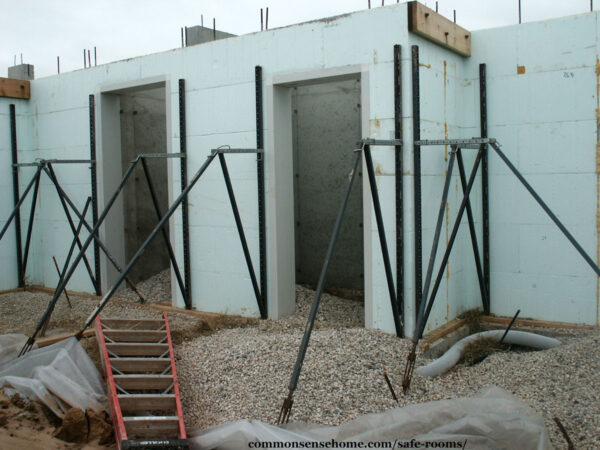
Our root cellar is under the front porch. During construction, we used full foundation walls, an insulated exterior-grade access door from the basement, and two four-inch vent openings.
The walls adjoining the heated basement are insulated. The exterior walls in contact with soil are not, because we want heat exchange with the surrounding earth.
Our cellar is roughly 6 by 8 feet. That’s enough space for a good supply of root vegetables, winter squash, canned goods, and other storage items without taking up a huge amount of the house.
Building a Root Cellar Outside the Home
The same basic rules apply to a freestanding cellar: keep it cool, dark, ventilated, and earth sheltered. A north-facing entrance is ideal because it reduces solar gain.
For a traditional underground or bermed cellar, aim for at least one to two feet of soil cover where practical. More earth generally means more stable temperatures.
Some people use new precast septic tanks, concrete culverts, or purpose-built root cellar kits.
Whatever you choose, make sure the structure is engineered to withstand the pressure of wet soil.
Don’t simply bury a shipping container. Shipping containers are designed to carry loads at their corners, not to withstand tons of soil pushing against their sides and roof.
Traditional Root Cellar
This is what most of us think of when we hear the phrase “root cellar”. There are insulated doors that lead down into the earth. These cellars go down or into the side of a hill.
Walls are concrete, cinder block, or more creative materials like old tires. You need to make sure the roof and walls are well supported to avoid collapse. Engage an architect or engineer to ensure your safety.
Earth Berm Root Cellar
Above ground root cellars are usually partly sunken with earth mounded on 3 sides and the door avoiding the direct sun. See the Above Ground Root Cellars post for more information.
Barrel in the ground for (Zones 6-9)
This is a winter storage option. The size and depth depends on the zone you live in. (For more information on zones see: Plant Hardiness Zones & Microclimate.)
Take a large container, with holes drilled in the bottom and top. Bury it level with the soil with a bale of hay as an insulating cover. This will work into zone 7 and possibly into zone 6 depending on cover and conditions.
Barrel in the ground for (Zones 3-6)
Buy one 55gal large heavy duty garbage can, and a 32gal smaller garbage can that fits inside the larger one. Both the larger garbage can and the smaller one need holes in the bottom.
The inside can needs a cover with vents / screen. Cover exterior holes with screens to keep rodents out. It also needs significant insulation above it (over it). Bales of hay, or piles of leaves can insulate it.
Prepare a hole that is deeper than the large garbage can, with rocks and gravel in the bottom to create a simple French drain. Another trick is to dig a very deep, large hole next to the garbage can hole and fill that hole with rocks. The deeper hole acts as a drain for your shallower garbage can root cellar.
Once you have the large garbage can in the ground and secure, lower the smaller one into the larger barrel. Store food in the small barrel.
When you need access, grab from the top or pull out the smaller barrel. This makes it easier to reach food the bottom. There are many variations on this type of in ground storage.
How to Get Better Results from your Root Cellar
Once you have a storage space, a little monitoring and adjustment can make a big difference. A root cellar isn’t a refrigerator with a thermostat. Conditions change with the seasons, weather, location, and what you put inside. Learn how your cellar behaves and work with it.
Root Cellar Temperature
Ideally, many root cellar crops prefer temperatures not far above freezing. Around 40°F (4.4°C) is a useful general target, although individual crops have different requirements.
The temperature of the soil several feet below ground is much more stable than the air temperature, but it varies with latitude, soil type, moisture, groundwater, and season.
In extreme cold, parts of a root cellar can freeze—especially near the exterior door and vent pipes.
If we’re expecting a short spell of severe subzero weather, we move vulnerable food away from the vents. In extreme conditions, you may need to temporarily reduce airflow through the vents. Don’t leave them closed permanently. Ventilation is important.

This soil temp database will likely be more accurate. Your root cellar is likely to be slightly warmer than either estimate, on average. Winter will be cooler than summer, which is what makes them useful for storage crops.
Root Cellar Ventilation
Poor ventilation is one of the most common root cellar design mistakes. People naturally think, “I want to keep the cold in,” so they build an airtight storage space. Unfortunately, that can trap ethylene gas and excess moisture along with the cold.
For passive ventilation, use two vent pipes, about 3-4 inches in diameter. Place the exhaust vent high, near the ceiling, where warmer stale air and ethylene gas can escape. Bring the intake vent down near the floor, where it introduces cooler fresh air.
Ideally, put the vents on opposite sides of the room to improve air circulation. Ours are next to each other due to building constraints, and they still work reasonably well. Real houses don’t always cooperate with textbook diagrams.
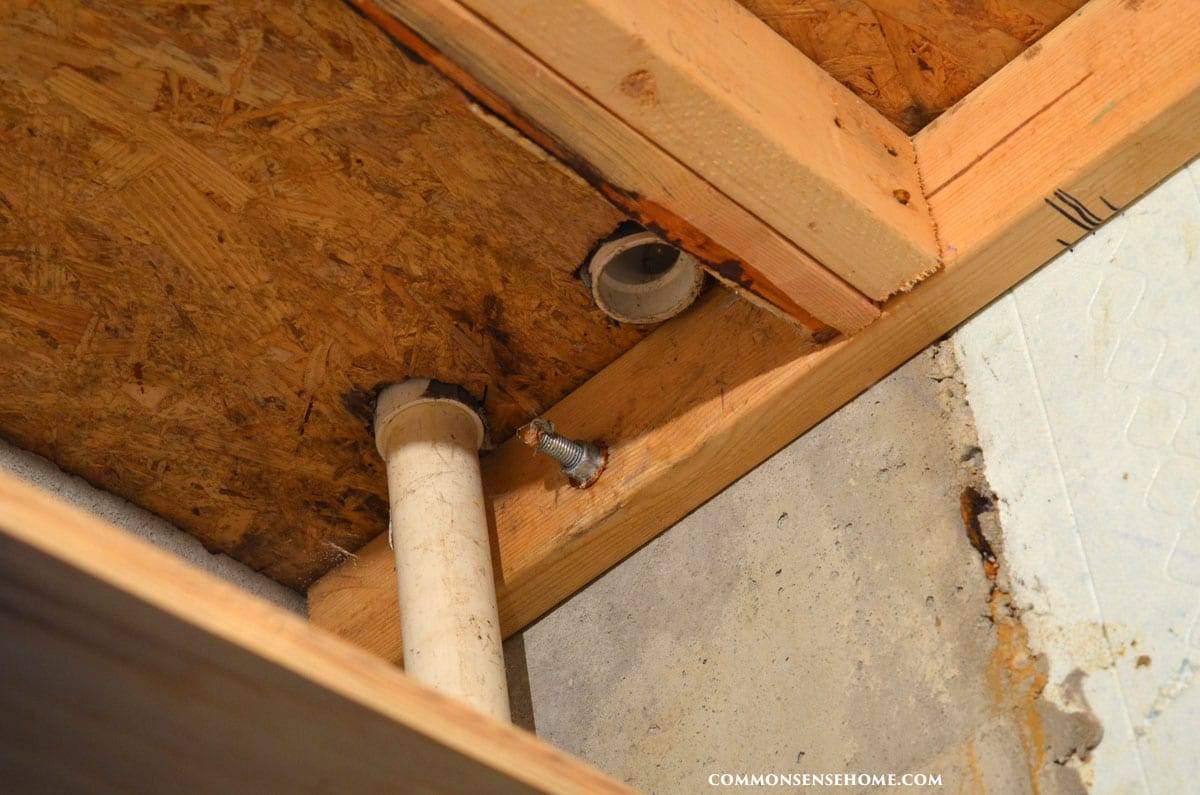
For our roughly 6-by-8-foot cellar, we use four-inch PVC vent pipes.
Larger storage areas may require larger vents or additional ventilation. Screen exterior openings to keep out mice and other small animals, and design the vent caps so rain, snow, and debris can’t fall into the cellar.
Preventing Ethylene Gas Problems
Apples, pears, and some other fruits release ethylene gas as they ripen. Ethylene can shorten the storage life of sensitive vegetables and contribute to sprouting, yellowing, bitterness, softening, and other quality problems.
When possible, separate heavy ethylene producers from sensitive crops. Because our root cellar is fairly small, we generally store fruit in our insulated garage or on the enclosed front porch instead of packing everything together.
This same principle applies to the produce drawers in your refrigerator.
Root Cellar Lighting
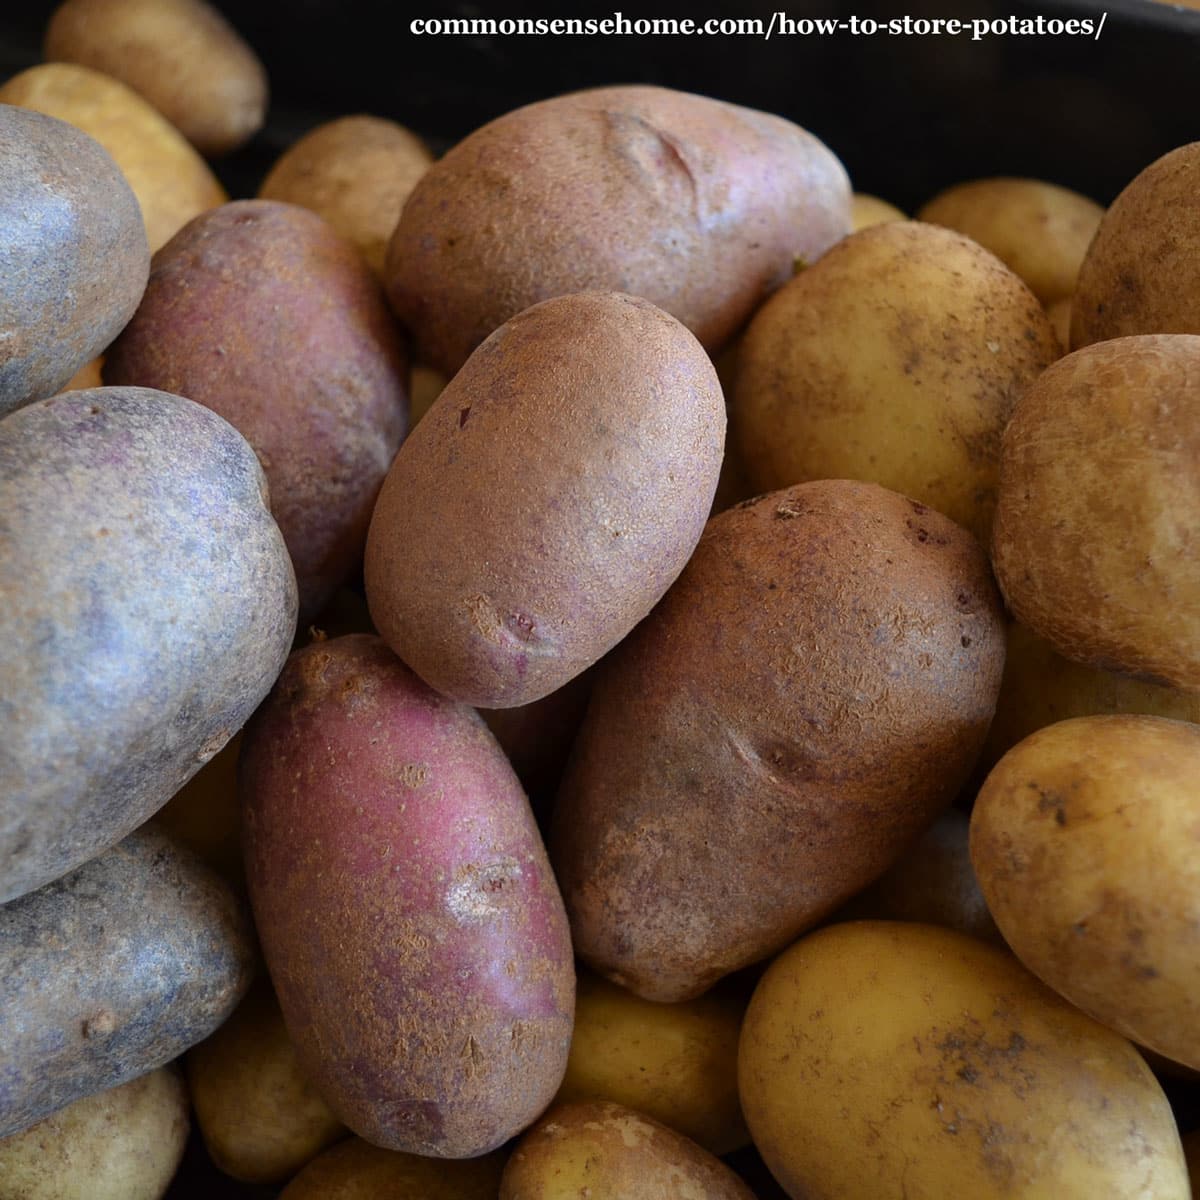
Food storage likes the dark. Light encourages sprouting and causes potatoes to produce chlorophyll and potentially higher concentrations of glycoalkaloids. It can also degrade the color and quality of canned and dried foods.
If you’re venting through a window, cover the unused portion of the window. It’s fine to install a light so you can inspect your food safely—just turn it off when you leave. We sometimes use burlap or newspaper over bins to block light while still allowing air circulation.
Monitoring Humidity and Temperature
A simple thermometer and hygrometer tell you whether the cellar is actually performing the way you think it is. Most root crops prefer high humidity, often around 80 to 95 percent. A dirt or gravel floor naturally helps maintain moisture levels.
Electronic temperature and humidity monitors are also available if you want to track conditions over time. I keep a simple Digital Indoor Thermometer in ours.
Electronic monitoring is an option if you want more precise records. The Govee Thermometer & Hygrometer has a simple display and can sync via Bluetooth.
Keep Things Moist But Not Wet
If stored vegetables start to shrivel, your root cellar may be too dry. A dirt or gravel floor often provides enough natural moisture. In dry conditions, lightly misting the storage area or using a shallow container of water may help increase humidity.
But more isn’t always better. Standing water, dripping condensation, or constantly wet produce encourages mold and bacterial growth. The goal is humid air, not wet food.
Ideal Root Cellar Shelving
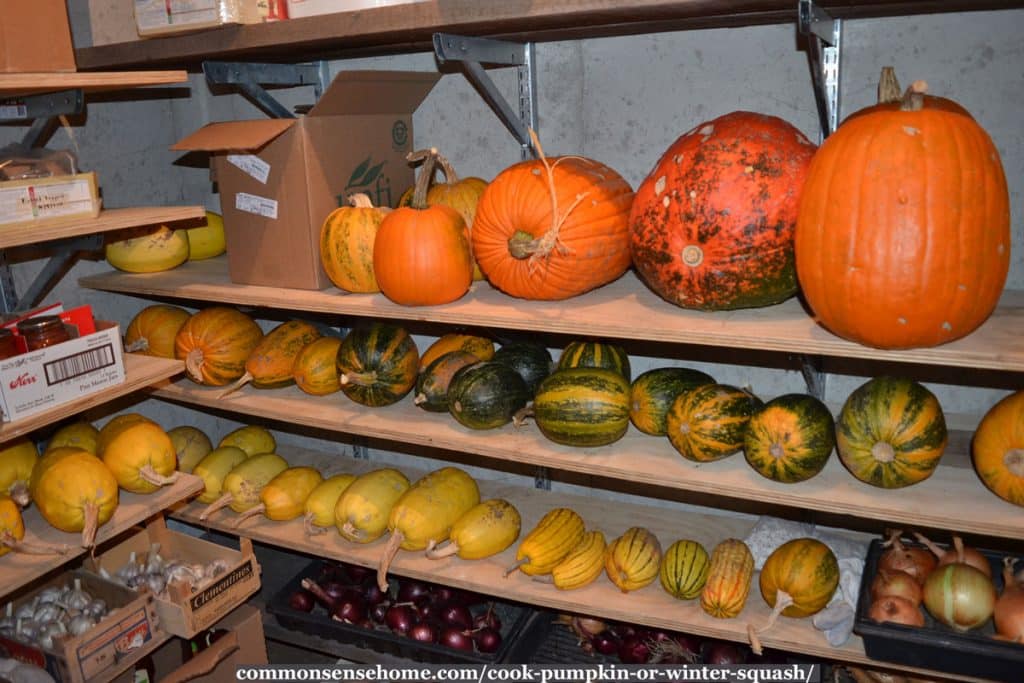
Shelving should maximize your storage area without blocking airflow. Leave a gap between shelves or bins and the walls. Don’t pack produce so tightly that air can’t circulate.
Remember that cooler air settles. Crops that prefer colder conditions can go lower, while foods that tolerate slightly warmer conditions can go higher. We store carrots and beets in buckets or bins packed with leaves. Our gravel floor helps maintain humidity.
Recommended Root Cellar Books
The classic root cellar guide is the book Root Cellaring: Natural Cold Storage of Fruits & Vegetables by Mike and Nancy Bubel.
The book contains detailed explanations of no electricity vegetable and fruits storage with specific temperature and humidity recommendations for each variety. There are also good photos and diagrams, which I really like.
The Complete Root Cellar Book is more recently published, and also received good reviews. Recipes from the Root Cellar helps you use your storage crops in the kitchen.



Make Your Food Storage Work for You
A root cellar doesn’t have to be perfect to be useful.
Our own cellar has taught us that the best storage system is one that works with your climate, your home, and the foods your family actually eats. We use the root cellar where it makes sense, the garage or porch for some crops, and canning, freezing, dehydrating, and other preservation methods for others.
The goal isn’t to recreate the way food was stored 150 years ago. It’s to use simple, reliable methods to make the most of the food you grow or buy—and build a little more resilience into everyday life.
For more practical food storage help, see:
- Long Shelf Life Foods – What Lasts Best (with Chart)
- Preparedness Storage – Finding Room and Keeping it Safe and Sound
- Home Food Preservation – 11 Ways to Preserve Food at Home
And if you’re still in the planning stage, don’t forget to grab the Root Cellar Resources above.

This article is written by Laurie Neverman. Laurie and her family have 35 acres in northeast Wisconsin where they grow a food forest and annual gardens. Along with her passion for growing nutrient dense food, she also enjoys ancient history, adorable ducks, and lifelong learning.
Originally posted in 2010, last updated in 2026.
I put front porch on my parents house, The walls are block 9′ tall and the floor is concrete. The ceiling of the root cellar is metal decking with concrete poured on top to make the floor of the porch above. The exterior is about 2′ out of the ground. I have an insulated exterior door going into the basement of the house. I haven’t vented it yet because I wasn’t sure what i needed to do. It gets alot of condensation on the metal decking on the ceiling year round. Your post says 2″ pipe one high, and one low. With my foundation only sticking 2′ out of ground should i run one pipe as high as i can get it and other pipe down about 18″ so it’s not too close to the ground? Or should i run an elbow and pipe down the wall for the lower pipe so it’s closer to the ground?
thanks
The wall penetrations of our root cellar are at the same height. What’s different is that one of the penetrations is connected to an elbow with a tube that goes down to near floor level inside the cellar itself, and one is a straight shot in near the ceiling of the cellar. Does that make sense?
I talked it over with my husband, and we both agree that if you have the option 2 1/2 to 3 inches might be a better size for the ventilation pipes.
Yeah this makes sense. I didn’t put the size of the room in there but it’s around 8×12. I will put the vents in and try it. do you cap the intake off when it’s hot out? I live in central PA so our summers are pretty hot. Also do you think i will have trouble with freezing in the winter? It gets down around 0 plus the wind chill in the winter?
I have never had freezing issues here in Wisconsin where it is much colder, although my vents are 2 inch diameter. (I still don’t think you would freeze with larger vents. I keep it open in summer just to avoid stagnant, musty air building up. I haven’t work with them in a warmer climate such as PA, so you might need to experiment and see what works for you.
you can use a central plastic pipe to the outside with a vent cap to keep bugs out, run it in and turn down with a elbo go almost all the way to floor. Do this on each end of room. on outside put a foundation vent in center of room above ground,,,use the holes in the block and go down into the room. cut out the block and use the holes to vent through. the foundation vent should be one that will close automatically in very cold weather. my root cellar is 20 ft long and 8 ft wide. it is under a outside porch with concrete, we insulated under the concrete and put treated plywood under it to protect the insulation. works very well as we made 3 ft wide 8 ft long frames with rat wire stapled to the bottom, set it on 8 in blocks and went all the way down the 20 ft side and across 8 ft end. we store 20+ bushels of potatoes in this been with shelves above on all sides. a solid wood door opens from basement into this. Use 3 lights on ceiling with switch on outside of cellar, we have used the left over potatoes for seed for 5 years now. also store seeds for green house here also..with out venting we had a bad mold problem,,,after installing vents mold went away in a few weeks. good luck with yours
Thanks for sharing your experience.
This is great for your location. However I live in the low country of South Carolina. We have excessive ground water. It is only cool from late October to early March.
Any suggestions?
The post “Above Ground Root Cellars” may give you some ideas.
What do you know about options for root cellars in the south? We don’t have basements because of the water table and my house sits on a slab on the ground, so there is no crawl space. What are my options? I’d love to learn more about this!
Angel – I don’t have any experience with southern conditions and I haven’t been able to find a good resource on the subject (if one exists). You want to use physics in your favor. Even with high heat and humidity, the ground stays somewhat cooler. Possibly not cool enough that you could have a full blown root cellar, but maybe enough to buy you some storage time. If you could build a storage area that was earth sheltered or very well insulated, even above ground, but with a floor that was gravel (not insulated), that storage area should stay cooler. Think old-fashioned spring house, where they had thick walls and a stream running through the floor. You also want to make sure to include ventilation that draws from bottom to top to carry away ethylene gas, which promotes spoilage. It might make sense to have your intake run below ground level (if you can, or have it run through a mound of dirt) to cool the air before it enters, and vent near the top to pull off the warmest air. I haven’t tried anything like this because of where I live, but that’s the direction I would take. Good luck!
Thanks so much, this helps my research!
Rather than a root cellar, you may have to do more than one planting but in smaller batches. In the south, you have the advantage of an extended growing season which would make storage a non-issue.
Thanks! Our winters can be rough, but there are some advantages to living in the upper Midwest.
What a great root cellar…and your photos are awesome…a great list as well. Unfortunately, living on the west coast, root cellars are not common…wish I had one…but too much rain.
Have a great week.
What a fantastic & informative post! I'll be bookmarking it for future use! We'd love to add a root cellar, but first we need to regulate our food production and grow enough to make it worth the while 🙂 (Our potatoes were gone before the month we harvested in was out.) But I would definitely love to store more food rather than canning and freezing so much. Thanks!
How cold is "very cold"? Are we talking permafrost? The ground temperature stays relatively constant, no matter what the air temperature. Here's an example: http://www.duanesworld.net/duanesworld.net.sensors.htm
An insulated area above ground will buy you extra time in storage, too, especially in cold climate areas. We keep apples in the garage until it gets well below freezing outside.
You should see if you can find the root cellar book at your local library (If you don't care to buy a copy). They include a lot of different options for storage with minimal energy inputs, above and beyond what we normally think of as "root cellar".
My dream is a root cellar. But alas we live in a very cold climate and the cellar would need to be very deep and then we will have water issues. There is no sloped land on our small lot, and the water table is high. Any ideas?
Every decision has its good and bad side. My husband and I are debating moving, too. We love our home and our neighbors, but it's really tough being apart during the week (he works in a nearby city two hours away). There are no easy answers, especially in these economically uncertain times.
The root cellar was one of the best and easiest things we included in the house. I love it!
Another useful post Laurie. We have been teetering on whether or not to stay in our (suburban) home and build a root cellar, add solar or wind backup, or move out to a more remote location that already has these things and a plentiful supply of water, but you make a cellar look so good and easy… Making decision tougher. lol.
Ideally separate rooms would be preferred, and since you're building new you may be able to put in a partition at minimal cost, but the ventilation is the biggest factor. If you've got a way to get that gas out you should be okay.
Happy Mother's Day to you, too, and thanks for stopping by!
Thanks for clarifying about the fruits and veggies – that makes sense. I got my book back from my friend and thumbed through it and had seen a plan with a separate room but didn't get to read about it so I began to think it might be necessary to have two areas, but I'm glad to know that separate bins and good ventilation is all that is necessary. If I put the cultures out there, they will be sealed with lids – I'll do the actually "culturing" in the house, but would like to store them out there once they are done.
Thanks for all the help on the root cellar! Happy Mother's Day!!
Amy – I'd say yes to fruit and veggies in the same cellar, just not in the same bins, especially if you ventilate properly. You've got the book, so you've got detailed recommendations for the type of cellar you're looking at building.
If you hit the temperature range you're looking for, keeping cultures in there should be no problem. Before electricity, a spring house was often the preferred option, but I'm sure folks made due with whatever they had available. The only way to know for sure will be to try it. Mine tends to stay a bit warmer than ideal, so I haven't tried it. Also, there will be an assortment of microbes associated with the food in storage, so they may influence the composition of your cultures.
I do keep cultured veggies (my sauerkraut) in small (1 gallon) crocks in my canning pantry. I bring up one crock at a time, put a quart of it in the fridge and the rest in the freezer (to keep it live but dormant). I've still got kraut packed in good condition from last fall. (Which reminds me, I need to bring up another crock this week.)
Laurie, this is so good. I'm trying to be patient as it will probably be at least a year before we can afford to build the root cellar which will go into the side of the mountain behind our house. I'm wondering, can you section off a small area with a wall and put in extra ventilation so as to do fruits such as apples in the same root cellar? I'm also thinking that I could keep some of my dairy cultures in there – especially if the electricity were to go out. What do you think?
hmmmm…very different environment. I imagine heat and moisture are the biggest problems. If you figure something out, please let me know. Your growing season goes pretty much year round, no? So even if you were only able to keep foods a bit cooler using earth sheltering it would probably help. Thanks for stopping by. 🙂
Awesome post! I have been researching this very subject lately. I live in Florida though and have very few Root Cellar options. 🙁 Great post!
Hi Carol. Thanks for stopping by. I haven't been on THL too much lately – just too far behind in everything! I hpe you had a successful gardening season.
Hi Laurie, I found you on Homeschool Lounge. I’ve started a garden blog, too.
The red and white buckets have leaves in them, packed around layers of carrots and beets. I have also tried packing carrots in sawdust and sand, but have found leaves to be the cleanest option (very simple to brush off the root) and they also hold enough moisture (but not too much) so the carrots stay hydrated but don't rot.
Because we don't go through a huge amount of potatoes, I lay those out in trays on the shelves along with the onions and garlic. I keep the potatoes as low as possible because they prefer cooler temps. Last fall all shelves and half the floor space was full (this photo is from an earlier season – 2007, I think).
leave the green tops on the carrots and layer them in dry straw,not hay,but straw, they stay nice and clean and no mold like you might get with leaves.
Every time I’ve tried storing carrots with tops, they’ve wilted, badly, in a day or two.
What are in the red and white buckets?