9 Thrifty Pumpkin Decorating Ideas – All Under $10!
Would you like to add some cheerful fall decorations without breaking the budget? I have nine pumpkin decorating ideas that you’re going to love. We’ll create nine different ideas, all for under $10! You can combine fresh pumpkins, flowers and herbs from your garden with common pantry and craft items to brighten any room.
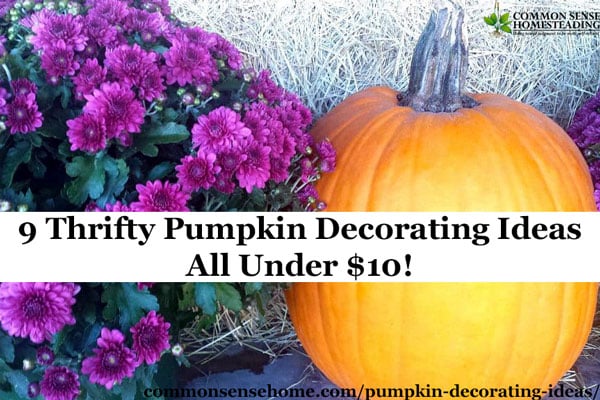
9 Sensational Pumpkin Decorating Ideas – All Under $10!
The key to these pumpkin decorating ideas is to use what you have on hand. Basil isn’t blooming? No problem. Use pine boughs. Running low on pop corn? Replace the pop corn with dried split peas. Garden is done for the season? Use dried grasses and seed heads, trimmed branches and evergreen boughs with dry floral foam.
You can create an elegant look without spending a lot of money. I’m betting many of you won’t even have to go to the store to re-create our pumpkin decoration ideas.
Getting Started- How to Decorate With Pumpkins
Ideally, you want to use a variety of textures and colors. Use a combination of soft and spiky, light greens and dark greens, tall and short. Sometimes less is more and sometimes more is better – it all depends on your personal preference.
- When decorating with pumpkins, I always start with the star of the show – the pumpkin. Then I fill in around (or in) it.
- Begin by taking a nature walk. Look for different color greens, browns, reds and oranges.
- Next, grab some filler, like moss, grass, nuts or a trailing herb.
- Find some candles. If you don’t have any on hand, the dollar store carries a large assortment.
- Finally, go shopping in your kitchen cabinets. Look for fillers like popcorn, dried beans, peas, or rice.
Preparing a Pumpkin Vase
I used a pie pumpkin, but you can use a larger carving pumpkin, a gourd or a squash. It’s easy to turn your pumpkin into a vase with just a little preparation.
Directions
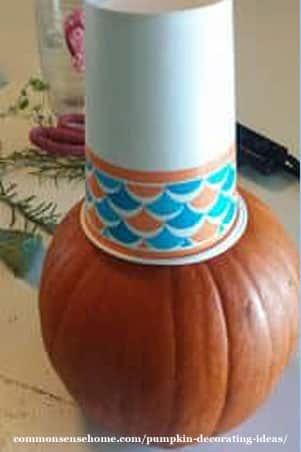
- Invert a cup or tin on top of the pumpkin and trace around the opening.
- Cut top of pumpkin following your outline and remove the pumpkin guts.
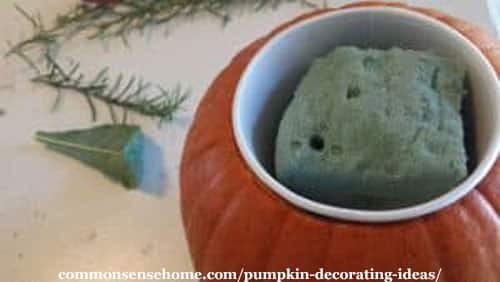
- Make sure floral foam fits in cup (trim if necessary) and soak moisture holding floral foam until saturated. (It may be helpful to place it in a sink with something heavy on top to weight it down so it soaks up water more quickly.)
- Add floral foam or dirt to the cup.
- Insert cup into hole on top of pumpkin.
#1 – Herbal Pumpkin Decoration
I adore dual purpose decorations. Not only is this an easy pumpkin decorating idea, it’s also edible.
One Centerpiece – 3 uses
- A beautiful centerpiece that also acts as a room freshener.
- Cook with the ingredients – add to a stew or roast
- Feed it to your livestock for a fall treat. (Make sure to remove the cup and floral foam.) The pumpkin seeds and the antibacterial herbs are great for foul and other livestock.
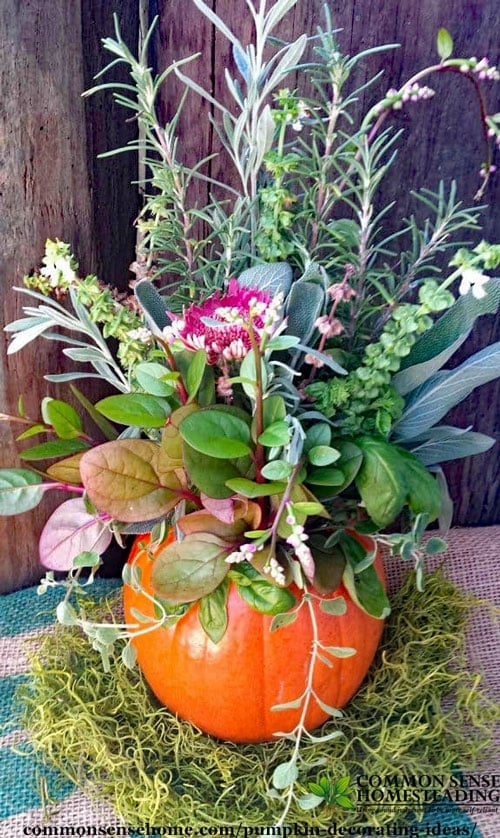
Herbal Pumpkin Decoration Supplies
- Pumpkin Pie Pumpkin or Larger. In addition to pumpkins, you can also use gourds or squash.
- Cup or tin to hold flowers and greenery
- Floral Foam
- Rosemary
- Sage
- Basil, leaves and flowers
- Malabar Spinach
- Lavender
- Rosemary
- Green or Spanish Moss
- I added a Gerber Daisy (it was my last one)
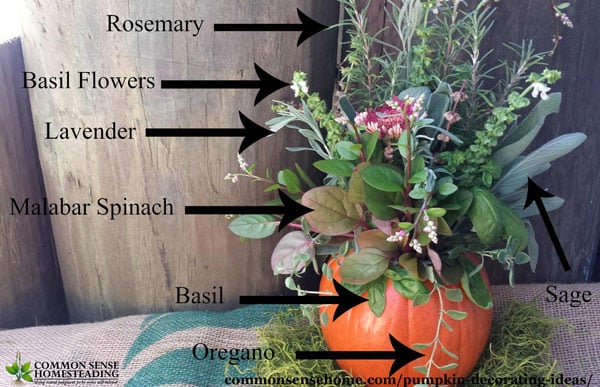
Herbal Pumpkin Decoration Directions
- Prepare the pumpkin vase.
- Start by adding the tall herbs, flowers or greenery either in the center of the pumpkin decoration (if it is going to be displayed in the center of a table), or in the back if it is going to be displayed against a wall (like mine in the picture)
- Layer textures and colors as you move around your centerpiece.
- Add enough foliage to hide the cup.
- When you are done with your masterpiece, you can place on a plate and surround the bottom with moss.
#2 – Fall Mini Pumpkins Tray
This is so pretty, you can keep it displayed well into fall and Thanksgiving.
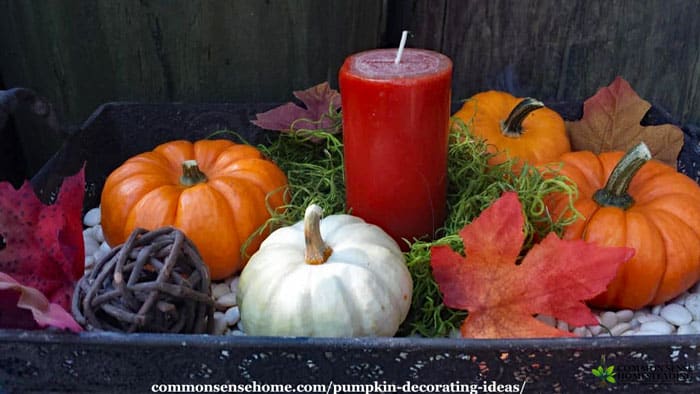
Fall Minis Supplies
- Serving tray or plate
- Dried beans (or peas)
- Candle
- Mini Pumpkins or gourds
- Random nuts or grape vine balls
- Moss
Directions
- Empty beans, peas or popcorn into the bottom of your serving tray.
- Place candle in the middle and surround with moss.
- Add mini pumpkins, leaves, gourds, vine to fill in but not completely cover the beans.
#3 – Popcorn and Pumpkins
You may have noticed I am using the same supplies but arranging them in different ways. This creates a cohesive style, but still provides a variety of pumpkin decorations. As you move from room to room in your newly decorated-for-fall home, you will have a nice flow of fall decor.
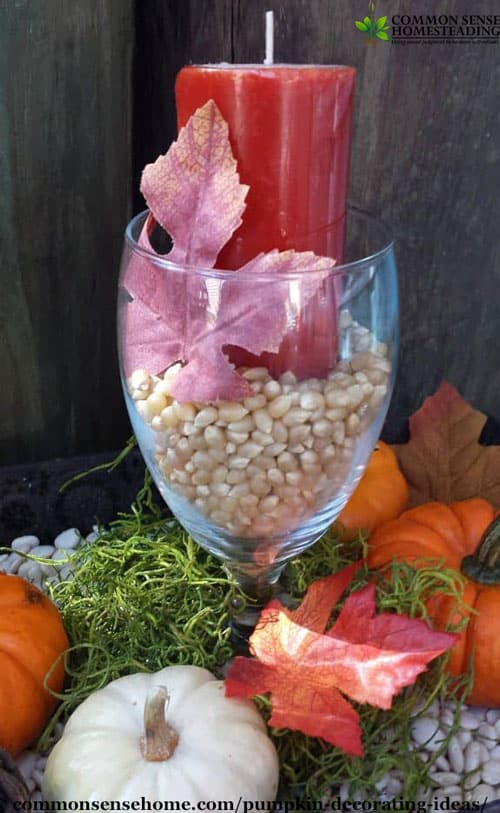
Popcorn and Pumpkin Supplies
- Serving tray or plate
- Dried beans (or peas)
- Candle
- Mini Pumpkins or gourds
- Wine Glass
- Popcorn
- Random nuts or grape vine balls
- Moss
Directions
- Add popcorn into wine glass and place candle in the middle.
- Place wine glass in the middle of serving tray.
- Empty beans, peas or popcorn into the bottom of your serving tray.
- Spread moss around bottom of stem of the glass.
- Add mini pumpkins, leaves, gourds, vine to fill in but not completely cover the beans.
#4 – Pumpkins, Popcorn & China
Another twist but similar ingredients. This decoration is dear to me because I get to display my grandmother’s china.
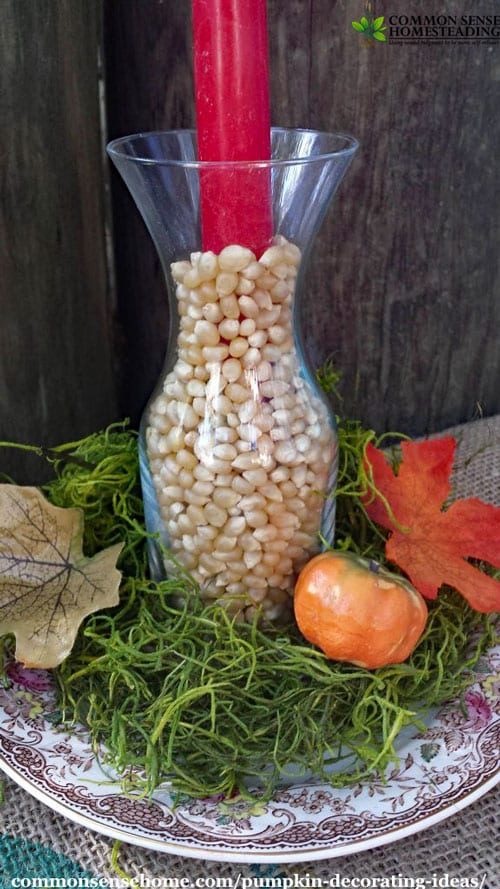
Pumpkins, Popcorn & China Supplies
- Small plate or salad plate
- Glass carafe or mason jar
- Tapered candle
- Mini pumpkins or gourds
- Popcorn
- Fall Leaves
- Moss
Directions
- Insert candle into glass carafe.
- Pour popcorn around candle.
- Place carafe on plate.
- Surround carafe with moss.
- Add mini pumpkin and leaves.
Would you like to save this?
#5 – Pumpkin & Plate
This pretty little fall decoration is perfect for small dinning tables or side tables. In addition to being pretty, it was the easiest to assemble.
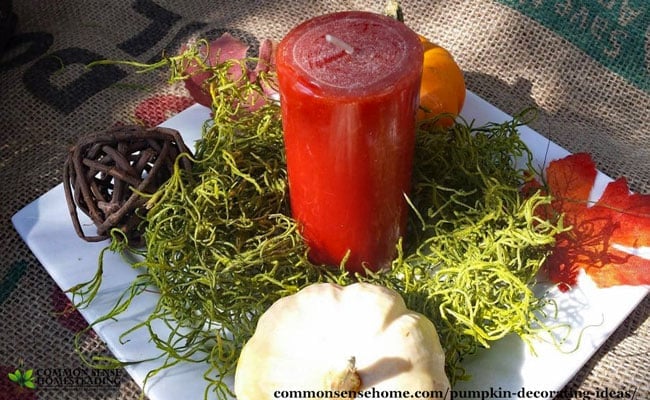
Pumpkin & Plate Supplies
- Plate- I like white to make the fall colors ‘pop’
- Moss
- Candle
- Mini pumpkins or gourds
- Leaves and or grape vine balls
Directions
- Place candle on plate.
- Add moss around candle.
- Arrange pumpkins and leaves on and around moss.
#6 – Pumpkins & Petals
This pumpkin decoration is absolutely stunning. The glossy greens, grays, reds and orange – just beautiful. I decorated this pumpkin so it would go against a wall. It wouldn’t display as well as a table centerpiece because of the placement of the leaves.
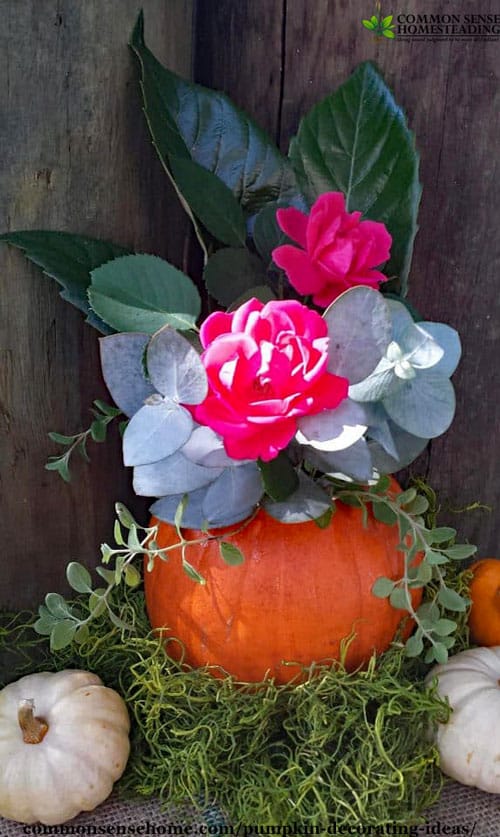
Pumpkins & Petals Supplies
- Pie Pumpkin, Carving Pumpkin, Gourd or Squash
- Floral Foam
- Loquat Leaves- Magnolia leaves would work great as well.
- 2 Roses
- Eucalyptus
- Oregano
Directions
- Prepare the pumpkin vase.
- Add loquat leaves in the back of the cup.
- Fill in with eucalyptus.
- Add roses.
- Tuck in oregano around the base of the cup.
- Once you finished decorating your rose sensation, place it on a plate and spread moss around the bottom of the pumpkin.
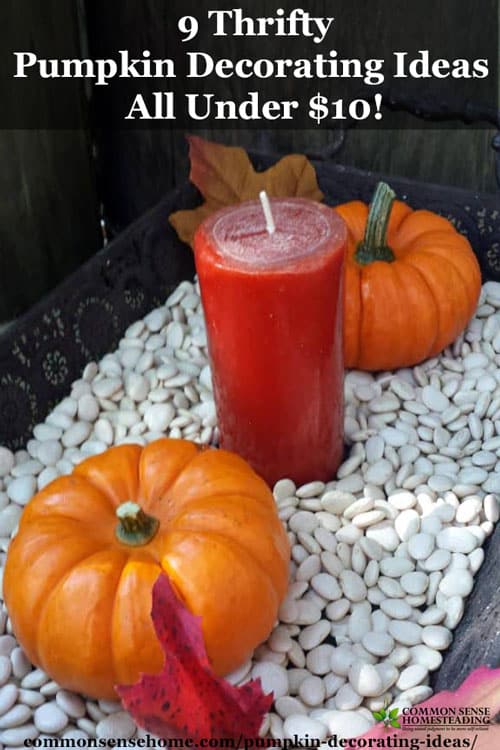
#7 – Pumpkins & Beans
This simple fall decoration idea is the prime example of less is more. (See top blog post photo.)
Pumpkins & Beans Supplies
- Mini Pumpkins
- Dried Beans, Peas or Popcorn
- Candle
- Leaves
- Serving tray
Directions
- Pour dried beans in bottom of serving tray.
- Add candle to the middle.
- Place pumpkins on either side.
- Add leaves.
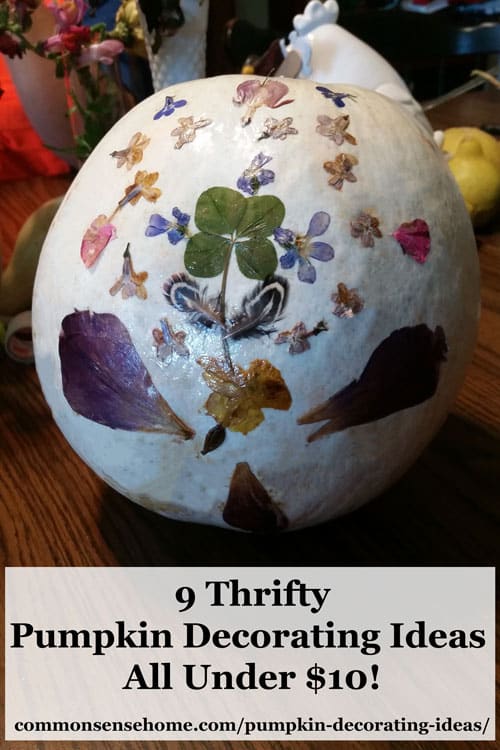
#8 – Pumpkin Decoupage with Fresh or Dried Flowers
If you have some fresh or dried flowers, you can decoupage them right onto your pumpkin. Dried flowers will be easier to work with and hold their color better, but thin petaled fresh flowers that lay flat (or flower petals) can also be used. You can get pressed dried flowers here. Deb’s girls even included some feathers with their design.
Select the pumpkin you want to decorate (white skinned pumpkins will work best for this one). Make sure the surface is clean and dry.
Collect your flowers/ plant material and lay out your design in a flat surface before sticking it to the pumpkin.
Pour some of your Mod Podge water based sealer into a bowl. Start with the focal spot of the design, gluing the flowers, leaves or petals in place. Apply the Mod Podge with a small, foam brush – to the plant material for sturdy items like leaves, or to the pumpkin for more delicate flowers. Complete gluing on your design.
Allow about 10 minutes for the glue to set, then coat the pumpkin design with a thin layer of mod podge. Let dry for one hour and apply a second coat.
If you want a decoration that you can use year after year, you can use this technique with a dried gourd, or artificial craft pumpkin. You can also use this technique with fabric or paper designs.
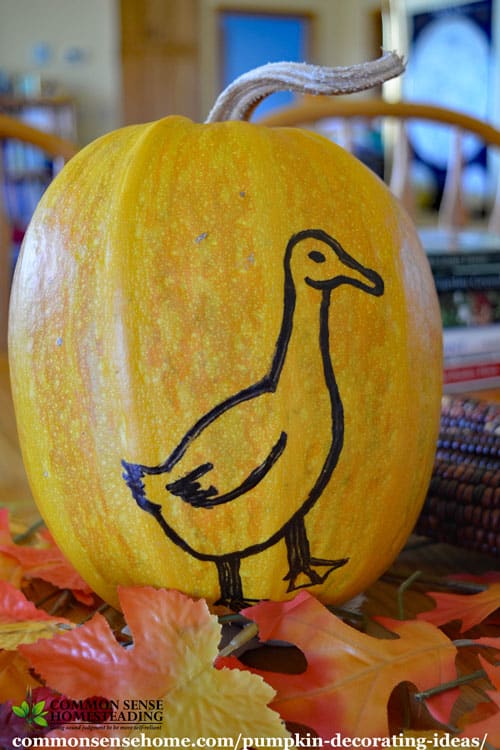
#9 – Pumpkin Stencils and Drawings
Instead of using pumpkin stencils for carving your Halloween pumpkin, you can use them in combination with a Sharpie marker to make a longer lasting design. If you’re a little artistic, you can also free-hand draw designs on your pumpkin. Laurie used a photo of her duck, Blue, as a model for this pumpkin. (The drawing doesn’t do the duck justice, but she plans to try again next year. 😉 )
There are a ton of cute stencils available in craft stores and online, such as:
- “farmhouse” stencil
- animals stencil set
- rescue dog stencils – lots of cute pups
Budget Friendly Pumpkin Decorations
When creating these pumpkin decoration ideas, I was fortunate not to have to spend a dime. However, I realize some of you may not have all these supplies on hand, so here is where you may end up spending money.
- Pumpkin – you can generally buy a pie pumpkin at the grocery store or farm for around $3.00 or less
- Candle – Dollar Tree $1.00
- Dried Beans, Rice or Popcorn – Grocery Store $1.00- $2.00
- Floral Foam – Dollar Tree $1.00. You can also use dirt to hold your plant stems in place of floral foam.
- Moss – Dollar Tree $1.00
- Mini Pumpkins and Gourds – Farmer or Grocery store $.50 – $1.00
- Fall Leaves – I have some fake leaves that I’ve used for years that I bought at the Dollar Tree. You can easily use real leaves.
Do you have any frugal fall decorating ideas or favorite fall traditions? Leave a comment and share your thoughts.
More Fall Goodies
You may also enjoy:
Maple Leaf Cookies Made with Real Maple Syrup and Maple Glaze (these are pretty enough that you may want to include them in your decorations)
How to Flavor Kombucha – Holiday Flavors – includes Pumpkin Spice Kombucha and Toffee Apple Kombucha
Pumpkin Fruit Leather – Tastes like Portable Pumpkin Pie

This post is by Amber Bradshaw of My Homestead Life.
Amber and her family moved from their tiny homestead by the ocean in South Carolina to forty-six acres in the Smoky Mountains in East Tennessee.
While building their off-the-grid homestead, they live like the days of old – cooking without electricity, collecting water from the creek and raising chickens, goats, pigs, turkeys, bees, and guineas. They’ve recently filmed their journey for a TV show on the Discovery Channel and the DIY Network/HGTV called Building Off The Grid: The Smokey Mountain Homestead.

One Comment