How to Infuse Herbs in Oil, Water, Vinegar, Alcohol or Honey
This post may contain affiliate links. Read my full disclosure here.
Looking for creative, easy ways to use homegrown herbs, or maybe you’ve tried some herb flavored oils or herbal vinegars and wondered about making your own? In this post we’ll cover how to infuse herbs in oils, vinegars, alcohols and honey. With just a few simple steps, you can make your own delicious flavored cooking oils, such as garlic olive oil, quickly and inexpensively.
Remember – always follow basic kitchen safely rules. Containers should be clean and dry. Glass is preferred for storage because it is non-reactive. If you have a concern about your herbal infusion interacting with your jar lid (for instance, with herbal vinegars), place a layer of wax paper between the lid and the jar.
How to Make an Infused Oil, such as Herb Infused Olive Oil
The best oils to use for herbal infusions are pure plant oils such as olive, sunflower, coconut oil, or almond oil. The oil I use most is olive, because it has a longer shelf life at room temperature.
I wouldn’t advise the use of canola, corn oil or “vegetable” oil. Most of these will be made from genetically modified crops, which I do not recommend for consumption. (Read more here.)
Small batches are always best with infused oils, so they can be used quickly before they have a chance to go rancid.
I don’t recommend mineral oils, even for topical use. If I wouldn’t eat it, I try to avoid putting in on my skin.
You can use whatever proportion of herbs to oil you prefer, but if you feel you need a measurement, start with 1 ounce of dried herbs to 10 ounces of oil. Kirkland olive oil tested clean of contaminants, and is reasonably priced.
Solar Herbal Infusion
Solar herb infusions work best with olive oil, which is the most shelf stable liquid oil. To make a solar infused herbal olive oil:
- Finely chop your clean, dry herb. (Wash herbs only if really grimy, and dry well, as excess water can cause the infusion to spoil.)
- Place the finely chopped herb in a lidded glass jar, such as a mason jar or condiment jar. (This is a great use for old jars that can’t be used for canning but have wide mouths and good fitting lids.)
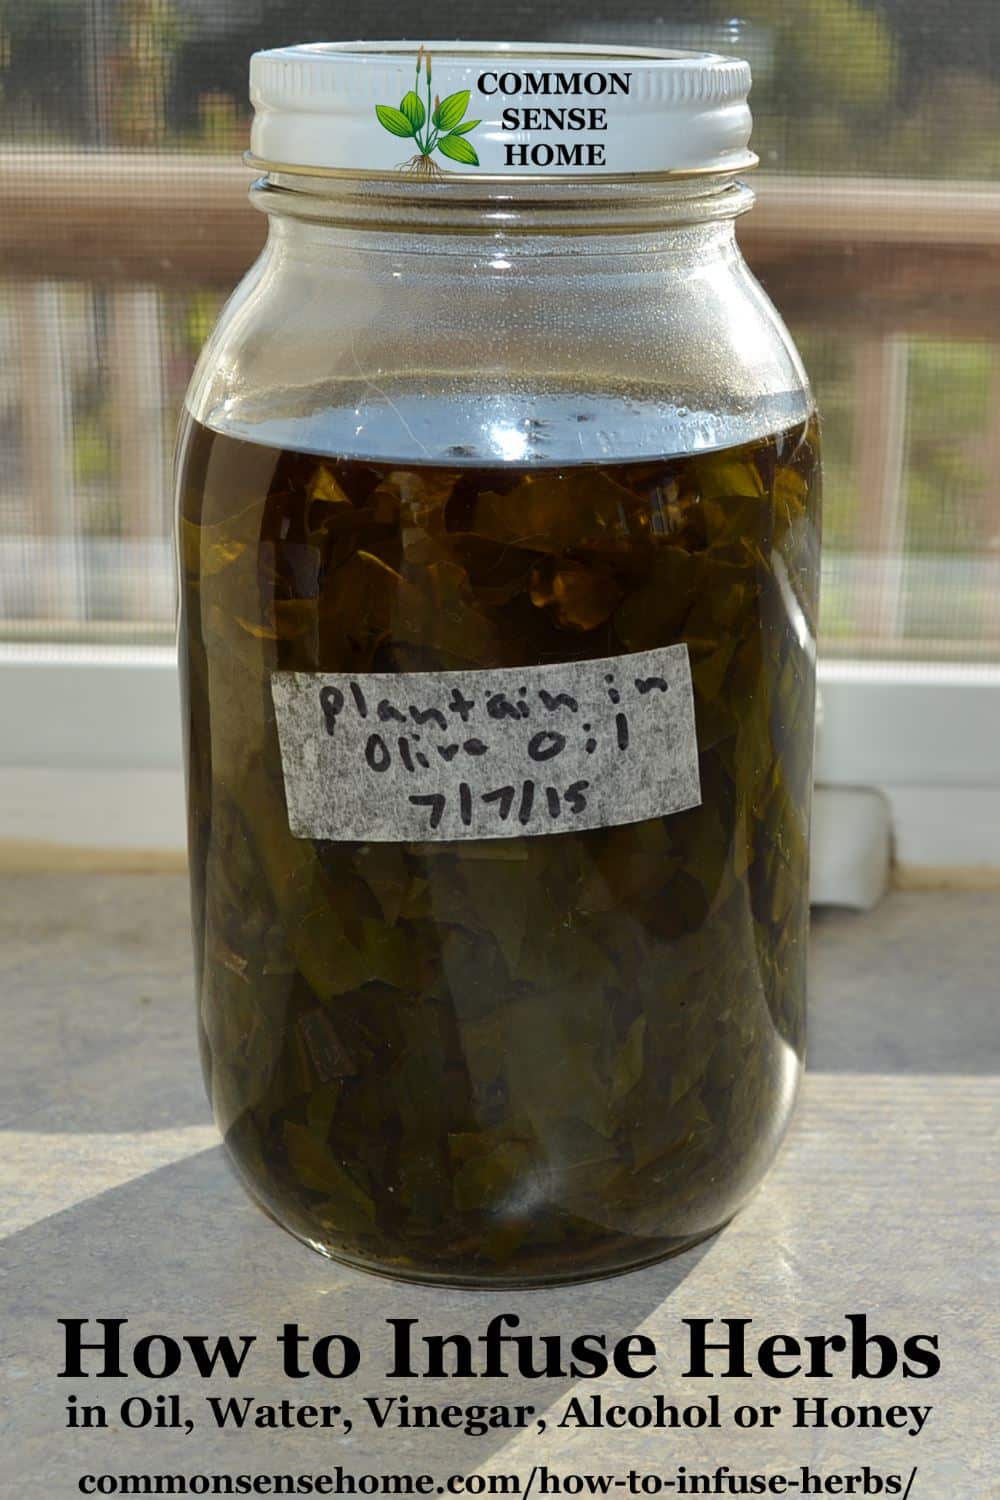
- Label the jar – for instance, “Plantain in Olive Oil’ and the date, as above. You’d be surprised how some chopped plants start to look similar to each other over time.
- Place the jar in a sunny window or other warm location for 2-3 weeks. Stir daily, pushing all plant matter below the level of the oil. Wipe off any condensation from under the lid or above the oil. Exposed plant material or excess water is likely to lead to mold.
- Strain out the plant material and pour oil into a dark glass container. Label with contents and date. Store in a cool location out of direct light to maximize shelf life.
This is the method I was taught by my herbal mentor, and is the method I use. Some people have expressed concerns over botulism because of the low acidity in involved. Botulism toxins exposed to sunlight are inactivated within 1 to 3 hours. If you are still concerned about botulism, I recommend infusing over direct heat following the directions below.
Direct Heat Herbal Oil Infusion
To quickly infuse herbs in oil for medicinal use or flavored cooking oils, you can use direct heat infusion.
For an oil infusion with fresh or dried herbs:
- Place your herbs and oil a double boiler, thick bottomed pot, or clean glass jar set in a pan of water.
- Simmer the herb and oil mixture on low for 4-6 hours for medicinal use, as long as needed for flavoring (30 minutes may be enough for a lightly flavored oil).
- Strain, cool, bottle and label with date and contents.
- Store in refrigerator.
Most people who use this method will only infuse fresh herbs if they are going to be used the same day.
For food items such as garlic or citrus peels, you should only use the direct heat infusion method and make the oil in small batches. Store in the refrigerator, and use within two weeks to eliminate the risk of botulism. Cold will slow, but not eliminate, the development of botulism spores.
Garlic and citrus are both naturally anti-bacterial (as are many herbs and spices), so risks are minimal, but we always want to error on the side of caution. Plus, fresh oils taste better!
Infused oils make a great base for homemade salves, such as plantain salve, which I always keep on hand for bug bites, bee stings and other minor skin irritations. Flavored oils such as chive or basil can be used as cooking oils and make lovely gifts.
Note: If you want olive oil with herbs for dipping, just go ahead and mix your favorite herbs right in your oil and serve, or allow to sit for a few hours before serving to infuse the flavors more strongly. Discard any unused herbal oil.
How to Infuse Herbs in Water
Water based infusions are similar to making tea, except that an infusion steeps longer. Most teas steep for 3-5 minutes to keep them from getting bitter.
Herbal infusions or medicinal herbal teas should steep for a minimum of 10-15 minutes. This will make them stronger and more bitter in many cases, but those bitter compounds are part of the medicine.
Experiment with different herbs and infusion times to see how it influences the flavor. Note: If you are under the care of a trained herbalist, follow their dosing and brewing instructions.
You can use a muslin tea bag or stainless steel tea infuser (this infuser is easy to fill and clean) to hold your herbs, but I generally prefer to leave my herbs loose and then strain after brewing.
To make a water based herbal infusion:
- Place one tablespoon of dried herbs or three tablespoons of fresh herbs into a ceramic teapot, mug or mason jar for each cup of tea you intend to brew.
- Cover herbs with boiling water.
- Place on the lid (or cover your cup with a saucer) and let steep for 10-15 minutes or overnight.
- Strain and drink.
I regularly make infusions of oatstraw and nettles for general health and wellness. Mint is great for soothing sore tummies. You can read about herbs and spices that boost you immune system here.
Would you like to save this?
How to Infuse Herbs in Vinegar or Alcohol
When you infuse herbs in alcohol or vinegar, it is commonly referred to as a tincture when used medicinally, but you can make some very tasty flavored vinegars and drink mixers, too.
Which Alcohol to Use?
For alcohol based infusions, I watch for sales on vodka, and prefer those in glass jars over plastic. I figure if the alcohol can draw compounds out of the herbs, it may attack the plastic, too.
If you want to make baking extracts, vodka has the most neutral flavor, but other alcohol such as rum or brandy pairs well with vanilla and some other flavors.
See How to Make Homemade Extracts – Vanilla, Lemon and Almond and Easy Chocolate Mint Extract Recipe for more info.
Which Vinegar to Use?
Raw apple cider vinegar is a staple in my kitchen (this is our favorite brand of ACV), so I use that for most vinegar infusions. If you want to switch things up, you can use different types of vinegars.
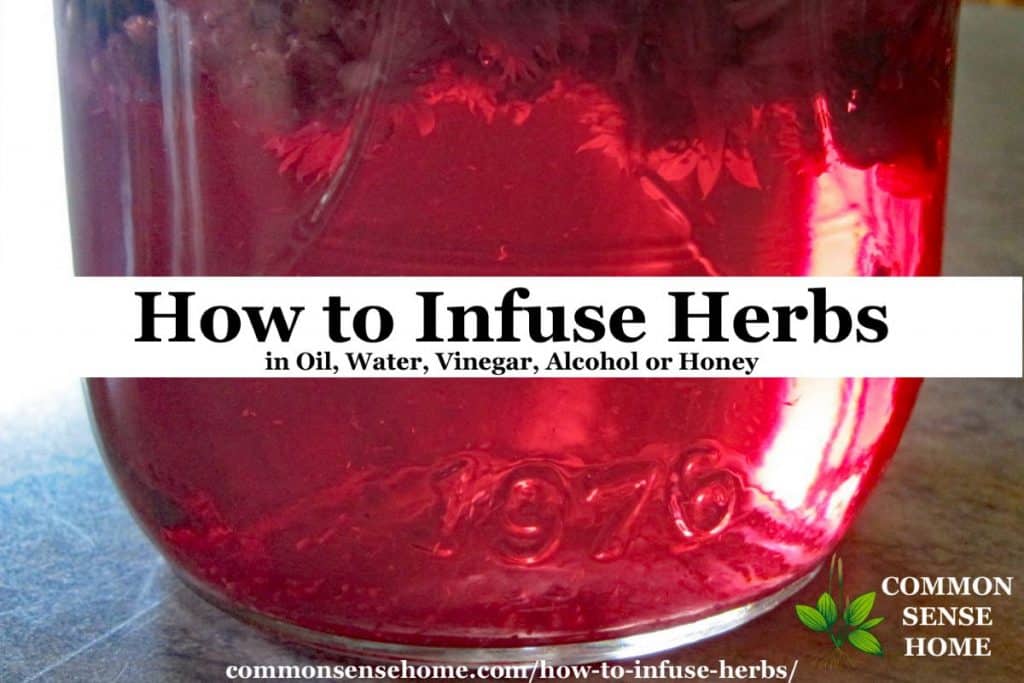
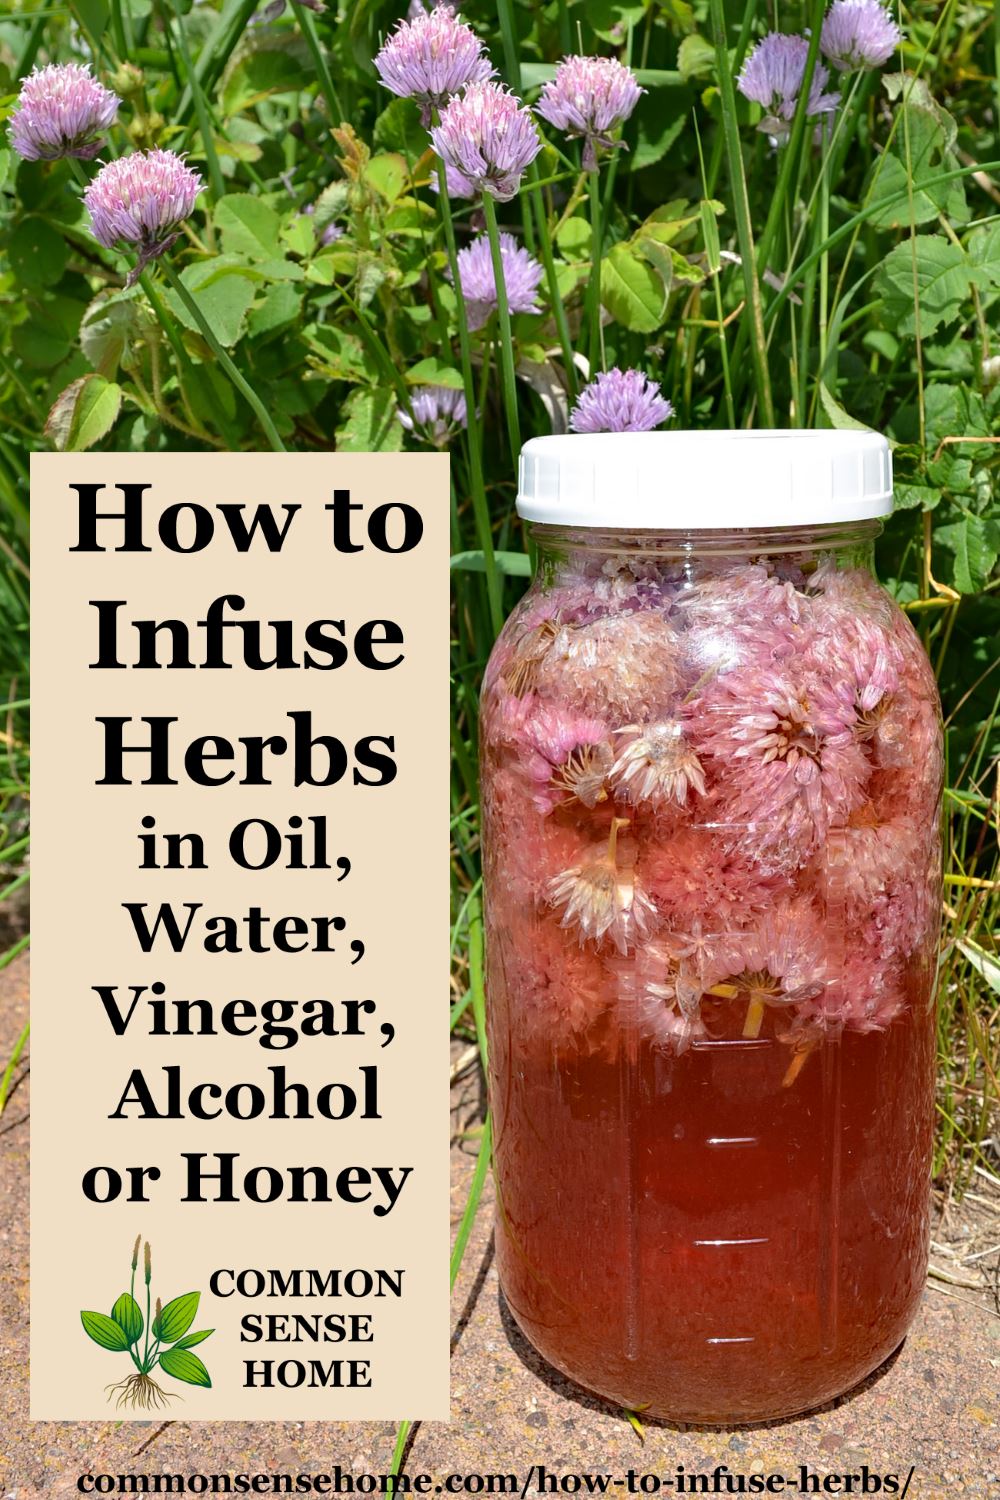
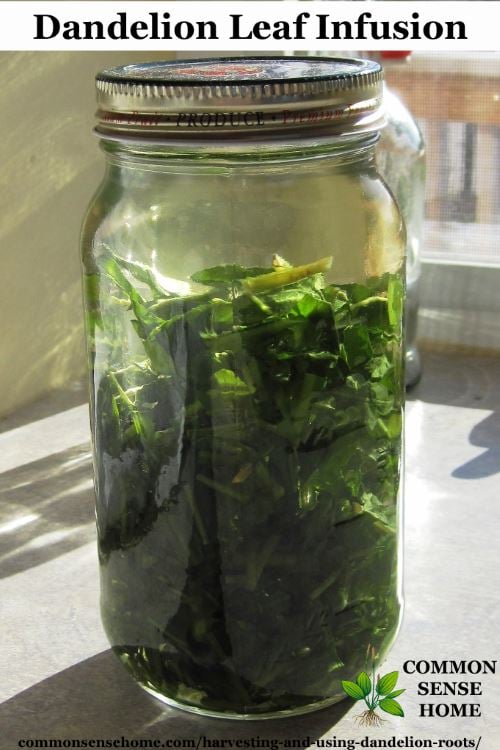
White wine vinegar turns hot pink when infused with chive blossoms. (Photo at top of post is chive blossoms and apple cider vinegar, wide photo is chive blossoms with white wine vinegar.)
I don’t typically use white vinegar for cooking, but it will work if that’s your preferred vinegar. I do sometimes pack a jar with citrus peels and white vinegar to make a natural citrus cleaner.
Herbal vinegar is ready in about two weeks, and is best stored in a bottle with a cork or other non-metallic lid. I often save my vinegar bottle and put the vinegar back in once it’s done infusing.
To make a basic alcohol or vinegar tincture:
(Adapted from Holistic Herbal)
- Place 4 ounces by weight of dried chopped or ground herbs (twice as much for fresh) into a glass jar with lid that can be tightly closed.
- Pour 1 pint of 30% (60 proof) vodka on the herbs, close the container tightly.
- Label with contents and date.
- Keep the container in a warm place for two to six weeks and shake it well twice every day. This one shouldn’t go in direct sun, but on the kitchen counter is fine.
- Strain out the plant material – it makes great compost. Don’t be afraid to squeeze it dry. You can let it settle before bottling or strain through a coffee filter if a clearer product is desired.
- Pour the tincture into a dark bottle (or store out of direct light). Don’t forget to label it with the contents and date. Pretty bottles of food stuffs look lovely on display, but light speeds the breakdown of many compounds in the food/medicine. When you’re trying to break down plant material to transfer its compounds into oil, this makes sense, but not for long term storage.
Susun Weed’s tincture making method recommends filling the jar with fresh herbs, filling it with 100 proof vodka making sure all the herbs are well covered, sealing, labeling and letting it stand for six weeks before straining. Sometimes she doesn’t even strain, just dips some out of the bottle and leaves the plant material in. She says she’s kept some this way for years with no loss of potency. I regularly use this method, because it’s quick and easy.
Is it Better to Infuse Fresh Herbs or Dry Herbs?
Susun Weed prefers fresh herbs, some sites recommend only dry herbs. Some recommend infusing in warmth and light, others recommend cool and dark. I think it’s a matter of working with what you have. I do oils in the sun, tinctures out of direct light, and I typically use fresh herbs for both. With water infusions, I’ll often use dry herbs.
Dandelion Aperitif
Adapted from Healing Wise
Ingredients
- 2-3 cups fresh dandelion blossoms
- 2/3 cup sugar
- rind of half a lemon
- 1 quart vodka
Directions
Do not wash flowers. Cut off green. mix all ingredients together into jar; cap. Shake daily. Wait two weeks, then strain and enjoy with ice and lemon, or hot with water and honey, or by itself before or after meals.
This recipe can be made with any edible flower or herb. See Top 10 Edible Flowers Plus Over 60 More Flowers You Can Eat for a list of edible flowers.
How to Infuse Herbs in Honey
You can also infuse herbs in honey. (I made some vanilla honey for Christmas gifts last year – so yummy!)
The flavor takes a little longer to permeate the honey, so I’d recommend a minimum of a month on this one, although if you are using strongly flavored herbs, two weeks may be enough.
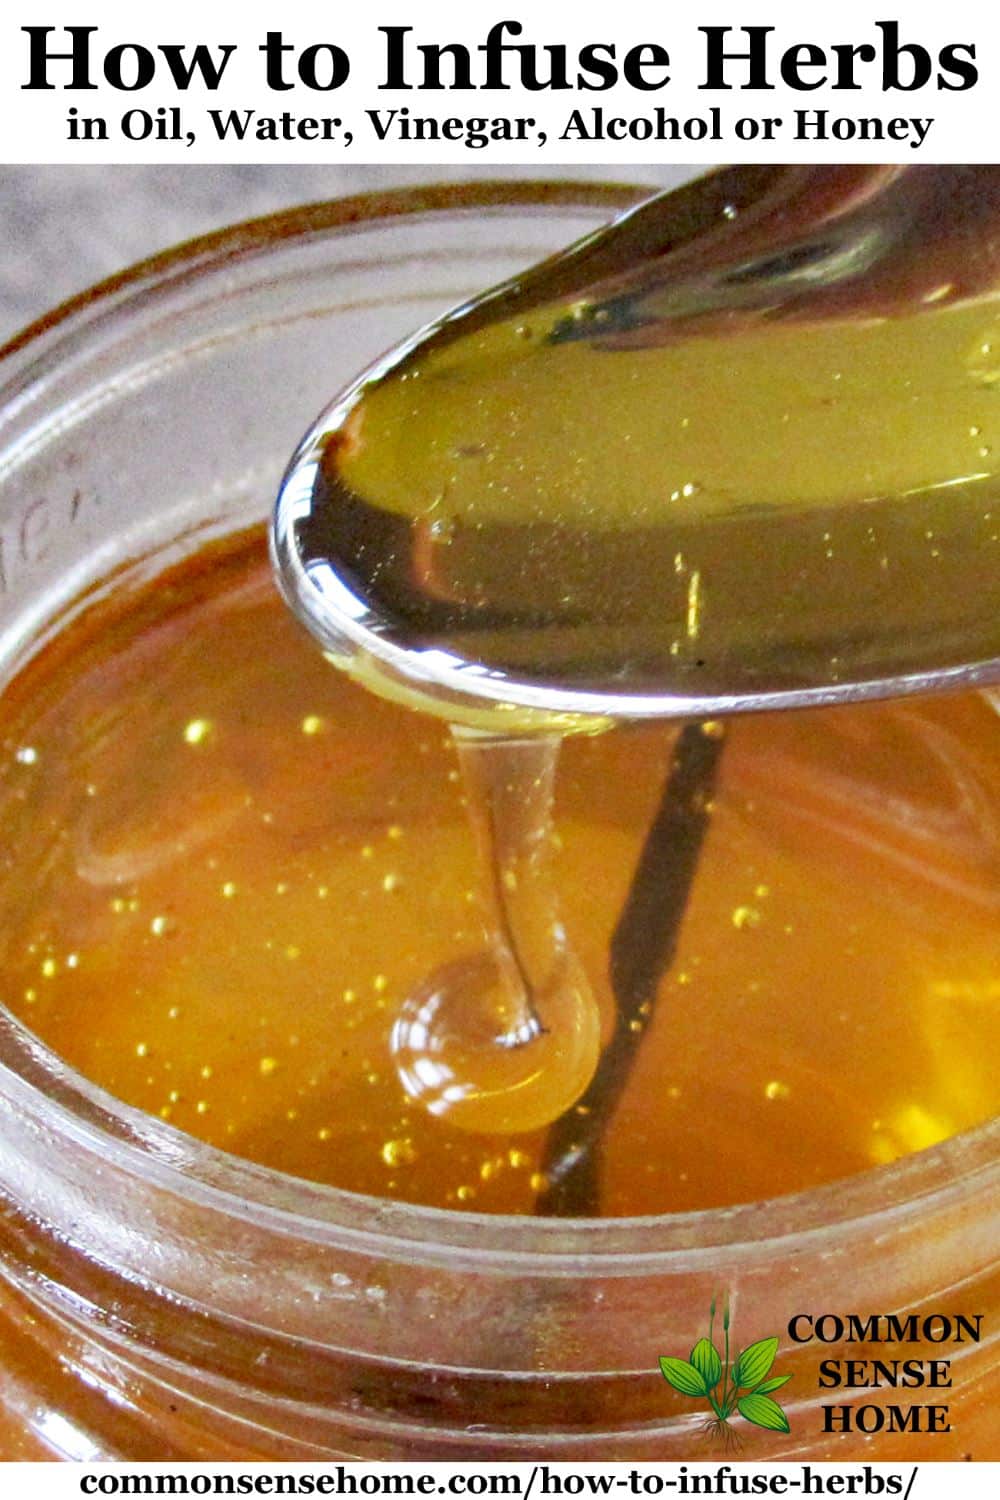
For vanilla honey, add one or two chopped vanilla beans per cup jar, depending on the size of the bean and whether they’ve been previously used. (I used beans that had previously been used to make ice cream and let them steep for three months.)
Rose petals, mint, anise, chamomile and lavender are other popular choices for flavoring honey. 1 to 2 tablespoons of herbs per cup of honey should be plenty. Mild honeys, such as clover honey, work best for flavoring.
Want to learn more about how to use herbs? Check out the courses at The Herbal Academy, such as The Introductory Herbal Course or Herbarium online herbal library.
You may also find useful:
- The Weekly Weeder Series
- How to Make Elderberry Wine
- How to Grow Stevia and Make Homemade Stevia Extract
Originally published in 2012, updated in 2017.

I have had an interest in herbs for a long time. Would like to know how to incorporate they in everything I do. Thanks for commonsensehome.com
I made a mistake I think. I have mullein leaves in vodka, set in window for 3 days. Is it still ok? Thanks in advance
I don’t normally put alcohol infusions in the window because the heat can drive the alcohol and volatile oils off, but three days isn’t all that long, so it should be fine.
For the dandelion tincture, is it the same amount of vinegar if you don’t use vodka?
Yes.
Very helpful. So glad i came across your site keep up the good work
Hi, I am boiling moringa, gotukola, turmeric, holy basil and gooseberry powders (1 tbsp each) in 1 cup of water and allow it to steep overnight. Next morning I am not straining and drinking the mixture as it is. Is it ok or does it have any adverse effect on our health. Pl. Reply. Thank you very much.
Each of those alone are healthy for most individuals. I have no idea if there would be any side effects from using them the way you describe, but it is possible to have too much of a good thing. It seems like a rather large ongoing dose. If you plan to keep dosing at this level, you may want to work directly with a local herbalist to develop a plan that is a best fit for your needs.
Thank you for your reply.
I wasn’t thinking of leaving the fresh root in the oil but filtering it out once the curcumin dissolves in the oil, say after 2 weeks. I quite understand though the concern about exposing the oil to sunlight as this may lead to its rapid deterioration but your opinion is that it is accepted practice. Correct me if I’m wrong.
Unfortunately, I’m not personally familiar with the oil and honey blend. Typically, exposing any type of unsaturated or polyunsaturated fat to sunlight or oxygen will lead to more rapid rancidity.
I have been thinking of infusing curcumin from fresh turmeric into blackseed oil which I want to mix with honey to be taken in one or two teaspoonful as a daily tonic. Honey mixed with blackseed oil is widely available but I know of none that is boosted with turmeric. After reading what you say about botulism, I am beginning to wonder if this is a good idea.
If you mix in small batches and keep it refrigerated, it should be safe, if a bit stiff, with fresh turmeric. Dried turmeric in honey should keep indefinitely.
Hi
I would like to make non alcoholic bitters for cocktails
Is it possible to use the vinegar extraction process for that, does it change the taste if you extract it using vinegar instead of alcohol
If you use a vinegar base instead of an alcohol base, you will have a vinegar flavor – more acidic, potentially a bit fruity with the right vinegar. Drinking vinegars have become popular in recent years, so some may still enjoy it.
Thank you for this wonderful article! Recently, I’ve been more interested on using natural products for my skin care routine. I want to make an onion-infused olive oil. Some sites arent really clear on how to make one and its shelf life. You mentioned herbs, does onion would work the same way? Please help enlighten me. Thank you!
Use the direct heat infusion method and store the oil in the refrigerator. Use within two weeks.
I have some rosemary that’s been in grapeseed oil for almost a year. I was wondering if I should throw it away or if I can still use it. I put it in the sun to make sure it doesn’t spoil, but I’m still concerned. If you could help me to know, I’d appreciate it. Thank you for your time.
Once opened, grapeseed oil is shelf stable for only about three months before it becomes rancid. The rosemary may slow that down a bit, but I wouldn’t recommend using it.
I was wondering if you could let us know how to make pure essential oils
Thank you
I wish there was a simple process for making essential oils at home, but I’m afraid there’s not. Most essential oils are created via steam distillation. Here’s an example of how lavender essential oil is made.
I have been making chive vinegar for decades. Starting with a gallon jug, pour out (and save) one quart. Pack the space with chive blossoms. No measuring. The honeybees are all over the chive flowers, but I have never been stung. Move slowly and with respect for the little harvesters, and they scoot away as you pluck.
Here’s one for you, Laurie:
Chive blossoms turn vinegar into a beautiful red liquid which has a pronounced onion flavor to use in salad dressings.
Honey from chive flowers is as sweet as any source with no onion flavor what so ever.
My honey merchant, who has hundreds of hives he rents out during the growing season, says the honeybees can sneak the sweet nectar out of the blossom without causing the “onion” flavor to be released.
Works for me!
Thanks, Daryl. I don’t normally measure with herbal tonics, either, but some folks feel more comfortable with numbers, especially when starting out. I wondered about whether or not the chive blossoms affected the taste of the honey, but figured the effect would be minimal because the bloom time is so short. I like to wait until my chive blossoms are nearly done with their bloom before harvesting so the bees get a chance to visit. We try to keep a wind variety of things blooming in the yard all through the season.
How so i infuse herbs and dried or fresh fruit in vinegar to make flavored dressings.
Please see the directions in the post for infusing herbs. If you wanted to try fruit, I’d chop it finely and follow the same method.
Question on butchers broom and horse chestnut: they’re very hard and woody so I was wondering if oil infusion and water boiling would work for a diy eye cream that I am working on?
I’d probably chop the plant material as finely as possible, and then slow simmer in oil over very low heat for several hours and strain when finished.
I had made an earlier infusion but left the plants whole so I don’t think it took. Will try grating them finely this time and see, thank you.
More surface area generally means better transfer to the oil/water/etc. Good luck!
Like to make honeysuckle infused honey for cough.
Thank you, Laurie Neverman.
I have mixed 4 gram of dried yellow dock with 8 gram of dried dandelion root together and put in a ceramic, slow cooking pot with 4 quarts of water. I boiled them for about 30 or 35 minutes.
The mixed herbs tea taste great. It doesn’t smell strong as the yellow dock root tea alone. But I am still afraid that I didn’t mix a correct amount of dried Yellow Dock Root and Dandelion Root for the tea. I also don’t know how often and how much I can drink this type of mixed tea in a week. For now, I just tried it by trial and error on myself to come up with the right amount.
Anyone opinion or idea and advice is more than appreciated.
Listening to what works for your body is always a good option. I find that I respond better to lower doses of many herbs than are commonly recommended.
To infuse herb in water to make tea. You said: To make an infusion, place one tablespoon of dried herbs or three tablespoons of fresh herbs into a ceramic teapot, mug or mason jar for each cup of tea you intend to brew.
I am somehow confused of the amount of water in this case. If I use two tablespoon of dried Yellow Dock to make a Yellow Dock tea. How much water should I use to make the tea for one tablespoon of dried herb? I wonder if someone could please help me with this?
More herb will mean a stronger tea. The measurements are a general rule of thumb. For a single cup of tea, use one tablespoon of dried herb and one cup of water. If you want to use two tablespoons of dried herb, use two cups of water. Roots are very fibrous, so they should steep for at least 10-15 minutes in a covered container for medicinal use.
I love garlic and onion infused olive oil! It has cure my daughter of an ear infection within a day! What is the proper way to make raw garlic infused olive oil and do I store it in the refrigerator? How long should I let the garlic sit in the oil?
Use the Direct Infusion method as described in the post.
I made a nice extract from Madagascar Black Vanilla Beans steeped in a nice bourbon. I just cut up the beans and put them in a decanter. I used 3 beans and then added 2 cups of bourbon. I let them sit for 6 weeks, shaking the decanter occasionally. Very nice extract.
Dear Laurie, I am a bit of a purist here so having difficulty with your recipes as i tend to always work in weight measures even for liquids this is especially important in soaping. Could you give weight measure of your liquid ingredients please?
Unfortunately, I’ve never weighed any of the ingredients. It’s not critical unless you’re attempting for follow a specific dosing regime as recommended by an herbalist. The plants themselves will vary from batch to batch, so it’s an inexact science.
Hi I stumbled on this educative site when I googled stevia, Thanks for the health tips. Kindly enlighten me on how to infuse Moringa leaves for optimum health. I am a health officer and would like to have as much info firstly to improve my wife’s health, she is grappling with fibroids, high blood presure among other challenges-we are above 50yrs of age.
yours health seeker,
Pius
I’ve never worked with moringa, so unfortunately I can’t answer that question, but there are many moringa focused sites on the internet that should be of some help.
I am in the process of infusing a blend of olive, avocado, coconut and safflower oil with fresh tarragon. The jars sat on my windowsill for three days, and they weren’t getting as much sunlight there as I’d hoped for. I moved them outside to get more sun, but forgot about them for two days. When I retrieved them and brought them in, they were hot to the touch. It’s been running about 95 degrees during the day here. Is that type of heat bad for my infusion? Have I cooked my precious plant compounds?
Avocado and safflower oils are not heat stable, so ideally I prefer to only use them in recipes where they are not heated. Two days at high heat is probably more heat than you want, but you can sniff or taste to see if you feel comfortable using the oil.
Hi
i plan to make hibiscus extract infused oil.
i dont have hibiscus flowers but i got hibiscus extract powder from a herb centre. can i do the direct heat infusion or keep it in olive oil in a dark place.
Will the extract powder work with same properties? I am just inquisitive to ask as i dont wanna go wrong.
I haven’t tried to infuse hibiscus extract powder, but I’d lean towards the direct heat infusion for a product like that.
There are some interesting facts mentioned in this article that I was searching for such a long time. thanks and I would like more from you!
Thank you for this extremely brilliant blog. I was looking for this kind of information for such a long time and I am more than happy to see such a great blog with plenty of useful information. Thanks again for sharing.
can you help me? I know this is old but I really need help. I did a mix of herbs and infused it into braggs ACV for about two weeks. strained into a sterilized mason jar and put it under the sink to use in my hair rinses and home made facial toners. but within a week it had this black liquid mold type stuff on the kid, it seemed like the vinager had seperated and gotten a lot darker and had a rancid smell to it. I wouldn’t be as worried if it wasn’t for the black mold looking stuff on the top of the lid and the strange smell… is this rancid? what can I do next time to keep this from happening?
thank you
“Black mold looking stuff” sounds bad. Normally, vinegar is very acidic, so it will inhibit mold growth. You may have introduced too much liquid in the form of fresh herbs. Try with dry herbs, or use less plant material, and make sure it is finely chopped so the vinegar can penetrate all the way through.
Could be a reaction to a metal lid.
Hey there.
I just thought I would let you know that it is a bad idea to recommend infusing fresh herbs in oil, for weeks in a sunny spot. I have taken the time to learn about botulism and how fast it can occur in oil and I recommend you do the same. You could cause someone to get really sick.
The method I describe in the post is from the teachings of Susun Weed, who has been studying and teaching herbalism for nearly 50 years. She has not been killed or crippled by botulism. She recommends the use of the fresh herb for greater potency. This is the way I was taught by my herbal mentor. This is the way I may my oil.
Since you are familiar with botulism, you must also know that the CDC recommends boiling all home canned food for 10 minutes before consumption. I don’t do that, either.
I’m sure you also know that the CDC recommends you do not feed infants under 2 years old honey because of botulism risk, although their own website notes there have been no recent cases of infant botulism from honey. Specifically, they state, “Most infant botulism cases cannot be prevented because the bacteria that causes this disease is in soil and dust.” See – CDC-Botulism
Botulism can be deadly. To reduce the risk of botulism exposure, some people will only infuse dried plant matter over heat, simmering them for 4-6 hours (or more or less, depending on which reference you use). They may also store them in the refrigerator, or only use them on the day they are made.
Traditionally, before refrigeration, long term preservation in oil without refrigeration was very common.
For more a more detailed explanation of safe food and herb preservation according to various government organizations, I recommend
“Food Safety & Preservation: Herbs and Vegetables in Oil” from Oregon State University
and “Preservation of vegetables in oil and vinegar” from CSIRO (Commonwealth Scientific and Industrial Research Organisation – Australia)
If I use lemon zest with 100 proof alcohol (or any other fruit) is there any risk of botulism? I’m looking to make some simple tinctures as you describe.. Thanks!!
The high alcohol content keeps any spores that are present from germinating and producing toxins. Think of lab samples preserved in alcohol.
Would these be the same as essential oils?
No, these are not the same as essential oils. Essential oils are the concentrated extracts of a given plant or plant material. They are commonly distilled from vast quantities of plant matter, although different techniques are used depending on the plant material involved.
For infusing in oil I didn’t see how much to use? U mention putting herbs in jar & the next comment said close with lid never mentioned adding the oil. I realize this is obvious but do u fill your jar full with herbs, then add only enough oil to cover them etc? Thank you
In her books Susun Weed describes “filling the jar and then filling it again”. I don’t really measure, I just use what I have harvested and make sure it’s completely covered with oil and stirred to remove air pockets. The more herbs used, the stronger the infusion.
I notice when infusing things (specifically i’m interested in honey and oils) everyone recommends you strain out the plant material. Why is that, and would it be okay to not strain? (for example lavender and honey)
Over time, the plant matter will fade and look less attractive, and of course most people don’t want chunks to fly out of a bottle when poured. Infused oils should be used fairly quickly, as they will go rancid over time. With honey, I’ve personally just scooped around the herbs, as honey acts as a preservative.
What about using coconut oil? I know you have talked about the great benefits of this. Would this work well like the olive oil or almond? Or maybe not since it solidifies above certain temperatures?
For me, most of the year my coconut oil is solid so it doesn’t work very easily, but you could certainly use it if you like.
Can you mix the oils when infusing? I would like to make a patchouli oil using dried herb but really don’t want it to smell too much like olive oil. Could I mix a bit of the olive oil (since it does have a longer shelf life) with mostly almond oil to make it last longer? Would it be better just to do straight almond oil? How long of a shelf life does almond oil generally have? I’m using it for a body oil and would like to bring out the patchouli smell as best I can. Thanks so much.
This site says sweet almond oil has a shelf life of 4-6 months, and suggests adding 10% wheat germ oil to extend shelf life. (http://herbs-n-oils.blogspot.com/2008/08/sweet-almond-oil.html)
yes very pepperoni or even like dog treats. It is actually a fresh calendula and olive oil infusion but I have a plantain going as well. Hope it is okay, may have to add essential oil to help with the smell.
The smell fades after the plant material is strained out, so maybe it will be okay. Otherwise, lavender oil is good for healing.
Just drained my first oil infusion and it has a smell. It smells different than the olive oil plain. Any thoughts?
Does it smell rotten or just strange? For instance, the plantain infusions smells a little like pepperoni as it ages. You are breaking down plant material to draw out the useful compounds. As long as there’s no mold or truly “rotten” smell, you’re probably fine.
This is all new to me too but I’m excited to try! Ive made my own vanilla extract and my own chive blossom vinegar. I would really like to learn more about making lotions and balms though, that’s next on the list!
I’ve just been gifted some new herb plants by a friend and I trimmed them back when I planted them so thought I’d use the trimmings . I now have lemon balm oil, chive oil, tarragon vinegar and sage vinegar sitting on the side steeping. We will probably use them mostly as salad dressings, my four year old loves putting together salads with me ! He thinks he is a master salad maker and who am I to argue with that.
Esther – that’s wonderful! It’s so fun when the kids start to take ownership of dishes that they make. My eldest likes experimenting with spice mixes. Some experiments have turned out better than others. 😉
This is so interesting! I’ve infused vinegar before and would love to learn more!
thank you for your directions of oil infused herbs. I also like olive oil and herbs. I have sage and basil growing that I am definitely going to try this with.
I have been making plantain infused oil, arnica and ginger for another oil as well… ;0)
Hi what do you use the infused oils for. New to this
They’re typically used in cooking – hot or cold, depending on your oil choice and herb choice. You can use as a simple salad dressing with a splash of vinegar or lemon, or sauteing vegetables. Garlic and green beans pair very well.
I have tried to infuse plantain with vinegar. It has worked for itchy spots (such as mosquito bites) and poison ivy.
This is all new to me and I can’t wait to learn more about it. I love using thyme, so maybe would use it first.
There’s so much interesting information here!
It’s hard to decide what to do first but I may try some comfrey because it is something I am finally growing here now. No wait, I have plantain too, maybe I’ll do both first! 🙂
Thanks for the helpful information! I really would like to make some real vanilla extract and some stevia extract..I will give it a try 🙂
I would like to make a comfrey infused oil.
Wow – great info here! I’ve pinned and shared on FB 🙂 As much as I love to cook and make things from scratch, I’ve never actually made an herbal infusion. So I can’t wait to follow the directions you have here for making herbal oils and herbal tinctures. Also really like the book giveaway – thanks for that!
I have some comfrey drying. And I have my first herb garden growing. I’m not sure I’ll be able to harvest anything this year as I would rather have an established herb garden, but we’ll see how it goes. 🙂
I’m growing horehound and will use it in honey for a throat syrup. Thanks to your blog I might even know what I’m doing now 😉 I can’t wait for your post on nettle. I checked out Healing Wise by Susun Weed from the library and LOVED it! I might have to buy it if I don’t win it. Thanks for the opportunity.
Lori – the nettle post is live – https://commonsensehome.com/nettles/
Just wanting to know… How would you go about making an extract or is the process the same as a tincture…??? What about using Everclear as opposed to Vodka for that…??? Is it too strong for extracts…???
Kate – yes, you make extracts the same way. I made a very yummy vanilla extract by mixing a couple different types of beans. Orange and almond extract are also very easy – just use orange zest strips and almonds. Everclear will work, but not exactly the same. It may be more bitter, for instance. More info on that here – http://chowhound.chow.com/topics/732579
How wonderful – gosh I just made some comfrey ointment and really enjoy using it – it is very healing. Plantain salve will be next on my list!
http://africanaussie.blogspot.com.au/2012/04/rainy-day-makes-way-for-experiments-in.html
and then try combinations of your herb.Comfrey and plantain are good together.
The infusion of herbs and honey is very common in Yemen- for adults and children. I use it regularly with my family, especially for coughs and stomach issues. It was so good to see this much ignored practice mentioned here- thank you for a great post!
Hey, thanks for the shout out! We’re brewing up some herbal goodies this week! See you tomorrow for Wildcrafting Wednesday!
I just recently started some vanilla extract in vodka – SO EXCITED! I also made some plantain olive oil a while back that I’ve been meaning to make into some salve with comfrey and calendula. And on my to do list next is to infuse some home made wild-fermented apple cider vinegar with rosemary. I heard recently that rosemary is good for dandruff, and my boyfriend and I have both been having a few more flakes than we’d like lately… But the rosemary vinegar will work perfectly for me because I have switched from shampoo to baking soda followed by cider vinegar. I am so inspired by your chive vinegar! I have some healthy garlic chives growing right now, so I may have to try it myself.
I’ve been making rosemary vinegar for my hair rinse for a few years. But yesterday I just strained out nettle and hibiscus. It is a glorious blood red color.
Great ideas! have to flavor me some vodka:)
I enjoy reading about the how toos of all these things, but once I have them in the jars it’s like—-Now what? I haven’t found a site that will help tell which herbs are best for what as an oil/tincture or best infused with honey/alcohol. It’s all mind boggling to me. Anywhere I can go and sort this all out, or does one just need to hunt here and there?
Judi – if there is one “how to” for all things herbal, I haven’t found it. I discuss two of my favorite books in this post – https://commonsensehome.com/getting-started-herb-gardening/ Susun Weed’s books are more intuitive, but I enjoy them, too, just for that reason.
Different cultures use herbs differently, and of course, different herbs grow around the world. I think it would take a lifetime or two to even make a dent in what can be done with them. Simply start where you are with what you have, and experiment with one new use at a time.
Hi, Judy. All herbs have own health benefits. Whatever herb you used, just google name of herb health benefits. Honey, alcohol and vinegar are extractors of all goodness from a plant, some of them getting more of goodness than others. Personally I thing alcohol would get more out of plant. English is not my first language, sorry for mistakes.
Olia
Hi, Judi. I realize I am replying long after your original question about herbs, but I have recently been taking classes from a woman who teaches herbalism at Bastyr School of Natural Medicine in Seattle. She has strongly recommended Rosemary Gladstar’s books on herbal medicine making, and I have found them to be excellent. They go over which herbs for various symptoms, as well as how to make truly lovely, very high end body creams and lotions with those infused oils, honeys, etc. Good luck!
I say play. what herbs and or spices are around you. do you want honey, or water, or oil…It is going into your body. have fun.
Watch “Green Witch” type videos on YouTube. All will become crystal clear and simplified?
Today I am infusing my own honey with my own herbs. I’m starting with lemon thyme honey for sore throats.
How did it turn out? What amounts of each did you use?
I do not have herbs yet but am very interested in learning what I need to grow to do this.