How to Can Green Beans – Step by Step Instructions
This post may contain affiliate links. Read my full disclosure here.
Canning green beans is one of those classic homestead skills that connects us with generations before us. When the beans start coming in faster than we can eat them fresh, I pull out the pressure canner and jars and get to work. There’s something deeply satisfying about hearing those lids “ping” as the jars seal—knowing you’ve stocked your pantry with fresh, local food.
We’ve been canning beans for years, and I can tell you from experience: once you’ve tasted home-canned green beans, it’s hard to go back to store-bought. They’re fresher, firmer, and you know exactly what’s in the jar—no mystery additives. Whether you’re brand new to pressure canning or just need a refresher, this guide will walk you step-by-step through how to can green beans safely.
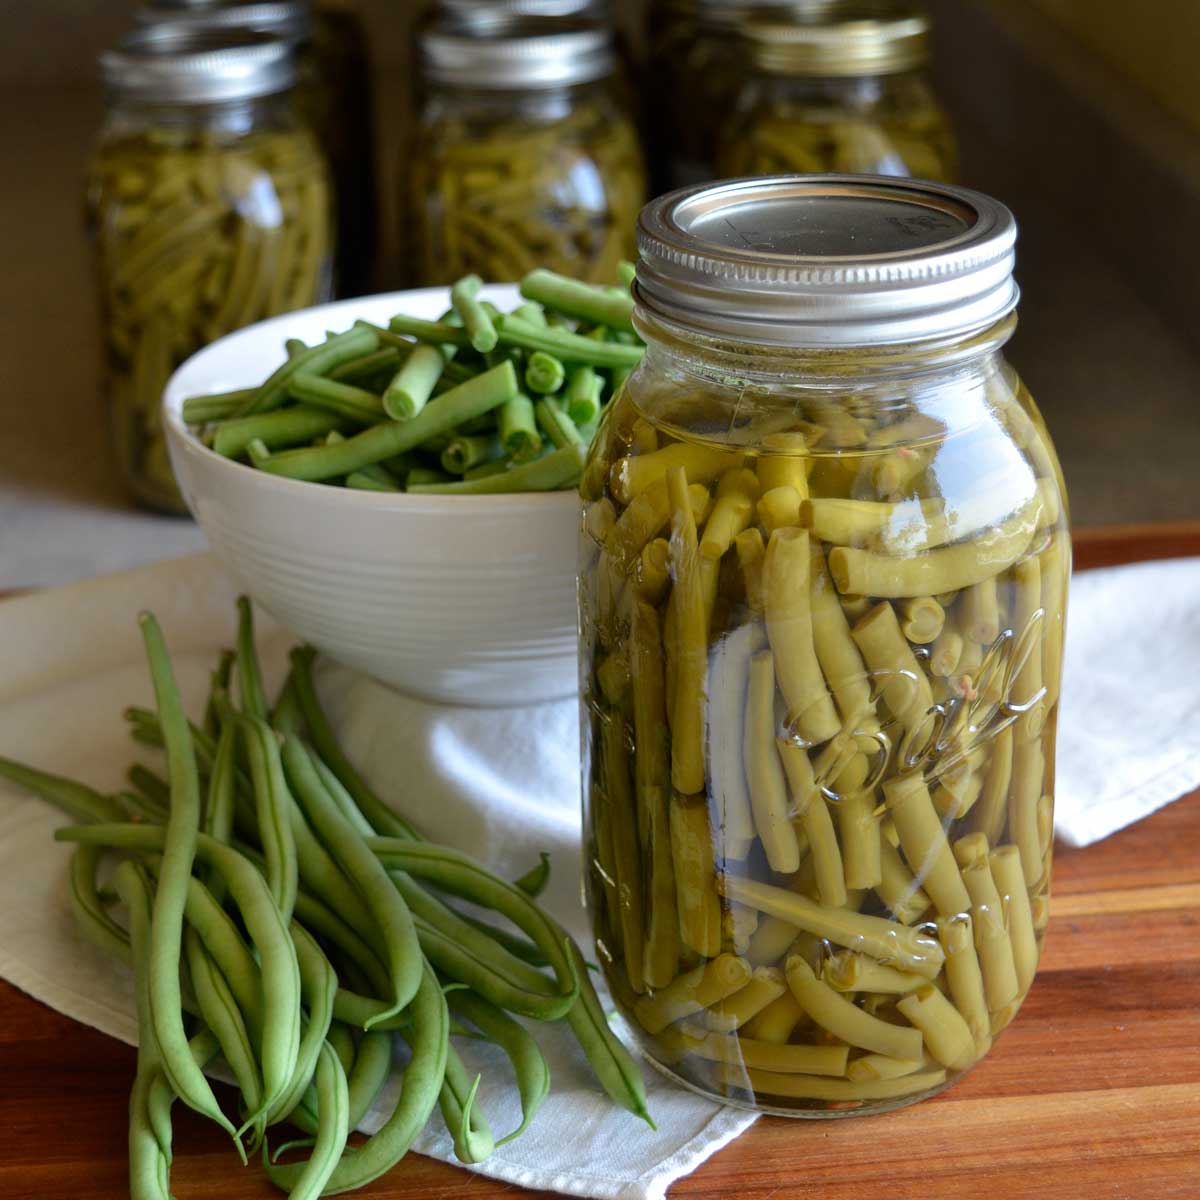
Some of our “green” beans are Purple Podded Pole Beans, which turn green when canned or cooked. Our main crop most years is Emerite pole beans. I prefer pole beans because there is less bending and they produce over a longer season.
Note: If you don’t have a pressure canner, it’s safe to make pickled green beans in a water bath canner. Adding vinegar drops pH lower than 4. 6, making them safe for water bath canning. You can also make small batch dilly beans that keep in the refrigerator.
Table of Contents
Raw Pack vs. Hot Pack
When canning green beans, you can choose between raw pack and hot pack.
- Raw Pack: Fresh beans are packed directly into jars at room temperature, then covered with boiling water. It’s quicker and easier, especially when working with a large harvest. The beans may shrink a bit more in the jar, but the process is simple.
- Hot Pack: Beans are pre-cooked for about 5 minutes before packing. This helps them keep their color and texture a little better in storage, though it takes extra time and handling of hot food.
I raw pack, because I find it much easier to load jars with room temperature beans rather than juggling hot beans and boiling liquid. But both methods are safe and approved, so you can use whichever works best for you. The processing time is the same for both.
How to Can Green Beans (Raw Pack)
Get everything ready before you start, because you want to move quickly once you start packing beans. See Getting Started with Home Canning for more information on equipment used in canning.
You’ll need:
- Fresh, tender green beans (about 1 pound per pint size jar, 1 ½ pounds per quart size jar)
- Canning salt (optional: ½ tsp per pint or 1 tsp per quart) – don’t use iodized table salt – it will darken/discolor the beans
- Clean pint or quart jars with two-piece lids
- Pressure Canner – because they are low acid, beans must be canned in a pressure canner, not a water bath canner
- Tongs or magnetic lid lifter, for lifting the jar lids
- Jar lifter
- Ladle, for filling the jars with liquid
- Hotpads, for handling hot everything
- Small dish clothes or paper towel for wiping rims clean
- Chopstick or thin spatula, to release air bubbles from the jar
- Canning jars – cleaned and kept warm
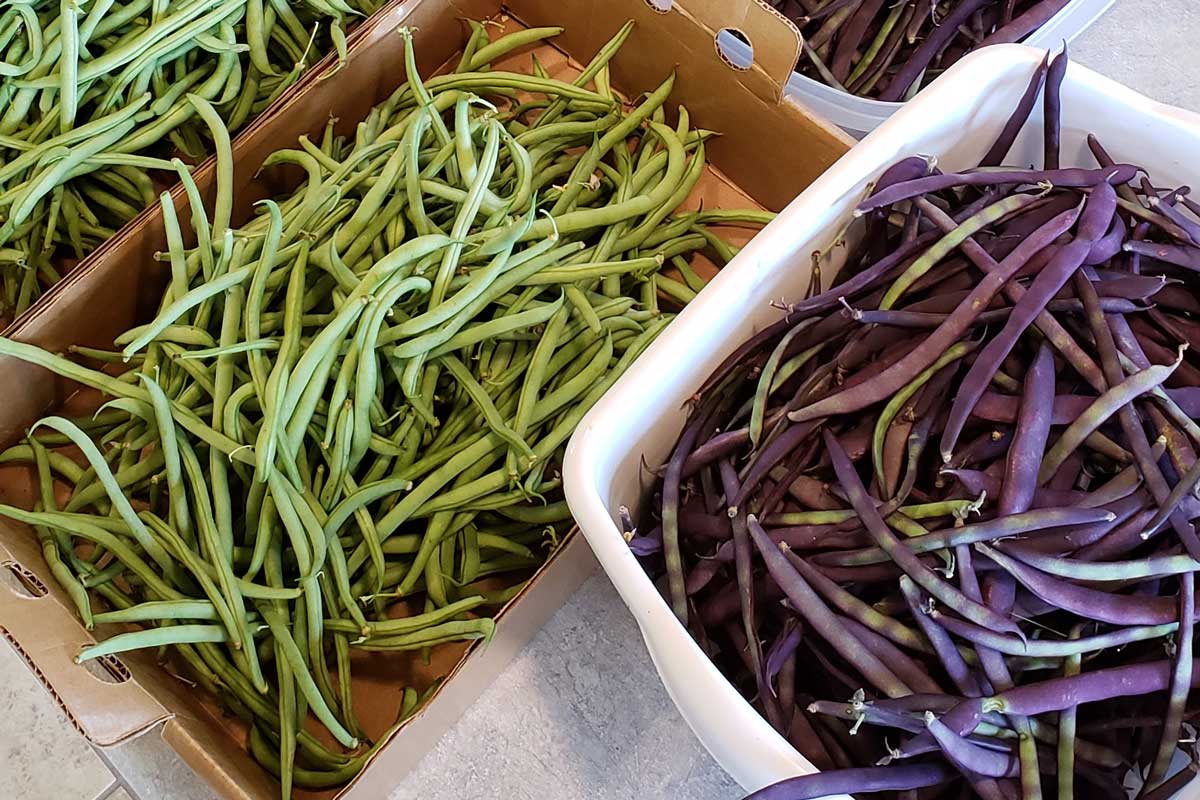
1. Prep the Beans
Wash beans thoroughly in cool water. It’s amazing how much grime washes off.
Trim off the ends and cut or snap into 1–2 inch pieces (or leave whole if you like French-style). Sort out any beans that are bulging with seeds or tough pods — they won’t soften in the jar. I prefer snapping over cutting, as it’s easier to notice if any beans are overripe. Once washed, drain in colander to prepare for packing into jars.
2. Prep Your Equipment
I wash the jars in the dishwasher and keep them hot, or heat them in the canner. My mom used to hand wash them and keep them in a warm oven. It’s best to work with everything warm or hot. Mixing hot and cold can lead to shattered glass.
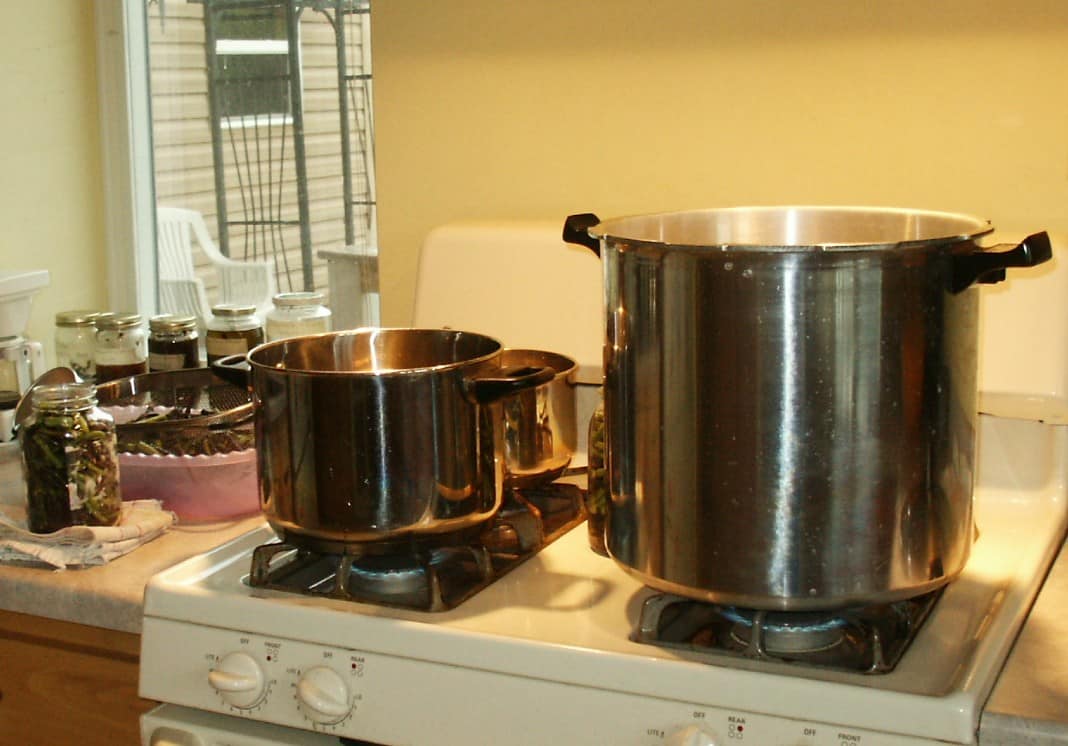
On the stove, place three quarts of boiling water and a tablespoon of white vinegar into the pressure canner. (Check your canner for filling guidelines.) The white vinegar helps prevent hard water deposits on the jars. Heat several quarts of water to near boiling to cover the beans.
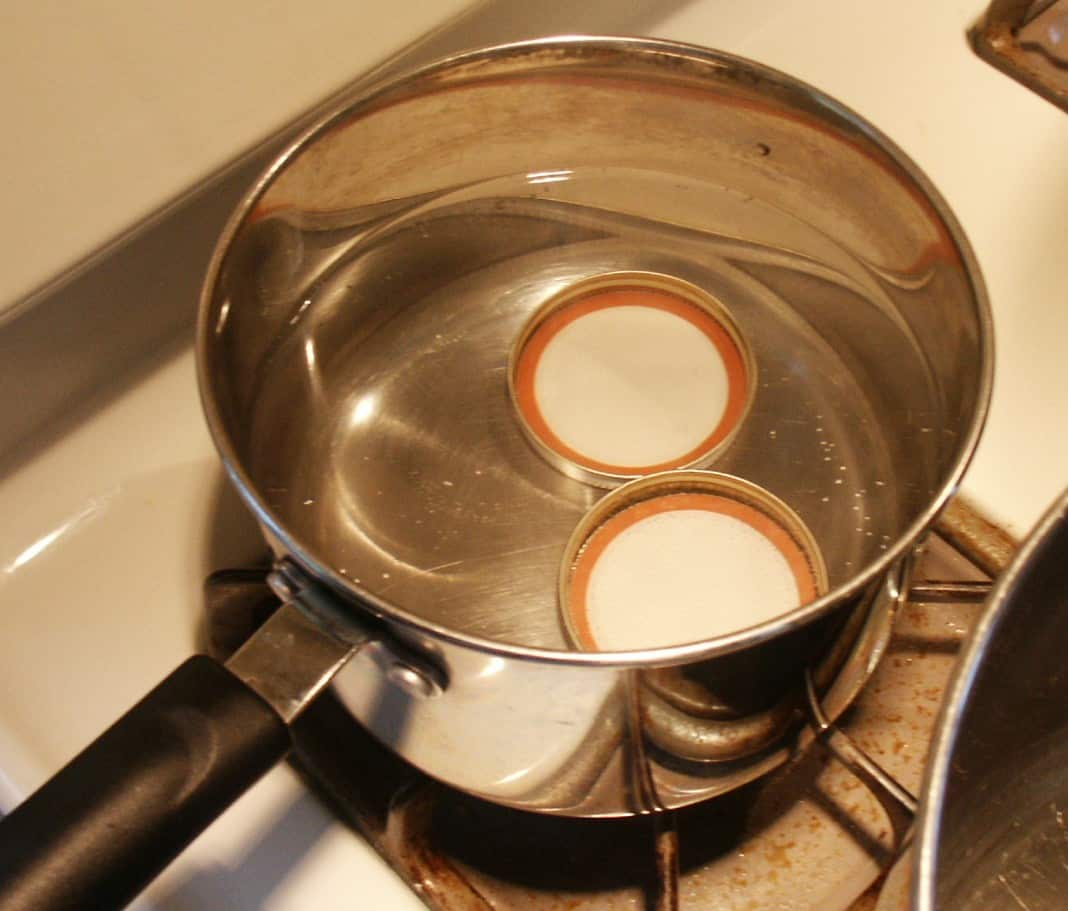
If desired, heat lids in warm water on “low”. Current guidelines do not require warming the lids, but I find I have less seal failures with warm lids. Never boil the lids before processing or you may damage the sealing compound.
3. Pack the Jars
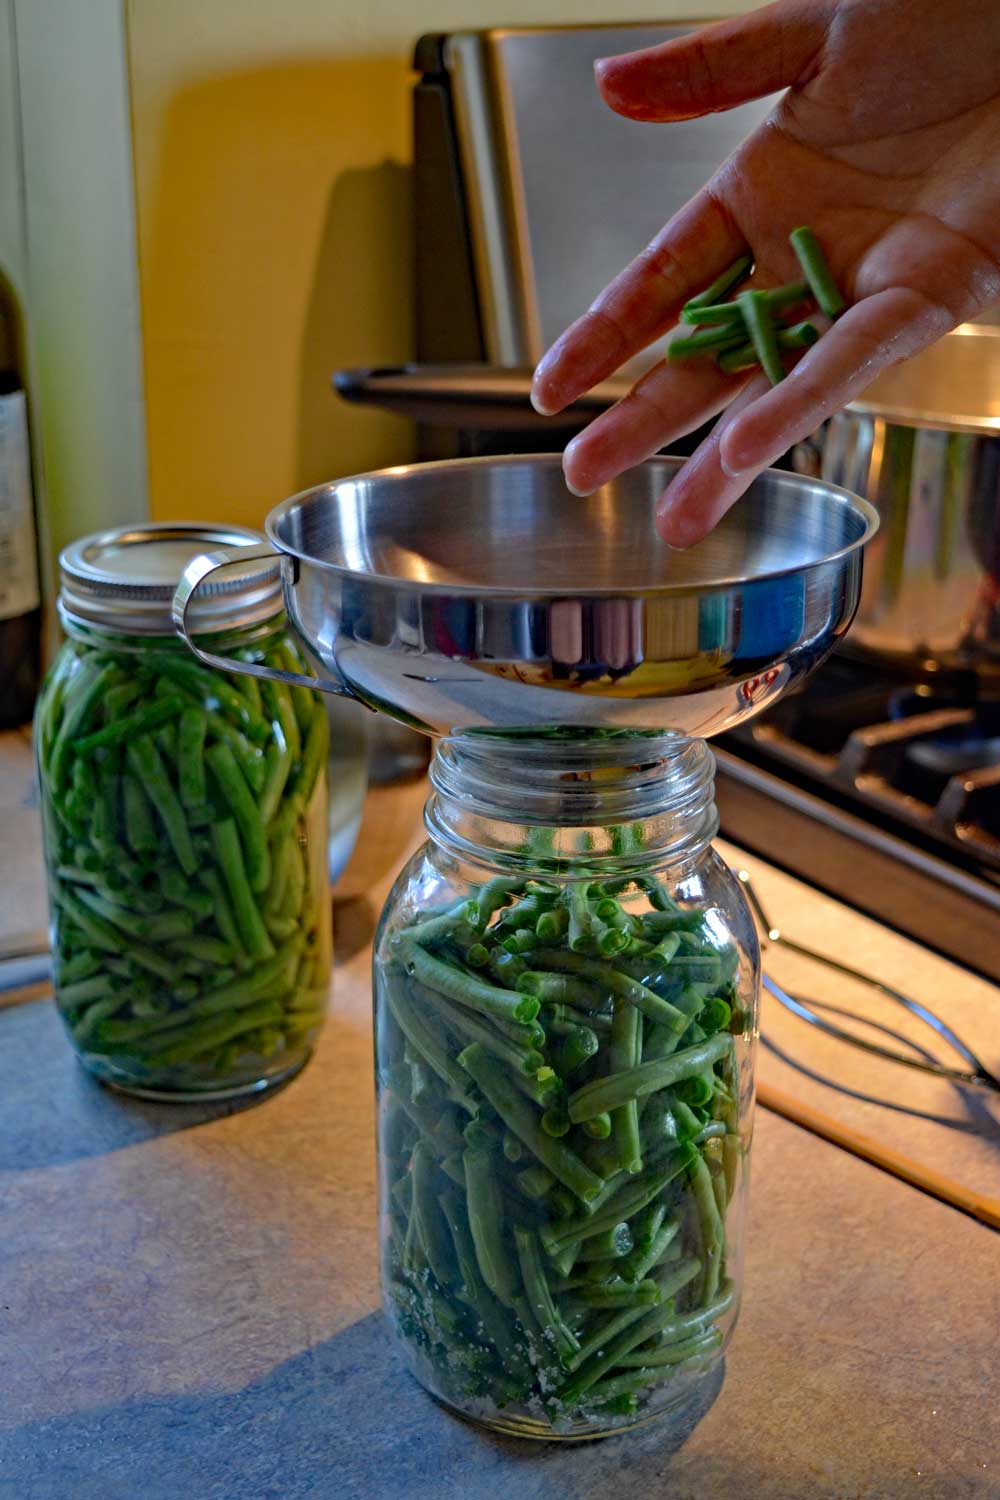
Pack raw beans tightly into jars, leaving 1 inch of headspace. Add ½ teaspoon salt per pint (1 teaspoon per quart) if desired. Shake them down/pack them in as you go. Fill jar with boiling hot water, maintaining 1 inch headspace.
Would you like to save this?
4. Remove Air Bubbles & Seal
Slide a wooden chopstick or thin plastic spatula around the inside edge of the jar to release trapped air bubbles. Do not use a butter knife or any metal objects, as they may scratch the glass.
Always make sure to double check your rims and jars for any nicks or cracks. Even a tiny nick can keep a jar from sealing, and a hairline crack will blow out the whole jar in the canner.
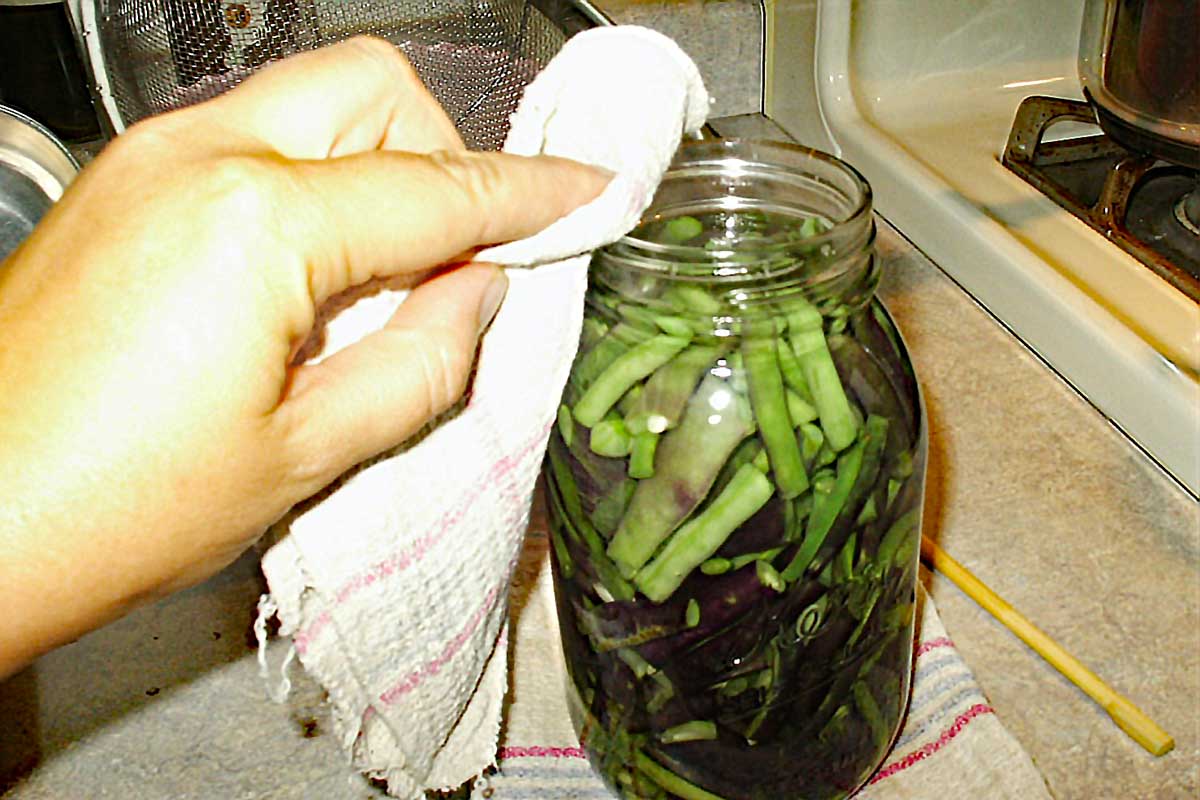
Wipe the edge of the jar with a clean, damp cloth or paper towel so you get a good seal. Place lids on jars and screw on bands until finger-tight.
5. Process in the Pressure Canner
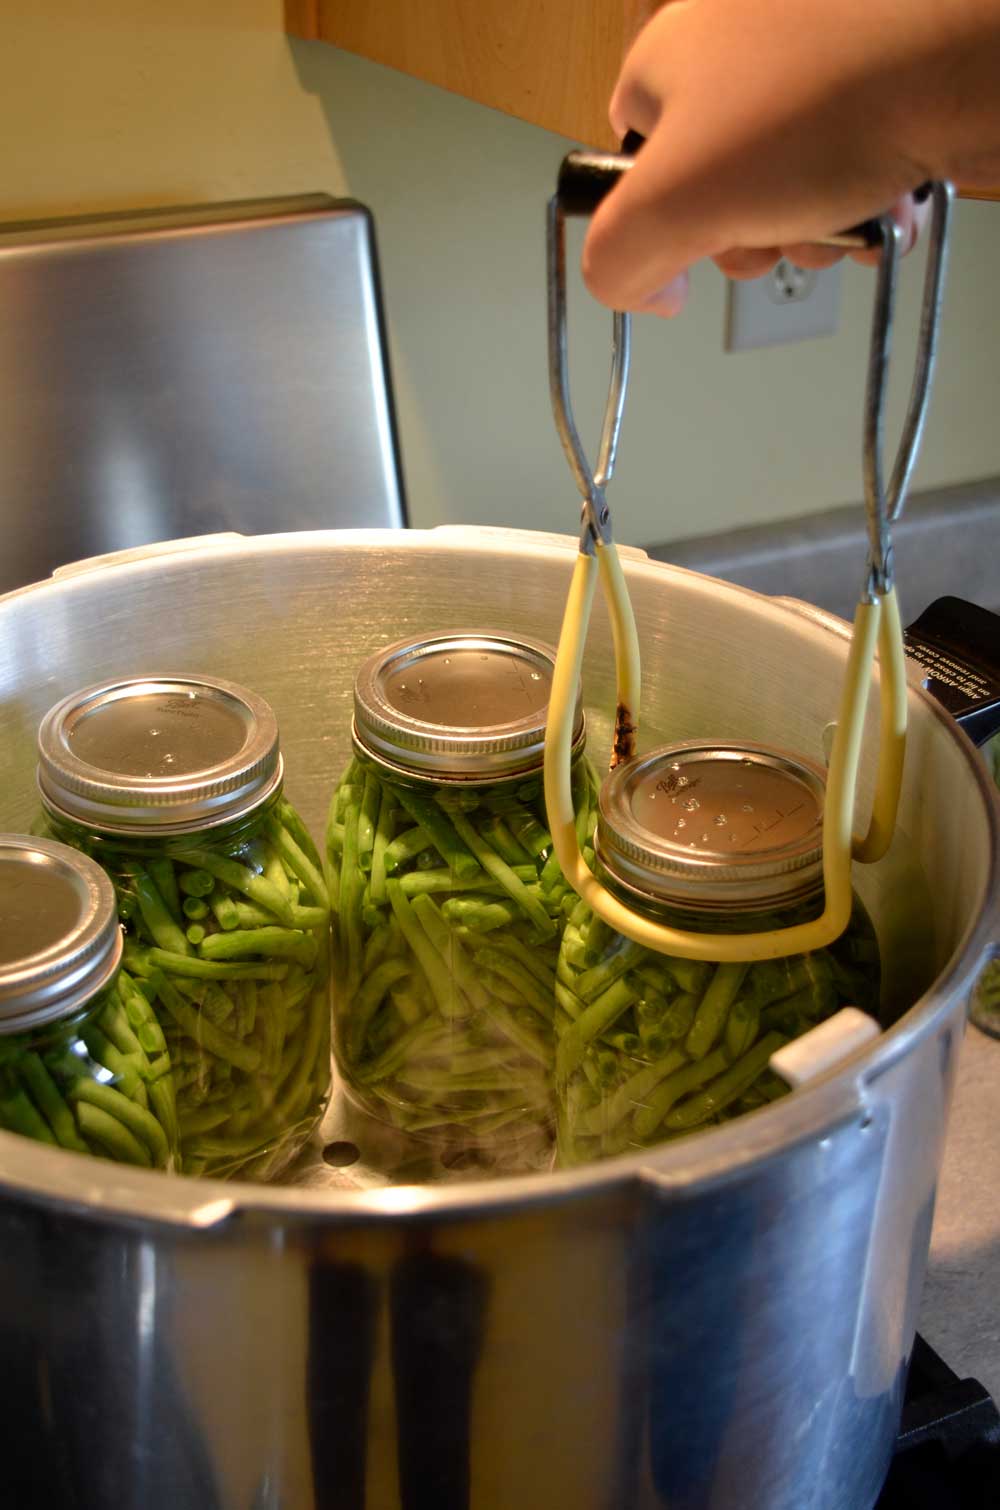
Place jars on the rack inside your pressure canner with 2–3 inches of simmering water. Lock the lid and vent steam for 10 minutes. Set the timer for 20 minutes for pints, 25 minutes for quarts.
Processing Times (Raw Pack):
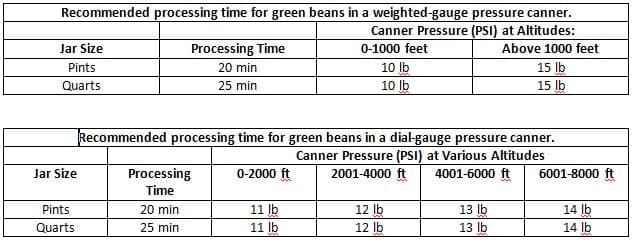
- Pints: 20 minutes at 10 lbs pressure (dial-gauge) or 11 lbs (weighted-gauge)
- Quarts: 25 minutes at same pressures
Adjust as follows for higher altitudes:
6. Cool & Check Seals
Turn off the heat and let the canner cool naturally to zero pressure. Don’t force it. Don’t bleed off the pressure or place cold rags on it or anything else, unless you want a big mess.
Wait 10 more minutes before opening the lid away from your face.
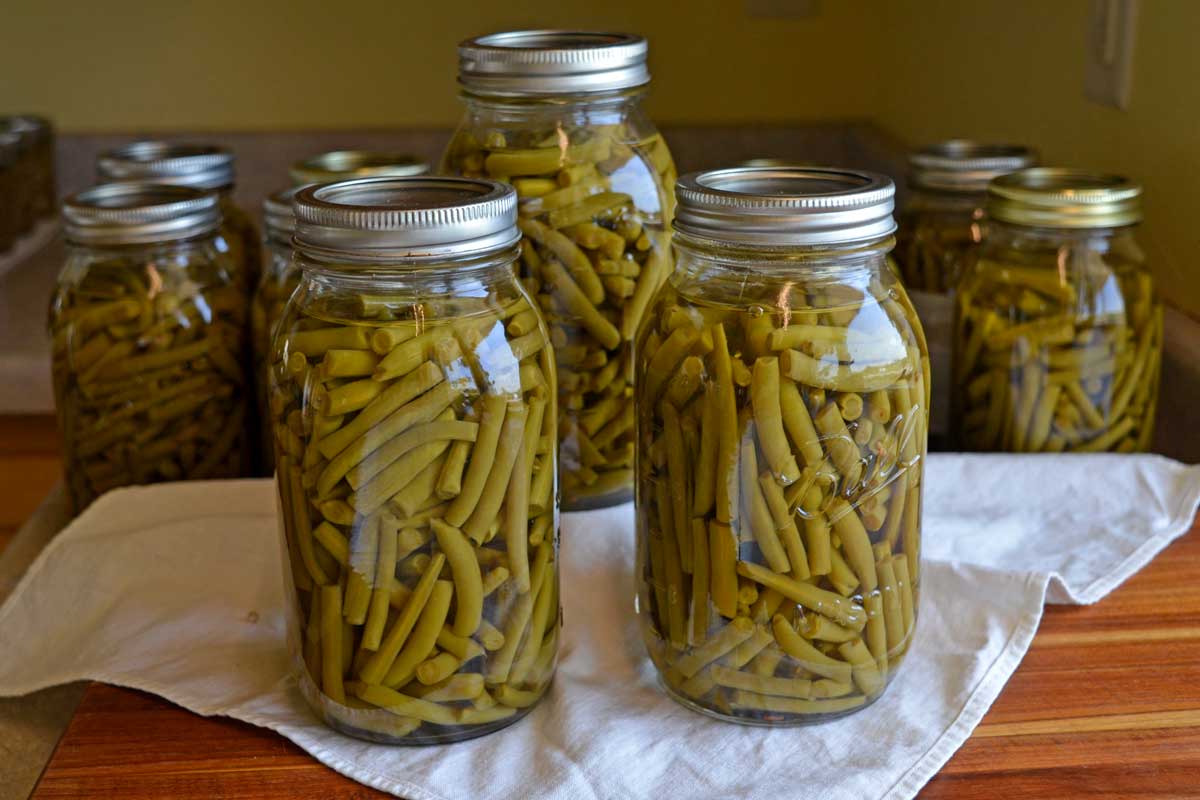
Remove jars and set them on a towel on the counter top, undisturbed, for 8-12 hours. Check lids — they should be concave and not flex when pressed. If you can pop the lids up and down, they did not seal properly. Refrigerate for short term storage or eat right away, or reprocess within 24 hours with a new lid.
7. Label & Store
Remove the rings (if you leave them on they tend to rust and may provide a false seal). Label and store in a cool, dark place. Home canned green beans are best used within 1-2 years of processing.
Frequently Asked Questions About Canning Green Beans
Salt is optional. It’s added for flavor, not safety. If you’re watching your sodium intake or prefer to season later, you can skip the salt.
Not unless they are pickled. Green beans are a low-acid food. This means they must be processed in a pressure canner to reach the temperatures necessary to kill botulism spores.
For best quality, use within 12–18 months. Food should still be safe longer if properly sealed, but flavor and texture decline over time.
Stick to canning beans plain. You can always season when you open the jar. Adding meats, dairy, or untested combinations changes the acidity and processing time, which could make the food unsafe.
How to Can Green Beans
Safe home canning instructions for green or wax beans in pieces or whole.
- Prep Time: 15 minutes
- Cook Time: 25 minutes
- Total Time: 40 minutes
- Yield: 7 quarts 1x
Ingredients
- Fresh, tender green beans (about 1 pound per pint jar, 1 1/2 pounds per quart jar)
- Canning salt (optional: 1/2 tsp per pint or 1 tsp per quart)
- Boiling water to fill the jars
Instructions
- Prep the Beans. Wash beans thoroughly in cool water. Trim off the ends and cut into 1–2 inch pieces (or leave whole if you like French-style). Check for blemishes or overripe beans — tough pods don’t soften in the jar.
- Prepare canning equipment, jars, and lids.
- Pack the Jars. Pack raw beans tightly into jars, leaving 1 inch of headspace. Add ½ teaspoon salt per pint (1 teaspoon per quart) if desired. Cover beans with boiling water, leaving 1 inch of headspace.
- Remove Air Bubbles & Seal. Slide a clean plastic or wooden utensil around the inside of each jar to release trapped air. Wipe rims with a damp cloth to make sure they’re clean. Place lids on jars and screw on bands until finger-tight.
- Process in the Pressure Canner. Place jars on the rack inside your pressure canner with 2–3 inches of simmering water. Lock the lid and vent steam for 10 minutes. Process according to the chart below, adjusting for your altitude. Processing Times (Raw Pack): Pints: 20 minutes at 10 lbs pressure (dial-gauge) or 11 lbs (weighted-gauge), Quarts: 25 minutes at same pressures
- Cool & Check Seals. Turn off the heat and let the canner cool naturally to zero pressure. Don’t force it. Wait 10 more minutes before opening the lid away from your face. Remove jars and set them on a towel, undisturbed, for 12–24 hours. Check lids — they should be concave and not flex when pressed.
- Label & Store. Mark the date on each jar lid or add a label. Store jars in a cool, dark place (50–70°F is best). For top quality, use within 12–18 months. If a jar doesn’t seal, refrigerate and use within a few days, or reprocess within 24 hours using a new lid.
More Bean Related Posts
- How to Store Green Beans (for Short Term or Long Term)
- What are shell beans? (Growing Tips, Usage, Storage)
- Bush Beans vs Pole Beans – Which should you grow?
- How to Save Green Bean Seeds

This article is written by Laurie Neverman. Laurie grew up in the kitchen, learning baking and home cooking from her momma. At age 15, she and her mom and two sisters created Irene’s Custom Cakes & Catering. This was her summer job through most of high school and college.
Originally posted in 2012, last updated in 2025.

what needs to be checked on home pressure canner before using this summer? who do I contact in Augusta County, Virginia 24401
Ideally, you would get the canner checked to see that it holds the correct pressure.
The Extension Office address and phone is as follows:
Extension Office Location
13 Government Center Lane
Verona, VA 24482
540-245-5750
If you call they should be able to get you connected with the right people, if the testing service is available locally.
What if your canner has a weight marked with 5 10 15
Pound weights only
Altitude – Weighted Gauge
0-1,000 ft – 10 pounds
1,001-2,000 ft – 15 pounds
2,001-4,000 ft – 15 pounds
4,001-6,000 ft – 15 pounds
6,001-8,000 ft – 15 pounds
8,001-10,000 ft – 15 pounds
I’m just starting to garden and I’m growing bush and pole beans. Can I mix the beans when I can them? Do they each have a different flavor or texture when canned? The same question with carrots…I’m growing Nantes, Danvers, Parisians and Mixed color carrots. Can they be mixed or do they also have different tastes and textures when canned?
Thank You for your help!
Hi Trish.
It depends upon the bean, but generally speaking it’s fine to mix and match to fill a jar with whatever type you have available. The canning instructions are safe for all varieties of string beans, whether pole beans or bush beans, green or purple or another color.
We usually grow purple podded pole beans and Emerite pole beans, and I mix them in jars. I can tell by the shape of the bean which is which (the purple podded pole beans are flatter), even though they both turn green after canning. Yellow wax beans have a similar texture, too, though they stay yellow.
If you want to can a bean with a larger pod, like a runner type, you may notice a difference in texture there, but it’s still safe to can them the same way. If you’re canning the pods and not the beans inside the pods, you want to catch them young, before they get too chewy.
Most carrots tend to have similar flavors and textures after cooking or processing, but you might find that some are a little more floral or a little more “foxy” (wild tasting). I’ve noticed that most of the purple carrots I’ve grown have a stronger flavor and studier texture that benefits from cooking. They can be a little chewy when raw, especially the really dark varieties.
Purple carrots will also stain the heck out of other foods in the same dish 9or canning jar). They make everything look like Muppet chow at first, and then fade to a less appetizing shade of grey. I’d keep them separate when canning, if you have any. I haven’t noticed the same problem with other carrot colors.
Love this web it is very helpful
How do you cook the canned beans?
They are cooked during the canning process, so you simply reheat them on the stove top or in the microwave.
Is there a purpose for adding salt to the beans? I have never cooked with salt much so i dont think id need salt to flavor them. plus my 16yr old is on low sodium diet.
They do help a small amount with keeping them shelf-stable, but the pressure canning process is the critical part and the salt can be skipped if you prefer.
Thank you.
Any suggestions on a canner for someone who will can green beans, tomatoes but not a overwhelming amount?
If you want to can green beans, you need to have a pressure canner. The Presto 16-Quart is a good unit, and the one I started with.
If you think you might want to be able to stack pint jars in the canner at some point, you’d need a 23 quart.
You can use a pressure canner for water bath canning, but it would be easier to have a dedicated water bath canner. (The pressure canners are heavier, and get really heavy when filled with water. It’s also a little bit tricky to keep the lid on but make sure it doesn’t build up pressure, at least on my stove, which tends to run hot.)
Amazon stocks 21 quart enamel water bath canners with utensil sets. You may also be able to find some at your local hardware stores.
I use the old blue canners to hot water bath my beans. I want to use pint jars. I cover my beans with water and boil how long should I boil my beans in pint jars?
I don’t recommend hot water bath canning of beans or any other low acid food due to the risk of illness or death from botulism toxin. Please see https://commonsensehome.com/botulism/ for more information.
My mom wants to freeze her green beans from her small garden until she gathers enough for pressure canning. Should she blanch them first? Could she then just thaw them out in the boiling water and use the same recipes on your site? Thanks for any insight you can give!
For best quality, I don’t recommend freezing before canning. The freezing and thawing process softens the beans, and the canning process also softens them, so by the time they were through both processes, they’d be mush. Beans will hold in the refrigerator for a week or a little better, which would allow time for multiple pickings to gather more beans. Collecting them in the fridge for canning would give a better end product.
If someone was bound and determined to freeze and then can beans, I’d make sure the thawed beans were at room temp (or warmer) before starting processing.
Once green beans are canned, can they be stored laying on their side? Or do they need to be stored upright?
I would not recommend storing jars of canned goods on their sides. I usually place mine in boxes, and will sometimes stack the boxes two layers high, but no more than that.
When you mentioned at the end of the article to remove the rings since they tend to rust, were you referring to the jars that didn’t seal good and were going in the fridge or do we take the rings off for long term storage?
You need to keep the rings on for jars that didn’t seal (until you use them), since the lids will be loose on top of the jar. Remove rings for long term storage. All lids on jars suitable for long term storage should have lids that are tightly clamped on by vacuum pressure.
Laurie…THANK YOU sooo much for the FANTASTIC, step-by-step, easy to understand directions…
My beans look YUMMY……Can’t wait to eat them when our cold, Upstate NY winter arrives….We’ll enjoy our “little taste of Heaven” until next Summer’s harvest!!!!
Glad you found the post helpful, Cheryl.
A neighbor brought beans to a boil, packed into quart jars, but forgot to cover with boiling water before putting on the lid, went ahead and pressured the proper amount of time. The jars sealed but have no water covering the bean. What would be the solution to salvage this 7 quarts of good beans? Maybe freeze in the jar???
They could be stuck in the fridge and eaten within a few days. I wouldn’t freeze them in the jars, but they could be opened and the beans repacked into freezer bags and frozen.
I don’t have a pressure cooker… can I still hot water bath my green beans???!? HELP!!!
Because they are low acid, green beans must be canned in a pressure canner to avoid spoilage. Pickled dilly beans – https://commonsensehome.com/dilly-beans/ – can be safely canned in a water bath canner because they have added vinegar. Otherwise, you can freeze or dehydrate your beans. To freeze beans, clean and blanch in boiling water for 3 minutes, chill, drain and pack. I prefer to vacuum seal, but you may use any freezer safe containers. For dehydrating, I again blanch for 3 minutes, chill, drain and pat dry. Most of the time I dehydrate them overnight so they are thoroughly dry. Pack in an airtight container for storage.
I’ve never canned before but am trying to start. I was wondering if anyone knows that when you are canning green beans can you add other seasonings, fatback, and butter to them or is that dangerous.
It’s best not to arbitrarily add fats or protein to canning recipes, as it will affect heat transfer and processing time. If you want to can something with fat or protein, please use a tested recipe. Small amounts of dried spices may be added without affecting processing.
I’ve been planting emerite pole beans for 4-5 years now. They are the BEST variety I’ve ever grown. I stumbled upon them and thought I’d try something new and have never gone back to Blue Lake or Kentucky Wonder. Even those I pick that that I miss at their peak size stay fleshy and not “seedy”. The least stringless bean I’ve grown as well. I’m pleased to see you’ve discovered them too.
When I first started my own garden, I tried a number of different popular varieties. Emerite beat the pants off of all of them. As you said, they hold quality even at larger sizes, and they are super productive.
I keep asking if you can can green beans if they have a bite or a rust mark on them. My wife’s mother told her don’t!! I’ve never gotten an answer. thank you.
We try to trim out those parts when processing, although once in a while some small rust spots make it through. The chew spots aren’t as bad, but rusty beans don’t hold up so well in storage.
At the end of the 25 minutes, can I remove the pressure weight or must I leave it on until it cools on its own to “0” pressure? If so, why?
You should leave the weight on until the pressure goes down to zero on its own. This allows the pressure to equalize within the canning vessel and jars. If you remove the weight prematurely, the jars may rupture.
Using my new pressure Barton cooker doing bean’s, it kept my pressure at 11 and I cooked for 20 minutes, but my little needle indicator never came up? The pressure held steady, will my bean’s process safely? I’ve always used an electric power cooker.
I assume you’re talking about a pressure canner and pressure canning, not pressure cooking?
I have not used a Barton pressure canner, and the online reviews indicate that the instructions that come with the canner are not very clear. I don’t know if their pressure relief valve pops up and locks like the Presto units.
If the canner held 11 psi for the required time, the beans should be safely processed.
You have tips and precautions I have not seen elsewhere. I have been dehydrating due to limited food prep and storage space. Will keep these instructions in mind for when my camp kitchen turns into a space with counters, tables and shelving. Me, too! Love those green beans! Met cutworms for the first time last year. The Anasa’azi beans did not appear to have been bothered at all beyond a few experimental grasshopper nibbles. Pole beans, bush beans, all kinds of plants hit the mulch and bunnies must have nibbled on most of what was left. Am cautiously experimenting, with emphasis on Anasa’azi’s. Thanks!
Sandy
Am I understanding correctly that you found the Anasa’azi beans to be cutworm resistant?
How do you like the Purple Podded pole beans? We grew Royal Burgundy bush beans and loved them. Looking for a purple pole bean to try.
They don’t produce quite as heavily as the Emerites (my favorite green pole bean), but they are the best purple pole bean I have found and a reliable producer.
I love the purples ones. I mix mine also when canning.
Love reading your canning recipes! I have been canning for well over twenty years and do things quite a bit different than you. To each his own as they say! I generally put up a lot more than you, 50 quarts of beans and 150 pints of salsa and Lord only knows how much tomato sauce I canned last year, I forgot to put it into inventory! When I can ‘big’ I don’t have to can the same thing every year and there is less danger of us running out. I DON’T buy canned food from the stores. I do ketcup and tomato soup also. Actually if I can grow it, I will dry it or can or freeze it! LoL! Love yur site and posts, Keep up the good work. More people need to get out of the stores and back to the basics!
Rachelle
Whatever works to put up food for your family is what’s right for you, as long as it’s kept clean and properly processed. 🙂 My mom’s system was a little different, too. I’m hoping for a good tomato crop this year, because the boys sure can pack away the salsa. Good to hear about your massive canning efforts. 🙂
Wow, I’m so impressed by those numbers! I would love to can that much, especially since we have a fairly large family (5 kids) and we’re moving towards more and more self sufficiency. I don’t have enough garden room for that much salsa, beans or tomatoes but I could still do way more. I’m curious how your method is different, since I’m new to pressure canning. Loved reading about what you do (and having different things in different years if you do it big). Thanks for the inspiration!
Now that the boys are older and we go through a *lot* of beans, I usually plant two 15 foot double rows of Emerite pole beans each year, plus a single 8-19 foot double row of Purple Podded Pole beans. In a good year, this gives us enough to can and then we barter any extras for other items from neighbors.
Wow, your canning surpasses anything I have ever been involved with. I haven’t canned in over 15 years as I used to help out my friend while doing it. I want to start doing it again and this website will help me when I’m ready. Thanks for the post I always enjoy reading these. God bless
Welcome, James. I was the youngest of six kids growing up on a dairy farm, so my mom always put up large amounts of canned goods each year. It’s a good feeling to have a well-stocked pantry at the end of harvest season.
Why did my canned green beans sour and the lids were sealed.
What do you mean by “soured”? Did you follow all the safety guidelines?
I have the same problem with my beans getting sour. It is not every jar. I can them all the same, they have a white film on the bottom.
Are they truly sour, or is something else going on? If you have hard water, sometimes the minerals will precipitate out of solution, forming a white film at the bottom of the jar. Using iodized salt instead of canning salt may also cause discoloration issues.
I’m losing green beans, too. The lid seems sealed, “pops” when opened, but beans smell spoiled and there is a white film on the bottom of jar. This is 4 or 5 months after processing. I have been canning my home grown produce for over 45 years and have not had this problem. Not with beans, tomatoes, or any fruit. I wonder if the dial gauge on the canner is going bad and will try to find a place to have it tested. If you have any other ideas, please help.
Your local extension office should be able to help you test your canner. Have you had your water tested recently? The sediment in the bottom of the jar might be some sort of mineral contamination or other that would affect the flavor of the product.
I canned Tomatoes for first time summer before last, i only lost 3 jars, and last summer i canned bread and butter pickles, dill pickles, and tomatos, beets,and tomato salsa,Peaches and Peach Salsa,my first time,and peach jam and i only have a few jars of jam and peaches left. I know my Granny was watching from Heaven.
You should have your pressure cooker tested each year to see accurate of the pressure guage. And how much correction you need to allow for depending how far the gauge is off. Low or high. Even new gauges are off. This assures that you process it at the correct pressure and time. To be safe.
Did you mean pressure canner?
So beautiful!! Way to go!