Easy 3-Ingredient Beeswax Lotion Bar Recipe (Non Greasy)
This post may contain affiliate links. Read my full disclosure here.

Most homemade lotion recipes involve quite a few ingredients, blenders, and more mess than I’d prefer to clean up. These lotion bars are the opposite of that. All you need for these hard lotion bars is three ingredients – plus a pot and molds. That’s it!
You can even use muffin tins if you don’t have other molds, since the bars use all-natural ingredients. We have troubleshooting tips, packaging ideas, printable labels, and substitutions to help you customize your bars.
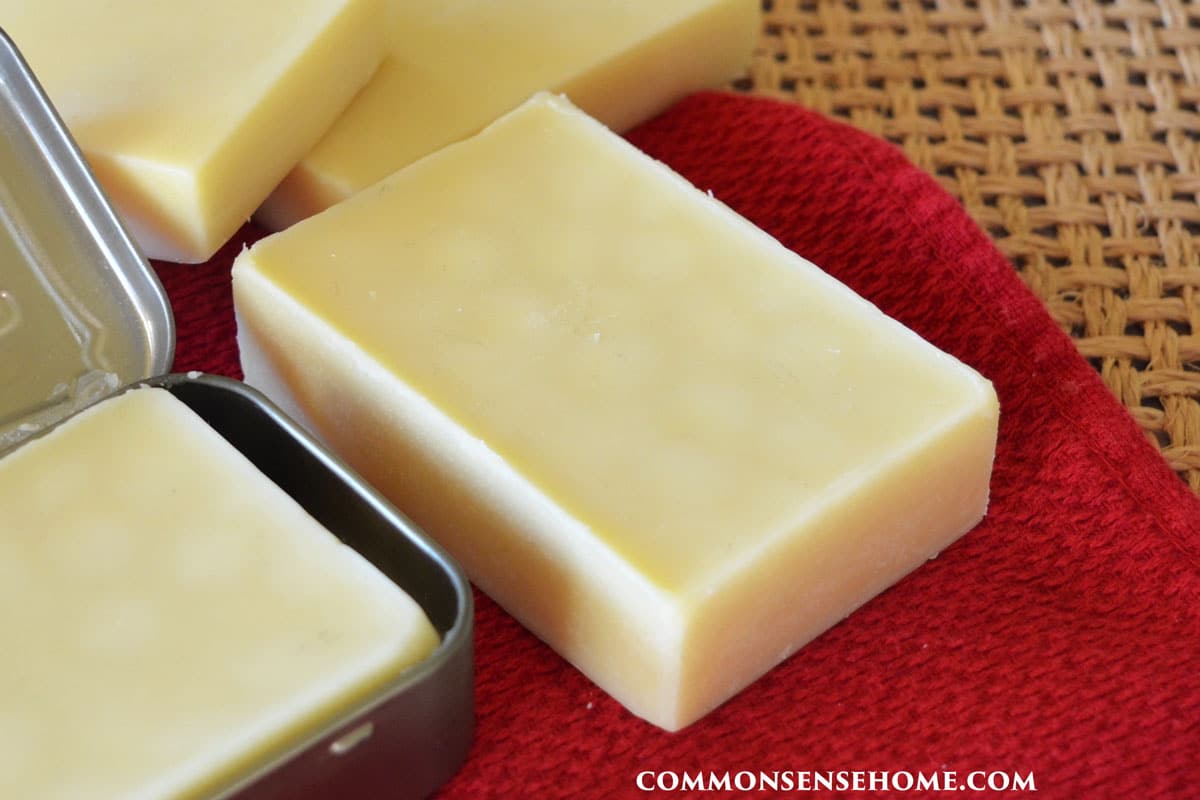
Table of Contents
What is a Lotion Bar?
A lotion bar is simply lotion in solid form. At room temperature, it stays firm. When you hold it in your hands or rub it on your skin, your body heat softens it just enough to glide on smoothly.
They coat and protect the skin, and are especially helpful for:
- Hands
- Heels
- Elbows
- Dry patches
The basic formula includes:
- Wax (beeswax) – gives structure and creates a protective barrier
- Butter (cocoa butter or shea butter) – deeply nourishing
- Oil (coconut oil or olive oil) – helps soften and spread easily
Together, they create a barrier that helps reduce moisture loss without feeling overly heavy.
You can also add vitamin E for longer shelf life and essential oils if you’d like a light scent or added skin support. If you enjoy working with herbs, you can infuse herbs into oil and then make the lotion bar with the infused oil.


How to Use a Lotion Bar
Using a lotion bar is simple. Hold the bar in your hands for a few seconds to warm it slightly. If your hands are cold, you may need to rub it a bit to get it started.
Then:
- Rub the bar directly on dry areas, or
- Rub it on your hands first, then apply where needed
It works especially well right after washing your hands or getting out of the shower.
Do homemade lotion bars really work?
These lotion bars have been wonderful for my winter dry skin.
I used to coat my hands at night with petroleum jelly because it was the only thing that helped. Regular lotions didn’t seem to make much difference. Plus, many of them have fragrances or ingredients I’d rather avoid.
Since I do a lot of dishes and wash my hands frequently, dry skin used to be a constant issue. These bars have been a simple fix. My only regret is that I didn’t try them sooner. The scent is light and pleasant (especially with cocoa butter), and they absorb fairly quickly.
How to Make Lotion Bars at Home – Step by Step
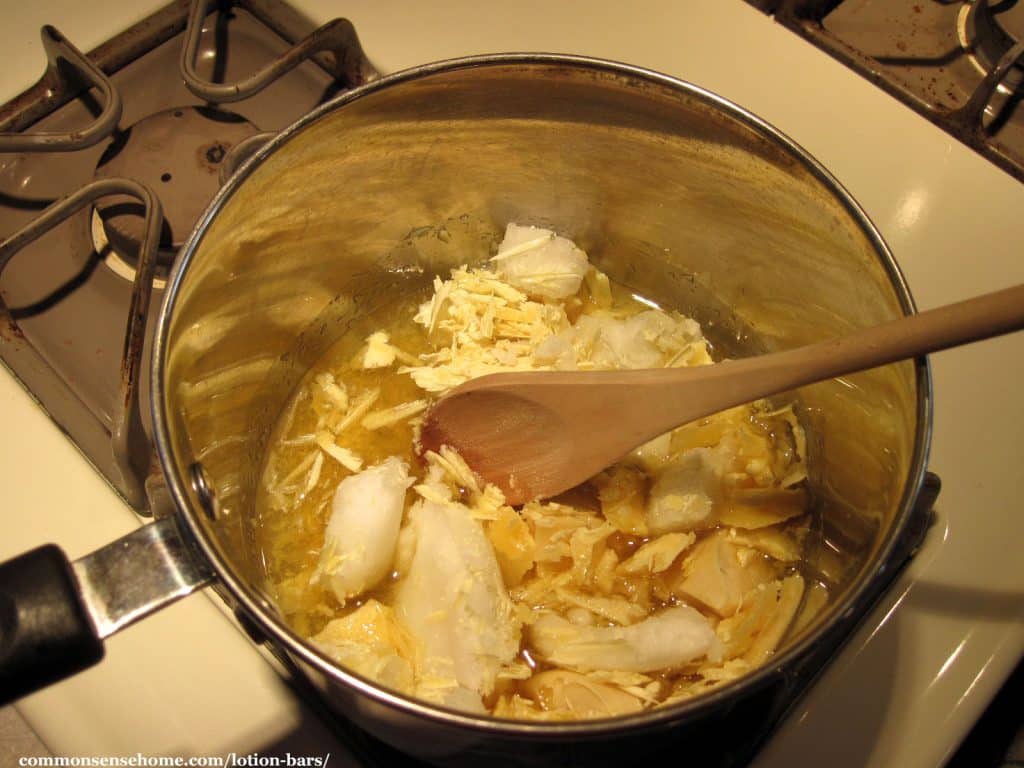
It helps to start with small chunks or shavings so everything melts more quickly.
Place butter, oil and wax in a heavy bottom pot or double boiler. You may also use an Instant Pot on the “keep warm” setting. Gently heat until everything is fully melted.
Remove from heat. Add optional ingredients:
- 1 teaspoon vitamin E per 12 ounces
- ~10 drops essential oils per 12 ounces
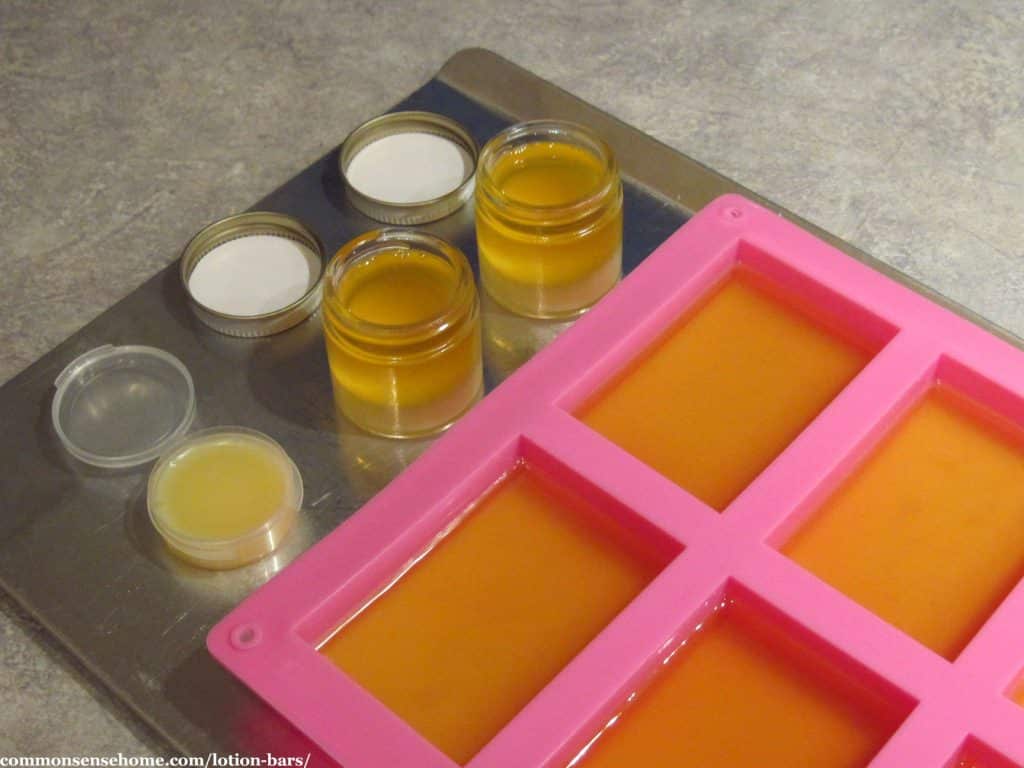
Pour the liquid into molds and let cool completely (several hours) until firm. If you have lip balm tubes, pour the tubes half full and allow the hard lotion to set up slightly, and then finish filling the tubes. I like to set my molds on a baking sheet to keep them level and easy to move around.
12 ounces of product fills one of the pink rectangular bar molds, making six bars. In the photo below I also filled small containers with lids to use as lip balms.
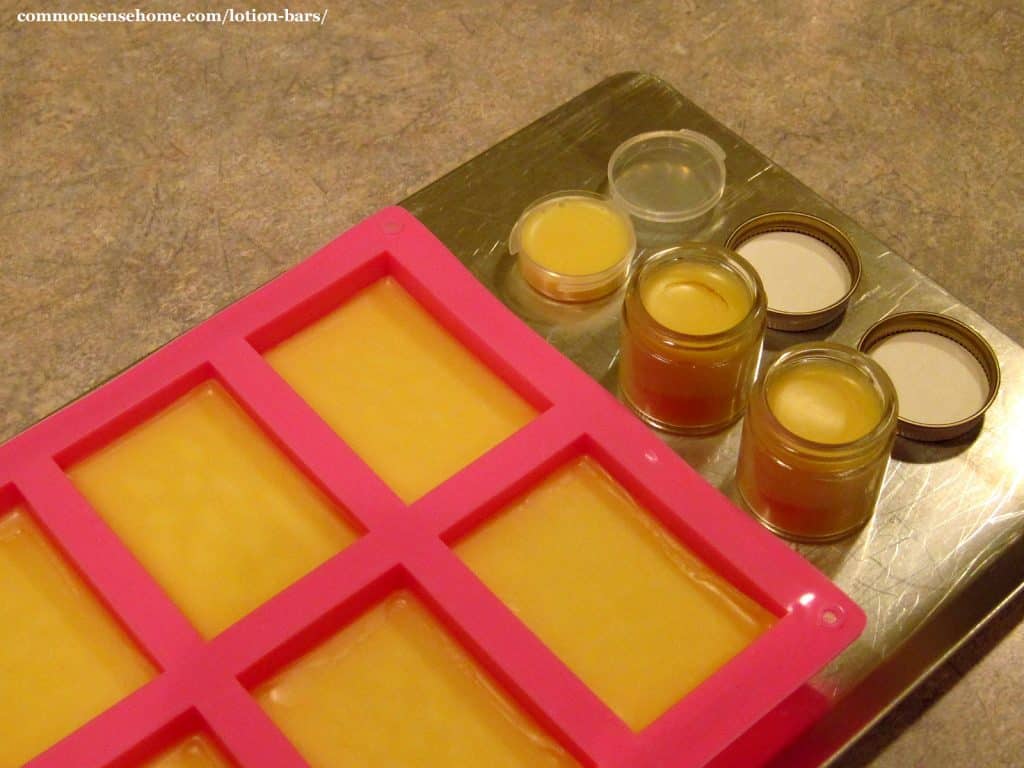
After several hours, the lotion will be firm and hard and should release easily from the mold.
Using Essential Oils (Optional)
Adding essential oils is optional. I skip them because we are sensitive to them. Start small—about 10 drops per 12 ounces.
Some potential combinations:
- Orange + cocoa butter (smells like chocolate orange)
- Peppermint + cocoa butter
- Lavender + shea butter
Keep in mind that cocoa butter already has a natural scent, so choose oils that pair well with it.
Non Greasy Lotion Bars – Troubleshooting Tips
Sometimes lotion bars have a greasy or slippery feel, especially in warm weather. Other times the bars may feel a little tacky or sticky.
- If your bars come out too slippery:
- Remelt and add more beeswax and/or cocoa butter.
- If they are too sticky/tacky:
- Remelt and add more oil.
Warm weather will naturally soften the bars, while cooler temperatures make them firmer. Don’t be afraid to remelt and adjust—this recipe is very forgiving.
You may also want to experiment with different combinations of oils and butters to see if you like those better. (See the Substituting Ingredients section below.)
What kind of beeswax do you use for lotion bars?
I prefer using unrefined beeswax for lotion bars. It has a light honey scent and a natural yellow color. We buy ours in bulk from a local apiary, and then chop off bits as needed for projects.
You can also use:
Would you like to save this?
- Beeswax pellets (easier to measure and melt)
- Refined beeswax (white, with less scent)
If you need a beeswax-free option, substitutes include:
- Candelilla wax
- Carnauba wax
- Soy wax
Candelilla and carnauba amounts = roughly half or less than amount of beeswax. Substitute soy wax in equal amounts. Soy wax is hydrogenated, so it’s not my first choice for skin care.
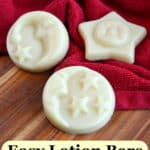
Lotion Bar Molds
I prefer the basic oval bars or rectangular bars, but the boys liked other shapes when they were little. Any heat tolerant mold will work.
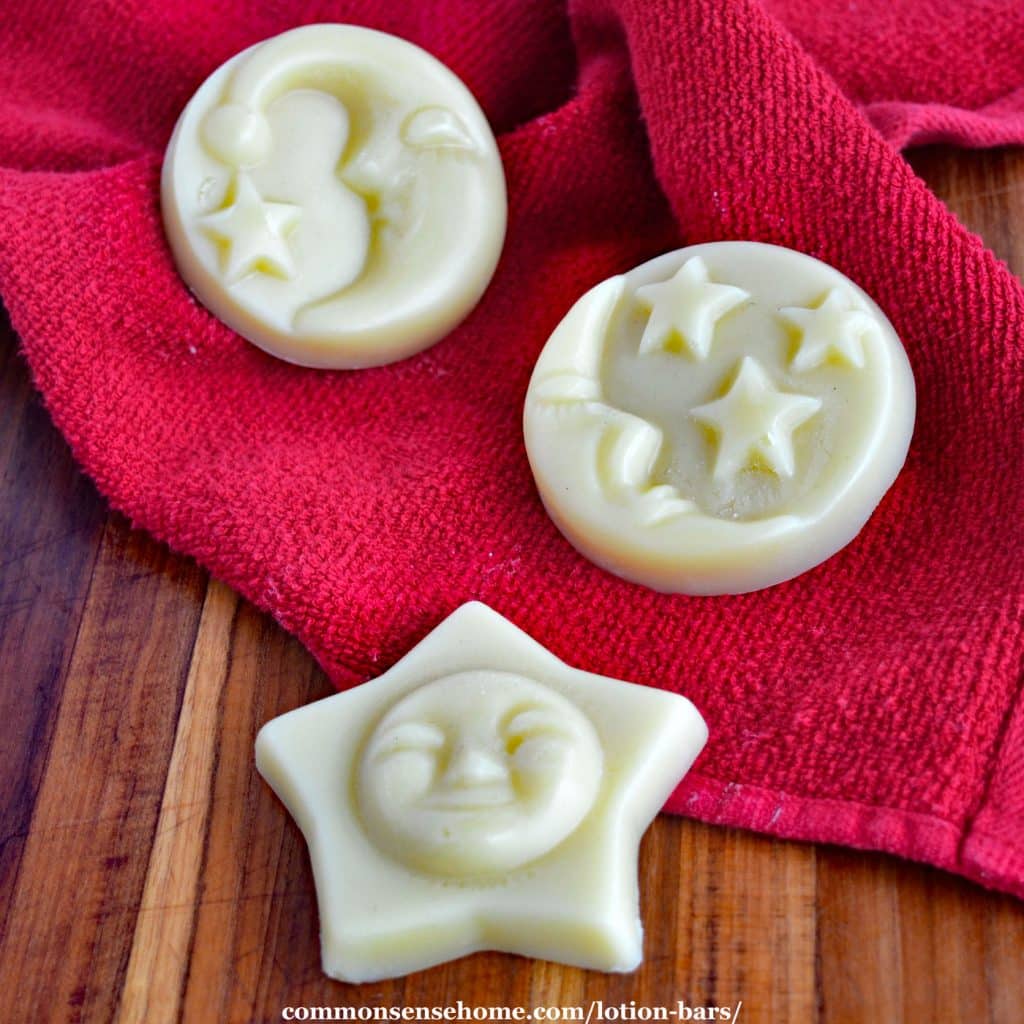
You can also use ice cube trays, muffin tins or candy molds. Stick to the basic recipe if you’re using molds that you plan to reuse for food. (Essential oils can leave a lingering scent and/or flavor in the molds.)
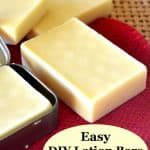
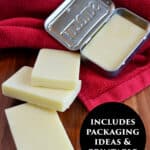
Another option is to pour the “bars” into a salve tin with a lid. You can also use a rectangular soap mold to create a bar that will fit into a rectangular tin.
I prefer to pour the bars separately and store them in the tin. It’s easier to apply the hard lotion if you can hold the bar in your hand.
If you use the rectangular bar mold, fill the cavities to about 1/8 inch below the top edge. That way they will fit in the rectangular tin and the lid will close snugly. The molds and tins are in the table below.


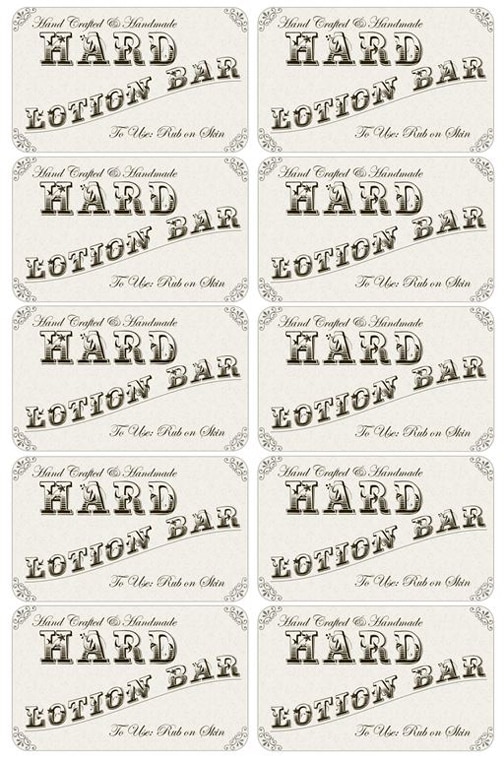
My friend, Casey, made up some simple printable labels that fit on the rectangular tins. (See more practical gift ideas here.)
Substituting Ingredients in Your Lotion Bars
One of the nice things about this recipe is how flexible it is. You can combine different butters and oils with good results.
Butters
- Cocoa butter
- Shea butter
- Mango butter (softer bar)
I find shea butter bars to be slightly tackier and slower to absorb. Cocoa butter gives a firmer bar and a scent I prefer.
Oils
- Coconut oil
- Olive oil
- Jojoba oil
- Fractionated coconut oil
I typically use coconut oil or olive oil, depending on what I have on hand.
Other Options
High-quality tallow or lard can also work well for skin care, though you may want to pair them with essential oils for scent.
See The Shelf Life of Oils for a listing of oil longevity. Note that many cooking oils labeled as “olive oil” are vegetable oil blends with olive oil. For best results, use real olive oil.
Packaging Your Lotion Bars
If you make several bars and don’t use them right away, keep the extra bars in a sealed container or bag. This will help preserve the lovely chocolate smell or any essential oils you choose to add.
As mentioned above, the bar molds fit neatly into the tins, which is great for gift giving or everyday use. To keep hard lotion in your purse during warm weather, a sealed container is best. Pour your lotion “bar” into a container with a screw top or other tight fitting lid. Apply it like a beauty cream.
For applying the hard lotion bar to heels or large areas of the body, use a deodorant style container. It makes the bars easier to hold.
It’s handy to make multiple smaller bars so each family member has their own. I learned this from experience when I first starting making hard lotion.
My younger son loved the cocoa smell so much he rubbed it all over himself after he got out of the shower. He even rubbed it in his armpits. I had been using the same bar as a lip balm, too…oops…
The next time I made a batch, I poured some into smaller containers to use as lip balm, and made my son his own special bar.
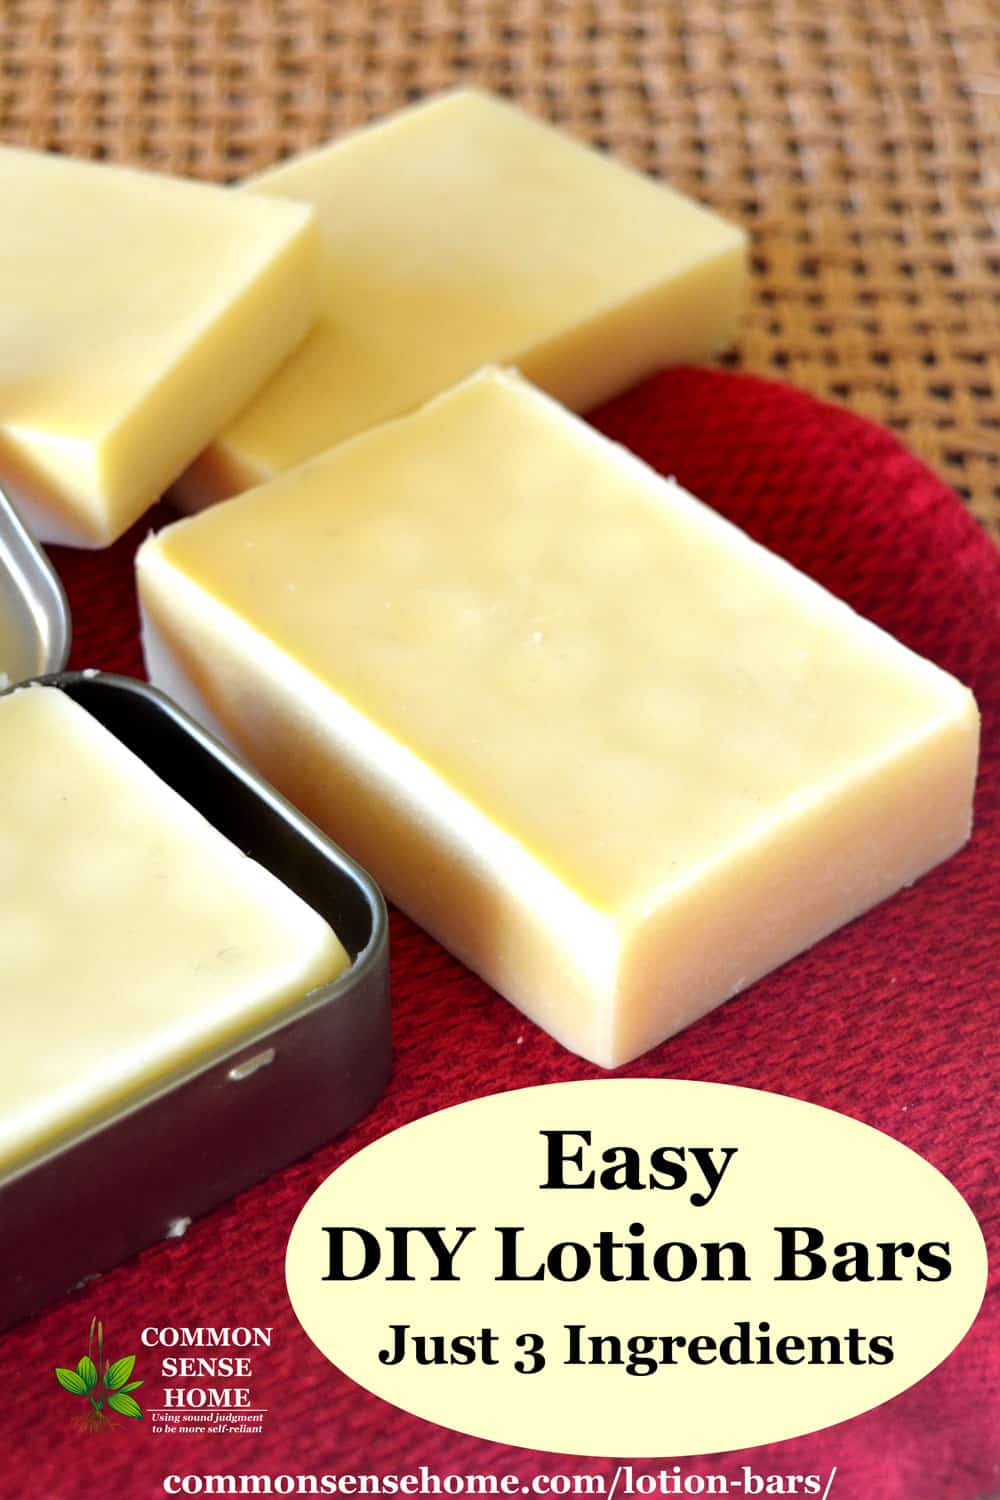
PrintLotion Bar Recipe (Non Greasy, with Beeswax)

With only three ingredients and one pot, this is the easiest way to make hard lotion bars and could not be more simple to clean as well. They repair your dry skin, smell great without being over powering, and are not greasy.
Ingredients
Use 1 part each, by weight.
- Cocoa Butter or Shea Butter
- Oil, such as Coconut Oil or Olive Oil
- Beeswax
For instance, 2 ounces of each ingredient. If using liquid oil, you can measure by volume. For instance, 2 ounces of olive oil to 2 ounces by weight each of cocoa butter and beeswax.
If you don’t have a scale, you can use a measuring cup to measure by volume. For instance, as one cup cocoa butter, one cup coconut oil and one cup beeswax. This will make a softer bar. For a firmer bar, use one cup butter, a half cup oil and a cup of wax (or similar proportions).
Instructions
- Place butter, oil and wax in a heavy bottom pot or double boiler. You may also use an Instant Pot on the “keep warm” setting. If you don’t have a double boiler, you can make one by placing a glass bowl or wide mouth Mason jar in a small saucepan of water.
- Heat gently, stirring regularly, until ingredients are melted.
- Pour into molds.
- Allow to cool completely before removing from molds. You can chill the bars in the refrigerator for 10-15 minutes to speed up the process. The finished bars do not require refrigeration.
Notes
Options: Add 1 teaspoon vitamin E per 12 ounces of bar for increased shelf life. Add essential oils of choice after lotion bar mix is removed from heat, before pouring into molds. Start with around 10 drops per 12 ounces of bar.
Remember, with essential oils, a small amount goes a long way. If you’re using cocoa butter, keep in mind how the EO you choose will pair with the scent of chocolate. Mint and orange essential oils are popular pairings with cocoa butter.
You may also make your bars with herb infused oils, such as plantain oil, which is great for skin issues, or dandelion oil, which is wonderful for muscle aches.
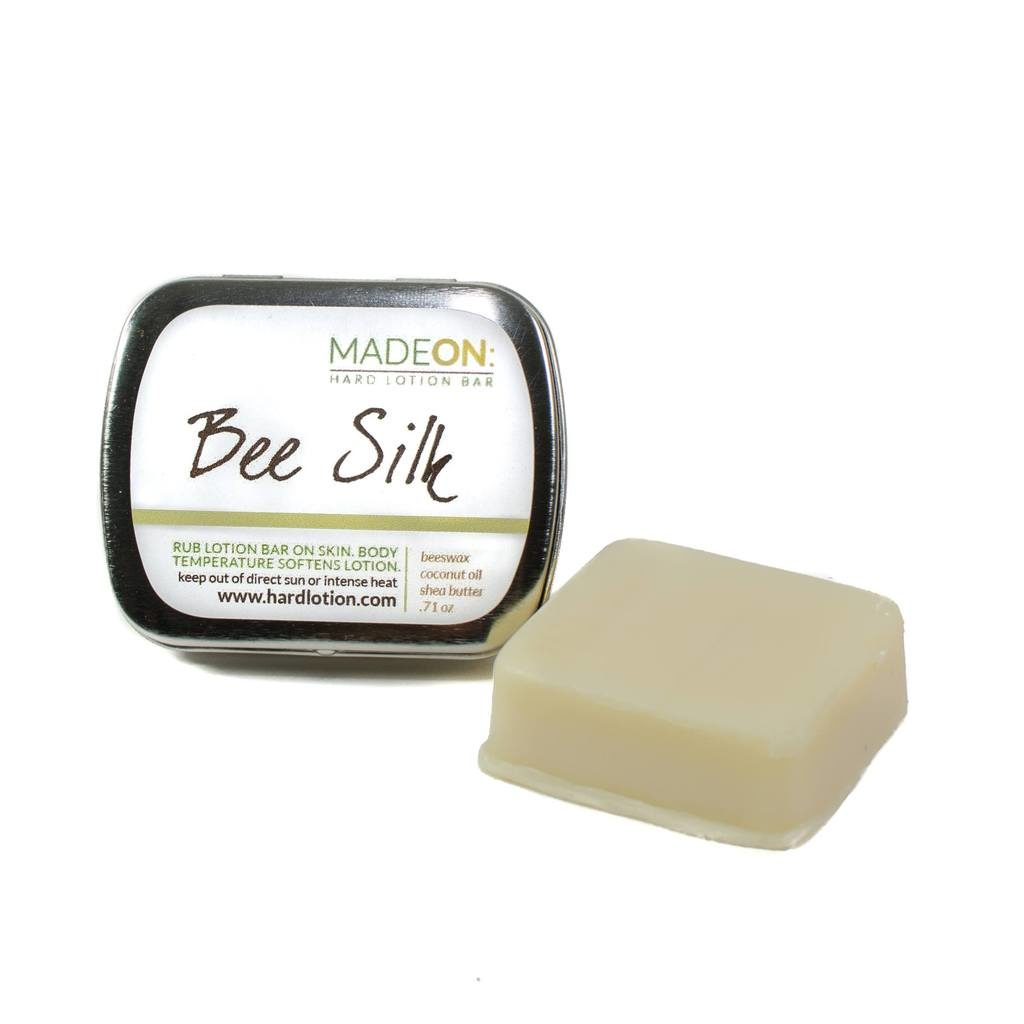
Buy Lotion Bars Online
If you’d like to purchase the bars ready made, you can visit the MadeOn Hard Lotion Store here. MadeOn Skin Care products is a family owned small business that creates non-toxic skin and hair care products for all ages.
You can find these ingredients (and containers and molds) at amazon.com (linked within the post), soaperschoice.com, and many other sites around the web.
Keep in mind that two ounces of each ingredient made three bars, so a bulk purchase would make a LOT of bars.
I hope you enjoy this great recipe as much as we do. This one’s a keeper in our house! Please pass the post along if you find it helpful, and leave a comment if you have any questions or ideas.
More Natural Products and Tips
You don’t need chemicals to smell clean. Try these articles instead.
- Easy Homemade Deodorant & The Best Natural Deodorants
- Make Your Own Perfume with Essential Oils
- 6 Ways to Get the Musty Smell Out of Clothes and Towels

This article is written by Laurie Neverman. Laurie is a lifelong learner with a passion for natural remedies and holistic healing. She’s successfully improved her eyesight, cleared her psoriasis, and gotten off of prescription medication.
Originally posted in 2012, last updated in 2026.
do you wet these to use them or just rub them in your hands?
Just rub them against your skin. The warmth of you skin will soften the bar. Think of the texture of a lip balm, just a bit firmer.
Could you put this in a deodorant container?
Sure!
Ok Thanks i’, a give it a try
Is the Cocoa butter a Hand And Body Lotion or do you use a pure Cocoa butter solution? I’m am new to this Thanks
The cocoa butter I’m referring to Is just plain cocoa butter made from cocoa beans. It’s a solid at room temperature.
I have seen beeswax in large bars, but the beeswax pellets are hard to find. Can I use the bar if I cut it up or grate it?
Absolutely! The pellets are easy to use, but bulk beeswax will work just fine.
I make solid lotion bars using only cocoa butter and shea butter. I use organic unrefined cocoa and shea butter. Since the cocoa butter is so hard, if I use it at a much higher rate than the shea butter, the bars stay hard and I’ve made a beautiful lotion bar using only 2 ingredients.
Maybe I should add couple drop of tea tree with Shea butter as astringent in the lotion bar.
When using olive oil, do you use one particularly marketed for skin? Or is cooking olive oil okay?
If it’s safe enough to eat, it’s safe to put on your skin. I use oils for cooking and skincare interchangeably.
do you have any idea of cost of these? per bar?
It would really vary dramatically based on the prices of individual ingredients and the size of the bars. I buy everything in bulk, so that keeps the price lower. They aren’t cheap, but they last a really long time. I’ll keep a single bar on my nightstand for several months.
Hi. Thanks for sharing your recipe. I would like to try to make this for Christmas gifts year. What do you store them in? Any packaging recommendations?
You could wrap them individually in wax paper or plastic wrap and tie with a ribbon. I keep them in a closed container or plastic baggie until I am ready to use them to trap more of the scent.
I pour my “lotion bars” into stick deodorant containers so it’s easier for me to rub on my feet and legs. I also make some and add vitamin E and arrowroot powder (I’m too sensitive to baking soda or I could use that) and use them for deodorant.
Do you use coconut oil for the oil?
I made these today and I’m loving them! I added the scrapings from two vanilla beans to mine instead of the essential oils (local store had nothing but tea tree oil – pew) and they smelled fantastic! I’m a long-time eczema sufferer, too, and these really helped with the constant itching! Thanks for sharing!
oh! this is fantastic! I was wanting to add vanilla, but didn’t order vanilla (oil?) when I placed my Amazon oil. Will try scrapings!
I tried this today and my bars turned out wonderfully! You were right…super easy!
It’s my kind of craft project. 🙂
Hi, Common Sense Idea!
I have never been to your delightful and informative blog before! I am going to be bold here, but I would like to ask you to consider linking-up this post next Wednesday (the 9th), because I would like to feature this post. Also, my thinking is that a lot of what you write about is very helpful and would encourage my readers. I need to make these bars for the same reason you did and I will have it right in front of my face in the link-up 🙂 Have a great New Year!!
Jacqueline – You have a link up on Wednesday? I’ll try to remember to visit. 🙂
I’d like to make these for my sister, but she’s vegan and therefore won’t be able to use them because they contain beeswax. Is there any other ingredient I could use in place of beeswax that would work the same?
You may be able to substitute Candelilla wax, carnuba wax or soy wax. Candelilla and carnuba amounts = roughly half or less than amount of beeswax. Soy wax can be substituted in equal amounts.
You can buy soy wax online.
More on vegan beeswax substitutes: http://www.ehow.com/list_5901420_beeswax-substitutes.html
I have very sensitive skin and have found that formulas with soy or candelilla wax can rash me up. No one has mentioned jojoba or castor oil, which appear in some skin formulas. They both upset my stomach, even when not used in lip balm, I guess because these waxy oils persist and eventually get onto my lips. Maybe a test batch would be a good idea. Some people go vegan due to sensitivities.
Regarding dry, chapped skin, I noticed that while my husband was an Ayurvedic massage technician, his car-repair rough hands were amazingly smooth and soft. Sesame oil was a common ingredient in the custom massage oil formulas he used. Sesame has particularly penetrating and moisturizing properties (among many other benefits), and is said to be able to penetrate the teeth and bones! It was the first oil recommended to me for oil pulling, and was very effective for that as well as for keeping my skin moist on frigid, dry winter days. Be warned that it is so penetrating that it is hard to wash out of clothing and towels! Also that it is very detoxifying for the skin, and should be used for body massage with the guidance of an Ayurvedic practitioner.
I found an excellent hand cream that I use in deep winter to keep my fingertips from cracking and peeling. It has a little sesame oil in it, and I am pretty sure this is what in this formula is so protective. You might like to try a small amount of refined sesame in a cream or bar that you only apply at bedtime, Laurie. You can find cotton gloves at most pharmacies that will help the cream penetrate and keep it off your sheets and clothes. When I started using that cream, the dry, chapped hands cleared up.
All this oil talk! My skin is much less dry these days, even though I live in a much colder region and am on my third decade of sub-zero winters. I do have a lot more nutritive oil in my diet, and a lot more milk fat from whole milk kefir, butter and cream. Yummy meals and yummy skin stuff is the way to go!
Thanks for sharing so much of your good life!
Sandy
Thanks for sharing your experience, Sandy. You’re lucky to have a husband with such a wide range of skills.
I may be mistaken, but I thought that sesame didn’t have quite the shelf life of olive oil or coconut oil. I do know that it is frequently recommended for oil pulling. I just find the flavor of coconut oil more pleasant. I do notice that when I have more healthy fats in my diet, my skins is better, but with my wonky thyroid I do have more dry skin issues.
I’ve been looking for an easy recipe for these bars. Maybe sometime after Christmas….
Hello, I made these lotion bars for Christmas gifts. I used 1 part beeswax, 1 part 100% cacao butter, 1 part coconut oil. My bars are a tad bit sticky when first applied. They do soak in eventually but am wondering if I can do something to avoid the stickiness. Can I melt them down again? Also should I add more beeswax or oil? Or maybe butter? I want them close to perfect, please help? I have used them for only a day and can already feel a difference .I would hate for my family to not use them because there sticky. Cuz they will be missing out. Thanks .
Renee from Made On Hard Lotion says “Greasy lotion bars have too much coconut oil and sticky bars have too much shea/cocao butter.” I’d try remelting with a little extra beeswax and/or oil.
Just made these today, thanks for the recipe. I added some sweet orange essential oil and filled a few empty lip balm tubes. Works great in this chapping dry cold weather!
I really like it as a lip balm, too. 🙂
Hi! I’ve been making these bars from your recipe and love them! But last night I made a batch and they are too hard. Like too much beeswax but I made them the same way I always do and I measure very carefully. Has this ever happened to you? I’m not sure how to fix it except to fiddle with more oil.
Thanks!
Hmmmmm..I haven’t had that happen yet, but I’ve only made a few batches because they last so long. You can remelt with more oil. Did you measure by weight or by volume?
Hi Laurie. I was reading your blog and wondered if among your many wonderful interests you know about the importance of feeding our kids organic foods and what is going on with our food supply and Monsanto…they are genetically engineering our food and many people don’t know this! Just wondering if you are aware, it just seems like you would be, but just in case!
You’d better believe it!
You may be interested in reading “Would you feed your kids pesticide chips?” – https://commonsensehome.com/would-you-feed-your-kids-pesticide-chips/
and “Is What we eat and drink making us sicker and dumber?” – https://commonsensehome.com/is-what-we-eat-and-drink-making-us-sicker-and-dumber/