How to Grow Garlic in the Garden – From Planting to Harvest
This post may contain affiliate links. Read my full disclosure here.
Want to learn how to grow garlic, but not sure where to start? Growing garlic is easy, and it’s usually pest free – you can even use it to make a pest deterrent spray.
This fall’s planting yields green garlic scapes (from hardneck varieties) in late spring/early summer and garlic bulbs in mid to late summer.
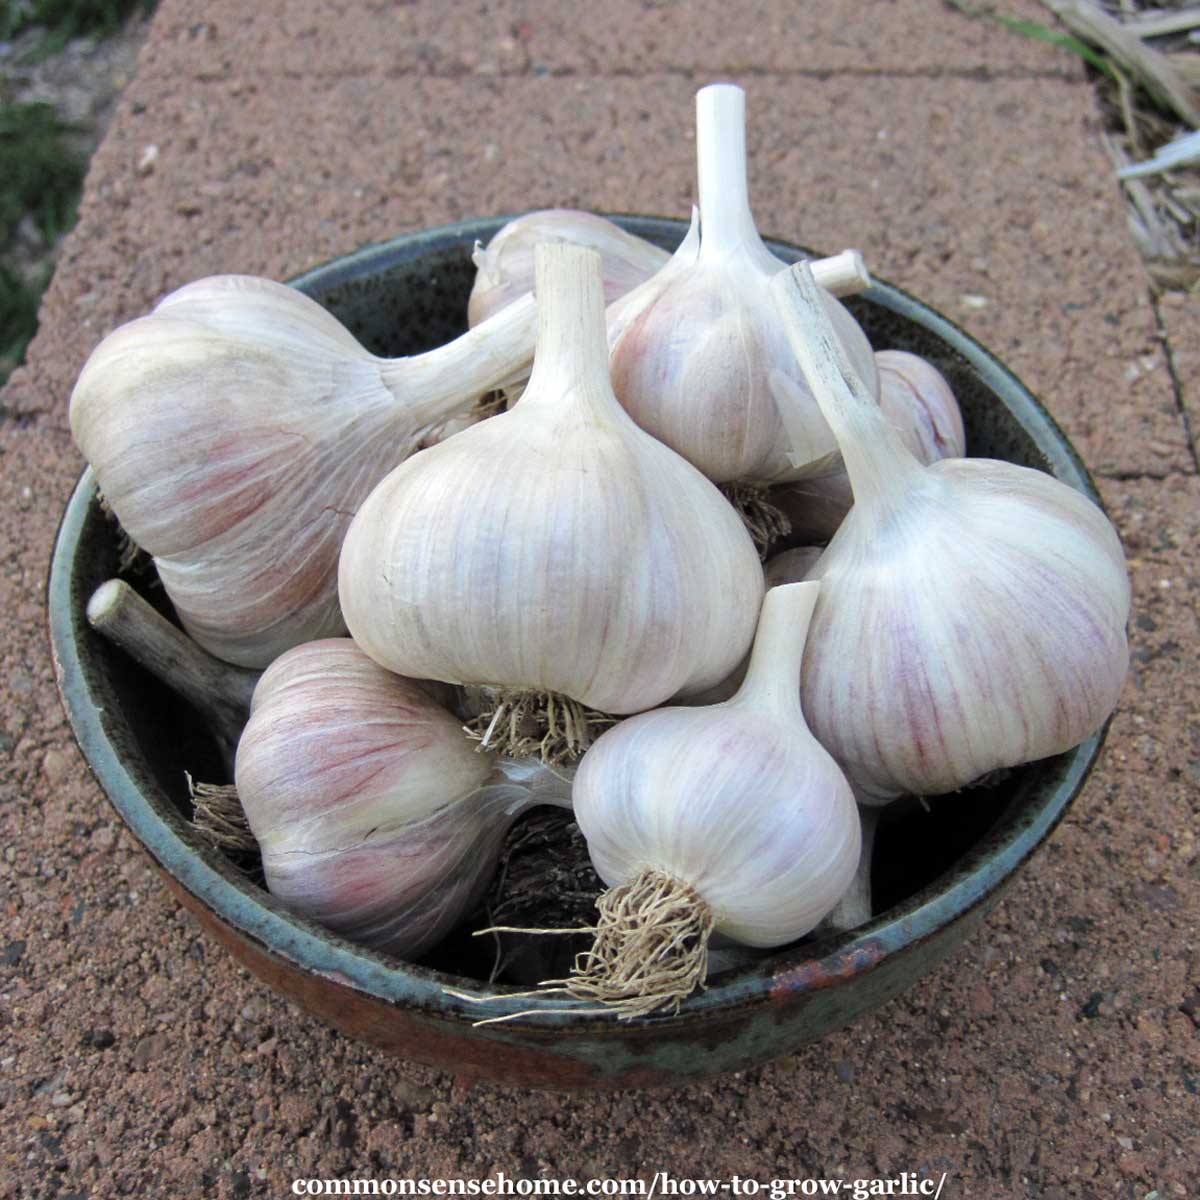
Table of Contents
Can I Plant Garlic from the Store?
Store garlic may be treated with sprouting inhibitors to increase shelf life. If treated, cloves may rot before they sprout. Store garlic may also have been grown in a very different climate and may not be well adapted for your area.
You can plant garlic from the store, but it wouldn’t be my first choice. Also, a large portion of garlic you find in stores is from China. The Chinese garlic is sprayed with chemicals and bleached during the import process.
The best option is get fresh organic garlic or organic seed garlic and plant it.
How long does garlic take to grow?
Garlic grows in a season after planting seeds in the fall. Garlic scapes are ready each spring and bulbs are ready each fall.
What’s the Best Garlic to Plant in My Garden?
The best option for growing garlic is to get some garlic bulbs from a local grower. That way you know you have garlic stock that is adapted to your climate. I got my first garlic bulbs for planting from my friend, Deb, who lives just a few miles down the road from us.
If you can’t find garlic from a local friend or market gardener, or would like to try different varieties, check online or at your local garden center.
Southern Seed Exchange carries softneck, hardneck, Asiatic and Turban and garlic assortments. Amazon.com features nurseries with softneck and hardneck varieties.
What are the Different Types of Garlic?
Hardneck or stiffneck garlic (Allium sativum var. ophioscorodon) has a stiff stem surrounded by a ring of cloves. Stiff neck varieties are often more hardy.
I grow a stiff neck type in my northeast Wisconsin garden. Southern Seed Exposure recommends stiffneck types for areas from Virginia northward. Best suited for zones 3-6, some 3-8.
Softneck garlic (Allium sativum var. sativum) has a smaller, flexible central stem, often surrounded by layers of cloves.
This is the type that can be braided, and these are also the types that are typically sold in the grocery store. They tend to produce larger yields than hardneck types, but may be less cold hardy. For zones 3-9.
Elephant garlic (Allium ampeloprasum) is not really a garlic at all, but a type of leek. It has a few large cloves and mild flavor that some people like and others do not. My mom grew it once and said she wouldn’t bother doing it again.
When to Plant Garlic
Garlic is planted in fall, typically after first frost has hit but before the soil has frozen completely. I select my biggest garlic bulbs to replant each season. (Eat the smaller bulbs.)
Over time this provides you with your own private stock of garlic that is well adapted to your garden growing conditions.
How to Plant Garlic
Plant garlic cloves in the fall. Prepare your planting bed. Break the bulb up into cloves. Don’t remove the paper on the individual cloves.
- Your planting area should get at least 5+ hours of sun. Those in very warm areas may benefit from late afternoon shade.
- Soil pH should be neutral to slightly acidic (6-7).
- Work the planting area thoroughly, digging in some compost or well rotted manure (not fresh manure!). Sprinkle on a light layer of bone meal or other natural fertilizer.
- Plant cloves, tip up, six inches apart, 2-3 inches deep.
- The soil should be moist but not muddy
If your soil is very light and fluffy, you may be able to stuff the cloves right into the dirt with your bare hands. My preferred method is to dig trenches across the width of the bed. I then place individual cloves about six inches apart down the length of the row.
Each clove will grow an entire new bulb. (You don’t plant a whole bulb in one spot, just single cloves.) Cover the cloves with soil and gently tamp down the earth.
Mulching Garlic
Before the ground freezes, cover your garlic patch with a nice thick layer of straw or leaves. This will act as insulation, protecting your bulbs from the freeze/thaw cycle and preventing the frost from heaving the bulbs out of the ground.
In spring, you can pull back the mulch to warm the soil and speed growth, and top dress with more compost if you have some available. Little green shoots should start popping up around the same time that other spring bulbs make an appearance.
Once the soil has warmed, I generally put some mulch back in place to keep weeds down and hold in moisture. Garlic doesn’t need much watering unless it is very dry. Less water = more concentrated flavor.
When to harvest garlic planted in the fall
Harvesting Garlic Scapes
Hardneck garlic will produce flower stalks called scapes in late spring. It’s best to remove these to increase the size of the main bulb.
Southern Exposure Seed Exchange states: “For highest yields, remove the scape (or “seed stalk”) at the junction of the highest leaf as soon as the scape has uncoiled from its 360° turn. Each week the scape remains after this stage causes a yield reduction of approximately 5%.”
I have noticed in my garden that the scapes I missed did indeed have bulbs that were noticeably smaller in fall.
Would you like to save this?
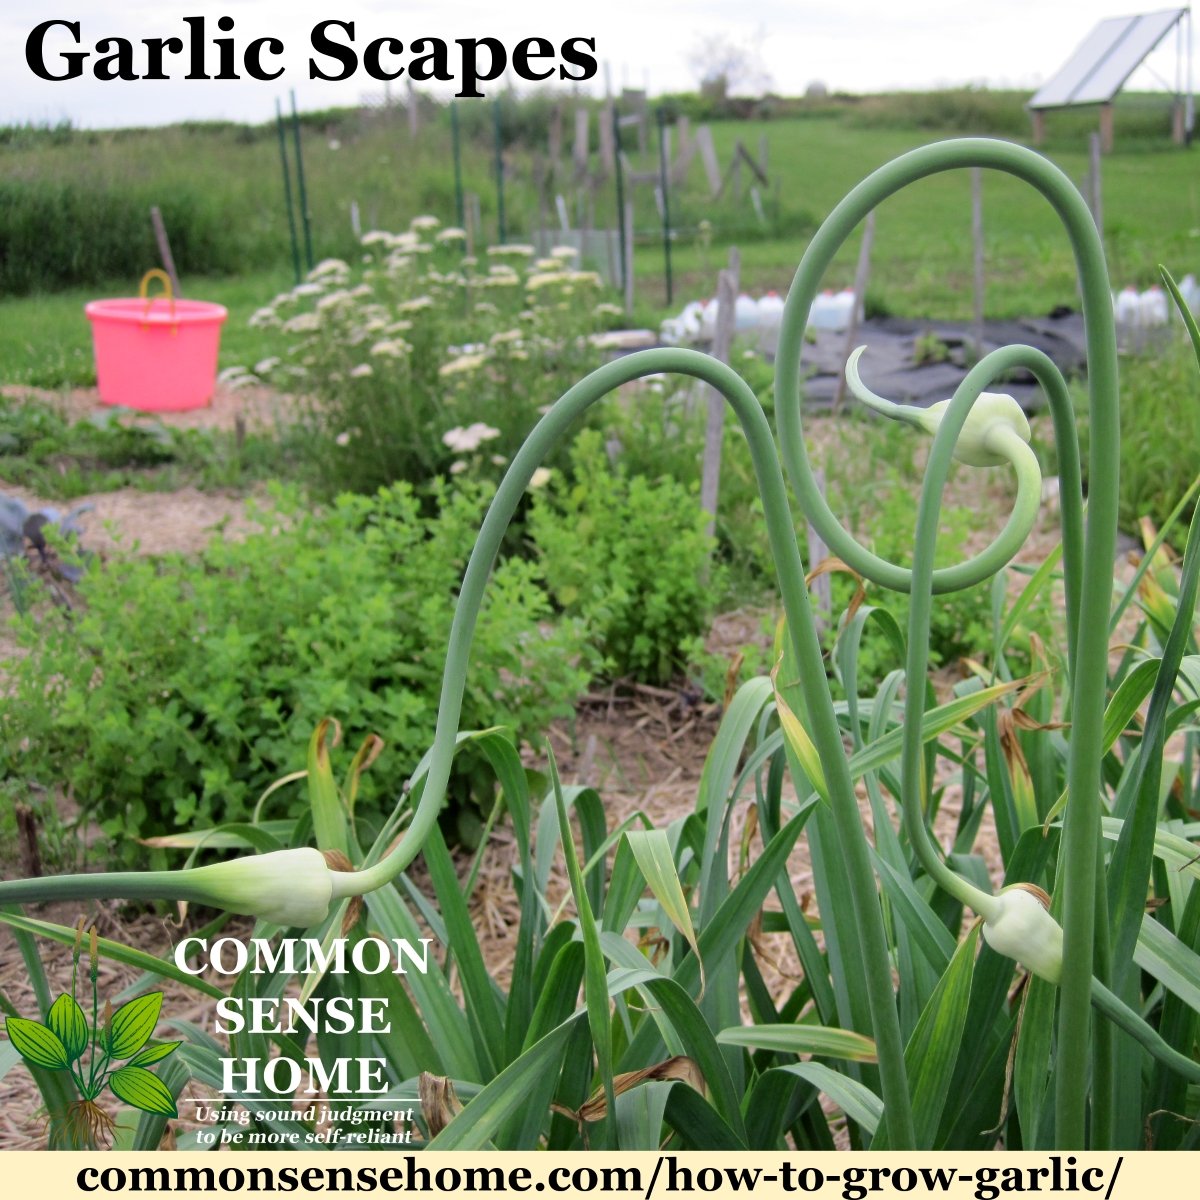
Once removed, these green scapes can be used to make garlic scape pesto or add garlic flavor to other recipes such as stir fries.
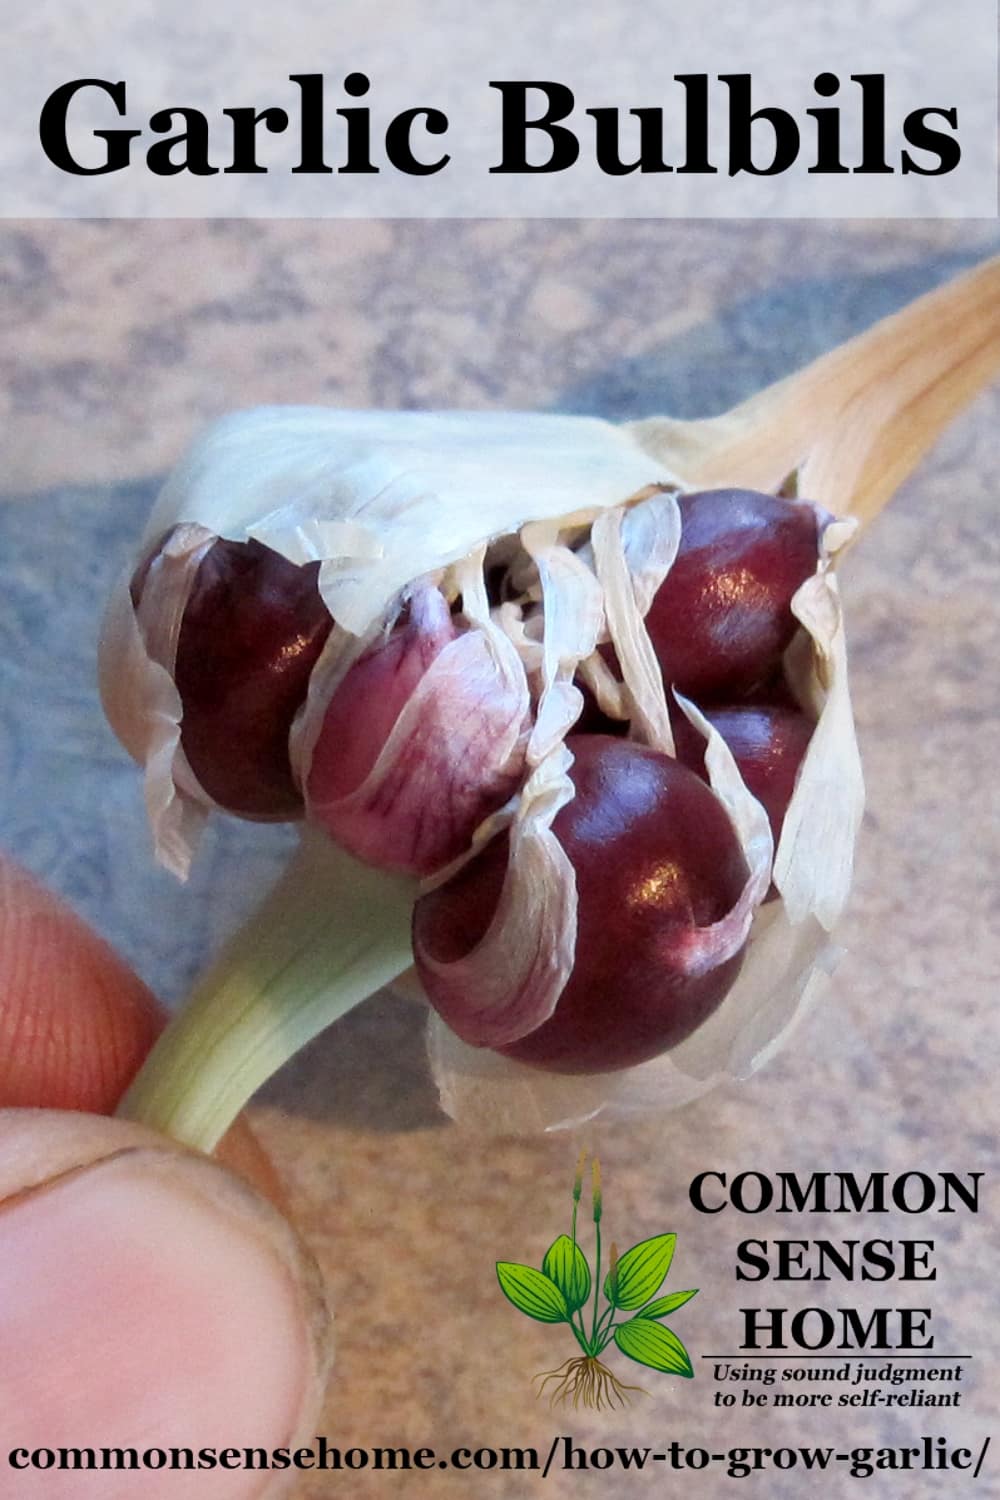
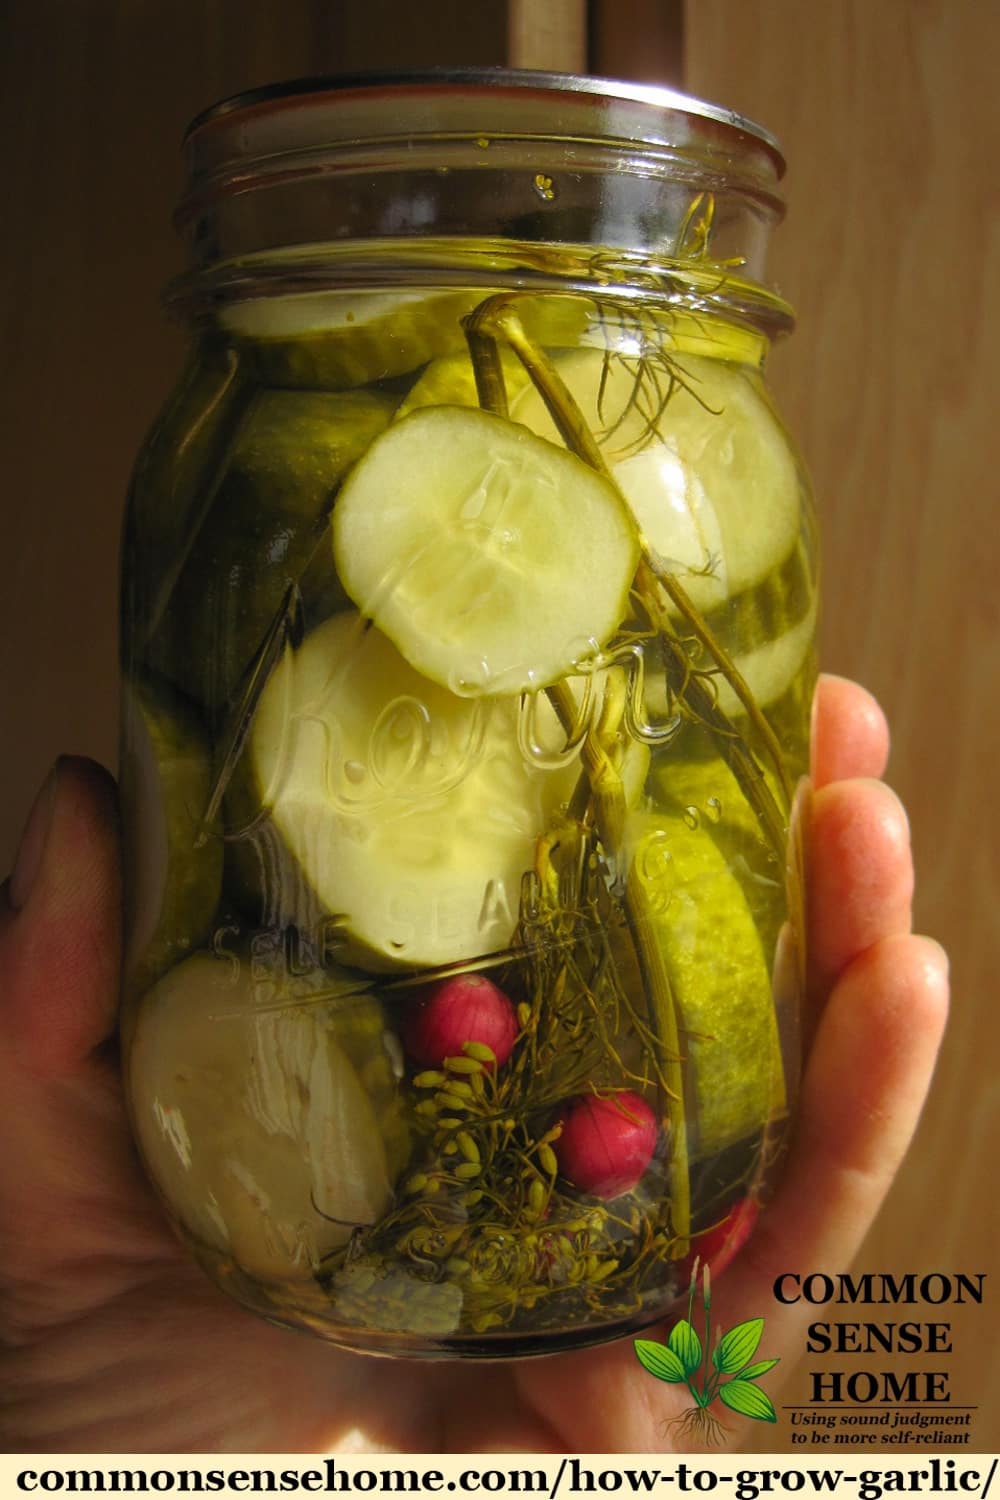
You can also let the snipped scapes sit in an out of the way corner and the flower bulbils will mature into miniature garlic bulbs. I like to use these mini-cloves in pickling recipes, such as garlic dill pickles.
You can plant the little garlic bulbils, but they will take at least two years to grow into standard size bulbs.
See “Garlic Scapes (Tips for Harvest & Use)” for more information and scape recipes.
Harvesting Garlic Bulbs
Garlic bulbs should be harvested in late summer when the lower leaves start to turn yellow and/or the tops tip over.
If you wait until the tops are entirely brown, the papery covering of the bulbs will get thin and the bulbs are more likely to fall apart in storage instead of staying like nice, attractive bulbs. (Ask me how I know…) They still taste fine, they just don’t look as nice.
Around here, we often get fall rains after a dry summer, and that may cause the bulbs to rot, too, if they are left in the ground too long.
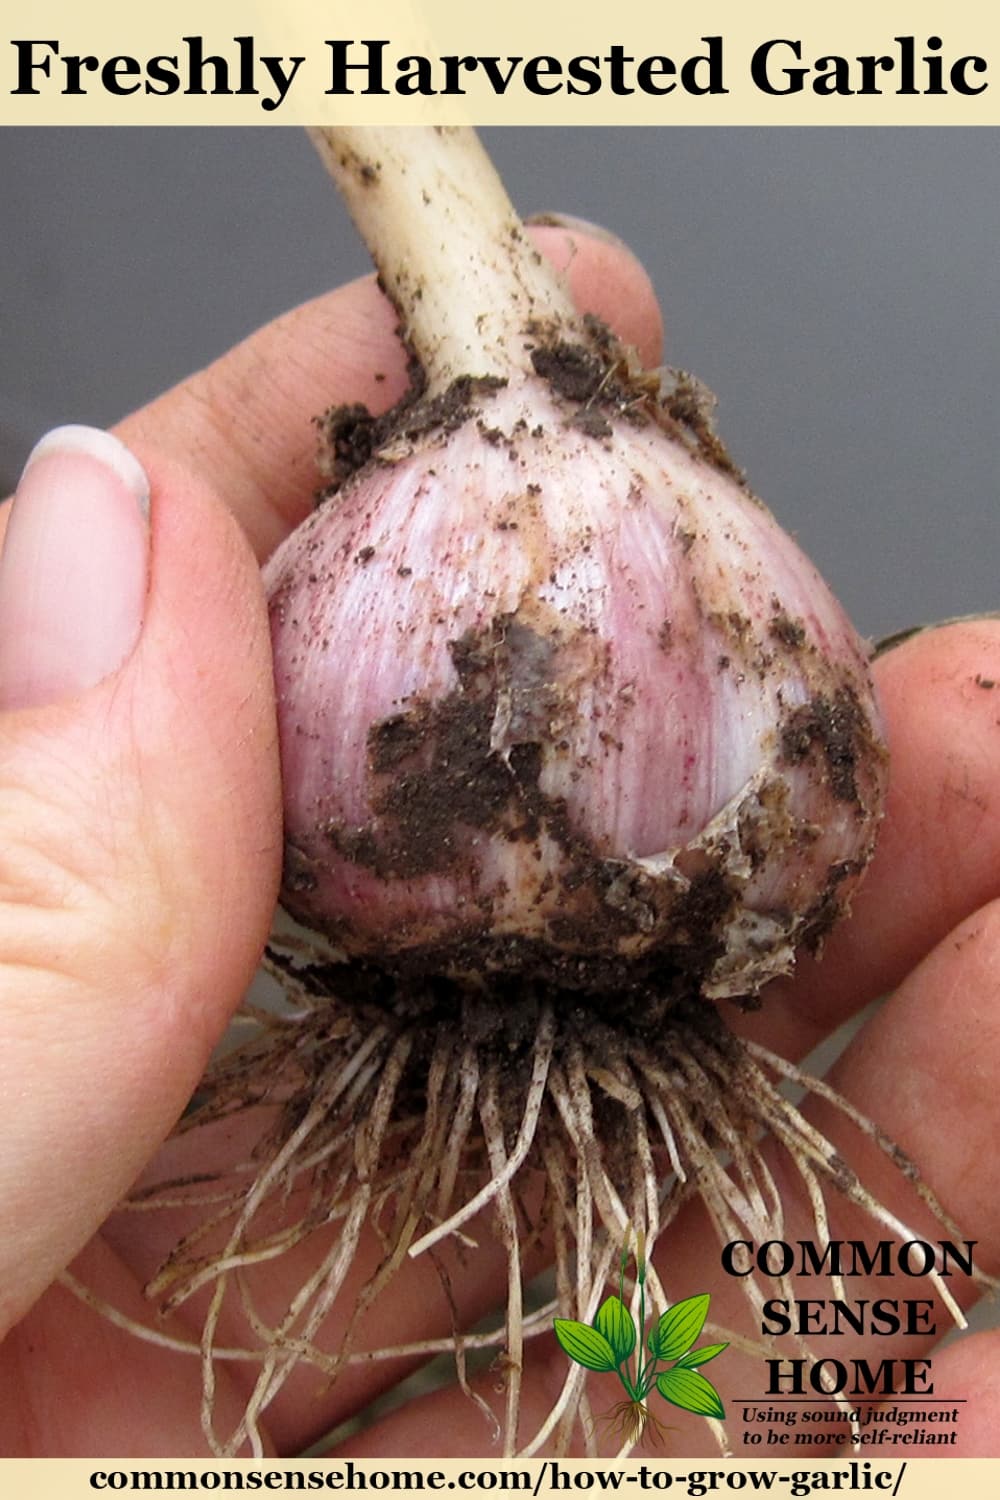
Loosen the dirt with a good garden fork and gently lift the bulbs from the ground. Unless your soil is really loose, just trying to pull the bulbs by the stems is likely to leave you with a bulb still in the ground and a handful of stem. (Not that I would ever do this…ahem…)
Curing Garlic Bulbs
If you want your bulbs to last in storage, you must cure them. Curing is simply the process of removing excess moisture and toughening the outer skin of the bulb.
Remove the bulbs with damage, soft spots or insects (you can use them, just don’t store them). Spread the remaining bulbs in a single layer in a dry area with good air circulation. Stems can crisscross, but don’t stack the bulbs.
I like to spread mine out in my greenhouse and cover them with a piece of burlap. A garage, outbuilding or covered porch may also work well. Avoid large amounts of direct sunlight to prevent sunscald.
You probably don’t want to cure them in the house if you can avoid it, as they will be very fragrant. They should cure in 70F to 80F temperatures preferably with reduced humidity.
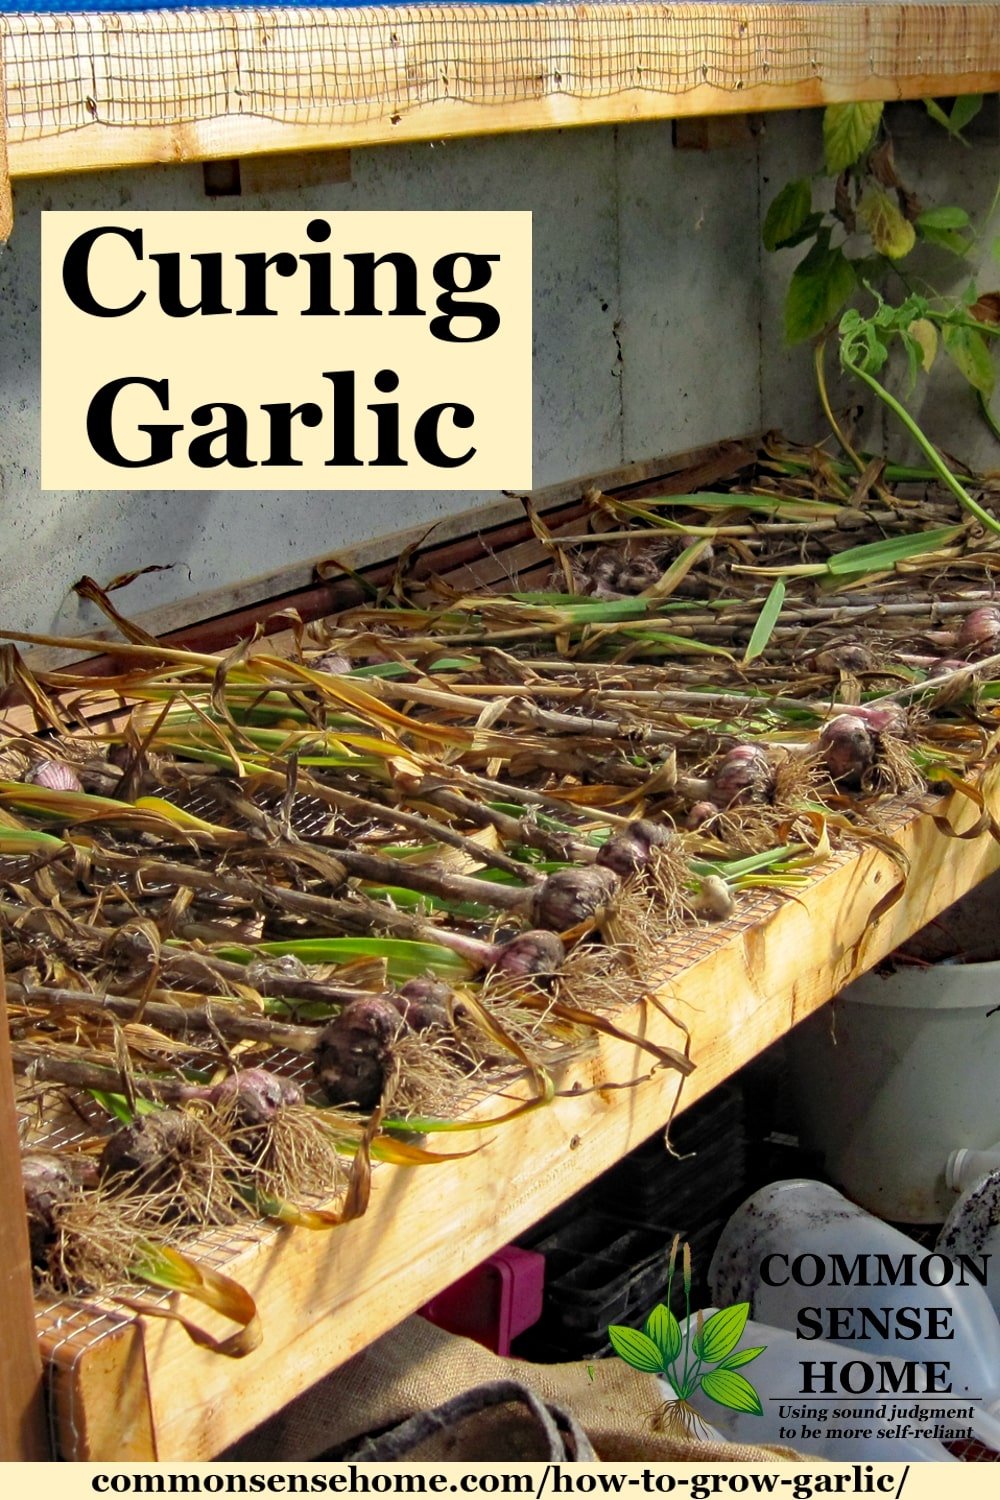
Let the garlic bulbs cure until the skins are dry and the necks are tight.
You want a dry, sturdy little package. Moisture will lead to rot and mold. Once the garlic bulbs are dry, brush off loose dirt and outer layers of skin and dirt.
Clip the tops and store them in a bin in a cool, dry location out of direct sunlight, or if you have the softneck type you can braid them and put them on display. Remember to save your biggest bulbs to replant.
Don’t send your teenage son to clean bulbs without supervision, lest you find him washing off the dirt in the sink and ruining the curing process. (Thankfully I caught him when he was on his first bulb.) Never wash them with water. Snip the roots off close to the bulb’s base.
Set any damaged bulbs aside to use first. I have kept bulbs in my basement from one season to the next, although by the end they are starting to sprout.
Low temperatures 34F to 40F and moderate to low humidity are best. Don’t let them freeze.
For more detailed information, see “How to Store Garlic for Long-Lasting Flavor“.
If you need longer storage, garlic may be sliced, dehydrated and ground to make garlic powder. Be warned – it is very fragrant while drying.
What not to do
Don’t store garlic in a sealed bag or container. Avoid high temperatures, high humidity and direct sunlight. Too much light, too warm, or too much moisture can cause the garlic to sprout early.
How to Braid Garlic
I have never braided garlic, as I only grow the hardneck types. This video from Gardenerd provides an easy to follow demonstration of garlic braiding.
And there you have it – how to grow garlic from planting to harvest. I hope you’ll follow in the tradition of the pyramid builders and add this fragrant bulb to your garden and your diet.
You may also enjoy:
- 6 Ways to Use Garlic in the Garden
- Cheesy Garlic Zucchini Bread
- Pickled Dilly Beans with Garlic and Cayenne Pepper
- Plant Hardiness Zones and Microclimate – Creating Your Best Garden
Originally posted in 2013, updated in 2018.



Can garlic be planted in a wood framed raised bed 1 foot above ground? Our coldest temps are between -40 & -50 in winter. If yes, how deep would we plant them?
I haven’t planted them in a raised bed that high, but they freeze in ground when planted in a non-raised bed, so they should be fine. I would plant them the same depth as in a non-raised bed, and mulch well before winter to help reduce temperature and moisture swings.
Great article! Just one question, you talk about cutting off the scapes… do you continue to cut them back as they grow more, or just the one time?
Thanks
Once you clip the scapes, they don’t regrow, so only one clipping is needed.
I did find one online reference that said the scapes might grow back if clipped too early, but this has not been an issue for me.
Thank you. That was probably the case. I don’t recall mine having curled yet. Again, thanks.
You’re welcome.
Great information, thank you! My husband and I are growing garlic for the first time this year and I can’t wait. Now all of the ingredients for our pickles will be homegrown!
I live in South Eastern Michigan and love the idea of the braided strands of the softneck garlic. I see that hardneck is better for colder areas, but do you think I could grow softneck here too?
If you wanted to give it a try, I’d look for varieties that note that they are more suited to northern growers. With all the varieties out there, I’m sure there have to be some that would work.
I am in zone 7. I have to pull them out because leaves were dried brown. the garlic are very small. I have no idea what I did wrong—what did I do to make them stressed?
Thanks
I’m not sure how your planting and harvesting season varies from ours, but it sounds like the may have needed more water and more fertile soil.
hi, Laurie:
2/3 of garlic leaves now are brown and bend down and no scape for those garlic I planted last Oct.
is it time to pull them out? or wait to mid summer?
Thanks
It would be awfully early for our area, but may be different in your zone. Pull one up and see what it looks like. If they’re dying back, my first thought would be that they’re either stressed or ready to harvest.
I planted my first garlic at the beginning of Oct., the green shoots already are popping up before winter come. Should I cut off shoots, cover them with straw when ground is frozen? or just leave them there?
Thanks
Don’t mess with the shoots! They are a good thing. Just mulch and leave them in place.
Your article was so timely! I just decided to order some organic garlic for planting, kind of spur of the moment, as I do not really take the time for gardening (although I have the space). I went to my inbox to check my receipt from my order and your news letter was there. Opened it up and there was the link to “How to grow garlic” article. Must have been meant to be! 🙂 Thank you!
It’s that time of year. 🙂
On storing garlic:
My grandfather was a wonderful gardener. He grew ALL the vegetables he and my grandma ate, with enough left over to supply his neighbors AND the local grocery store occasionally; along with melons, berries, pecans and walnuts, peaches, even horseradish; and the dill, hot peppers, and garlic my grandma put in her pickles.
He told me probably 40 years ago that the best way to store garlic long-term is to peel the cloves, put them in a jar, and cover with olive or other oil. He showed me some that he had preserved this way and they were in excellent condition.
Bonus: the oil is good too!
While preserving garlic in oil is a long used technique, it’s no longer recommended because of botulism concerns. Botulism spores can grow in a low acid, oxygen free environment – such as submerged in olive oil. They occur naturally in the soil, so you can’t really guarantee that your garlic is free of the spores.
The University of Maine Cooperate Extension offers safe guidelines for infusing herbs in oil. They don’t recommend infusing garlic without acidification, and note that:
Hi Laurie, I was wondering if you can help? Here in Connecticut we harvest our garlic in late July early August and usually the garlic leaves start to turn yellow/brown in color a couple of weeks prior to . It is May 10th and my garlic leaves which are only 6-8inches in height are already turning color. What does this mean. Please help . Thank you.
It sounds like there’s some sort of problem, but I’m not sure what as, so far, my garlic has been healthy. Here are a couple of resources that may help:
What’s Wrong with My Garlic?
Garlic Diseases and Pests
Love this post! Your post are always so well written! I have a question for you.
We harvested our garlic this summer, and cured it, then this fall I took the best looking bulbs and planted them and waited and waited and waited and nothing. Not even one came up! Any ideas on why this might have happened? I know it is way to late to try a replant and all I have are the same bulbs that didnt come up!
Could they have gotten too dried out or too wet and rotted? Did something eat them? I’d dig up the area and see if you can find any evidence to figure out what happened. We still need to get ours in the ground yet for next year. Not sure where you’re at, but it’s not too late in Wisconsin.
I have never planted garlic before but my husband really wants to do it. This post came at just the right time for us. We’ll be planting in the late fall (we live in the south). Thanks so much. This is a great post1
I figured it’d be time for some folks to be harvesting and planting soon, so it was time to get the information out there again.
Linda, a couple of years ago I found an old patch of garlic (20y/o from when my FIL had a garden). At harvest time I dug up all I could find. The soil (I’m in the south too) was somewhat packed (we have a lot of clay) so I found a variety of sizes from really nice to yearlings to “seed” size. When I planted them I did so in our garden and the did really well the next year….I also found more (though small except for one) in the old patch. Happy growing Linda! My problem was curing and storing and Laurie helped me with that through this article, thanks Laurie!
You’re welcome!
Hi! Thanks for info about garlic growing! I have a question I am hoping you can help me with–we grew garlic last year, and thought we pulled everything up, but over the winter several dozen shoots have sprouted. They are bunched fairly close together, and my question is: can we pull up the shoots, separate them more evenly and replant? Thanks!
Try half as is and split the others and see which gives you the best results.
Very useful article! Thank you for posting.
Thanks for this! I saw garlic grown in USA for 50 cents a bulb yesterday and I almost fainted. I use a bulb of garlic every day in my cooking! But my MIL gave me her bulbs so I’m curing them right now. I can’t wait to plant them and your post will be very helpful!
That’s a lot of garlic! Great motivation to plant your own. Good luck!
I get really upset when I see garlic at the store that came from China. I would love to grow my own!
-andi
I remember buying garlic in the store that was labeled on the front side of the package. When I got it home, it said it was grown in China on the back. Frustrating.
The garlic we have available for purchase here is inexpensive but is grown in China (except for the odd time that I seen it at farmer’s market). I have planted 100 bulbils every fall for the past five. I plant the bulbils which develop into little garlic rounds in the second year and I harvest decent sized bulbs the third year. After the bulbils are planted I don’t do anything with them except for weeding until they are ready for harvest. Just leave them do their thing. I live in Alberta, Canada with harsh winters (temperatures as low as -30C, and occasionally lower ) and warm summers (temps as high as +30) and it does quite well. Just love having our own organic home grown garlic.
Great article, Laurie! I’ve never planted garlic but you’ve just inspired me. I’m going to plant them in a raised bed. Sharing it!
Thanks, Todd. It took me 4 years to finish, so I’m glad it was worth the wait. 😉
Great post. I love growing garlic. This is my third year and I have it everywhere; in 3 gardens, in 3 containers and even in a cup on my windowsill. I even put another batch in yesterday as I had lost these “seed garlic” really late but can never have too much garlic. Oh must add I’m in New Zealand so I know I’m about 3 months late but oh well. I plaited my garlic last year boy is it hard work but wow it looks cool!!! Will be doing it again this year. Mx Check out how I did it on http://www.nzecochick.com/2013/01/plaiting-garlic.html
In a cup? Must be a big cup. 🙂
Hello! I was wondering if I would be able to plant garlic in a container in the fall. I grow most of my veggies in containers and wondered if this would work as well. Thanks for the great article!
You betcha! Make sure the bulbs have room to grow – keep them at least 2 inches from the edge of the container and 5 inches apart. Use a potting mix with good drainage so they don’t rot, and do take steps to protect the soil from freeze/thaw cycles (with straw or other covering). Keep the soil damp but not soggy.
I’ve done it, and this year I did get some small but tasty bulbs. Mine were planted too close together but I can remedy that next year. 😀 Also don’t leave them to overwinter in the container; this doesn’t work. I tried that the first year and got nada. Live and learn, right?
Janyne – what did you do with them over winter that worked well for you? I’ve seen other folks who plant in containers say they overwintered successfully, but they may have been in milder climates and I haven’t tried it. I’m thinking in our area it make work better to pull the container into a garage or shed where it wouldn’t freeze so hard.
I have to give you some kudos. This is an AMAZINGLY well written article. You’ve covered everything from selection to storage. I don’t have much of a green thumb, but your instructions are so simple that I doubt even I could mess it up. I’m excited to have garlic as my first crop in my new garden beds. I’ll let you know how it goes.
Thanks again and I look forward to learning more from you 🙂
~Andrea @ Project Simple Home
Thanks, and I hope it works out well. For me, I was sorry I hadn’t tried it sooner, since it is so easy to grow.
I have some wild garlic growing not a lot but Can I Break the cloves apart from the bulb AN plant them in My herb Garden ? THANKS AND GODBLESS YOU ALL AND BLESSED GARDENING TO YOU ALL !
Yes, you can. I haven’t tried it, but it is supposed to work well. Here’s a more info on wild garlic propagation: https://sites.google.com/site/knowyourvegetables/know-your-onions/know-your-wild-garlic/how-to-grow-wild-garlic
I use garlic for flavoring and health. I also live in Florida; is it possible to grow down here and if so which would be best? Thank You
It looks like you may be able to grow some varieties in the northern parts of Florida, but I don’t have experience as a southern grower. If it can be done, I bet the folks at Southern Exposure Seed Exchange would know. Their garlic page is at: http://www.southernexposure.com/garlic-c-25.html?zenid=gqoothbgdsod1va2ec44jdg617
Thanks for the info!! I can’t wait to get some garlic started!
I have been wanting to plant Garlic, but never have. My daughter just gave me some garlic seeds from her garden. Could you tell how to plant tha seeds please.
Thanks so much,
J Rass
Seeds? Do you mean bulbils? Plant the bulbils in spring, harvest in summer/fall like regular garlic and cure. Replant that fall. Grow out again, harvest, replant. By year three they should be up to normal garlic size.