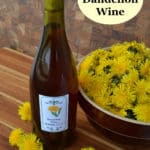
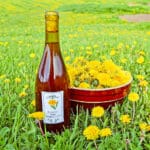
Warm & Golden Dandelion Wine Recipe (Old-Fashioned Wine Making)
This post may contain affiliate links. Read my full disclosure here.
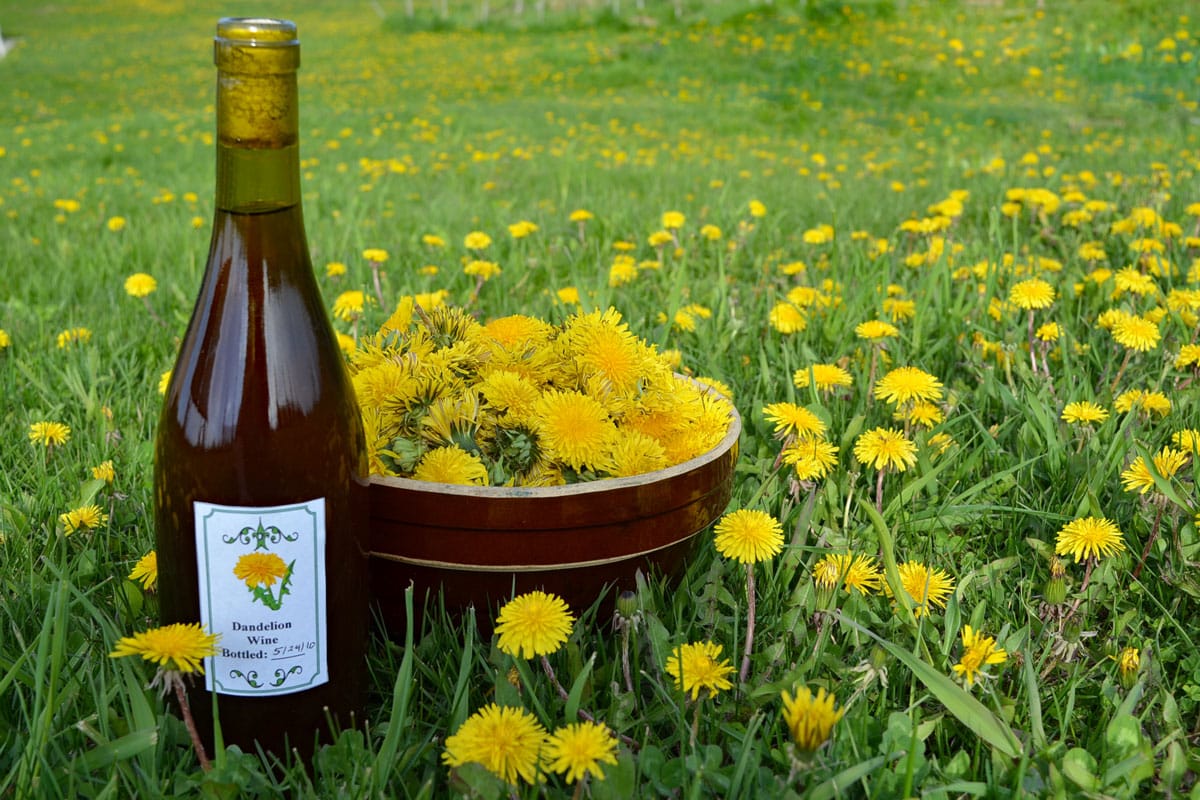
Wine out of dandelions? You bet! Making homemade dandelion wine is a longstanding family tradition. We don’t make it every year, but I do like to keep a few bottles on hand for company.
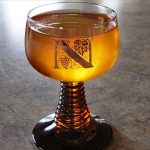
The taste of this dandelion wine is rich, golden and warming – more like a good brandy than a wine. I’ve had friends who don’t normally like wine comment that they do enjoy this “spring tonic”. This is a “country wine” made from simple ingredients with basic equipment.
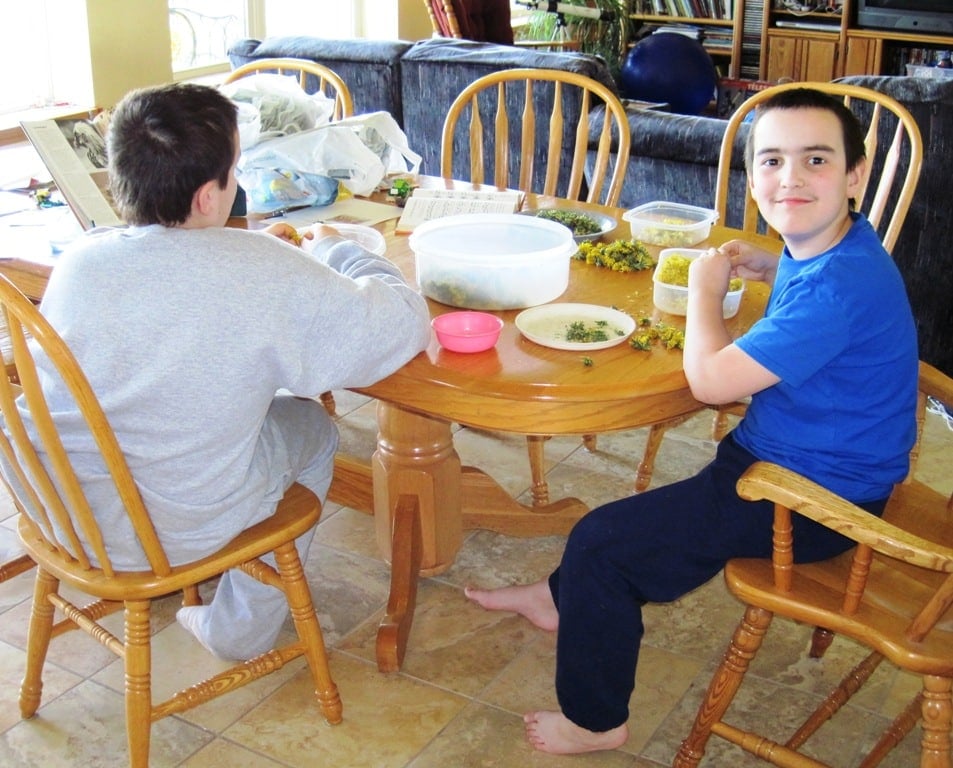
When we get dandelions, we get LOTS OF DANDELIONS! They are everywhere! (Boy photos are from 2010. They have grown quite a bit since then, but I kept these photos here for the happy memories.)
Dandelions are wonderful for bringing up nutrients and breaking through compacted soil. This area of the yard had a lot of compaction from soil being moved around, so the dandelions were working overtime.

Table of Contents
Gathering the Flowers
Make sure your dandelion flowers are free of pesticides, herbicides and other contaminants. I usually don’t rinse the blossoms, though you can if they are dusty. They are sterilized during the first part of brewing. We gather bins of flower heads outside, and then bring them inside to remove the petals.
Don’t pick dandelion blossoms for wine or eating from an area used by pets for their “bathroom”. As I explained to a reader in the comments, I’m fairly sure goat pee will not wash off.
What part of the dandelion is dandelion wine made from?
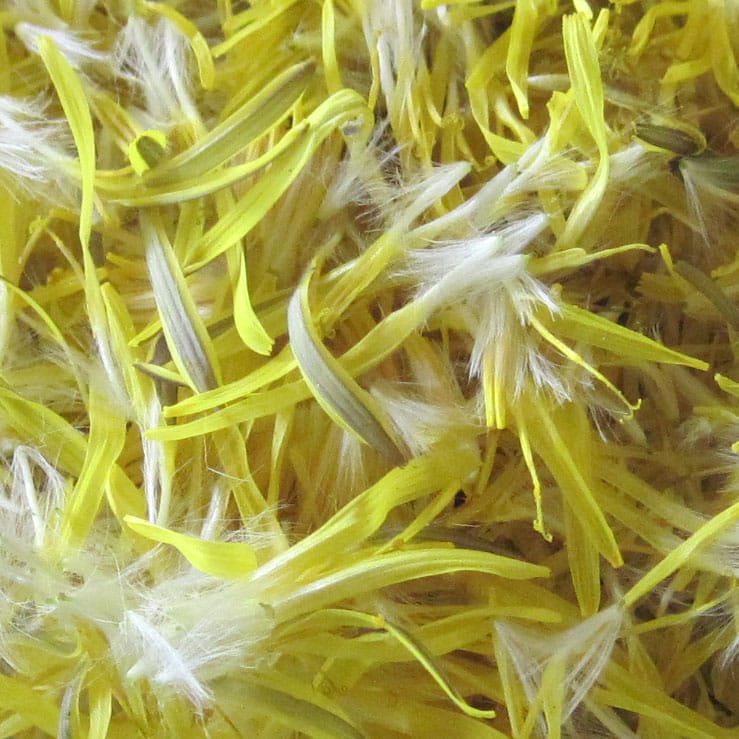
For dandelion wine, use the yellow flower petals only. Leaving the petals attached to the green base of the flower will result in a bitter, unpleasant wine. My neighbor made this mistake when she tried to make dandelion wine, and she ended up throwing out the whole batch.
I use 3 quarts of loosely packed yellow dandelion petals (pictured below). Not 3 quarts of flower heads, 3 quarts of petals only.
If you don’t have enough dandelion petals from one picking, freeze the petals until you have enough.
The boys and I sat down to a session of “second picking” to remove the yellow petals from the blossoms. You want to remove the petals as soon as possible after picking, as the flower heads close over time. Once they close, it’s tough to get the petals off.
If you are working alone, it may be best to pick some of the flowers needed, remove petals, then pick more flowers and repeat. That way, you won’t have trouble with the flower heads closing before you have time to clean them. It’ll also give you a chance to get up and stretch.
Making Homemade Dandelion Wine
“Dandelion wine, believed to be of Celtic origin, is regarded as one of the fine country wines of Europe. In the late 1800s and early 1900s, it was not proper for ladies to drink alcohol. However, dandelion flower wine was considered so therapeutic to the kidneys and digestive system that it was deemed medicinal even for the ladies.“
Adapted from Dandelion Medicine, in combination with my mother’s recipe.
Remember, all your fermentation vessels should be glass, ceramic, stainless steel or food grade plastic. Never ferment in aluminum or iron, as it can react with the wine.
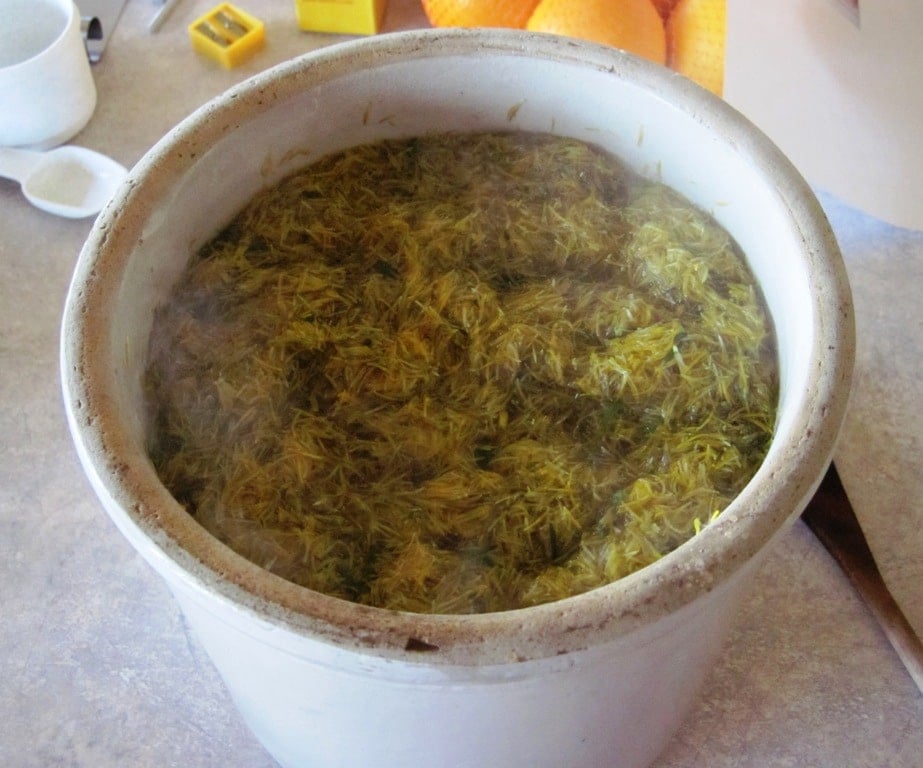
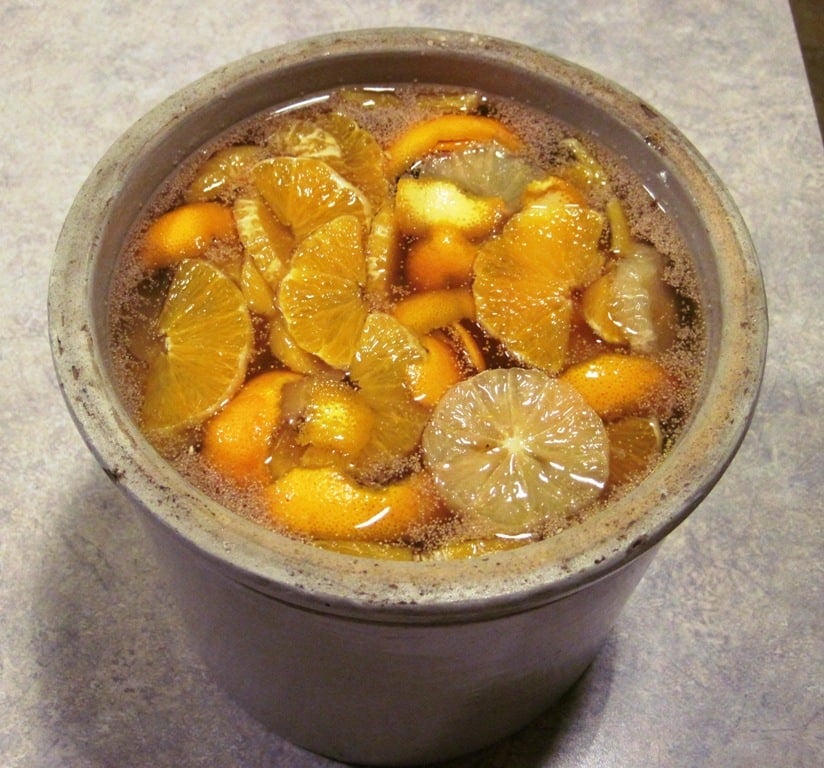
I normally use my two gallon crock for one gallon of wine, since the fruits bubble up during fermentation. You can see in the photos below that a one gallon crock gets very full.
Ingredients
- 3 quarts dandelion petals, loosely packed
- 1 gallon water
- 2 oranges, with peel, preferably organic
- 1 lemon, with peel, preferably organic
- 3 pounds sugar
- 1 package champagne yeast or wine yeast (this yeast finishes at around 12-14% alcohol)
- 1 pound raisins, preferably organic
How to make dandelion wine – Directions
1) Collect the blossoms when they are fully open on a sunny day, after the morning dew clears. Remove green parts and measure out 3 quarts of loosely packed petals.
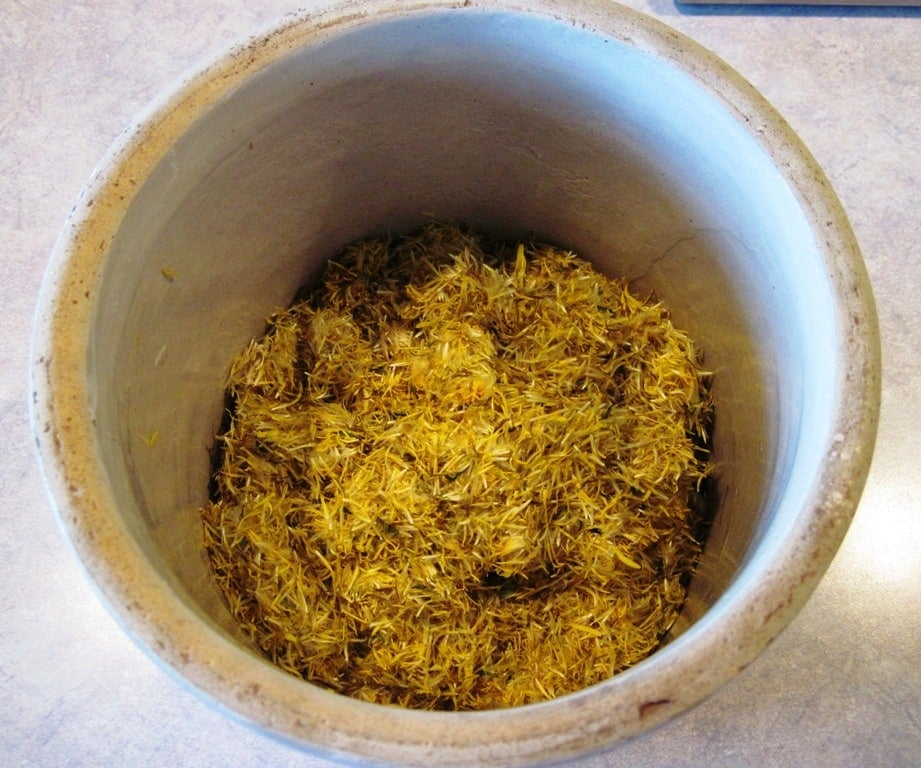
2) Bring the water to a boil and pour it over the flowers in a large pot or crock. Cover with a towel to keep dust out and let steep for three days. Stir daily to keep the petals submerged in your “dandelion petal tea”. They will develop a musty smell, which is normal.
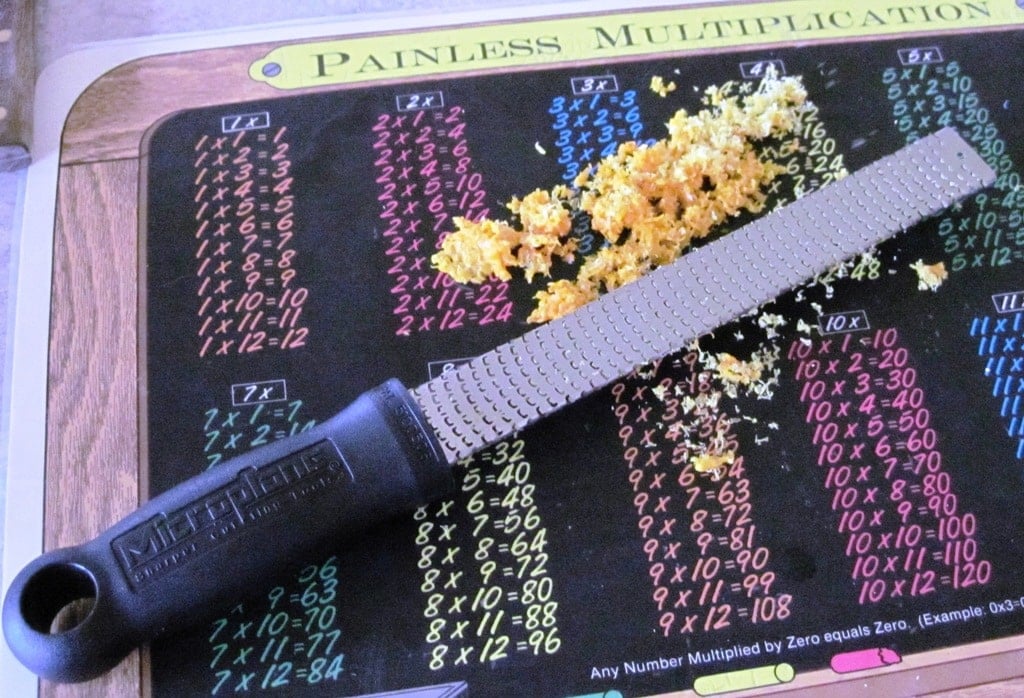
3) Prepare the oranges and the lemon. Zest about half of the rind and peel off the rest in thin strips. You want to minimize the amount of white pith added to the brew.
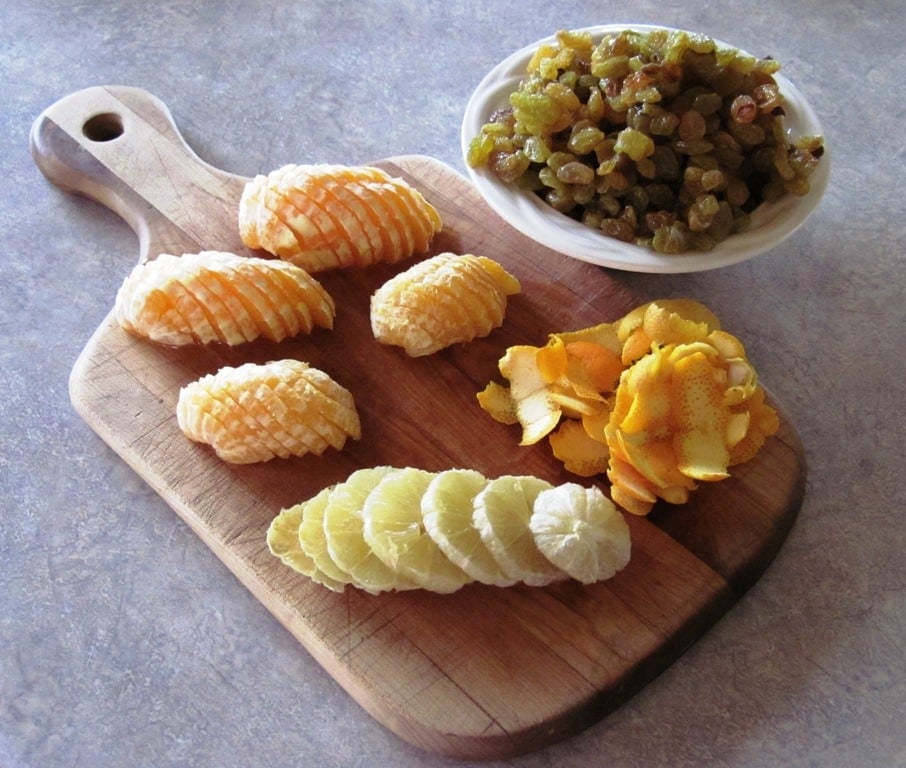
4) Clean most of the pith off the fruit and slice into thin rounds.
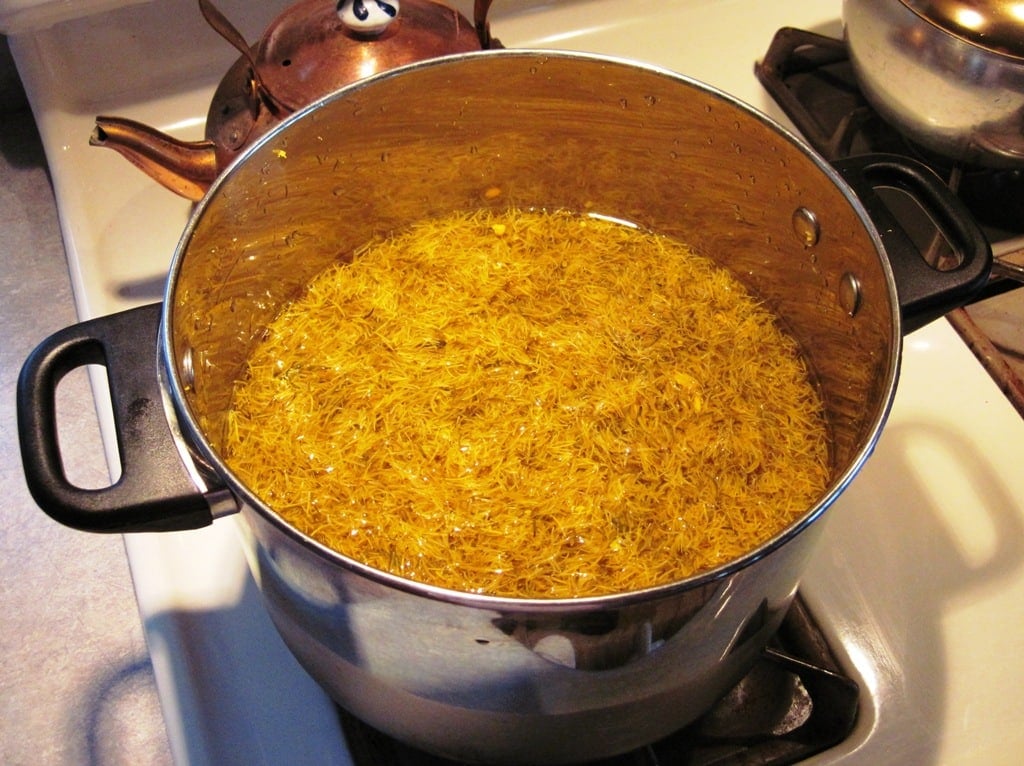
5) Add the lemon and orange zest to the flower-water mixture and bring to a boil. Remove from heat, strain out solids. Dissolve the sugar in the flower water. Allow to cool to room temperature.
Would you like to save this?
6) Add the yeast, raisins, and orange and lemon slices and rind strips to the liquid. Put everything into a crock (or wide mouth carboy with airlock) to ferment. I cover my crock with a clean cotton towel held down by a rubber band to keep dust and bugs out. (Not shown.)
Stir daily with a wooden spoon or non-reactive stir stick. When the yeast gets active, the bubbles will lift the fruit up to the top of the wine. You want to stir so all the fruit gets pushed back under the surface and wet down daily.
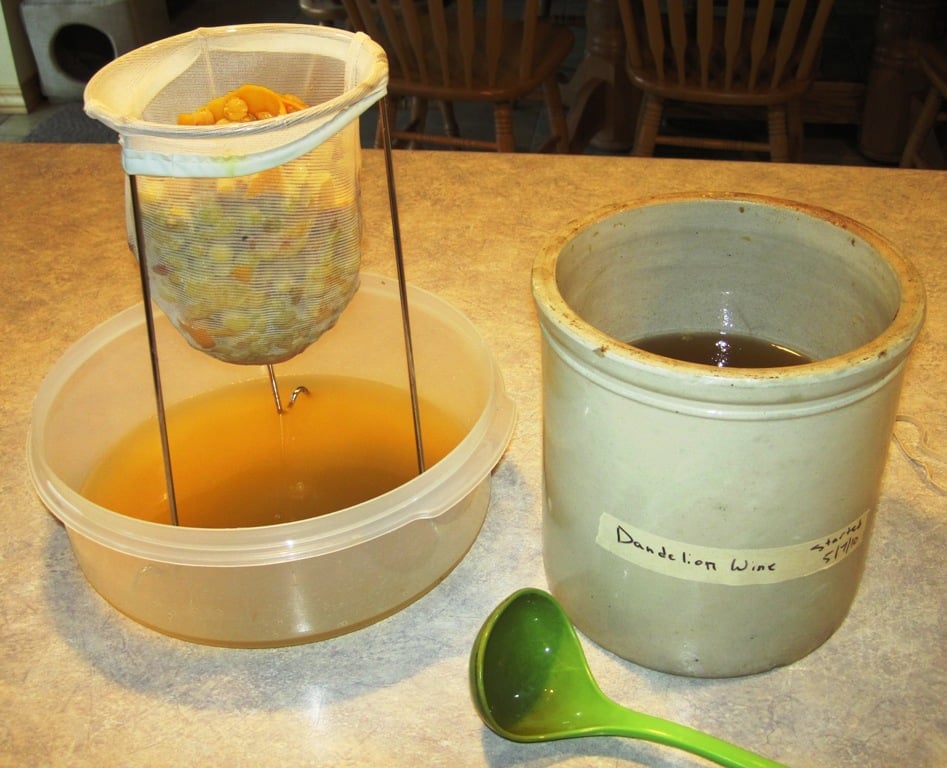
7) When the primary fermentation mixture stops bubbling (1 -2 weeks), fermentation is almost done. Strain the liquid through several layers of cheesecloth, a flour sack towel, or a jelly bag.
Bottling the Wine
You have two options for bottling your homemade dandelion wine. You can let it finish in bottles, or move to a carboy and then bottle.
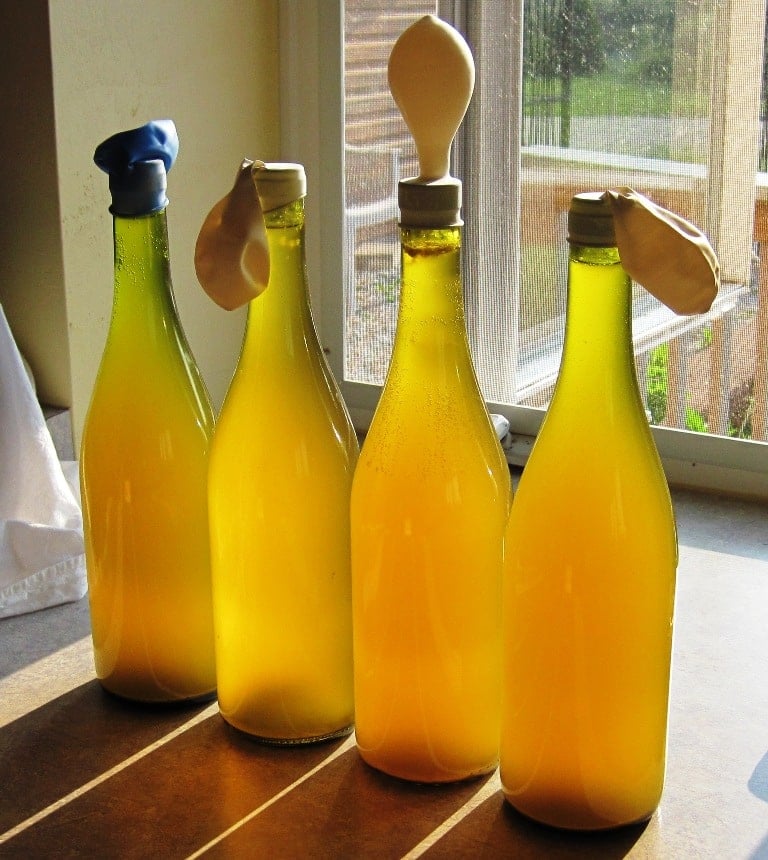
To finish in bottles: After straining, move the young dandelion wine directly to clean bottles. Slip a deflated balloon over the top of each bottle to monitor for further fermentation. When the balloon remains deflated for 24 hours, fermentation is complete. You will probably need four or five 750 ml bottles.
Cork the bottles and store in a cool, dark place for at least six months before drinking.
NOTE: Do not seal bottles tightly before they finish fermenting, and don’t put them somewhere warm. Otherwise, you’ll end up with exploding bottles, like my sister, Mary, when she stashed them in a closet. Apparently, it sounded like there were bombs going off or they were being shot at.
If you would like a clearer wine, transfer the strained dandelion wine into a one gallon carboy with airlock before the final bottling. Allow to ferment in the carboy for 2-3 months, and then rack into the bottles.
If you’d like to download a pdf of my wine labels, use this link: Printable Dandelion Wine Labels.
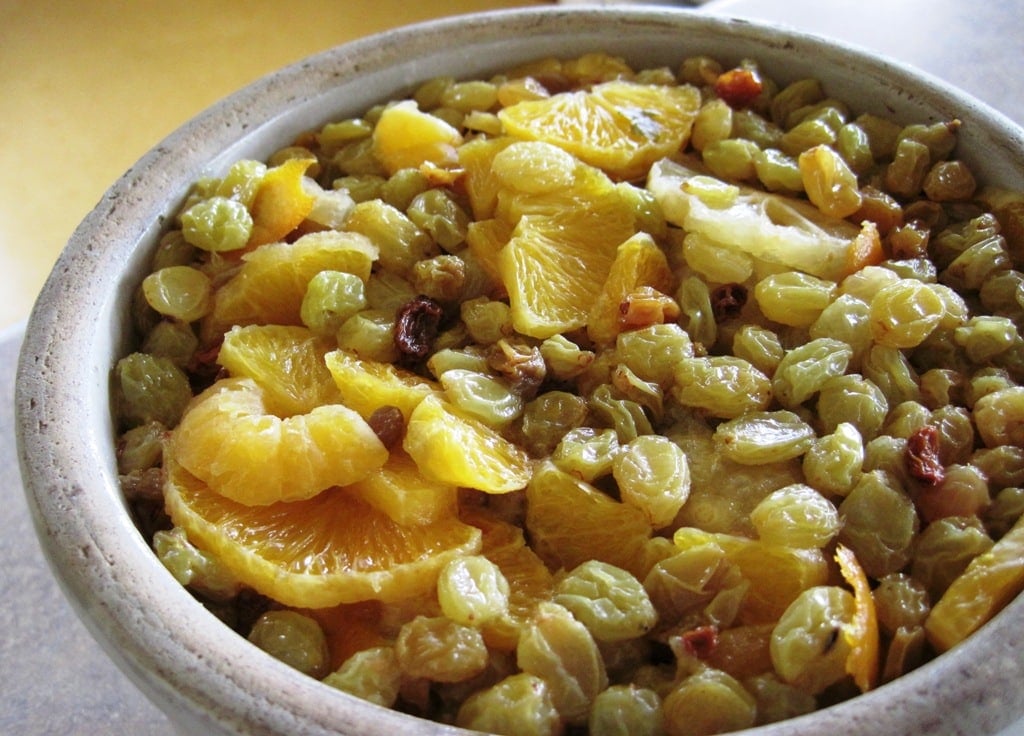
If you don’t want to send the wine fruit to the compost pile, try Dandelion Wine Fruitcake.

Recommended Materials for Making Dandelion Wine
- Wine Yeast – store extra yeast packs in the fridge or freezer. I normally use Lalvin Wine Yeast EC-1118.
- 2 Gallon Crock – 2 gallons gives you space for fermentation.
- Wine Bottles – It’s fine to wash and reuse old wine bottles. You will probably need five 750ml bottles.
- Corks – It’s best to use new corks. I like the #9 Straight Wine Corks.
- Wine Bottle Corker – This double lever model works like a charm.
- Gallon carboy with airlock – optional, for clearer wine.
Old-Fashioned Dandelion Wine Recipe
A smooth and hearty flower wine with citrus notes that will warm you from head to toe.
- Yield: 4–5 bottles 1x
Ingredients
- 3 quarts dandelion petals, loosely packed
- 1 gallon water
- 2 oranges, with peel, preferably organic
- 1 lemon, with peel, preferably organic
- 3 pounds sugar
- 1 package wine yeast
- 1 pound raisins, preferably organic
Instructions
- Collect the blossoms when they are fully open on a sunny day. Remove any green parts and measure out three quarts of petals.
- Bring the water to a boil and pour it over the flowers in a large pot or crock. Cover with a towel to keep dust out and let steep for three days. Stir daily to keep the petals submerged.
- Prepare the oranges and the lemon. Zest (finely grate) about half of the rind and peel the rest off in very thin strips. You want to minimize the amount of white pith added to the brew.
- Finish peeling the citrus, and slice them into thin rounds.
- Add the lemon and the orange zest to the flower-water mixture and bring to a boil. Remove from heat, strain out solids, then add the sugar, stirring until it is dissolved. Allow to cool to room temperature.
- Add the yeast, raisins, and orange and lemon slices and rind strips to the liquid. Put everything into a two gallon crock (or wide mouth carboy with airlock) to ferment. I cover my crock with a clean cotton towel held down by a rubber band. Stir daily with a wooden spoon or non-reactive stir stick.
- When the primary fermentation mixture stops bubbling (1 -2 weeks), fermentation is almost done. Strain the liquid through several layers of cheesecloth or a flour sack towel.
Bottling the Wine
You have two options for bottling your homemade dandelion wine. You can let it finish in bottles, or move to a carboy and then bottle.
To finish in bottles: After straining, move the young dandelion wine directly to clean bottles. YOu will probably need four or five 750 ml bottles. Slip a deflated balloon over the top of each bottle to monitor for further fermentation. When the balloon remains deflated for 24 hours, fermentation is complete.
Cork the bottles and store in a cool, dark place for at least six months before drinking.
If you would like a clearer wine, transfer the strained wine into a one gallon carboy with airlock before the final bottling. Allow to ferment in the carboy for 2-3 months, and then rack into the bottles.
Notes
Do not seal bottles tightly before they finish fermenting. Always store your wine in a cool location.
Is Dandelion Wine Alcoholic?
Yes. If you use wine yeast as recommended in the recipe, you should end up with around 12 to 14 percent alcohol.
If you’re feeling adventurous, you may be able to nurture wild yeast from the raisins to do the fermenting. Wild yeast brews will have a lower alcohol content, because wild yeast dies off if the alcohol levels get too high.
You can learn more about using wild yeasts in the book, “The Wildcrafting Brewer“.
Is Dandelion Wine Medicinal?
Nearly every part of dandelion is full of nutritional value, with vitamins and minerals packed in every part of the plant. Aside from its great taste in wine making, it also has been used throughout history for its medicinal properties.
For more information, check out this article on Dandelion Benefits.
To dig even deeper into this amazing plant, check out The Dandelion Workshop online course. It includes a printable guide and step-by-step videos for making a variety of dandelion recipes and remedies.
You may also enjoy:
- Harvesting and Using Dandelion Roots
- Low Sugar Dandelion Jelly Recipe
- Dandelion Fritter Recipe
- How to Make Dandelion Root Tea
- Get Rid of Dandelions Without Chemicals
I’ve also answered a lot of reader inquiries in the comments, so be sure to have a look if you have questions. If you don’t find your answer (or would like to share some wine making stories or observations), leave a comment below.

This article is written by Laurie Neverman. Laurie mixes her rural background and engineering training to create a unique and resilient homestead. She enjoys getting to know wild plants and using them for food and medicine. Her most unique experiment to date was quackgrass wine.
Originally published in 2010, last updated in 2026.
I’m looking to make this over the weekend, I’ve read alot of homebrewing forums about sanitizing the carboys and equipment. Did you sanitize any equipment and if so what did you use ?
I’m Old School. I wash things with soap and water and air dry. Sometimes I put bottles in the sun to dry for the UV treatment.
If you like, most home brewing supply stores stock sanitizing chemicals. You can also boil equipment.
Correctly handled, the commercial yeast will quickly produce an environment hostile to bad bacteria and other microbes. We ditch the flower petals after the initial infusion time, and the fruit mix that’s left is naturally acidic, which inhibits bacterial growth, too.
Hello again,
Im just after tasting the wine I made and left to age over the summer and it is very delicious. Thanks for the recipie !!
Thanks for letting me know, and I’m glad it worked well for you.
The McDonalds ad makes your site basically unusable. The ad jumps over your recipe with no way to delete other than close out your site and try to get in before the McDonalds ad jumps in.
I’m not seeing what you’re seeing. There should be a jump to recipe button at the top of the article that takes you straight to the printable recipe. All ads should be closeable with an “x” at top right corner, and there should be no jumping ads. You may want to scan your device for viruses.
I’m going to make a third batch of your lovely dandelion wine this year – so far, not a dandelion in sight, not for another month or more. Last year’s batch was not so sweet as the one the year before, tastes more like dry white wine, although still nice.
My question is – would increasing the quantity of sugar I put in this time ensure a sweeter wine? Are there any drawbacks to this I should be aware of?
Many thanks!
As I understand it, when fermenting, the yeast will eat sugar until the alcohol content gets so high that it kills the yeast off. So adding a little more sugar should sweeten it. You can also add sugar water after the initial ferment, before racking, but that might kick off additional fermentation, so plan accordingly. (Use an airlock or balloon to allow gas to escape.)
Was the area where you fermenting a little warmer last year than the previous year? That will have an impact on the fermenting process, too. Keeping things a little cooler and slowing down the ferment tends to yield a more mellow wine.
There are specific formulas and measurements for sweetening to get more exact results, but it’s not something I’ve tinkered with as we simply roll with the variety in flavor that each year produces. I’m a lazy wine maker.
As home brewer, I confirm that adding sugar after fermentation will certainly wake any yeast back up. if you want to sweaten it before bottling, use a non fermentable sugar (like Stevia) or you will need to pasteurize the brew. Or simply sweeten by the glass when drinking.
This is my 3rd year making this, and it is my go to recipe. What I’ve done since the first time, is I add a nice little gob of local honey to it when I add everything else. The heat dissolves it nicely into your batch. It has given it a nice mellow added sweetness. People couldn’t believe it when they tasted it. One man said it was almost like a mead but not quite. This is by far the best recipe out there! I can’t wait to taste this year’s batch as my dandelions that I have fermenting have a sweeter smell this year.
I’m glad it’s worked out well for you, and thank you for taking time to share your experience (and adding a bit of honey).
I’m back with 2 more questions .. how do we increase the alcohol content from 12-13 % to maybe 15% if we want? (Just curious!) and also, if we lost some volume due to evaporation , where can we add back in some liquid (or white grape juice I read)? I had 1.5 quarts of loosely packed petals so I decided to go with 12 cups of water versus the full gallon… I didn’t want it to be too watered down. It’s currently steeping but I just realized it won’t even be close to filling the 1 gallon carboy. I read that it has to be at most 2 inches from the top of the container? What do I do, please? 🙂
To boost the alcohol content more, you’d probably need to do some distilling, because the yeasts can only tolerate/generate up to certain levels. Not something I have attempted, so I may be mistaken, but that’s my understanding at this time.
Yes, the liquid should be close to filling the carboy so that the space at the top fills with CO2. Adding white grape juice or sugar water are the most common options to stretch the wine and fill the carboy, or you can add some white wine.
Thank you!! My only other question is, I just realized many recipes call for the flowers to be included in the primary phase? Any particular reason you strain yours? Doesn’t it lead to a weaker dandelion flavor?
After three days of steeping, those petals have given up all the flavor they have to give. Think about herbal tea. 10 to 15 minutes is plenty to get the flavor into your water. Leaving the petals in also increases the possibility of spoilage. Fruit is naturally acidic, so it’s protected from microbes while the fermentation brings the whole mixture to a lower pH, and eventually produces alcohol, which also inhibits microbial growth.
I suspect people leave the petals in to make the process simpler, but they’re definitely not needed for flavor.
Okay, thanks so much! I used your recipe to a “t”… just started brewin’ now! So far so good
Just use a higher alcohol tolerant yeast (the package should give it).
Hello! I’m about to collect dandelions to make this, and I’m unsure about one part – for the beginning steeping, should the water & petals stay warm the whole time, like in a crock pot? Or is it supposed to cool down?
You do not need to keep the petals warm the entire time.
I made this exactly by the recipe as it was my first “hedge” wine. After I made the petal “tea” I was very disappointed as it tasted of nothing, despite my hands looking like a chronic smoker due to plucking the petals.
However, I really wish that I’d made a double batch now. It won’t make the recommended maturing time due it tasting wonderful after 5-6 months.
I will be making this year after year, particularly as my plucking appeared to make the dandelions even more vigorous on my garden.
Oh BTY the tip on using a balloon for fermenting with a single pin prick is genius! I’ve never seen that in any other sites, and it was so helpful.
Thank you for getting me into this new hobby. Since the dandelion wine, I’ve made elderflower wine, wild plum, and soon to be elderberry and blackberry wine.
I’m glad you enjoyed the wine, and yes, the expectations of final flavor should not be based on the initial flavor of the petal tea.
Now I have airlocks and such for fermenting, but when I first started out, the balloons were quite handy. I’m glad you found them helpful, too.
I dont see it in the directions but in the other comments people say about putting a single pin prick in the balloons. Am I supposed to put a prick in the balloons?
I do not put a pin prick in the balloon.
By the time you put the wine in bottles, fermentation should be nearly finished. The balloon should not expand dramatically in size. If your balloon does blow up large enough that you are concerned, simply remove, deflate, and put it back on.
With no pin prick, it’s easy to see when there’s not a large amount of gas from the wine. With a pin prick, the gas can leak out, so it’s harder to tell that the wine stopped fermenting.
Laurie, I include old-time recipes at the back of my novels in the Nandria Series set in 1940. I would so like to include your recipe for dandelion wine, if i may have your permission – with acknowledgement of you as the source. Thank you for your consideration. MaryJane Nordgren
Sure, that’s fine.
Forgot to mention a HUGELY helpful tip. As I was gifted some glass carboys, I didn’t have the bungs and airlocks for them, and Amazon UK customers rated their only source as poor. Therefore, I followed the tip to use the balloons with a single pin prick and it worked perfectly, not only for this wine, but my subsequent elderflower wine. Pure genius. I haven’t found this tip anywhere else on line, but it was a life saver for my wine efforts this spring. Thank you.
I made this about 5 months ago, but sadly, haven’t been able to wait the full time before sampling. It’s REALLY good, clear, and tastes like sherry now. In fact, I did a taste test with another person with “real” sherry vs. this wine, and the dandelion is hands down the best.
It is a lot of work, as I don’t have little hands to help. I was very grateful for the photo which clearly shows that the petals also contain the “fluff”. It took a day or two to get the yellow stains off my hands from all the petal picking! After the first day of making the “tea”, I was dismayed to find NO flavour. All that work, sob!
Fortunately, things changed quickly. I’ve seen other recipes that don’t include the raisins, but I believe this is essential. It is well worth the effort, and I will be making it each year now. If it’s this good too young, I cannot wait (as proven earlier), for it to mature.
Thank you for a superb recipe.
Thank you very much for your time! The Cats Ear have antioxidant properties, I will give it a try with the citrus flavors. Cats Ear Christmas Wine.
Thank you for your wonderful site!
You’re welcome, and if you think of it when the wine is ready, let me know how it turns out.
Laurie, I need your advice! I have 12 cups of Cats Ear petals in my freezer. Will the Dandelion wine recipe work with my Cats Ear?
Thank you!!
It’s looks like they’re edible, so it should be safe. I’ve never tasted them, so I can’t give feedback on any subtle flavor differences, but they are supposed to be fairly similar in flavor.
This is an absolutely lovely site, and this page is just brilliant. 🙂
Thank you.
O’ Dandy Lion,
so boldly yellow,
sitting on my lawn,
such a fine fellow!
You are the first sign of Spring,
whose early scouts make me sing.
Soon the whole mob will encamp
upon the green grass so damp.
Spread afar,
like Abraham’s children.
Boundless stars,
over hills they will run.
With your gold we are rich,
treasure in a field niche.
Tis slander to call thee a weed.
Thou art a fair flower indeed!
I would no more yield
to mow you over
than a lucky field
of four leaf clover.
Shine on little sun.
With you life seems fun.
Soon parachutes will fan,
alight over the land.
You’ll be left bare and bony
after your babies take flight.
I’ll recall grey times, lonely
until you made the days bright!
(by George Wooley)
I am 81 years young. I have this recipe scribbled down from my Great Grandfather. Gives you an idea how long people have been making this wine. My recipe said to use a crock pot.
Thanks for sharing your story. Folks have been using wild plants for a long, long time, and I’m glad to see an interest in it again.
I tried this receipe for the first time last year, it worked really well. I do have a problem with trying to stay away from drinking it all, as I want to have a bottle to drink while I make the next lot! It does say try and keep for as long as possible, and I want to see what it tastes like after a year.
When I was a child back in the early 1950’s in the UK, all the old ladies in our village and the surrounding villages made wine from a variety of things, cowslip, elderberry and parsnips, as well as dandelion. As a toddler I was not in a position to ask for a taste! but would love to know how this receipe may or may not differ.
It really is very good, and I loved the boozy fruit left over, it made a wonderful cake.
Thank you so much for the detailed instructions. Every part of the process, I had no questions about whether I was doing it right because it checked out with what you’d written. We just opened our first bottle after the long 6 month wait and it’s very drinkable, though deter than I expected. Will definitely make again!
I tried mine today when I racked it into a new carboy and it’s already delicious! 4 months in. I was surprised at how sweet it was. My one question, I forgot to take a gravity reading at the beginning. What was yours? I followed the recipe to a T so I’m assuming mine would be close.
Alas, I have no gravity readings. The recipe has worked for years, so I just roll with it.
I am having my first attempt at dandelion wine, and have just poured the boiling water on the petals, as per receipe. However, after a couple of hours leaving them to soak – its supposed to be left for 2-3 days – the liquid looks very dark, is this normal?
I only used yellow petals, I didn’t put in any of the dark green part.
The petal tea will darken as the yellow petals oxidize. This is normal. You’re good to go.
WOULD LIKE TO ORDER WHAT I NEED FROM AMAZON . THE AMOUNT AND WHAT KIND OF YEAST NEEDED FOR A 1 GALLON CARBOY IS NOT MENTIONED. CAN SOMEONE HELP WITH THIS QUESTION? THANK YOU
As mentioned in the article, I use wine yeast. Wine yeast comes standard in small packets that can make between one and five gallons. This is the brand I use – Lalvin Wine Yeast.
Hi Laurie,
Love your recipe…going to try to make dandelion wine for the first time. You said that one can use a carbon rather than a crockpot..do you ferment for the same period of time? 2-3 months then an additional 6 months in the bottles? Forgive me if you said that above somewhere.
If you would like a clearer wine, rack the wine into a gallon carboy with airlock before the final bottling. Allow to ferment in the carboy for 2-3 months, and then rack into the bottles. The wine should age a minimum of 6 months, but it improves with age. We usually age it at least a year, but have some bottles over 10 years old.
I love this recipe and go one step further where I rack from primary ferment crock to secondary glass carboy (after primary ferment calms down). After 10-15 days in secondary, when still bubbling but most of the lees have settled to the bottom, I rerack to another glass carboy trying the best not to disturb the lees on the bottom and then let it finish out its 2-3 months there. This creates a very clear wine, and minimizes the dead yeast flavor it picks up from sitting on the lees that long.
I’ve also modified this recipe using homemade vanilla extract, homemade cacao extract, and strawberry juice for 3 well-loved flavor variants!
Yes, the direct to bottle option is simpler, but racking to a carboy gives a clearer wine, as noted in the article:
If you would like a clearer wine, rack the wine into a gallon carboy with airlock before the final bottling. Allow to ferment in the carboy for 2-3 months, and then rack into the bottles.