Warm & Golden Dandelion Wine Recipe (Old-Fashioned Wine Making)
This post may contain affiliate links. Read my full disclosure here.
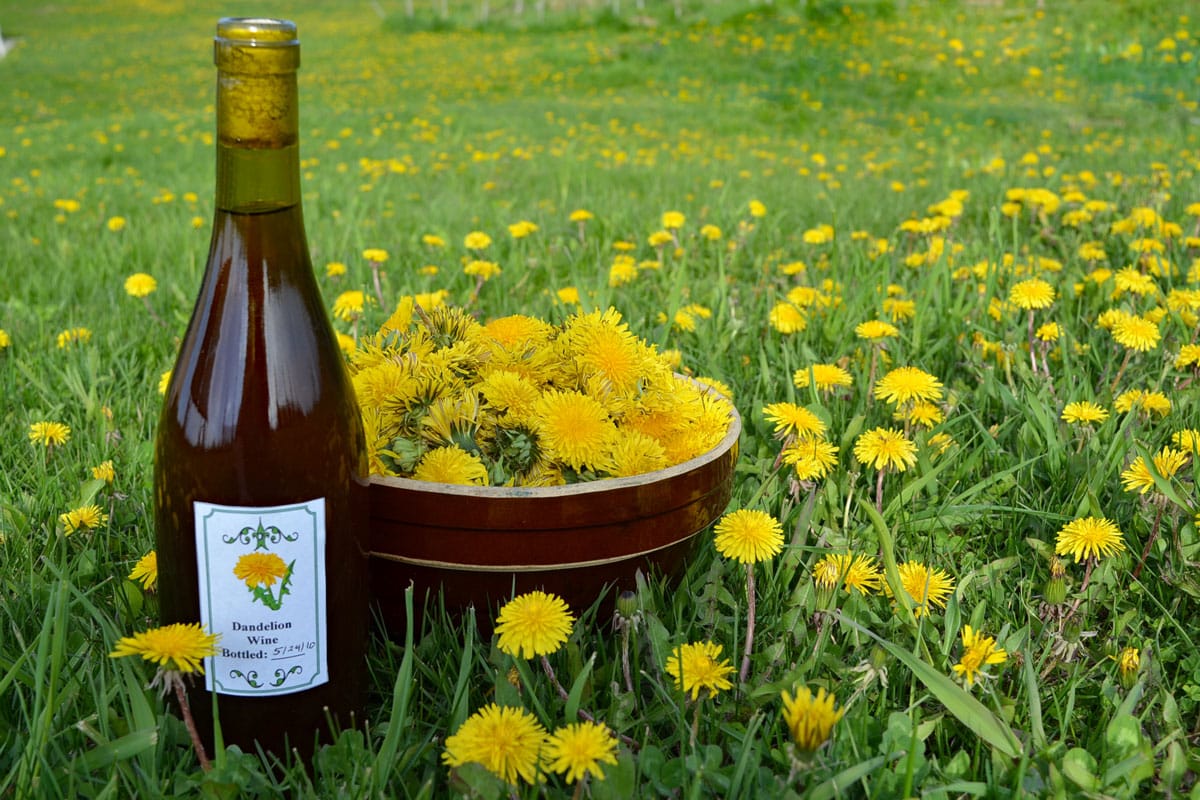
Wine out of dandelions? You bet! Making homemade dandelion wine is a longstanding family tradition. We don’t make it every year, but I do like to keep a few bottles on hand for company.
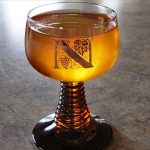
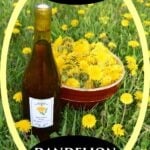
The taste of this dandelion wine is rich, golden and warming – more like a good brandy than a wine. I’ve had friends who don’t normally like wine comment that they do enjoy this “spring tonic”. This is a “country wine” made from simple ingredients with basic equipment.
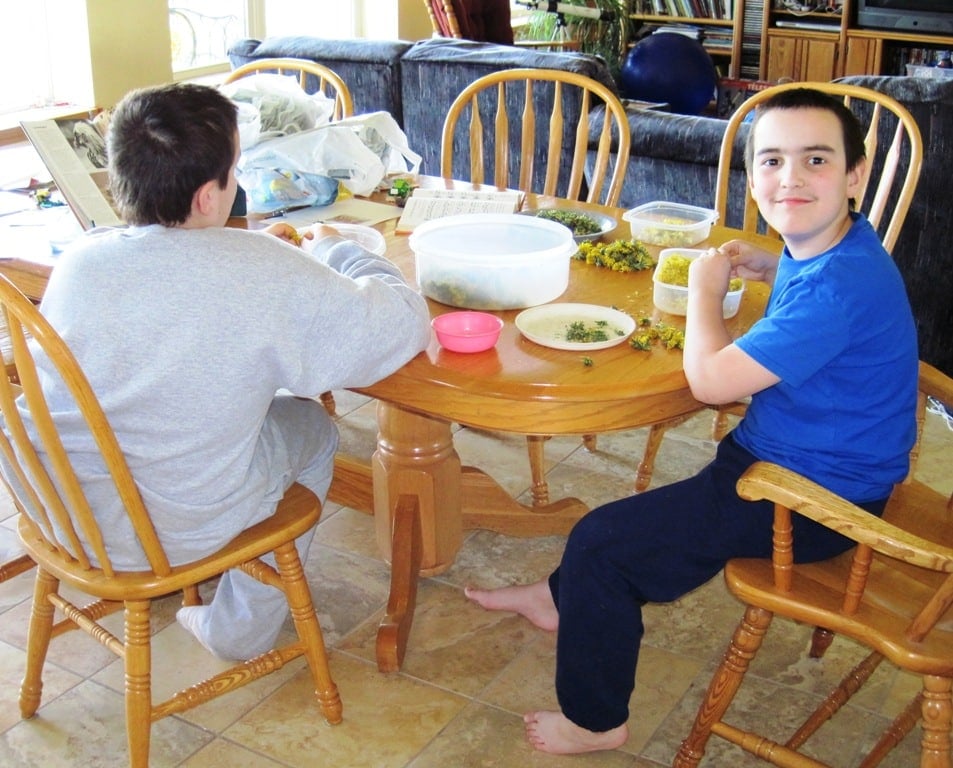
When we get dandelions, we get LOTS OF DANDELIONS! They are everywhere! (Boy photos are from 2010. They have grown quite a bit since then, but I kept these photos here for the happy memories.)
Dandelions are wonderful for bringing up nutrients and breaking through compacted soil. This area of the yard had a lot of compaction from soil being moved around, so the dandelions were working overtime.

Table of Contents
Gathering the Flowers
Make sure your dandelion flowers are free of pesticides, herbicides and other contaminants. I usually don’t rinse the blossoms, though you can if they are dusty. They are sterilized during the first part of brewing. We gather bins of flower heads outside, and then bring them inside to remove the petals.
Don’t pick dandelion blossoms for wine or eating from an area used by pets for their “bathroom”. As I explained to a reader in the comments, I’m fairly sure goat pee will not wash off.
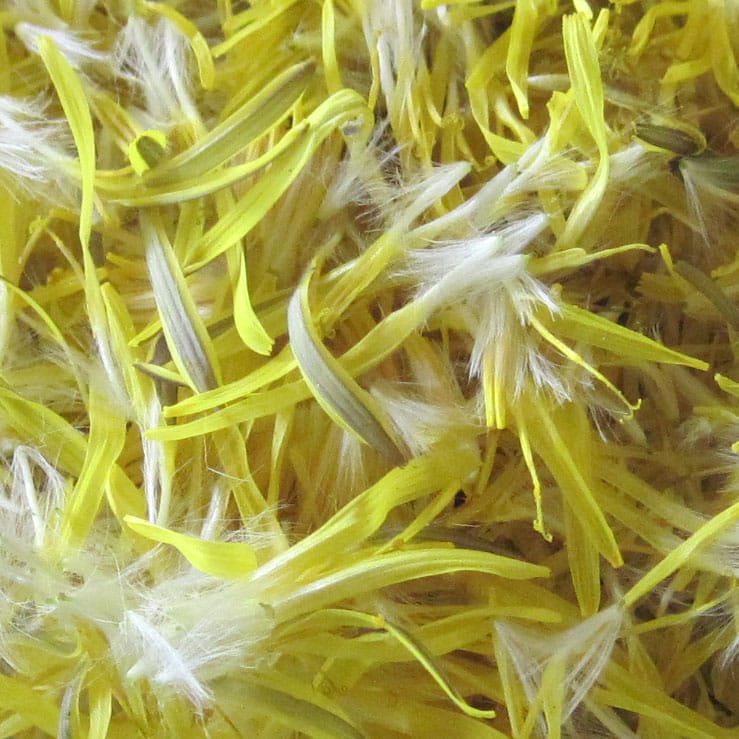
What part of the dandelion is dandelion wine made from?
For dandelion wine, use the yellow flower petals only. Leaving the petals attached to the green base of the flower will result in a bitter, unpleasant wine. My neighbor made this mistake when she tried to make dandelion wine, and she ended up throwing out the whole batch.
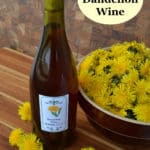
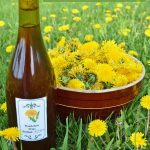
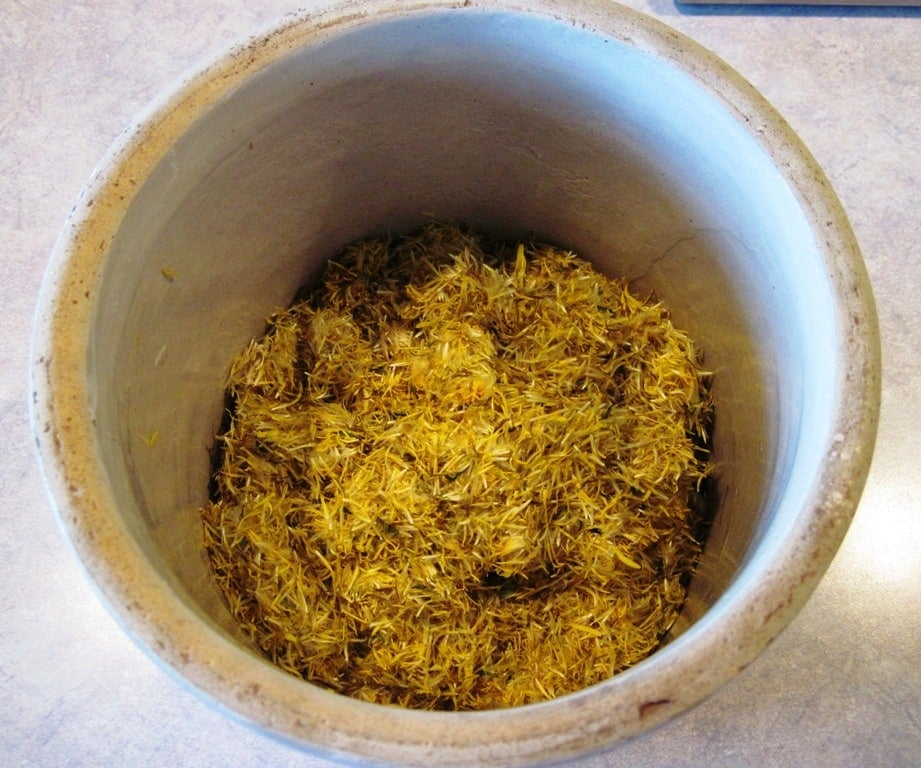
I use 3 quarts of loosely packed yellow dandelion petals (pictured below). Not 3 quarts of flower heads, 3 quarts of petals only.
If you don’t have enough dandelion petals from one picking, freeze the petals until you have enough.
The boys and I sat down to a session of “second picking” to remove the yellow petals from the blossoms. You want to remove the petals as soon as possible after picking, as the flower heads close over time. Once they close, it’s tough to get the petals off.
If you are working alone, it may be best to pick some of the flowers needed, remove petals, then pick more flowers and repeat. That way, you won’t have trouble with the flower heads closing before you have time to clean them. It’ll also give you a chance to get up and stretch.
Making Homemade Dandelion Wine
“Dandelion wine, believed to be of Celtic origin, is regarded as one of the fine country wines of Europe. In the late 1800s and early 1900s, it was not proper for ladies to drink alcohol. However, dandelion flower wine was considered so therapeutic to the kidneys and digestive system that it was deemed medicinal even for the ladies.“
Adapted from Dandelion Medicine, in combination with my mother’s recipe.
Remember, all your fermentation vessels should be glass, ceramic, stainless steel or food grade plastic. Never ferment in aluminum or iron, as it can react with the wine.
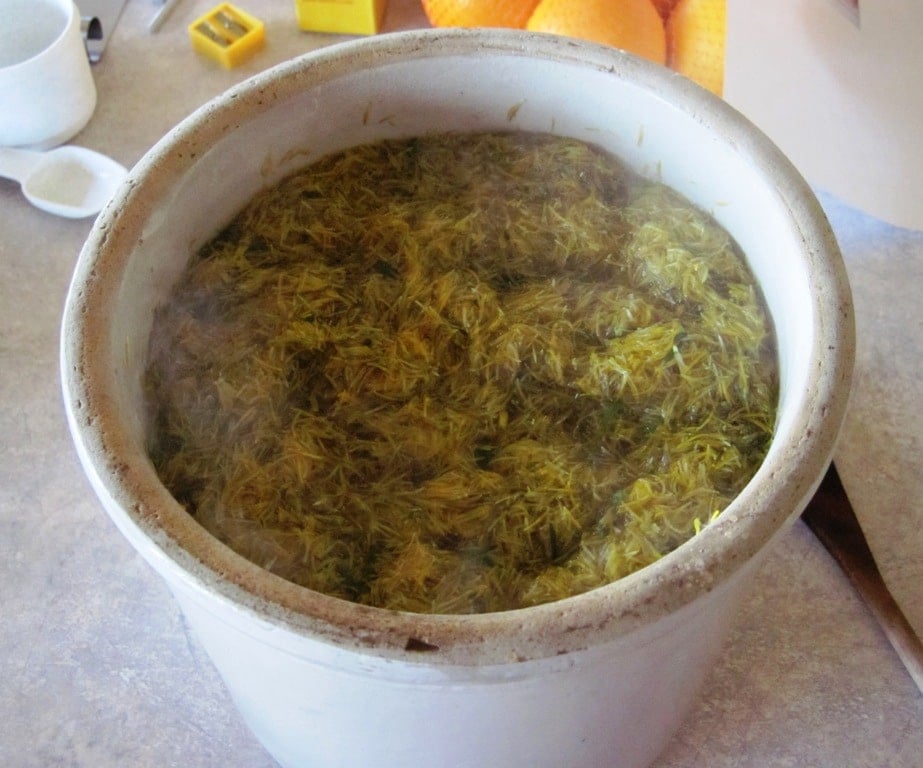
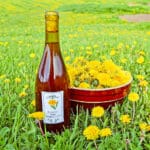
I normally use my two gallon crock for one gallon of wine, since the fruits bubble up during fermentation. You can see in the photos below that a one gallon crock gets very full.
Ingredients
- 3 quarts dandelion petals, loosely packed
- 1 gallon water
- 2 oranges, with peel, preferably organic
- 1 lemon, with peel, preferably organic
- 3 pounds sugar
- 1 package champagne yeast or wine yeast (this yeast finishes at around 12-14% alcohol)
- 1 pound raisins, preferably organic
How to make dandelion wine – Directions
1) Collect the blossoms when they are fully open on a sunny day, after the morning dew clears. Remove green parts and measure out 3 quarts of loosely packed petals.
2) Bring the water to a boil and pour it over the flowers in a large pot or crock. Cover with a towel to keep dust out and let steep for three days. Stir daily to keep the petals submerged in your “dandelion petal tea”. They will develop a musty smell, which is normal.
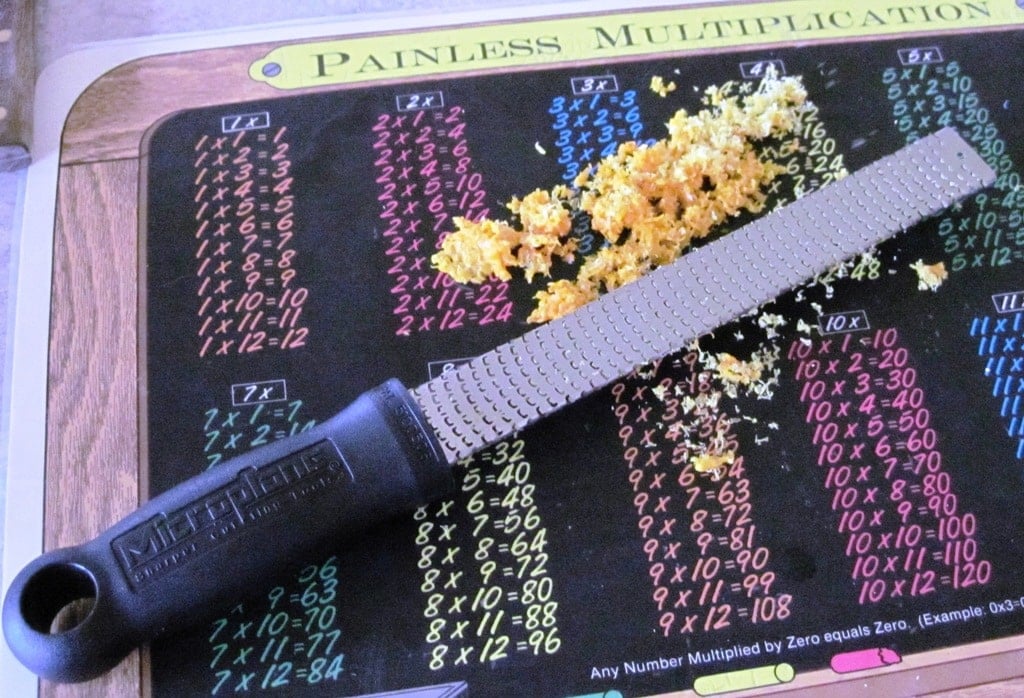
3) Prepare the oranges and the lemon. Zest about half of the rind and peel off the rest in thin strips. You want to minimize the amount of white pith added to the brew.
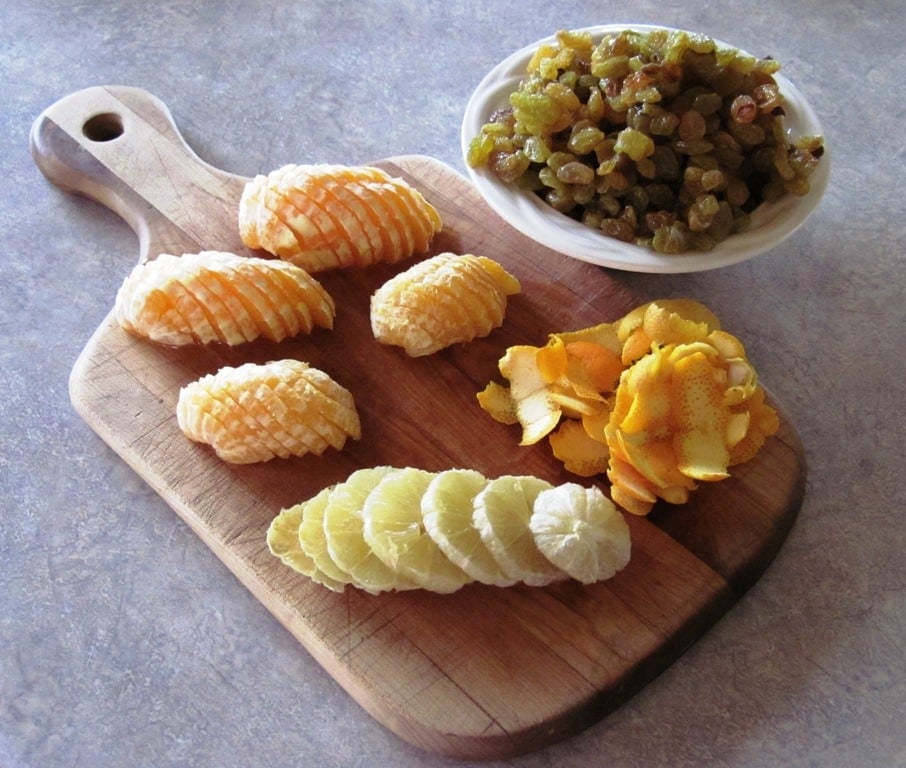
4) Clean most of the pith off the fruit and slice into thin rounds.
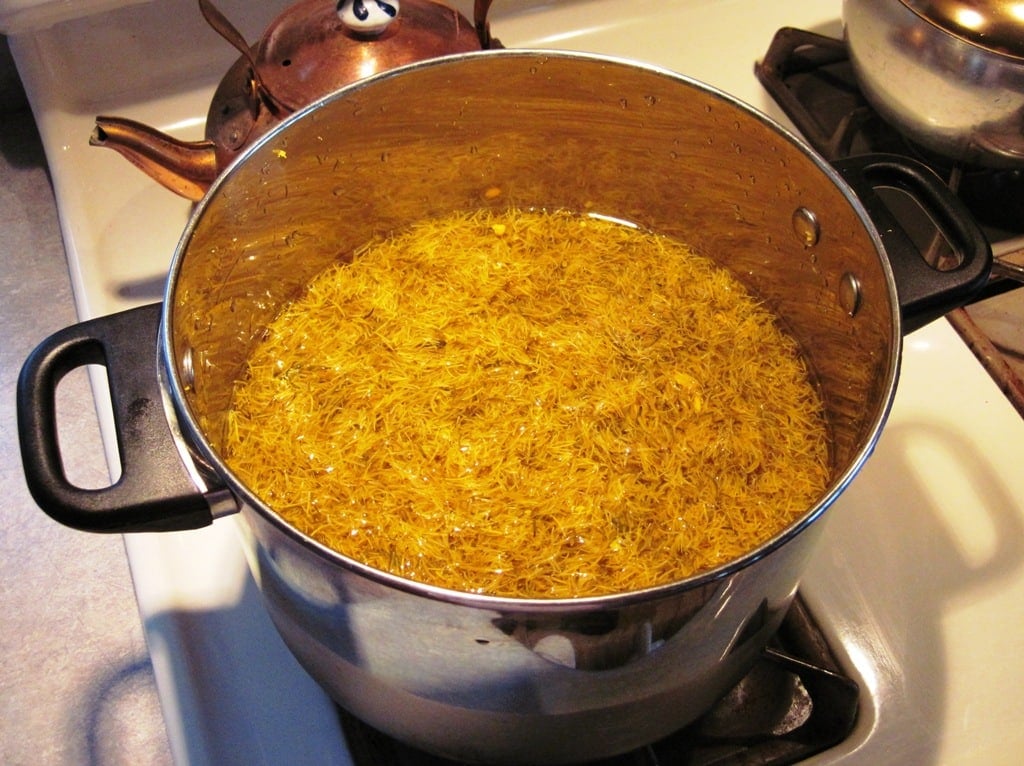
5) Add the lemon and orange zest to the flower-water mixture and bring to a boil. Remove from heat, strain out solids. Dissolve the sugar in the flower water. Allow to cool to room temperature.
Would you like to save this?
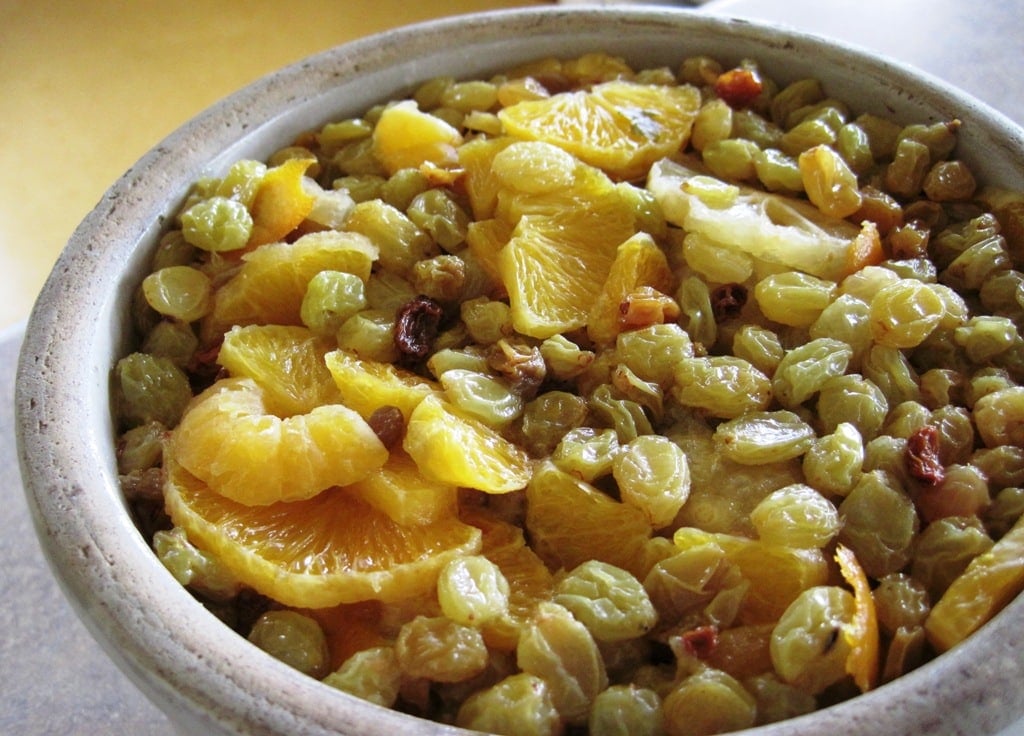
6) Add the yeast, raisins, and orange and lemon slices and rind strips to the liquid. Put everything into a crock (or wide mouth carboy with airlock) to ferment. I cover my crock with a clean cotton towel held down by a rubber band to keep dust and bugs out. (Not shown.)
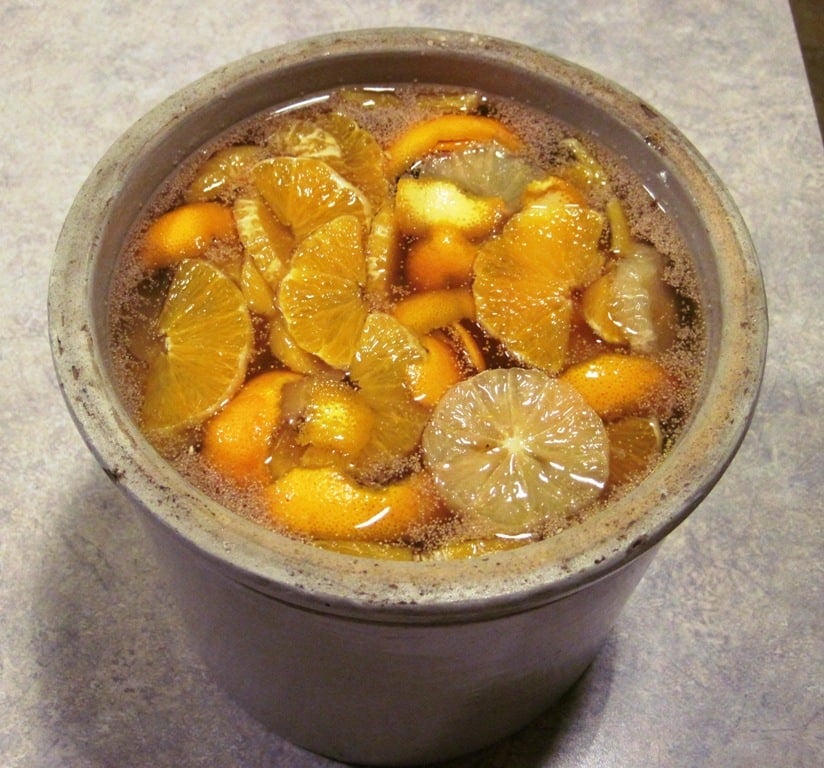
Stir daily with a wooden spoon or non-reactive stir stick. When the yeast gets active, the bubbles will lift the fruit up to the top of the wine. You want to stir so all the fruit gets pushed back under the surface and wet down daily.
7) When the primary fermentation mixture stops bubbling (1 -2 weeks), fermentation is almost done. Strain the liquid through several layers of cheesecloth, a flour sack towel, or a jelly bag.
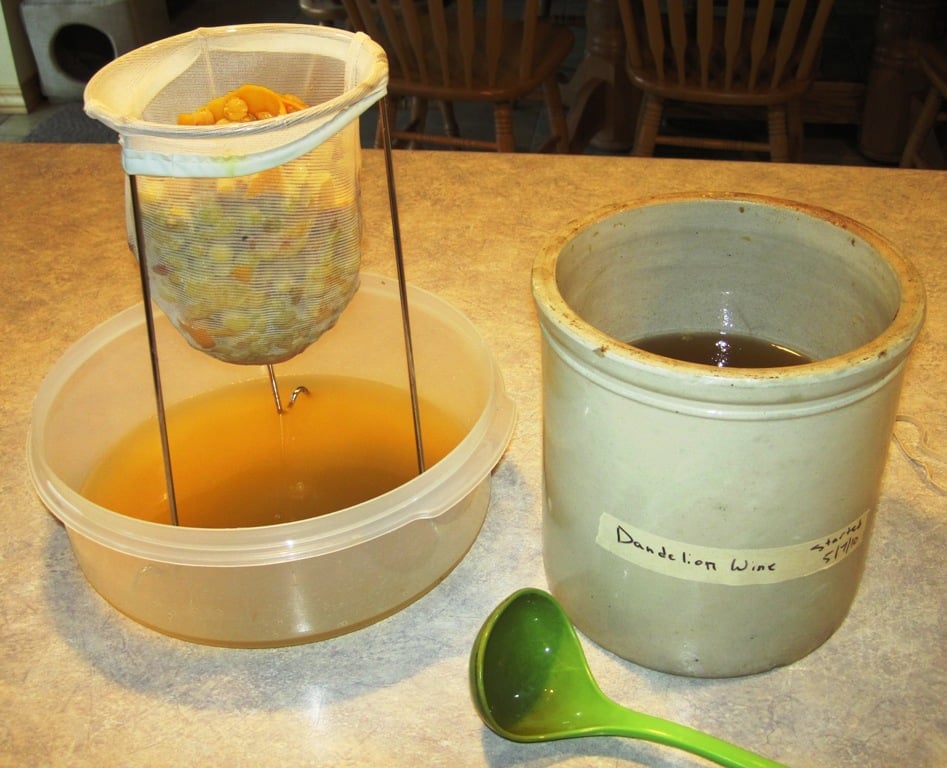
Bottling the Wine
You have two options for bottling your homemade dandelion wine. You can let it finish in bottles, or move to a carboy and then bottle.
To finish in bottles: After straining, move the young dandelion wine directly to clean bottles. Slip a deflated balloon over the top of each bottle to monitor for further fermentation. When the balloon remains deflated for 24 hours, fermentation is complete. You will probably need four or five 750 ml bottles.
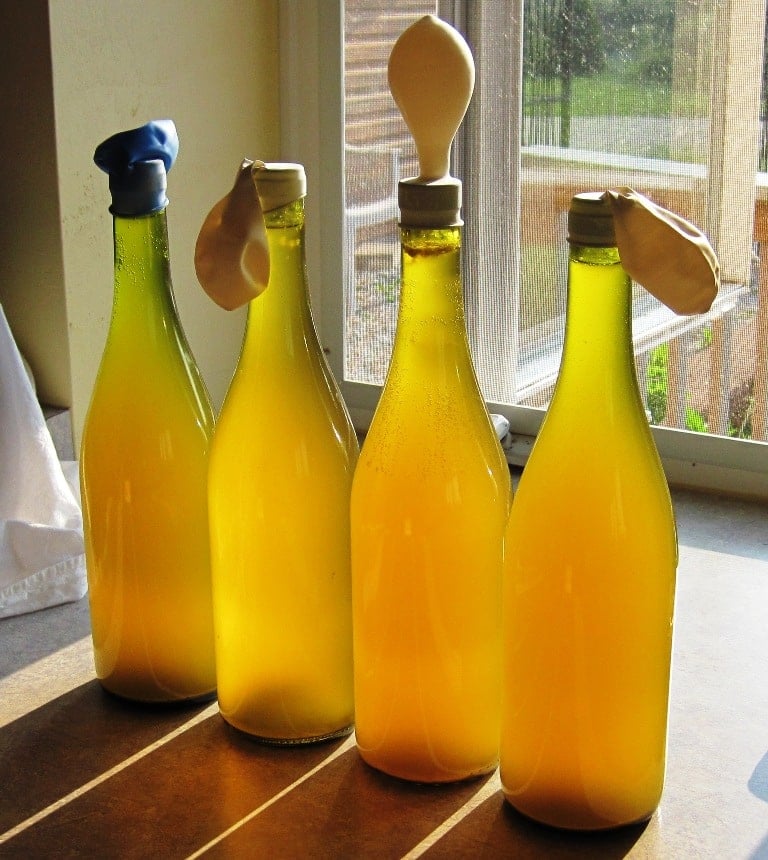
Cork the bottles and store in a cool, dark place for at least six months before drinking.
NOTE: Do not seal bottles tightly before they finish fermenting, and don’t put them somewhere warm. Otherwise, you’ll end up with exploding bottles, like my sister, Mary, when she stashed them in a closet. Apparently, it sounded like there were bombs going off or they were being shot at.
If you would like a clearer wine, transfer the strained dandelion wine into a one gallon carboy with airlock before the final bottling. Allow to ferment in the carboy for 2-3 months, and then rack into the bottles.
If you’d like to download a pdf of my wine labels, use this link: Printable Dandelion Wine Labels.
If you don’t want to send the wine fruit to the compost pile, try Dandelion Wine Fruitcake.

Recommended Materials for Making Dandelion Wine
- Wine Yeast – store extra yeast packs in the fridge or freezer. I normally use Lalvin Wine Yeast EC-1118.
- 2 Gallon Crock – 2 gallons gives you space for fermentation.
- Wine Bottles – It’s fine to wash and reuse old wine bottles. You will probably need five 750ml bottles.
- Corks – It’s best to use new corks. I like the #9 Straight Wine Corks.
- Wine Bottle Corker – This double lever model works like a charm.
- Gallon carboy with airlock – optional, for clearer wine.
Old-Fashioned Dandelion Wine Recipe
A smooth and hearty flower wine with citrus notes that will warm you from head to toe.
- Yield: 4–5 bottles 1x
Ingredients
- 3 quarts dandelion petals, loosely packed
- 1 gallon water
- 2 oranges, with peel, preferably organic
- 1 lemon, with peel, preferably organic
- 3 pounds sugar
- 1 package wine yeast
- 1 pound raisins, preferably organic
Instructions
- Collect the blossoms when they are fully open on a sunny day. Remove any green parts and measure out three quarts of petals.
- Bring the water to a boil and pour it over the flowers in a large pot or crock. Cover with a towel to keep dust out and let steep for three days. Stir daily to keep the petals submerged.
- Prepare the oranges and the lemon. Zest (finely grate) about half of the rind and peel the rest off in very thin strips. You want to minimize the amount of white pith added to the brew.
- Finish peeling the citrus, and slice them into thin rounds.
- Add the lemon and the orange zest to the flower-water mixture and bring to a boil. Remove from heat, strain out solids, then add the sugar, stirring until it is dissolved. Allow to cool to room temperature.
- Add the yeast, raisins, and orange and lemon slices and rind strips to the liquid. Put everything into a two gallon crock (or wide mouth carboy with airlock) to ferment. I cover my crock with a clean cotton towel held down by a rubber band. Stir daily with a wooden spoon or non-reactive stir stick.
- When the primary fermentation mixture stops bubbling (1 -2 weeks), fermentation is almost done. Strain the liquid through several layers of cheesecloth or a flour sack towel.
Bottling the Wine
You have two options for bottling your homemade dandelion wine. You can let it finish in bottles, or move to a carboy and then bottle.
To finish in bottles: After straining, move the young dandelion wine directly to clean bottles. YOu will probably need four or five 750 ml bottles. Slip a deflated balloon over the top of each bottle to monitor for further fermentation. When the balloon remains deflated for 24 hours, fermentation is complete.
Cork the bottles and store in a cool, dark place for at least six months before drinking.
If you would like a clearer wine, transfer the strained wine into a one gallon carboy with airlock before the final bottling. Allow to ferment in the carboy for 2-3 months, and then rack into the bottles.
Notes
Do not seal bottles tightly before they finish fermenting. Always store your wine in a cool location.
Is Dandelion Wine Alcoholic?
Yes. If you use wine yeast as recommended in the recipe, you should end up with around 12 to 14 percent alcohol.
If you’re feeling adventurous, you may be able to nurture wild yeast from the raisins to do the fermenting. Wild yeast brews will have a lower alcohol content, because wild yeast dies off if the alcohol levels get too high.
You can learn more about using wild yeasts in the book, “The Wildcrafting Brewer“.
Is Dandelion Wine Medicinal?
Nearly every part of dandelion is full of nutritional value, with vitamins and minerals packed in every part of the plant. Aside from its great taste in wine making, it also has been used throughout history for its medicinal properties.
For more information, check out this article on Dandelion Benefits.
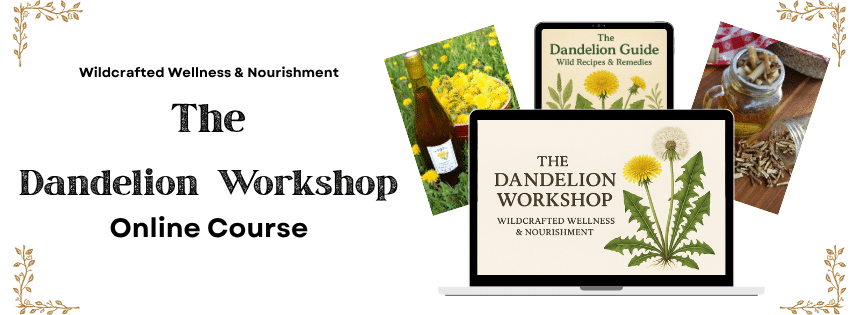
To dig even deeper into this amazing plant, check out The Dandelion Workshop online course. It includes a printable guide and step-by-step videos for making a variety of dandelion recipes and remedies.
You may also enjoy:
- Harvesting and Using Dandelion Roots
- Low Sugar Dandelion Jelly Recipe
- Dandelion Fritter Recipe
- How to Make Dandelion Root Tea
- Get Rid of Dandelions Without Chemicals
I’ve also answered a lot of reader inquiries in the comments, so be sure to have a look if you have questions. If you don’t find your answer (or would like to share some wine making stories or observations), leave a comment below.

This article is written by Laurie Neverman. Laurie mixes her rural background and engineering training to create a unique and resilient homestead. She enjoys getting to know wild plants and using them for food and medicine. Her most unique experiment to date was quackgrass wine.
Originally published in 2010, last updated in 2026.
We followed a recipe from RGladstar on 4/21 and used 2 c sugar. Today, 5/20, the product is very sour. Should we add more yeast and sugar (dissolved in water), to re-ferment? Or, should we cork as is and store in basement? BTW, we used the whole flower bud. Sure glad we found your site. Linda & Karen
If you used the whole flower bud, it may be beyond saving. The green makes it very bitter, which is why I warn against using it in the post. If you’re willing to spend the time and sugar, a referment isn’t likely to make it worse. Aging will take some of the raw edge off, but the bitterness is likely to stay. As an experiment, if the batch is big enough, you could try sugaring half and bottling half. I suspect others are curious to see if it can be saved, too.
And welcome to the site!
Thank you for your quick reply! We are going to further the experiment by sugaring half (referment) and bottling the rest. Wish we’d seen this site before we processed the whole flower bud. Is there any chance a batch that’s been sitting in the bottle for a month can be “bad”, rancid or bacteria-laden? Or does this process prevent that? Just want to be sure we’re not spending a lot of time on bottles of bad wine, no that we haven’t been having fun with this!
The alcohol should act as a preservative. If it was off, it’d most likely have more of a vinegar flavor, not a bitter or sour flavor.
I did this to my elderberry wine 2 years ago. I was worried it might have gone off, but it smelled lovely so I warmed it up, added more sugar and more yeast. Now, it’s clear and delicious!
Thanks for sharing your experience.
Year 2 for making this wine with your recipe! Has anyone ever tried adding other fruit or (juice) to it like raspberries or blueberries during the fruit fermentation process? I haven’t come across any recipes online. They all seem to stick with lemons and oranges (assuming those are for acidification).
I’ve never seen a dandelion wine recipe with other add ins – but fruit has sugar, so it will ferment. The thing about wine making (like cooking) is that you have to be mindful of the flavor blends. Too many different things in the pot, and your flavors get “muddy”. (Just watch one of those TV cooking competitions where a contestant throws the whole pantry into one dish.) Citrus and blueberry are a classic pairing, so if you wanted to experiment, I’d probably start there, but I’m not sure how the blueberries would play off the raisins.
Hi, love the blogs!!! Had a question about fruit, and adding or making carrot wine!!? Lol
The only root based wine I have on the site is quackgrass wine, as we generally prefer to eat our carrots instead of fermenting them and I can never grow enough. As long as you have sugar and yeast, you can make some sort of country wine.
I forgot to let the mixture cool before I added the fruit and wine yeast. Now it doesn’t seem to be bubbling (I think I killed the yeast). Can I add another packet of wine yeast now that it is cool?
Yes, you can add fresh yeast.
Hi there! I have reached the stage of balloons on the bottles. They’ve been inflated for a little over a week. Just curious to know if there is a guide line as to how long they will be inflated? Is this something that can take weeks, months? Love the post! Can’t wait to taste the wine!
It depends on how active your yeast is when they go in the bottles, which is largely determined by temperature and sugar content. I would think it should take less than a month in most cases.
oh boy! I did not measure my flowers before plucking all the petals. I was trying to get 3 quarts of petals but I see now that is not what you meant. Anyone have any idea as to how much 3 quarts of blossoms ends up being when plucked?
I am not sure. A little more or a little less won’t make a huge difference in the recipe. We often throw in extra because the boys pick so many.
Can you used dried dandelion flowers instead of fresh? I have dandelions but not enough at one time to make wine and I refuse to pick them anywhere near any roads.
Probably, I just don’t know how it would affect the flavor.
Once you pluck the yellows off, you can freeze them. Do not THAW them before boiling and do not freeze ANY greens from them they turn to mush. I frequently have to freeze my petals for a second picking before making Jellies.
Thanks for the tip, Tia. I will add a note to the post.
I can’t wait to try the Dandelion wine recipe. My mom and I went to Wisconsin years and years ago and found a place up there that sold it. We loved it but could never find it sold anywhere else. Now thanks to you I can make my own.
I’ve never heard of anyone selling it. Interesting.
I absolutely love to drink wine, but I do not like sugary stuff, as I am a huge but about balanced blood sugar. I also love to find ways to incorporate wild weeds and herbs into everything. Is there a way I could add less sugar to make it only a hint of sweetness and add other spices that don’t hinder fermentation? Also, could I add chamomile petals as well for additional health benefits? I just love dandelion and chamomile together.
Most of the sugar is consumed during the fermentation process. The end product is not very sweet. It’s your brew, so you are certainly welcome to experiment with adding whatever you like. That’s the fun of homebrewing. You might also try a simple vodka or brandy based infusion with the herbs and spices of your choice, or a mead with added herbs and spices.
Hi Laurie!
Thanks for sharing this recipe:) I began the process about a month ago now and then had to leave town so left the final steps for a friend to finish. After about 2weeks the citrus solution was still bubbling so we decided to strain and bottle with balloons anyways. I arrived home yesterday and the balloons are still on the bottles inflated some…wondering what I should do now since obviously the fermentation is still going? I noticed there’s some sediment in the bottom of the bottles I could try straining out again? Any advice would be much appreciated:)
Love,
Heather
You can simply leave them until the fermentation stops, then cork, if you don’t mind a little sediment. This is what I normally do because I’m not too fussy, and the flavor was still good. Otherwise, you could transfer back to a gallon carboy and let fermentation finish there, then rack to bottles and cork for a clearer wine.
love the comment but for homemade blackberry wine I use panty hose ,several thickness from the legs to strain the wine off the berries or a thin curtain several thickness sewed into a bag ..also do this straining when I rack in bottles at the finish just put my bag over the funnel..hope this is helpful
What did you do to get the fines out of the liquid? Did you rack the wine, & if so how many times?
Thanks for the recipe & I’m in the middle of the process here myself. I’m at this stage & I’m wondering what is best to do to get the clearest wine before I cork it up. Thanks!
I didn’t rack, so I ended up with some sediment, but not too much. You could age it in a gallon jug until it stops fermenting and then rack for a clearer wine.
This is my first time making wine. I’m interested in a clearer wine, so I read to “rack” it in a carboy for a few months before bottling. So, my initial fermentation is starting its second week. It’s still aggressively fermenting. When that stops, do I put “all” in the carboy, liquid and fruit, or just liquid?
Before moving to a carboy, I like to filter out the fruit so only liquid goes into the carboy. I line a mesh strainer with an old flour sack towel or heavy duty cheesecloth to strain, and let any sediment settle to the bottom as much as possible before gently pouring into the carboy.
Going to start making wine this week and wondered what you are using to cover the pot for the first stage after you pour the boiling water on the petals to steep. Cloth? Pot lid? Also, safe to double the recipe? Or make separate batches. How many bottles does your batch make?
I used a flour sack towel with elastic band to cover the pot while steeping. Doubling the recipe shouldn’t be a problem, other than taking more time to pick and pluck the flowers. This batch made five bottles of wine.
I see you said it makes 5 bottles . What size are the bottles??
I used recycled wine bottles, so 750 ml.
Thank you. I actually have 5 bottles from sparkling lemonade. They are 750no. I don’t like to waste. They have those rubber seal gaskets and the wire that pops down to lock the lid down. I’m drawing a blank on what they’re called. I wonder if those would work. (As long as fermentation was done of course.)
Those are called swing top or bail top bottles. Technically, yes, you could bottle in them, but from what I’ve seen on the wine making forums, folks wouldn’t recommend aging in them because the gasket may give out over time. (Alcohol and rubber don’t mix well.)
Sorry, one more question! Can I use a plastic fermenter bucket? And if I can, do I just put the lid on loosely?
For the initial ferment? That should be fine.
Thanks!
as long as it is food grade
which, if it is sold as a fermentation vessel, it should be
I was wondering if you might be able to substitute a pound of sugar with 16 oz of maple syrup? We make our own and I thought it might add a different flavor. Kinda like using sap for maple beer.
At http://winemaking.jackkeller.net/sugar.asp, they say:
And at http://homedistiller.org/sugar/wash-sugar/maple they say:
“Yes, you can use maple syrup to make alcohol. How? Well you take a recipe, follow it and BAM you have your brew. What if you don’t have a recipe? Well most people I know substitute maple syrup for honey in their mead recipes.”
Sooooo… it would seem to imply that one could substitute maple syrup for sugar, although I have not tried it.
Just wanted to thank you for your website! What great, timely recipes and ideas. Just made my first batch of dandelion wine. How fun! I’m going to try strawberry- rhubarb next, and then maybe lemon balm. The possibilities are endless 🙂
Thank you for your kind words, Joanie. Sometimes it’s a challenge to balance doing the projects with writing about the projects, but hearing that people are interested keeps me going.
We did this dandelion wine recipe up last Spring (2014) and popped the bottles among all the dandelion flower gatherers this month. WOW!!!!!!!!! Is all we can say!!!! It’s bubbly and slightly sweet and “citrusy”… FABULOUS! Thank you SO MUCH for both the clear instructions and tastey ingredients! I think a home made gingerale along these lines would be super, although I wonder how one could incorporate raw honey and less/no sugar? If you know of a similar recipe please let us know! Thank you again :)))))
Maybe Wellness Mama’s Naturally Fermented Ginger Ale?
making this now am confused about the yeast. recipe calls for 1 cake or 1 oz but the link takes me to lalvin wine yeast which is 0.176 oz So do I use 2 packages? sure hope you see this post soon
Sorry for the confusion. The original recipe used bread yeast, which will work, because it feeds on sugars, but I typically just use a packet of wine yeast, which is more than enough for a batch of wine.
Laurie, you tutorials are absolutely the best!! As an added bonus, you constantly crack me up… goat-pee-free zone! LOL! Now that’s a blog post right there.
Thanks, Todd. While safe to consume because the petals would be boiled and steeped, I just can’t imagine that goat pee would provide flavor nuances that I’m looking for. Of course, coffee beans harvested from civet poop are a gourmet delicacy, so I may be missing out.
What’s the easiest way to get the goat pee off the flowers?
I don’t think there’s any way to completely remove urine because of the absorbancy of the flowers and all the little nooks and crannies. I’d highly recommend harvesting in a goat pee free area. Maybe a friend wouldn’t mind you harvesting?
WOW! What a great idea! It’s a must try! Thank you.
Hi I was wondering if instant yeast would work has I’m having a hard time finding champagne yeast.
Some sort of wine yeast would be best, but just about any yeast will work in a pinch.
My wine yeast wouldn’t ferment, so I used good old old dried bread making yeast and the dandelion wine turned out perfectly! I have heard of floating toast on the top of country wines – I expect that’s for the yeast content, too.
The floating bread was commonly used in combination with bread yeast, or as an assist to catch wild yeast. Glad you were able to improvise successfully.
Love love love! I do dandy mead, fried dandelion fritters, and I aim to dig up roots this fall to make some roasted dandy root tea! 🙂 Sharing to my twitter feed right away!
http://pixiespocket.com/2011/05/recipe-box-dandelion-fritters.html