Troubleshooting Tips to Help You Bake the Perfect Loaf of Bread
This post may contain affiliate links. Read my full disclosure here.
I got a phone call from an old friend yesterday. As we were talking, his recent bread baking mishaps came up. He told me, “Next time we’re over for a visit, you have to show me how to bake bread. I’ve been trying, but one loaf of bread was flat, another loaf of bread looked great and then in caved in, and I just can’t get my bread to turn out right.”
Since he and the family won’t be able to come and visit until summer, I decided to write up a list of troubleshooting tips to help you bake the perfect loaf of bread, or at least bread that won’t do double duty as a door stop.
We’re going to tackle things in a question and answer format, so hopefully if there’s a question you’ve run into while bread baking, you’ll find it in the list.
What flour should I use to make bread?
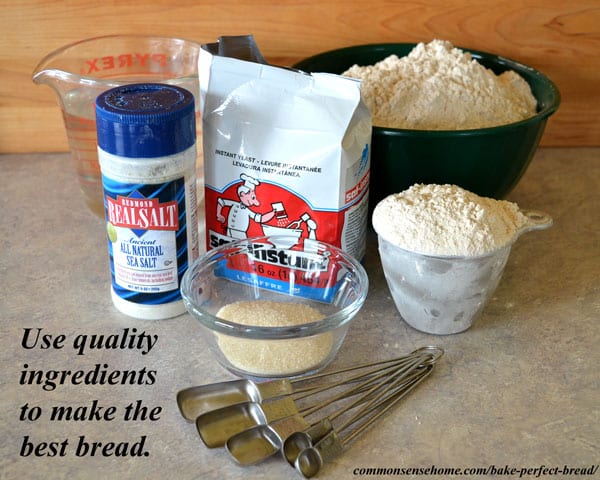
This may seem obvious to some, but bread flour is the preferred flour for making bread. Why use bread flour and not all purpose flour? (I mean, it says “all purpose”, right? Bread is a purpose.)
Bread flour has a higher gluten (protein) content. Gluten gives standard yeast breads wonderful stretchiness to their dough, to trap those beautiful burping yeast bubbles so your bread rises to blissful heights. Gluten is what I miss most in gluten free baking. 😉
Brands do make a difference. My personal favorite flour is King Arthur. It has always given me excellent results.
I can’t get buy King Arthur in bulk through my buying club, so right now I’m using organic Golden Buffalo flour from Heartland Mill. Golden Buffalo is a high protein wheat flour that has the coarsest flakes of bran removed, leaving the finer bran and germ behind. It’s like “whole wheat light”.
If you’re buying wheat berries to grind for bread flour, look for ones that are labeled “hard wheat”. The hard wheat varieties are the ones that have a higher gluten content.
I generally use a hard white, but hard red spring wheat gives a nice, somewhat nutty flavor to the bread and is also very good.
Most of the older grain varieties like Einkorn and Kamut® contain less gluten, so you may want to wait to experiment with them until after you’ve mastered bread with a high gluten flour.
How Warm Should the Water Be That I Add to the Bread Dough?
Think baby’s bath water. If you would scald your behind dipping it in the water, it’s too hot.
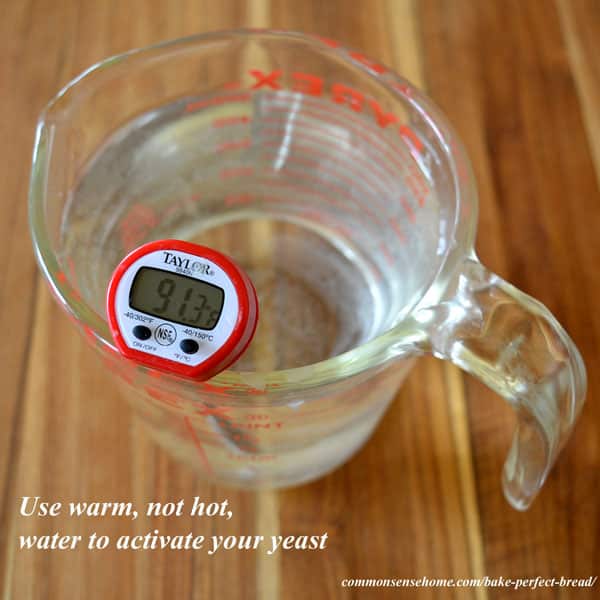
The cookbook that comes with my bread machine asks for 80° F(26.7° C) water. I’ve seen other recommendations that go as high as 120 – 130° F. Much higher than that, and you’re getting into dangerous, yeast killing territory. (140°F (60° C) = dead yeast.)
I aim for around 90-100° F (32 – 38°C) water (or other liquid) to activate the yeast. If you don’t know how hot that is, get an inexpensive kitchen thermometer to help.
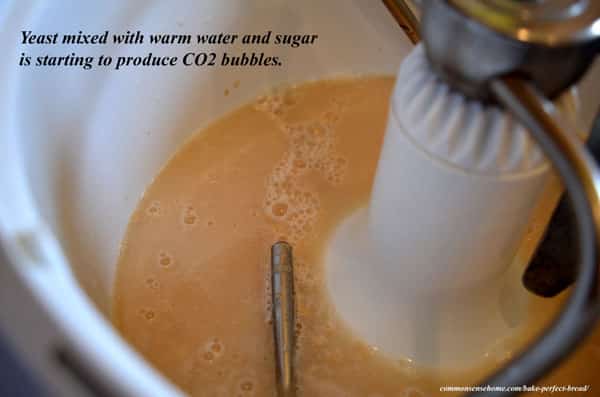
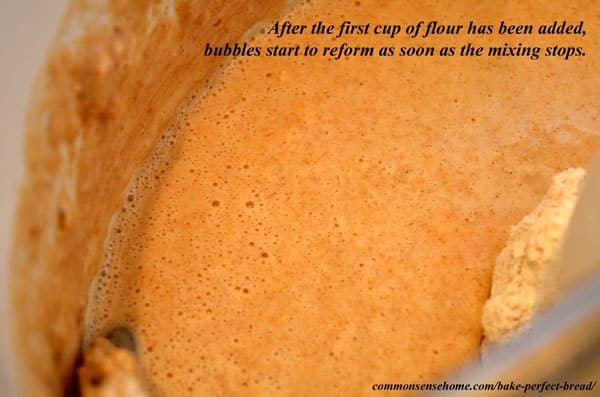
If your yeast is happy, you should see bubbles start to form in your proofing water and in the beginning stages of dough making.
Which Yeast Should I Use to Make Bread?
You’ll find several types of yeast in the baking aisle. (Don’t use wine yeast to make bread, or bread yeast to make wine. They are different strains of yeast.) They may stock fresh yeast, active dry yeast and instant yeast.
Active dry yeast and instant yeast are most commonly used for making bread.
Many recipes call for active dry yeast, which must be proofed (dissolved in warm liquid) before you mix in the rest of the ingredients.
If you don’t proof your active dry yeast, you don’t give it a chance to dissolve properly, so the bread may be gritty, and you don’t give the yeast beasties a chance to wake up, so the bread will not rise well.
Quick rise, instant or bread machine yeast is made up of finer grains, and can be used directly in a recipe without being proofed. This makes it a time saver because you don’t have to wait for the yeast to wake up.
Quick rise yeast is recommended for use in bread machines. I normally use SAF-INSTANT yeast when I’m not making sourdough.
Fresh yeast must be kept refrigerated and spoils quickly. It comes in little rectangular patties and looks like tan toothpaste.
How much yeast is in a package?
1 package active dry yeast = about 2 1/4 teaspoons = 1/4 ounce
1 (.6-ounce) cube or cake of compressed yeast (also know as fresh yeast) = 1 package of active dry yeast
1 envelope or packet of instant yeast = 2 1/4 teaspoons = 1/4 ounce
1 (6-ounce) cube or cake of compressed yeast = 1-1/2 to 2 teaspoons instant yeast
Substitution: To substitute instant or bread machine yeast for active dry yeast, use 25% less instant yeast than active dry.
How Warm Should My Bread be to Rise?
For your bread to rise, or proof, it helps if it’s warm, but not too warm.
With healthy yeast, bread will even rise in the refrigerator – it just rises really slowly. Just check out any of those “5 minutes per day” bread recipes where they keep a tub of dough in the fridge. The fridge dough will have bubbles.
Most of us would like to bake the bread the same day we mix it up, so a little warmth is helpful. Remember, don’t go over 140° F (60° C) or you’ll kill the yeast.
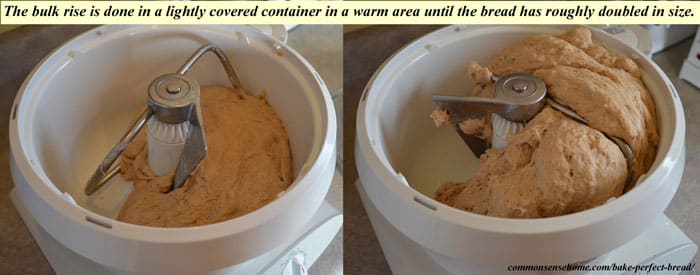
For the first rise or bulk proof, aim for around 75 – 85° F (24 -29° C).
For the second rise or final proof of the shaped loaves, aim for around 90-100° F (32 – 38°C).
Temperatures that are too warm will yield flopped or flattened bread as the yeast pumps out gas faster than the gluten can stretch and organize to create a lovely domed bread structure.
Slowing down the ferment a little also develops a better flavor in the bread.
This is one of the reasons homemade bread often tastes richer than mass produced commercial breads, which are all about speed. SeriousEats.com recommends a rise time of roughly two hours for a good balance of flavor and texture.
My Bread Didn’t Rise – What Did I Do Wrong?
If you have the right temperature ranges listed above and your bread still won’t rise, there may be a problem with your yeast.
Remember, active dry yeast needs to proof in warm liquid for 10-15 minutes before adding it to the rest of the ingredients.
You can mix your sugar into your proofing water to help jump start the process if you like. Yeasts like to eat sugars.
If your temperatures are correct and you proofed your yeast and it still isn’t working, check the date on the yeast package.
My mom had a friend call who tried to make mom’s bun recipe, and the friend couldn’t get it to rise. They talked over what had been done and couldn’t find a problem – until they checked the date on the yeast. It had expired 7 years ago!
The tiny grocery store in my home town didn’t do a ton of business, and I guess that product sat on the shelf much longer than it should have.
My Dough is Too Sticky – Can I Fix it?
Many recipes for the home bread baker are measured by volume (cups, tablespoons, etc.) because it’s convenient. The problem is that flour can readily absorb moisture depending on the humidity levels. Also, different types of flour will naturally contain more or less moisture and behave differently.
This means that even if you follow a recipe exactly, your dough may turn out too sticky or too hard. For example, freshly ground flour tends to have a higher moisture content, and in my experience always makes a sticky dough.
Would you like to save this?
The Golden Buffalo flour I’ve been baking with tends to be very dry, and I usually end up using only 2/3 to 3/4 of the flour that I would typically use for a loaf of bread or it turns into a brick.
If your dough is too sticky, you can usually fix it by kneading in extra flour a little bit at a time until the right consistency is reached.
Conversely, if your dough is too stiff and dry, you can knead in more water, around 1-2 tablespoons at a time, until it softens up.
Don’t add a lot of water at once, or you’ll make a sticky, sloppy mess. As I mentioned, some flours will naturally be more sticky than others.
Standard, good quality commercial bread flour will be the easiest to work with and less likely to make a sticky dough.
My Bread Dough Smells Sour, Like Beer or Alcohol – What Happened and is it Safe to Eat?
When yeast breads rise too long, they “over-proof”. Alcohol is a natural by product of yeast, along with carbon dioxide. More fermenting equals more alcohol.
Your bread should still be safe to bake and eat. The texture and flavor will be different, but the alcohol should be driven off by the heat of baking.
My Bread is Too Dense – I Baked a Brick – How Can I Bake Lighter Bread?
To go from brick making to bread baking, start with the right ingredients.
With experience, you can work with different ingredients more easily, but for the beginning baker, keeping things simple produces more consistent results.
- White bread flour will make a lighter loaf than whole wheat flour. Start with white bread flour and gradually add more whole wheat flour until you get a mix that works for you.
- Make sure your water is warm and of medium softness. Red Star Yeast notes that, “Too hard or too soft water, as well as water high in fluoride or chlorine, will result in short, stubby loaves.” Use filtered or bottled water if you have any of these problems.
- Make sure your yeast is fresh and active. Proof active dry yeast.
Make sure you knead the dough enough to develop the gluten, which will give structure to the bread so it traps the air bubbles inside. This means kneading at least 6-8 minutes by machine or 10-12 minutes by hand.
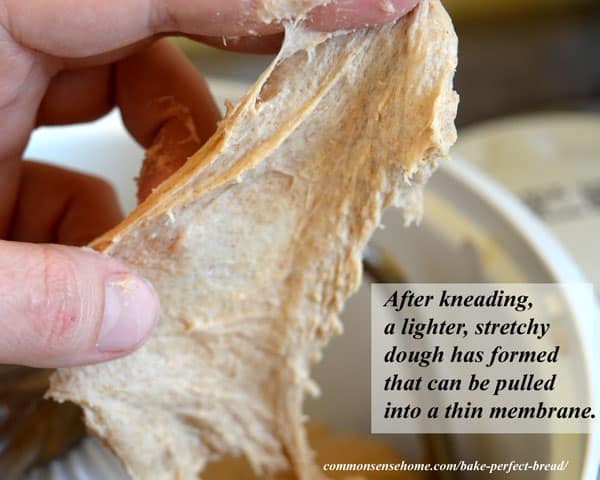
For whole wheat flour, more kneading may be required. You’ll know that you’ve kneaded the dough enough when it starts to develop good elasticity and an almost satiny feel.
White bread flour based dough should hold up to the window pane test where you can stretch a thin membrane of dough between your fingers.
Whole wheat bread dough should still be stretchy, even if you can’t quite form a thin membrane.
Is it Possible to Knead Bread Too Much?
If you’re mixing by hand, it’s pretty unlikely that you will overmix/knead your bread too much.
If you’re using a mixer, overkneading is more of possibility. Don’t crank your mixer on high and walk away.
I always use a low setting on my Bosch Universal Kitchen Machine to knead bread. (I upgraded to the Bosch after killing three bread machines. Over ten years and it’s still going strong.)
Follow the manufacturer’s instructions for your machine. Turning a heavy duty electric mixer up on high and leaving it may cause the dough to overheat and start breaking down the structure of the dough.
My Bread Looked Perfect Going Into the Oven – and Then it Collapsed
This may sound a little strange, but you want to put your bread in the oven before it looks perfect.
Bread will rise a little in the oven as it bakes, so you want to get it baking when it’s just a little smaller than you expect the finished loaf to be. If your bread has risen too far when it goes in, odds are it will fall a little (or a lot) during baking.
Another possibility is that your dough is too wet. If if looks fine at the beginning of baking and then collapses, try reducing the amount of liquid or adding a little more flour the next time around.
On the King Arthur bread machine advice section, they note: “Bread that rises, then collapses in the middle as it bakes — the infamous “crater bread” — contains too much liquid. Adjust your formula.”
Yet another reason your bread collapsed may get back to what I mentioned earlier about rising temperatures that are too warm.
Remember, slow and steady on the rise gives the bread time to build a support structure to capture and hold the CO2 from the yeast.
My Bread Didn’t Brown – Is it Baked?
There can be a several reasons bread doesn’t brown properly. Most commonly, the oven isn’t heating right.
Get an oven thermometer and make sure your oven is holding the correct temperature, and that your top heating element is working. If your bread has reached an internal temperature of 200° F (93° C), it’s baked enough to eat, whether it brown or not.
If you are baking with steam to get a crackly crust, too much steam/moisture building up on the bread can prevent it from browning. Try using less steam.
On the flip side, if your bread is burning on the top before it’s baked all the way through, try adjusting your oven temperature down. If you have your oven manual, some of them give options for resetting your temperature range.
Otherwise, you can just note the difference and adjust recipes accordingly. My oven tends to run a little hot, so I drop suggested recipe temperatures by 5 degrees F and it works just fine.
If your bottoms are getting too brown before your tops are done and your oven temperature is fine, you may want to invest in heavier bread pans and/or a baking stone.
Stoneware loaf pans and baking stones hold and gently distribute the heat during baking to avoid hot spots and provide even browning.
I invested in two Pampered Chef unglazed loaf pans many years ago and they are still holding up well to weekly use.
There are also a variety of glazed stoneware loaf pans available, and glass loaf pans work well, too.
If Your Bread Flops, Don’t Give Up!
If my teenage sons can manage to make a decent loaf of bread, you can, too!
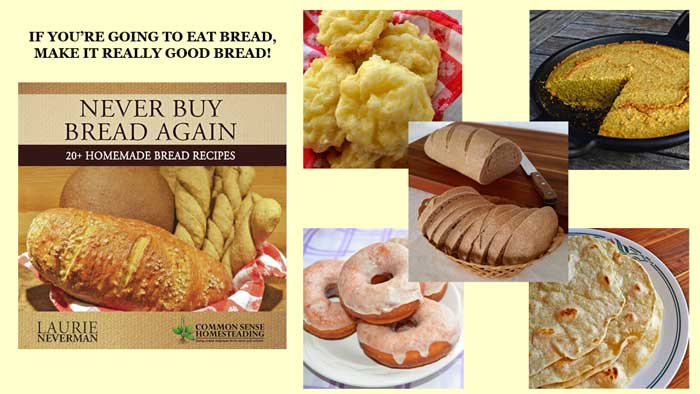
Start with a proven recipe, like those in my book, “Never Buy Bread Again – The Bread Book for Beginning Bakers “. We cover over 20 of the most commonly made breads, including quick breads and gluten free breads. The book also includes storage and par-baking tips.
Use quality ingredients, and don’t skimp on the kneading time. With practice you’ll be creating beautiful loaves of fresh baked bread.
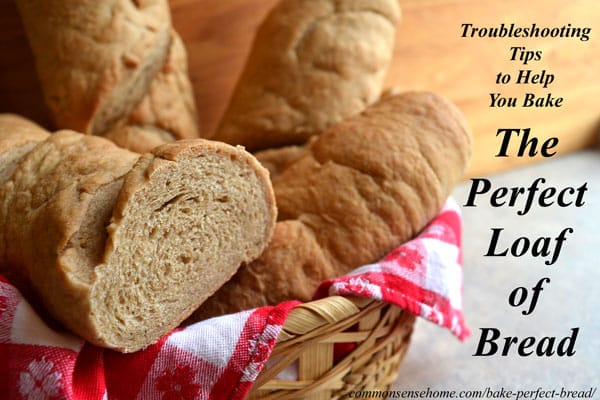
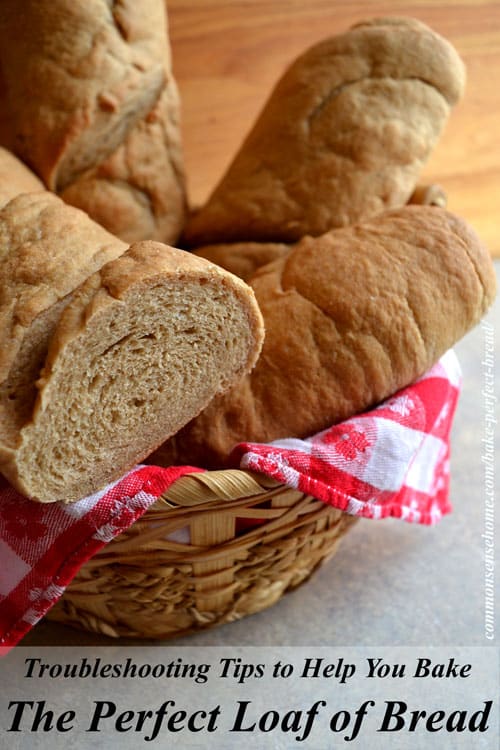
P.S. If you’d like to make the bread featured in the photos of this post, it’s my crusty French bread recipe made with Golden Buffalo flour.
If you found this post useful, please Pin and Share. 🙂


what temp should i bake my loaf bread? it doesn’t get done in the middle…….thanks
What does the recipe say? What size of loaf are you baking? What style of loaf are you baking? Does your oven bake true to temperature or run hotter or cooler than it should be?
The winter temp in my home is 63-65 F. Any tips on how to get the warmer temps the dough needs to rise or should I just plan to wait longer?
Hi Crystal.
There are several different ways you can boost the temp for your dough.
You can turn on the oven light and place the bread in the oven. You can turn on the stove on low and put the dough on top of the stove.
If there’s space on top of the fridge, that also tends to be a warm spot. If you have a large cooler, you can put a hot water bottle in the cooler and put the dough in the cooler with the hot water bottle.
You can fill a small sink or large bowl with hot water, and set the dough bowl into the hot water.
Thanks!
You’re welcome. Happy baking.
Hi there
thankyou for writing such an informatuve post.
I have been recently venturing into making breads at home.I found out out that my bread doesnt browns and is too pale yet it is ready to eat.
I also made garlic bread prior to white sandwich bread yet because i couldnt see the bread browning i thought it wasnt done ….turns out i over cooked it.
Yesterday,i made white sandwich bread which was soft ready to eat after being baked for the prescribed time yet it didnt brown at all.
Can you point out some reasons for not browning of my bread?Also how do I test if my flour is bleached or unbleached …..it isnt written on it’s cover
Did you follow the directions in the article and check your oven temp and internal temperature of the bread? The oven temperature is the most common problem with lack of browning.
Get an oven safe thermometer and place it in the oven. Set the desired temperature. When the oven indicates that it is up to temperature, check the thermometer. If the thermometer indicates that the temperature does not make the oven setting, you’ll need to adjust the oven OR “cheat” by setting your temperature higher or lower on you oven setting until you get the temperature you want.
Our last stove always ran a little hot and tended to brown baked goods too quickly, so we simply set it five degrees lower than the listed recipe temperature and it was fine.
Given that your stove isn’t browning quickly enough, you might try setting it 5-10 degrees hotter than the listed temperature and see how your bread bakes.
If your flour isn’t labeled as bleached, then it’s probably not bleached.
We have used the same bread recipe for years. Alll of a sudden the bread started falling after baking we use 2 cups of whole wheat flour with 3 cups of white flour. I have tried less water , less yeast . But nothing worked. This recipe work fine for the first three years, then the last two it dosen’t. Help
Any chance that your flour changed? Maybe try a little more flour or a little more salt?
Hi, I’ve been using a thermometer for checking the temperature of my bread. I’m trying to make it go up to at least 93C¤ but it never gets that hot although the oven is on 200 C¤ and it’s been in the oven for over 3 hours. It just gets dried out and I can’t figure out what I’m doing wrong. I’ve tested the thermometers before, so I know that there’s nothing wrong with them.
Maybe try tenting some aluminum foil over the pan to encourage even cooking, or lower the oven temperature to around 180C?
I just baked some Italian bread using 00 Tipo pizza flour, and although the bottom crust browned nicely (on a Silpat on top of a thin cookie sheet), the top crust barely browned at all. Any suggestions?
Thanks for a great wealth of information!!
You’re welcome.
Try moving the rack higher in the oven for more symmetrical browning.
Whole wheat, 100%, which seems to rise perfectly, bake out perfectly, then the next time it falls some while baking, or it never rises that much. I know there are discrete variables which I probably vary randomly. The best indicator, looking back, is how “into it” I am.
I heard a long time ago, “cooking is a science, baking is an art,” which may correlate with someone’s definition of art as opposed to craft, art having more coming out of it than what’s going in, while craft is producing exactly what you intend going in, like clockwork. Art, this definition says, always says something of its own.
That, then, reminds me of art being a business, and some people don’t like their art to speak. “Speak only when you’re spoken to.” They don’t want craft, but neither do they want prophetic denunciation, rather, they want a dumb “everything’s dumb, so don’t complain, and if you’re not dumb, you’re not right” message from their art. Art can say that. It can broadcast dumbness as its spirit. Inertness. Stolidity.
So when my bread comes out perfectly, I think I have a light touch, all the time in the world, and that would probably let me make all those tiny adjustments that all those variables need–without realizing it, without keeping a transcript, without a program. I was a painting student once, had one successful moment in oil, where an antler sat on a window sill, just a little area of that, wet paint on top of wet paint without mud puddles; the teacher stopped by and said, “That’s the idea, how did you do that?” and I said, “I don’t remember”. That reminds me of a painter, they showed some of the work, on TV saying painting is like running across a street in traffic, if you stop to think, you get run over, and this painter looked happy.
I’d say bread has some basics, a proper general ratio of flour to liquid, don’t kill the yeast, it’s got to be unsticky enough to not insult your reason but if you overdo the unstickiness you get a quasi-brick, and now we’re into the craft where there is no art, and the bread left the station ten minutes ago. Here it is: unhappy bakers make bricks. I think that’s why I dread break-making a bit now: it’s the happiness test. Now that I face this, I look forward to the next time, while the current rendition is 39 minutes into its rise. I know: don’t count, watch, and leave some rising for the oven: that’s one sign of unhappiness, pushing your luck to gain that ideal you have in your mind. Anxiety. Unhappiness. Not watching what you’re doing. Not being into it.
The phenomenon you describe is often referred to as “flow”, and is much lauded in some circles. Once you know what you’re looking for in a particular loaf of bread, you’ll know whether the loaf you’re working on at a particular time is headed the right direction. The troubleshooting guide is a starting spot. With 100% whole wheat, especially certain whole wheat varieties or freshly ground wheat, yes, the dough will be somewhat sticky. Sourdough also tends to be sticky.
Hi – I’ve been baking my own white bread for about a year now with acceptable results but I have recently been plagued with a problem of my dough becoming too wet during the second kneading.
After the first first kneading the dough is fine – I would describe it like as being like putty with a silky finish. I prove it until it has doubled in size then knead it again and it becomes wet and sticky . It never used to this so I’m confused to why it does now.
I don’t knead by hand I use a mixer for about ten mins the first knead and about five the second . On the second it’s too wet within a few seconds.
The dough does not rise much on second proving and when I take it out of the rising bag it shrinks , I never used to have this problem before the mix started being wet and sticky.
Any ideas as to what’s going and causing the dough to be too wet please?
Did you switch brands of flour or did the flour brand that your using change how they process their flour? I’ve found that different types of flour give very different results. That would be the first thing I would check if the bread has worked well in the past.
With the first proofing, I typically only let it raise for about 20 minutes before punching down, and then when I punch it down all I do it punch it down – no more kneading. From what you’re describing, it seems like the yeast has done all it’s going to do (did you change types of yeast?) and you’ve overworked the available gluten and the structure of the bread is collapsing. You might try switching types of flour and/or switching yeast, working the dough more gently and adding a little less liquid.
To make the texture finer do I knead the bread for 8 minutes on the second speed? In my recipe I use 14 cups of flour to make 5 loaves.
Make sure you knead the dough until it is smooth and elastic – however long that takes with a larger batch of bread. Keep the speed at the lowest setting on you mixer. Turn it up too much and the dough can get overworked. Take the time to do the three rises – mix, rise for about 20 minutes, punch down, full rise, roll into loaves and let rise again.
Thanks for the post there is a lot of good info in there with some info that I had never realised why they happened like the Bread Looking Perfect Going Into the Oven – and then it Collapsing. Have suffered that a few times without knowing why!
Hi I live in the UK and being baking bread for 25 years but recently the bread rises then collapses. Why? I don’t know. I use the same flour which is delivered to me straight from Whissendine Windmill organic stone ground bread flour white ( with out chalk ) Help x
More active yeast? Try letting the bread rise for a shorter amount of time before baking?
Great post, Laurie! You really covered all the bases and explained things in a way that is very easy to understand. Sometimes when I read product websites or other posts, things are explained to a point that experienced bread bakers would understand, but us uninitiated, sometimes want to say “what?” or “then what?” You took the extra step to answer those basic questions. You also answered my question as to why the bread I make in my bread machine wasn’t raising properly. I loved the pictures too. So helpful! Thanks so much for taking the time to show us that successful bread making IS possible for the rest of us!!
You’re very welcome.
I love to bake honey whole wheat bread, but lately I notice when I cut my bread next day there is a whole going through the bread, this has never happened before, what is the problem? Could it be I have not rolled the dough tight enough to shape it?? help.
If I were to guess, I’d suspect that perhaps you’ve left it to raise a little bit too long. When it goes into the oven, it should be shy of the size you expect when finished, as it will rise during baking. With warmer temps, bread will proof faster and be ready to go in the oven sooner.
Thank you for a very informative blog.
I baked some sweet bread rolls last night which turned out perfect, and I was happy. However, they all turned hard in the morning. Edible, but hard.
Can you tell me where I went wrong? Is it in storing?
Would be very grateful for any feedback.
Storage in an airtight container will help, also using fats that are solid at room temperature like butter, lard or coconut oil will also improve the tenderness and shelf life of bread products. Generally speaking, home baked goods will not maintain their softness as well as commercial baked goods, which contain dough conditioners and preservatives to help maintain the softness for an extended shelf life.
Hi our flour is different, so we can use and measure our flour differently. I will find the article and post if that’s ok.
Hi in Canada our bread is different so we can use and measure our flour differently. I will look for the article. and post if its ok.
I used to love to bake bread–until i movedfrom normal altitude to very high. No matter what i do, the dough rises beautifully then flops.
Any help would be appreciated.
It’s not something I have experience with, but King Arthur has a great High Altitude Baking Tips Guide on their website.
Hi,
I enjoy your website very much and also encourage my daughter to learn good ideas etc. I have been making my breads last 40 years. I have idea that if we make bread with sour dough starter the good bacteria eat away gluten in flour and then the bread turn out great and healthy that what I have notice in breads. Secondly, I use to make cheese home because my kids love pizza. I use to boil milk and add lemons juice but here my cheese does’t turn so great. please any suggestion. Thanks
almas
Where is the “here” that your cheese doesn’t turn out so great at, and did your lemon juice cheese turn out well before? The lemon juice cheese I’m familiar with is more of a soft cheese that is good as a spread, but i wouldn’t normally use it for pizza. Most of the store milk in the United States is pasteurized at high temperatures, which damages the protein so it will not make cheese well. I do have 30 minute quick mozzarella post on the site, which is okay for cheese. Otherwise I’d suggest a traditional mozzarella recipe, which is even better.
Thank you for all the tips! This article was very helpful! Also, thanks for putting the links in for the various products! I never heard of a Bosch mixer before! I always thought that Kitchen Aid was the top of the line and bought one just a few years ago, mainly for the slicer/shredder attachments which I was extremely disappointed in!!! None of them have been sharpened at all! I have made a few loves of bread but they have been lacking in the elasticity so evidently they need more kneading! The Bosch will be my next mixer!
I can vouch for the Bosch attachments being sharp. I nicked my finger on one the first time I washed them. 😉
Where was this post yesterday? Or should I say … yesterday was when I needed it. I think I see now what went wrong. Going to try YOUR french bread today. THANKS!
Any ideas about gluten free breads?
IMO, gluten free breads are even tougher to master. I’ve tried several different recipes over the past couple of years, and still haven’t found my “go to” recipe. I have noticed that most GF bread recipes I’ve tried take a crazy long time to bake in comparison to wheat bread, and tenting the loaves with foil to prevent excessive browning before the inside is completely baked is often helpful. If I find a recipe I absolutely love, I’ll be sure to share it on the site.
Why are you baking Gluten-free bread? Do you have Celiac disease?
No, I don’t have celiac disease, but I do have Hashimoto’s thyroiditis, which is an autoimmune disorder. Some Hashi’s patients find that their symptoms improve when they go gluten free. I’ve also dealt with psoriasis and candida overgrowth, and for a time I eliminated an assortment of foods, including gluten, to get my condition under control. More on that here – https://commonsensehome.com/anti-candida-anti-psoriasis-diet/
When I had allergy testing done, I did not react to gluten. At this point, I do limit my gluten consumption, in part because I’m not a huge eater, so less bread means I eat a wider variety of other foods. Most commercial breads are filled with other junk I don’t care to eat, too. I haven’t purchased bread in… I don’t even know how long. Many, many years.
Gluten free cooking and baking is very popular right now, so I want to have options on the site as a resource for readers. Personally, the more variety we have in our diets, the better I figure our odds are of getting a good mix of nutrients. I think that the current anti-gluten frenzy will pass over time.
Aloha! What kind of mixer is pictured above? My Kitchen Aid stand mixer just died (I make bread and pizza dough almost weekly), and I need to replace it with something that can handle making large batches of bread. Do you have any suggestions? Thank you.
That would be the Bosch Universal Plus Kitchen Machine that I bought after I killed my third bread machine. I regularly use it to make double batches of whole wheat bread and it’s holding up well.
I killed three Professional Model KitchenAids before I bought a Cuisinart. Haven’t needed to replace it, yet, and it’s been 6 years.
Yeah, the KitchenAid aren’t built quite as well as they used to be anymore.