
Vegetable Dehydrating – How to Dry Vegetables for Storage

This post may contain affiliate links. Read my full disclosure here.
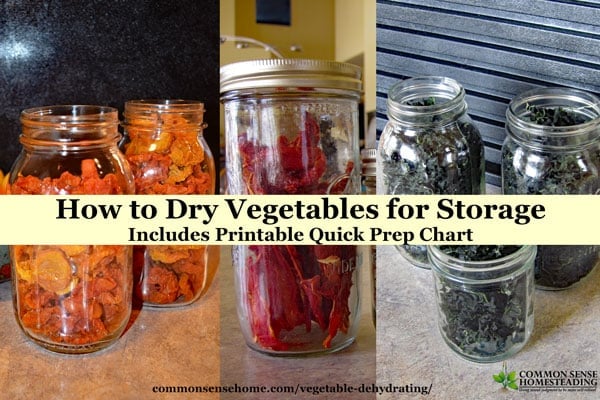
Vegetable dehydrating is an easy way to store vegetables for long term use. During harvest season, my dehydrators live on my kitchen counter. Herbs, greens, fruits, veggies – everything gets dried and neatly tucked away for use year round. This post covers basic instructions for vegetable dehydrating to help you dry vegetables safely at home.
Would you like to save this?
Vegetable Dehydrating – Why Dry Veggies for Food Storage?
- Space Saving – Because vegetables have so much water, they shrink dramatically during dehydrating. If you’re tight on storage space, dehydrating is a great fit.
- No electricity required for storage – Once processed, dehydrated vegetables require no refrigeration or freezing.
- Lightweight – Since most of the water is gone, dried vegetables are lightweight, making them handy for camping or emergency preps.
- Minimal equipment required – I like commercial dehydration machines, especially in our humid climate, but folks also dry successfully with solar dehydrators or homemade drying racks. This non-electric 3 tray covered drying rack can be hung near a wood stove or other well-ventilated area for dehydrating.
Note: If using solar or air drying, drying times will likely be longer than those specified below. Turn food daily, protect from bugs and maintain good air circulation until food tests dry. For guidelines on drying foods using an oven, see “Home Food Drying – 6 Things You Need to Know to Dehydrate Food at Home“.
Recommended Vegetable Drying Tools
Solar Drying – The Sun Oven can be used as a food dehydrator as well as an oven.
See a more extensive list of kitchen tools for dehydrating in the post “Home Food Drying – 6 Things You Need to Know to Dehydrate Food at Home“.
For a full dehydrating course, please visit Traditional Cooking School. In this course you’ll learn how to quickly and easily dehydrate your own traditional foods for long-term storage, summer-fresh flavors, good health and freedom from energy dependence whether you’re on the camping trail or in your own kitchen… The Dehydrating eBook & Video Package (retail $64 – sale $20) contains: the Dehydrating eBook, 5 Dehydrating Master Class Videos, Lacto-Fermented Beverages eBooklet, and bonus printable worksheets!

Prepping Your Veggies for Drying
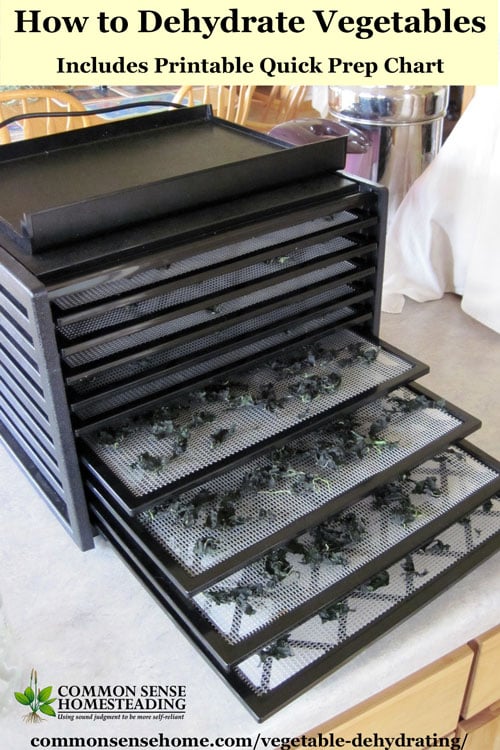
For dehydrating vegetables, set your electric dehydrator to 140°F (60°C). Remember, thinly sliced veggies will dry faster, and if you get all the pieces roughly the same size, they will dry in roughly the same amount of time.
Most vegetables should undergo a pretreatment, such as blanching or dipping, before dehydrating. Why? They dry faster and last longer. If I’m going to spend weeks growing beautiful veggies, I can take a few more minutes to dry them correctly.
Blanching is briefly precooking food in boiling water or steam. It stops enzymatic reactions within the foods, which slows down decomposition. Blanching shortens drying time (skins are softer so water gets out easier) and kills many spoilage organisms.
Steps for steam blanching (fruit and vegetables):
Adapted from Virginia Cooperative Extension.
- Use a steamer or a deep pot with a tight-fitting lid that contains a wire basket or could fit a colander or sieve so steam can circulate around the vegetables.
- Add several inches of water to the steamer or pot and bring to a rolling boil.
- Loosely place vegetables into the basket, no more than 2 inches deep.
- Place basket into pot (vegetables should not make contact with water).
- Cover and steam until vegetables for the recommended time (Table 2).
- Remove basket or colander and place in cold water to stop cooking.
- Drain and place vegetables on drying tray.
Steps for water blanching (vegetables only):
- Use a blancher or a deep pot with a tight-fitting lid.
- Fill the pot two-thirds full with water, cover, and bring to a rolling boil.
- Place vegetables into a wire basket and submerge them into the boiling water for the recommended time (see table below).
- Remove vegetables and place in cold water to stop cooking.
- Drain and place vegetables on drying tray.
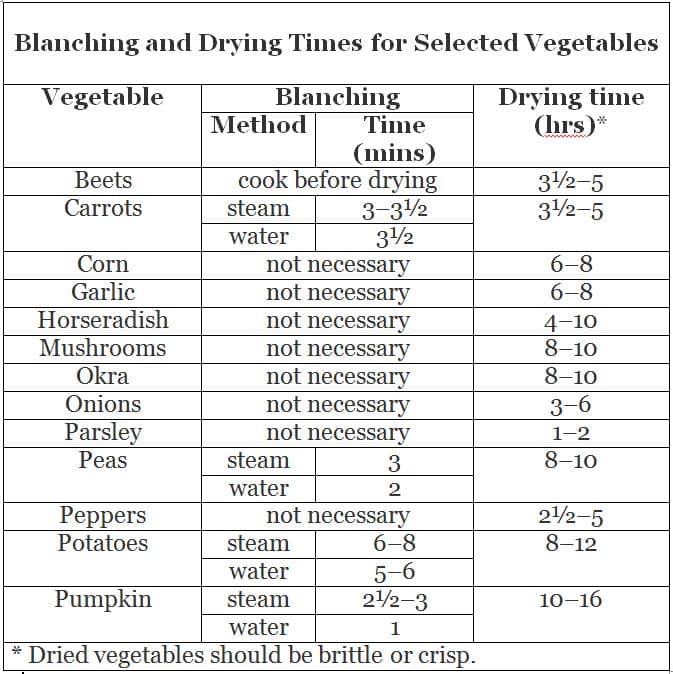
Download the Printable PDF version of the chart here
Note: Although not listed in the chart, I do blanch all cabbage family crops (broccoli, cabbage, cauliflower, kale, etc.) for 2 minutes in a boiling water bath.
How do I Know my Vegetables are Done Dehydrating?
Up to 90% or more of the moisture is removed from vegetables when they are fully dry. They should snap/break cleanly, and be brittle. This may take longer than listed times, depending on the humidity levels.
Quick dryness check: Put your dehydrated vegetables in a mason jar, put a lid on and wait for a day. There should be no condensation on the underside of the lid. If you see condensation, put them back in the dehydrator. You might also want to cut any thicker chunks into smaller pieces.
If you want to be extra sure, you can buy a hygrometer that fits on top of a mason jar like a lid, the Hygrolid. My preferred storage method for dehydrated vegetables is vacuum sealed in mason jars. You can also use plastic zipper bags for short term storage, or Mylar pouches with oxygen absorbers for longer storage. However you store your dehydrated vegetables, keep them away from moisture as much as possible.
You may also find useful:
- Dehydrator Versus Freeze Dryer – What’s the Difference?
- Summer Squash Gummy Candies sweetened with fruit juice
- Homemade Fruit Leather – Works with a Variety of Fruits
Originally posted in 2014, updated in 2022.
Dried tomatoes would be a must as would jerky from all types of meats and seafoods. I also dry ingredients for ethnic cuisines; asian, mexican, middle eastern etc. Another must would be herbage!! I would definitely put it to good use.
I would LOVE to win this dehydrator!!!!!! My first drying project would be tomatoes. YUM!!!!
I would dehydrate whatever I have in the garden ready to process. I want to try some cucumber chips and see if they are good. The peaches are ready and would be good dehydrate as well as cantaloupe.
I would dehydrate mushrooms first…. have several winter soups recipes that assorted dried mushrooms would be perfect for… Last summer I dried plums and peaches for the first time and have been saving tips and “recipes” so I can start dehyrdating a bigger assortment of foods and the Excalibur Dehydrator will the perfect ticket!
Elderberries and rosehips, they’re abundantly wild around our property! We’re new with continuous kombucha brewing and those elderberries and rosehips will surely add excellent boost in nutrients to our kombucha drink, not just flavor. Would love to dehydrate anything in abundance that otherwise wont have space in our freezer. So pick me, thanks a lot! 🙂
Wonderful fruits, and you are so blessed to have them on your property.
D remember with exceptionally therapeutic and delicious herbs that some will be toxic in their raw form, a protection from excessive predation. Elderberries must be thoroughly cooked before consumption or they may case notable digestive discomfort. I have never bought the dried commercial berries, but I suspect they include the same precaution Laurie published a superb article about prepping rose hips to avoid discomfort from the prickly hairs inside them. Honeyberries must be thoroughly cooked. Hawthorne berries must be pittted before or after cooking due to issues with toxicity (the pits are said to pass through chickens with no consequences, but a crushed pit will do harm. Herbs care often potent because the are on the wild side of Nature!!
I would have to learn and play with the dehydrator because I have never had one!! This is absolutely awesome that you are offering this dehydrator!! I am new to your site and new to canning and dehydrating!!! I am absolutely excited about trying to eat healthy and preserve food. I am totally new to this but I am trying to include my husband and children (as much as they would like) in this process. It is expensive to try to buy everything at once though!! Thank you for the chance to win this dehydrator!!
This is the most fabulous dehydrator I have seen. Would sure help make short work of harvest!
I invested in one (same size, without the timer) a couple of year ago, and it has been great during harvest season when large amounts of produce start coming in. I load it up before bedtime and empty it in the morning.
Tomatoes!! Store-bought sun-dried tomatoes are so expensive.
I would dehydrate herbs first then I would start on veggies and make fruit leather.
If I win, I’ll be drying everything I can get my hands on!!!
ANYTHING I can get my hands on!
I would make kale chips for my husband, they are one of the few healthy snacks he actually likes. I’m would also LOVE to make homemade fruit leather. We’ve been wanting one of these dehydrators for years, they are just a little too pricey for us. Thanks for the chance to win one 🙂
I would dry tomatoes first and my husband would make jerky.
I would dehydrate our herbs, veggies and make jerky!
Would love another way to store what we grow.
I would love to be able to dry herbs and vegetables out of our garden
I am drying calendula right now for soap, I’d use it for herbs, tomatoes, and whatever else tickled my fancy 🙂
I think the first I would really want to dehydrate would be strawberries and bananas!
I would probably play with it first…. go buy bananas and berries and make snacks. Then I may get serious and dry some things for my food pantry.
I would first dry my garden herbs, then fall fruits..and then sprouted grains!