How to Make Pumpkin Wine – A Unique Pumpkin Recipe
This post may contain affiliate links. Read my full disclosure here.
Did you know you can make a fruit wine out of just about any fruit or vegetable with a fairly high sugar content – even pumpkin wine?
One of my foraging mentors, the late Mike Jacisin, was willing to experiment with fermenting just about anything. One year he was blessed with an abundance of onions, so he made a batch of onion wine. Alas, said onion wine went down in infamy as the worst brew he ever concocted. It’s become a running joke in our extended circle of family and friends.
This year we had so many sweet onions that I considered a small batch of the infamous brew, since I missed out on tasting the original. Thus far my husband has vetoed the idea.
Since he won’t let me ferment onions, I’d like to share how to make pumpkin wine. Like Mike, I’m willing to bulk up my food and beverage storage with a wide variety of foodstuffs. Plus, it’s fun to break out a bottle of an unusual brew for friends.
I am not a big wine drinker, but I love the rich, yeasty smell in my kitchen as the wine ferments. Wine is pretty forgiving, too. I’ve made batches that are better or worse, but nothing completely skunky like some of my beer brewing friends have encountered.
How to Make Pumpkin Wine – Step by Step
Use pumpkins or other winter squash to make this simple homemade wine. Pie pumpkins and winter squash have sweeter pumpkin flesh than jack o’ lantern pumpkins. If you don’t have whole spices on hand, you can substitute a teaspoon of pumpkin spice seasoning.
This recipe makes one gallon of wine. The wine bubbles a fair amount during the first ferment, so I initially ferment in a 2 or 3 gallon container.
Ingredients
- 8 cups pumpkin
- 1 pound raisins (I used golden, but any are fine.)
- 1 – 4 inch cinnamon stick
- 1 inch fresh ginger root
- 1 whole nutmeg
- 1 gallon water, boiling
- 5 cups sugar (granulated sugar or brown sugar)
- 1 teaspoon yeast nutrient
- 3 teaspoon acid blend (Pumpkins are low acid, so acid helps promote proper fermentation. See below.)
- 1 package wine yeast
Directions – First Ferment
Wash, trim, peel and chop (or grind) the pumpkin. I peeled and shredded my pumpkin and mixed it with the raisins before adding the spices.
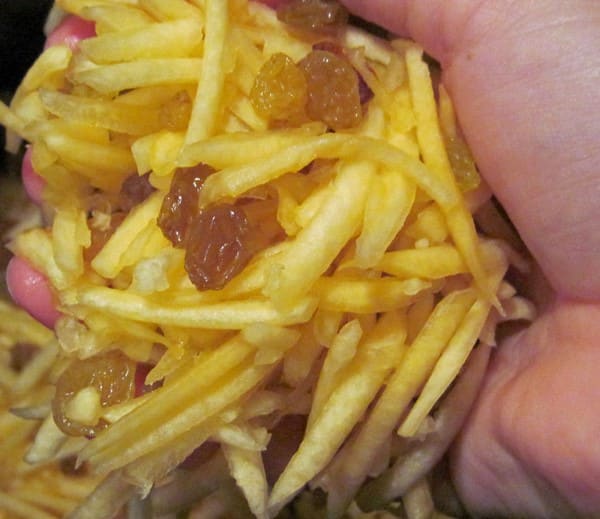
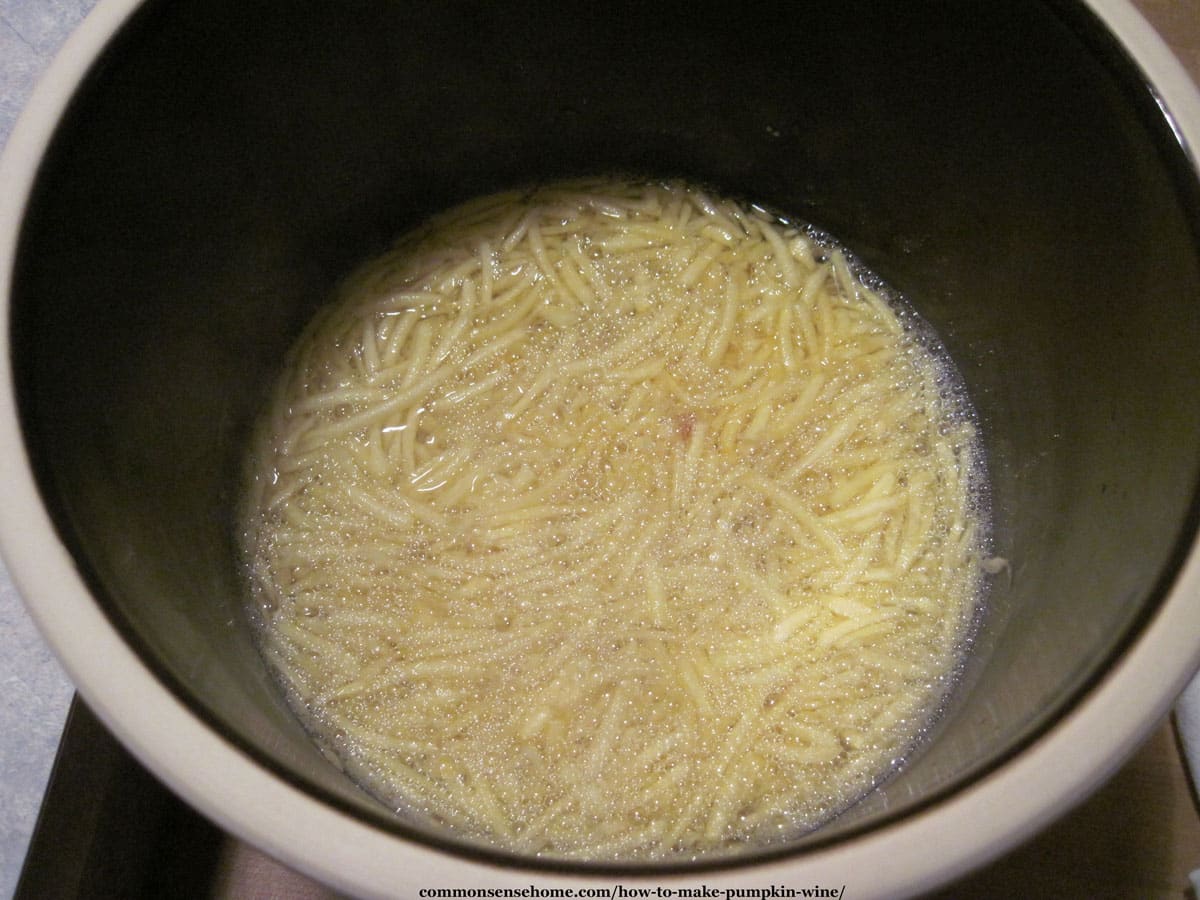
Place the pumpkin in a primary fermenter, such as a food grade 3 gallon bucket or large crock. (I used my three gallon crock.) Add raisins, spices and boiling water. Let sit overnight.
Add sugar, yeast nutrient, and acid blend. Stir well to dissolve sugar. Specific gravity should be between 1.090 and 1.095.
Sprinkle yeast over the mixture and stir. Stir daily for three to five days, until specific gravity is 1.040. (I bought a hydrometer but not a graduated cylinder, so I skipped this step. If you would like to see how to measure specific gravity using a hydrometer, check here.)
The mix will get nice and bubbly, and should have a pleasant, mildly yeasty smell and pumpkin flavor.
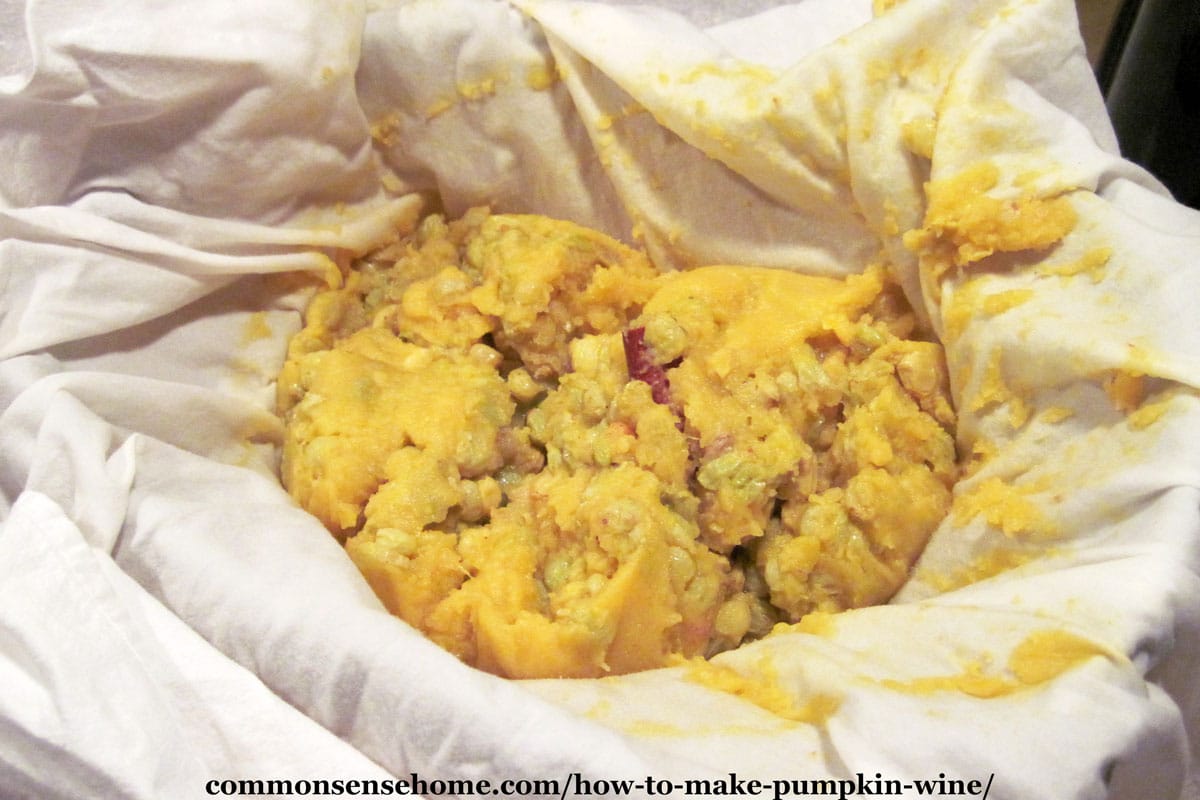
At the end of this first ferment, the pumpkin will have turned to mush and the grapes will be plump.
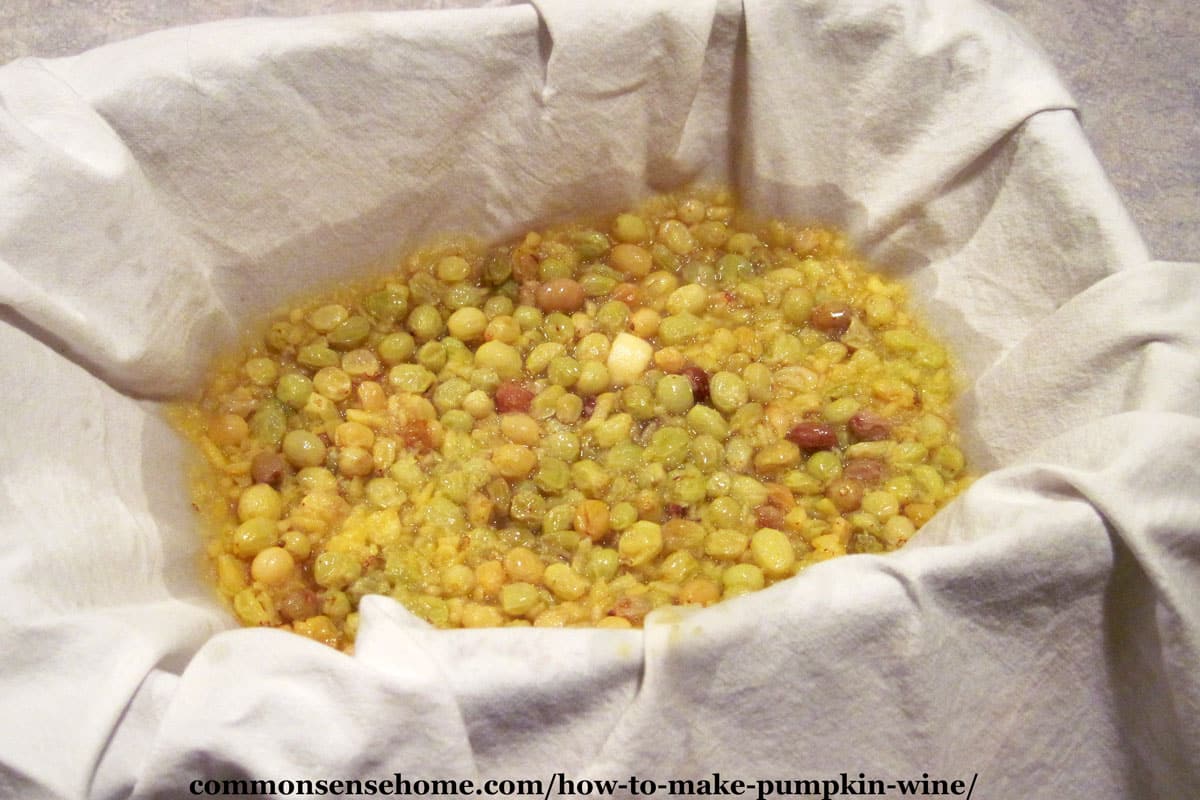
Strain the wine dregs (the leftover solids from the wine) and squeeze out as much juice as you can. We compost this or feed it to the chickens.
Would you like to save this?
Second Ferment
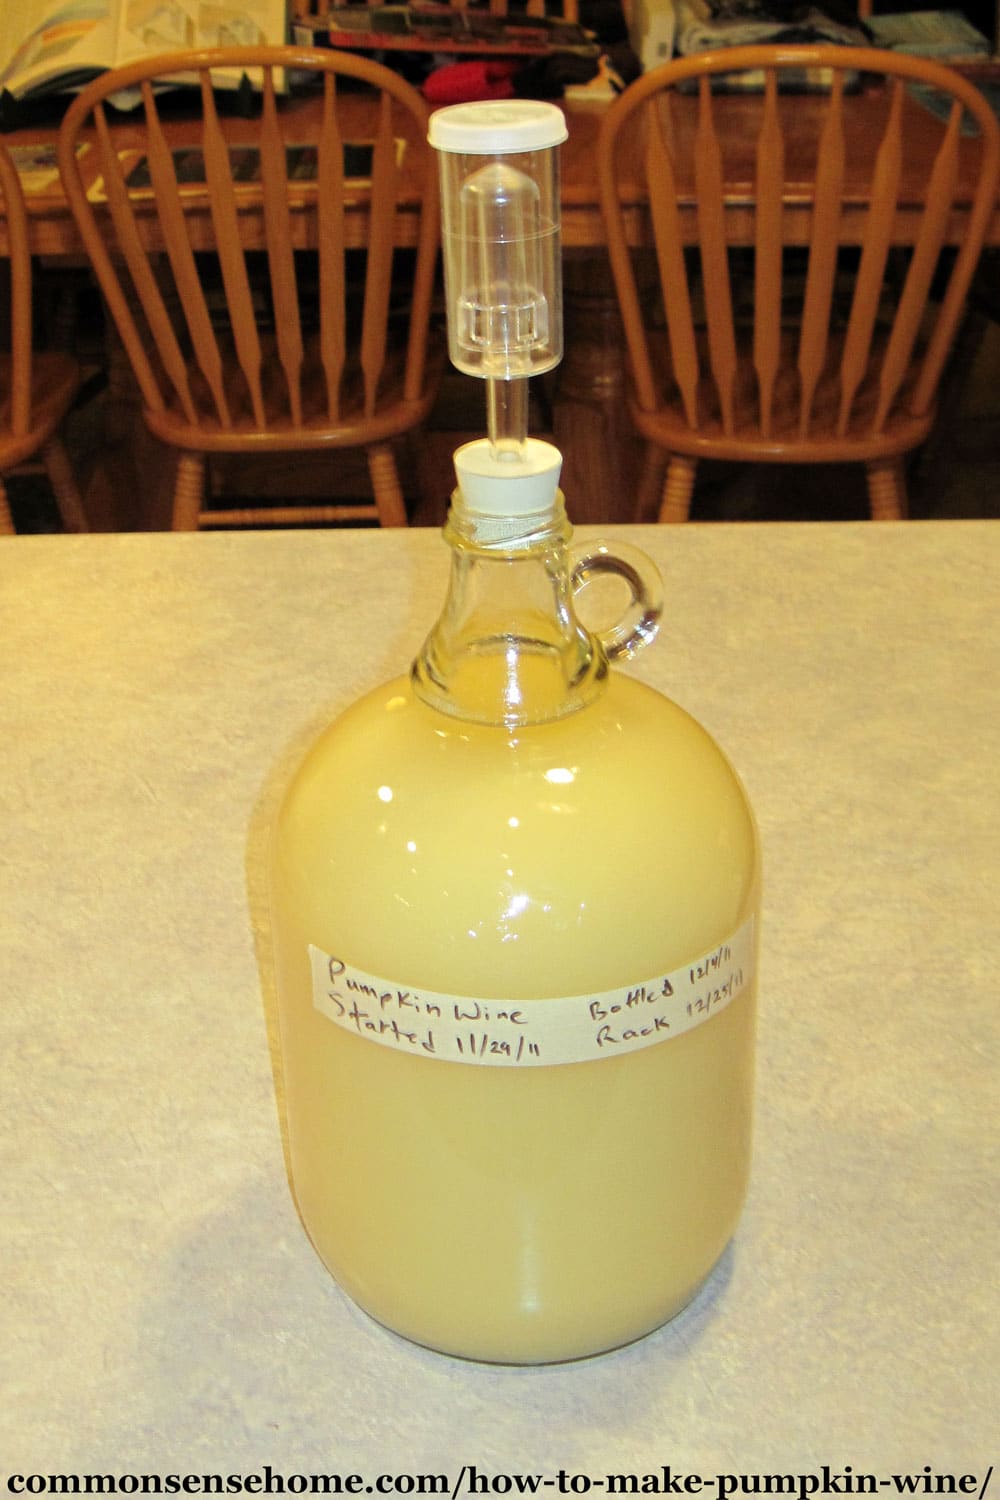
Siphon pumpkin wine into a one gallon secondary fermenter, add enough water to fill the fermenter, and attach airlock. You can see at this point the wine is very cloudy – not terribly appealing. It clears as it ages. I used a glass gallon jug with a plug type airlock.
Final Aging
For a dry wine, rack in three weeks, and every three months for one year. Bottle.
For a sweet wine, rack at three weeks. Add 1/2 cup sugar dissolved in 1 cup wine. Stir gently, and place back into secondary fermenter.
Repeat process every six weeks until fermentation does not restart with the addition of sugar. Rack every three months until one year old. Bottle the wine.
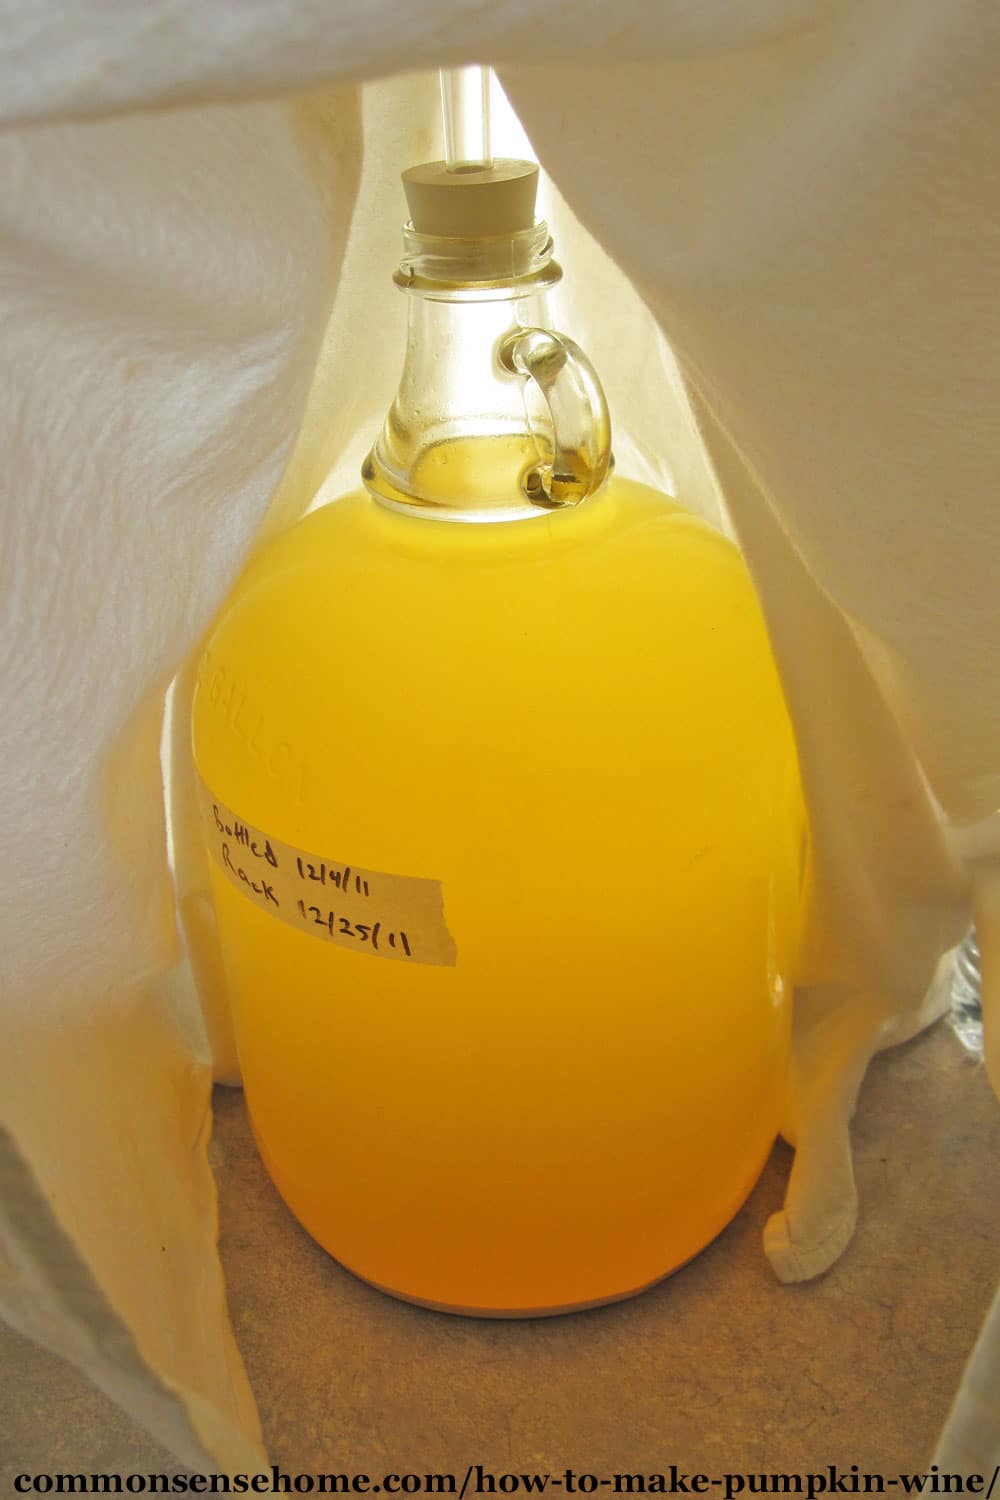
Here’s the wine is sitting, covered, in a corner of the kitchen. The particulates settled very nicely – no more cloudy wine.
Allow the wine to age for one full year from the date it was started. Prepare it in fall to enjoy the following year.
We made the dry version in October 2011. It packed a punch, but I prefer my wine a little sweeter, so we’ve switched to the sweet version.
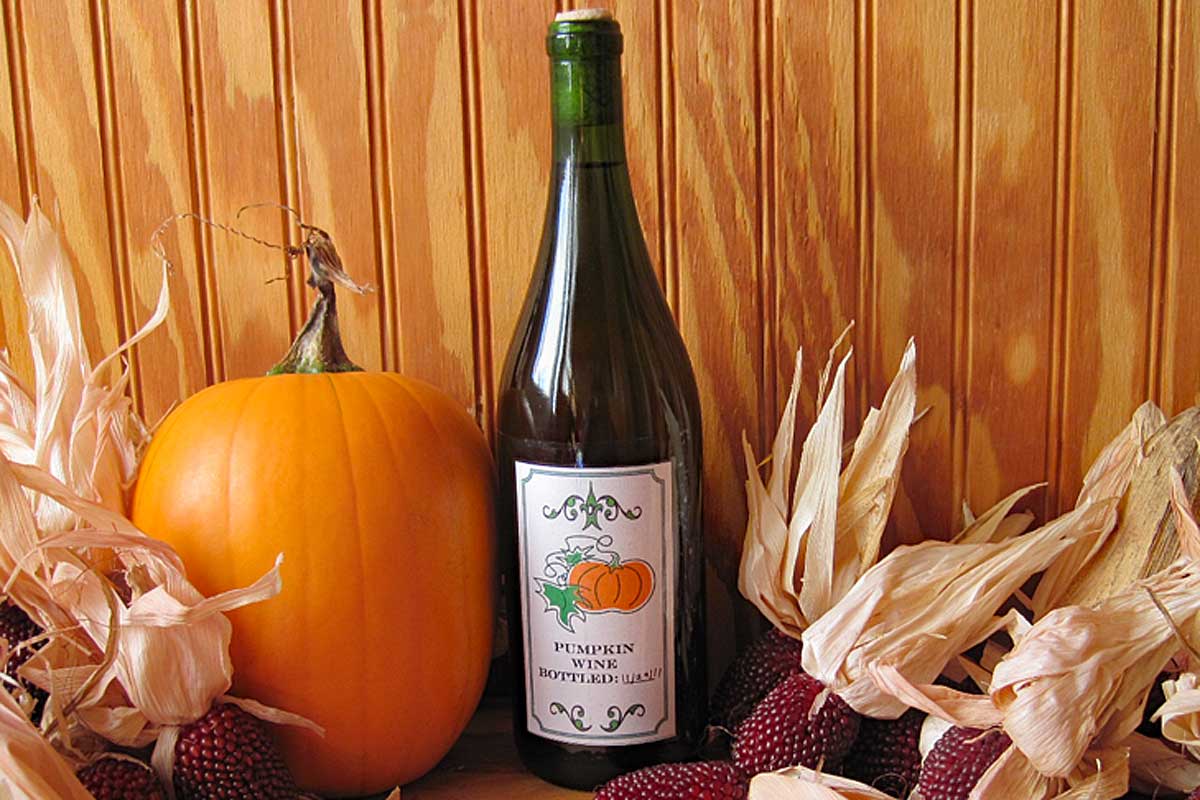
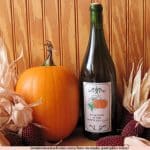
You can download a pdf of the wine labels I used here. => Printable Pumpkin Wine Labels
PrintPumpkin Wine Recipe
Sweet or dry, this unique wine is sure to be a conversation starter.
- Yield: 1 gallon 1x
Ingredients
- 8 cups pumpkin
- 1 pound raisins (I used golden)
- 1 – 4 inch cinnamon stick
- 1 inch fresh ginger root
- 1 whole nutmeg
- 1 gallon water, boiling
- 5 cups sugar
- 1 teaspoon yeast nutrient
- 3 teaspoon acid blend
- 1 package wine yeast
Instructions
- Wash, trim, peel and chop (or grind) the pumpkin. Place in primary fermenter (2-3 gallon container). Add raisins, spices and boiling water. Let sit overnight.
- Add all other ingredients except yeast.
- Stir well to dissolve sugar. Specific gravity should be between 1.090 and 1.095. Sprinkle yeast over the mixture and stir. Stir daily for three to five days, until specific gravity is 1.040.
- The mix will get nice and bubbly, and should have a pleasant, mildly yeasty smell.
- At the end of this first ferment, the pumpkin will have turned to mush and the grapes will be plump. Strain the must and squeeze out as much juice as you can.
- Siphon into a one gallon secondary fermenter, make up to volume with water (if needed) and attach airlock.
- For a dry wine, rack in three weeks, and every three months for one year. Bottle.
- For a sweet wine, rack at three weeks. Add 1/2 cup sugar dissolved in 1 cup wine. Stir gently, and place back into secondary fermenter. Repeat process every six weeks until fermentation does not restart with the addition of sugar. Rack every three months until one year old. Bottle.
- Let age for at least a year for best flavor.
Notes
Pumpkins are low acid, so you need to add extra acid to help promote proper fermentation.
What are an acid blend, acidity, wine yeast and yeast nutrients?
If you’re new to winemaking, these items may not be familiar to you. This explains acid blend, acidity, wine yeast and yeast nutrients.
Acid Blend
A blend of acids important to wines, usually tartaric, malic and citric acids. While there are many different formulations of acid blend, the recipes on this site calling for acid blend assume a blend of 50% tartaric, 30% malic and 20% citric. If your acid blend uses a different ratio, you may want to use slightly more or less depending on your blend.
Acidity
The amount of acid in the must, liquor, or finished wine. Insufficient acidity in the must will result in a poor fermentation and a slightly medicinal and flat taste.
Too much acid will give the wine an unpleasant sourness or tartness. Some acid is necessary for fermentation. Up to one-fourth of the initial acid content is consumed by the yeast during fermentation.
Low-acid musts are usually corrected by adding tartaric acid (the principal acid in grapes), malic acid, citric acid, or acid blend. An acid testing kit is indispensable in measuring initial acidity.
Wine Yeast
Yeast cultured especially for winemaking, with such desirable attributes a as high alcohol tolerance, firmer sediment formation, and less flavor fluctuation. You can buy wine yeasts from a winemaking/ brewing specialty shop or by mail order.
Yeast Nutrient
Food for the yeast, containing nitrogenous matter, yeast-tolerant acid, vitamins, and certain minerals. While sugar is the main food of the yeast, nutrients are the “growth hormones,” so to speak.
Related Recipes on Common Sense Home
You may also enjoy:
- Dandelion wine, Pear wine or Elderberry wine
- Pumpkin Leather – portable pumpkin pie
- Maple Sweetened Pumpkin Pie
- Pumpkin Pasta
Have you ever tried winemaking? What’s your favorite brew? What other ways do you use up excess pumpkin or squash?

This article is written by Laurie Neverman. Laurie grew up in the kitchen, learning baking and home cooking from her momma. At age 15, she and her mom and two sisters created Irene’s Custom Cakes & Catering. Her cookbook, Never Buy Bread Again, helps beginning bakers make beautiful homemade bread with easy, reliable recipes.
Originally posted in 2011, last updated in 2024.


hi.. is this a 1 gallon recipe, or a five gallon recipe? You don’t specify what size container, you simply say “top up with water”. We are very new to making wine, and have already run into this problem. It’s a terrible waste of sugar and time to not know the details. I’d love to try this recipe. Could you clarify this for me? Thanks in advance ☺️.
It’s a one gallon recipe. When it’s in the first ferment, it may bubble up out of a one gallon crock, which is why I do the initial ferment in a larger crock. I will add more text to clarify this in the article.
what do you mean by the term “rack” especially when you say” rack every 3 weeks”?
When you “rack” a wine, you siphon the liquid into a clean container, leaving the yeast dregs behind in the original fermenter. This gives you a clearer wine. If you only have one carboy/fermenting vessel, you can siphon into a bowl or pot. Then wash your carboy and clean out the dregs, and put the wine back in.
If liquid levels are too low in the clean fermenting vessel, you may add a little water, a little sugar water, or a little white grape juice to top it off. (You want the liquid close to the top of the carboy so the air space above the wine fills with CO2.)
My brother made Pumpkin Wine many years ago. It was very good, but a little darker as he used more cinnamon. The wine was very strong, alcohol taste. My cousin did make Onion Wine. That was good too! But I think that would only be good to cook brats or hot dogs in?
My husband makes an awesome spiced pumpkin wine. Love it! His recipe is almost exactly like yours… only difference is that he lets it sit until the yeast dies. ?
What spices does he use?
Someone show this to Trader Joe’s so they can add it to their pumpkin inventory!!!! lol ?
Hello, I am planning on making this wine I just had one question. When making it sweeter is that a 1/2 cup of sugar to a cup of wine, that’s what it sounds like, or is it a 1/2 cup of sugar to a gallon? And how would you add it with out the gallon overflowing?
1/2 cup sugar to a gallon of wine. If you rack the wine before adding the sugar, odds are you’ll open up enough space by removing the lees from the bottom to add sugar without it overflowing.
Can using My wine press after first fermentation a good idea?
Sure, that’s perfect if you have one available.
Yes I do have one, I use it for my home grown concord grapes!
So many grapes made 3 five gallon batches, one with two pounds of cherries. Also making one gallon Apple cider wine and just started five gallons of my pumpkin wine.
so I have to wait one year to bottle the pumpkin?
If you’re pretty sure it’s dead, you can bottle sooner. This one tends to have a lot of particulates, so if you want a clearer wine, keeping it in the carboy longer and racking every so often significantly improves the clarify. If you don’t mind a the risk of a little haze, it’s not an issue. Mine definitely tasted better at the two year mark than at one year, after aging in the bottles for a year.
Added note:
If you do not kill the yeast before bottling you run the risk of blowing corks out or even blowing the bottom off the bottle. I learned from experience it is a mess. A mistake you only make once
A couple of comments
1. When you add more sugar you create more alchohol. The yeast keeps feeding on it. That is why you say it packs a punch. Yeast eating sugar give off 50% alchohol and 50% carbon dioxide this causes the bubbling effect)
2. After 3 months in second fermentation most sugar will be gone.
3. To end fermination add potassium sorbate it is stabilizer (about 1/2tsp per gallon then add potassium metabisulphite (add 1/4tsp per 6 gallons). This will kill any yeast left.
4. Add a clarified. This will drop all remaining patricals.
5. Make simple syrups (I use 6 cups sugar to 2 cups of water) heat to combine sugar to thicken. Add to your wine. Mix to your desired sweetness.
Bottle and let age if you can wait) the wine should be drinkable in three months. Good luck
Kindly advise , in place wholenutmeg what else can I use?
You can use any spices you would normally use with pumpkin or squash.
I just started a pumpkin spice recipe but used a must bag, and it floats!! I tried to sink it when I put the yeast on last night but someone must have bumped it because this morning when I checked the bag had floated back to the top! Will this mess up my wine? The bag moving looks like it may have stirred up the yeast. Any help or advice would be so appreciated!
No worries. It’s normal for the spice bag to float. Think about a tea bag – they often float, too, but you still get flavor in your tea.
Idea – glass is neutral… how about sterilizing a few marbles and popping them in the bag – ?
?
If you were to add glass of any sort, make sure it’s food safe. Some glass contains high levels of lead. For instance, those flattened glass craft “rocks” note specifically on the package that they are not safe for use in contact with food. Something like a fermentation weight would be safer.
Hi Laurie, have you considered backsweetening this wine for the extra sweetness you suggest? And if not, why?
Considered? Yes. Done? No. Why? 1. Because I’m a lazy wine maker. 2. Because I have friends who like dry wines, so I send it their direction if I have more than we care to drink.
I make pumpkin wine, but I add grape concentrate, and Maharajah Chia spice and oolong tea that has not been brewed. It’s so good you wouldn’t believe. I found that pumpkin takes a long time to c learn if the pH is off, so check that pH prior to adding the yeast. I use lemons juiced to adjust the acid. Also, the yeast is burgundy yeast. I find that after you do the 2nd rack, to put the entire brew bottle into a refrigerator helps smooth, clear, and debate a properly pH wine.
That’s sounds like a very good combination. Would you care to share your recipe?
Will you share your recipe?
Hello!
Still fairly new to brewing so got a simple question. I see that you are using a 1 gallon carboy for this recipe. I am looking to try a 5 gallon batch, so I was just curious if that means I would just be required to use 5 times the ingredients or if there are specifics when trying to make larger batches.
Thanks so much.
Matt
The general rule of thumb is simply to multiply the ingredients, except the yeast. Most yeast packets can ferment from 1-5 gallons.
Thank you very much.
I followed the directions, added my yeast, yeast nutrient and acid. 4 days later the mixture is still 1.09 and doesn’t smell any different, just sugary. Ideas? Is this batch need to be scrapped?
Thanks, Jeremy
Is there any chance your yeast was bad, or is the area where you’re fermenting cold? Yeast likes a little warmth, and does expire or become inactive if stored improperly. If you have or can option more yeast, you could try jump starting the batch with more yeast and a warmer location, as long as it’s not “off” smelling.
Would this work with canned pumpkin as well?
The flavor would be different, but the sugar content is still there, so it would probably ferment.
You would have to read the label on the can to see if Sulfides are present that prevent baterior from forming in the can and or wild yeast from fermenting in the can…Good luck with this wine…It is worth it!!!
Hi, I plan to try this recipe but this will be my very 1st experience making wine. So I have 2 very newbie questions… To be clear (and not mess up my batch) what does “make up to volume with water” mean? Just fill the rest of the gallon jug with water? Also, what does “rack” mean? I would assume place a closed bottle on a wine rack but apparently not if it has to be done every so often in this recipe. Maybe lightly rock the bottle to ‘stir’ up contents??? Thanks 🙂
“Make up volume with water” does mean add water to fill the bottle. If you’re really short, you’d be better off drinking the young wine than diluting it too much, but if you’re just a bit short, make it work.
Stirring wine = bad.
“Racking” is the process where the wine is drawn off the sediment via siphon hose. You want to leave the sediment behind so the wine is as clear as possible. No stirring or shaking! 🙂 Just google or search on youtube for “how to rack wine” for a demonstration. The sediment isn’t “bad” per se, but too much may give an off flavor to the wine over time (it’s dead yeast) and it doesn’t look very pretty in a bottle. I noticed I have some pear wine I really should have racked once more before bottling. There’s a line of sediment up the side of the bottle.
Thanks so much for the reply 🙂 I will be sure to look in to racking.
Oh also, does this recipe require the small cooking pumpkins or any size will do? And should they be baked to remove the skin?
I used a jack-o-lantern type pumpkin, and peeled it and shredded it raw.
How did it turn out? I could be wrong of course, but I understand pumpkin to not have any diastatic power to convert it’s own starch into fermentable sugars yet your recipe didn’t mention anything about adding enzymes to be able do this. I’m guessing this is more of an infusion of pumpkin flavor and that the pumpkin isn’t actually being fermented. Does this sounds about right?
It doesn’t have a really strong pumpkin flavor, per se, because the type of pumpkin I used was not strongly flavored. I think a nice rich squash with darker flesh would have a more pronounced flavor. This ended up quite dry.
As for the fermenting or not fermenting, it sure seemed to be fermenting, as there were bubbles throughout the mash and the pumpkin appeared to be somewhat broken down. Don’t all raw fruits and vegetables have some amount of natural enzymes, and wouldn’t some possibly be introduced from the raisins?
What does rack mean?
Racking is the process of removing new wine from its sediment. This is typically accomplished using a siphon hose and another vessel. For a more detailed description of how and why to rack, visit “Racking Your Wine“.
So many years late, but taking is siphoning off the liquids from the solids.
Do you think roasting the pumkins before scraping/crushing/chopping would effect the flavor in a good or bad way?
There’s only one way to tell for sure… Maybe it would be sweeter because you’ve converted some of the starches to sugars with the roasting process?
I have a question? I misread the recipe and added 3 camdin tablets yikes will this totally mess up my wine?
I don’t *think* so, but I’m not absolutely sure. It might kill your wine yeast. Watch for bubbles, and make sure that the wine can breath to dissipate excess sulfur. You can read more about the proper use of campden tablets here: https://winemakermag.com/629-should-i-add-campden-tablets-each-time-i-rack-my-wine-and-how-do-i-measure-the-level-of-sulfite-in-my-wine
No problem every fruit wine recipe I have calls for Camden tablets.
This looks really amazing! Wish I was your neighbor, so I could pop in and try some =) I would like to say I will make this, but the whole chemistry thing intimidates me!! I do make yogurt, but that is as far as my science experiments go. Pumpkin wine? Who knew! Great post!
know a good friend I will be sharing this with she loves making her own wine
Thanks for this post! I've made several batches of dandelion and concord grape wine but have been waiting for a good pumpkin year to try this. Hopefully next year 🙂
~J~
Hanneke and Allison – it looks good and smells good, so I am optimistic.
Kathy – I third hard apple cider this year and it was very good. Sounds like you have interesting neighbors. 🙂
Very interesting! I wonder how it will turn out 🙂
Our neighbors make all sorts of wine, apple, strawberry margarita, kiwi and lime. Some of the more unusual flavors are not always good alone but when used with mixers make a nice punchy drink. I'll be curious to see how this turns out.
Amazing. My word verification word was…………..WINEOGY.
Thank you for this recipe, I've been making wine for many years with all kinds of fruit and herbs, never heard of this though. And with a lot of pumkins still left……I will give this a try.
Enjoy your holidays, greetings from the Netherlands.