How to Freeze Corn (on the Cob or Off)
This post may contain affiliate links. Read my full disclosure here.

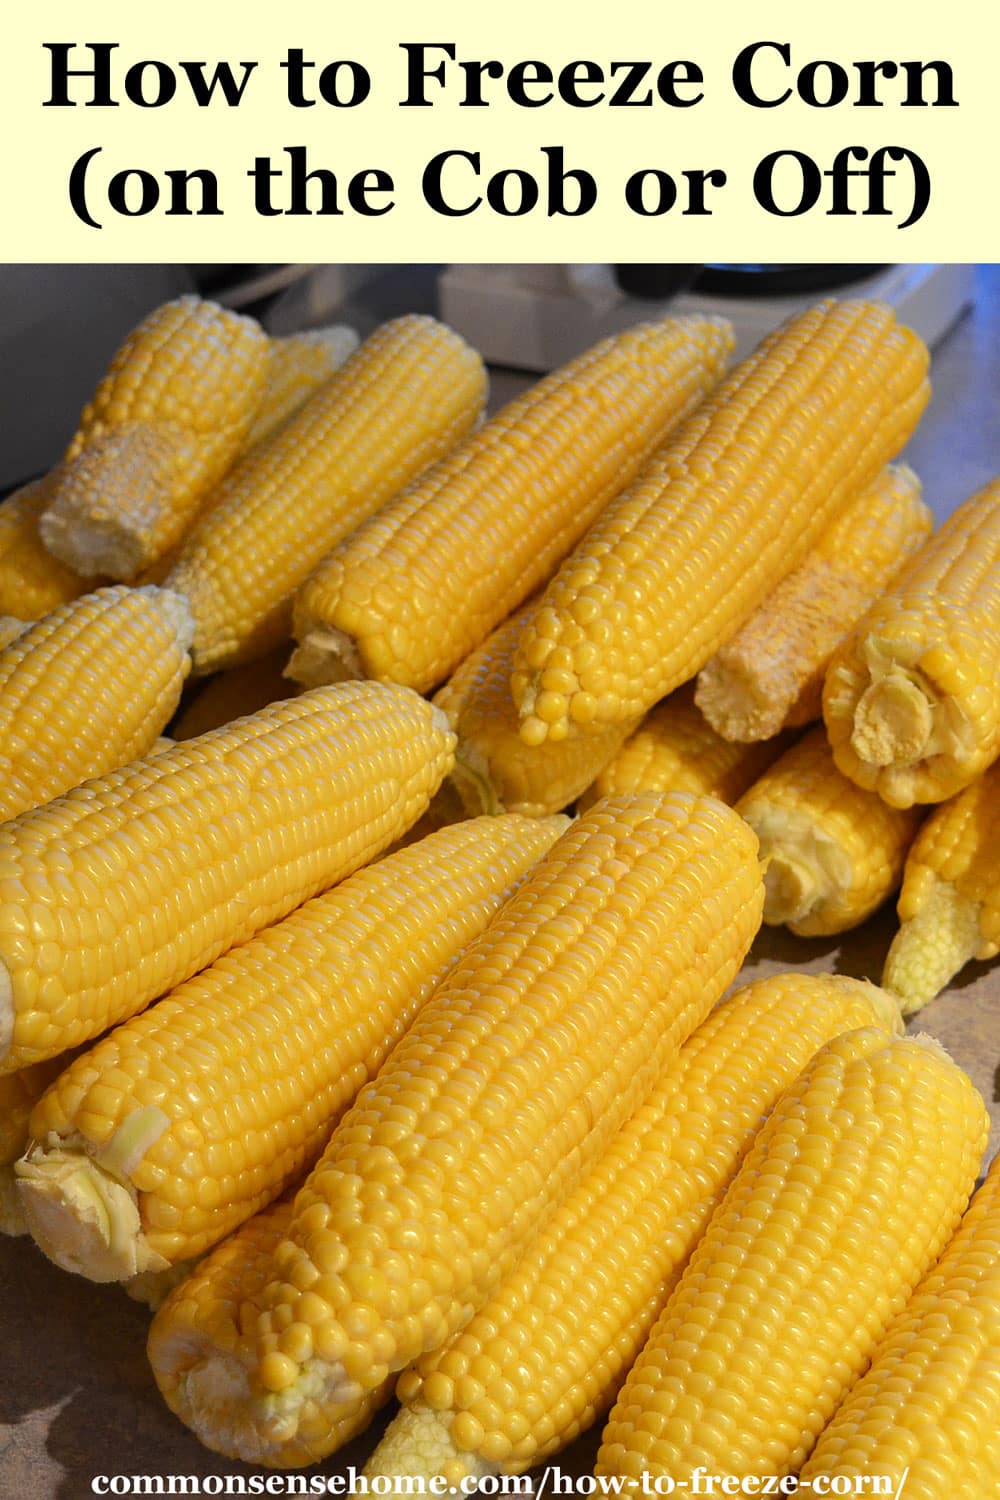
When you can’t get fresh sweet corn, frozen corn is my next choice. We’ll share how to freeze corn on the cob or off, or as cream corn. Freezing corn gives you a fresher tasting product, and it takes only minutes to prep for the freezer.
Prepping your Sweet Corn for Freezing
The quicker you get your sweet corn from the garden to the freezer, the better the flavor. This is more important with older varieties of corn, which start converting the sugar in the corn to starch rapidly after picking.
Modern supersweet hybrids can hang around for a while after picking without getting starchy. That said, it’s still best to pick and process the same day. If you can’t process immediately, leave the husks on to protect the flavor until you are ready to freeze your corn.
Select ears of corn that are full and plump. You want corn in the “milk stage”, where you can poke a kernel and white, milky liquid comes out.
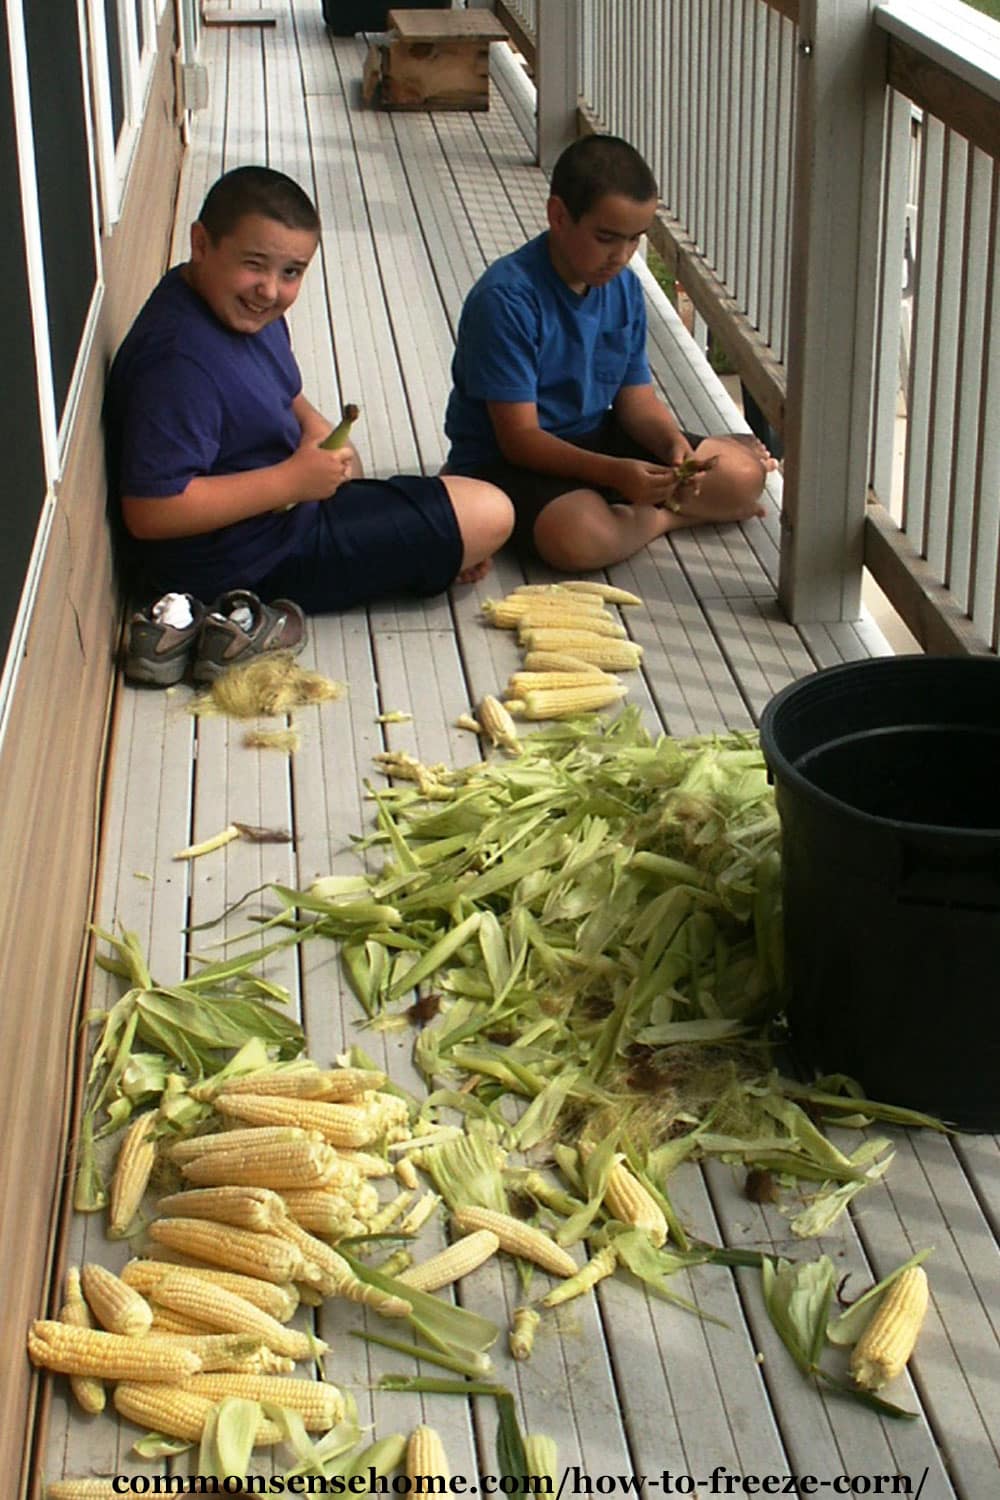
Husk the corn and remove the silk. Trim off damaged kernels, if there are any. (See tips for controlling corn borers here.
How to Freeze Corn on the Cob
NOTE: When you reheat frozen corn on the cob, you don’t get back the original texture. Keeping it on the cob makes it mushier. The flavor is fine, but it’s softer. I usually freeze it off the cob.
First, you need to blanch the corn.
Fill a large pot with water and bring it to a boil. While you’re waiting for the water to heat up, prepare an ice bath.
An ice bath is a basin or large bowl filled with cold water and ice. We use ice from our ice maker most of the time, but you plan ahead and freeze a large block of ice, it melts slower.
If you don’t have ice, it’s okay to use cold water. Just change it out if needed to make sure it stays cold so the corn cools quickly.
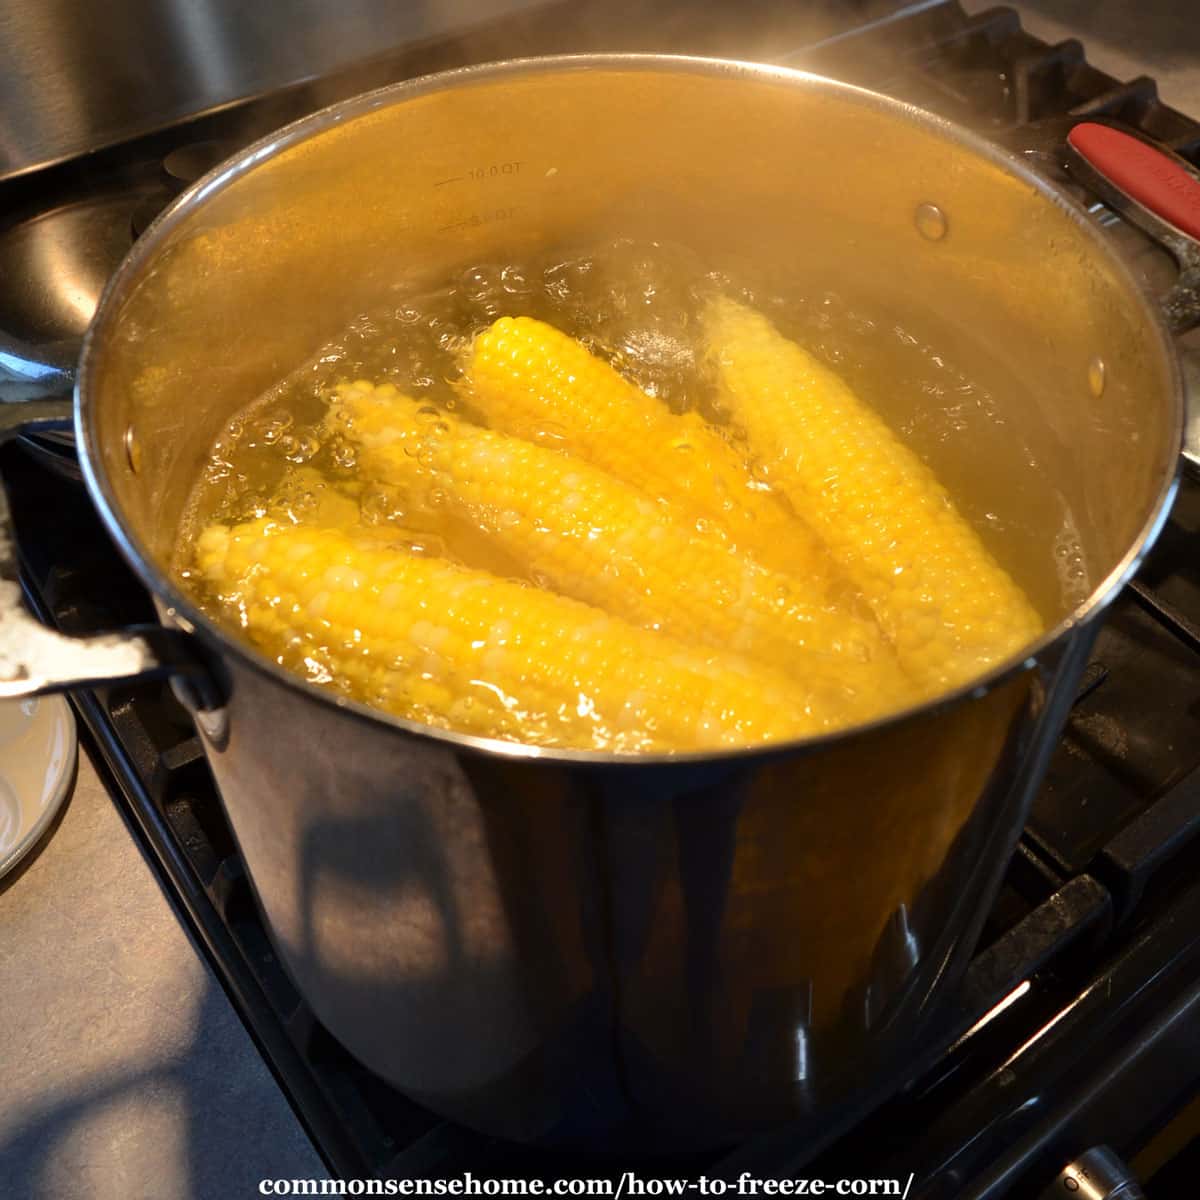
Once your water is boiling, add the corn to the boiling water. Start your timer immediately, and cook the corn for 5-6 minutes. I usually cook 6 cobs at one time in my 8 quart stock pot.
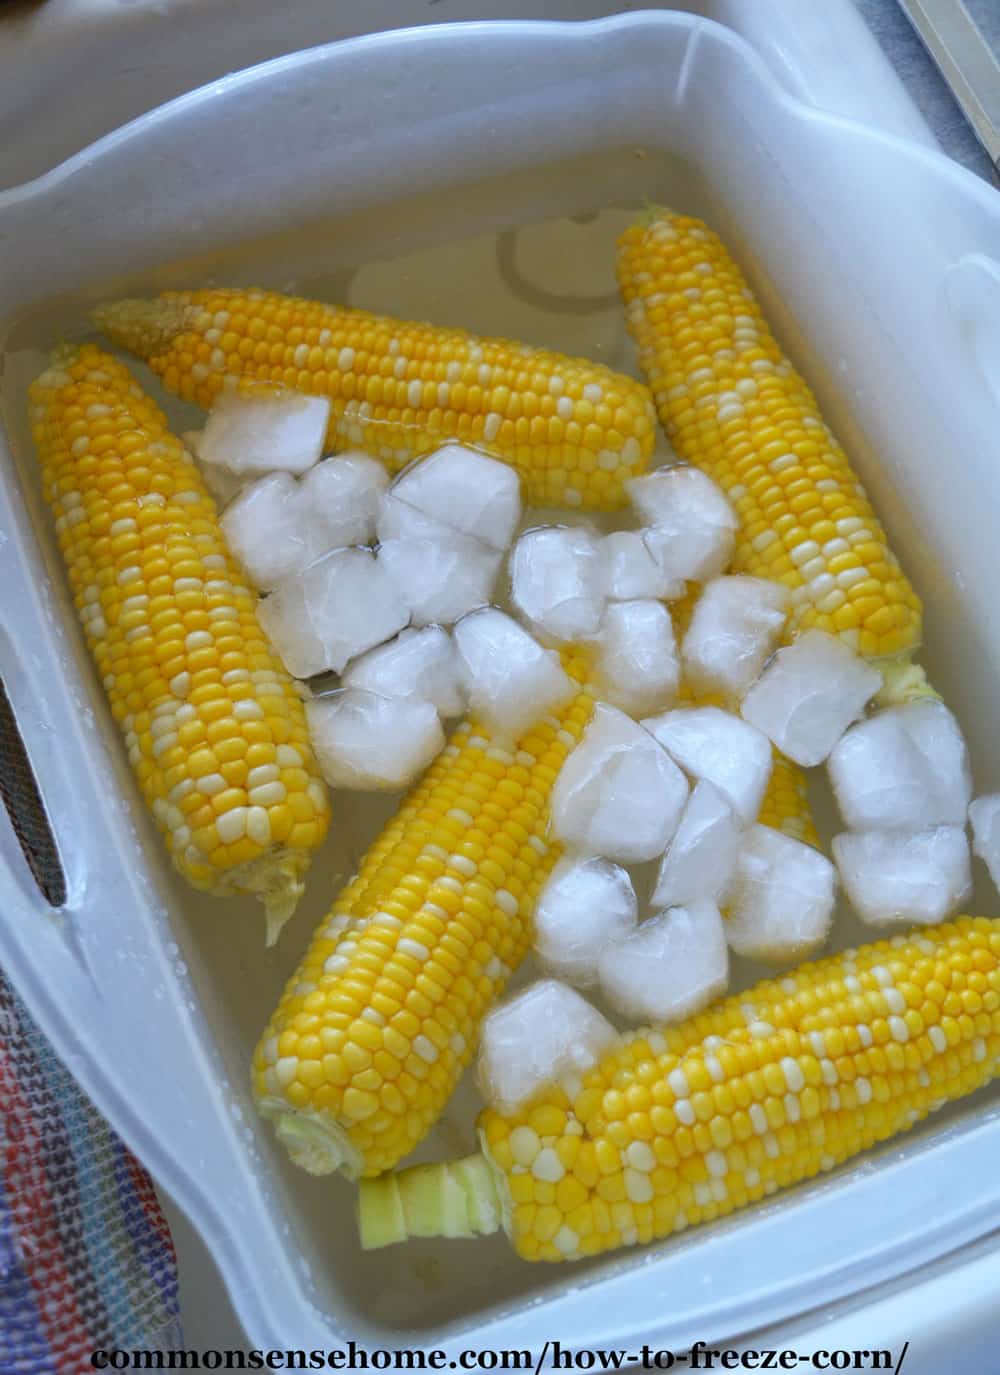
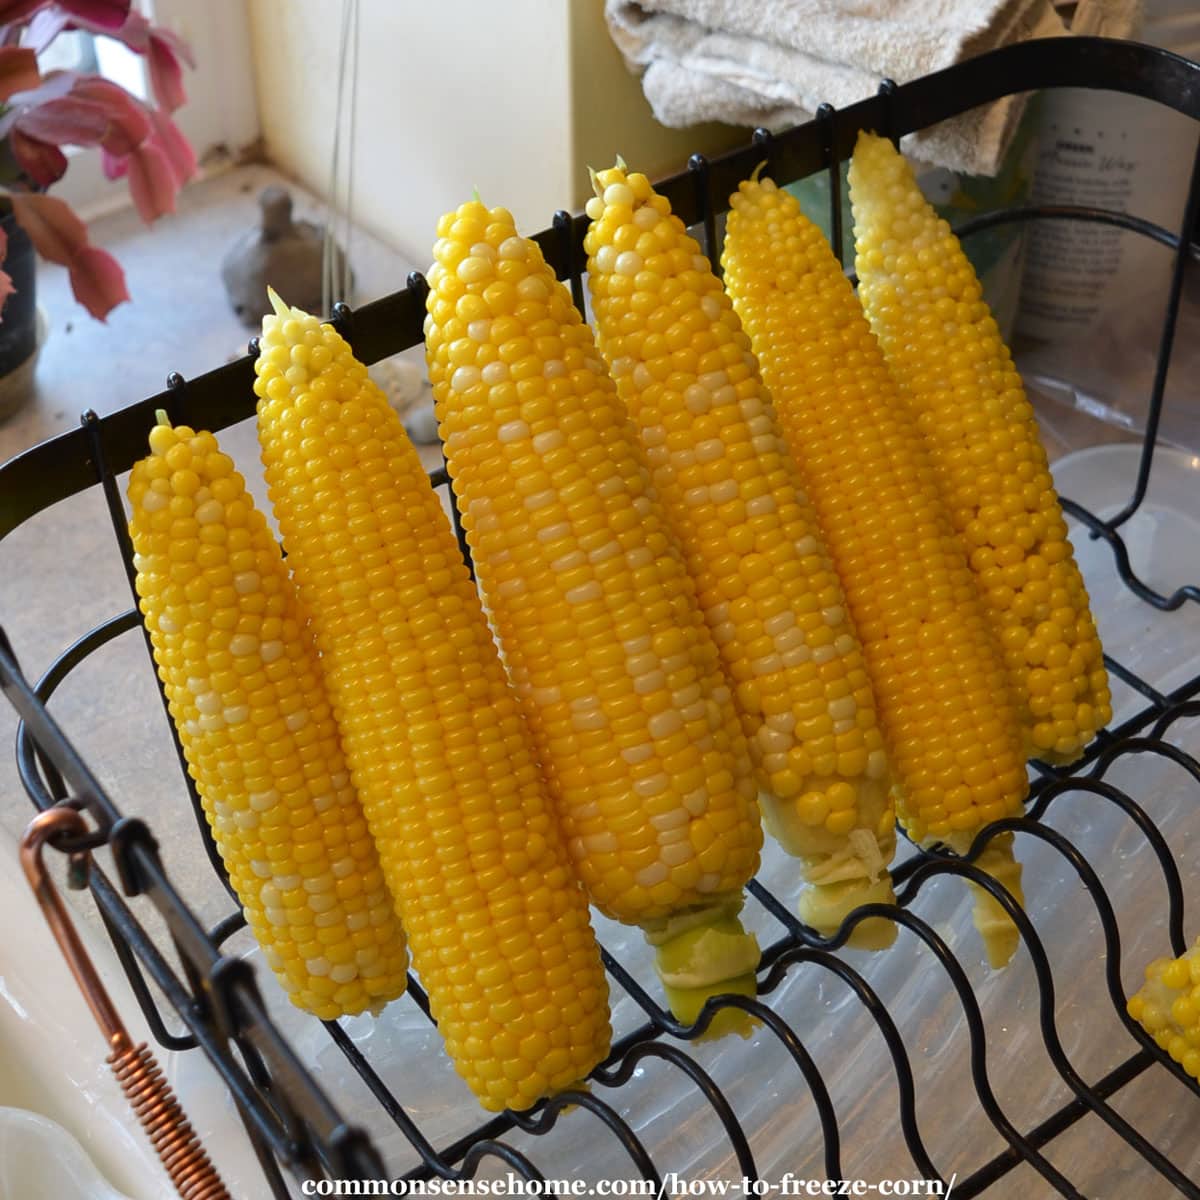
Remove the corn from the boiling water and place it in the ice water. Allow it to cool completely, and then remove it from the water to drain. (I put mine is my dish rack.)
Pat the corn cobs dry and pack them into freezer bags or vacuum seal bags. Remove as much air as possible to prevent freezer burn. (A good vacuum sealer makes this much easier.) Date and label the containers.
Place the corn in the freezer in a single layer and allow it to freeze completely. Once it’s frozen solid, you can stack it or gather the bags into a large bag for convenience.
Freezing Corn Off the Cob
Most of the time I freeze corn, I freeze it off the cob. Cutting the kernels off the cobs saves so much room in the freezer, and I think the corn tastes better.
Would you like to save this?
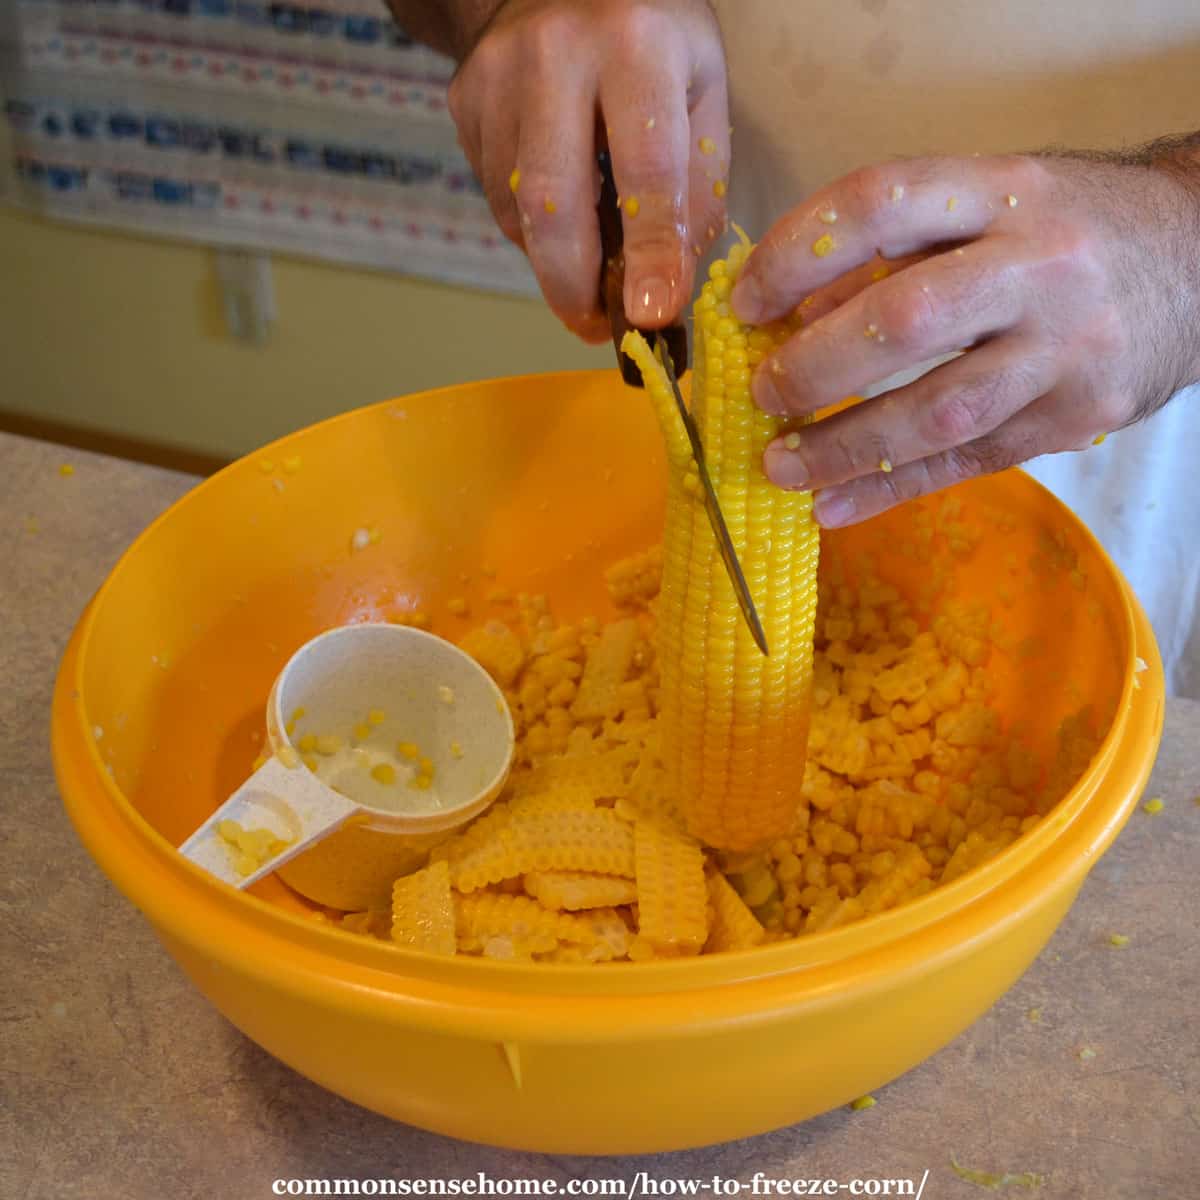
To freeze corn without the cob, blanch and cool the ears of corn. Then cut the kernels off the cobs with a sharp knife or corn stripper. (I’ve also seen people shove the cobs through the center of an angel food cake pan.)
It’s best to remove the kernels over a large bowl, bundt pan, or baking sheet. You want some large container to collect the kernels. Some juice will spray during cutting, so expect some messiness.
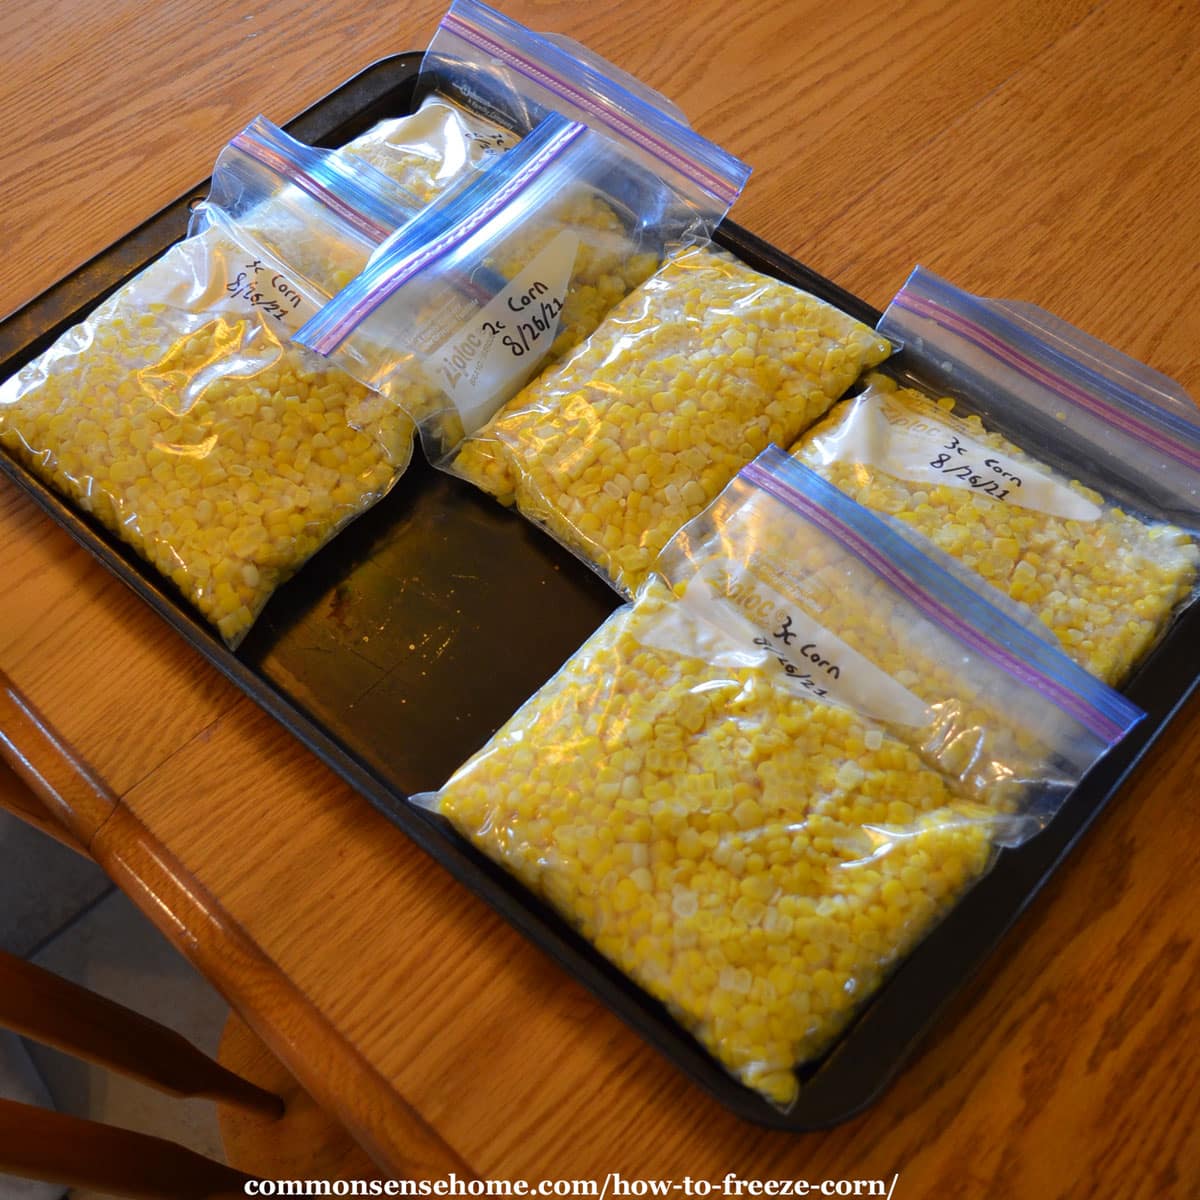
Pack the corn into plastic freezer bags and squeeze out excess air. If you prefer, you can pack the kernels into can-or-freeze jars or plastic freezer containers. Leave 1/2 inch headspace. Date and label the containers and freeze in a single layer, as with the corn on the cob.
To vacuum seal, it’s best to freeze the corn on a baking sheet first, and then pack it into vacuum seal bags. Once the corn is frozen, pack, seal, date, and label.
Chickens love to peck at the leftover corn cobs, or you can use them to make corn cob jelly.
Freeze Corn – Cream Style
The original “cream” in cream style corn came from the “milk” of the corn itself.
Blanch and drain the corn as above. Cut the kernels off the cob, then scrape the cob with a knife to extract the milk and pulp.
It’s easier to get a creamier texture if you don’t trim the kernels quite as close when cutting them off the cob. This leaves a little more juice and pulp for the “cream” part of the corn.
Pack and freeze just like the whole kernel corn.
Do you have to blanch corn before freezing?
You don’t have to do anything you don’t want to do, but I do recommend blanching corn before freezing for best quality.
Why? Blanching deactivates enzymes, improving storage quality. Unblanched corn doesn’t keep as well.
The heat deactivates the enzymes, and the rapid cooling of the ice bath keeps the corn from getting mushy. Without the ice bath, the corn keeps cooking and develops a starchy texture.
PrintHow to Freeze Corn

Freeze your garden or farm market sweet corn for year round use.
Ingredients
- fresh sweet corn
- water, for boiling
Instructions
- Husk corn cobs and remove silk.
- Blanch corn 5-6 cobs at a time. Boil for 5-6 minutes, then place in an ice water bath until cool.
- Drain corn. Pat dry if freezing whole cobs.
- Cut corn from cobs if desired. To make cream style corn, cut corn from cobs, then scrape the milk and pulp from the cobs.
- Pack the corn into bags or containers. Remove as much air as possible from bags, leave 1/2 inch headspace in containers.
- Date and label, and freeze in a single layer in the freezer.
Notes
For best quality, use frozen corn within 8-12 months.
For longer storage life, use vacuum sealed bags or containers. Freezer corn kernels or cream style corn on a baking sheet before packing into vacuum seal bags.
More Canning and Preserving Recipes
We have dozens of canning and preserving recipes and guides on the site, including:
I did this but my corn texture on the cob was mushy when I took from freezer to microwave. It tastes good but yuk. What am I doing wrong?
Odds are you didn’t do anything wrong, it’s just the nature of frozen corn on the cob after reheating, which is why I don’t normally freeze it on the cob.
As noted in the article:
“When you reheat frozen corn on the cob, you don’t get back the original texture. It seems like keeping it on the cob makes it mushier.”
Maybe I can rephrase that or bold it to make it clearer? As you noted, the flavor is good, but the texture is much softer.
Just did this today. Super easy. Question: when thawing for consumption, how should the corn be heated up (on the cob)? Thanks
You can heat the corn pretty much any way you would normally cook it, but keep in mind that it has already been pre-cooked for freezing, so you only need to heat it through, not cook it again, so cooking time is much less.
Great article on freezing corn. Thank you very much.
Thank you, Betty.