Warm & Golden Dandelion Wine Recipe (Old-Fashioned Wine Making)
This post may contain affiliate links. Read my full disclosure here.
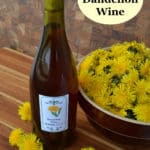

Wine out of dandelions? You bet! Making homemade dandelion wine is a longstanding family tradition. We don’t make it every year, but I do like to keep a few bottles on hand for company.
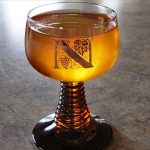
The taste of this dandelion wine is rich, golden and warming – more like a good brandy than a wine. I’ve had friends who don’t normally like wine comment that they do enjoy this “spring tonic”. This is a “country wine” made from simple ingredients with basic equipment.
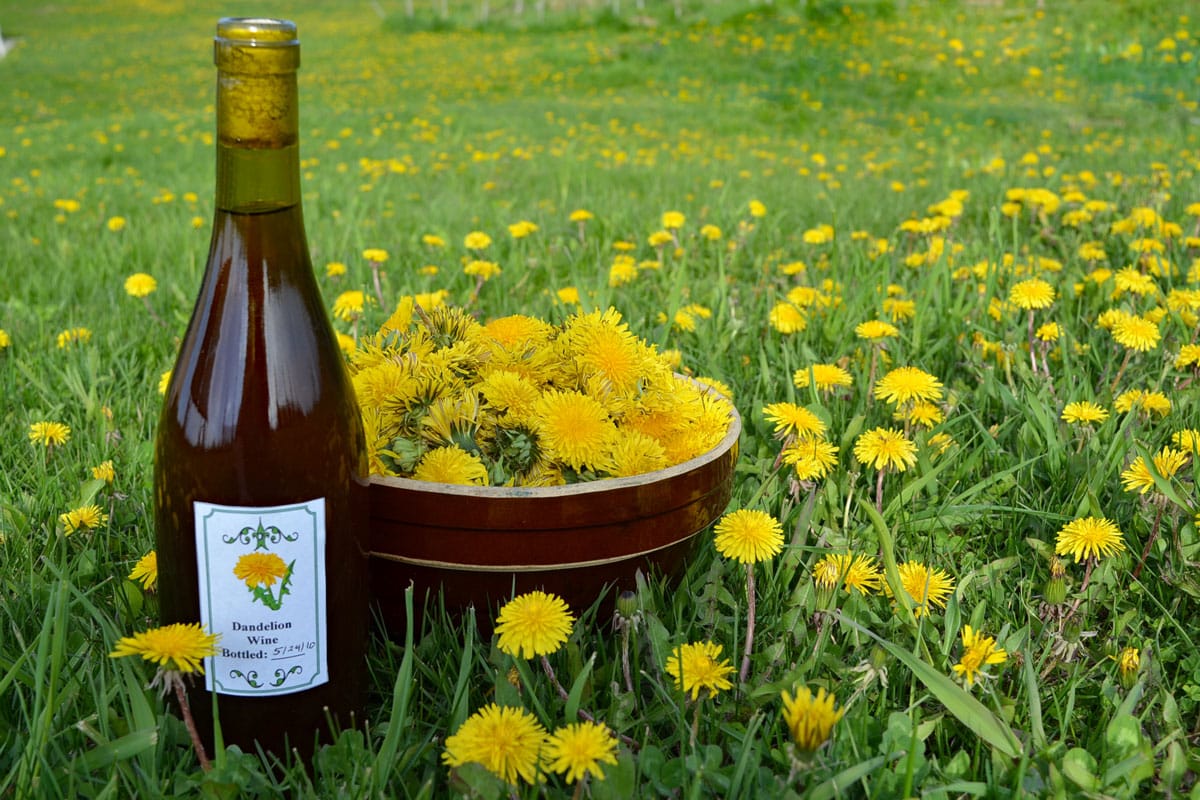
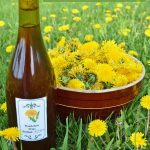
When we get dandelions, we get LOTS OF DANDELIONS! They are everywhere! (Boy photos are from 2010. They have grown quite a bit since then, but I kept these photos here for the happy memories.)
Dandelions are wonderful for bringing up nutrients and breaking through compacted soil. This area of the yard had a lot of compaction from soil being moved around, so the dandelions were working overtime.

Table of Contents
Gathering the Flowers
Make sure your dandelion flowers are free of pesticides, herbicides and other contaminants. I usually don’t rinse the blossoms, though you can if they are dusty. They are sterilized during the first part of brewing. We gather bins of flower heads outside, and then bring them inside to remove the petals.
Don’t pick dandelion blossoms for wine or eating from an area used by pets for their “bathroom”. As I explained to a reader in the comments, I’m fairly sure goat pee will not wash off.
What part of the dandelion is dandelion wine made from?
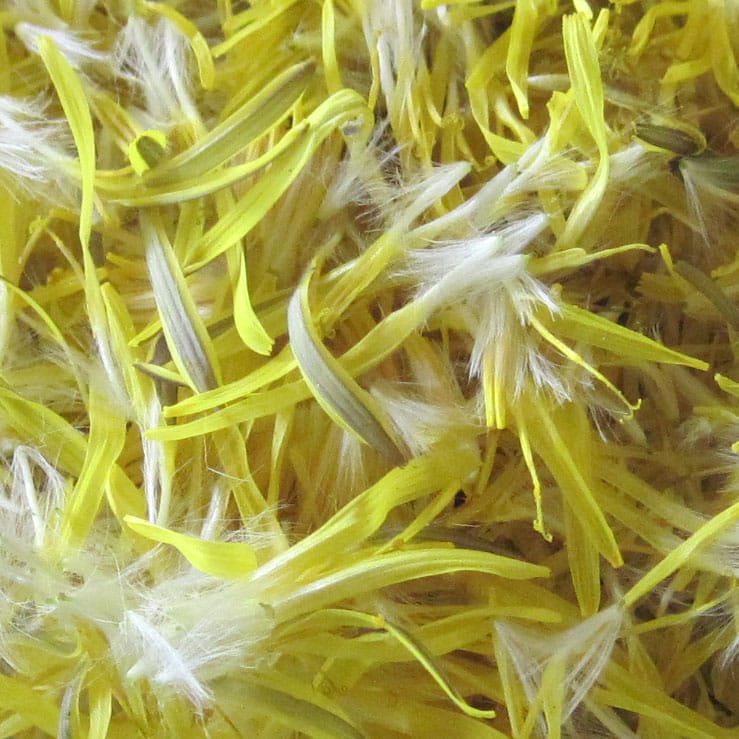
For dandelion wine, use the yellow flower petals only. Leaving the petals attached to the green base of the flower will result in a bitter, unpleasant wine. My neighbor made this mistake when she tried to make dandelion wine, and she ended up throwing out the whole batch.
I use 3 quarts of loosely packed yellow dandelion petals (pictured below). Not 3 quarts of flower heads, 3 quarts of petals only.
If you don’t have enough dandelion petals from one picking, freeze the petals until you have enough.
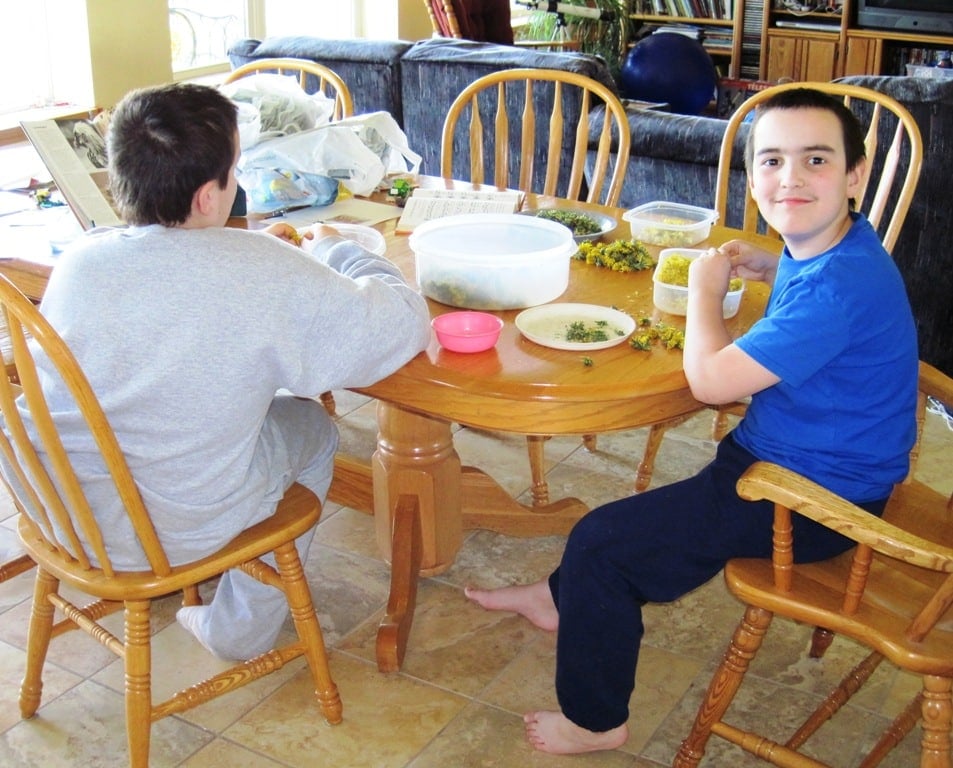
The boys and I sat down to a session of “second picking” to remove the yellow petals from the blossoms. You want to remove the petals as soon as possible after picking, as the flower heads close over time. Once they close, it’s tough to get the petals off.
If you are working alone, it may be best to pick some of the flowers needed, remove petals, then pick more flowers and repeat. That way, you won’t have trouble with the flower heads closing before you have time to clean them. It’ll also give you a chance to get up and stretch.
Making Homemade Dandelion Wine
“Dandelion wine, believed to be of Celtic origin, is regarded as one of the fine country wines of Europe. In the late 1800s and early 1900s, it was not proper for ladies to drink alcohol. However, dandelion flower wine was considered so therapeutic to the kidneys and digestive system that it was deemed medicinal even for the ladies.“
Adapted from Dandelion Medicine, in combination with my mother’s recipe.
Remember, all your fermentation vessels should be glass, ceramic, stainless steel or food grade plastic. Never ferment in aluminum or iron, as it can react with the wine.
I normally use my two gallon crock for one gallon of wine, since the fruits bubble up during fermentation. You can see in the photos below that a one gallon crock gets very full.
Ingredients
- 3 quarts dandelion petals, loosely packed
- 1 gallon water
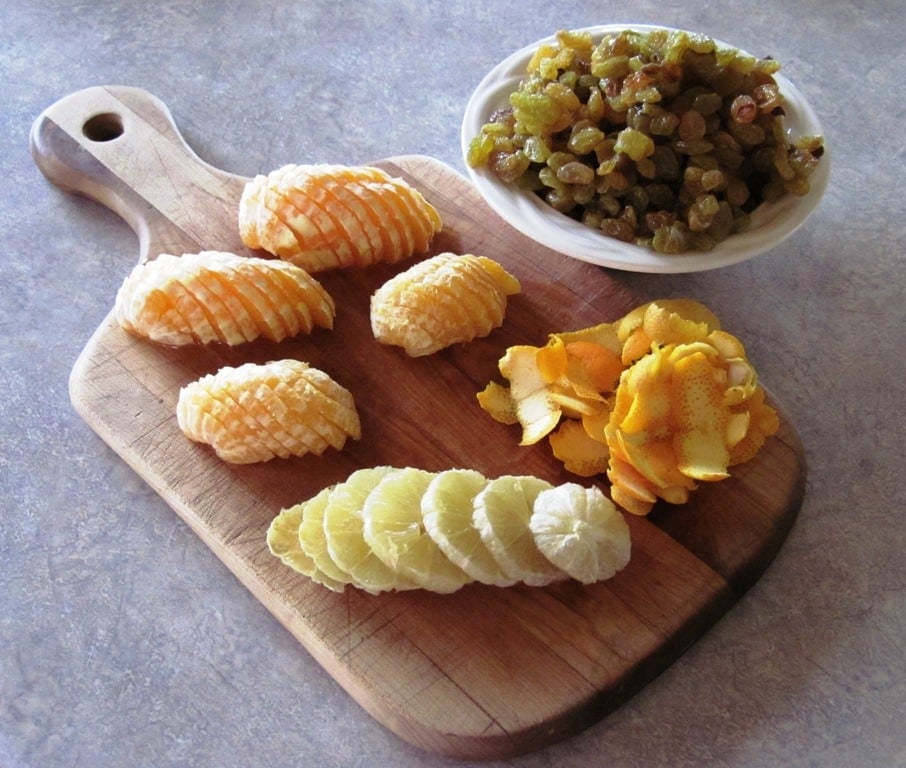
- 2 oranges, with peel, preferably organic
- 1 lemon, with peel, preferably organic
- 3 pounds sugar
- 1 package champagne yeast or wine yeast (this yeast finishes at around 12-14% alcohol)
- 1 pound raisins, preferably organic
How to make dandelion wine – Directions
1) Collect the blossoms when they are fully open on a sunny day, after the morning dew clears. Remove green parts and measure out 3 quarts of loosely packed petals.
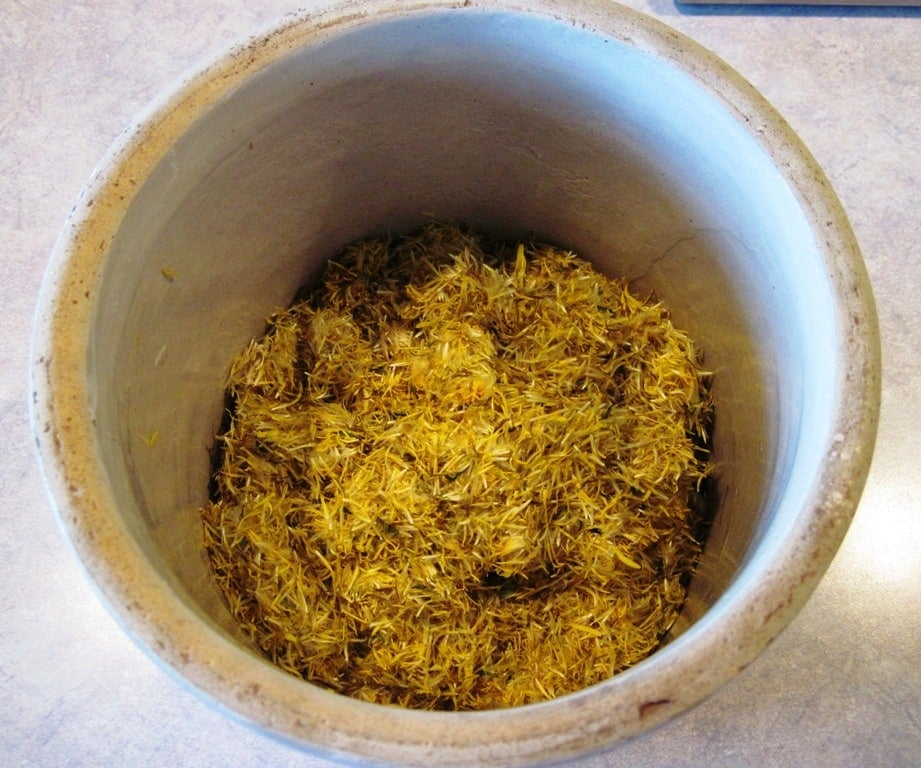
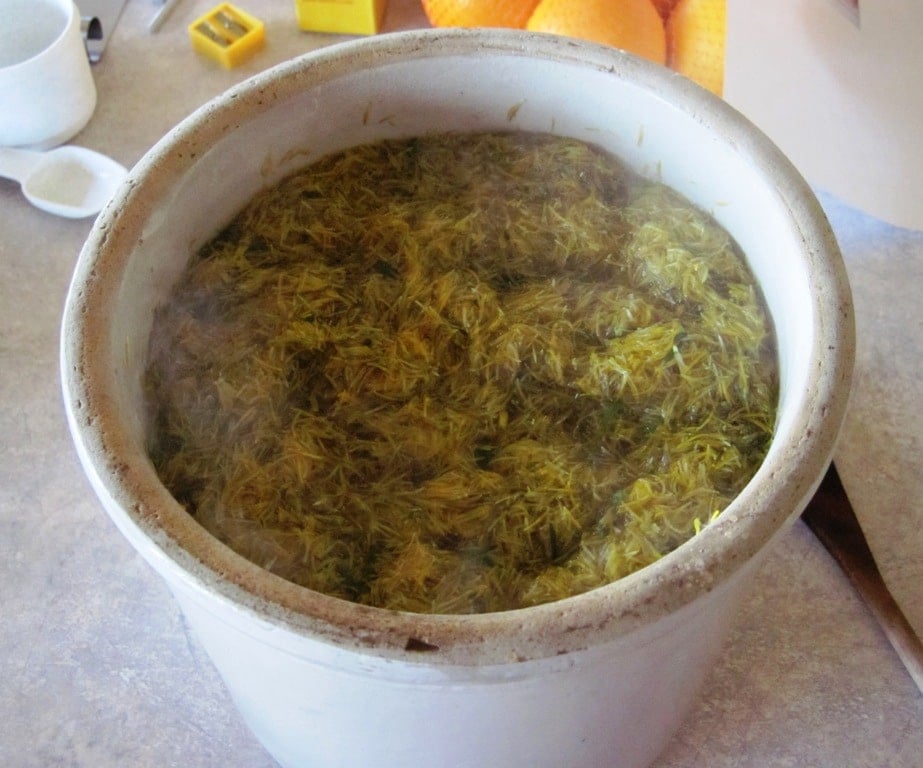
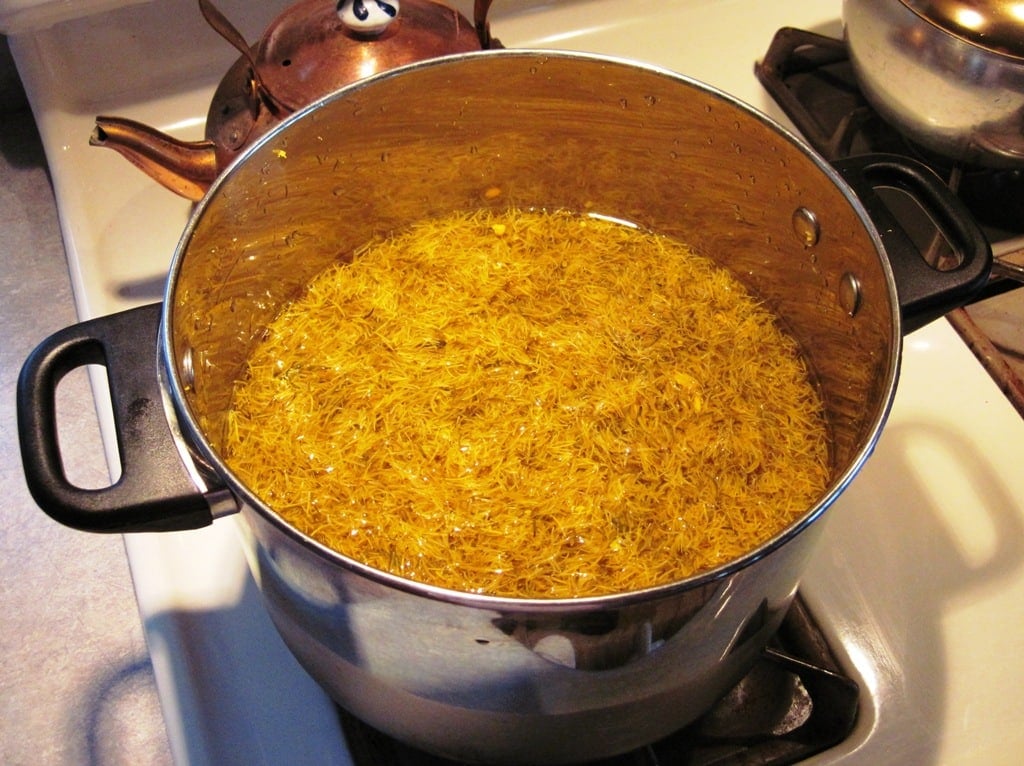
2) Bring the water to a boil and pour it over the flowers in a large pot or crock. Cover with a towel to keep dust out and let steep for three days. Stir daily to keep the petals submerged in your “dandelion petal tea”. They will develop a musty smell, which is normal.
3) Prepare the oranges and the lemon. Zest about half of the rind and peel off the rest in thin strips. You want to minimize the amount of white pith added to the brew.
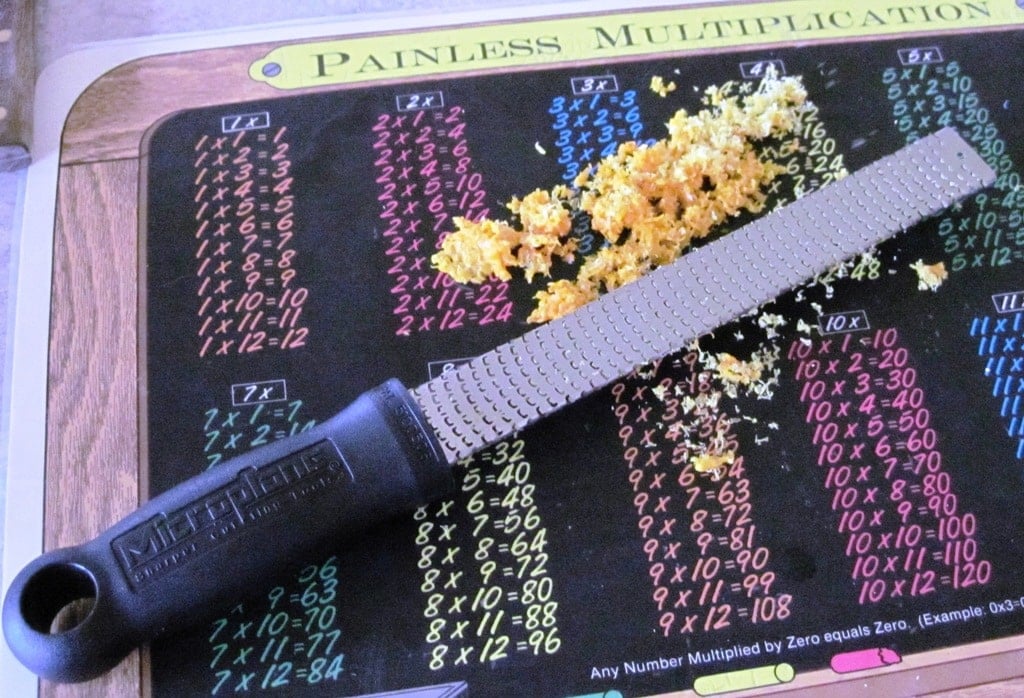
4) Clean most of the pith off the fruit and slice into thin rounds.
5) Add the lemon and orange zest to the flower-water mixture and bring to a boil. Remove from heat, strain out solids. Dissolve the sugar in the flower water. Allow to cool to room temperature.
Would you like to save this?
6) Add the yeast, raisins, and orange and lemon slices and rind strips to the liquid. Put everything into a crock (or wide mouth carboy with airlock) to ferment. I cover my crock with a clean cotton towel held down by a rubber band to keep dust and bugs out. (Not shown.)
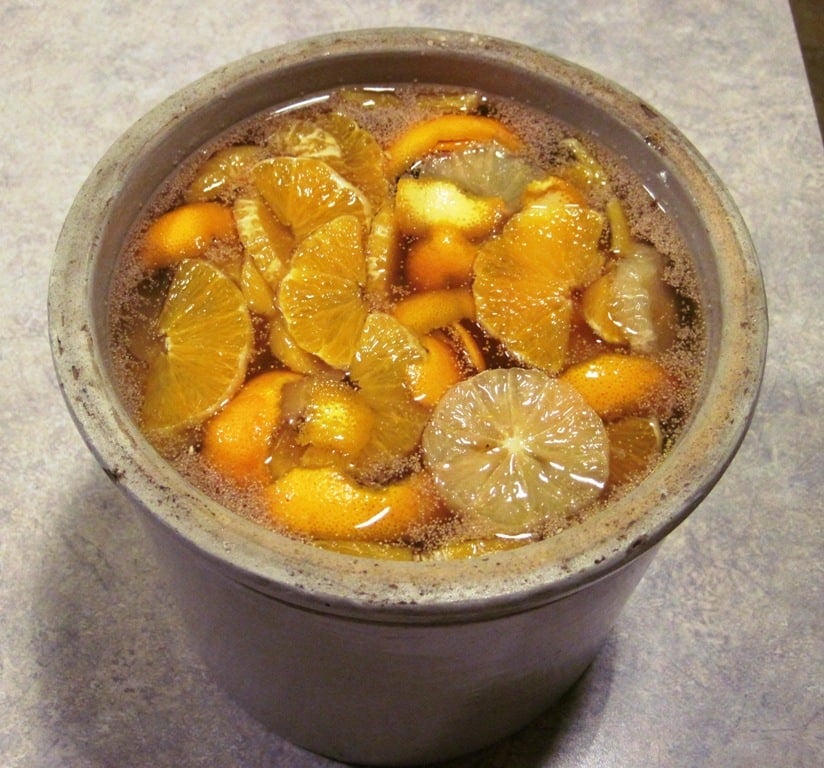
Stir daily with a wooden spoon or non-reactive stir stick. When the yeast gets active, the bubbles will lift the fruit up to the top of the wine. You want to stir so all the fruit gets pushed back under the surface and wet down daily.
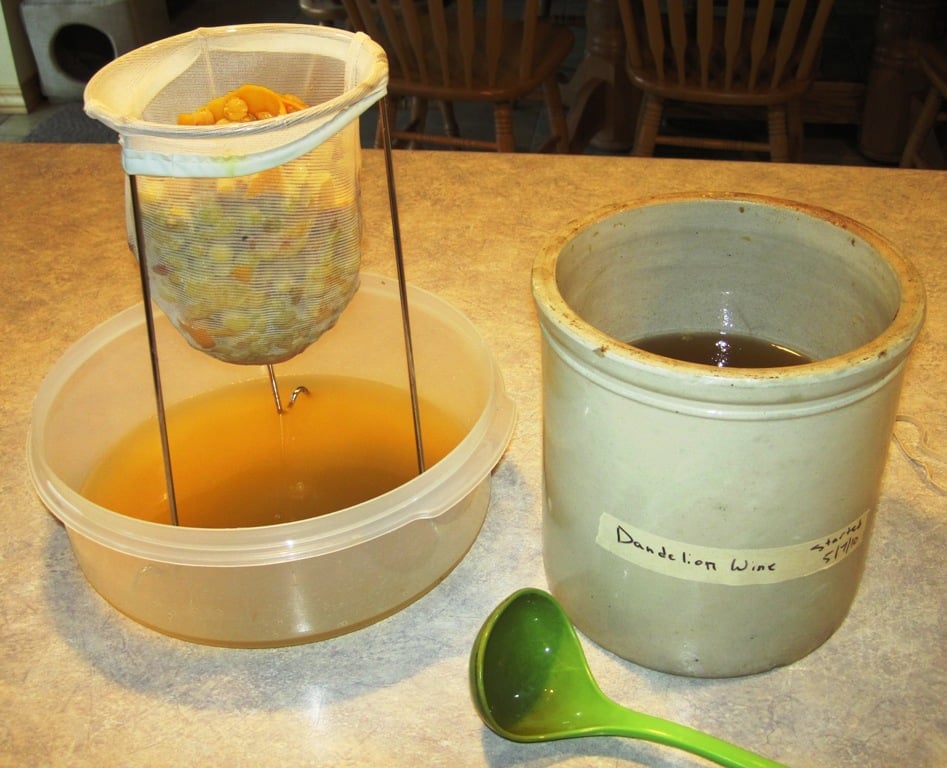
7) When the primary fermentation mixture stops bubbling (1 -2 weeks), fermentation is almost done. Strain the liquid through several layers of cheesecloth, a flour sack towel, or a jelly bag.
Bottling the Wine
You have two options for bottling your homemade dandelion wine. You can let it finish in bottles, or move to a carboy and then bottle.
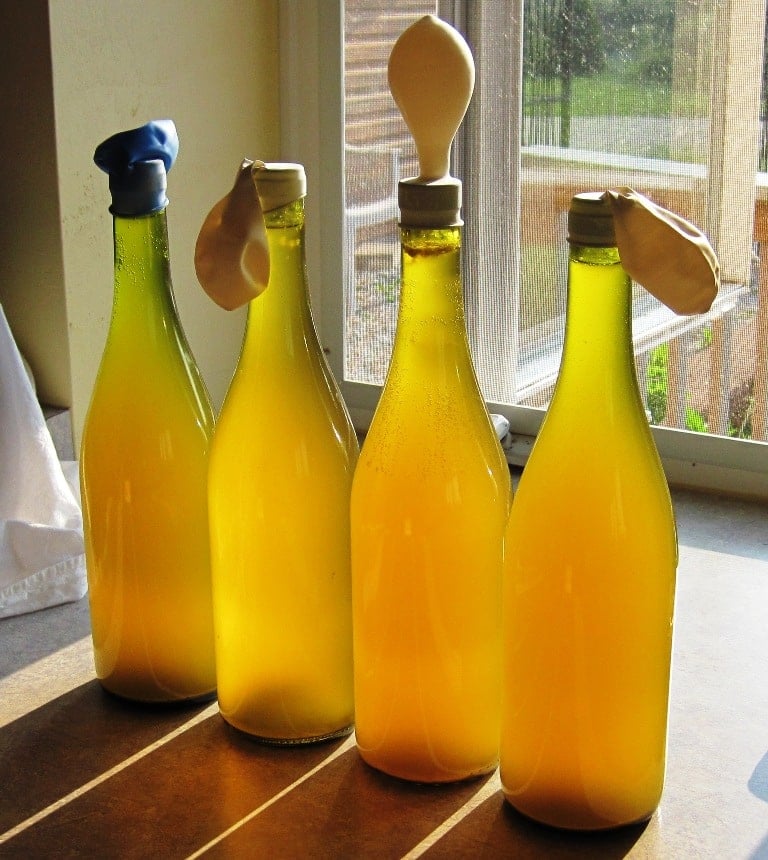
To finish in bottles: After straining, move the young dandelion wine directly to clean bottles. Slip a deflated balloon over the top of each bottle to monitor for further fermentation. When the balloon remains deflated for 24 hours, fermentation is complete. You will probably need four or five 750 ml bottles.
Cork the bottles and store in a cool, dark place for at least six months before drinking.
NOTE: Do not seal bottles tightly before they finish fermenting, and don’t put them somewhere warm. Otherwise, you’ll end up with exploding bottles, like my sister, Mary, when she stashed them in a closet. Apparently, it sounded like there were bombs going off or they were being shot at.
If you would like a clearer wine, transfer the strained dandelion wine into a one gallon carboy with airlock before the final bottling. Allow to ferment in the carboy for 2-3 months, and then rack into the bottles.
If you’d like to download a pdf of my wine labels, use this link: Printable Dandelion Wine Labels.
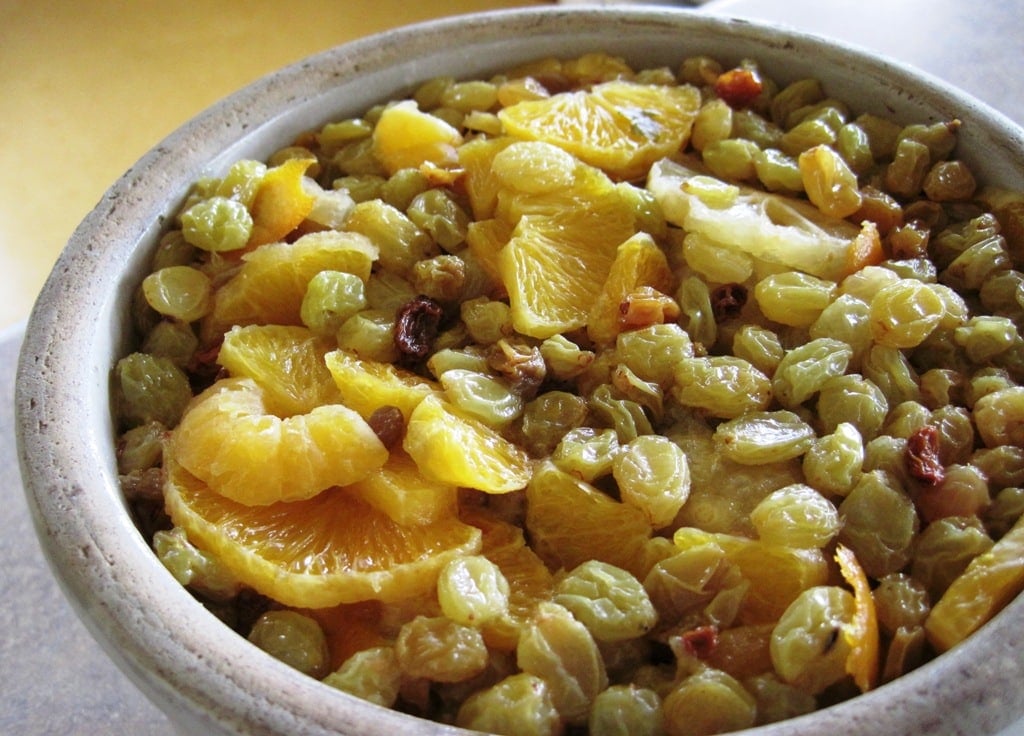
If you don’t want to send the wine fruit to the compost pile, try Dandelion Wine Fruitcake.

Recommended Materials for Making Dandelion Wine
- Wine Yeast – store extra yeast packs in the fridge or freezer. I normally use Lalvin Wine Yeast EC-1118.
- 2 Gallon Crock – 2 gallons gives you space for fermentation.
- Wine Bottles – It’s fine to wash and reuse old wine bottles. You will probably need five 750ml bottles.
- Corks – It’s best to use new corks. I like the #9 Straight Wine Corks.
- Wine Bottle Corker – This double lever model works like a charm.
- Gallon carboy with airlock – optional, for clearer wine.
Old-Fashioned Dandelion Wine Recipe

A smooth and hearty flower wine with citrus notes that will warm you from head to toe.
- Yield: 4–5 bottles 1x
Ingredients
- 3 quarts dandelion petals, loosely packed
- 1 gallon water
- 2 oranges, with peel, preferably organic
- 1 lemon, with peel, preferably organic
- 3 pounds sugar
- 1 package wine yeast
- 1 pound raisins, preferably organic
Instructions
- Collect the blossoms when they are fully open on a sunny day. Remove any green parts and measure out three quarts of petals.
- Bring the water to a boil and pour it over the flowers in a large pot or crock. Cover with a towel to keep dust out and let steep for three days. Stir daily to keep the petals submerged.
- Prepare the oranges and the lemon. Zest (finely grate) about half of the rind and peel the rest off in very thin strips. You want to minimize the amount of white pith added to the brew.
- Finish peeling the citrus, and slice them into thin rounds.
- Add the lemon and the orange zest to the flower-water mixture and bring to a boil. Remove from heat, strain out solids, then add the sugar, stirring until it is dissolved. Allow to cool to room temperature.
- Add the yeast, raisins, and orange and lemon slices and rind strips to the liquid. Put everything into a two gallon crock (or wide mouth carboy with airlock) to ferment. I cover my crock with a clean cotton towel held down by a rubber band. Stir daily with a wooden spoon or non-reactive stir stick.
- When the primary fermentation mixture stops bubbling (1 -2 weeks), fermentation is almost done. Strain the liquid through several layers of cheesecloth or a flour sack towel.
Bottling the Wine
You have two options for bottling your homemade dandelion wine. You can let it finish in bottles, or move to a carboy and then bottle.
To finish in bottles: After straining, move the young dandelion wine directly to clean bottles. YOu will probably need four or five 750 ml bottles. Slip a deflated balloon over the top of each bottle to monitor for further fermentation. When the balloon remains deflated for 24 hours, fermentation is complete.
Cork the bottles and store in a cool, dark place for at least six months before drinking.
If you would like a clearer wine, transfer the strained wine into a one gallon carboy with airlock before the final bottling. Allow to ferment in the carboy for 2-3 months, and then rack into the bottles.
Notes
Do not seal bottles tightly before they finish fermenting. Always store your wine in a cool location.
Is Dandelion Wine Alcoholic?
Yes. If you use wine yeast as recommended in the recipe, you should end up with around 12 to 14 percent alcohol.
If you’re feeling adventurous, you may be able to nurture wild yeast from the raisins to do the fermenting. Wild yeast brews will have a lower alcohol content, because wild yeast dies off if the alcohol levels get too high.
You can learn more about using wild yeasts in the book, “The Wildcrafting Brewer“.
Is Dandelion Wine Medicinal?
Nearly every part of dandelion is full of nutritional value, with vitamins and minerals packed in every part of the plant. Aside from its great taste in wine making, it also has been used throughout history for its medicinal properties.
For more information, check out this article on Dandelion Benefits.
To dig even deeper into this amazing plant, check out The Dandelion Workshop online course. It includes a printable guide and step-by-step videos for making a variety of dandelion recipes and remedies.

You may also enjoy:
- Harvesting and Using Dandelion Roots
- Low Sugar Dandelion Jelly Recipe
- Dandelion Fritter Recipe
- How to Make Dandelion Root Tea
- Get Rid of Dandelions Without Chemicals
I’ve also answered a lot of reader inquiries in the comments, so be sure to have a look if you have questions. If you don’t find your answer (or would like to share some wine making stories or observations), leave a comment below.

This article is written by Laurie Neverman. Laurie mixes her rural background and engineering training to create a unique and resilient homestead. She enjoys getting to know wild plants and using them for food and medicine. Her most unique experiment to date was quackgrass wine.
Originally published in 2010, last updated in 2026.
just moved my dandelion wine into the carboy. have about 3/4 full, should I add something else or will it be ok?
It’s best to fill the carboy to within a half inch or so from the top. That way, you ensure that the headspace above the wine fills with carbon dioxide, preventing oxidation.
You could transfer the wine to a smaller carboy, top off with some white grape juice, or add some sugar water. Adding grape juice or sugar water will change the flavor profile slightly. A common homemade wine topping solution is: 1 cup sugar to 2 cups water (roughly a 2:1 water-to-sugar ratio by volume).
this is incredibly confusing. an equipment list is seriously necessary. how big of a pot do I need, how big of a jar for the fermentation and how big of a jar for the storing?
Please see the section labeled “Recommended Materials for Making Dandelion Wine“, which is right above the printable recipe card.
Hi! I make a lot of fermented foods and preserve foods, but this is my first time trying winemaking.
I’m so confused about how to bottle the wine. I looked through the comments and couldn’t find answers. I also looked through some resources at my local home brew shop, and on YouTube, but there seems to be nothing spelling out the very VERY basics without a bunch of jargon! Help!
My wine is on day three of the primary fermentation, in a big stainless steel stock pot.
Hi Emily.
I haven’t recorded a video of bottling, because it can be rather messy and I use my mouth rather than an auto siphon or other tools. This is arguably not sanitary, but it’s the way my mom did it, it’s simple, cheap, and it gets the job done. It’s also somewhat entertaining, at least for us. Start with about 5-6 feet of 5/16″ diameter siphon hose. It’s best to do this with a friend, with one person working each end of the hose.
In our house, we put the carboy up on a higher section of the counter, and the bottles on a lower section, but I hold the bottles in my hands as I’m filling to having a lower counter section isn’t essential. You do want the bottle you are filling lower than the carboy while you are filling. Some people fill bottles on the floor to keep them nice and low.
Once I have the carboy and clean bottles ready, we position the hose. Usually my son handles the carboy end, while I handle the bottle end. You want to keep the hose end that’s in the carboy above the lees (sediment at the bottom of the bottle). We generally start pulling from the top and slowly move it down as the liquid level drops. You want to avoid stirring up the lees.
On the bottle end, I suck on the tube until I get the flow going (establish the siphon), and then quickly cover the end of the tube to hold the liquid in place. Then I position a bottle and let the wine flow in. When the wine reaches 1 to 1.5 inches below the very top of the bottle neck, I use my thumb to block the end of the hose, set the first bottle aside, and grab the next bottle and repeat the process. This goes on until we reach the lees – or close enough to it that we can’t draw cleanly.
If there’s enough in the carboy for another bottle, I may move the wine to a 2 quart jar and let it settle again before drawing for the final bottle, or strain first, and then move it to the 2 quart bottle to settle. The smaller horizontal footprint and increased vertical space makes getting that last bit of wine a little easier, but you have to allow time for settling once the lees is disturbed.
Once the bottles are filled, then you put the corks in. This does work best with a commercial corker. I pounded some in with a rubber mallet in our early years of wine making, but I don’t recommend it.
If you don’t want to mouth siphon, you can get a bottle filler wand, like this bottling wand kit from Fermtech.
Thank you for typing all that out! This might seem silly, but why can’t one just use a sanitized funnel and a ladle or measuring cup…and just pour the wine into the bottles via the funnel? Why all the (what seems like) extra fuss with the siphon?!
Do you mean directly from the crock to bottles? You certainly can – just be aware that you will end up with a significant amount of sediment in the bottom of the bottles as the wine ages. Over time, this may give an off flavor to the wine. At a minimum, you’ll probably get chunks in your glass when you pour the wine, especially as you get closer to the bottom of the bottle. Pour it through a strainer or coffee filter to catch the chunks, or drink them if you like. (Most people are put off by globs of dead yeast floating in their wine, but they do contain B vitamins.) That’s what the photos in the article show from one of my early batches of wine (crock to bottle via ladle).
When the wine is done with the crock stage of the fermentation, it’s still young. Though fermentation has slowed, it probably hasn’t stopped 100%. The yeast will keep munching any available sugar, and settling to the bottom as they die. There are also suspended fine particulates, like pectin from the citrus, in the wine, even though it looks “clear”. These settle out to that film in the bottom of the bottles if you go straight from crock to bottle. I did this when I first started brewing because it was simpler. Then I went to serve the wine later and it was chunky, which was no so appealing.
Aging in the carboy gives a smoother finish to the wine, and that sediment is left behind in the carboy, so you’re not serving chunky wine. How much sediment there is will vary depending on the wine type. Pumpkin and blackberry both had over an inch of lees in the carboy. Dandelion doesn’t normally have quite that much.
Would I be able to store wine in mason jars instead of buying new bottles/corkers?
It’s better to use wine bottles for a number of reasons. The first concern is oxidation. Even with a good lid seal, mason jar lids are not as oxygen-resistant as corks or wine bottle closures. Oxygen exposure can make wine flat, vinegary, and brown. I’ve run into this trying to age extra wine that didn’t fit in my carboy in a mason jar with an airlock. It should have been okay, but the jar wine definitely had an “off” flavor compared to the carboy wine.
Wine is acidic. Standard canning lids can eventually corrode or react with acidity, especially if sulfite levels are low (and this recipe doesn’t use sulfites by default). storage is humid, and/or wine touches the lid repeatedly.
Finally, if the wine is still fermenting even slightly, CO₂ can build up and lids may bulge or jars can leak or crack. Wine bottles are thicker glass than mason jars. (Though of course it’s possible to blow corks out of the wine bottles, as I noted in the article, which also makes a heck of a mess.)
Thank you, this was helpful!!
I have a lot of dandelions in my backyard, I’m gonna give this a try 😊 just 2 questions: do the flowers need to be washed first and also are there any risks associated with it, similar to stuff that happens with moonshine? Sorry if these questions sound stupid but I’m a newbie. Thanks!
Hi Anna.
I generally don’t wash the blossoms, because they’ll close up and it would be nearly impossible to get the petals off. They are sterilized with boiling water while making the wine.
Not sure which risks you’re referring to with moonshine, but homemade wine is a very different product from ‘shine.
There’s no methanol produced during wine fermentation, so there’s no danger of methanol poisoning from improper distillation.
As long as your equipment is clean, there shouldn’t be a risk of equipment contamination, like you might see in a poorly made still.
With the commercial yeast specified in the article, the yeast will die off once the alcohol content reaches around 12-14%, so the final product cannot be extremely high in alcohol like moonshine.
You cover quality control, so any screw ups are on you, but at the worst you might make vinegar or bad tasting hooch, or get really sloppy and grow mold in your fruit.
There should be no fire or explosion risk like there may be with an improvised still.
It is legal to make homemade wine for personal consumption only in all 50 states, up to 200 gallons/per year if you have 2 adults or more in the household.
Thanks for the detailed reply Laurie! I was wondering about methanol mainly. I’m not in the US so I think I should be fine. I’m gonna give it a try these days! Tomorrow should be sunny. Thank you again 😊
Gotcha. It’s ethanol from fermentation, not methanol via distillation, and much lower alcohol by volume.
This is my first time making wine ever. I absolutely love dandelion wine but it is no longer made anywhere near me, so I have decided to make my own. I know nothing about wine bottles. I have looked it up and there seems to be ones that have a wooden cork you need the corker for, then there are ones that are rubber like with a flat plastic pieces on top and heat seal band you shrink over the top of it, and finally ones that are attached to the bottle with a rubbery stopper on them though a lot of those say for beer. Which one of these are the best way to bottle wine? Does it matter what method you use? I am clueless.
Hi Tori. No worries.
Referring to these “ones that are attached to the bottle with a rubbery stopper on them though a lot of those say for beer” – I think you’re referring to what are called bail top or swing top bottles. These are thick walled, very sturdy, and designed to handle carbonation, which puts extra pressure on the bottle. You shouldn’t need those for your wine, though you could use them if you like the look.
As for “ones that are rubber like with a flat plastic pieces on top and heat seal band you shrink over the top of it” – I haven’t worked with these, but if you only intend to keep your wine a short time, they should be fine. Rubber will break down over time, causing seal failure. The same goes for screw top bottles. They get the job done and work for short term storage, but I wouldn’t attempt to age a wine in them.
I like a basic corked wine bottle because it’s simple and it works. If you have friends who are wine drinkers, they may be willing to save bottles for you so you can get them for free. Otherwise, a case of bottles isn’t terribly expensive, and you can reuse them indefinitely. Always wash well before filling. A bottle brush is a good investment, no matter what type of bottle you choose. I use soap and water most of the time, though I do have some bottle cleaner in case of stuck in grime.
With cork sealed bottles, you do need to buy a corker, but again, it should last you for the rest of your life. It’s kind of fun to use, too. The flat bottomed bottles are a little easier to clean than the domed ones, but both work just fine.
I use bottles like these – https://amzn.to/4tytlmR – 750ml Green Wine Bottles with a flat bottom
Corks like these – https://amzn.to/4eHvFTP – #8 Straight Wine Corks for Wine Bottles, 1.73″ x 0.87″ (44 mm x 22 mm) Beige (this is a bag of 100)
And a corker like this one – https://amzn.to/4cJAIRb – Double Lever Corker for Wine Bottles (this particular corker comes with 20 corks as it’s listed at the time of posting)
You’ll want a siphon hose to transfer the wine from the carboy to the bottles, too. I just use a piece of hose and my mouth to siphon because we only make wine for family and friends, but they have fancy little siphon pump and hose kits, too, like this one – https://amzn.to/4tGxc19 I prefer a smaller diameter hose for siphoning. It’s a bit slower, but gives you more control over the flow. I tried a larger diameter one and the wine went all over the place. I find it helpful to have a friend around when bottling, so one person can watch the end of the hose in the carboy while the other works the end of the hose going into the bottles.
it is my first time making dandelion wine and i have honestly been winging it from like 4 different places to offer a guide. it’s been roughly 3 weeks in the water locked jar and its still bubbling away, fruit and all in the jar.
my questions right now are… do i take the fruit out? do i keep it in? am i supposed to move it to a different jar now? when do i strain my fruit out and not have the sediment at the bottom? how clear is clear? how do i know when the fermentation is done? if i remove the sediment and the fruit, will it still be fermentating?
any and all help is appreciated.
Hi Shannon.
By three weeks, the fruit is probably starting to break down and shed more pectin and debris into the wine, so I’d go ahead and remove it.
I would strain the wine through a mesh strainer lined with a flour sack towel or multiple layers of cheese cloth or even an old cotton t-shirt. (Don’t use anything synthetic.)
If you wish to continue fermenting in the same airlocked container, that’s fine. I would clean it before I put the strained wine back in. If you do not have enough wine to fill the vessel to within 1/2 inch of the top, add a little white grape juice or sugar water to top it off.
Even with straining through cloth, at this point the wine will be somewhat cloudy. As you strain it, you can attempt to leave the majority of the lees (bottom sediment) behind. Some always mixes in, but it will settle out during the second ferment.
As for “how clear is clear” – as the wine ages, the lees settle. Your finished wine should look as clear as any finished commercial wine. When it’s time to bottle, you’ll want to avoid disturbing the lees at the bottom of the bottle, and siphon the wine from the top of the bottle.
The wine will keep aging and changing in flavor as long as it exists. I recommend waiting at least a year to drink it, though some people drink it as young as six months, and we’ve enjoyed some that was over a decade old.
If you remove the sediment and the fruit, yes, odds are it will still be fermenting for a time. Why? Fermentation continues until the alcohol content gets high enough that it kills all the yeast off. The yeast that I recommend in the article tops out at around 12-14%. So, it will keep actively fermenting until that point is reached.
I did this, but I did a third and a large ball container with cheese cloth over the top with the ring holding it down.
For fermentation all it did was like bubble the first day or two and it doesn’t bubble now except when I stirred it bubbles or is like a carbonation type sizzle .
It’s only a week in. I don’t know if I did something wrong. It sure smells like a strong white wine though. LOL
I’m not sure what to do ? if I waited two weeks and just strain it and put it in the other container but concerns me it’s not just sitting there bubbling.
You may not see significant bubbles, but if it smells like wine and you can see bubbles when you stir, odds are you are good to go.
The first flush of fermentation is the most aggressive, while the yeast is feasting on all the readily available sugar. That’s when you get the most bubbles. After the initial all you can eat buffet, fermentation slows down dramatically, but doesn’t stop completely. If you strain and move the wine to a carboy/jar with airlock, you’ll see tiny bubbles appear in the airlock – not bubbles that look like an aerator in a fish tank. These are microscopic yeast burbs that we’re dealing with, not cow farts, so much smaller bubbles.
This is why it can be tempting to go straight to bottles without a balloon or airlock – it looks like nothing is happening. That’s what led to my sister’s bottle explosions. Be patient, and let the little yeast beasties do their thing. As long as it smells alcoholic and not spoiled, you’re on the right track.
Good to know, No it does not smell spoiled that’s for sure .
I strained it again as this was the Mark of two weeks. I put it in a 2 quart ball jar, but it doesn’t go all the way to the top. I’m about 2” shy.
I don’t know if that matters or should I put some water or juice in it?
I’ll say this stuff smells so strong – it smells like super strong white wine , like I don’t even think there’s any sweetness to it at all lol which I really like a sweet wine so I’m going to have to probably mix it with Sprite if I want to enjoy it next year.
The harshness of it mellows with age, but this recipe does lean towards dry rather than sweet. I would add a little white grape juice to fill up your container to within an inch or so from the top. If there’s a big air space at top, sometimes the CO2 doesn’t fill the gap enough to protect the wine properly. You could also try sugar water, say 1/4 cup sugar in 1 cup warm water, like hummingbird nectar, to add some sweetness. It may perk up fermentation for a bit, so you may want to place the jar in a bowl in case it bubbles up and makes a mess.
If you want a sweeter wine with a lower alcohol content, you may want to experiment with natural yeasts in the future. They top out at around 5% alcohol and then die off. We made some natural yeast mead and it was yummy.
Okay, thank you I will add some White grape juice or, do you think pineapple juice would work? I have that I don’t have white grape juice. I have to get some. But I do have some small cans of pineapple juice. Wonder if that would sweeten it up more if that would just make it ferment more ?
And I think somehow I tried to add my last question twice?
White grape juice is generally recommended because it has a more neutral flavor, but if there’s sugar, it’ll work. You’ll have a bit of a pineapple accent to the flavors, but I think that would blend well.
Fermentation is limited by the alcohol tolerance of the yeast. Once you reach the die off point of the yeast (around 12-14% alcohol), it’ll start croaking and stop fermenting. Until then, added sugars will act as yeast food. You may be close enough to that point that some of the sweetness will be retained.
Yes, you entered the last question twice, but that’s not a problem. Because I have comment moderation to avoid the spammers being able to easily post, sometimes people double post, thinking their comment was not accepted. I delete the extras and all is well.
Hi Laurie!
This is my first time making wine, and Dandelion Wine is my favorite book from childhood so I thought I would give it a go. Your recipe is so detailed and I am so excited to get started!
I had a question about this step… I bought a carboy and I see that you used a crock for your process. As I’ve never used a carboy before and I was wondering if I am able to unscrew the top and stir the fruit or if that would ruin the fermentation process. I am happy to take any tips and altered recipe advice for using the wide-mouth carboy!
Here are the steps in particular I was looking at:
“6) Add the yeast, raisins, and orange and lemon slices and rind strips to the liquid. Put everything into a crock (or wide mouth carboy with airlock) to ferment. I cover my crock with a clean cotton towel held down by a rubber band to keep dust and bugs out. (Not shown.)”…
“When the yeast gets active, the bubbles will lift the fruit up to the top of the wine. You want to stir so all the fruit gets pushed back under the surface and wet down daily.”
Thank you again for your help!!
Hi Francesca.
It’s absolutely okay to use a wide mouth carboy instead of a crock when the fruit is in. All my carboys are narrow mouth, so I opt for the crock for this step.
When using a wide mouth carboy instead of a crock, you can either cover the mouth of the carboy with a towel like I do for the crock, or use the lid and airlock. Either way is fine, as long as the CO2 can escape and the bugs and dust are kept out. You do still want to stir while the fruit is in to help keep it well soaked. If the fruit is sticking up out of the liquid, airlock or not, it tends to discolor and may even start molding. It’s not pretty or tasty.
Thank you so much, Laurie, for your wonderful tips! I am excited for the process ahead.
Since I am using a carboy for the primary fermentation, can I also use it for the second fermentation? I just watched your video and wanted to clarify that after I strain the liquid from the primary fermentation (1-2 weeks), I can then put the liquid back into the carboy and let it sit for 4-6 months. Is that correct? Would the wine be clearer and ready to bottle and drink after that stage? Or would I still have to do the “balloon bottle” trick?
I am grateful for your time!
Hi Francesca.
Yes, it’s absolutely okay to strain out the fruit and petals and put the wine back in the same carboy to age. After 4-6 months in the carboy, there should not be a need to balloon the bottles.
Once carboy time is done, we siphon the wine from the carboy directly into bottles, taking care to avoid the lees (settled dead yeast and other sediment) that naturally accumulates at the bottom of the carboy. Then we cork and label the bottles, and store them on their side in a cool, dark location. (Storing on the side keeps the corks damp so they don’t dry and shrink and let air in that could spoil the wine.)
The wine is ready to drink at about a year (it’s safe to drink it sooner, but the flavor will be more “foxy”). We’ve aged some up to 15 years, and it just gets smoother with time.