How to Make Challah Bread – Step by Step Photos and Braid Video
This post may contain affiliate links. Read my full disclosure here.
This is a guest post by Lady Lee of Lady Lee’s Home.
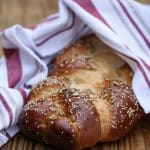
Challah is the traditional Jewish Sabbath bread, rich with eggs and oil, and a bit sweet. While commonly served as an oblong braided loaf, on Rosh Hashanah, round challah is served to symbolize eternal life.

Every Friday, I bake challah bread for our Friday night dinner. It never gets old. Challa is amazing with anything. You can top it with savory spreads like pesto or salted butter, you can top it with sweet spreads like honey or Nutella. You can clean whatever sauce is left on your plate at the end of a meal with a handful of challah, or you can make a mean french toast with it in the morning. Bottom line – if you never made challah, it’s time to give it a try. You’ll love it!
Measuring your Challah Bread Ingredients with a Scale
A couple of months ago, my aunt came from Israel for a visit. She is a baker and I was a goner. I gained approximately 17 lb in a week, but it was a great week! We spent some time in the kitchen together and she showed me a few tricks of the trade.
One of them I especially liked because its result is only one dish to wash.
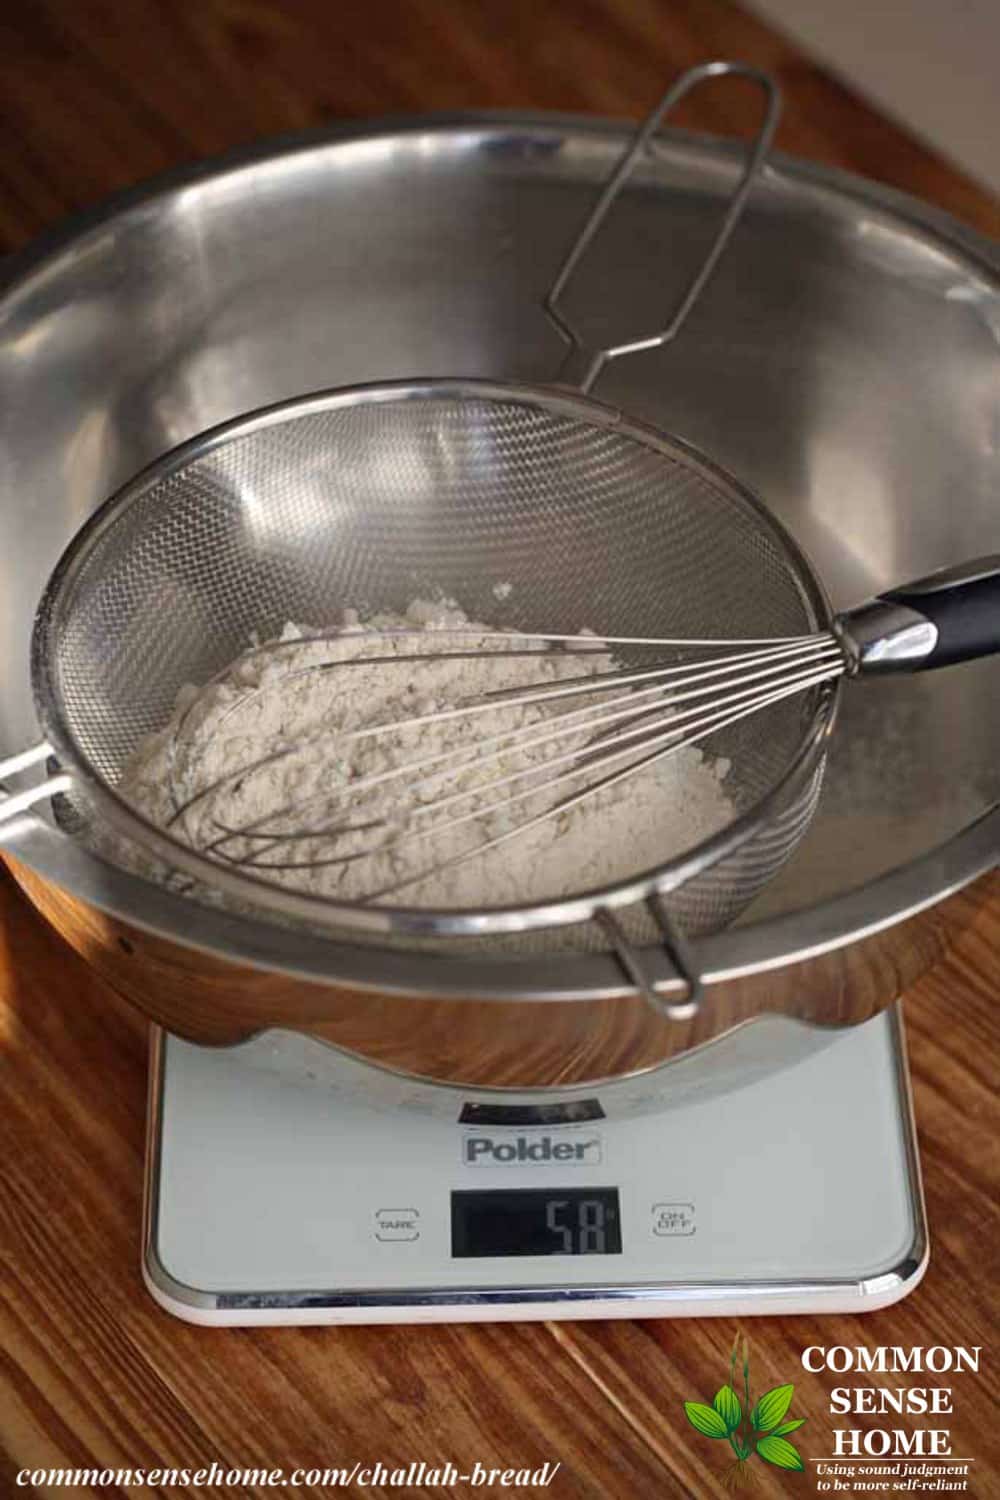
Instead of using measuring cups and spoons, we used a simple kitchen scale to measure all of the ingredients. I know it might be a bit hard to comprehend because here in the US we are so used to recipes with cups and tablespoons measurements, but try to keep an open mind.
First, quantities are much more accurate when you weight. This way, professional bakers can assure that they get the exact same bread each time.
Second, if you make large quantities you don’t have to have many measuring cups and spoons, or wash and dry them all the time. There is just one big bowl and that’s it.
So you place a large bowl on the scale and zero it by pressing the TARE button. Then sift one kilogram (=1000g) of bread flour into the bowl. I will list the recipe bellow in grams, but also cups and spoons if you prefer it that way better.
Challah Bread Recipe
To sift the flour, I use a large mesh strainer and a whisk. Hold them above the bowl and move the flour around until you sift enough of it into the bowl.
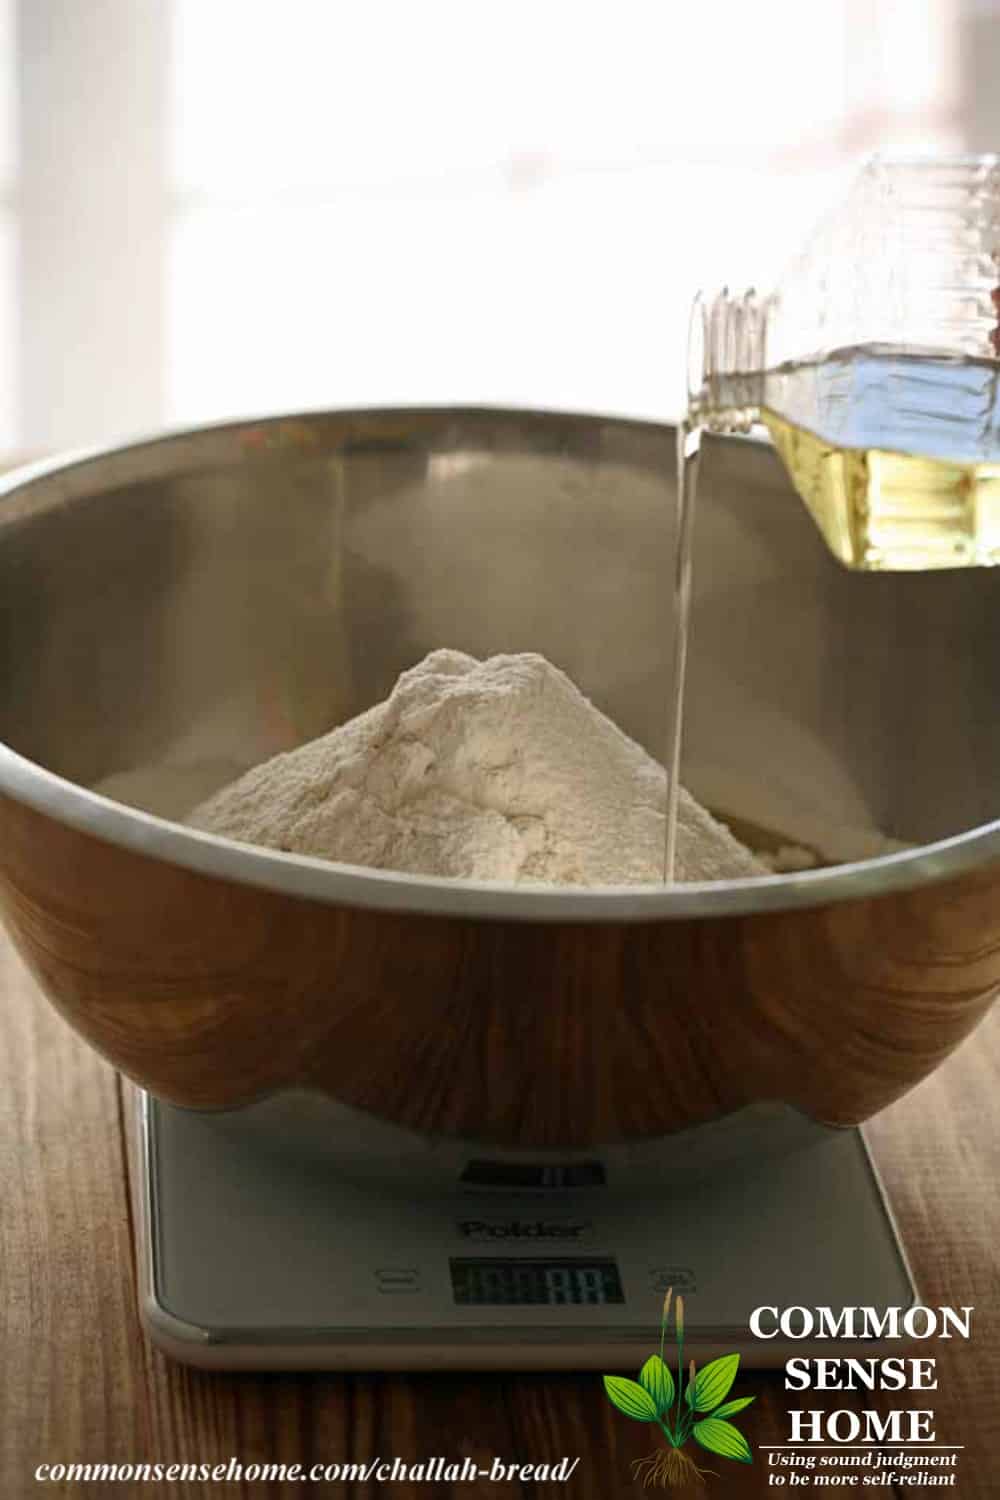
Zero the scale before adding each successive ingredient. Add 100g of canola oil, 100g of sugar, 20g dry yeast and 20g salt. Add 2 large eggs.
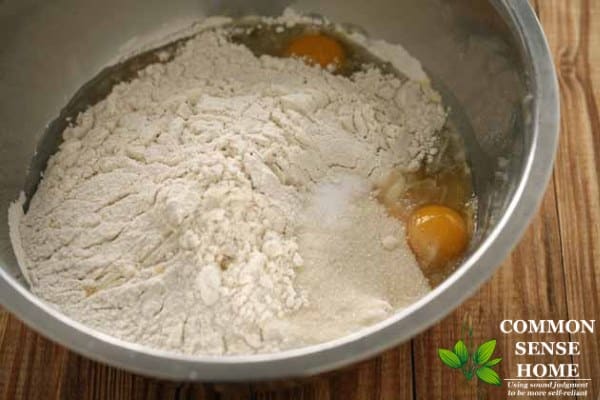
Once you have all of the ingredients in the bowl, you are ready to start adding the warm water.
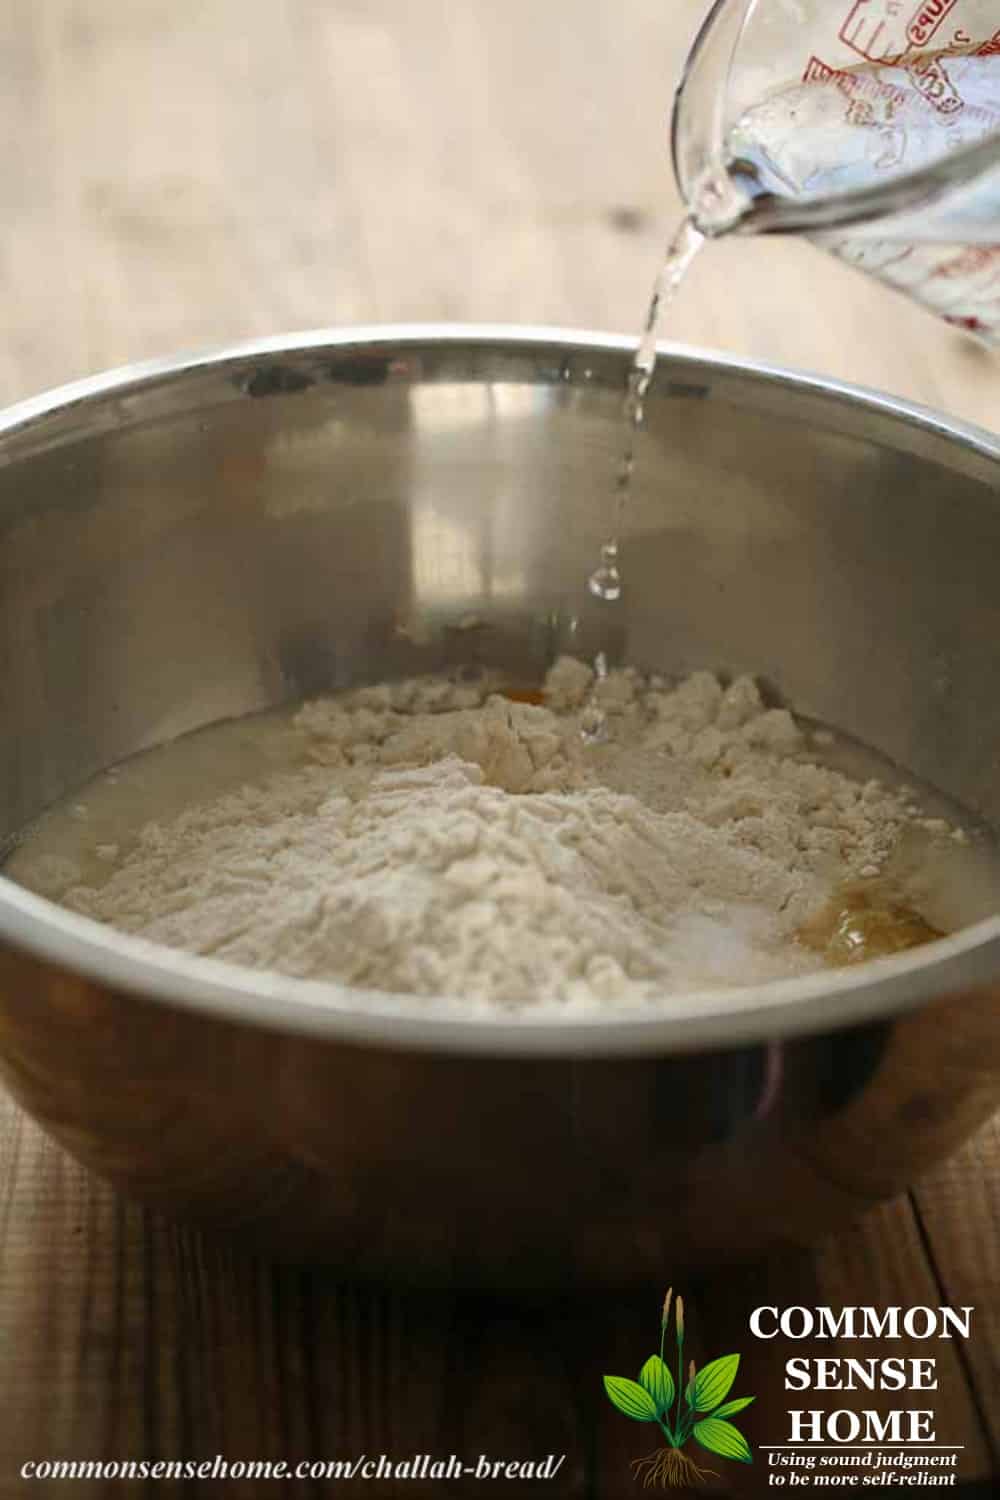
Don’t add all the water at once. I add a cup of water, start working the dough with one hand, and gradually add the second cup, until all the ingredients come together.
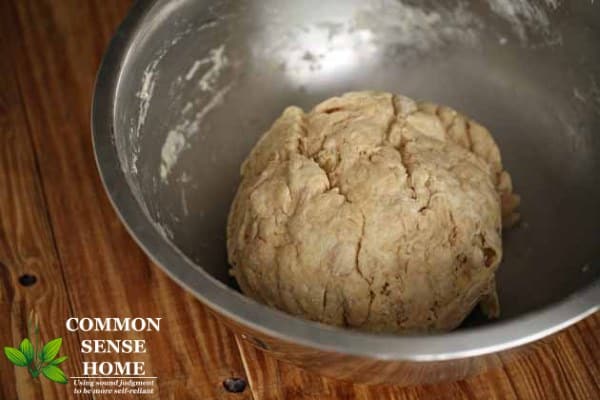
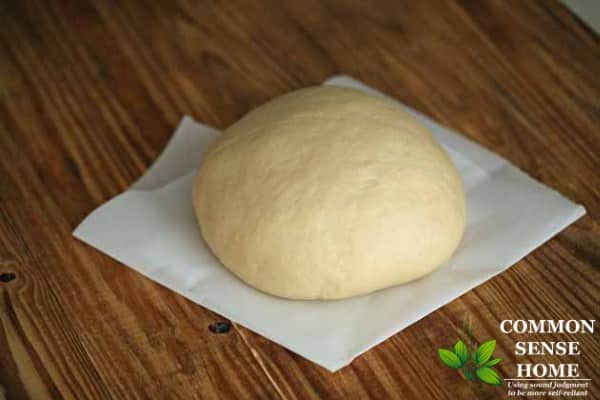
I then transfer the dough to a lightly floured work surface and knead for about ten minutes until it is smooth and elastic. Form into a ball of dough.
By the way, you can do the same thing in a stand mixer with a dough hook if you prefer using one. Place all the ingredients in the mixer bowl, add a cup of water, let it start mixing slowly, then gradually add the second cup of water. Once a ball of dough is formed, raise the speed a bit and let the mixer knead the dough for 8-10 minutes.
Would you like to save this?
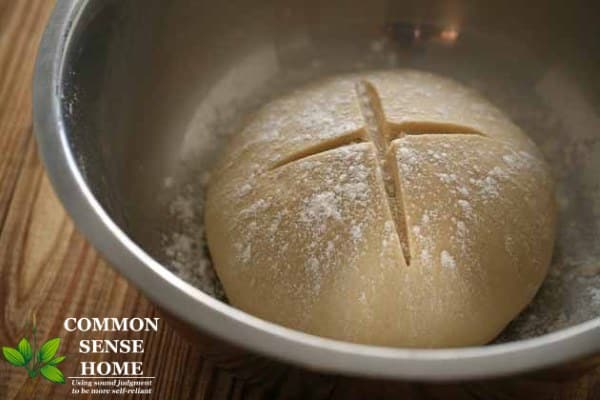
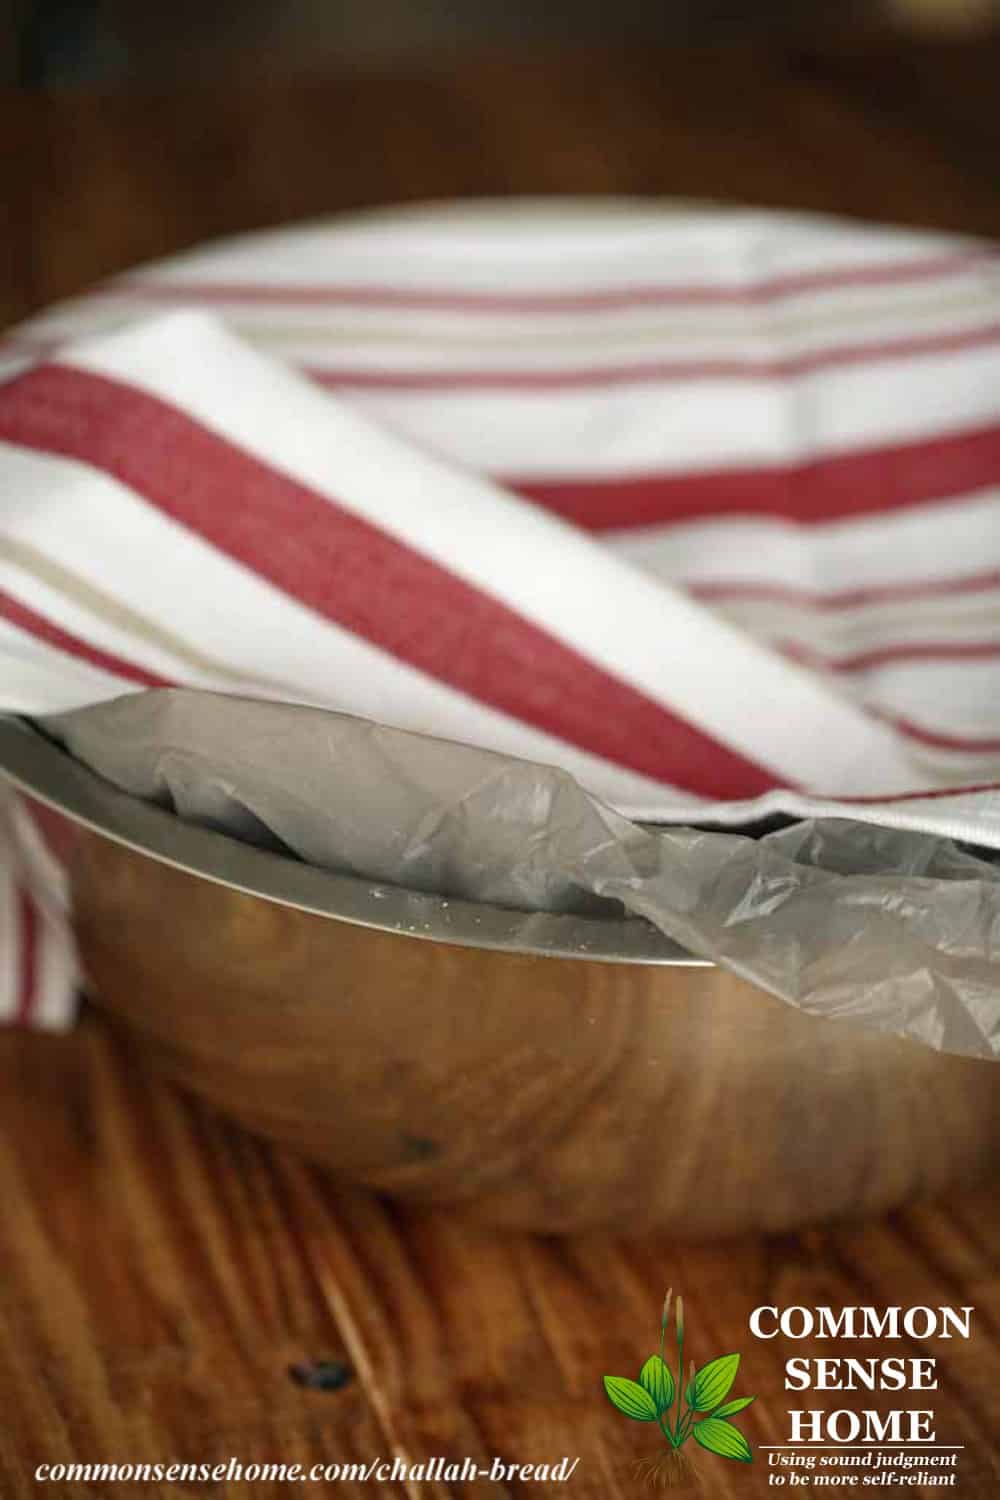
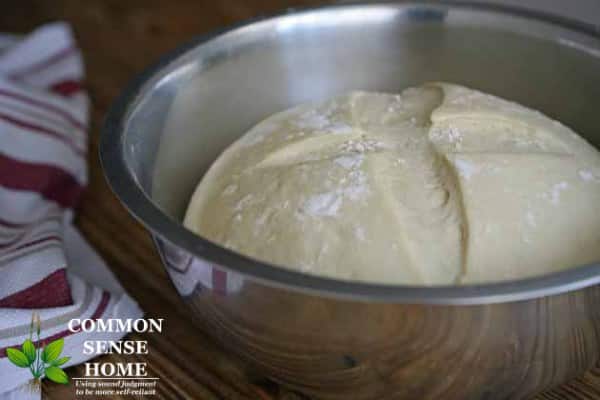
Place the dough back in the bowl and with a sharp knife, cut an X at the top. This will help the dough rise quickly. Dust it with a bit of flour and cover with a plastic wrap and a kitchen towel. Place it in a warm location for about 30 – 40 minutes. Let rise until doubled in size.
After 40 minutes, it should look like the dough below.
Making the Challah Bread Braid
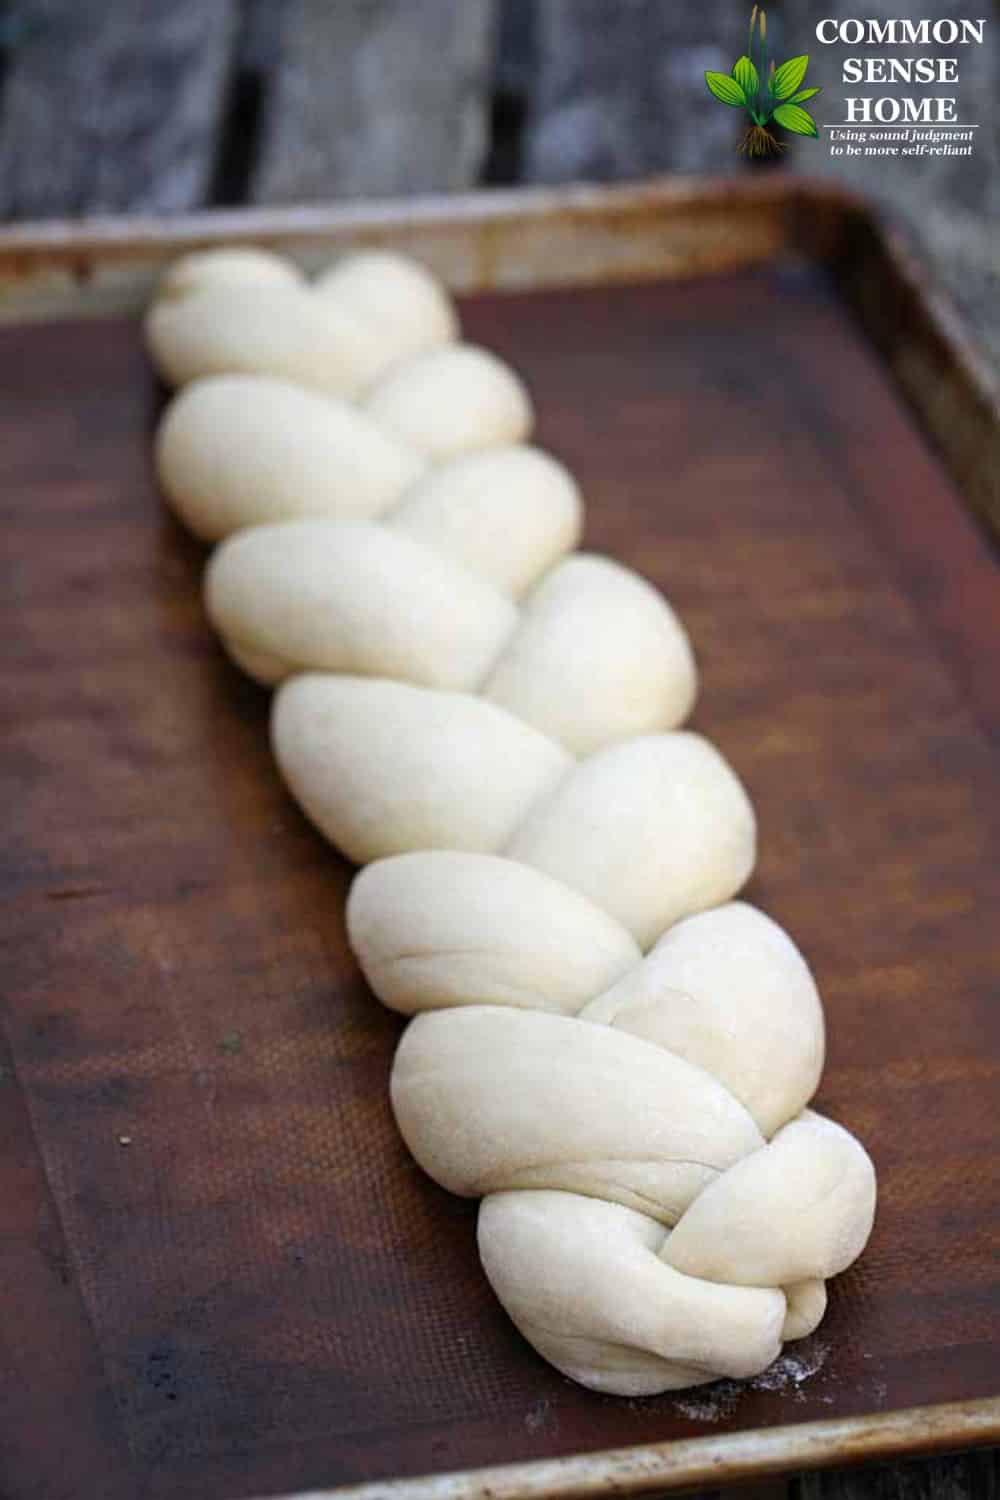
Divide the dough into two to make two large loaves. After dividing the dough into two parts, divide each of the parts into three. Roll each part into a strand and braid, as demonstrated in the video below. You can divide it more if you want to make smaller loaves or even small buns. (Reduce baking time as needed for smaller loaves.) Visit “5 Ways to Braid Challah Bread” for more braiding tips.
Set the braided loaf on a baking sheet and cover with a kitchen towel. Let it rise until doubled in size, about 45 minutes.
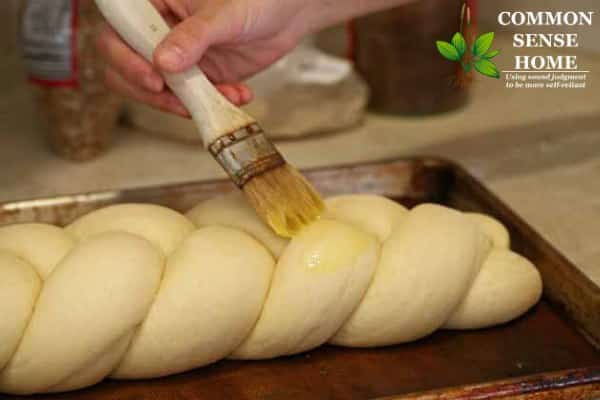
After 45 minutes, warm the oven to 350°F. Beat one egg and brush the challah gently…
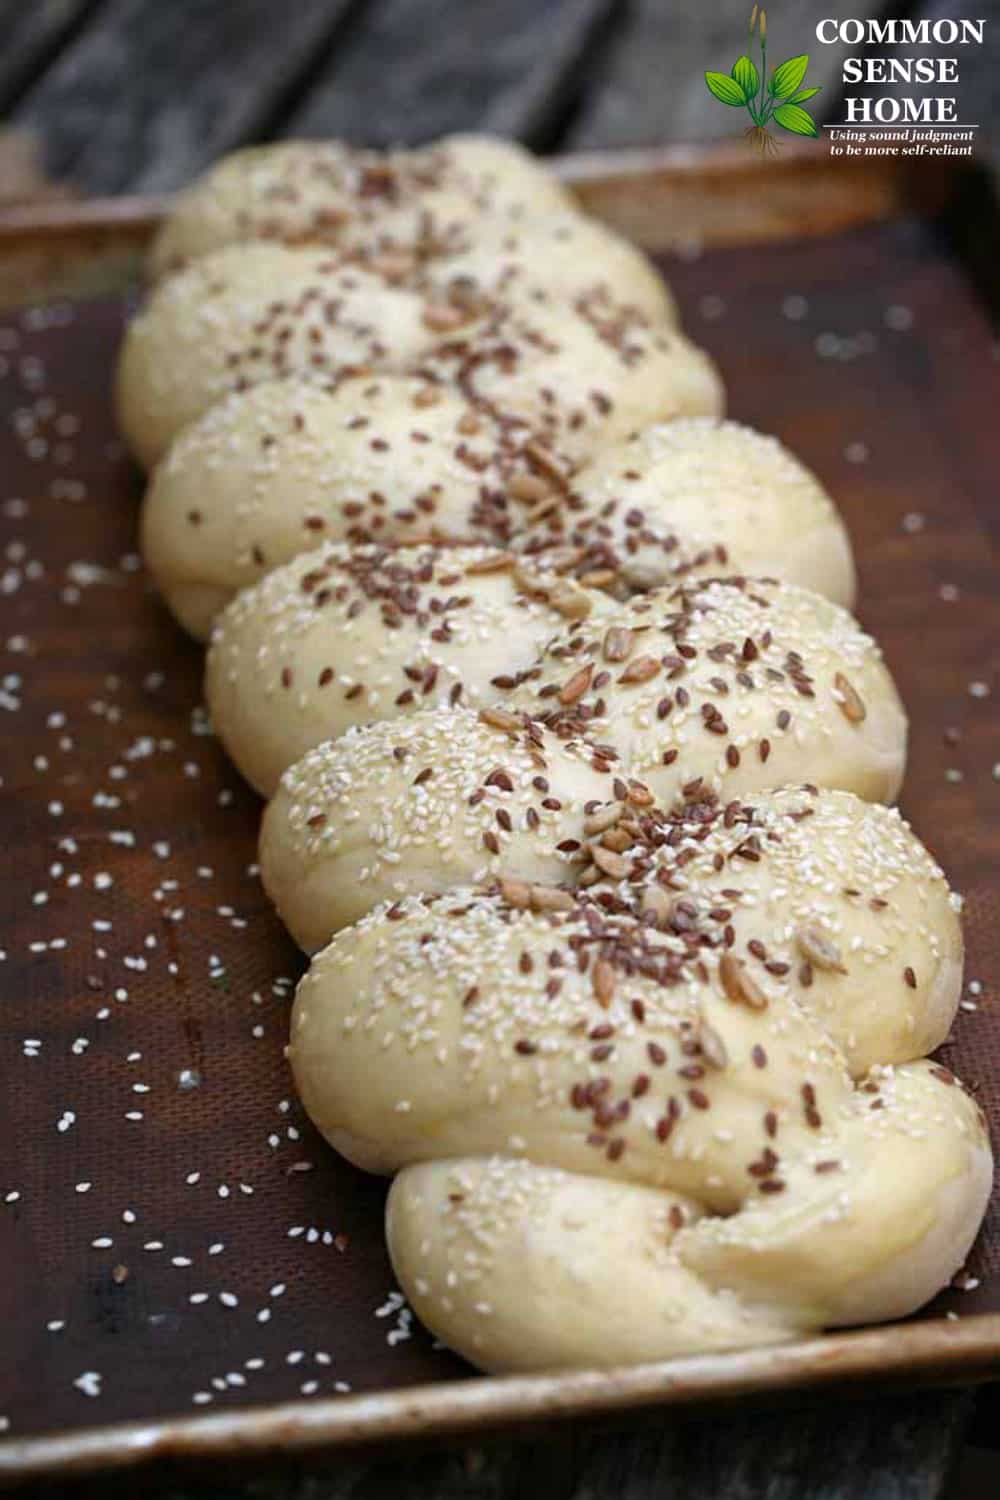
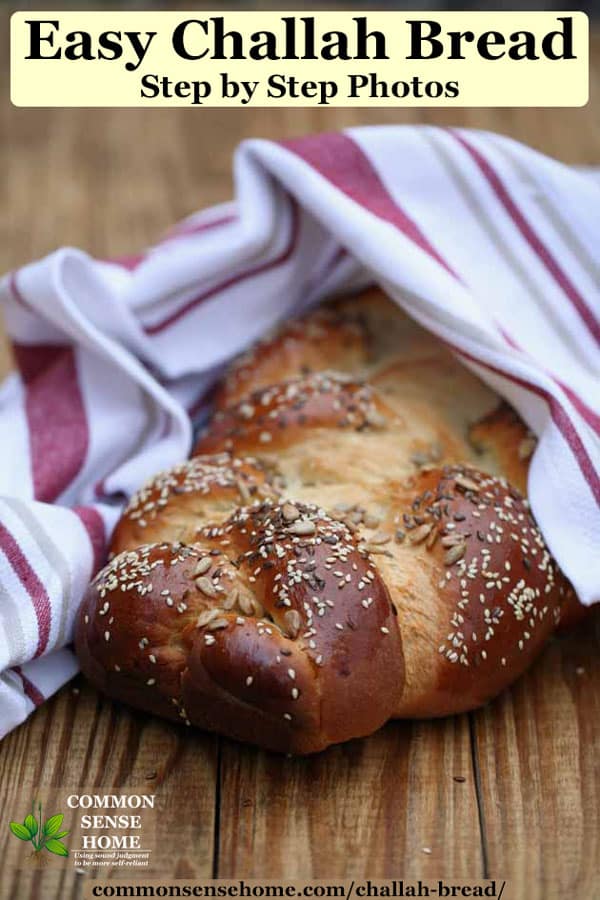
Top it with whatever seeds you want. Here I used sunflower seeds, sesame seeds, and flax seeds. Bake for 35 minutes or until golden.
Don’t try to resist the challah when it is out of the oven. Grab a piece, spread some salted butter on it, and enjoy. This is why we made two – one loaf of bread to enjoy immediately. and a second one that can stay nice and whole for dinner. The first one will probably be gone by then, especially if you have kids… or Nutella in the house.
Challah Bread
A rich and delicious bread that pairs well with sweet or savory topping or soups and stews. Makes a great French toast.
- Prep Time: 2 hours
- Cook Time: 30 minutes
- Total Time: 2 hours 30 minutes
- Yield: 2 loaves 1x
- Category: bread
- Method: baking
- Cuisine: bread
Ingredients
- 1 kg Bread Flour (7 Cups)
- 20 g Dry Yeast (1 1/4 Tablespoon)
- 2 Large Eggs
- 100g Canola Oil (3/4 Cup)
- 20g Salt (3 Teaspoons)
- 100g Sugar (3/4 Cup)
- Approximately 2 cups of Water
Instructions
- Sift bread flour into a large bowl.
- Add the rest of the ingredients except the water. Stir.
- Start adding the water a little bit at a time while working the ingredients into dough.
- Transfer the ball of dough to a floured work surface and knead for 8-10 minutes.
- Set the dough back in the bowl, cover with a plastic bag and a kitchen towel and set aside to rise for 40 minutes.
- Uncover and transfer the dough to a work surface.
- Divide the dough, braid as you wish and place on a baking sheet.
- Set aside, cover and let rise about 45 minutes.
- Brush with egg and sprinkle with seeds.
- Heat oven to 350°F. Bake 30-50 minutes depending on the size of the loaves.

This is a guest post by Lady Lee of Lady Lee’s Home. Lady Lee is a wife and a mother with a soul of a farmer and a passion for homegrown and homemade everything. She was born in Israel and raised in a small agricultural commune called kibbutz, where everything was grown, made and shared. Her family lives on a small North Carolina homestead. She can’t shut up about the garden, farming is her dream, she is very curious about food and home remedies, and loves her family’s DIY adventures. Those things are what she blogs about at Lady Lee’s Home.
More Delicious Homemade Bread Recipes
Did you know Common Sense Home has over 100 made from scratch recipes on the site, including over a dozen bread and cracker recipes? (Plus over 20 homemade jams and jellies.) You can find them all, listed by category, on the Recipes and Kitchen Tips page.
Some of my favorites include:
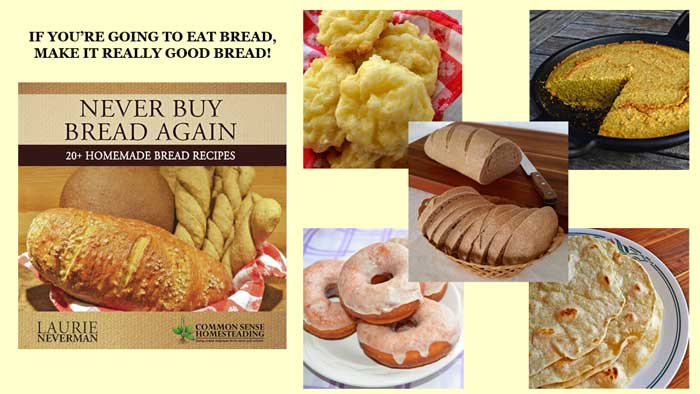
I also have a recipe book available titled, “Never Buy Bread Again – 20+ Homemade Bread Recipes“. This book features a wide array of breads, from basic sandwich bread to quick breads to sourdough, plus troubleshooting and storage tips. Several of the recipes are also featured on our youtube channel, so you can bake right along with me (Laurie). The book is available in print and ebook formats. I taught my sons to bake when they were around 10 years old, and I can teach you, too.
Not sure you want to take the time to bake your own bread? Check out some of the not-so-nice ingredients in commercial breads. The book also includes some gluten free breads, for those who are avoiding gluten. I dedicated the book to my mother, who passed away in 2010. She loved to bake, and always welcomed everyone to her home with delicious baked goods. I don’t bake quite as much as she did because I have a smaller family, but I figure if you’re going to eat bread, you should make it really good bread!
Originally posted in 2015, updated in 2018.
I respect and appreciate how you present recipes. You explain the “why” behind a recipe process. I started weighing ingredients because of someone’s suggestion in a recipe. It is accurate and simplifies the process for consistent results. I will make this bread