Before You Plant Sunchokes, You Need to Read This Post
This post may contain affiliate links. Read my full disclosure here.
Sunchokes (AKA Jerusalem artichokes) are gaining popularity for their health benefits. Learn how to grow sunchokes, when to harvest and how to use them – plus the big mistake that we made when we first planted them.
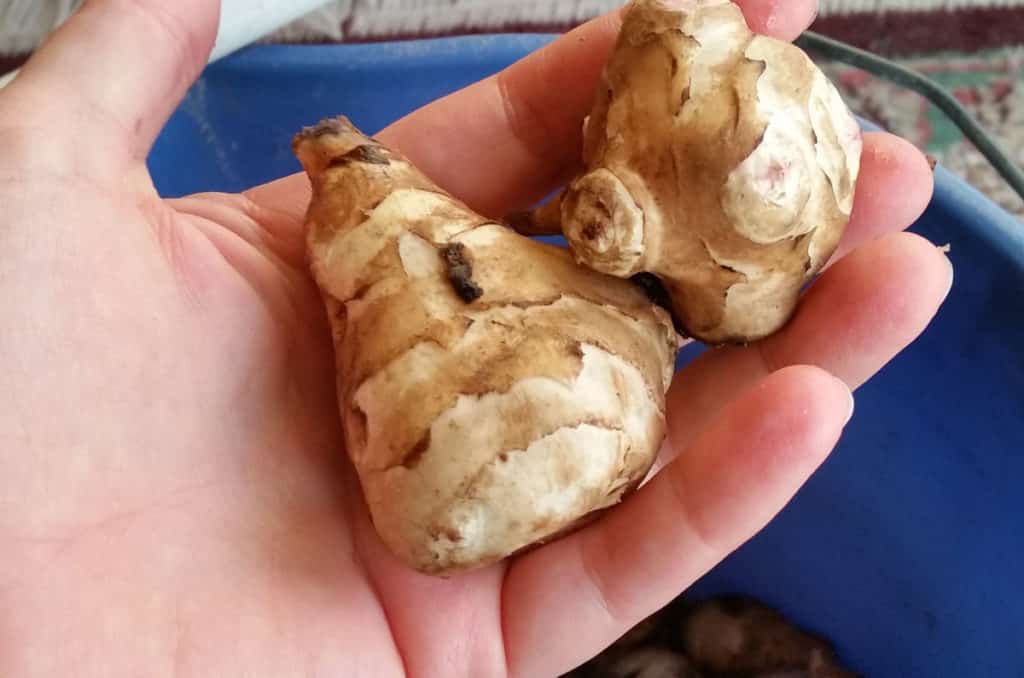
What are sunchokes?
Sunchokes are native to eastern North America. They are also known as Jerusalem Artichokes or Sunroots. They are not related to Artichokes, but they are related to sunflowers. The whole “Jerusalem” thing is supposedly linked to the Italian word girasola, which means sunflower.
Sunchokes are a perennial plant that grows six to ten feet tall. While they do have pretty yellow flowers, they are grown for their edible roots. Their roots are high in inulin (more on that below), and can be used raw or cooked.
Historically, sunchokes have been a valuable food source in Native American culture, especially during late winter when storage runs low and spring crops are not yet available. (See Full Moon Feast for more on yearly eating cycles.)
How do you Grow Sunchokes?
Sunchokes are grown from roots or sections of root, typically planted in spring or fall while roots are dormant. (Order sunchoke tubers here.)
For best results, use the following planting guidelines:
- Sunchokes prefer loose, well-drained soil, but will tolerate poor soils. (Lighter soil makes harvesting easier.)
- Space sunchoke tubers 12 to 18 inches apart, 4 to 6 inches deep.
- Space rows 4-6 feet apart (they will be prone to spreading).
- Soil temperature at planting should be at least 50F.
- Plant in full sun
- Do not plant in areas that are consistently wet, as wet soil will rot the tubers. Plants are drought tolerant, but produce best will a regular supply of water.
- pH of soil best between 5.8 and 6.2 (neutral soil)
- Preferred growing temps = 65 to 90 F.
- Cover your soil with an inch or so of organic mulch for easier harvesting and root protection.
- Plant in a dedicated bed that can be mowed around for control, or sink barriers into the soil around the sunchokes at least 24 inches deep to prevent spreading. (More on this below.)
When are Sunchokes Ready to Harvest?
Sunchokes are harvested in late fall or early spring. They require 110 -150 days to maturity, depending on the variety and growing conditions. Light frost increases the sweetness of the tubers.
Unlike potatoes and some other root crops, sunchokes cannot be cured and stored. They have a thin skin and dry out easily. I have kept them in container in the refrigerator for a couple of weeks. They keep best in the ground, dug as needed for use.
In northern areas, a thick layer of mulch may keep your sunchokes accessible longer, but may also encourage mice or voles to move in and have a snack.
For bigger roots, make sure your plants don’t get too crowded, and ensure they get watered regularly. You can also cut off flower stalks to encourage root growth. Please don’t cut off all your sunchoke flowers! They flower late in the season, when flower choices are limited for pollinators.
How do I Eat Sunchokes?
Sunchokes are edible raw or cooked, including the skins. They are difficult to peel and turn grey quite quickly, so a good scrubbing is a better option.
Raw, sunchokes are similar in texture to a water chestnut or jicama. After a light frost, they take on a somewhat nutty flavor. For my part, they taste best raw after a frost.
To help prevent browning of sliced sunchokes, soak the tubers in a mix of 2 tablespoons lemon juice (or ¼ cup vinegar) and one quart water.
Sunchokes need to be treated as their own vegetable. Boiled and mashed – plain awful; in a stir fry, tasty. There are entire websites devoted to sunchoke recipes, but here are a few easy options for you to try.
- Baked sunchokes – Bake well-scrubbed tubers at 350F for 30-40 minutes, until fork tender. Toss with a bit of oil and seasonings before baking for extra flavor.
- Sunchoke stir fry – Substitute sunchokes for water chestnuts in your favorite stir fry recipe.
- Steamed sunchokes – Steam whole sunchokes for 10-15 minutes. Shorten steaming time if cubed or sliced. Serve with butter and a sprinkle of parsley, or a dash of lemon and dusting of nutmeg.
- Sunchoke chips – Thinly slice sunchokes and drop into hot oil. Fry chips until lightly browned and drain on a paper bag. Salt and season warm chips to taste.
Do Sunchokes Cause Gas?
Sunchokes are loaded with inulin.
Inulin is a type of starch that although not digestible by humans, acts as a prebiotic in the digestive tract, feeding our beneficial bacteria.
It’s become a widely use filler in many foods to bump up the fiber counts. It also increases calcium absorption in the body, and doesn’t spike blood sugar. (See the book “Perennial Vegetables” for all the dirty details.) There are even sweeteners made for diabetics made out of sunchokes.
Some sources claim that eating a large amount of sunchokes may lead to mild gas for those who are not used to it. They have even been nicknamed, “fartichokes”.
I can testify that eating a large portion of boiled sunchokes will give you horrible, gut-racking gas like you have never experienced before…well, except for that one time when you were pregnant and thought it was a good idea to eat prunes, cheese curds and cucumbers in large amounts all at the same time.
Start slowly when eating sunchokes, and perhaps avoid serving them in large quantities at dinner parties. Give your digestive system time to build up the right bacteria to deal with the extra inulin.
Readers have suggested a couple of different tips to beat sunchoke gas. One suggested that you eat some sunchokes raw, and don’t scrub all the dirt off.
I assume that some soil microbes come with to help aid digestion. Another reader says that harvesting after frost is a big help, as the frost naturally breaks down some of the inulin for you.
A Word of Caution About Growing Sunchokes
“Easy to grow” and “disease-free through heat and drought” are code words for “You will Never Get Rid of this Plant!”
When I first planted sunchokes, I skimmed over the note in the seed catalog that said “they will spread and may be invasive”.
I planted my tubers late in spring, in one corner of a garden bed. There were nine rather wrinkled little roots, and I didn’t think they would all survive. Not only did they survive, they thrived. We tried to harvest the whole patch that first year, but must have missed a few.
The next spring they were back, and they were spreading. We tried to keep up eating them, but the fall was muddy and we couldn’t get into harvest.
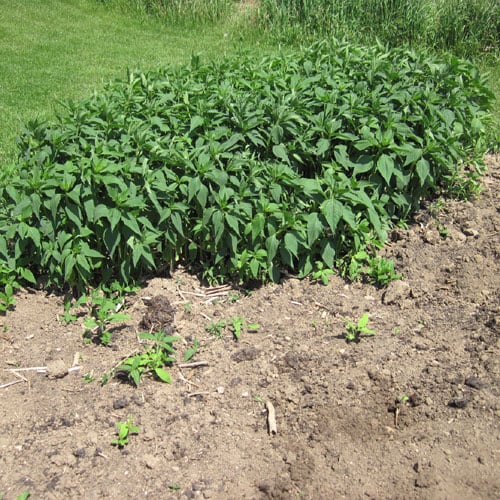
By the third season, we had the lovely thicket of 12 foot tall flowers you see at the post. As I was digging them in fall, I tossed some damaged roots off into the tall grass away from the garden.
Would you like to save this?
Sunchokes Spread from the Smallest Bit of Tuber
Fast forward to spring. Those root bits haphazardly thrown into the weeds – they’ve now sprouted into plants. There’s a new sunchoke colony.
I decide I need to get rid of some of the sunchokes, and invite anyone who would like some to come dig them. Two friends come over.
Four different adults attack the patch. Bushels and bushels of sunchokes are hauled out of the garden. The patch size is reduced roughly by half to start the spring.
Time passes. The bed is worked up again by my boys. They remove more sunchokes from the same area that the adults have already gone over.
Before I put the transplants in, I work over the same area one more time. THERE ARE STILL SUNCHOKES COMING UP! This area has been gone over by four adults and two kids, and there are still sunchokes hiding in the dirt.
Here’s the main patch. You can see the smaller outliers in the foreground. That area should be clear.
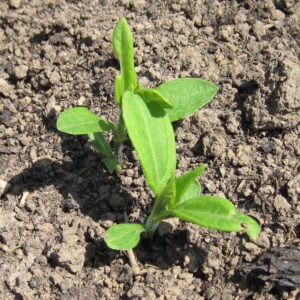
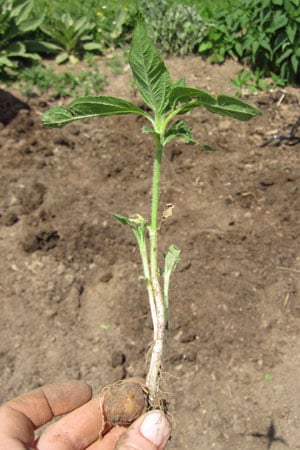
Here’s a nice, innocent looking sunchoke seedling.
Once we dig it up, we see that this single tuber is trying to regrow an entire sunchoke thicket.
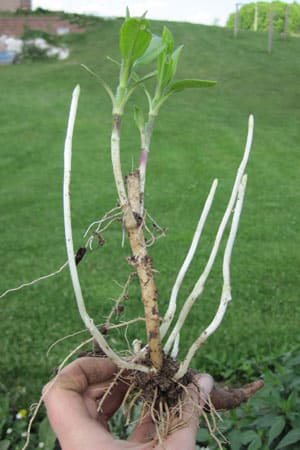
Even tiny pieces, no bigger than the tip of my thumb, can regrow entire large, vigorous plants.
They’re virtually unstoppable. Weeks later, and I’m still digging up shoots from among my cabbage seedlings.
Plan Ahead with Your Sunchoke Plantings
I urge you, do not plant sunchokes in a standard garden bed, or field, or anywhere else you might like to grow other plants at some time in the future. You will spend very large amounts of time attempting to remove them if you do.
Plant them in their own area that can be mowed around, to keep them under control. You can also plant them in pots – as long as they are big pots. Try one tuber per 18 inch diameter pot.
My neighbor says her horseradish plants are the same way. Plant both at your own risk. Maybe they should be planted next to each other, to see which one wins.
Alternatively, introduce pigs or chickens into your sunchoke area and let them tackle clean up duty. Jerusalem artichokes make a fine fodder crop.
Sunchokes are good for you. They look pretty, taste okay, and are quite expensive to buy in many areas, if they are available at all.
They’re a “perfect” choice for a new exotic vegetable to try. I just wanted to let you know that you’re likely to have a lifetime commitment with them once they enter your garden. Don’t say I didn’t warn you. 😉

Are there any other plants you’ve grown that want to take over your garden?
Leave a comment to warn other gardeners before they end up fighting them, too.
Also, if you could include in your comments roughly what area you are from, that would be great. Some plants will spread in some locations but not in others.
Originally published in 2012, updated 2017.


