
How to Make Pear Wine – Easy Homemade Recipe

This post may contain affiliate links. Read my full disclosure here.

When life gives you an abundance of ripe pears, why not turn some of them into homemade pear wine?
This old-fashioned pear wine recipe uses fresh pears, raisins, sugar, and yeast to make a flavorful country wine. You don’t need expensive equipment or a collection of winemaking additives. A large crock or food-safe bucket, a few basic kitchen tools, and some patience will get you started.
One of the things I enjoy about making country wines is that every batch is a little different. The sweetness of the fruit, the yeast, and the fermentation conditions all influence the finished wine. That’s part of the fun. You’re capturing a little bit of the harvest to enjoy months later.
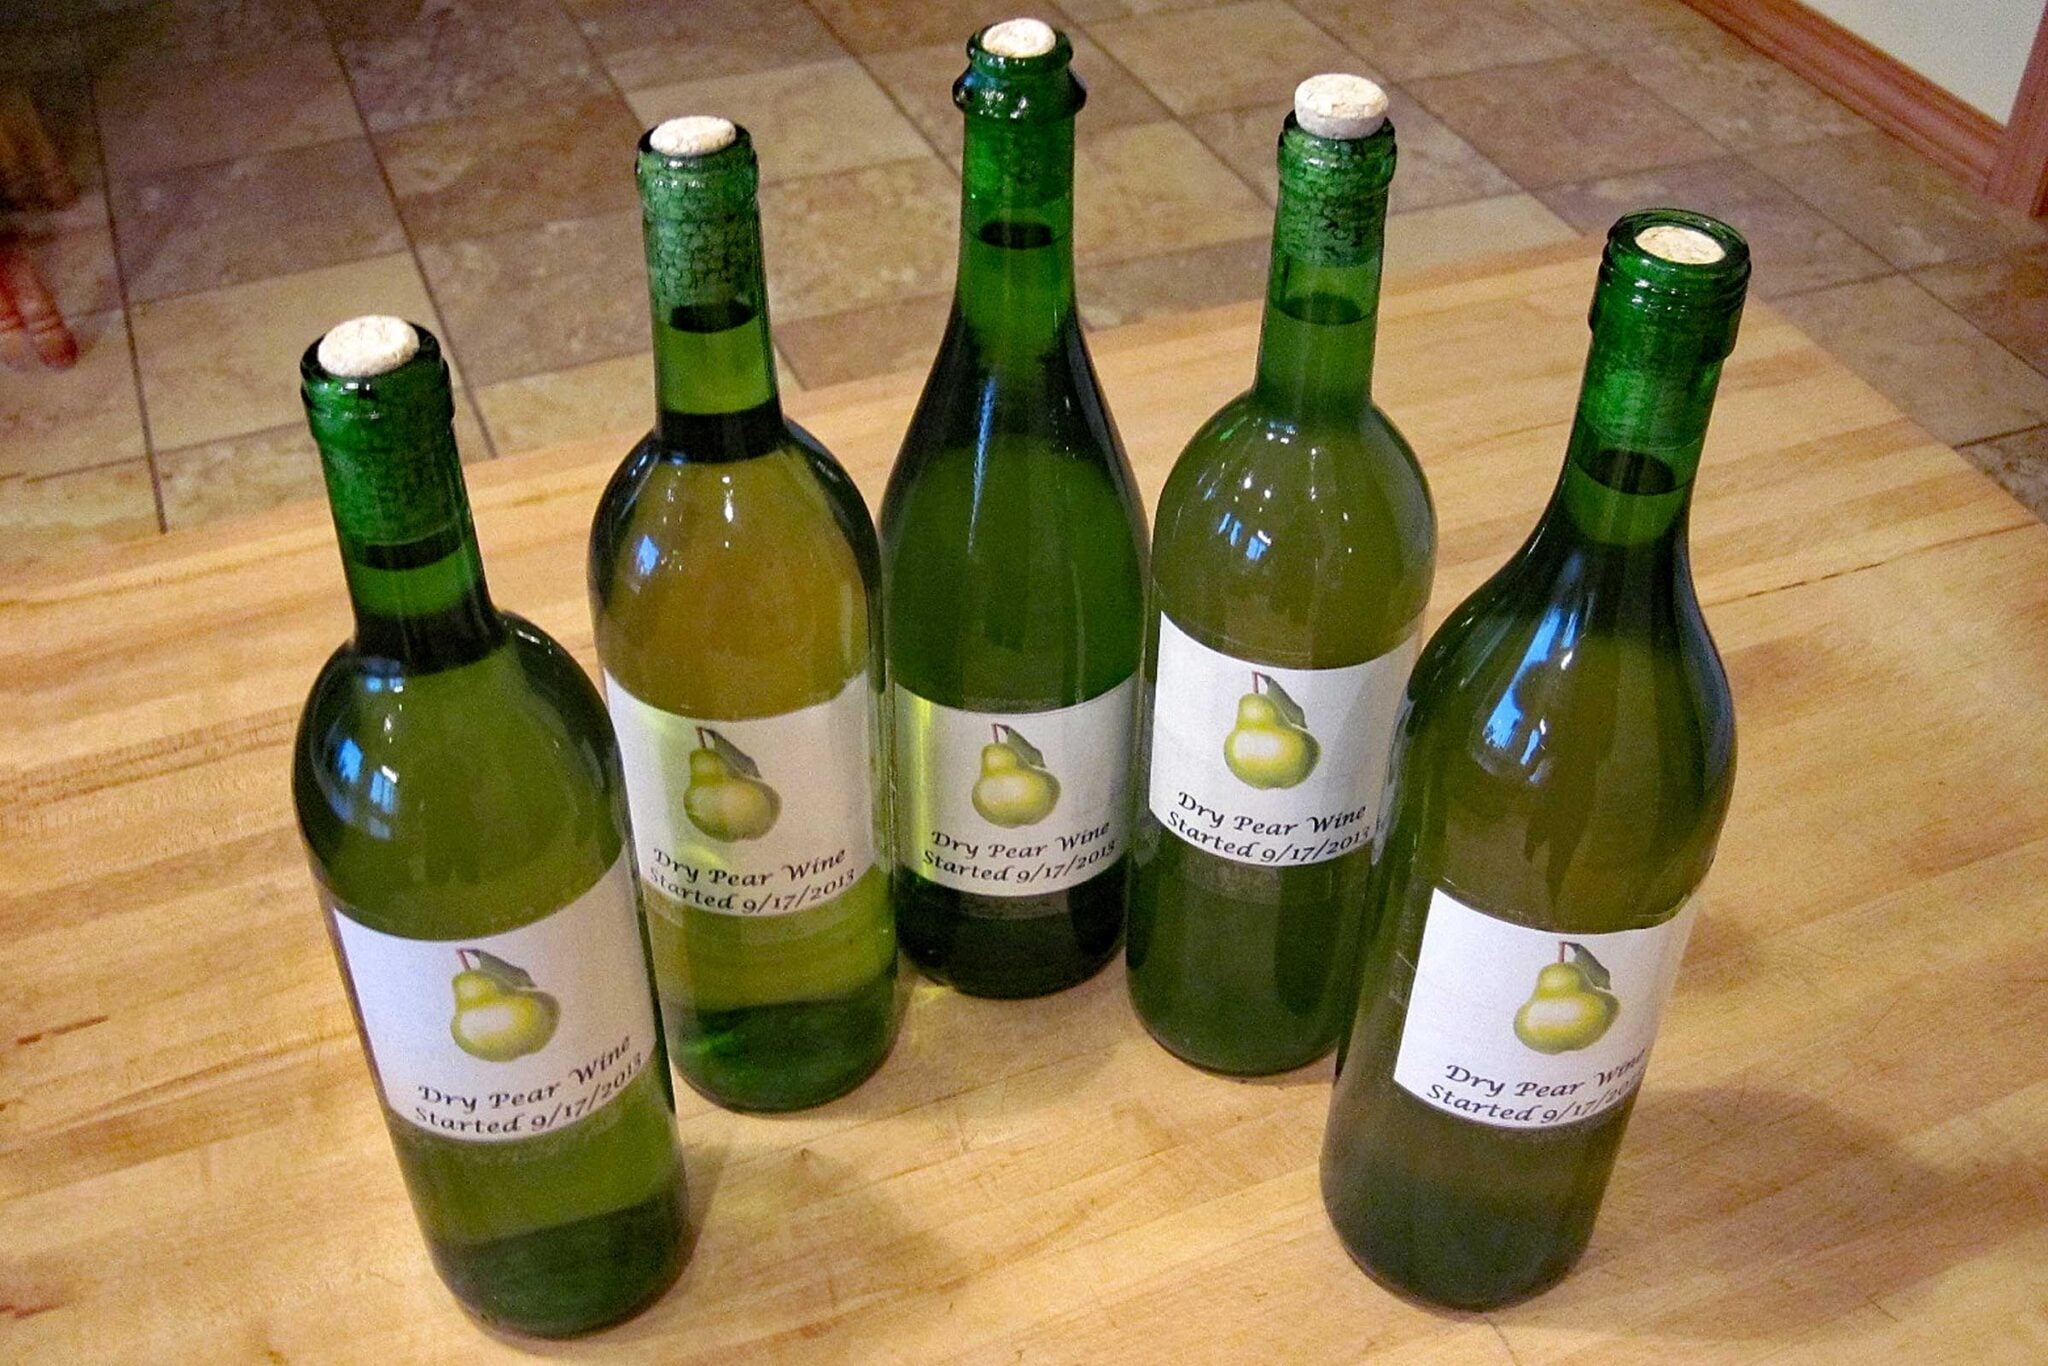
Table of Contents
Homemade Pear Wine at a Glance
- Yield: Approximately 1 gallon, depending on how much liquid you recover from the fruit
- Flavor: Delicate pear flavor, ranging from dry to slightly sweet
- Best pears: Fully ripe, fragrant pears
- Preparation: About 30–45 minutes
- Primary fermentation: 7–10 days
- Secondary fermentation: Several more weeks, or until fermentation finishes
- Aging: Ideally 6–12 months
This recipe is adapted from “How to Make Wine in Your Own Kitchen” by Mettja C. Roate. It’s an older book that focuses on making wine with everyday ingredients.
For a more recent book on country wines, check out “Wild Wine Making” by Richard W. Bender. It features pear wine, blueberry-pear wine and pear-black currant wine, along with 142 other fun recipes.
Ingredients for Homemade Pear Wine
- 4 quarts chopped, unpeeled ripe pears (about 5 pounds)
- 3 cups white or golden raisins, chopped
- 5 cups cane sugar
- 1 cup light brown sugar
- 4 quarts water
- 1 packet wine yeast
- 1 teaspoon yeast nutrient (optional)
What Kind of Pears Make the Best Wine?
Use ripe pears with good flavor and fragrance. Bartlett, Bosc, Seckel, and other varieties can all make good wine. Pears ripen best after picking, so give firm fruit time to soften before using it. The fruit should be sweet and fragrant, but not rotten.
You can use pears with minor bruises or blemishes, as long as you trim away the damaged areas. Discard moldy fruit. Leave the skins on for extra flavor, but remove the stems, cores, and seeds.
Simple Equipment for Making Pear Wine
You probably already have most of what you need in your kitchen.
- Large crock or food-safe fermentation bucket (2-3 gallons)
- Knife or potato masher for preparing the pears
- Stockpot for dissolving the sugar
- Clean flour sack towel or other breathable cover
- Jelly bag or fine strainer
- Clean glass jug or carboy for secondary fermentation
- Airlock and stopper
- Food-safe tubing for transferring the wine (helpful, but not essential)
- Clean wine bottles and corks
I use a crock for the first stage of fermentation. The fruit and liquid need plenty of room because the mixture foams and bubbles as the yeast gets to work. Avoid aluminum or other reactive containers.
Table could not be displayed.A word about cleanliness: You don’t need to turn your kitchen into a laboratory, but you do want clean equipment. Wash everything thoroughly and rinse well.
An airlock is one piece of inexpensive equipment I recommend. It allows fermentation gases to escape while helping keep fruit flies and excess air out of the wine.
How to Make Pear Wine
This recipe is forgiving. Just keep things clean and let the yeast work its magic.
1. Prepare the Pears
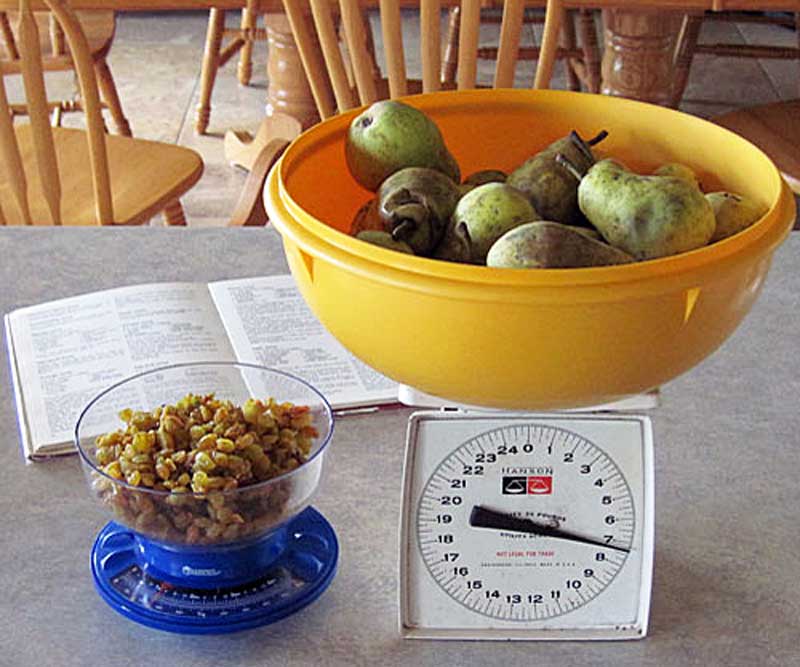
Wash the pears, remove the stems and cores, and trim away any damaged spots. Leave the skins on. (No seeds – pear seeds are bitter and can give the wine an off flavor.)
Finely chop or crush the pears. A potato masher works well with very ripe fruit. Place the prepared pears and chopped raisins in your fermentation crock.
2. Make the Sugar Syrup
Combine the cane sugar and brown sugar with two quarts of water in a large stockpot. Heat gently, stirring until the sugar dissolves. Bring to a boil, then remove from the heat and allow the syrup to cool.
Add the remaining two quarts of water to the pears and raisins, followed by the cooled sugar syrup. Stir everything together.
3. Add the Yeast
When the mixture has cooled to room temperature, add the wine yeast and optional yeast nutrient according to package directions. Stir well.
Cover the crock with a clean flour sack towel, securing it firmly around the rim. I use an old elastic headband to hold mine in place. Fruit flies love fermenting fruit, so make sure the cover is secure.
Set the crock somewhere out of direct sunlight, where the temperature stays reasonably comfortable. Around 65–75°F is suitable for many wine yeasts, but check the recommendations for your particular yeast.
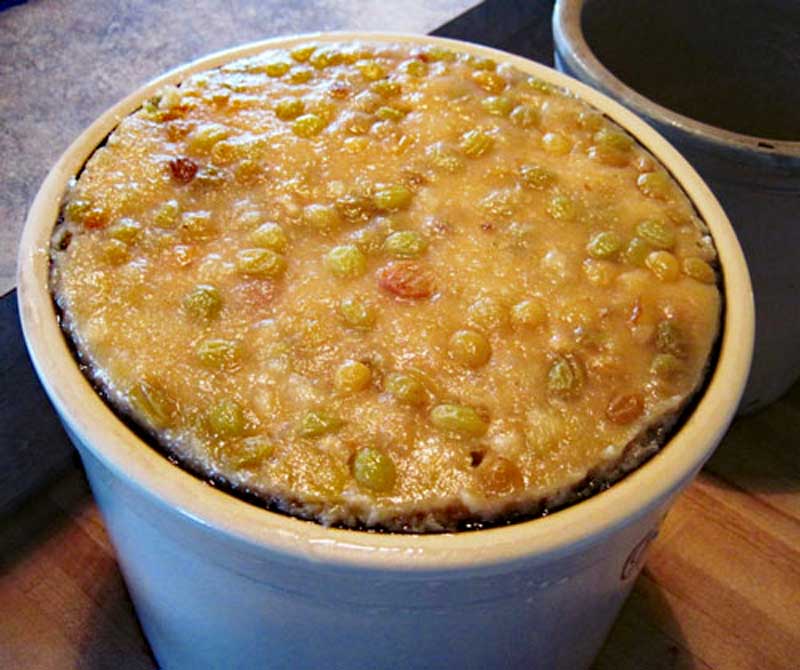
Note: With my 2 gallon crock, the fruit almost bubbled up out of the top overnight. It didn’t, but it was close. I woke up to the image below on day 2. Use a three gallon crock for extra wiggle room.
4. Let the Pears Ferment for 7–10 Days
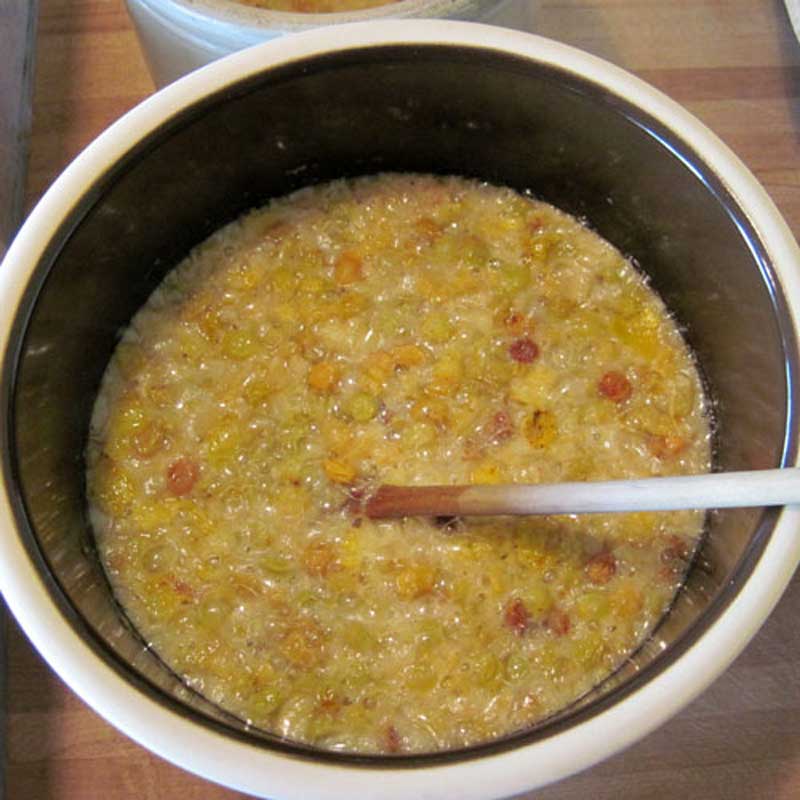
This is where the magic happens. Within a day or two, you should notice bubbling, foam, or a pleasantly yeasty aroma. The fruit may rise to the surface as the yeast gets to work.
Stir the mixture daily with a clean utensil, pushing the floating fruit back into the liquid. The most vigorous fermentation usually happens during the first several days. As the yeast consumes sugar, the bubbling gradually slows and the aroma becomes more wine-like.
Let the fruit ferment in the crock for about 7–10 days.
Pay attention to what the wine is doing rather than treating the calendar as an absolute rule. If fermentation is slowing and the fruit has softened, you can move on to straining. If you notice fuzzy mold or other obvious signs of spoilage, discard the batch.
5. Strain and Continue Fermenting
After 7–10 days, strain the mixture through a clean jelly bag or flour sack towel to remove the pear pulp and raisins. Gently squeeze the bag to recover the liquid.
Return the liquid to the crock. Set in a warm place to ferment another week. No stirring is necessary during this second fermentation.
At the end of the second ferment, strain liquid through several thicknesses of cheesecloth or a flour sack towel. Siphon or ladle into the strainer, leaving the sediment at the bottom of the crock. (You’re aiming for a clear product at this point.)
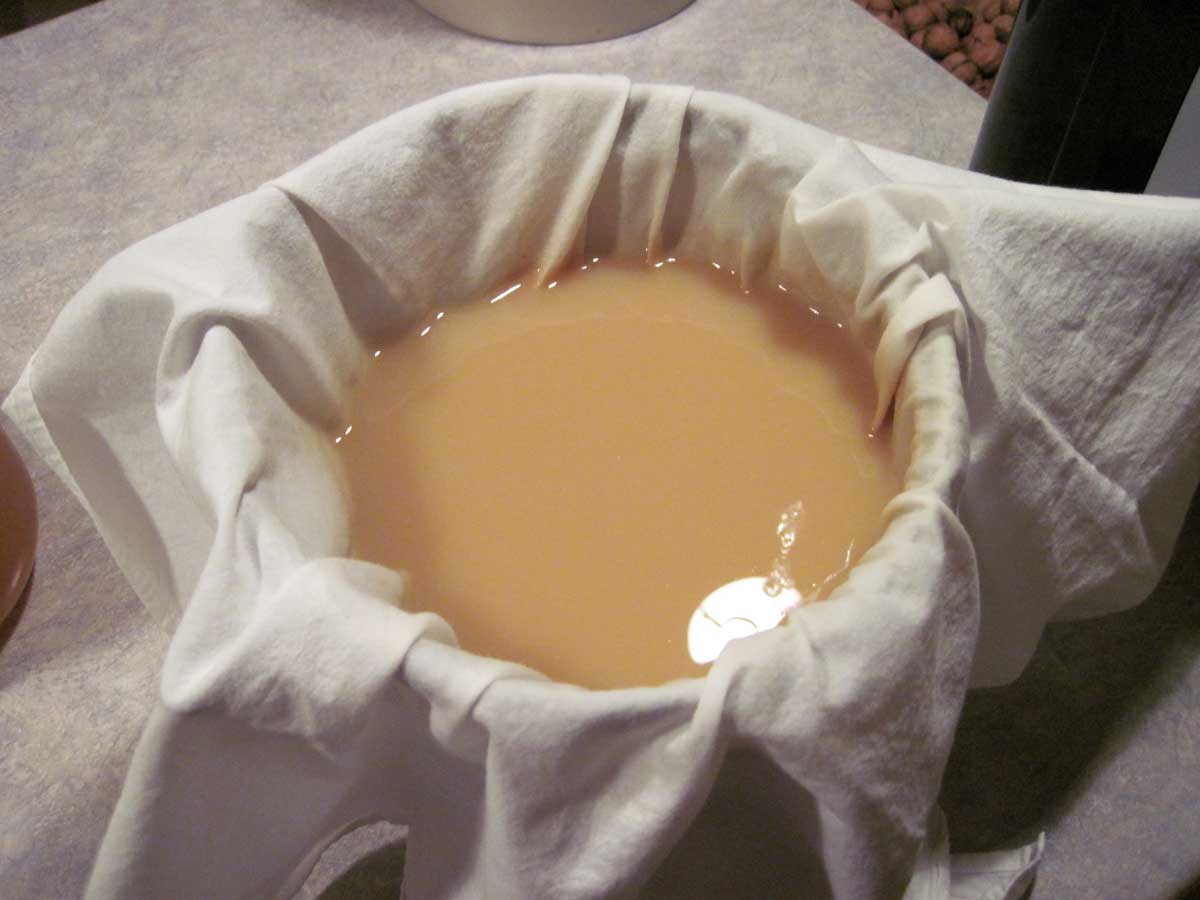
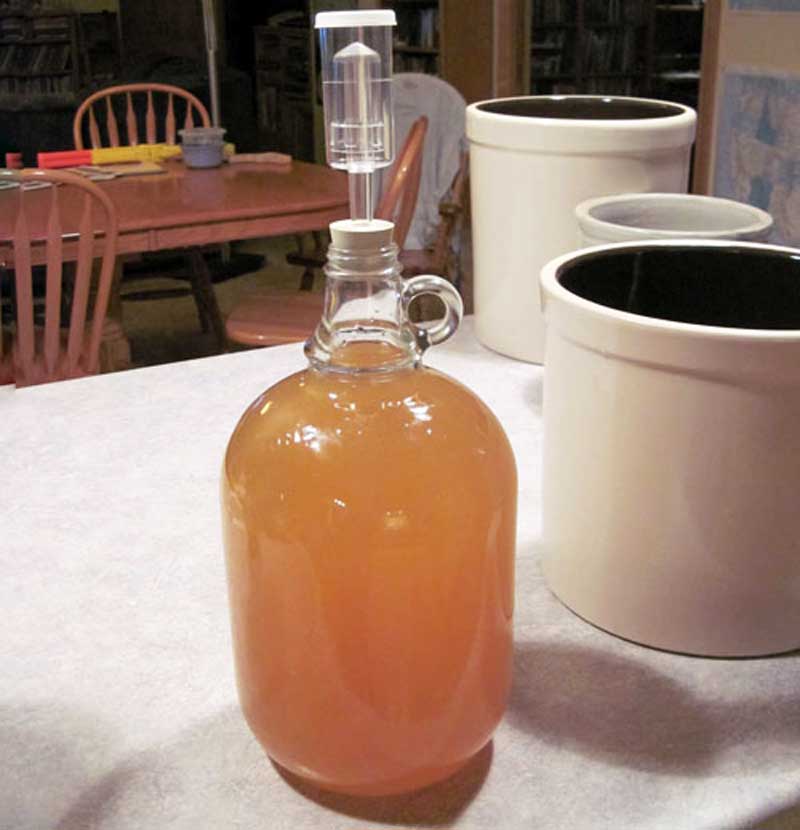
Transfer the wine to a clean glass jug or carboy fitted with an airlock.
6. Let the Wine Settle and Clear
As fermentation slows, the wine will gradually begin to clear. A layer of sediment, sometimes called lees, collects at the bottom. This is mostly spent yeast and tiny particles of fruit.
In 2-3 months, carefully siphon the wine into a clean fermentation vessel, leaving the sediment behind. This is called racking. You can use food-safe tubing for this step. It’s easier than pouring and helps reduce the amount of sediment transferred.
Pears contain pectin, which can make pear wine slower to clear than some other fruit wines. You can use pectic enzyme if you want a clearer finished wine, but it’s optional.
If another substantial layer of sediment develops, you can rack the wine again.
7. Bottle and Age the Wine
Patience is one of the most useful ingredients in homemade wine. I usually keep my wine in a carboy for 6 months before bottling.
Once the wine is finished fermenting and clear, transfer it into clean wine bottles and cork them. We demonstrate bottling in the video below. Store in a cool, dark location for 6–12 months.
If you like, you can use a hydrometer to test fermentation. (I never have, but many people do.) Check that the specific gravity remains stable over several days and is consistent with a completed fermentation.
Don’t seal wine in bottles if you’re uncertain whether fermentation has finished. Pressure from renewed fermentation can push out corks or break bottles.
If you’re unsure, leave the wine in an airlocked container and give it more time while checking its progress. You can sample it earlier, but aging gives the flavors time to mellow and blend.
Simple Pear Wine Variations
Once you’ve made the basic recipe, you may want to experiment. The original cookbook suggests adding ¼ pound of chopped candied ginger to the fruit mixture. For a spicier wine, you can also add 10–12 black peppercorns.
Other possibilities include:
- Pear and ginger: A warming combination, especially for fall.
- Pear and apple: Use a mixture of ripe pears and apples for a different fruit balance.
- Pear and elderberry: A small amount of elderberry adds color and a stronger fruit character.
- Pear and herbs: Experiment with a small amount of a familiar, food-safe culinary herb, such as thyme.
Start with small batches when trying new combinations. It’s easier to experiment when you aren’t risking several gallons of wine.
Do I Need Campden Tablets?
No. I don’t use Campden tablets in this recipe.
Campden tablets release sulfur dioxide, which helps limit unwanted microorganisms and oxidation. They’re used in conventional winemaking, but they’re not essential.
I’m sensitive to sulfites, so I prefer to avoid adding them.
More Homemade Wine Recipes
You don’t need a vineyard, expensive equipment, or a chemistry degree to turn seasonal fruit into a homemade beverage. You can make wine from pears, berries, flowers, herbs, and all sorts of ingredients that might otherwise be overlooked.
Use what you have, pay attention to the fermentation, and see what develops. Not every batch will be perfect, but each one teaches you something. And when you finally open a bottle months later, you get to enjoy a little taste of the harvest all over again.
If you enjoyed making pear wine, try these other country wine recipes:
- Easy Strawberry Wine Recipe
- Pumpkin Wine – made with pumpkin or squash
- Dandelion Wine – made from dandelion flower petals
- Elderberry wine – made from elderberry fruit
- Quackgrass Wine – this is made from the roots of weedy quackgrass, which have a sweet flavor
Need more pear ideas? Check out 9 Ways to Preserve Pears, Plus Tips to Prevent Browning.
PrintHomemade Pear wine
This easy homemade pear wine recipe combines just a few simple ingredients to turn an abundance of ripe pears into delicious homemade wine.
- Prep Time: 30 minutes
- Total Time: 30 minutes
- Yield: Approximately 1 gallon 1x
- Category: Beverage
Ingredients
- 4 quarts of chopped, unpeeled ripe pears (approximately five pounds)
- 3 cups of white raisins, chopped
- 5 cups of cane sugar
- 1 cup of light brown sugar
- 4 quarts of water
- 1 packet wine yeast
- 1 teaspoon yeast nutrient (optional)
Instructions
- Wash the pears, remove stems and cores, and trim away bruises. Discard moldy or rotten fruit. Finely chop or crush the pears, leaving the skins on. Place the pears and chopped raisins in a large, clean fermentation vessel.
- Dissolve the cane sugar and brown sugar in 2 quarts of water. Bring to a boil, remove from heat, and cool.
- Add the remaining 2 quarts of water and cooled sugar syrup to the fruit. Stir well.
- When the mixture reaches the temperature recommended for your yeast, add champagne yeast and optional nutrient according to package directions.
- Cover securely with a clean cloth to keep out insects. Ferment for approximately 7–10 days, stirring daily with a clean utensil to keep the fruit moist.
- Strain out the pear pulp and raisins. Transfer the liquid to a clean fermenter fitted with an airlock, leaving room for any remaining foaming.
- In 2-3 months, carefully siphon the wine into a clean container, leaving sediment behind. (Rack the wine.) Repeat as needed.
- Once fermentation is complete and the wine is clear, transfer into clean wine bottles and cork. (Around 6-12 months. ) Never seal wine that may still be fermenting.
- Store in a cool, dark location with the wine bottles on their sides to keep the corks from drying out. Age for a total of at least 6 months (start to finish) before drinking. 12 months is better.
Notes
If you prefer clearer wine, you may use pectic enzyme after the primary fermentation.
Primary fermentation: 7–10 days, Aging: 6–12 months
About the Author

This recipe is from Laurie Neverman, author of Common Sense Preparedness and founder of Common Sense Home. Laurie grew up on a Wisconsin dairy farm, learning traditional food preparation and preservation from her family. She has decades of experience with home cooking, gardening, preserving the harvest, and making old-fashioned country wines.
Originally published in 2011, last updated in 2026.
I just picked a bag full of elderberries. I hope to try your recipe.
I hope you enjoy it.
Sounds like something I want to try grow our our fruit ( pears, grapes, kumquat, and several other exotic ) love the post.
My wine is more like shine & cloudy. I strained it & now in 8 qts mason jars, lids have sealed on their own. It all new so I’m going to let it set for 2 days to settle. I’m not even sure that right. But after do I have to refrigerate it? I will keep it in mason jars.
The alcohol content should preserve it, so it doesn’t need to be refrigerated.
What you’re missing is racking your wine, which removes the sediment. Too much sediment will add off flavors to the wine as it ages. I’d advise putting your wine back into one large container, letting it settle, and then racking it, leaving the sediment behind and giving you a clear product. Here’s a video on racking wine:
Technically, you could leave it in mason jars, but I bet you could round up used wine bottles from friends. A corker will cost a little up front, but corks are cheap.
Thank you for sharing, starting the first batch tonight with the ginger and peppercorns, Christmas is coming and Spiced Pear Wine has a nice ring to it.
High can you tell me how much ginger you added
Iv got some dried ginger
Do you just put it in grate or chopp it
Thanks
The recipe I researched suggested candied ginger, specifically, ” If you desire more character in your wine, add 1/4 pound of candied ginger, finely chopped, at the same time as the raisins. If you desire heat along with the spicy taste, also add ten or twelve black peppercorns.”
If you wanted to try some fresh ginger, I would shred or finely dice it, and start with no more than 1/4 cup. I wouldn’t use dried ginger, personally, because I believe the flavor would be inferior, but if you did use it i would finely chop or grate it and use a 1-3 teaspoons.
In the initial fermenting phase did you have to vent the bucket. I am using a 5 gallon bucket and can’t tell if it needs to be vented. A friend of my husband said no. But I don’t want an explosion.
Yes, while the yeast is active, ventilation is required, either via primitive methods like the tea towel cover, or via airlock on your fermenting vessel. As long as the yeast is active, carbon dioxide will be produced and will need a place to go.
Great website !
Working on our first batch of pear wine
Have a question on the sugar per gallon – Your ‘Pear Wine Recipe’ calls for 7 cups (3.5 pounds) of sugar per gallon. Have checked several other recipes and most call for 2 pounds sugar per gallon.
Do not want overly strong wine
Why 3.5 pounds sugar per gallon ?
Wayne
Go ahead and use two pounds if you like. This has 3.5 pounds because that’s what the recipe I based it on used. I didn’t find it to be overly sweet, but it’s not a dry wine, that’s for sure.
Rice wine is lot easier,cook the rice when its ready,spread it over a large clean plastic to let it cool.
Then add yeast and fill back into a container.let it ferment for a week keep the lids loose so co2produced may not explode your container. And its ready by a week. With a good muslin cloth seperate the solid from liquid. And allow for settling and you have it.
That certainly does sound simple, but it wouldn’t use up my excess pears.
it is so good with tacos
hi, trying your pear wine recipe now and wow smells so good, and just in the 2nd part of the fermentation, so a couple weeks to go yet. Was wondering if the recipe allows for different fruits? We have a lot of apples left over and want to try to change the fruit but keep the rest of the recipe…maybe even a banana or orange wine. curious anyways thanks for any reply
Bill
I would expect apples to ferment most similarly to pears, but bananas and citrus would likely merit a different approach. If it has sugar, it will ferment, but working with a recipe should help create a more reliably tasty product.
Your “wine is good” update is dated September 7, 2013. Your basic post is dated September 22, 2011. Do I understand that it took over 2 years for the wine to be “good”? If that’s what it takes, so be it. But it’s a little daunting to start a project like this if it doesn’t pay off for 2 years. Thanks for any response.
Wine should generally age at least a year, and, yes, two is generally better. The date just happens to be what it is because I was updating old posts and also happened to drinking some of the wine.
when do u add the yeast it dont even say
Add the yeast once everything else is in the crock, when you’re setting it to ferment.
I noticed you say in recipe white raisins, in my town white raisins are not available, and I just have golden raisins. Would there be a difference in color and taste? I have some pears, that I have to do something with immediately.
White raisins = golden raisins, because they come from white grapes. That was the term used by the author I referenced. Sorry for any confusion! Even dark raisins would work, the flavor would just be a little different and the color would be darker.
I’m going to try using a juicer for the pears and let you know how it turns out.
Sounds good!
Thanks for the great idea for pear wine. I made pear wine last year and i think it turned out pretty good. Most of it is buried in back yard right now. You seemed to work your recipe in stages….the raisons and pears sit, then add the shredded wheat 40 hours in, and then add the water and sugar water (not sure when you did this.), and finally the champagne yeast (now sure timing on this one either). Is this timing important or can I add all ingredients from go and let it sit for the three weeks?
Thanks for the help! My pears are not ripe enough to “mash” at this point so guess I best let them sit a little longer. Last year I didn’t “mash” the pears….just cut them in and added the ingredients. Think that would be OK?
Patricia
Taking the process in steps gives time for different flavors to develop. Wine (from what I’ve experimented with so far) is pretty forgiving, so you could try it and see if you like the results. Mashing the pears gives more surface area for all the little microorganisms to work their mojo and releases the juices. I’ve always been a masher, so I can’t compare the flavors myself. Again, wine is pretty forgiving. If it ferments, you can make some sort of wine.
Thanks! I’m going for it and will let you know how it turns out. 🙂
I am making some pear wine and can’t find corks that will go in the wine bottles. All the corks that I have seen are to big to fit a wine bottle and I don’t have a thing that will push the cork in the bottle. What can I do?
To properly/safely cork a wine bottle, you really should have a corker. They’re not crazy expensive, and it will give you a secure seal. I friend of mine carved down corks to fit and put them in with a mallet, but I can’t recommend this.
You can can find corkers online, such as a Portuguese Double Lever Corker on Amazon.com
, or at local home brewing stores if you have any in your area.
use tapered corks
I’m going to have to find that book! I just put our peach wine into our secondary fermentor. http://msgoldielocks.blogspot.com/2012/08/let-fermentation-begin.html Good luck! This is also my first attempt at winemaking. It’s a bit intimidating, but after I get each step completed it doesn’t seem that bad. The hard part will be waiting……
I enjoy winemaking. It’s so easy! If we drank more, I’d make more. I love the yeasty, fruity smell the crocks make on the counter during the initial ferment. I bet your peach wine will be lovely!
I wish I could trade you 20 lbs of pears for 20 lbs of peaches! I have so many Williams/Bartlett pears right now that my dehydrator (and the wine crock) are running 24/7…let us know how it goes!
I love the Wine from the Kitchen book and have been using that –avoiding the sulfa tabs and the extra cost… Pear can be a very nice sparkling wine if you like that too.
Great! I like wine because it’s largely just mix and forget. Very little attention required, overall.
I haven't yet. Maybe next year. I'm pretty new to the whole winemaking thing, so I'm a little cautious. I guess the worse that could happen is that I end up with pear vinegar.
don’t use common everyday yeast. it’ll make it nasty. there are several different kinds of wine yeast you can use that are each designed to give your wine a different aspect. yeast like GMA used to use baking is a bad idea
While modern winemaking yeasts will give a more consistent product, what do you think the old timers used to use before there were homebrew stores and online ordering options?
Wine yeasts are the most reliable option, but if someone truly doesn’t have ready access to them, other yeast will do in a pinch. You can even create your own yeast starter, but again, the results tend to be less consistent.
Have you made it without the champagne yeast?
Wow cool thanks for sharing! i might have to try this out since i have pears coming out the wazoo at the moment!
This could get very interesting,I have Way to many pears. I enjoyed the way the post is written.
Late entry for commenting on this recipe but thought I should mention this today after finding your post for pear wine. Years ago (decades actually) people used to make sauerkraut (pickled cabbage) in crocks. These were later deemed to be poor for health since they actually have lead in them. They are no longer safe for anything to do with foods and especially alcohol; mostly just decorative today. Use ONLY food grade plastic or glass, brew stores all carry such things. Also note: crock pots have ceramic glazed liners, at 80 degrees F. at least 15-20% starts to “leach” off and it’s what you’ll consume in the foods you have made. There’s also a reason today that more and more people have brain deficiencies-Parkinson’s, Alzheimers etc and coincidentally, our parents or grand parents probably pickled cabbage, crock pots used to be all the rage. Today, some manufacturers make slow cookers with metal liners. DO NOT use anything but what I suggest above for making wine or beer-FOOD GRADE containers only!
That’s really good information regarding crocks and lead.
I’m stunned. Another entire industry built on a lethal technology. Hopping down to the hardware store for my lead test kit asap!
Older crocks may have a risk of containing lead. If you have an older crock and are unsure, simple lead test kits are available at most hardware stores. You can see the testing process demonstrated at http://www.crockandjar.com/testing-your-old-crock-for-lead/.
Ohio Stoneware crocks, the type I use and recommend in the post, are lead free and recommended for food storage. Specifically, from their amazon.com description:
Made of reliable Stoneware
For preserving and storing vegetables
Lead-free and contains no harmful chemicals
I’d be far more concerned about chemicals leeching from plastic over time, especially when the plastic is in contact with acid and alcohol. Some glass containers may also contain lead – especially those manufactured overseas.
As for lead in crocks and crockpots contributing to Alzheimer’s and other brain health issues, it’s far more likely that the current Standard American Diet is to blame, along with demonizing of cholesterol and poor gut health linked to antibiotic overuse and other lifestyle factors. I suggest reading The Alzheimer’s Antidote for a breakdown of the latest research on cognitive decline.