Harvesting Walnuts – How to Pick & Store Walnuts for Freshness
This post may contain affiliate links. Read my full disclosure here.


Harvesting walnuts is a part of our fall routine most years. We don’t have walnut trees yet, but our neighbors have black walnut trees and English walnut trees. I normally use the black walnuts for their hulls to make black walnut tincture, and use the English walnuts for their nut meats.
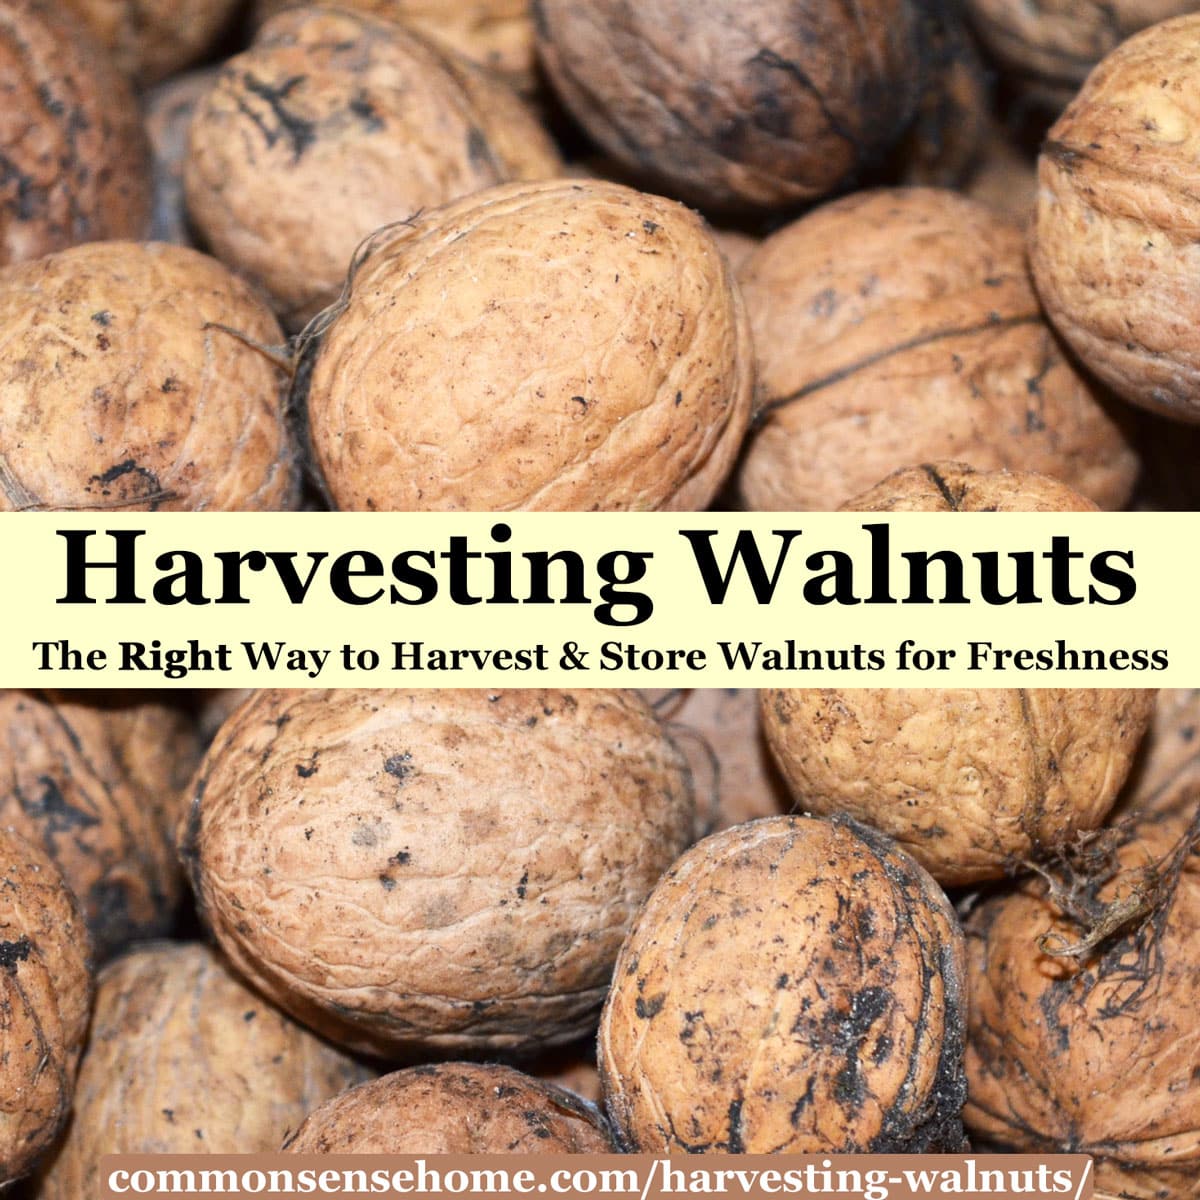
Both types of walnuts have a tough green outer hull, but the hulls on English walnuts usually split open and are easy to slip off. Black walnuts require more effort to hull, and their shells are thicker and nut meats smaller.
English walnuts have thinner husks and shells, and are easily cracked with a lever style nut cracker. In this post I’ll talk about harvesting English walnuts, picking the fresh nuts and drying them for storage in the shell. We’ll also cover the best way to store nuts out of the shell.
Note: The maple candied walnut recipe has moved here.
Harvesting Walnuts
In the fall of 2014, I got a phone call from one of my neighbors – “Would I like walnuts?” It turns out that other neighbors, relatives of theirs, have two beautiful 89 year old Carpathian walnut trees in their front yard, both of which produced a bumper crop that year.
Those trees were sent directly from the Carpathian mountain area all those years ago, at a cost of $1 each, which was big money back then. They came with an apology note about how expensive they were. (I heard this story from the folks who owned the trees as we picked nuts. The farm is still in the same family, and the trees were purchased by the grandfather of the current owner.)
We were blessed with many buckets of nuts, enough to share with family and friends. I had to learn how to process walnuts.
Since then, we get called when there are excess nuts. Some years they don’t have any to spare, but luckily, walnuts can store a long time in the shell. With what we store from year to year, I haven’t had to buy walnuts since 2014.
Gathering the Nuts
Harvesting walnuts (in this case, harvesting English walnuts) is simple. We gather the fresh nuts in a bucket after they fall to the ground. Because we’re gleaning at the neighbor’s place, we only pick up fallen nuts.
If you were harvesting English walnuts from your own tree, you could go ahead and grab nuts off the lower branches as soon as the green husks start to split open. Wear gloves if you don’t want to stain your hands dark brown.
Avoiding Bitter Walnuts
Walnut husks are extremely high in tannins, which are bitter in flavor. The longer the hull stays on the walnut, the more bitter the nut inside is likely to be. In the book “The Resilient Gardener”, the author notes how she was able to gather and use nuts in her area that others avoided “because they were too bitter”. By gathering promptly as they fell, hulling immediately and curing, she quickly had a stockpile of free, delicious nuts.
As we sort nuts, we set aside any that have stuck-on blackened hulls, along with undersized nuts and damaged nuts, for animal consumption. (The chickens don’t seem to mind the bitter flavor.) Our chickens LOVE walnuts, and the walnut shells act as grit.
The video below shows the walnut sorting process. (Make sure ad blocker is disabled for video to play.) We remove the hulls and moldy nuts are discarded.
Walnut Harvesting Tools
For several years we harvested walnuts by hand, but this year we tried a ball style walnut harvester (similar to the Garden Weasel Medium Nut Gatherer). Holy smokes did that speed up picking! There are similar nut pickers sized for larger nuts, and even powered nut harvesters.
The video below shows the walnuts in their green hulls, and harvesting walnuts with a rolling nut picker.
Drying Walnuts for Storage
I was instructed by the tree owners to spread the fresh walnuts out in a warm, dry, shaded place to cure for at least a month before using them. I’ve seen mixed recommendations online on how long to dry. I suppose it depends a lot on your conditions.
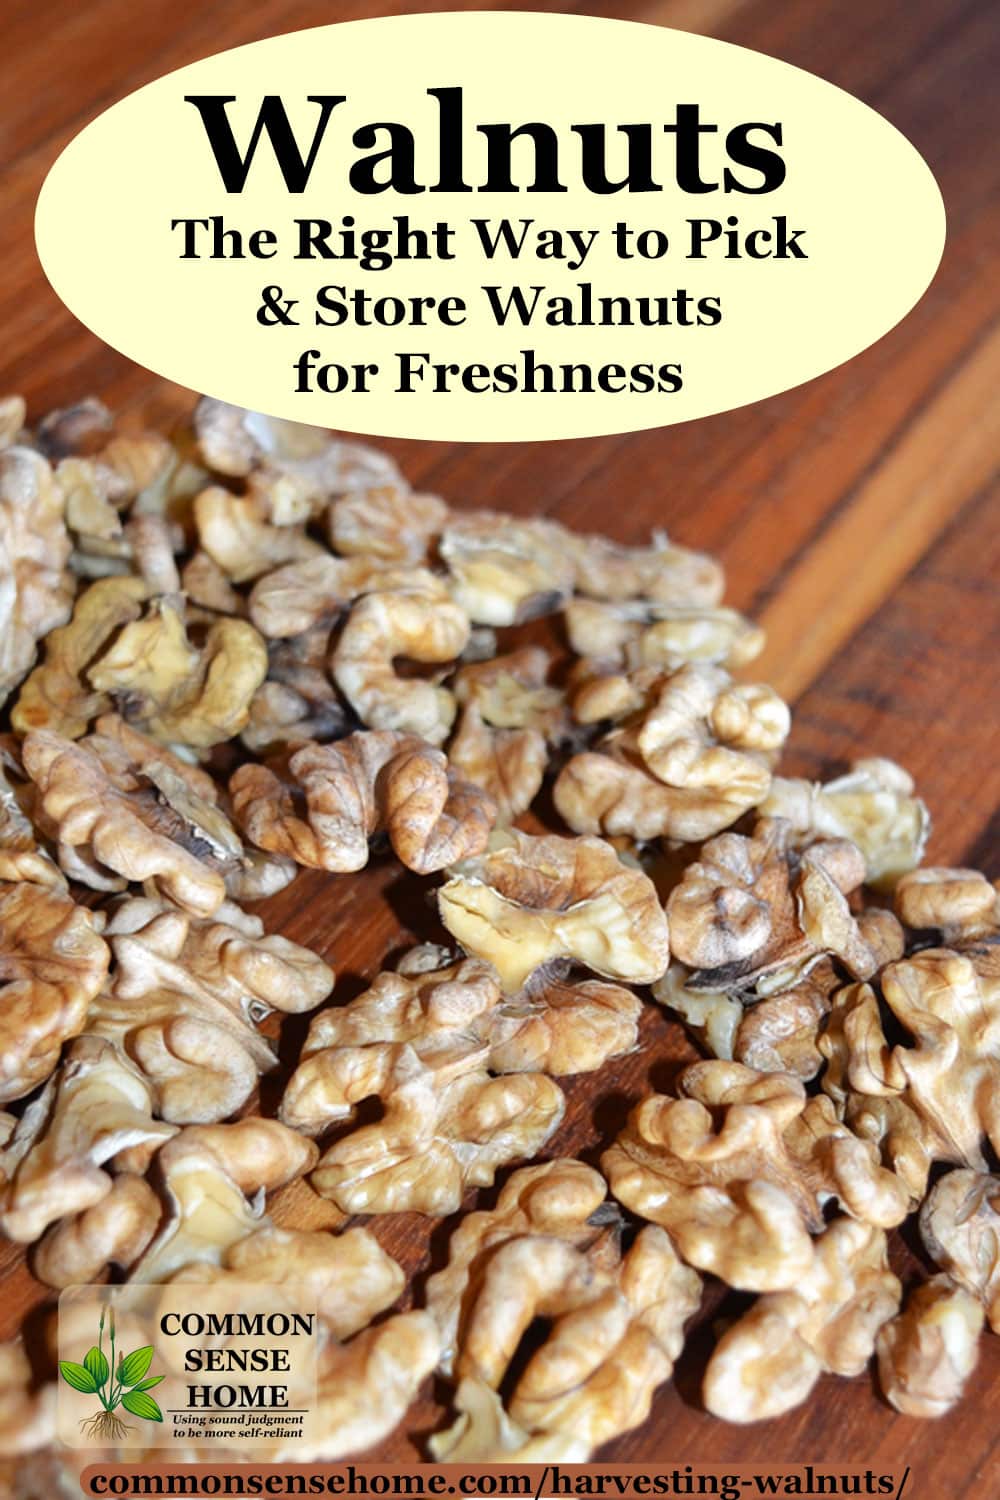
The goal of drying walnuts for storage is to reduce the moisture within the nuts to prevent mold growth. When properly dried, the nuts inside should have a nice “snap” and not be rubbery.
At this point, the walnuts should hold for up to three years in the shell in cool, dry conditions (if you don’t eat them all first). So far I’ve stored my fresh walnuts for over two years at a time with no loss in quality.
Sometimes,I spread my walnuts out on the mesh shelves of my greenhouse to dry. (I did find that the mice got a few of them when I used this option.) Once I have them spread on the shelves, I cover them with burlap to keep out the light.
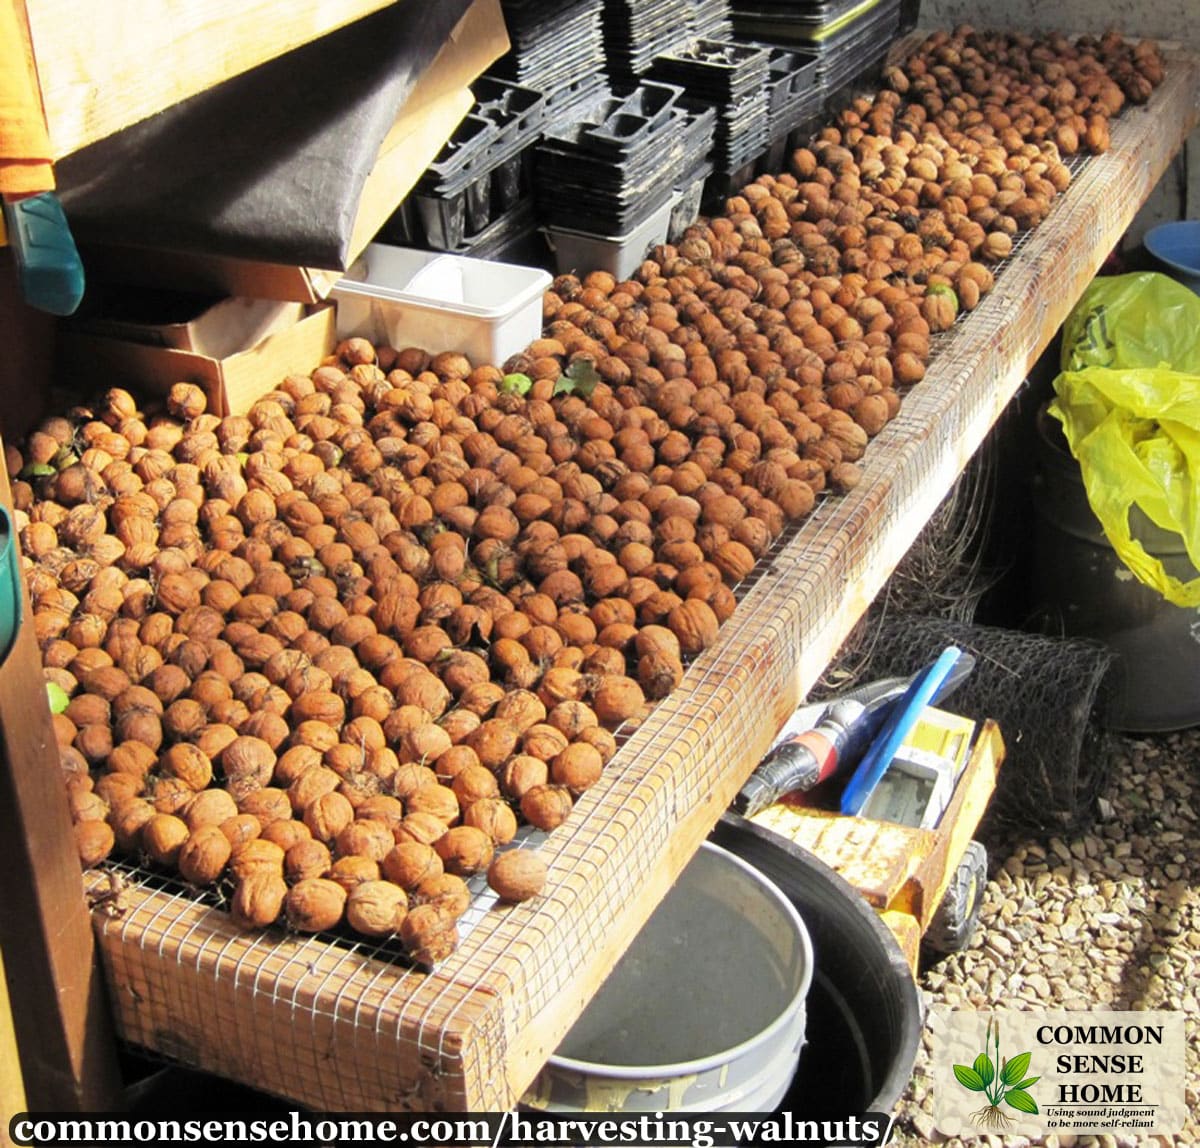
Because of the mouse risk, I usually dry my walnuts in trays in the finished basement or in the living room. I spread the walnuts out in shallow cardboard boxes, or in my black planting trays that I use for seed starting.
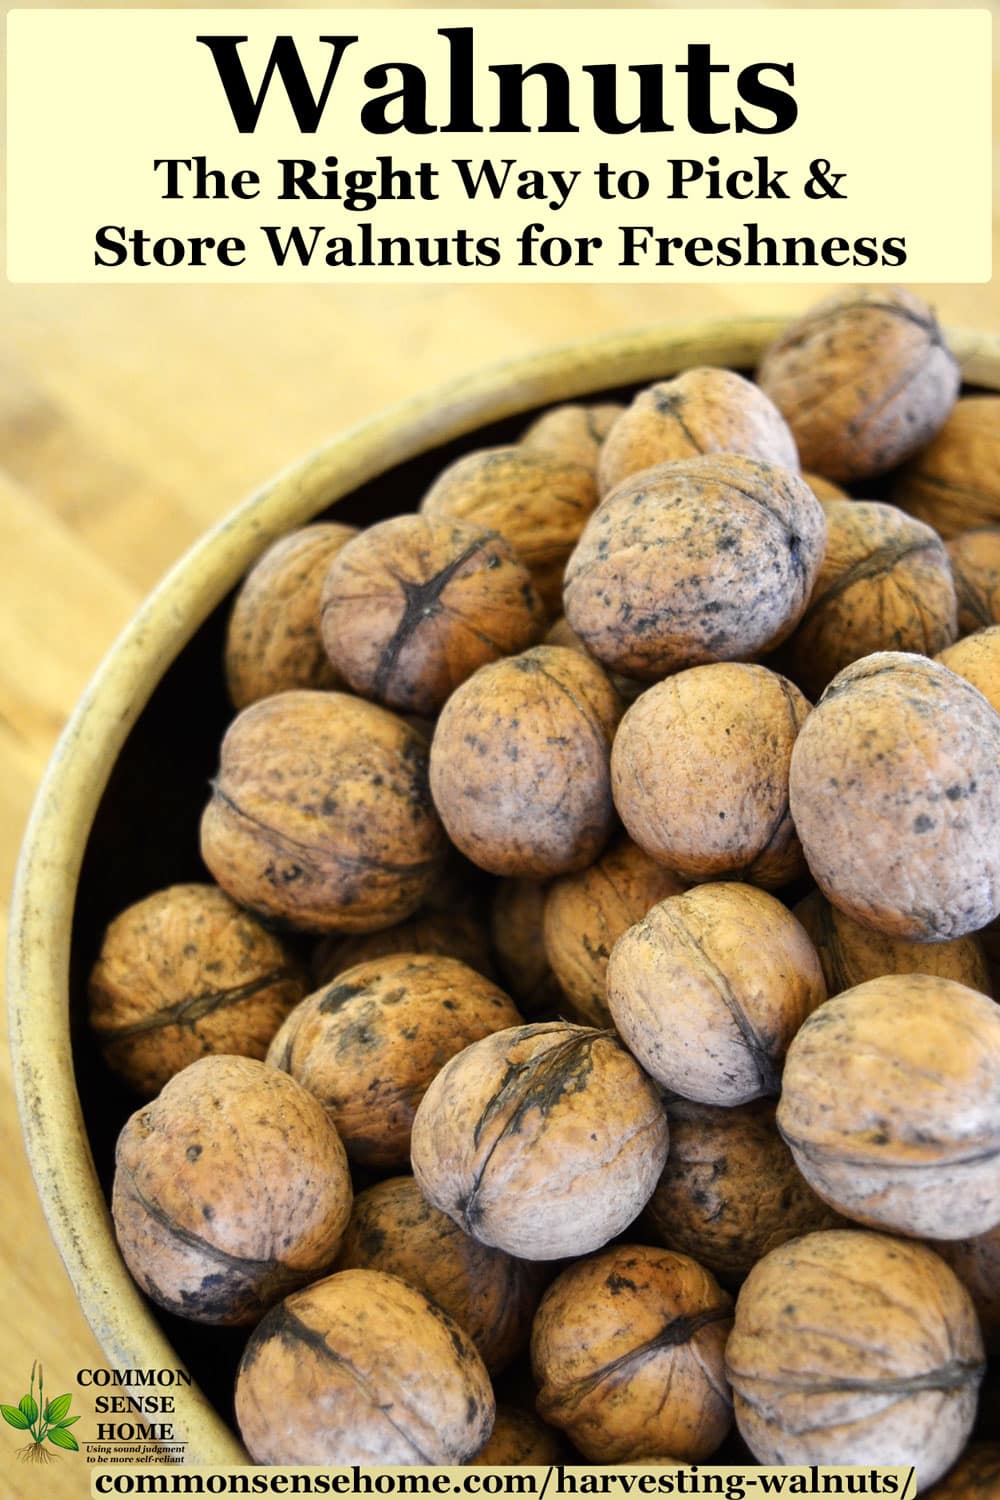
Once the fresh walnuts are dry and cured, I store them in the shell. We keep ours in five gallon or one gallon buckets with lids. (Mice do love walnuts, so make sure any storage container you use is rodent proof.)
Would you like to save this?
Gamma lids make it easy to get into the buckets as needed. Store your walnuts in a cool, dry location out of direct sunlight. Don’t store the buckets in the root cellar. We tried this (thinking the buckets would protect the walnuts) and had issues with nuts getting moldy inside.
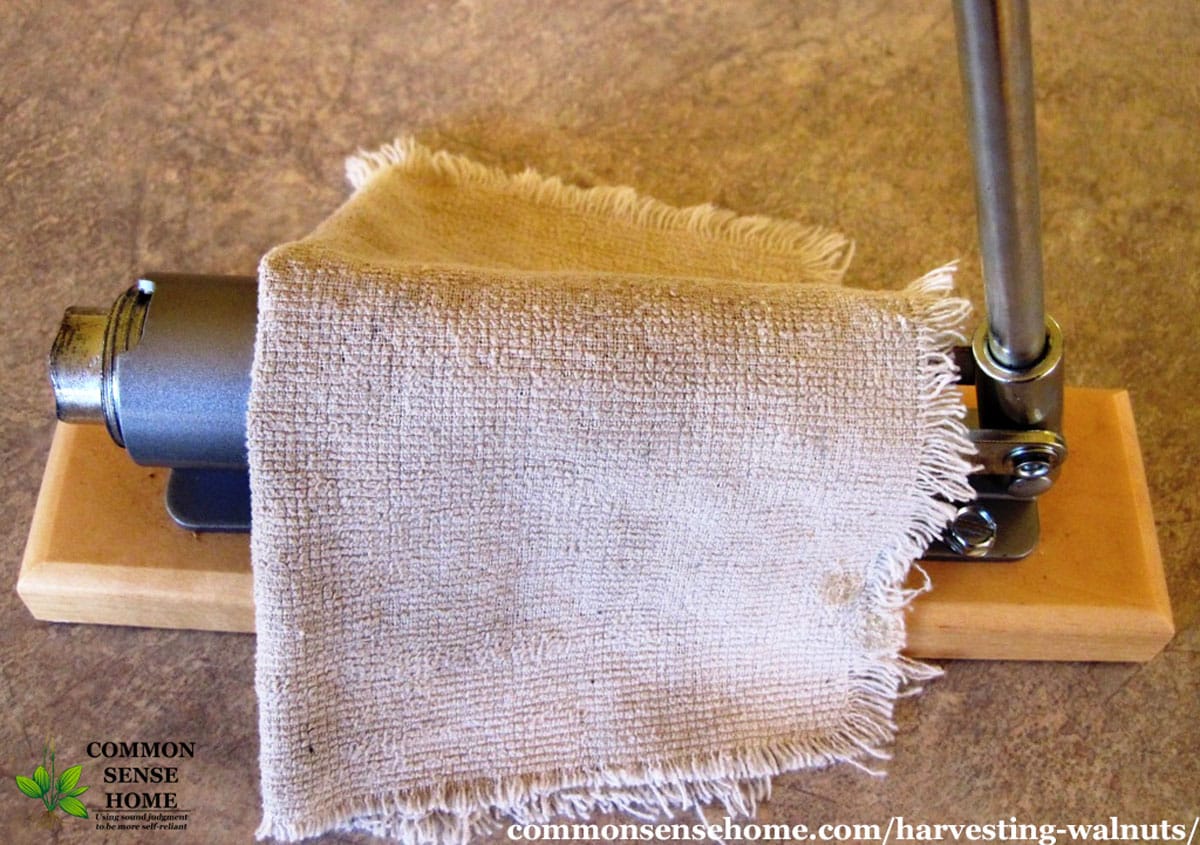
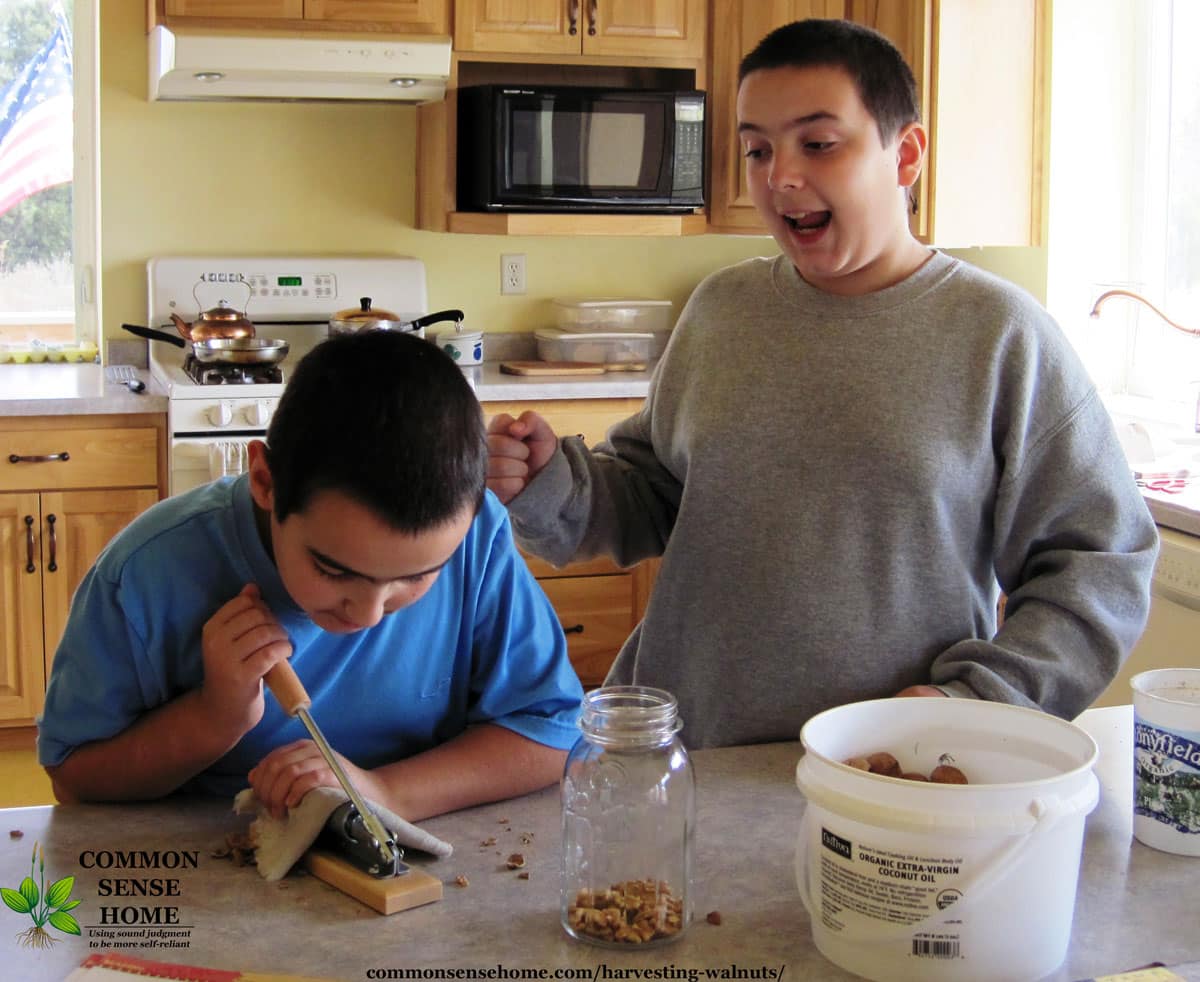
Easy to Use Walnut Cracker
For cracking our monster nut harvest, I was lucky enough to find a great deal Reed’s Rocket Nut Cracker at the local kitchen store. If you do any serious volume of nut cracking, you need one of these nut crackers.
If you have a smaller nut or odd sized nut, like a hazelnut, just fold a bit of dish towel and tuck it in the cracker with the nut to make sure it fits tight enough to crack. (Looking for a black walnut cracker? Try this heavy duty nut cracker instead.)

This cracker saved so much time and so much easier to use than our old “pincer” type cracker. I got one for our neighbors who shared the nuts, too. To avoid flying pieces of shell, we covered the cracker with a cloth as we cracked. (I cut up an old, worn bath towel, which we use in place of paper towels in the kitchen.)
The nuts come out neatly, too, often in clean halves instead of bits and pieces. It’s rather fun to use, too.
The Best Way to Store Walnuts
As mentioned above, fresh walnuts, properly dried, will keep for three years in the shell. The shell acts as a natural protective barrier. This is how I store most of my walnuts.
Once shelled, the oils in walnuts quickly go rancid. You should either use freshly shelled nuts right away or store them in the refrigerator or freezer for best quality. In the fridge they should keep for six months, in the freezer, safely a year.
You may be thinking, “But they don’t store walnuts cold at the grocery store.” Once you’ve had a chance to compare the taste of freshly shelled versus pre-shelled, you’ll know that they probably should.
Many stores do turn over product fairly quickly, but store nuts are, in general, not optimally processed and not terribly fresh. It’s cost prohibitive.
It’s safe to eat raw walnuts, but we usually take the time to make Crispy Walnuts.
What are Crispy Walnuts?
Crispy walnuts are raw walnuts soaked in salt water and then dehydrated until crisp. Soaking and dehydrating removes excess tannins, phytic acid and enzyme inhibitors.
Maybe you’ve encountered a sore, puckery mouth after eating several walnuts? That’s the tannins.
Some people also get a “heavy” feeling in their belly after eating nuts. That’s the enzyme inhibitors. They’re great for keeping the nuts from sprouting too soon, but can make the hard to digest.
After the soaking and dehydrating, the walnuts taste almost like roasted walnuts. No more pucker mouth and no more heavy gut.
When we want to get nuts ready for eating, we shell a bunch of nuts and process them into Crispy Nuts ala Nourishing Traditions.
Crispy Walnut Recipe
To make crispy nuts, mix together in a non-reactive bowl:
4 cups walnuts (also works with other nuts)
1 tablespoon sea salt
Enough water to cover
Stir and leave on the counter overnight, or at least 7 hours. Drain well in a colander and dehydrate at 125°F for around 24 hours, depending on how crispy you like them.
Store them in the freezer to prevent rancidity. Don’t forget to date and label them. They will keep for months. For even better quality, vacuum seal them.
Using Walnuts
Walnuts are great as a snack, in granola or hot cereal and for baking. There are number of recipes featuring walnuts on the site (you can view our entire recipe listing here). Some of my favorites are brownies, coconut oil fudge and cranberry walnut pie. Maple candied walnuts are delicious and make a great gift.
What are your favorite ways to use walnuts? Do you have any walnut harvesting tips to share? Leave a comment and share your thoughts.
Originally published in 2014, last updated in 2019.
I have several large black walnut trees on the property. I find the hulls are easier to remove when they are green or yellow. Once the hull dries out and shrinks around the nut they are really hard to remove. I use a heavy pair of work boots and a large flat rock to remove the hulls. Just step on the hull and roll it back and forth until the nut is released. Most will have worms inside the hull, don’t worry they don’t get inside the nut. I place the nuts into a old milk crate until I cover the bottom. Next I use the garden hose with a nozzle set to the jet position. Blast the nuts to remove all loose material, this may require shaking the batch and hosing a number of times. A pressure washer works even better. Next you need to do the dunk test. I fill a 5 gallon bucket half full of water and pour in the washed nuts. If any of the nuts float to the top they are no good. I then place the wet nuts into an old onion bag or something like it to dry. I found it helps to prevent mold growth if you use your leaf blower to dry the nuts pretty well before you hang them to dry for about 3 to 4 weeks.
Thanks for the tips, Dave.
I made a trial batch of the maple candied walnuts in Sunday, lovely, so just made two more batches to give as gifts, thank you for the recipe so easy so delicious
I’m glad you enjoyed it. 🙂
Just wondering how to use an oven to dehydrate? I just sent the dehydrator over to my mom’s….I could get it back if the oven won’t work.
If you can set your oven temp low enough, that’s one option. Some people also dry with just the pilot light.
I found a bunch of walnuts, wet, black, and gooey in the grass that have already had the green husk fall off. I’ve spread them out on newspaper in a cardboard box. I changed the newspaper today but still have quite a black gooey mess. what to do?
Can you hose them off or pressure wash them?
hello laurie, this was the simplest, most helpful article I came across when googling drying walnuts so although i don’t have enough to warrant going to this kind of effort I’ve linked to it on my post today. Best wishes and happy cracking, Nic
I see you only have a small amount, so fresh eating is fine. I’ve found that with proper curing, the nuts have kept over two years in the shell without going rancid, so that’s nice for when the trees have an “off” year and don’t produce well – like this year. They did not like our cold, wet spring, dry cool summer, and soggy cool autumn.
I would like to know the best way to remove the inside skin (it leaves the bitter taste) in an efficient manner.
Thanks
After the soaking and drying the skin comes off easily. I store my nuts in ziplock bags and the skins (what’s left of them anyway) settles in the bottom of the bag.
are you soaking the nuts and dehydrating prior to making the maple candied or are those just straight out of the nut cracker?
I prefer to soak and dehydrate and then make the maple candied nuts.
Our fingers are blackened and our nails are greenish lol! and we probably only have a bucket full drying out. GOOD Grief! But… Someone told me black walnuts are the super nut…? Either way I dont know what to do with this ridiculous collection.
Black walnuts (Juglans nigra) are much harder to work with. The ones in the post are Carpathian walnuts (Juglans regia), which shed their outer shells on their own and have shells that are less tough. I haven’t processed more than a bucket worth of the black walnuts, a I don’t have a heavy duty cracker and a hammer is extremely tedious.
The University of MN offers more detailed information on processing black walnuts: http://www.extension.umn.edu/yardandgarden/ygbriefs/h404blkwal.html
we have a surplus of black walnuts. Cant keep up with them. Hate to see them go to waste but they are just soooo much work for so little. My kids are just 14 and 6, six year old didnt last long peeling and rinsing 🙁
i meant kids are just 1, 4 and 6.
I moved to a small town in Pennsylvania, I noticed, a few walnut trees at the back of property behind the cemetery, there are about 5 trees. I picked up the good looking green balls, neighbors look at me like {she thinks she’s going to collect walnuts, the poor dear, no one bothers with them they just fall}.
Well, now how to get the green outer shell off and do they need to sit for awhile before or after I get the green ball off the nut?? confused in Pa.,, I have shed , no green house yet. any ideas
I suspect you have black walnuts (Juglans nigra), not Carpathian walnuts (Juglans regia). They are significantly tougher to process. On the type I have, the green husks will fall off on their own, and the shells are easy to crack with a standard sturdy cracker. Black walnuts generally require manual husking (removal of green covering) and their shells are notoriously tough to crack. There are heavy duty crackers designed specifically for the purpose. The husks will also stain everything they come in contact with once broken open, leaving a dark brown stain.
The University of MN offers more detailed information on processing black walnuts: http://www.extension.umn.edu/yardandgarden/ygbriefs/h404blkwal.html
With my processing instructions, I use my greenhouse because it is handy. My neighbors spread theirs out in their attic. The owners of the trees had them all over the floor of their living room. Any place that is warm with good air circulation should work just fine.
Can you tell me what to do with these Black Walnuts I have? I have no idea what to do with them falling off the tree 🙁
Black walnuts are tougher to work with, that’s for sure, and the nut meats are much smaller. The same basics concepts apply for curing and storage (the green outer hull should come off more easily after curing, but not as easily as English walnuts), but to shell them with any degree of ease, you need a very heavy duty nut cracker. When we tried to process some years ago without a proper cracker (using a hammer), they were flying everywhere and the nut meats were mangled. The hulls will stain dark brown color, so you may want to use gloves and protect surfaces.
The Master Cracker is American made and looks promising – http://www.amazon.com/gp/product/B008Z189FY/ref=as_li_tf_tl?ie=UTF8&camp=1789&creative=9325&creativeASIN=B008Z189FY&linkCode=as2&tag=commosensehom-20“>Master Cracker for Black & English Walnut, Plus Filbert Nut/hazelnut, Pecan, Macadamia, Chestnut- American Made
I really enjoy the taste of the soaked and dried walnuts. I hope you will, too.
Walnuts are awesome! I'll give that soaking and dehydrating method a try. Thanks for the tip!
Carla – I've only used it for walnuts and hazelnuts….hmmmm…have you tried adjusting the opening of the nut holding area so that it's just slightly smaller than the length of the nut being opened? Although I show the walnut in the third picture positioned with its seam running vertically, we did find that the nuts opened more cleaning when the nuts were positioned with the seam running horizontally. Maybe if you held the pecans in the cracker the "long way" so that the cracker closed to 1/8" -1/4" inch shorter than the nut? I don't think they have pecans in the shell around here any more, or I could give it a try. If you do try this and it works, could you let me know?
Can you share how to use the nut cracker? I picked one up on clearance after Christmas for a really good price, but it just seems to smash our pecans to smush. What's the trick?
Love my neighbors! We troubleshoot their computers and share excess produce, and they share excess when they have it. Really nice people.
Wow I need neighbors like yours! Thank you for sharing this story on Real Food Weekly.
I remove the husks from my English walnuts and let them dry outside or inside depending on the weather. To tell if they are dry enough I drop them 8 or 10 inches on to a hard surface. If they bounce they need to dry more. If they do not bounce they are dry enough and the membrane between the haves we’ll be dry as well. The bounce test saves cracking them to soon. Try it for your fresh off the tree nuts
Thanks for taking the time to leave a comment, ladies. Jo – these nuts were really a blessing, as nuts in the store are so dear. The flavor is outstanding and I know they are fresh. I planted some hazelnut bushes last year. I tried to protect them as well as I could over winter. Hopefully the mice and deer didn't damage them too much.
Pamela – that wood sounds lovely. We've got locally grown hickory cabinets and I love the natural graining of the wood.
Enjoyed the history of the trees. It's always fun to know the story behind something.
At some point in time when my hubs health will allow it he will custom build our kitchen / dining cabinets out of black walnut lumber. Cut down and milled by a close friend of ours that has a tree service. These 2 trees have a history also, they were well over 80 yrs.old at the time they had to come down (we've have had the lumber in storage for quite a number of years now ). The trees were planted by one of the former Governors here, I believe in the early 20's. I can't recall what the Gov's name was though.
Enjoyed that photo of your boys again…!!!
Please be aware that walnut wood bleaches when placed in the sun. Be careful is you are going to make walnut cabinets.
I like your nut cracker. It's wonderful that you have access to whole nuts that have not been shelled and gone rancid like many store-bought nuts. We had access to lots of walnuts in California, but here we have more pecans. In Sweden we had lots of hazelnuts.
It's a great post, many still don't realize the importance of soaking the nuts.