Edible Shot Glasses or Mini Serving Cups – Fun and Easy to Make
This post may contain affiliate links. Read my full disclosure here.
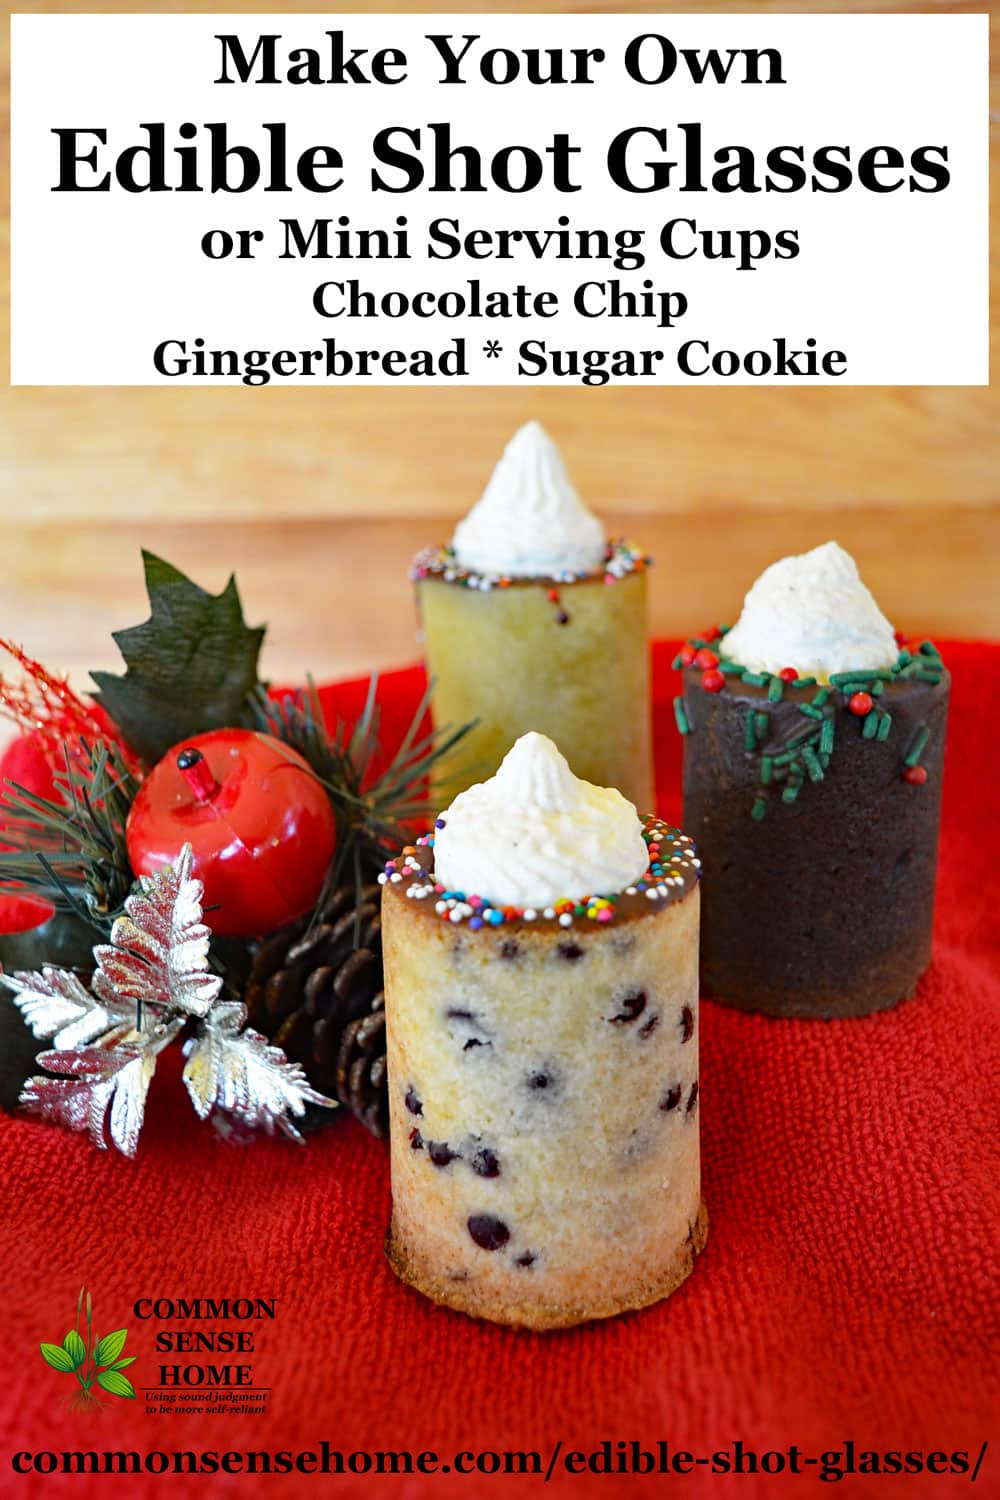
When I saw a lady from a local cake shop demonstrate how to make edible shot glasses on the local morning show, I knew I had to try them. We’re not big drinkers, but the mold works great as an edible serving cup, too.
Fill a cookie shot glass with eggnog, ice cream or pudding. Make finger gelatin in a gelatin cup and fill it with wassail punch. Sprinkle some nutmeg on an eggnog whip cream filled gingerbread cup.
The only limit is your imagination! (You can get the shot glass mold that I used here.)
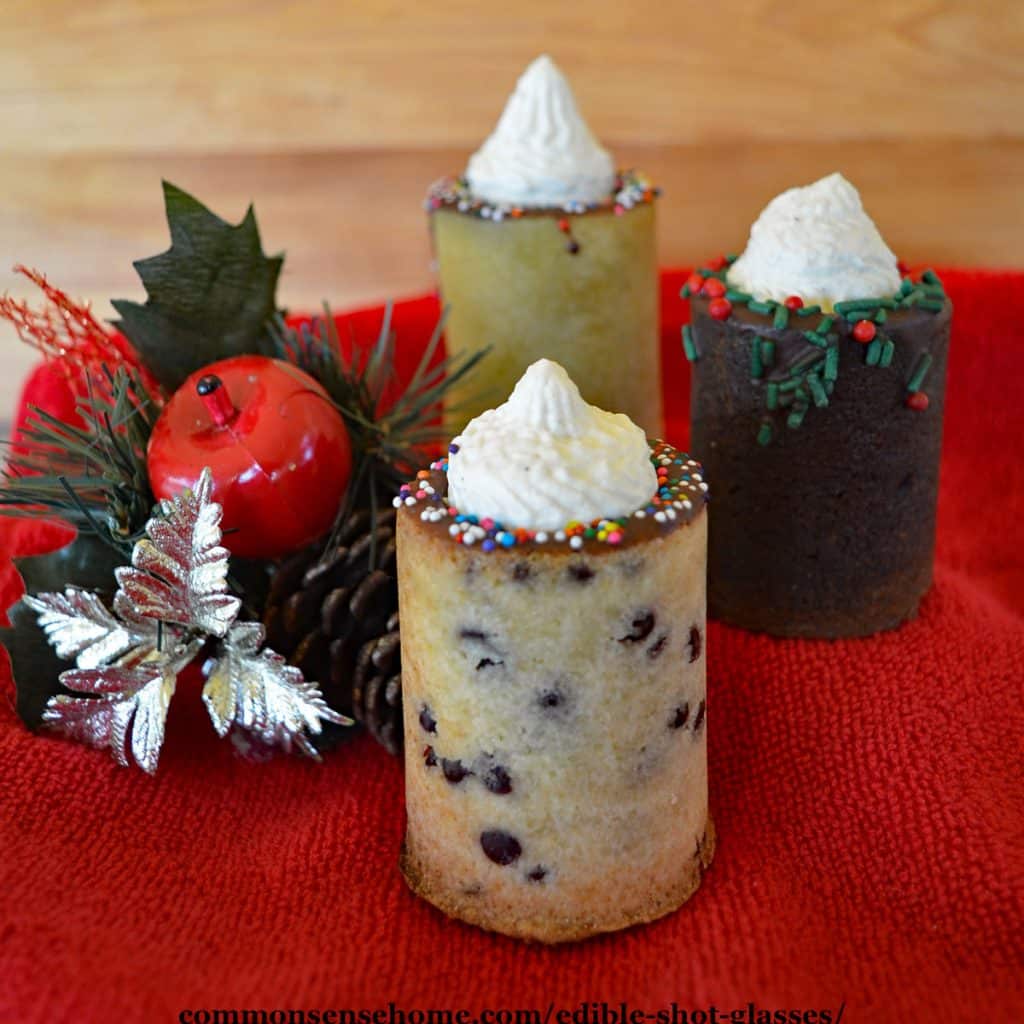
You can use these edible shot glasses to hold liquid, too, of course. Just make sure to:
- Line cookie glasses with chocolate or summer coating to seal them
- Use room temperature or chilled beverages
- Fill cups just before serving
I was surprised that the shot glass molds didn’t come with recipes, and when I went hunting for instructions and recipes on the internet, most of them weren’t very clear.
The boys and I tested several recipes, adjusting times, temps and ingredients until we were happy with the end product. I hope you like the results, too.
The recipes are grouped into cookie shot glasses, gelatin shot glasses (jello shot glasses) and hard candy shot glasses. You can also use chocolate or candy melts, water (ice shot glasses) or pureed frozen fruit (serve a strawberry mini margarita in a frozen strawberry glass).
Don’t want to make your own edible shot glasses? There are an assortment of ready made edible shot glasses, too, such as:
Cookie Shot Glasses (or Mini Edible Serving Cups)
To get the glasses to bake evenly and fill the forms completely, there are a few steps you should follow.
- Fill the molds completely, packing tightly to avoid air pockets.
- Place the mold on a baking sheet to keep it level in the oven. (I used Airbake sheets.)
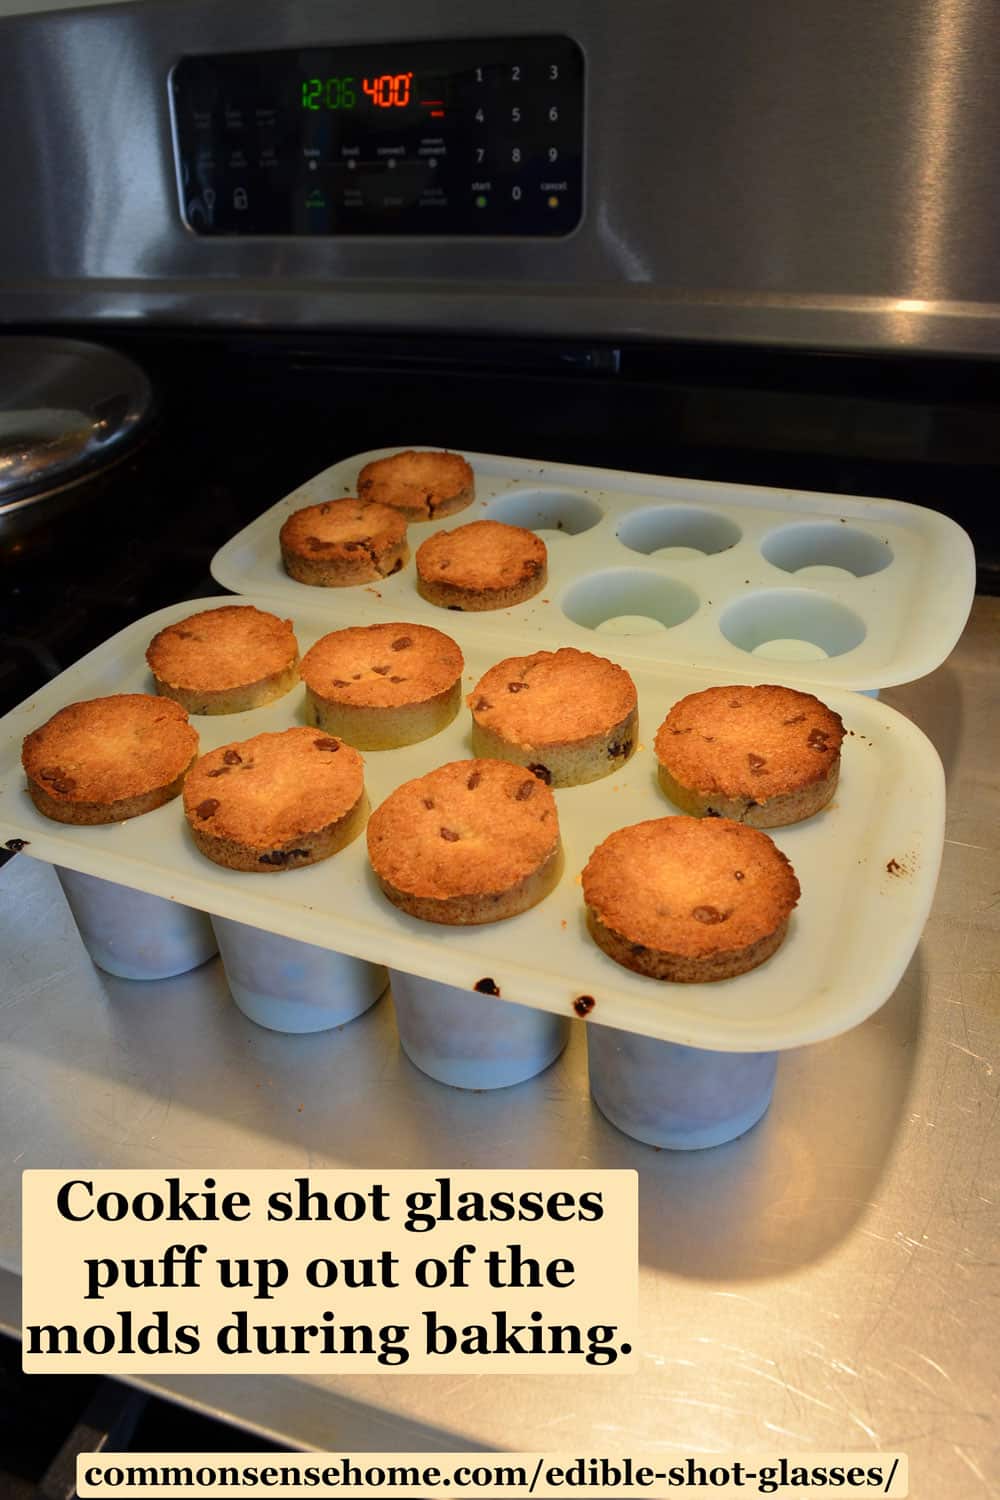
- Bake the cookies until they puff over the top of the mold and tops are lightly browned and crisp.
- If exposed end of cookies are browning too fast, cover with aluminum foil.
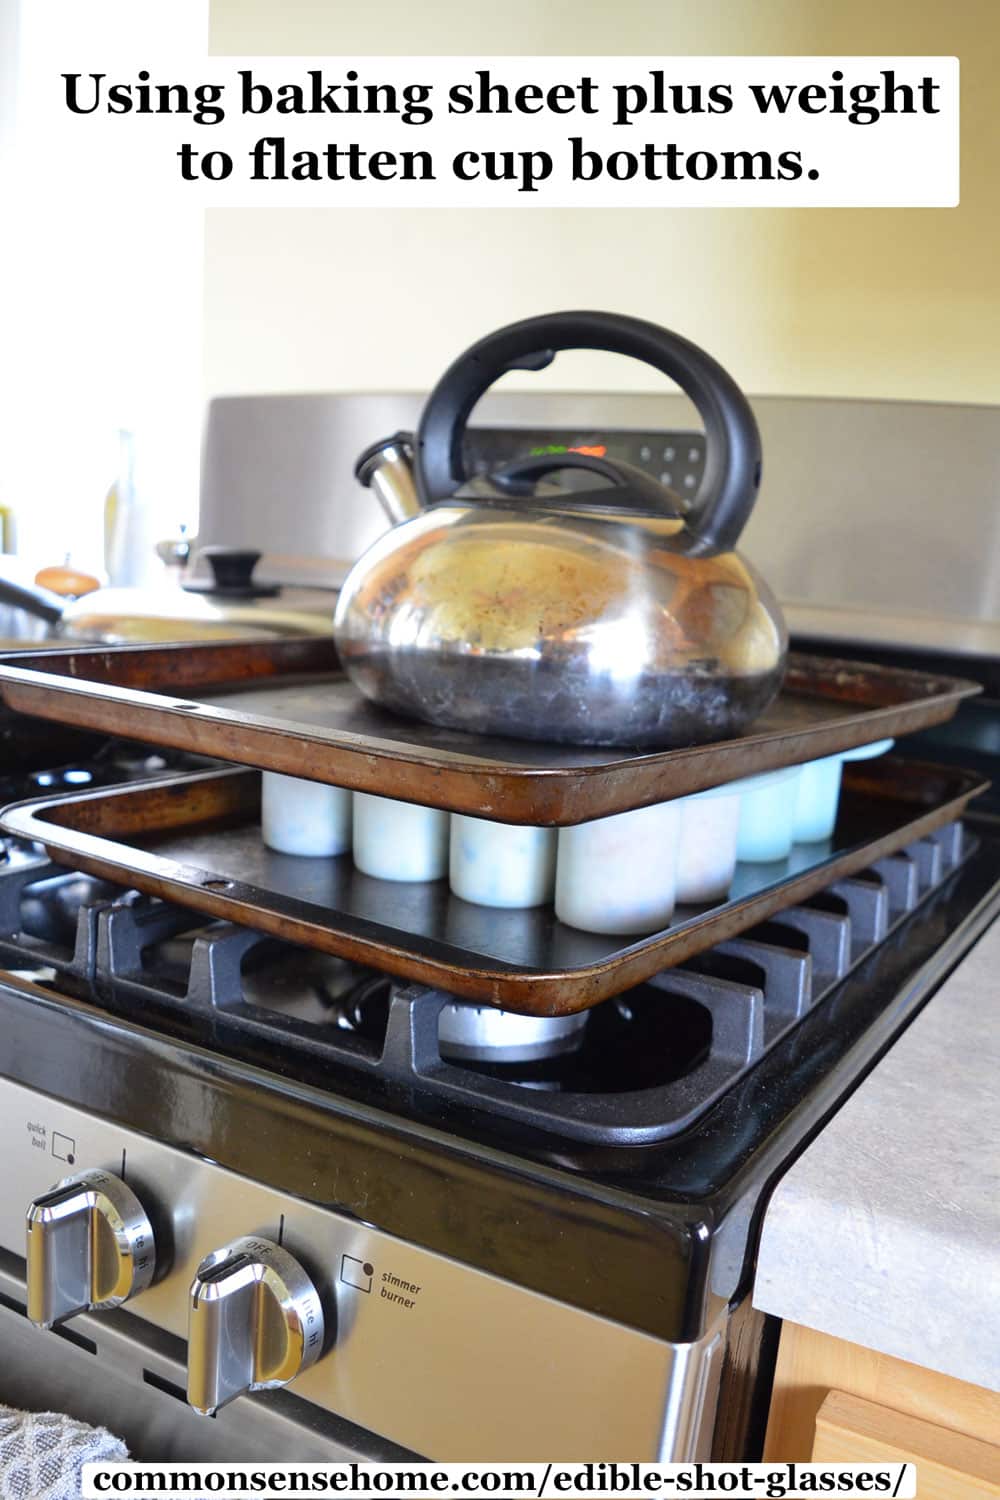
- When the cookies are finished baking, remove from oven and place on a flat surface. Use a baking sheet to press down on the tops of the cookies and squish them back into the mold. (I set the pan on top of them with my tea kettle on top for five minutes.)
- Move mold to fridge or freezer to cool completely before unmolding.
- When removing the cookies from the shot glass molds, work gently, pushing and pulling the mold away from the cookie. Manipulate the mold, not the cookie.
- To make the cookies leak-resistant, coat inside with a layer of chocolate or candy melts. For chocolate, adding 1 teaspoon to 1 tablespoon of coconut oil per half cup of chocolate will make the chocolate flow more easily. This allows you to spoon some chocolate into the shot glass, spin to coat, and dump out the excess – much easier than painting it on. Summer coating should flow well “as is”. If it doesn’t, try the coconut oil trick. I prefer to gently heat the chocolate or summer coating on the stove top, but you can use the microwave if you prefer. Just make sure you don’t get it too hot, or it will seize and get hard instead of melting.
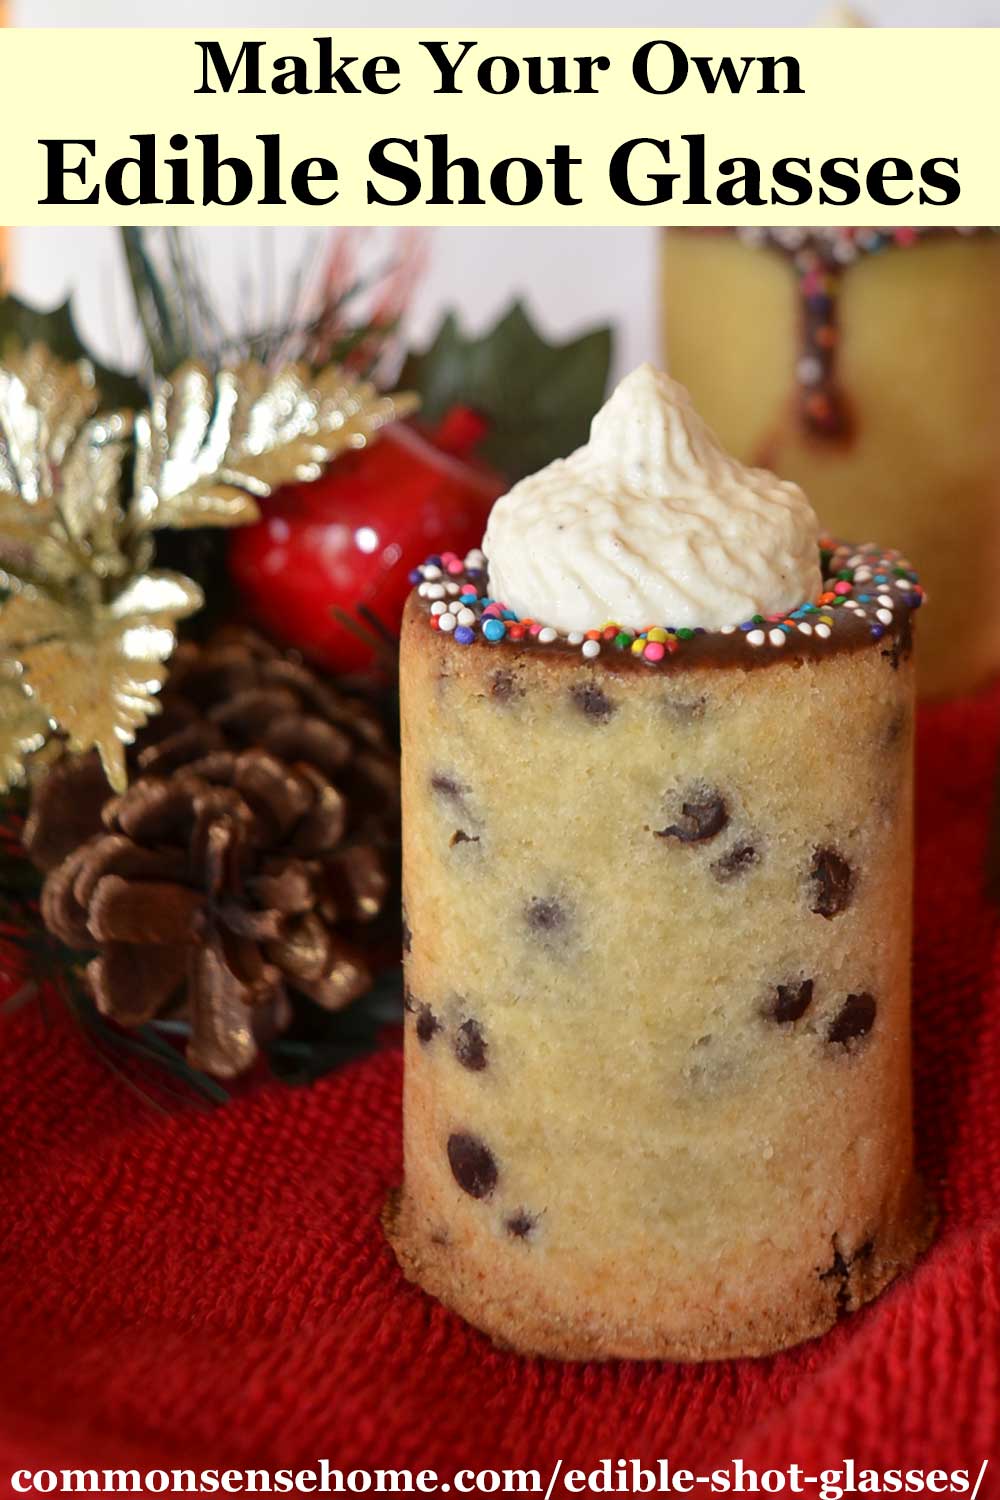
Chocolate Chip Cookie Cups
Adapted from Chatelaine.com
Ingredients
- 1 cup butter, at room temperature
- 3/4 cup granulated sugar
- 1 egg
- 1 tsp vanilla
- 1/2 tsp salt
- 2 1/2 cups all-purpose flour
- 1/2 tsp baking powder
- 1/2 cup mini semi-sweet chocolate chips
- melted chocolate, for coating
- coconut oil, optional, for coating
- Sprinkles, optional
Directions
Preheat oven to 375°F.
In a medium bowl, cream together butter and sugar. Blend in egg and vanilla. In a separate bowl, blend dry ingredients (flour, baking powder, salt). Add dry ingredients to butter mixture. Stir in chocolate chips. Mix will appear crumbly.
Press cookie dough into shot glass molds, filling each cavity completely. Bake on pan as directed above for 30-35 minutes, until cookies are puffed and golden brown. Remove from oven and press back into mold. Chill and remove from mold. Serve “as is” or coat with chocolate and sprinkles, if desired. Chill until chocolate is set before filling with liquid. Use within one week of baking for best results. Store in an airtight container. Note: This recipe is supposed to make 8 cups, but for us it made 11.
Gingerbread Cookie Cups
Ingredients
- 2 1/2 cups all-purpose flour
- 1/2 teaspoon salt
- 1/2 teaspoon ground nutmeg
- 1/2 teaspoon ground cloves
- 1 teaspoon ground ginger
- 1 teaspoon ground cinnamon (plus additional for garnish)
- 1/2 cup butter
- 1/2 cup granulated sugar
- 1/2 cup molasses
- 1 egg
- 1 cup white candy melts (or chocolate chips) and Christmas nonpareils (for garnish)
Directions
Preheat oven to 375°F.
In a medium bowl, cream together butter, sugar and molasses. Blend in egg. In a separate bowl, blend dry ingredients (flour, salt, nutmeg, cloves, ginger and cinnamon). Add dry ingredients to butter mixture. Mix will appear crumbly.
Press cookie dough into shot glass molds, filling each cavity completely. Bake on pan as directed above for 20-25 minutes, until cookies are puffed and exposed edges are firm and dry. Remove from oven and press back into mold. Chill and remove from mold.
Serve “as is” or coat with white candy melts or chocolate and nonpareils, if desired. Chill until chocolate is set before filling with liquid. Use within one week of baking for best results. Store in an airtight container. Note: This recipe is supposed to make 8 cups, but for us it made 10.
Sugar Cookie Cups
Ingredients
- 1/2 cup butter, room temperature
- 3/4 cup white sugar
- 1 egg
- 3/4 teaspoon vanilla
- 1/2 teaspoon salt
- 2 cups flour
- 1/2 teaspoon baking soda
- melted chocolate, for coating
- coconut oil, optional, for coating
- Sprinkles, optional
Directions
Preheat oven to 375°F.
In a medium bowl, cream together butter and sugar. Blend in egg and vanilla. In a separate bowl, blend dry ingredients (flour, baking soda, salt). Add dry ingredients to butter mixture. Mix will appear crumbly.
Would you like to save this?
Press cookie dough into molds, filling each cavity completely. Bake on pan as directed above for 15 minutes, until cookies are puffed and golden brown. Remove from oven and press back into mold. Chill and remove from mold. Serve “as is” or coat with chocolate and sprinkles, if desired. Chill until chocolate is set before filling with liquid. Use within one week of baking for best results. Store in an airtight container. Makes 8 cookie cups.
Eggnog Whipped Cream Recipe
Adapted from allrecipes.com.
Makes a great filling for the cookie cups, or topping for pudding or drinks served in the cookie cups.
Ingredients
- 1 cup heavy whipping cream
- 1-2 tablespoons granulated sugar
- 1 tablespoon vanilla extract
- 1 tablespoon rum or 1 teaspoon rum extract
- 1/2 teaspoon ground nutmeg
Directions
Pour whipping cream into mixing bowl and whip on high speed until soft and fluffy. Add sugar and nutmeg and whip until stiff peaks form. Add vanilla and rum, whip to stiff peak stage again. Serve immediately or chill and serve within 4 hours.
Gelatin Shot Glasses (“Jello” Shot Glasses)
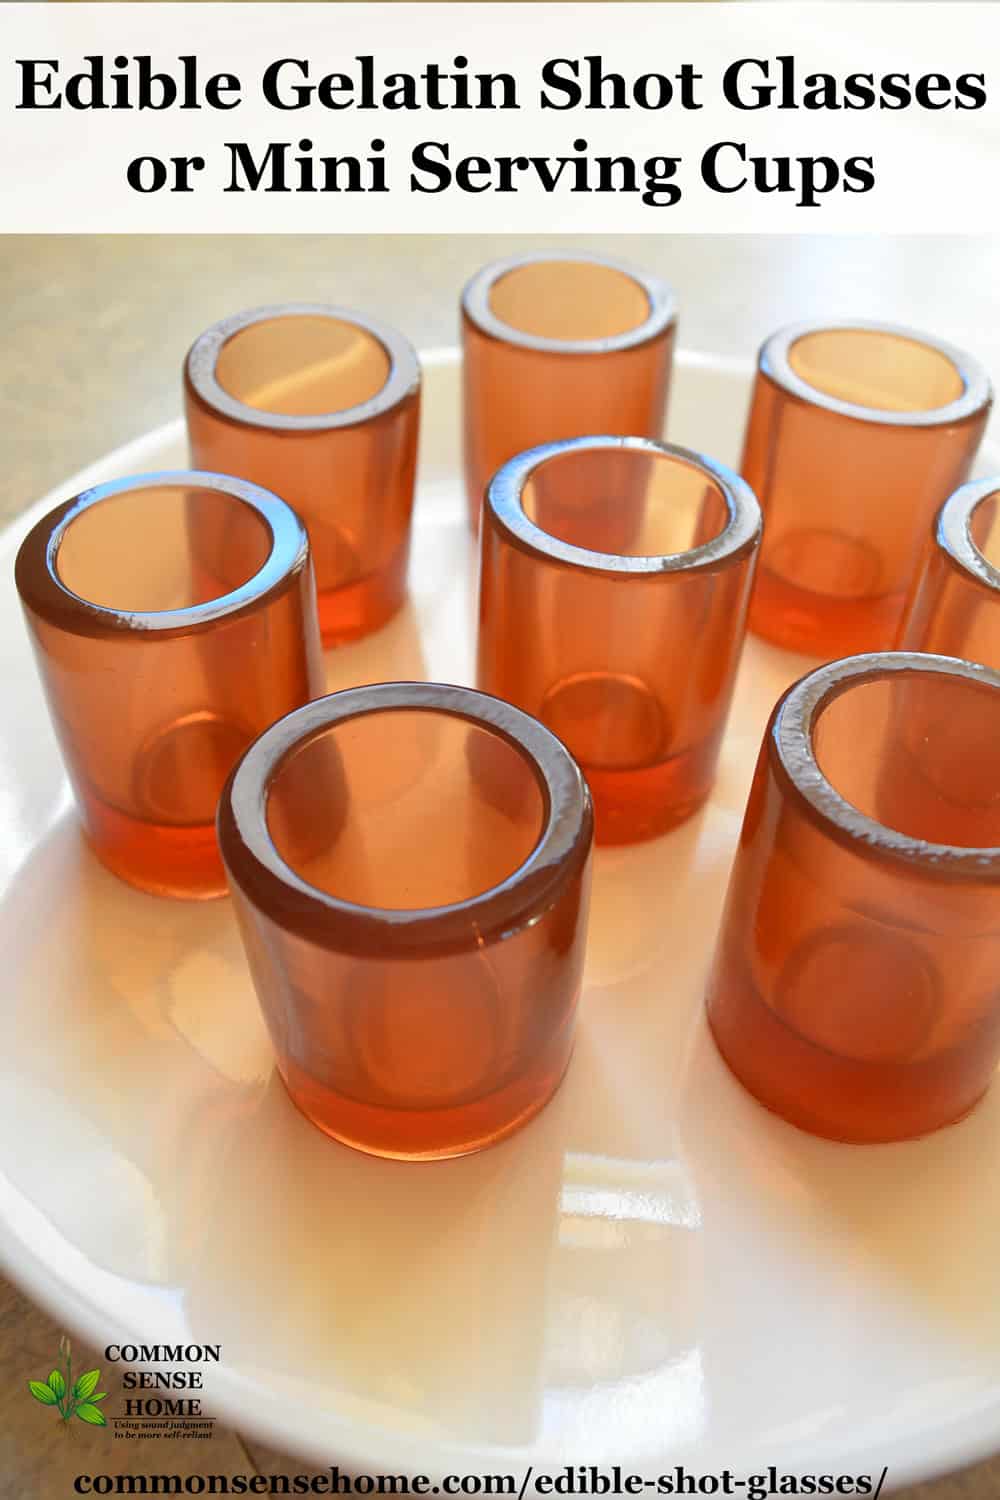
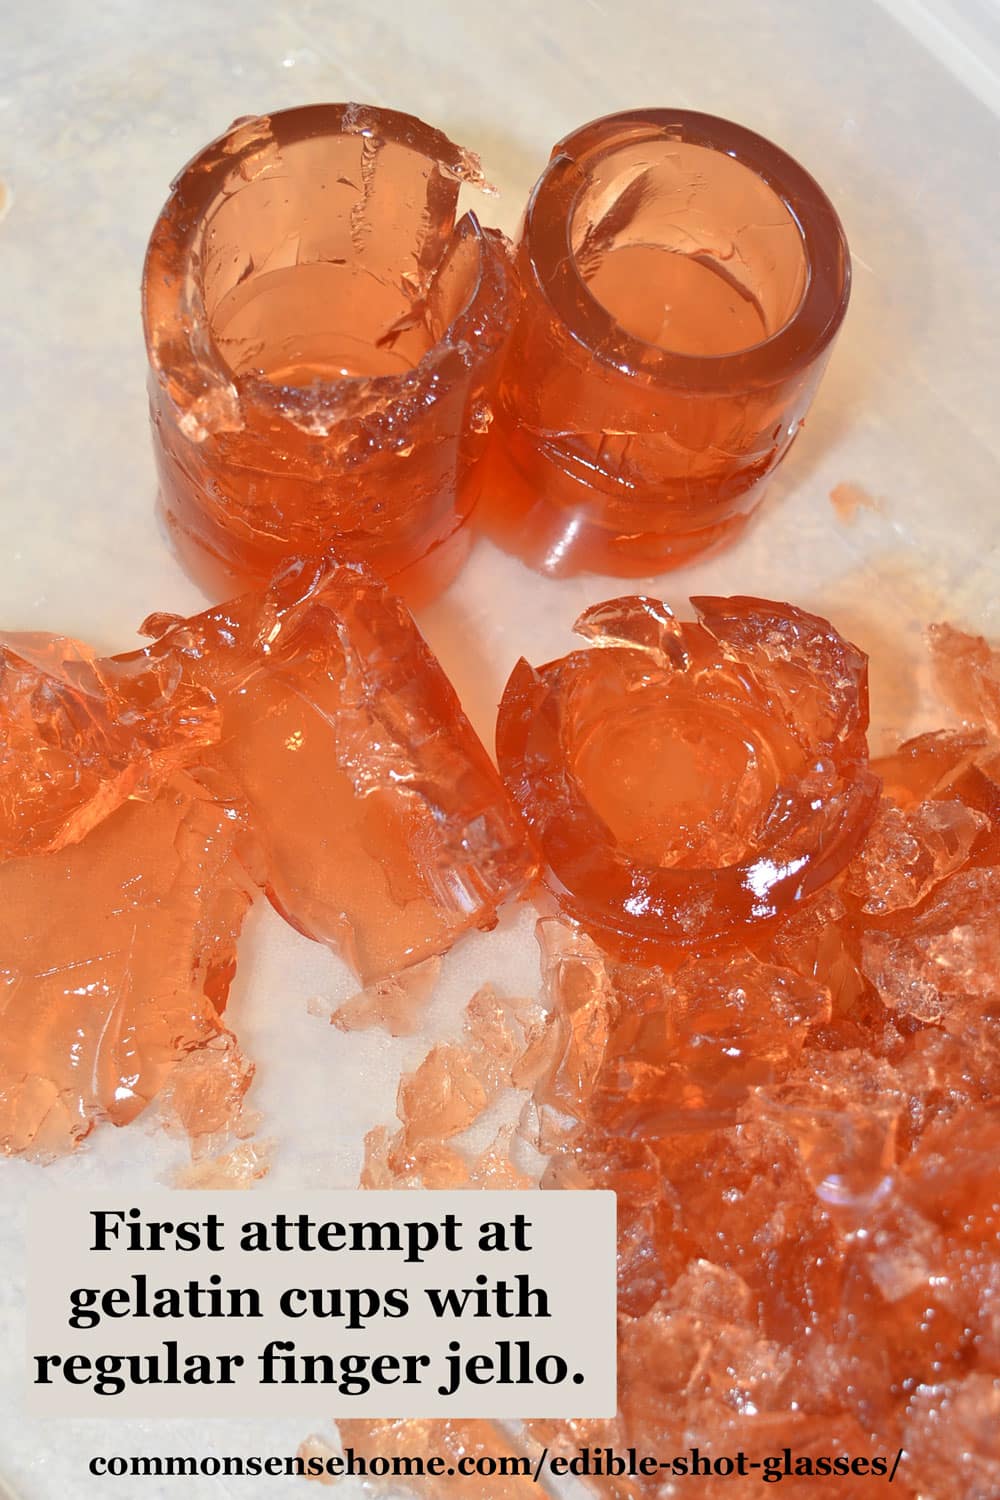
Don’t use regular strength “finger jello” in these molds, or you’ll end up with a mess. Freezing makes the problem even worse. To get a stable cup, you need very firm gelatin. Here’s the recipe that we used.
Ingredients
- 2 cups fruit juice, divided
- 4 tablespoons (1/4 cup) gelatin powder Buy gelatin
Directions
Measure out one cup cold fruit juice. Sprinkle gelatin over cold fruit juice. Stir in and let stand for one minute. Heat the rest of the juice until boiling.
Stir cold juice and gelatin into hot juice until completely dissolved. Place shot glass mold on a pan or other flat container. Fill molds with gelatin.
Place in refrigerator to chill for 3 hours, or overnight. Gently remove cups from molds and fill as desired. Makes 8 shot glasses.
Candy Cane Shot Glasses
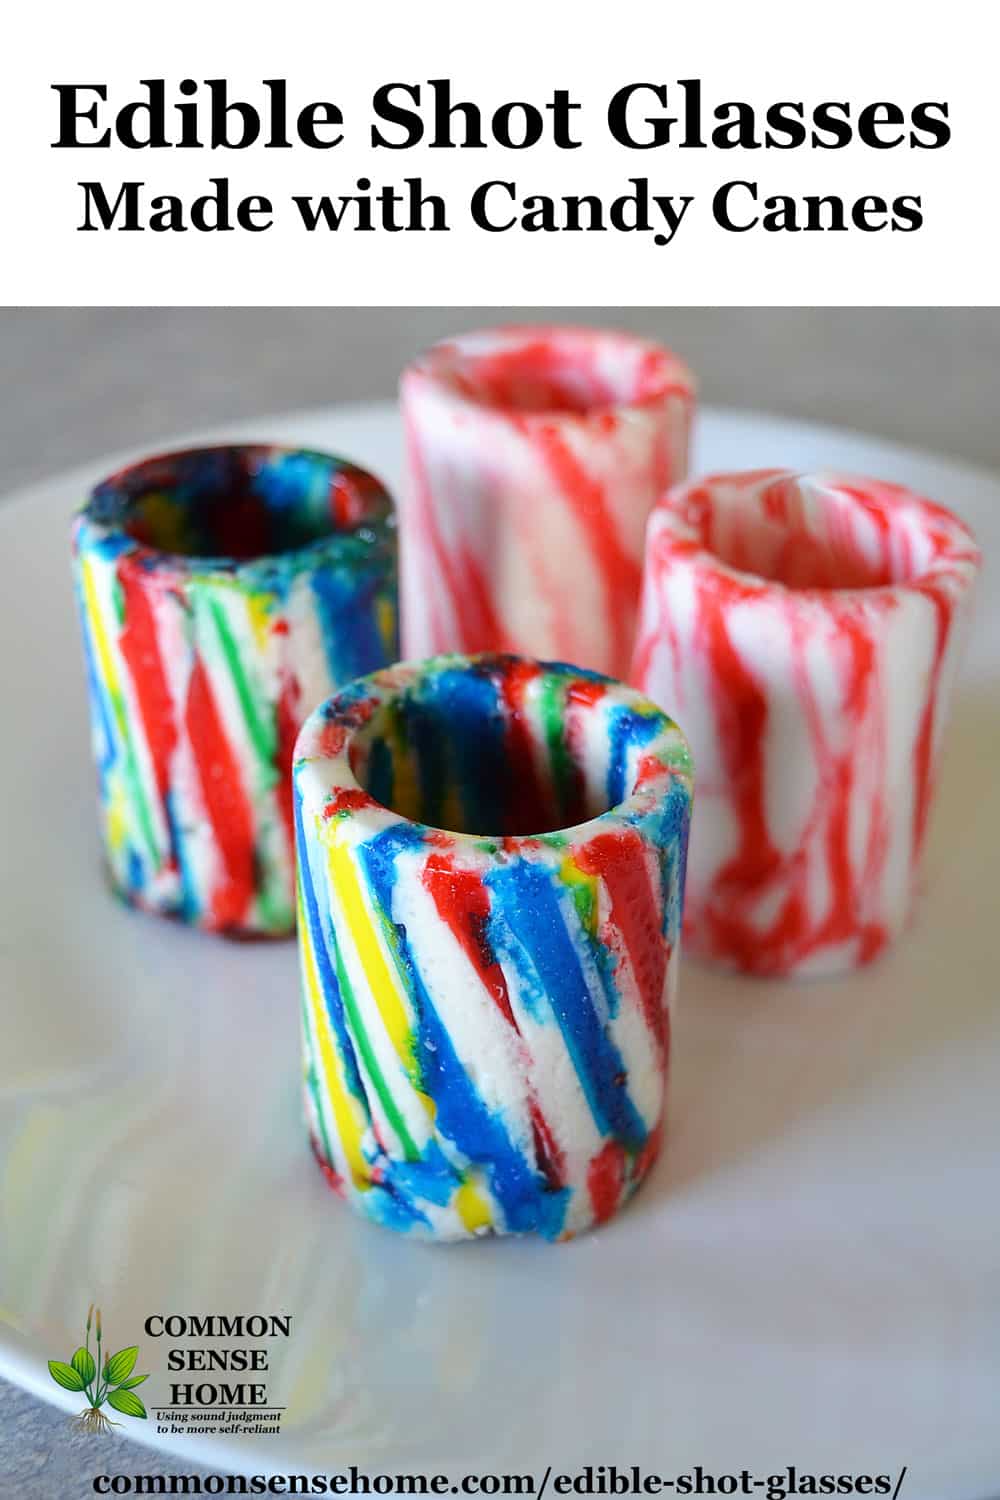
You will need about 4 regular sized candy canes per shot glass, so around 32 to fill all eight sections of the mold.
Preheat oven to 375F.
Break candy canes into lengths roughly the height of the mold. Stuff pieces upright around the mold, making sure that they reach all the way to the bottom.
Pack as tightly as possible to avoid air pockets. Fill in top of mold with smaller candy pieces and bits, mounding slightly above mold. Candy will melt and settle into the mold as it is heated.
Place mold on baking sheet and bake for about 10-15 minutes, until candy is soft. Remove from oven. Using a butter knife, carefully press candy into mold and level bottoms. (Be careful – mold will be hot.)
Remove mold from pan and chill on level surface until cool. Remove shot glasses from molds by gently inverting one glass at a time and squeezing out the center. Store candy cups in a sealed container away from direct heat.
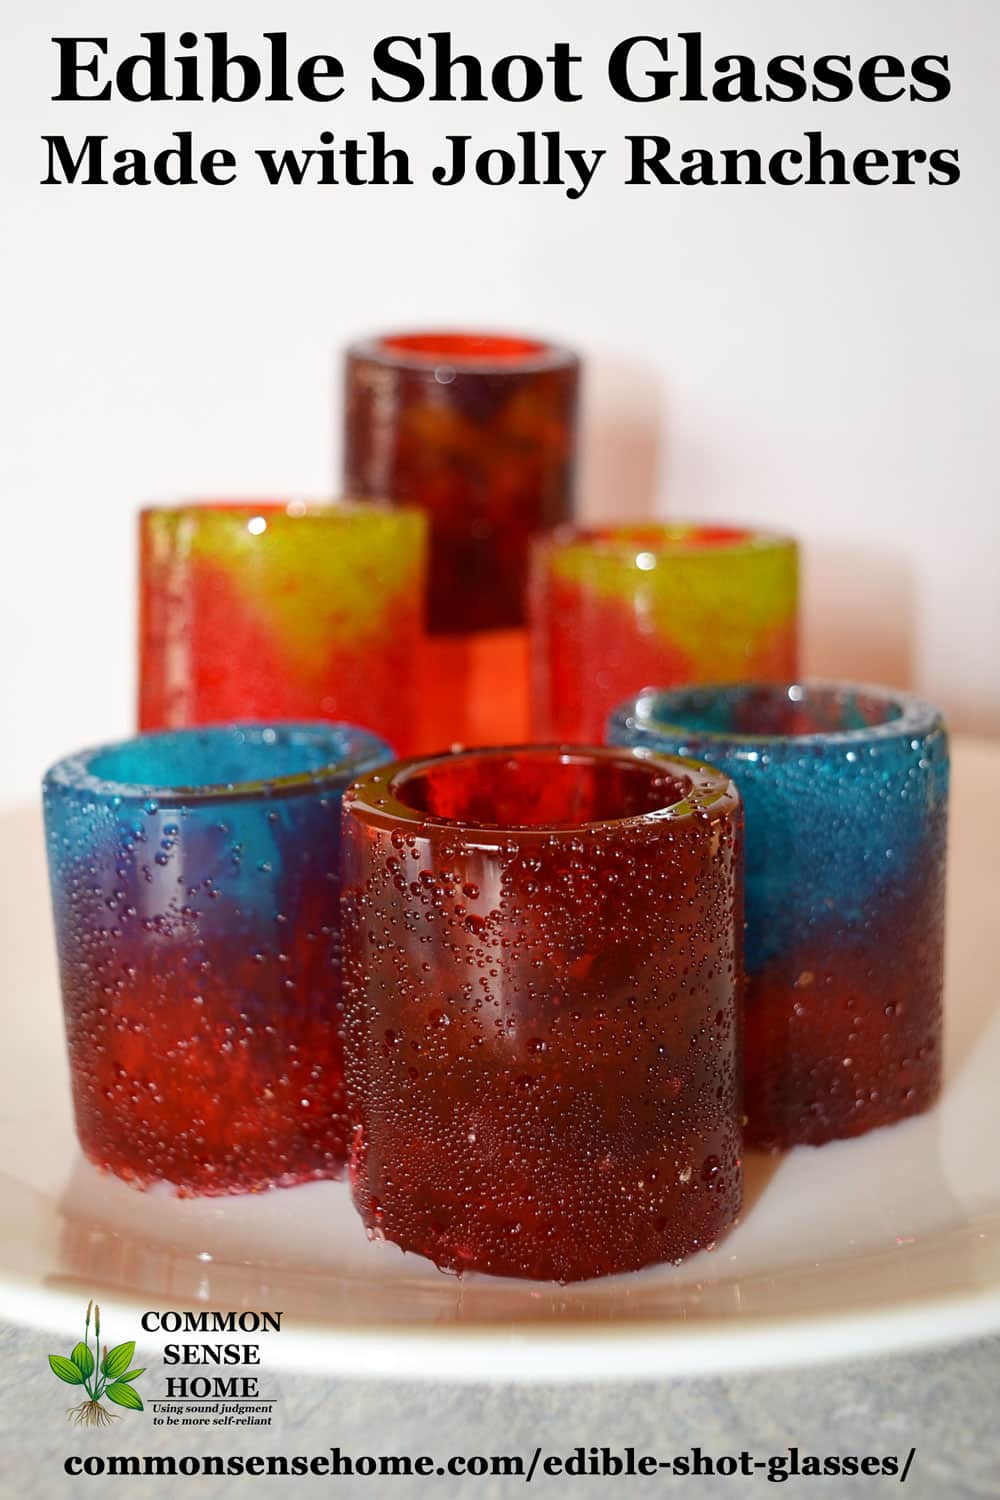
Jolly Rancher Shot Glasses
Adapted from Princess Pinky Girl.
You will need about 13-14 candies per shot glass.
Preheat oven to 350F.
Stuff the candies into the mold. Don’t worry if the mold bulges in or out a little – just cram those candies in there. They’ll melt together to fill in the air pockets. Heaping a little on top is good, as the candy will shrink quite a bit.
Place on a baking sheet and bake for 9-10 minutes. You want it soft, but not bubbling. (Bubbles show up in the finished glass.)
Remove from oven and cool completely on a level surface. If bubbles appear, tap out gently with a spoon or butter knife.
Note: Some sites suggest crushing the candies and pouring them into the molds. I don’t recommend this, as we tried it and found that we couldn’t fill the molds full enough. The crushed candy melted down and we ended up with half of a glass.
Download printable PDF of all these recipes.
Have you ever made edible shot glasses? Which recipe did you use and what did you serve them with? Leave a comment and let me know what works for you.
You may also enjoy:
- Lemon Shortbread Cookies
- Coconut Oil Fudge – Easy, Delicious, No Baking Required
- Chocolate chip cookie dough truffles made with almond flour and coconut oil
Last updated in 2018.

I just bought a few of these molds and still there are not very many recipes out there. Thank you for this list, I’ll be trying them out!
Hello, going to make the chocolate chip glasses today. Do I spay the molds with cocking spray before filling? Thanks
Nope, I don’t pre-treat the molds. The butter in the cookies lubes the silicon enough so they pop out easily.
thank you so much for the cookie recipe and how to do it. I was wondering about it raising up and what to do. I will now try using the cookie dough. Your the first to post how to do cookie and look forward to a brownie or double chocolate recipe. again thank you
You’re welcome. I’ll do some testing and see what I can come up with for more chocolate.
Approx. how much melted chocolate is needed to make one batch of these as chocolate cups?
Each cup holds about 2 ounces of liquid, so the entire mold holds 16 ounces of liquid total.
Thanks for the quick reply. I have one but haven’t yet used it. I was thinking about buying another because I like to have at least two of things like these to cut down on wait time in between. The amount mattered because it would determine how frequently I may use it/them. One pound per isn’t too bad, I suppose, but that means about $5 per every 8 individuals. Maybe I’ll make the cookies. Thanks also for the recipes.
Having two molds is helpful if you want to do any volume of cups. If you plan to use the cookies for liquid, make sure to coat the inside with a layer of chocolate or candy melts to seal it.
Thanks, the coating part I knew about because I’ve had the Wilton cookie cup pan, metal one, for awhile now. I rarely used it because I only have one of them and so it takes too long to make more than one batch. I find this silicone one to be much more practical. I’m sure I’ll purchase a second one and thanks again. I’ll be looking at more on your site.
How long can i keep the shot in the frigd….like can i do them today and use them next sunday???
They should be fine for next weekend if kept refrigerated.
Maybe that why…i used a can of frozen juice that we have To mix with water..do you think that cranberry juice can work????
Even juice that you mix with water should work, as long as you use enough gelatin. If it has a higher sugar content, that might interfere with the gelling process, but shouldn’t make a huge difference. Cranberry juice should work fine.
Can i add more gelatin than 1/4 cup
Yes, if you need to do so. I wouldn’t add too much more (maybe one tablespoon extra to start?), as the more you add, the more challenging it will be to get it to all dissolve evenly.
Did you ever try with soft candy like gummy bears????
No, but gummy bears tend to turn into sticky goo when you heat them up, so I think it would be tough to get them to cooperate in forming a cup.
If you try it and I’m mistaken, please let me know.
You were right…the soft candy are not stable and very sticky…i did it another time with real jello and it works….whhoooo!!!!
Thanks for letting me know. Glad the jello ones worked out.
For the gelatin shooter…ca we froze them?
If you want to do a frozen shotglass, I’d suggest using a fruit puree or frozen beverage. When you freeze the gelatin cups, they get icy but don’t freeze evenly, making a weird, slushy texture. Note that anything frozen will be uncomfortable for your guests to hold. A good compromise might be making the gelatin cups and keeping them chilled, and filling them with a slushy drink.
Ok ..thank very much….!but doesn’t work at all for the jello shoot#!!!
Booze is antifreeze, so it doesn’t like to freeze. Make cup out of gelatin or frozen something without booze, fill with booze slushy.
ItS a real mess on side
If you’re using something frozen and some don’t turn out, you can thaw the material and try again. If you made ugly gelatin cups, the only options are to eat the mistakes and try again (or serve to non-fussy guests).
When removing the gelatin cups from the mold, make sure they’ve had plenty of time to set up. Don’t rush them out of the mold. We gently loosen each cup around the bottom edge, and then invert each section of the mold. Once the cup is sticking out, we then loosen the center of the mold and release.
What kind of fruit juice you are using???
I’ve used several different types. I look for 100% juice blends, pulp free to get the jewel like color tone to the glasses. My husband picked up some Old Orchard Red Raspberry juice blend that has a great deep red color.
Hello….i would like To put in my jello …pudding mixed with tequila rose …did you ever tried something like that???
You might want to test taste some to see that you like the combination of pudding and jello together, but yes, using pudding with tequila rose mixed in to fill the cups should be fine, if that’s what you’re asking. Go light on the booze or it will cause your pudding to break down, and don’t fill until you’re close to serving time because the booze will start to break down the gelatin cups, too.
If you want to make the cups out of pudding and booze, that won’t work. Still a problem with the booze acting as a solvent and anti-freeze. You may be able to add gelatin to your pudding to get it to set up into a cup, but I think the texture would be unappealing. Alternatively, I think you could make a frozen pudding cup – but no booze in the pudding itself.
I did hard candy first, then chocolate chip cookies second. Tomorrow, I do cake mix and red candy apple mix looks good, I put ice cream in my cookie shots…
Sounds like you’re on a roll!
need recipe for chocolate cookie shot glasses trying different ones but cannot get it quite right. Too soft or too croumbly. Need help asap
I’m sorry, it’s my busy time in the garden right now getting everything mulched and trellises up, and around 90 outside, so I don’t have recipe experimentation planned in the immediate future.
These look intriguing. I will have to get the molds and try! The recipes look very delicious, too. Thanks for all the hard work making sure the recipes work!
It was fun to do something “artsy” in the kitchen. Back when we had the family catering business, everything needed to be dressed up before serving. These would have sold like hotcakes! The gelatin ones are the easiest to make, and went the fastest at the Christmas party.
What do you mean by finger jello? I’ve never heard that term and when I searched it I just got recipes for jello blocks.
Finger jello is gelatin that is firm enough to eat with the fingers rather than with a spoon. Typically it is cut into blocks. To make the gelatin mini cups, it needs to be extra firm, or the cups fall apart.