How to Can Tomatoes – Step by Step with Photos & Video
This post may contain affiliate links. Read my full disclosure here.
We’re sharing how to can tomatoes in their own juice for maximum flavor. These are great for soups, stews, or sauces. Remember, always start with fresh, ripe tomatoes in good condition.
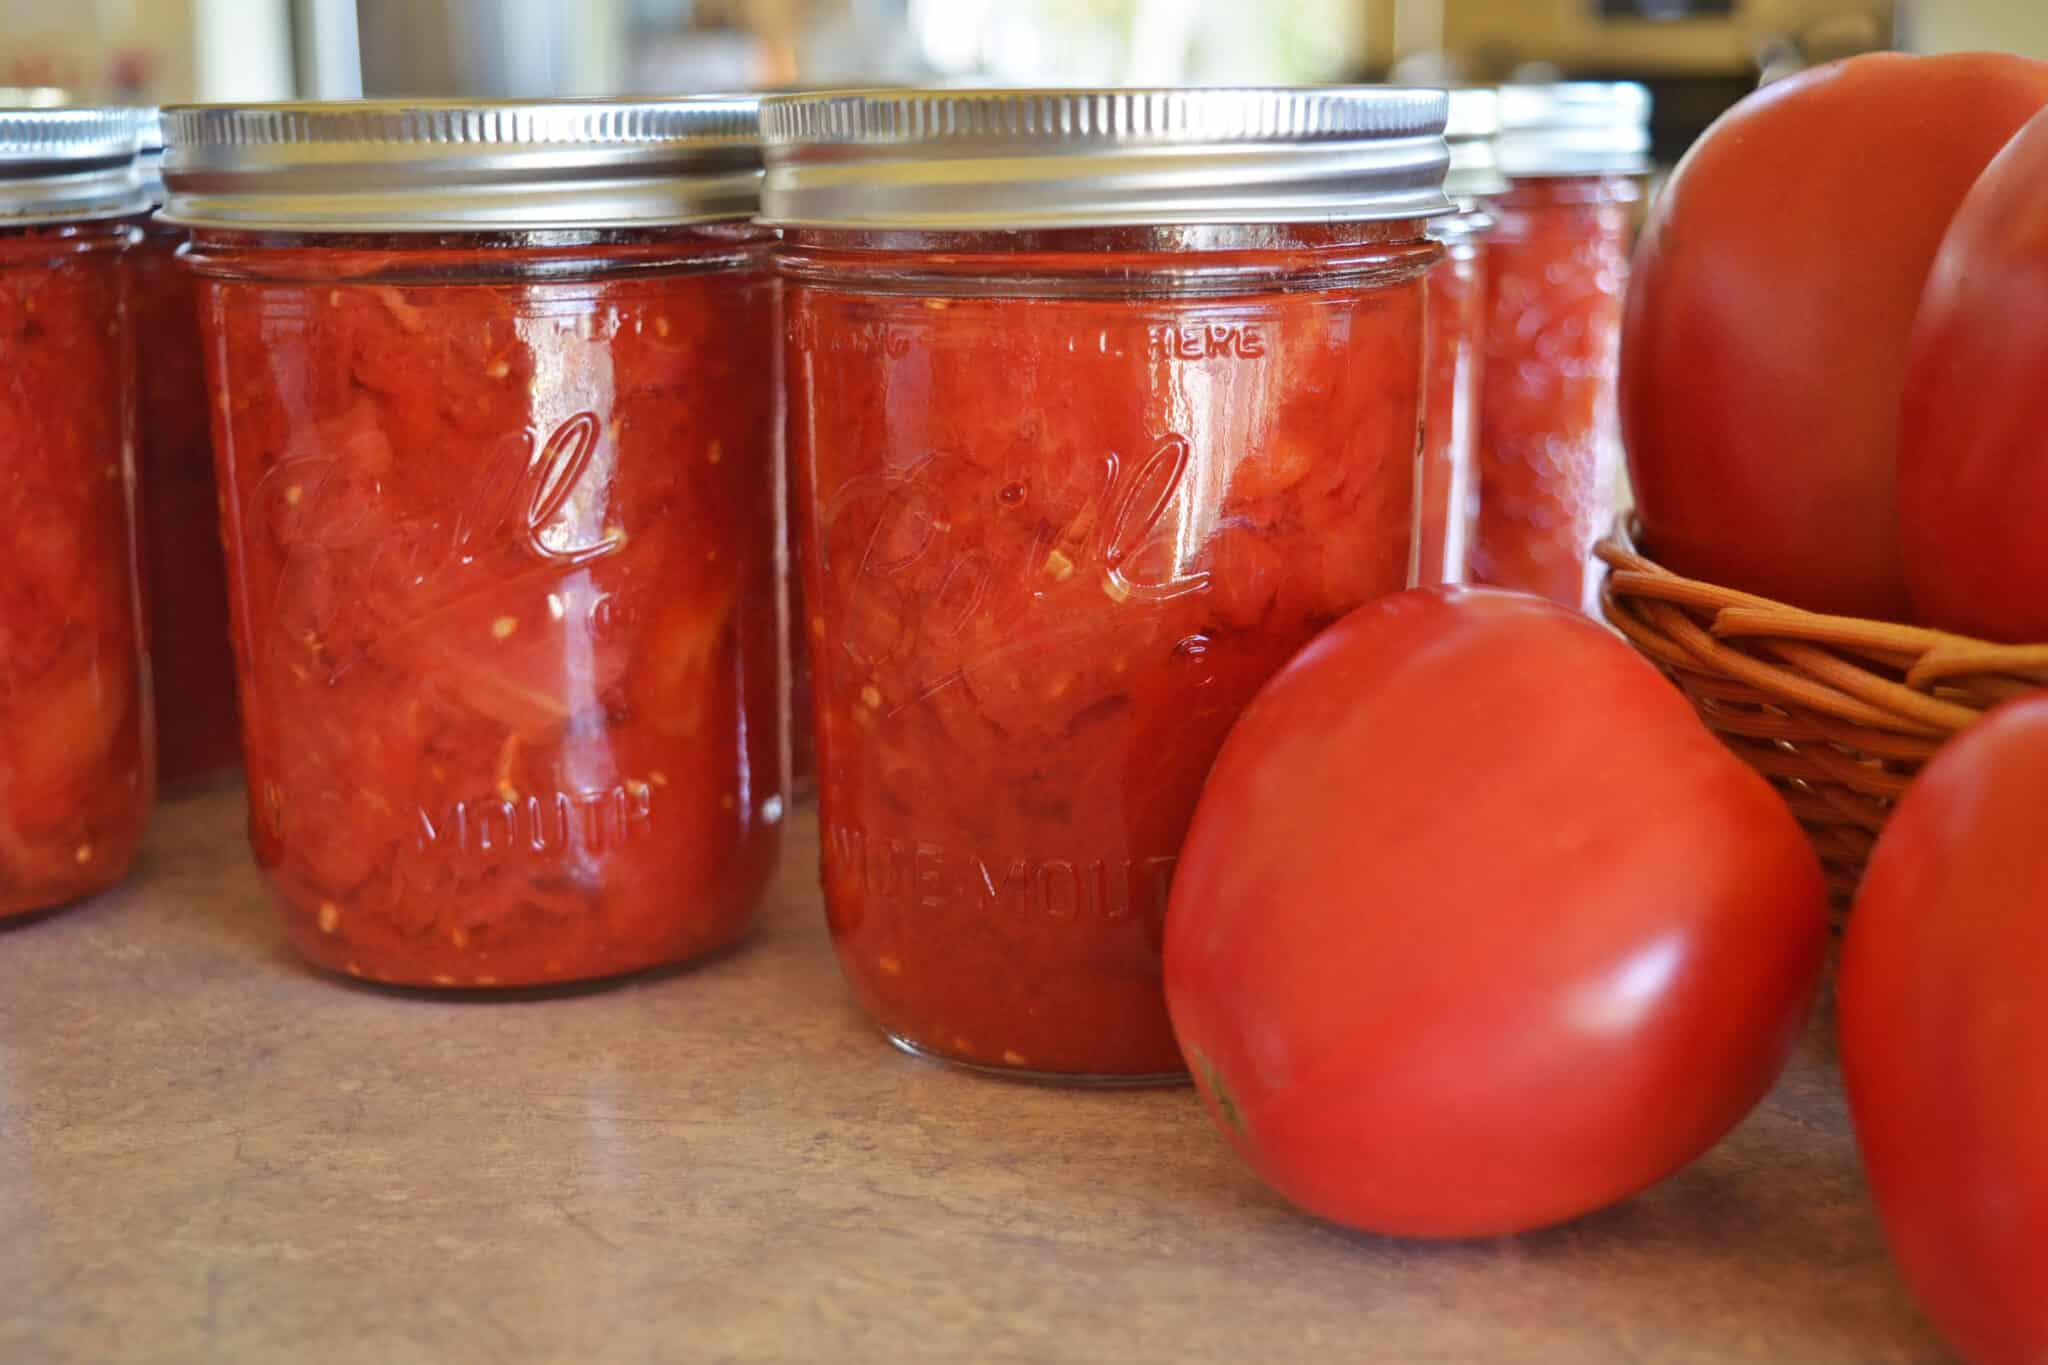
Equipment You Need to Can Tomatoes at Home
You need equipment to prep the tomatoes, and equipment for the canning process itself.
For Tomato Prep
Pairing Knife – to core and quarter tomatoes. A small serrated knife works well.
Big Stockpot – for blanching and heating your tomatoes, 8-12 quarts.
Wire basket or large strainer scoop – to move tomatoes into and out of blanching water.
Large basin of cold water with ice – to cool tomatoes after blanching.
For the Canning Process
Mason Jars – All jars should be clean. Inspect the jars for any signs of damage, especially nicks or uneven edges on the jar rims that may interfere with sealing.
I like to run my jars through the dishwasher to keep them clean and warm for processing. Alternatively, I heat them up right in the water bath canner.
Two Piece Lids and Rings – The ring holds the lid in place, the vacuum formed during processing completes the seal.
Boiling Water Canner, Large Stockpot, Steam Canner, or Pressure Canner – If you don’t have a canner, you can use a large stockpot. You want a pot that will hold enough water to cover the jars with one to two inches of water during processing.
You don’t want the jars directly on the pot bottom. Place a folded kitchen towel or metal rack in the bottom of your pot.
Jar Lifter – This allows you to lift jars safely into and out of the boiling water.
Big Ladle – to fill your jars.
Jar Funnel – A large funnel that fits standard or wide mouth jars to make filling easy.
Lid Wand or Tongs – If you want to preheat your lids, use tongs or a lid wand to lift them out of the warm water. Preheating is not necessary for most current metal lids, but is required for Tattler lids and older metal lids.
Thin Plastic Spatula or Chopstick – Used to remove air bubbles from the jar prior to processing. Do not use metal! Metal knives or spoon handles may scratch the glass.
Kitchen towel – After processing, place your finished jars on a kitchen towel. Use an older towel, in case any tomato juice leaks.
What Goes in the Jars?
We need tomatoes, acid, and salt (if you like).
Tomatoes – I prefer a meaty tomato like Oxheart or San Marzano. Roma tomatoes are also good for canning.
Acid – Use Lemon Juice or Citric Acid Powder – For safe canning, pH must be at or below 4.6. Tomatoes are right on the borderline, so adding acid makes for safe canning. (If you have a pH test strips, you can check your tomatoes to make sure they are below 4.6.)
Add one tablespoon of bottled lemon juice to each pint jar, 2 tablespoons to each quart jar. Bottled lemon juice has standardized acidity for safe canning.
If you prefer, you may use 1/2 teaspoon citric acid powder per quart, 1/4 teaspoon per pint. Citric acid will not affect the flavor of the tomatoes as much as lemon juice. Note: Citric acid is made from corn, so I opt for a GMO free brand of citric acid.
Salt (optional) – You can add 1 teaspoon per quart, 1/2 teaspoon per pint.
How to Can Tomatoes in a Hot Water Bath Canner
You can weigh and wash your tomatoes the day before canning, and gather your equipment. I’ve included photos from a couple different canning sessions so you can see how canning tomatoes looks in our kitchen. There’s a print friendly version of the instructions at the bottom of the article.
You need around 2 1/2 to 3 1/2 pounds of tomatoes per quart (about 1.5 pounds per pint). This adds up to around 21 pounds for 7 quarts, or 11 pounds for 7 pints. (A standard water bath canner holds seven pints or quarts.)
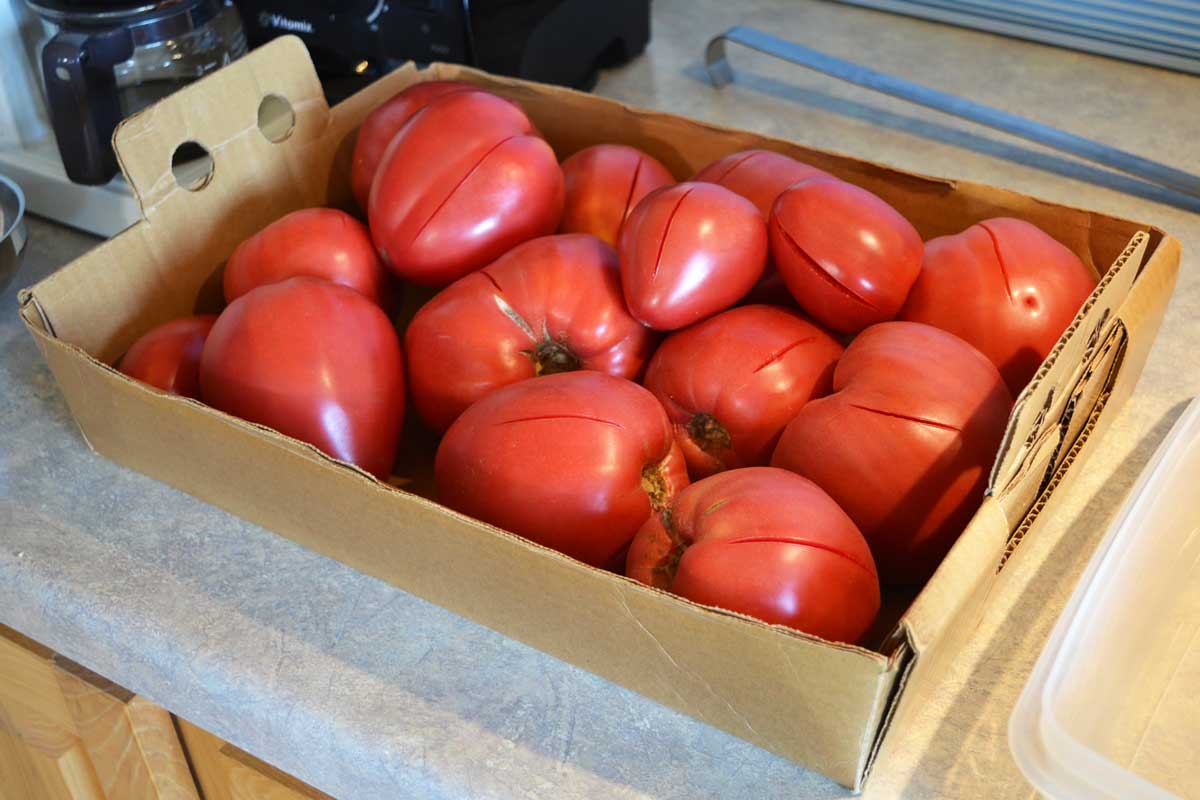
On canning day, you need to:
- Prepare your canning equipment.
- Prepare your tomatoes.
- Fill the jars and seat the lids.
- Process the jars.
- Allow the jars to cool, wipe spills, check seals, and label the jars.*
*This can be done the day after canning.
1. Preparing Your Canning Equipment
Wash the canning jars and lids and rinse well. Keep jars warm in the dishwasher, an oven at low heat (200°F) or in your water bath canner. I keep my lids warm in a small pot on the back burner. You can also place them in a bowl and pour hot water over the top of them.
Fill the boiling water canner or stockpot to within 3-4 inches of the top. Heat water to near boiling while you prepare the tomatoes.
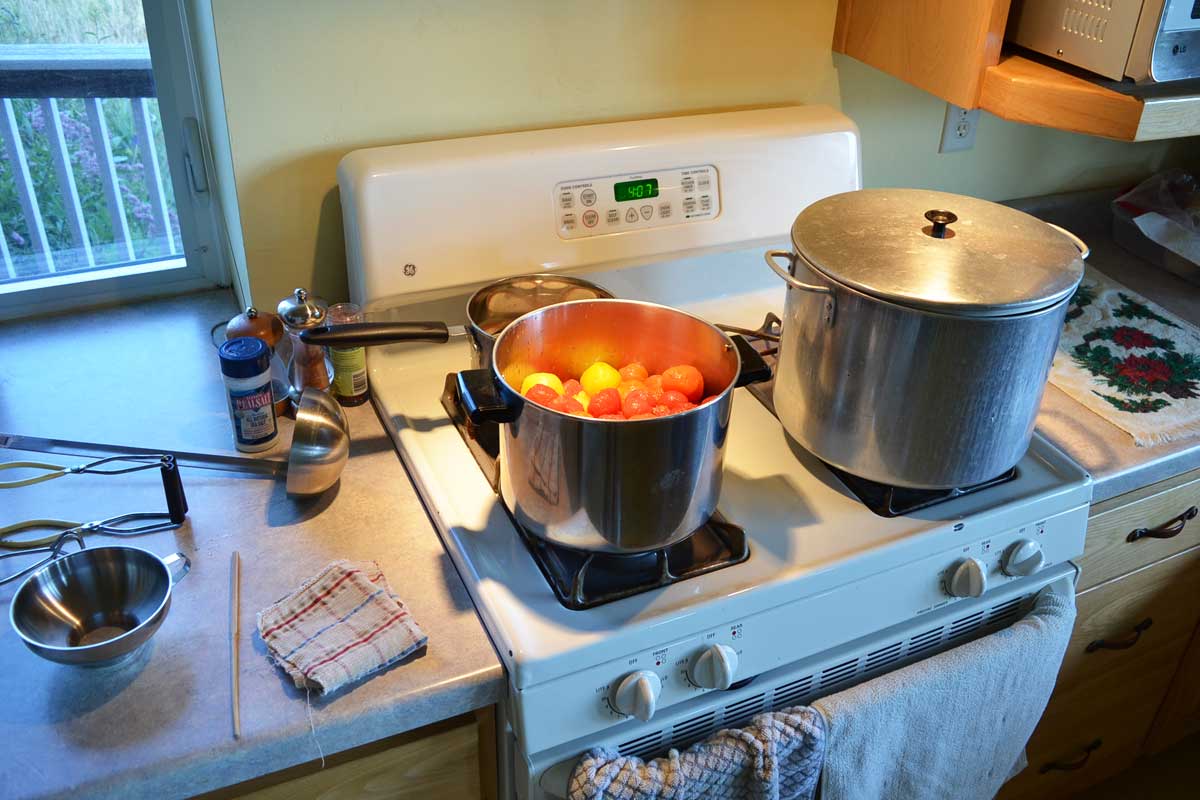
2. Preparing the Tomatoes
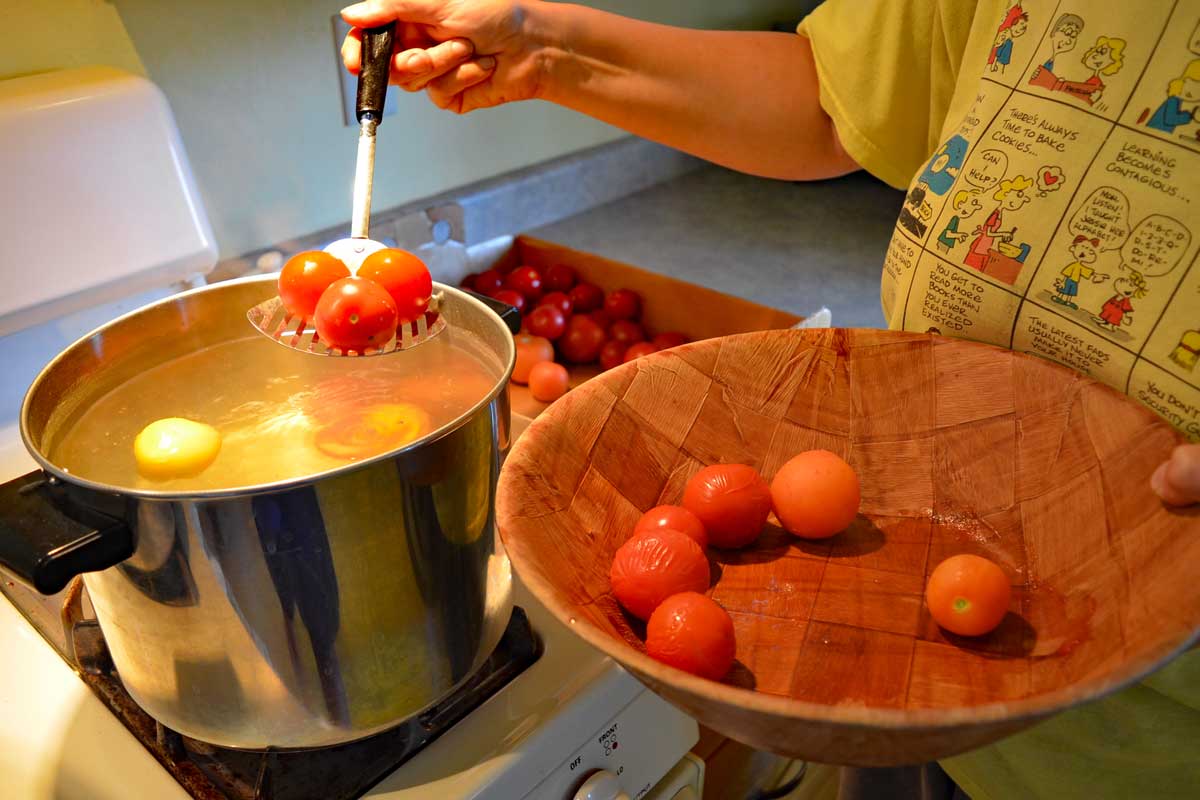
Wash the tomatoes and remove the skins with blanching. To blanch the tomatoes, place them in boiling water for 60 seconds, until skins start to crack.
Would you like to save this?
Remove from boiling water and place into ice water to stop the cooking and make them cool enough to handle.
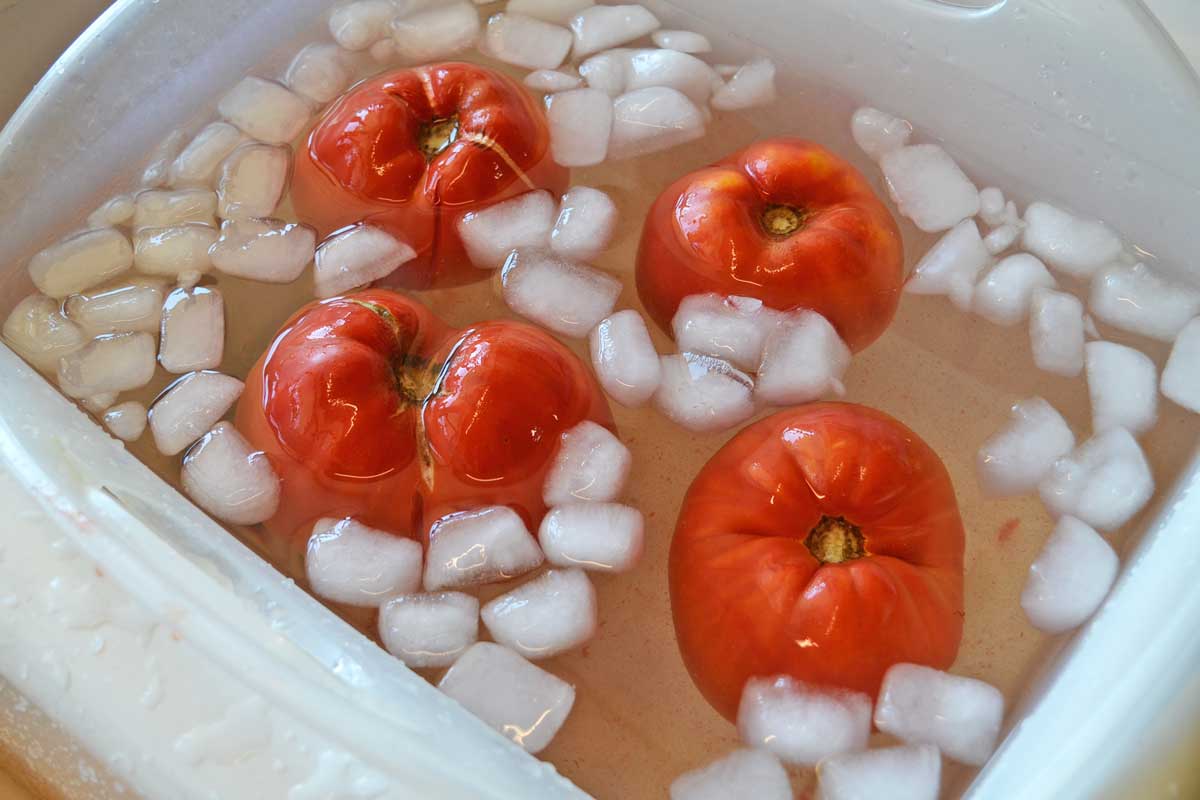
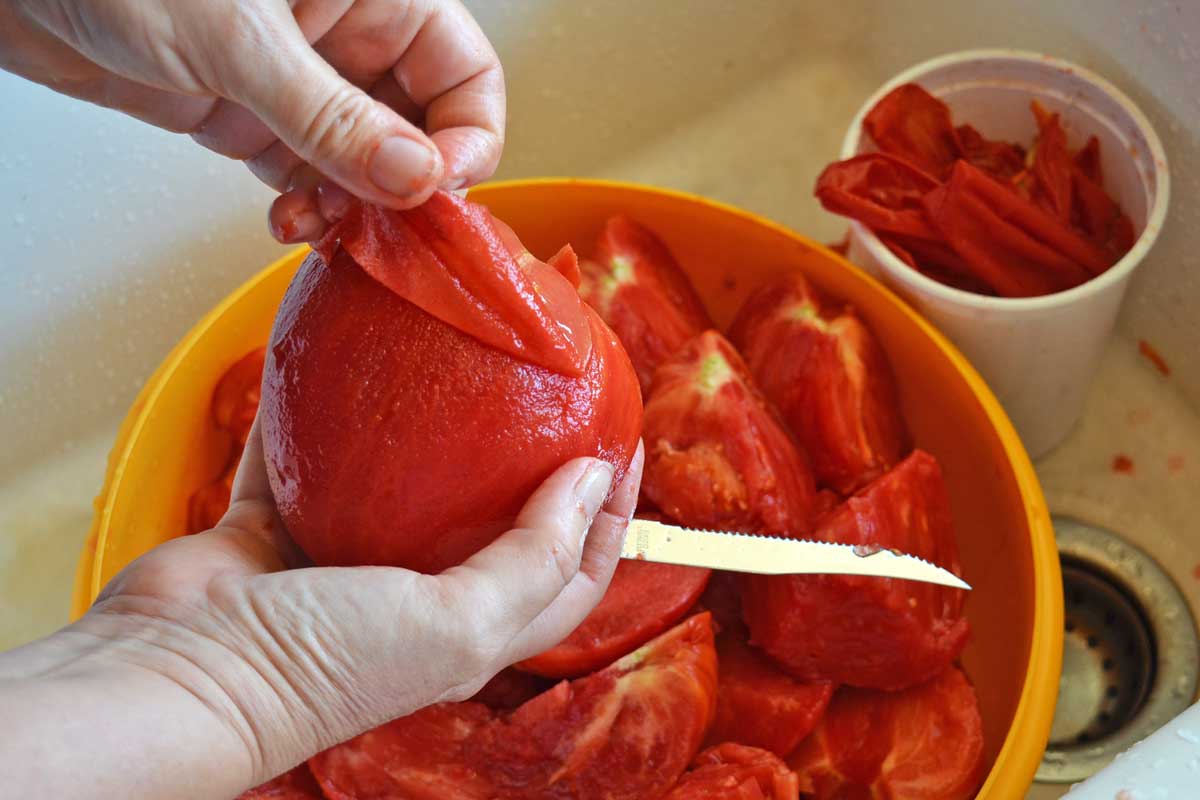
Slip skin off tomatoes. Cut out core and any damaged areas. Leave tomatoes whole or cut into quarters or pieces.
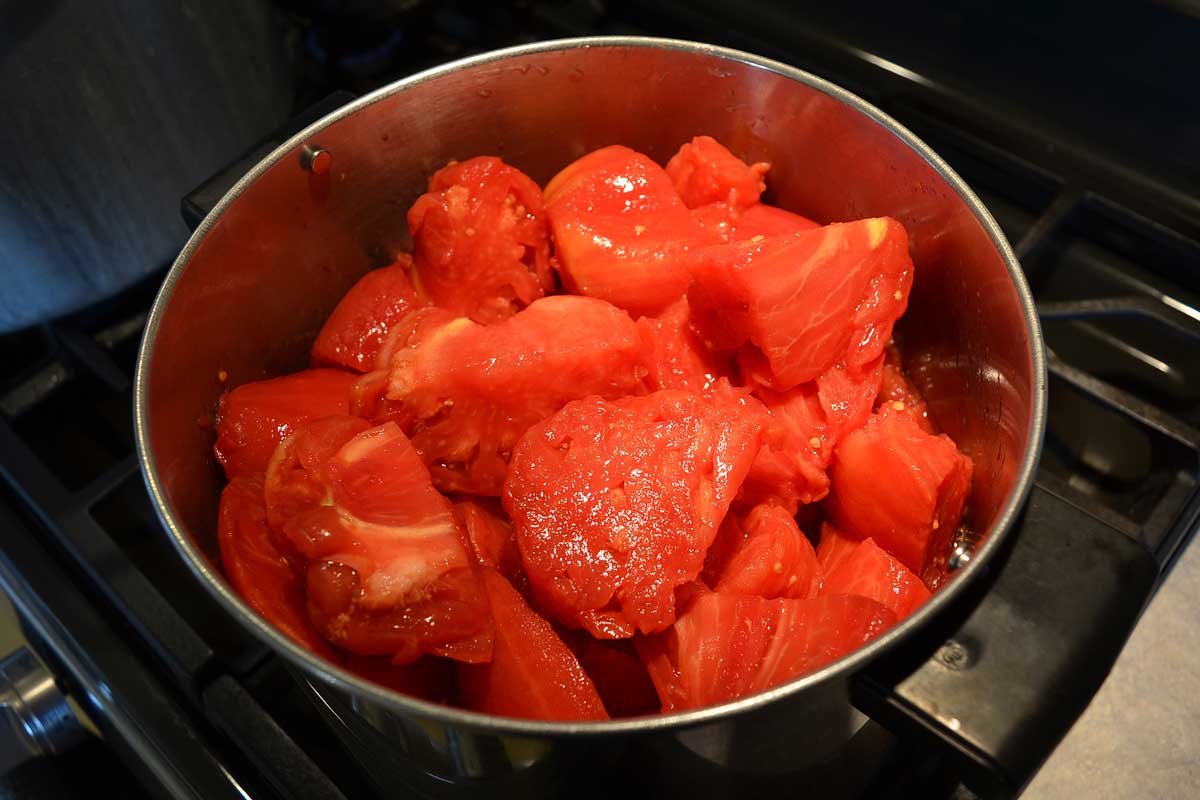
Place tomatoes in a large stockpot, and heat for around 5 minutes. As the tomatoes heat, they should make enough juice to easily cover the fruit in jars. Hold at a simmer.
3. Fill the Jars and Seat the Lids
First, add lemon juice and salt (if desired). Add the tomatoes, filling the jar to 1/2 inch from top.
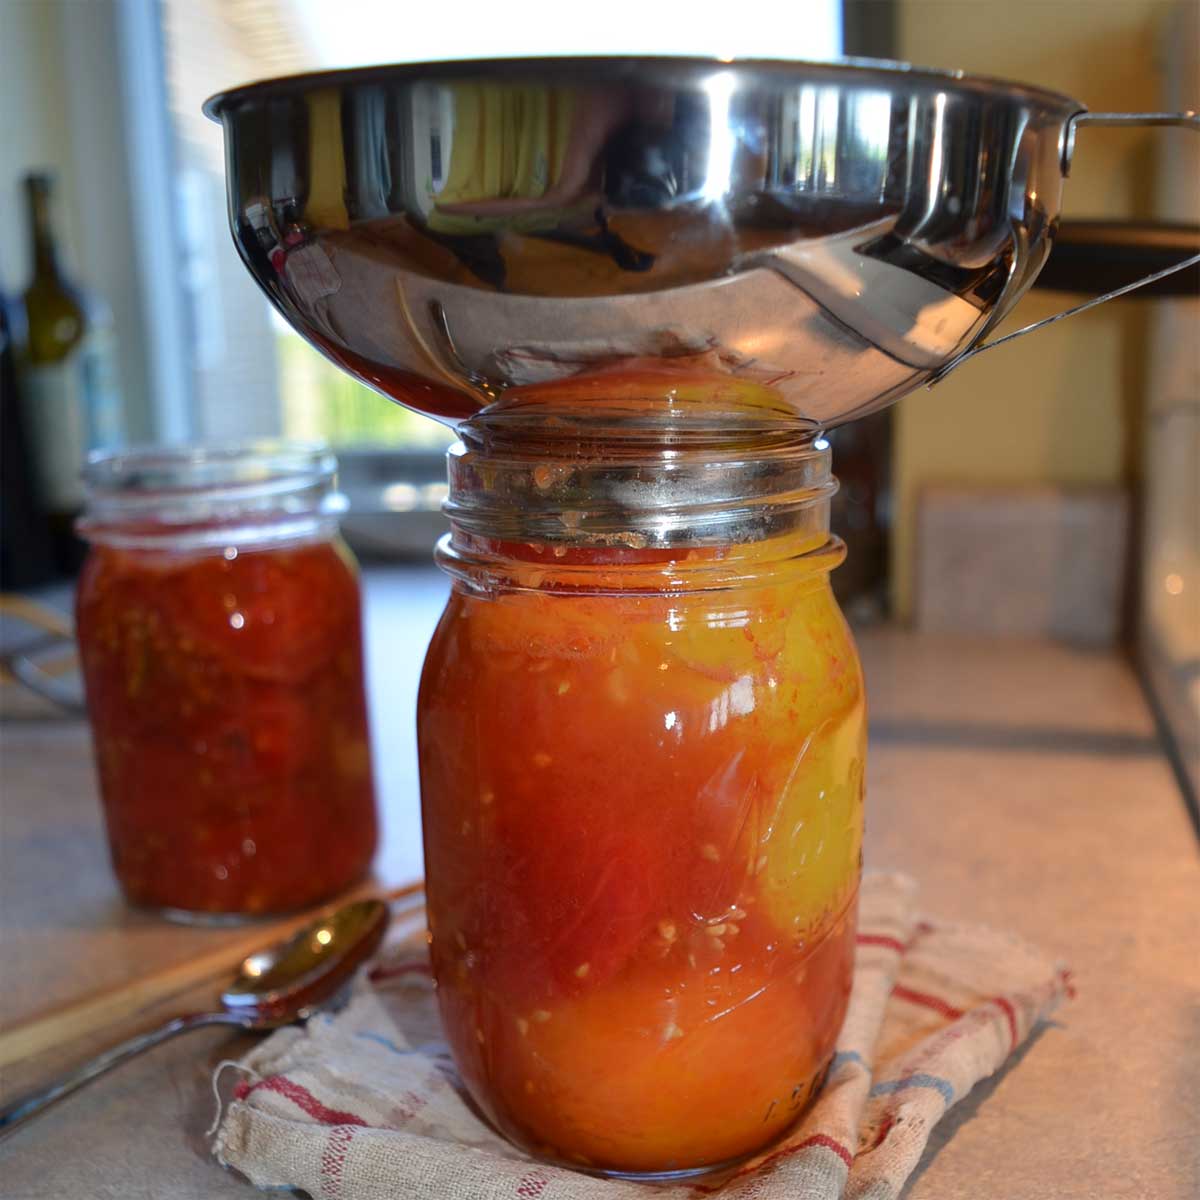
Use a spatula or wooden chopstick to remove air bubbles. Adjust liquid so there is 1/2 inch headspace. Wipe rims with clean, damp cloth. Place and the lid and ring and finger tighten.
Remember, air needs to escape from the headspace during processing, so we don’t want the rings too tight.
4. Process the Jars
Load the jars into the canner or large pot. Put lid on canner. Bring water to boil, making sure 1-2 inches of water covers the jars.
Begin timing when water reaches a rolling boil. Reduce the heat and keep the water at a low boil. Process pints for 40 minutes and quarts 45 minutes at a low boil.
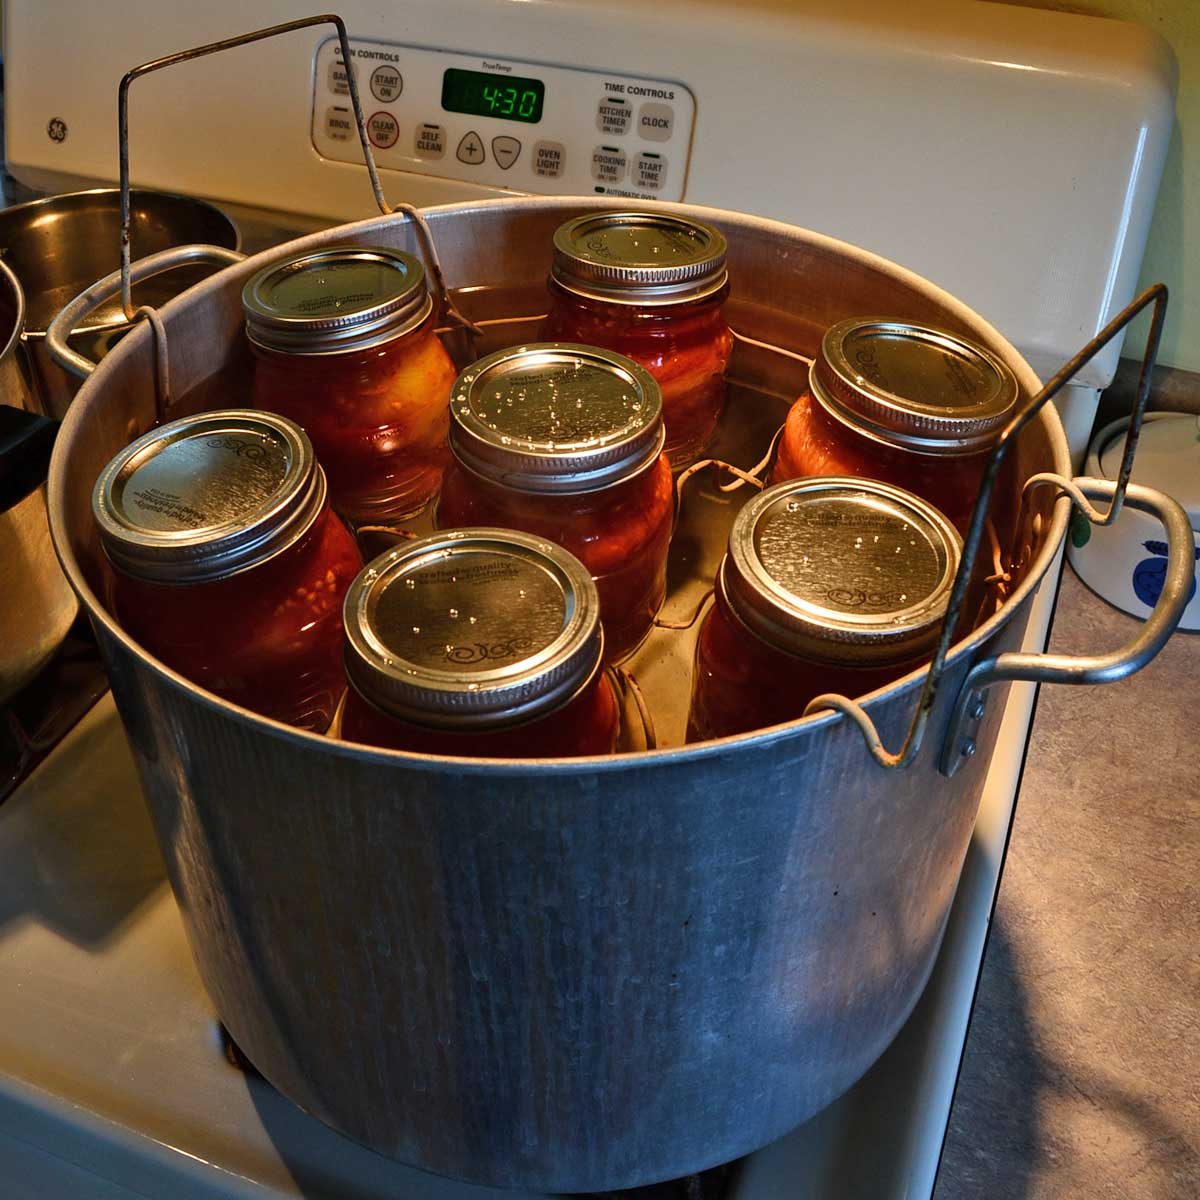
5. Allow the jars to cool, check seals, and label the jars.
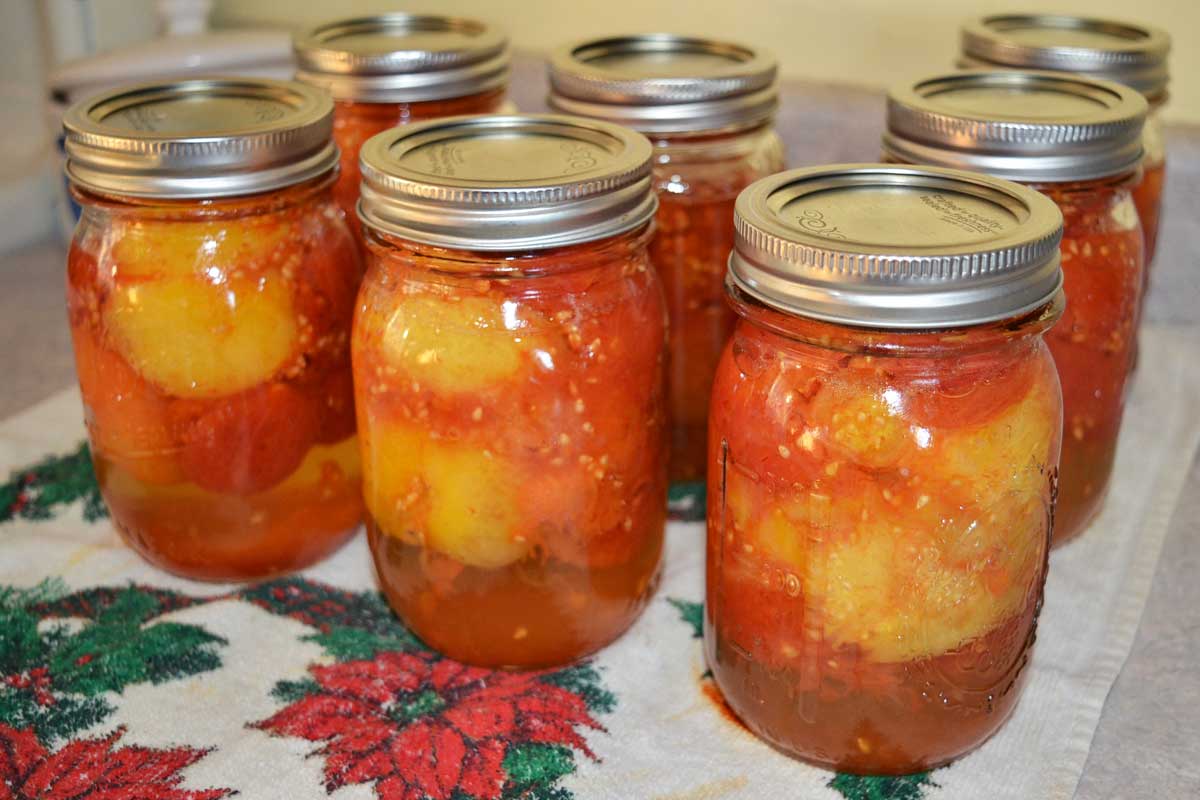
When processing time is complete, turn off the heat and remove canner lid. Allow canner to cool for 5 minutes. Remove jars from canner and set them on a dry towel to cool. Do not tighten rings.
Let sit for 12- 24 hours, until completely cool. Check lids for seal by pressing gently down in center of lid. The center of the jar lid should not flex.
Refrigerate unsealed jars and use within 48 hours. Double check seal by removing ring and gently trying to pry off the lid with your fingers.
After checking the seals, wipe off jars and lids with a clean, damp cloth. Label and store in a cool, dark, dry location. Too much light will bleach the color out of your tomatoes.
Altitude Adjustments for Water Bath Canning
For those at 1,000 feet above sea level or higher, adjust water bath processing time as follows:
- 1,000 to 3,000 feet => Add 5 minutes
- 3,001 to 6,000 feet => Add 10 minutes
- 6,001 to 8,000 feet => Add 15 minutes
- 8,001 to 10,00 feet => Add 20 minutes
Pressure Canning Instructions
Prepare the jars as you would for water bath canning. Process pints and quarts for 25 minutes at 11 pounds pressure for dial gauge canners. Use 10 pounds pressure for weighted gauge canners.
For altitudes above 1000 feet, increase dial gauge pressure as follows:
- 1,001 – 2,000 – 11 pounds
- 2, 001 – 4,000 – 12 pounds
- 4,001 – 6,000 – 13 pounds
- 6,001 – 8,000 – 14 pounds
- 8,001 – 10,000 – 15 pounds
For altitudes above 1000 feet, increase weighted gauge pressure to 15 pounds.
Maintain pressure for the entire processing time. Adjust heat as needed so that the pressure does not drop too low, or get too high. Digital electric pressure canners do the adjusting for you, which is handy.
Safely Preserving the Tomato Harvest
There are a ton of videos and posts on the internet that show improper canning techniques. Many people still pack their hot tomatoes in hot jars, screw on a hot lid and call it “canned tomatoes”. There are several ways this can get you into trouble.
First, if you’re wiping off jar rim after jar rim with the same towel, you may be transferring bacteria to that nice, clean jar. Since you aren’t heat processing, there’s nothing to kill off that bacteria.
Second, to prevent the growth of botulism, you need a pH equal to or less than 4.6. Many tomato varieties now have a higher pH than 4.6. This is why safe canning recipes always add extra acid to tomato products that will be water bath canned. If you seal a jar with food that is above 4.6 pH, you could have a breeding ground for botulism, which can be fatal.
Third, the canning process creates a vacuum in the headspace above the tomatoes. If you hot pack without canning, it’s more likely that you will end up with air retained in the headspace. This retained air can lead to spoilage.
I know folks complain about the time involved in canning the safe way. It takes months to grow tomatoes, and canned tomatoes last for years. To me, a little extra time in the kitchen is worth it to know that I am feeding my family safe food.
PrintHome Canned Tomatoes
These home canned tomatoes are a great pantry staple, and an easy way to preserve the tomato harvest.
- Prep Time: 15 minutes
- Processing Time: 40 minutes
- Total Time: 55 minutes
Ingredients
- tomatoes – 3 pounds per quart, 1.5 pounds per pint
- 2 tablespoons lemon juice per quart, 1 tablespoon per pint
- salt (optional) – 1 teaspoon per quart, 1/2 teaspoon per pint – use non-iodized salt
Instructions
- Wash the canning jars and lids and rinse well. Keep warm. Fill the boiling water canner or stockpot to within 3-4 inches of the top. Heat water to near boiling while you prepare the tomatoes.
- Wash the tomatoes and remove the skins with blanching. Cut out cores and cut into chunks.
- Place tomatoes in a large stockpot, and heat for around 5 minutes. As the tomatoes heat, they should make enough juice to easily cover the fruit in jars. Hold at a simmer.
- Filling the jars – First, add lemon juice and salt (if desired). Add the tomatoes, filling the jar to 1/2 inch from top. Use a spatula or wooden chopstick to remove air bubbles. Adjust liquid so there is 1/2 inch headspace. Wipe rims with clean, damp cloth. Place and the lid and ring and finger tighten.
- Load the jars into the canner or large pot. Put lid on canner. Bring water to boil, making sure 1-2 inches of water covers the jars. Begin timing when water reaches a rolling boil. Reduce the heat and keep the water at a low boil. Process pints for 40 minutes and quarts 45 minutes at a low boil.
- When processing time is complete, turn off the heat and remove canner lid. Allow canner to cool for 5 minutes. Remove jars from canner and set them on a dry towel to cool. Do not tighten rings.
- Allow jars to cool completely. Test seals and wipe up any spills. Remove rings, date and label. Store in a cool, dark location. For best quality, use within 18 months.
Notes
You may use 1/2 teaspoon citric acid powder per quart, 1/4 teaspoon per pint, in place of the lemon juice. Alternatively, you can pH test your tomatoes. If they are at or below 4.6, they are safe to can without added acid.
Pressure Canning Instructions
Prepare the jars as you would for water bath canning. Process pints and quarts for 25 minutes at 11 pounds pressure for dial gauge canners. Use 10 pounds pressure for weighted gauge canners.
For altitudes above 1000 feet, increase dial gauge pressure as follows:
- 1,001 – 2,000 – 11 pounds
- 2, 001 – 4,000 – 12 pounds
- 4,001 – 6,000 – 13 pounds
- 6,001 – 8,000 – 14 pounds
- 8,001 – 10,000 – 15 pounds
For altitudes above 1000 feet, increase weighted gauge pressure to 15 pounds.
More Tomato Recipes
We love our homegrown tomatoes – and preserving them to enjoy year round. These are some of our favorite canning recipes.
- Home Canned Spaghetti Sauce
- Savory Salsa & Tips for Preserving your Favorite Salsa Recipe
- Home Canned Tomato Soup
- Ketchup – Canning Recipes & Probiotic Recipe
- Pickled Cherry Tomatoes

This article is written by Laurie Neverman. Laurie grew up in the kitchen, learning baking and home cooking from her momma. At age 15, she and her mom and two sisters created Irene’s Custom Cakes & Catering, which was her summer job through most of high school and college.



Two concerns: sulfite allergies & wiping rims. 1.) I gave up canning because I developed a sulfite allergy. I have asked National Center for Home Food Preservation and other governmental preservation experts for an alternative to bottled lemon juice. I explained my allergy and the presence of the allergen in bottled lemon juice. I was told there wasn’t a safe alternative and was reprimanded and bullied! Is there a sulfite free alternative? 2.) I use a very hot, clean dishcloth to wipe my rims. When I feel it is soiled, I thoroughly rinse, sometimes wash, in very hot water and then return to wiping the rims. I see most instructions now say to use paper towels—expensive, dirty(?), & wasteful! Are my actions safe?
Thank you so much for sharing your expertise!
Hi Teresa.
I’m sorry you had to deal with jerks. They are far too common nowadays.
1. Bottled lemon juice alternatives – the goal is to ensure that your pH is at or below 4.6. Typically this is done with bottled lemon juice, vinegar, or citric acid. Problem – if you are extremely sulfite sensitive, all of these may be an issue.
If you get pH strips or a pH tester, you can test you juice to see if it’s acidic enough without adding lemon. If so, you’re good to go. Fresh lemon juice is still acidic – without the sulfates – so if the tomatoes are not acidic enough, you could add fresh lemon juice to the pot until you get the pH in the safe range.
I’m sure the food safety people might squawk about this, but we make pickles with acidic brine, so it should be fine.
Another alternative would be freezing instead of canning the tomatoes, if you don’t want to mess with pH testing.
2. I wipe my rims with a clean, damp cloth, too. The current guidelines are getting ridiculous and wasteful. Some university extension offices are telling people not to consume elderberries anymore, saying that they should only be used for ornamental use. One of the oldest medicinal plants known to mankind, and now it’s not safe? Ridiculous.
WOW! I asked my questions this afternoon and you have already replied! Exceptional! BRAVA!
I asked the experts about pH strips & testers, telling them that death would occur if I used their guidance…. Once again, insensitive remarks were given. I have seen food safe citric acid crystals, would these work in lieu of fresh lemon juice? Or would this throw off the liquid ratio?
I now have two freezers instead of a full canning cupboard—well, 2 freezers and 4 refrigerators!
I questioned the elderberry warning, yet I have not seen any documented scientific proof!
I keep wondering why people lack “street smarts,” and make easy things so very complicated! Thank you for your wisdom and kind words.
Thank you for your kindness.
If you have citric acid that you know is safe for you to use and won’t set off your allergies, it’s safe to use. I prefer citric acid to lemon juice, since it doesn’t add any lemon flavor to tomatoes.
Most canning recipes include enough liquid to insure good heat transfer through convection (moving fluid helps to transfer most of the heat), especially if your recipe includes foods that might not be acidic enough on their own. This is why safe soup recipes for canning have plenty of liquid in them, and why pumpkin butter isn’t recommended for canning. In addition to not being acidic, pumpkin butter is also thick, so there’s not much liquid movement. If you are packing tomatoes in their own juice, there’s plenty of liquid from the tomato juice.
Apple butter is safe because the pH is below that 4.6 mark, even though it is thick and doesn’t flow well. With an acidic product, conduction should provide enough heat.
We are constantly told to “trust the experts”, but as the years go on, more “experts” are bought and paid for by persons or businesses that don’t have our best interests at heart. They want you to use wasteful paper towels for sanitation, but they don’t care that the food supply is filled with herbicides, pesticides, and other contaminants. They turn a blind eye to how much the nutrient value has dropped in most food.
I don’t have a canner, I’m going to use a stockpot. When you say lower each jar into the pot, do you mean lower each jar as it is ready or wait till all the jars in the batch are ready and then lower them one at a time. Or am I overthinking, and it doesn’t matter.
Thanks,
Carol H.
There’s not a significant difference. When I’m using the rack in the canner, I load the rack, then lower them all at once. Without a rack, it’s probably easiest to prep all the jars for the pot, and then lower them in a batch so you can adjust their positions as you’re loading to make sure they all fit.
Just got done canning tomato puree in a water bath canner and realized that I used 1 tablespoon instead of 2 per quart. Do you think it would be safe to eat those jars since it has some lemon, and if I am only using it for chili/soup that is boiled for a long time?
Maybe you could pick up some pH strips and test the acidity in one jar, just to be sure? It’s probably okay, but they usually have the strips pretty cheap at your local hardware store. the pH should be 4.6 or lower.
Thanks, Laurie. I have some pH strips here but they don’t go down below 5.5. I’ll have to go look for something else.
I’d bet that it’s fine I just get nervous since you can’t see or taste botulism spores.
Can you use a crawfish pot and basket to process tomatoes?
As long as the jars don’t sit directly on the bottom of the pot and you can control the heat, it should work.