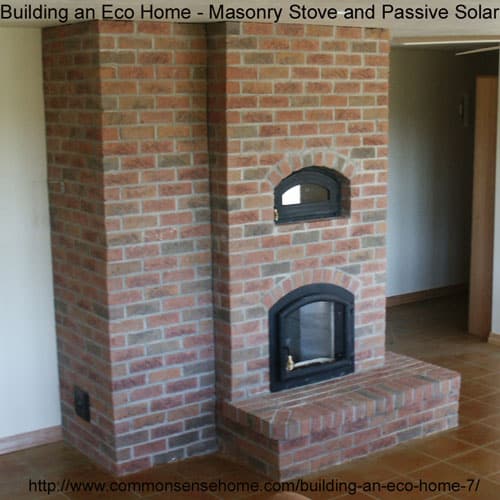
Building an Eco Home – part 7 of 8 – Masonry Stove and Passive Solar
This post may contain affiliate links. Read my full disclosure here.
The “Building an Eco Home” series is a set of articles that were originally published in The Healthy Independent while we were in the process of building our current home. I have made only minor edits to include links and format for the online publishing. I will be discussing green building and remodeling in more detail in upcoming posts, so if you want to know more about a topic, please make a request.
Hosting Our First Solar Tour
The Solar Tour of Homes on October 1st went very well indeed. We had around 50 people come through on the WPS sponsored tour with absolutely beautiful weather. It was a pleasure to share our “lessons learned” with such an enthusiastic group, although next year we’re going to break down the house features room by room so we don’t forget things as we show people around. August and I both remembered a number of features after everyone left that we forgot to mention during the tour itself. I feel that we are learning right along with the attendees and look forward to next year’s tour.
Facing Cold Temps with No Active Heating System in Place
As the sun dropped lower in the autumn sky and nights began to chill, we had the opportunity (not by choice) to find out how well the passive solar aspect of the house really worked. You see, we had some difficulties getting our active heating system hooked up. We had a Combicor water heater with built in heat exchanger for space heating from Bradford White, and we had our tubing in the floor, but our heating contractor did not complete the hook up until the last week of October.
So, there we were, with nighttime temperatures in the 30’s, no firewood for the masonry stove and no space heating system. Plus, the winds out here show why some of the first utility scale windmills in Wisconsin were installed in Kewaunee County.
We operated on passive solar gains, normal gains (cooking, appliance heat, people heat) and, eventually, the masonry stove. Now, I know some people have yet to turn on their heating systems, but I swear it is much colder and windier out here than it is in town, and our friends and family will vouch for it, too.
Without the masonry stove with nighttime temps in the mid-thirties, the coldest the house ever got was around 65 ºF. In comparison, my brother and his family over in Colorado just moved into their new home with similar temps and one night with a non-functional heating system found that the temperature in their stick built house dropped down to 60ºF overnight.
Getting Started with the Masonry Stove
I admit, I was getting a little worried. Thankfully, I called my wonderful sister Lois and her husband Ron, and they were more reliable than the heating contractor. Ron operates a sawmill over in Dallas, Wisconsin, and they brought over a huge truckload of hardwood scrap lumber on October 8th. We unloaded the lumber, cut some to length and started the tempering process of the masonry stove.
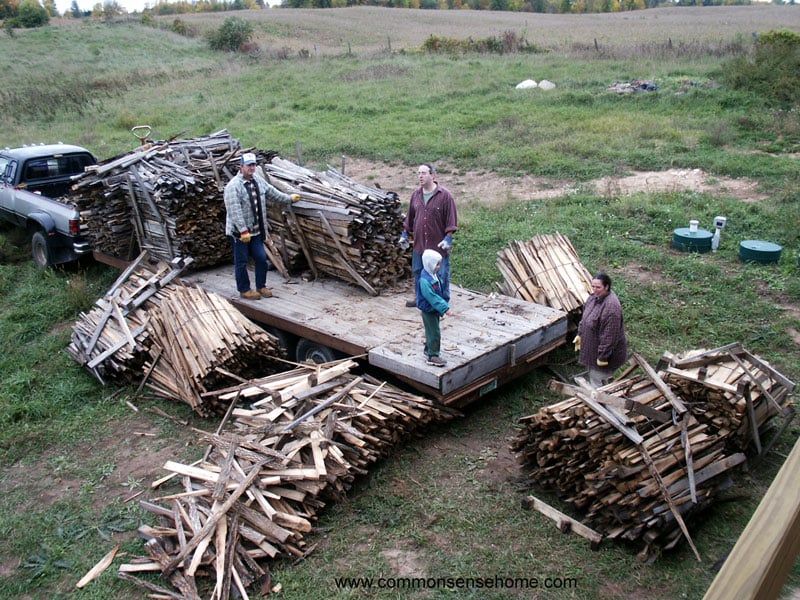
For those who are not familiar with a masonry stove, because the units are so massive, they need to be slowly brought up to temperature over a series of days to drive off any residual moisture and prevent cracking or other catastrophic failure. The cardboard wrap that encases the inner core also burns off during this time to provide an air space between the core and the brick facade to allow for different rates of expansion and contraction.
Would you like to save this?
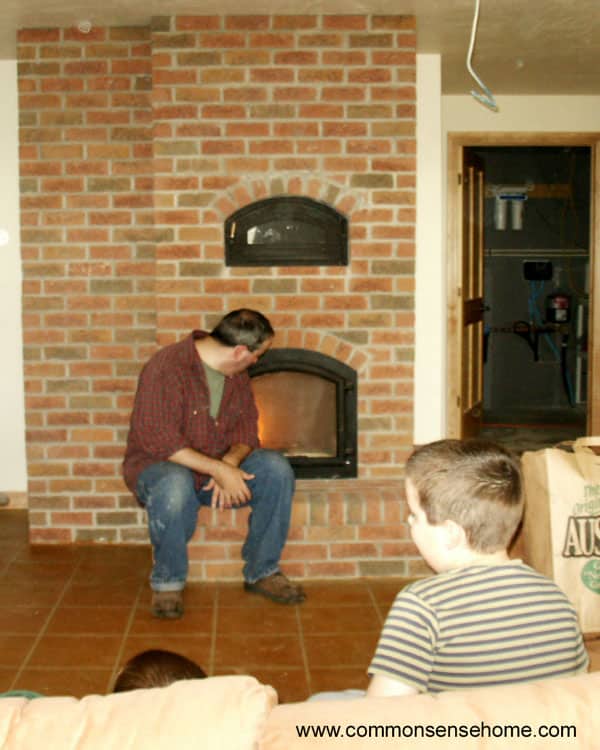
In our case, our TempCast stove with bake oven option needed to be tempered for five days. We started on day one with fires of a few sheets of newspaper and two or three one inch diameter sticks of kindling, which were set about every three hours. We ended on day five with six to eight pieces of “real” firewood (three to four inches in diameter), newspaper and kindling. From day six onward, depending on the weather, we have generally fired the stove once or twice a day with a firebox full of wood. The unit continues to radiate heat for over 24 hours after firing.
It is important to realize that a masonry stove does not operate like a standard wood burning stove. First, to ensure that combustion is as clean and complete as possible, the wood for a masonry stove must have a moisture content of 20% or lower. We purchased a moisture meter (recommended by TempCast) for under $15 at FleetFarm to test the moisture levels of our wood and found that most was around 15-18%.
Wet wood requires energy to drive off the moisture, decreasing combustion efficiency and increasing pollution, as we all can tell from watching wet, smoky fires. Second, the wood must be cut into small pieces not to exceed 5 inches in diameter, with four inches or smaller recommended. This allows the wood to catch and burn quickly, resulting in higher temperatures within the firebox and establishing secondary combustion of the gases in the bake oven chamber.
Third, you can’t increase the heat output of the stove by just throwing more wood on the fire. The stove burns hot and quick, then radiates the heat slowly to the room. Attempting to increase the heat output by firing more frequently will result in overfiring and could damage the stove. The TempCast guidelines recommend no more than 100 pounds of woods in a 24 hour period.
Finally, TempCast recommends a “top down” burn with pieces of wood placed in alternating rows with spaces between the wood of ½ to 1 inch. In this type of fire, smaller pieces of wood are placed in the top layers while larger pieces are placed on the bottom and the fire is lit from the top. Then, as the larger pieces of wood outgas as they come up to temperature, the gases are burned by the fire above, increasing combustion efficiency and reducing pollution. The air spaces also contribute to more efficient combustion.
How a Masonry Stove is Different from a Typical Woodstove
To see the stove in action is amazing. The flames leap and dance with an almost liquid look, first flickering as the smaller wood catches, and then burning white hot, and finally tapering down to a molten blue pyre. This is not your grandma’s fireplace. These units required a dedicated fresh air feed, especially in an air tight house like ours, to supply the combustion air necessary for such a high temperature fire. The fresh air feed has a damper that can be closed when not in use. The chimney damper can be closed completely as well after all combustion is complete, keeping the heat within the home.
Because the unit it only fired once or twice a day, once the fires burn out both dampers can be closed to maximize the heat retained within the home. Along these same lines, you do not need to have a fire burning at night. We generally fire around 7:00 pm in the evening and are able to close the dampers down by 10:00 pm or earlier. As an added precaution, we have CO/combustible gas detectors plugged in near the unit and near the bedrooms, as well as a smoke alarms places around the home.
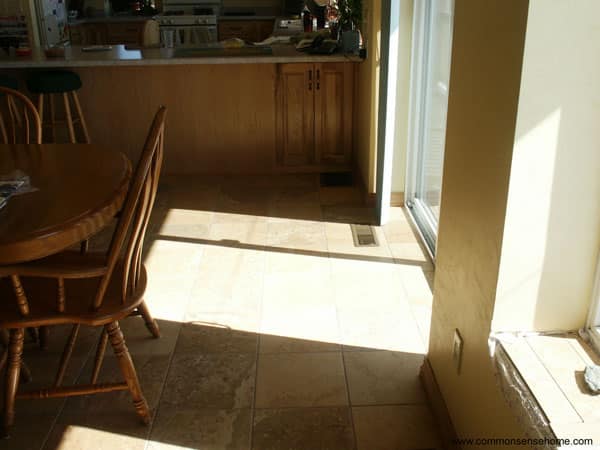
Insulating the Large South Facing Windows
During the time period with the masonry stove and passive solar, temperatures stayed in the upper 60s or above, depending on the level of sunlight. One problem we ran into was the large nighttime losses from the large south facing windows. They’re great when the sun is shining, but terrible for back body losses once the sun goes down. In retrospect, I would recommend, in this climate, aiming for the 7% of floor area rather than the 12% (we have closer to 12%).
We had smaller windows on our version of the plans, but when we talked it over with our builder he figured more was better and we were losing area to frames, etc, and before we knew it, the big windows were in and cast in concrete. We have dealt with the problem by installing insulating cellular shades, which make a world of difference. Our cellular shades of choice are Bali DiamondCell® Double Cell 3/8″ Semi-Opaque that we ordered at Menards. We have some less expensive single cell shades in one bedroom, but they don’t insulate nearly as well.
Earlier this week, I checked the temperatures in the computer room on the north side of the house. Outside, it was 35 degrees, in the window sill between the glass and the shade it was 55 degrees, and in the room it was 75 degrees with nothing but residual heat from the previous evening.
The in floor radiant heat did finally get hooked up, and it does run occasionally, usually at night and so far only in the main living area. The high ceiling there is our undoing, in terms of heating efficiency, but the feeling of the rooms is worth the extra energy it takes to nudge them up to temp. We don’t yet have the active solar heating installed, but that will be the next piece of our energy puzzle. We plan to use the sand bed under the basement slab and the house itself as space heating storage, along with an additional water storage tank for domestic hot water.
Wishing you and yours a warm and cozy holiday season.
Eco Home Building 8 part Series
- Building an Eco Home Part 1 – Introduction
- Building an Eco Home Part 2 – Getting Ready
- Building an Eco Home Part 3 – Construction
- Building an Eco Home Part 4 – ICF, HVAC and Plumbing
- Building an Eco Home Part 5 – Floor Plans
- Building an Eco Home Part 6 – Deck, Cabinetry and Woodwork
- Building an Eco Home Part 7 – Masonry Stove and Passive Solar
- Building an Eco Home Part 8 – Eco-Friendly Flooring
65°F in your house in October. I know the feeling. 😉
We moved into our new earth-sheltered house in May, 2011. I had not yet hooked up the tubes in our PAHS system; in fact I didn’t hook them up until a few weeks ago. At that time our house had no heat source other than the sun and the masonry stove. We flew out to California in the middle of December and arrived back Christmas eve around 10:30 p.m. where the outdoor temperature was near 0°F. We arrived home around midnight and walked into the house not knowing what to expect. The thermometer on the wall read 62°F.
The many, many tons of insulated thermal mass surrounding our house are both good and bad. Bad in that it takes a lot of heat-energy transfer to change its temperature just one °F. And good in that it slowly gives up or accepts heat-energy to help stabilize the indoor temperature. Our average annual temperature is 52°F, so the constant ground temperature 20 feet down is 52°F. If we had had no solar heating, the indoor temperature probably would have been between 55-60°F.
So this year I finally got around to hooking up the PAHS tubes in late November. And then I hauled a cord of wood into the garage. But I didn’t get around to start tempering the masonry stove until about ten days ago. Night-time temperatures in the house were dropping to 64°F. Now that the PAHS is hooked up and I’m firing the stove regularly, the thermometer is reading 72°F as I type.
Do you have any moisture issues with being completely earth sheltered? I do notice more dampness in the basement than upstairs, which is something we watch in hot, humid summers to avoid condensation and mildew.
We have had some moisture problems in the north rooms, but only in the summer, where the temperatures tend to run several degrees cooler than the rest of the house. See Nothing Runs Like a Trane We installed a plenum with a 3-ton Trane A/C coil when we built the house, but didn’t have it hooked up the summer of 2011. We had two dehumidifiers working to keep the humidity below 50%, but they dumped a lot of heat into the house and increased the afternoon temperature to a maximum of 83°F in mid to late summer. This summer we connected a two-stage Trane heat pump to the A/C coil and set the thermostat to 74°F, the target relative humidity to 50%, and the droop to 2°F. Droop means that the temperature will not fall below 74°F if the humidity is 50% or less, and it will not fall below 72° if the humidity is 50% or more. Throughout the summer with the heat pump running, the humidity never went above 50%. The heat pump ran surprisingly little. We also ran one dehumidifier part time in the northwest room to insure no mildew. We probably used 1/3 the electrical energy this summer compared to last, and the house was always cool (too cool for me).
I wanted to set the thermostat to 76 or 78°F with a 2°F droop, but the heat pump would not run long enough to remove the humidity. That is the problem with having a large cool thermal mass that removes much of the heat, having a high R-value in the walls that keeps outdoor heat out, and having circulating air tubes that allow cooled moist air to come in. In essence, there is insufficient cooling demand for the A/C unit to adequately remove the moisture in the air. We were fortunate that just one stage of the two-stage heat pump was able to keep the humidity at 50% without demanding a further reduction in thermostat setting.
Thanks. That jives with other reports I have read, but it’s good to read it first hand.
Nice house! I had looked into using ICFs but chose concrete and rebar. Especially like the masonry stove. 😉