The Best Homemade Brownies – Never Bake Brownies from a Box Again
This post may contain affiliate links. Read my full disclosure here.
When I was first married (nearly 20 years ago), brownies were one of the things I baked using a box mix. I had tried several recipes, and could never get that crisp edged/soft center combo that makes brownies oh-so-good. Then I found this recipe – the best homemade brownies I’ve ever tasted. I have not purchased a box mix since. You can make them with or without nuts, or half and half. The recipe is so simple that the boys can make it on their own. I hope you enjoy it, so you, too, never make brownies from a box again.
The Best Homemade Brownies Recipe
Adapted from Hershey’s Chocolate and Cocoa Cookbook
Ingredients
- 1 cup granulated sugar
- 1/2 cup butter, softened
- 1/2 teaspoon vanilla
- 2 eggs
- 1/2 cup unsifted all-purpose flour, unbleached, unbromated – or – gluten free flour blend such as Cup4Cup or Pamela’s
- 1/3 cup cocoa, preferably organic, Fair Trade certified
- 1/4 teaspoon baking powder
- 1/4 teaspoon salt
- 1/2 cup chopped nuts, optional
Directions: In a medium bowl, cream together butter and sugar. Add eggs and vanilla, blend until smooth. In a separate bowl, sift together dry ingredients. Gradually blend dry ingredients into sugar mixture, stirring until just blended. Do not overmix. Nuts may be added at this time, or sprinkled over some or all of the batter in the pan just prior to baking.
Spread batter evenly in a greased 8 inch square baking pan, or an 8 inch round or heart shaped pan. I usually use my 8 inch glass baking dish, or double the batch and use a 9×13 pyrex baking dish. I’ve taken to sprinkling the nuts on half of the batter because my husband likes them but my boys don’t, so that way they can each grab what they prefer easily.
Bake metal pans 30-35 minutes at 350 degrees F, glass pans 30-35 minutes at 335 degrees, until edges are set. Center will be soft but will firm up at the brownies cool. DON’T OVERBAKE! Only the edges should be set up when you take the pan out of the oven. If they’re coming out on the dry side, bake them for less time or drop the temp, or both. I always bake in a heavy glass pan, so that takes longer to bake then metal, and doesn’t dry out as quickly. The Cup4Cup or Pamela’s flour blends work great! You’d never know they were gluten free.
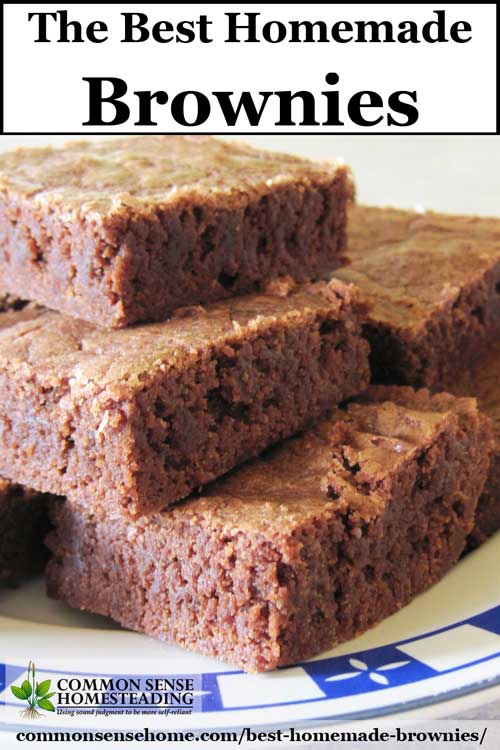
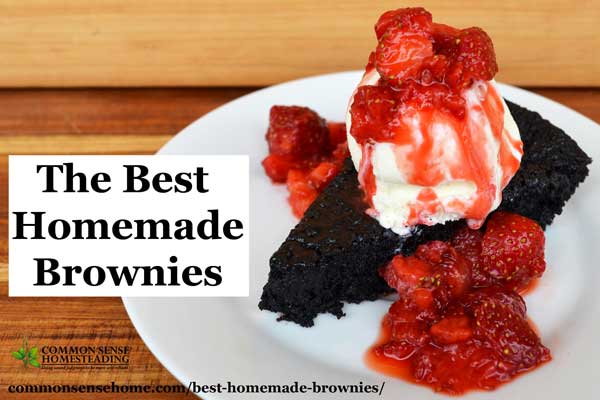
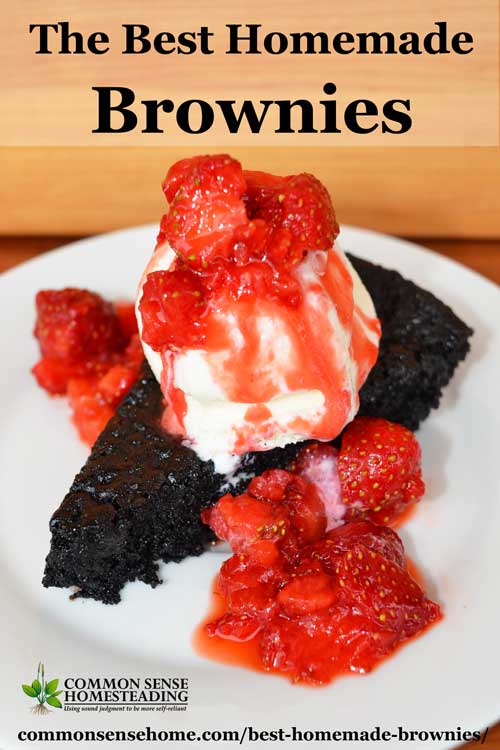
If you want to mix things up, you can bake with extra dark cocoa such as King Arthur Black Cocoa. This cocoa has a more pronounced chocolate flavor and rich, deep color. The top and bottom brownie photos in this post were made with black cocoa, and paired up with fresh strawberries and vanilla ice cream.
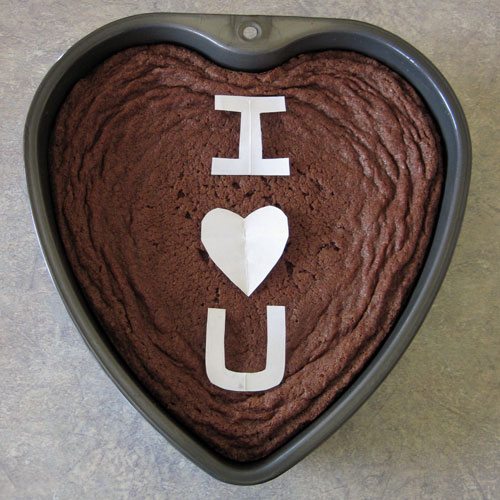
If you want to get a little fancy for Valentine’s Day (or other special occasion), you can bake in a 9-Inch Heart Pan and use some simple stencils with powdered sugar. I cut stencils out of some scrap paper and set them on the brownie.
Would you like to save this?
I used my The Pampered Chef Flour/Sugar Shaker to sprinkle the top with powdered sugar (a sifter would work, too), and then removed the stencils. If sugar creeps in under the stencils, you can remove it by gently dabbing at the excess with a damp fingertip. Isn’t it sweet?
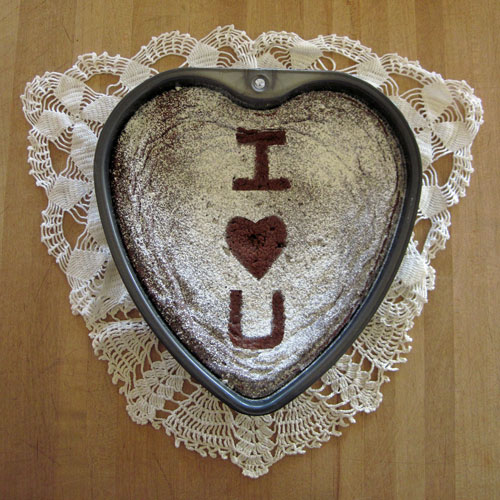
The boys couldn’t wait until daddy got home to sample it, but they did only cut off one edge so he got to see the letters. 🙂
PrintBest Homemade Brownies
Quick and easy homemade brownies that you can make from scratch in minutes. Rich and delicious, enjoy with nuts or without.
Ingredients
- 1 cup granulated sugar
- 1/2 cup butter, softened
- 1/2 teaspoon vanilla
- 2 eggs
- 1/2 cup unsifted all-purpose flour, unbleached, unbromated – or – gluten free flour blend such as Cup4Cup or Pamela’s
- 1/3 cup cocoa, preferably organic, Fair Trade certified
- 1/4 teaspoon baking powder
- 1/4 teaspoon salt
- 1/2 cup chopped nuts, optional
Instructions
- In a medium bowl, cream together butter and sugar. Add eggs and vanilla, blend until smooth. In a separate bowl, sift together dry ingredients. Gradually blend dry ingredients into sugar mixture, stirring until just blended. Do not overmix. Nuts may be added at this time, or sprinkled over some or all of the batter in the pan just prior to baking.
- Spread batter evenly in a greased 8 inch square baking pan, or an 8 inch round or heart shaped pan. I usually use my 8 inch glass baking dish, or double the batch and use a 9×13 pyrex baking dish. I’ve taken to sprinkling the nuts on half of the batter because my husband likes them but my boys don’t, so that way they can each grab what they prefer easily.
- Bake metal pans 30-35 minutes at 350 degrees F, glass pans 30-35 minutes at 335 degrees, until edges are set. Center will be soft but will firm up at the brownies cool. DON’T OVERBAKE! Only the edges should be set up when you take the pan out of the oven. If they’re coming out on the dry side, bake them for less time or drop the temp, or both. I always bake in a heavy glass pan, so that takes longer to bake then metal, and doesn’t dry out as quickly. The Cup4Cup or Pamela’s flour blends work great! You’d never know they were gluten free.
Notes
- If you want to get a little fancy for Valentine’s Day (or other special occasion), you can bake in a 9-Inch Heart Pan and use some simple stencils with powdered sugar. I cut stencils out of some scrap paper and set them on the brownie.
You may also enjoy:
- Sourdough Brownies (they’re really easy and not sour at all – I promise)
- Chocolate Chestnut Brownies
- Honey Sweetened No-Bake Chocolate Peanut Butter Bars
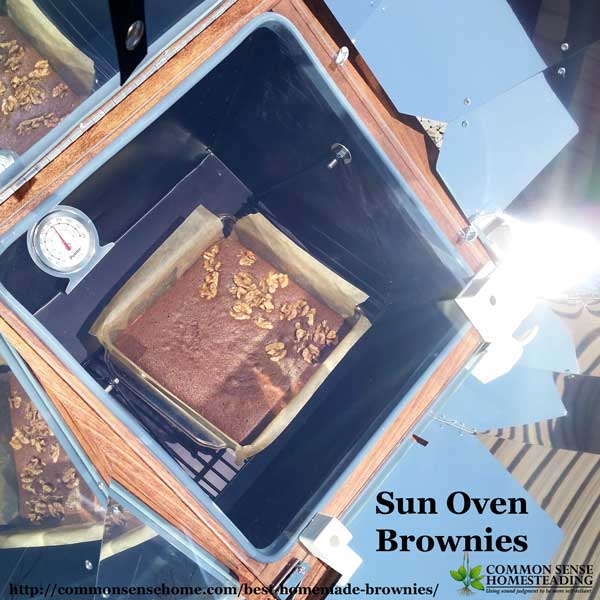
Sun Oven Brownies
P.S. These brownies also bake well in a Sun Oven. They were the first recipe we made in ours.
Originally published in 2012, updated July 2016.



At which stage can I add caramel sauce and nuts?
I don’t normally add caramel sauce, but if you wanted to try it, I’d swirl it over the top of the batter just before it went in the oven. Nuts can be mixed in after the dry ingredients, or sprinkled over the top just before the batter goes into the oven.
Maybe I missed it, how long do you bake if you do a double batch? Single batch was delish, need more!
Baking time is similar for single or double batch.
I followed the recipe to a T. I baked them in glass at 335 for 35 minutes and they were set on the outside, still raw on the inside. I placed them back in for a few minutes at a time. All in all I’ve baked them roughly 50 minutes and their still raw on the inside. I tried letting them cool to see if it would harden and it’s still just goop. Any ideas?
You have several options:
Use a larger pan so that the dough is not so thick in the middle and will bake more quickly
Try a different brand of flour, such as King Arthur, or use a little more flour when you mix up the dough. In my experience, King Arthur is one of the best flours readily available in most markets.
Increase the temperature that you’re baking at (probably not your best option)
This is a great looking recipe… Will try it soon… Thank you…
Enjoy. 🙂
Just tried these tonight for my girls’ sleepover. We’ve just gone GMO free this week and they were really suffering the loss of “EVERYTHING” ( insert 7yr old girls over-dramatic voice here)
These rock! The kids were very please with their work and said they were “soooo worth the wait”
Thank you for making our transition that much easier!
BTW-I did add a teaspoon of olive oil (the batter just looked a little “thick” to me without it)
Depending on the moisture levels of your flour and egg size, the batter will be a little thicker or thinner. It’s just fine to adjust a bit. Glad the girls enjoyed the brownies. 🙂
Thanks for this, made a double batch of these over the weekend, and they are awesome! 😀
Great! We’ve been making them recently with gluten free flour blends, too, and they still turn out well.
Good but my batter turned out vet mouse lik
The batter will be thick, not runny, when it is placed in the pan.
SOOO yummy My kids and hubby loved it we are baking these for the second time this month tonight. tyty!
You’re very welcome. Thanks for letting me know that they worked out well for you.
I use the recipe on the side of the Baker’s chocolate box and it is awesome as well. Very similar recipe but with baking chocolate instead of cocoa powder. The main trick is to not overbake on any brownie recipe!
11-29-12, Organic cocoa????!!! common sense person you haven’t a clue where coco comes from or how it’s grown do you ?
Yes, I do have some idea – http://www.frontiercoop.com/sustainability/fairtrade.php
“For millions of farmers around the world, Fair Trade means thriving communities, kids in school, and a healthy environment. By purchasing Fair Trade products, you support the farmers who grow and deliver quality tea, cocoa, vanilla and sugar.”
Hi Laurie: You sound like an amazing wife and mom. Your recipes look delicious. I am new to this site but looking forward to trying some soon. Thanks for sharing!
Welcome, Brenda.
I have been trying to find recipes that will be healthier for my family, but they also have to taste like what the family is used to. This led me to try your brownie recipe. Final result: The hubby and children loved them! They are my toughest critics. We now have a new favorite brownie recipe. No more box brands for us 🙂 One question though, can I substitute unrefined sugar in the recipe for white sugar?
I am no where near the homesteader that you are, but I’ve enjoyed learning from your various posts. Thank you for sharing!
Unrefined sugar will brown differently and give a slightly different texture. How about trying half and half to see if you like the results, and then going all the way if that fits your family’s taste?
Thanks for your words of encouragement. It gets pretty crazy this time of year (during primary harvest). 🙂
I found switching to a dark muscavado sugar that it made everything very rich. For example, my standard chocolate chip cookie recipe has to be cut down to 3/4 or so. And even so, it’s still too rich, in that hubby can only eat 3 or 4 cookies instead of most of a tray at once.
That’s a great tip! That’s usually not a problem at our house, but I should share that tip with a friend of mine whose husband devours all things sweet. (He burns it all off, too, working around their homestead.)
I tried this one today but mine turned out a little dry. Any thoughts on what I might be doing wrong?
Don’t overbake them. The center should still be soft when they are taken out of the oven. It will stiffen as they cool.
I’ll give that a try, thank you!
Now I’m craving brownies lol. We might have to make some soon. 🙂
Yup, looks simple enough and soooo good! I like your creativity with the confectioner’s sugar 🙂
Thanks, Julia!
O how very sweet of you! Thank you So very much – I will certainly think of you as my valentine this week. : -)
How cute with the lettering!! Very creative! Nice to find a tried and true homemade brownie recipe!
Thanks, Linda!
Man, I could have used this brownie recipe last week!! Looks great. I pinned it and look forward to trying it.
Thanks for the pin!
Oh how I love brownies! I’ll have to try some gluten-free ones this weekend!
P.S.~We like to throw a handful of chopped up dark chocolate pieces onto the top of the batter before baking!
Double chocolate – yum! I’d do coconut, too, but I’m the only one who likes it a lot. 🙂
Thanks for posting this recipe! The last few recipes I have tried for brownies either used so much chocolate, or didn’t come out great…I’m glad to have a good recipe recommended. Will have to try this one soon 🙂
Lisa Lynn – this one isn’t fancy, but it sure is easy and good. I hope you enjoy it, too.
Hello,
I’m so excited to try out this brownie recipe. I’m really craving a taster homemade brownie. I did have a question about the sugar. You said 1 cup and I usually don’t eat or cook with lots of sugar. If I cut the sugar to 1/2 a cup will they still taste good do you think? I know the recipe is using pure cocoa which needs sugar but I just don’t want them to be too sugary sweet. Any suggestions?
Thank you so much
I know a cup seems like a lot, but they don’t come out terribly sweet because of the bitterness of the cocoa. I’d try cutting to 3/4 cup first, and then try cutting to 1/2 if 3/4 cup gives acceptable results.
Ah, thanks for the post Laurie…prompts me to make my Gluten Free Brownie recipe in my heart pan for V Day!
Pamela – do you have your recipe on your site? Add a link if you do.