How to Restore Cast Iron Cookware
This post may contain affiliate links. Read my full disclosure here.
It takes a little effort to restore cast iron cookware, but it’s worth it. This post covers cleaning and restoring cast iron with step by step photos. We’ll help you strip and reseason damaged and rusted cast iron cookware so it looks and cooks the way it should. (Plus you’ll see why vintage cast iron is best!)
I’d like to tell you a quick story about one of my early experiences with cleaning cast iron, and why restoring cast iron means so much to me.
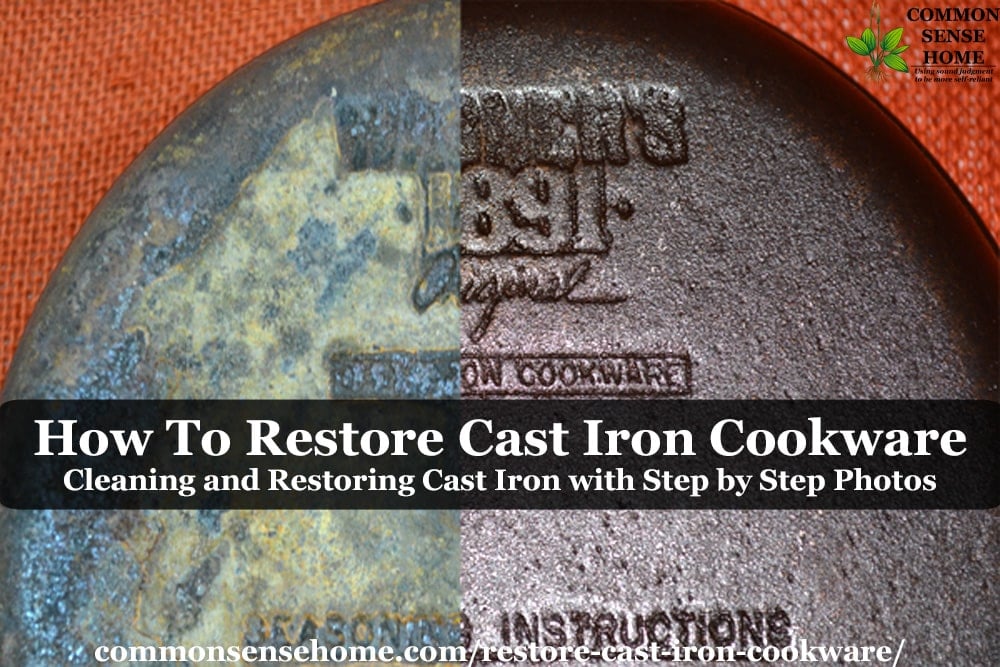
I cringe a little every time I see bad rust on a cast iron pan. Yeah, it’s kind of nasty looking but that’s not what bothers me.
When I was first married I had a cast iron pan and my husband, after cooking breakfast for me, left the pan soaking in the sink. Yes, you read that right, he left it soaking.
As a young girl who thought men should just “know better” you can imagine the argument that followed. What was worse is that I had no idea how to fix the pan – there was no internet to speak of at the time, and I wound up throwing it away. So those rusty pots and pans remind me of a time when I made a few more mistakes than I do now.
Now, that I know better, when I see those neglected pots or pans I have an overwhelming desire to take all of them and show them love and affection and help them “look and cook” like they they were intended to.
A little like marriage, it takes a little time and a bit of work to restore cast iron cookware, but it is really worth the time and effort!
Restoring Cast Iron
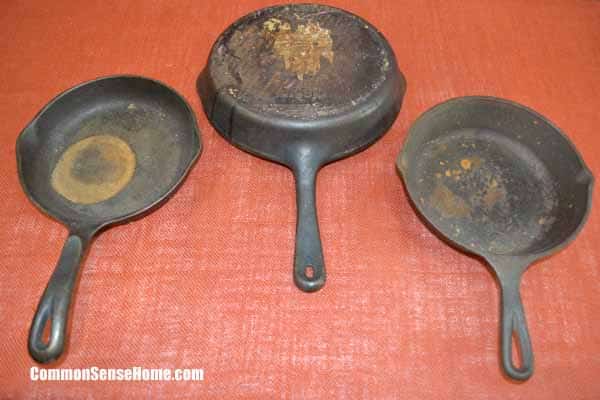
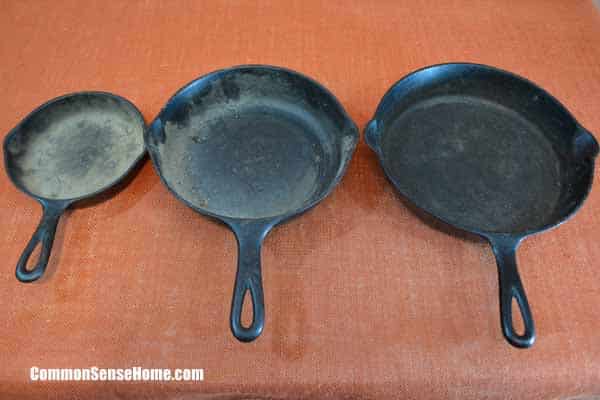
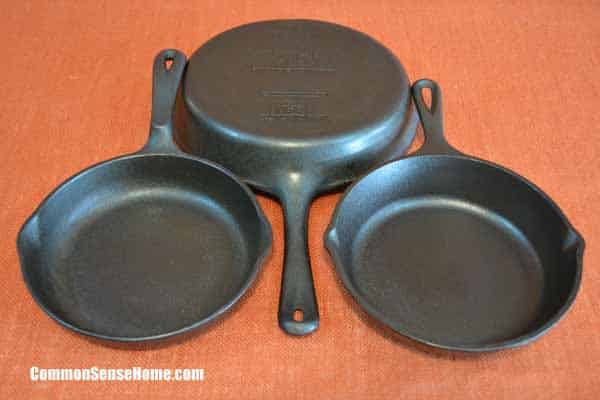
Here are three old cast iron skillets I found at a yard sale that need to be stripped and re-seasoned. There are two modern Wagners and one Lodge. They are not high quality collectible pans (more on that in a minute) but they are worth restoring and will make fine frying pans.
Stripping the Cast Iron Before Reseasoning
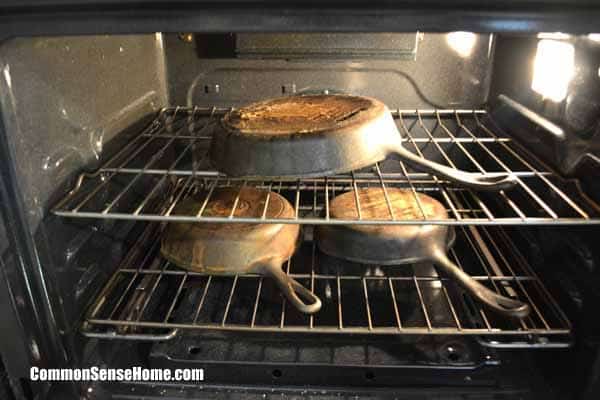
The easiest way to strip cast iron cookware is to use the self-cleaning cycle on your oven. I realize not every oven has a self-cleaning option, so my advice would be to find a friend with a self-cleaning oven and offer to give them a pan.
The second option to try if you don’t have a self-cleaning oven would be to try an outdoor grill. The temperature needs to 500 F° to burn off the coating (or patina), but it needs to be consistent so a grill could work depending on its capabilities.
Another option is to use an oven cleaning spray. It’s messy, hazardous and I would try and make a new friend with a self-cleaning oven before I would try it, but some people do strip old seasoning off cast iron using these chemicals.
The cookware only needs to be in the oven or grill for about 2 hours. Honestly, since my oven does have a self-cleaning option and automatically locks I just let it complete the cycle which takes about four hours.
If you were going to do a lot of stripping you might want to only do the two hours to save energy, and if you’re working in a warm climate to not have your house heat up. Let the cast iron cookware cool down completely before going on to the next step.
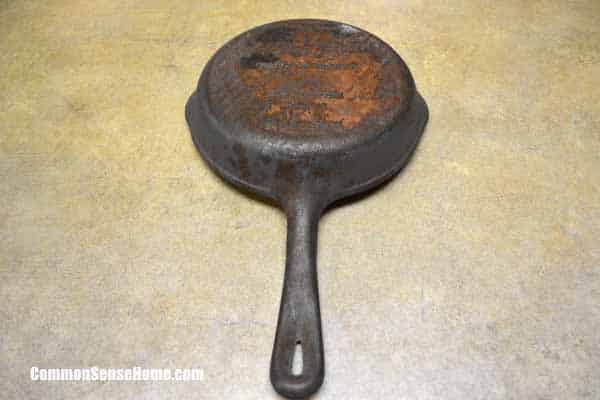
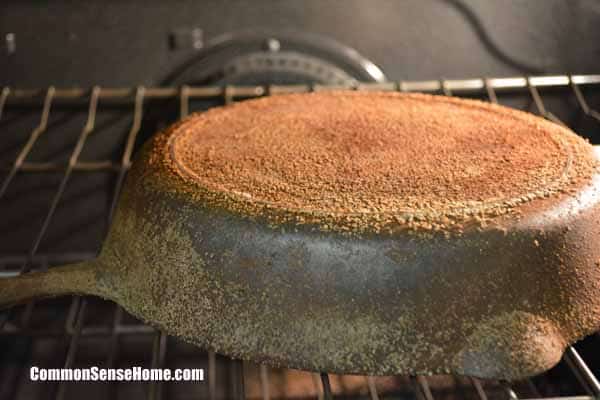
Here is what the smaller Wagner looks like after the self-clean cycle. There is orange stuff that kind of looks like rust but it’s actually the seasoning that’s been burned off the pan. Like what’s left in the bottom of a dirty oven after you’ve had it on self-clean.
Scrubbing off the Old Cast Iron Seasoning
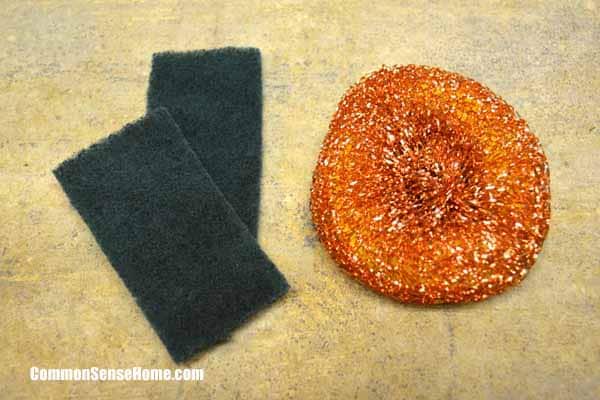
You will need to scrub the pans. I use whatever scrubbing pads I have around but you want something that will scour. This is not a job for the non-scratch pads. A wire brush that you might use on a grill will work too. They even have chain mail scrubbers specifically designed for cleaning cast iron.
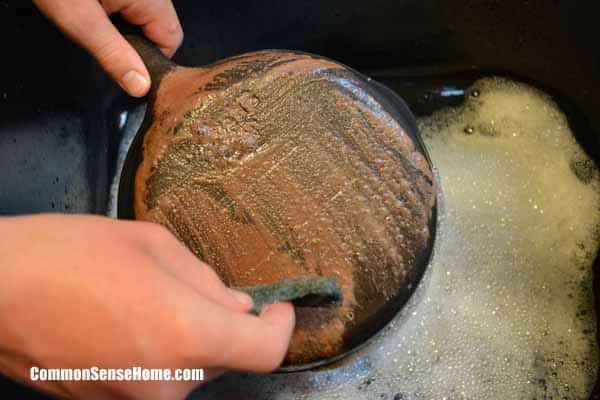
I’m not going to lie, you have to really scrub and scrub and probably scrub some more. It depends on how bad the cast iron was to begin with. You’ll see that the stuff that looks like rust washes off.
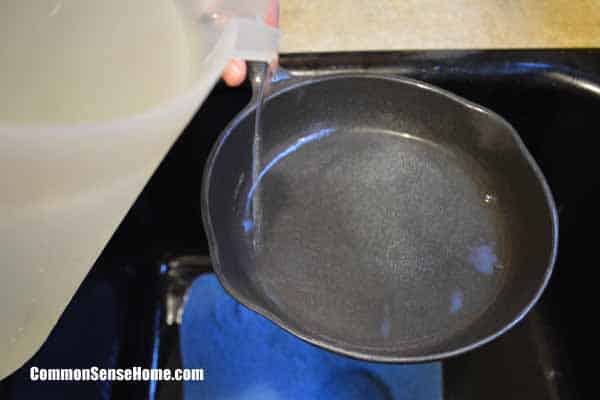
Scrub the cookware until it’s clean. It may take a good 15 to 20 minutes per piece. Then pour chilled water over the cast iron for the final rinse to prevent flash rust.
It’s fine to use soap at this point, even though you’ve probably heard to never use soap on cast iron cookware. That only applies to seasoned cookware, where you want to protect the seasoning or patina on the pan.
Here we are completely stripping any seasoning off the pan so soap will not hurt the cookware. Learn more about how to wash cast iron cookware here.
Smoothing Out the Surface of Modern Cast Iron Pans
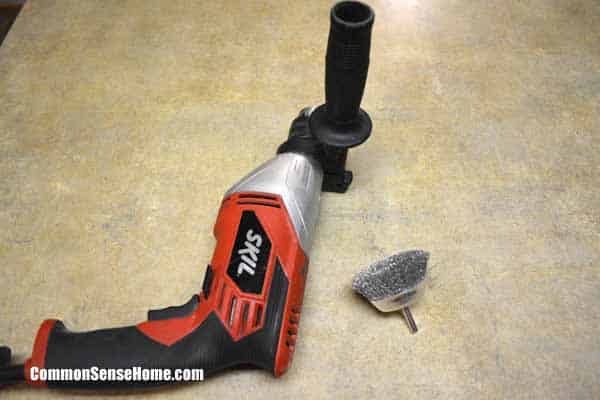
As I mentioned before these pans were manufactured relativity recently, after the 1960’s. So they don’t have as smooth a surface as the older more collectible pieces. To smooth out the surface you can use a wire brush like this one that attaches to an electric drill. You can find the drill attachment at most home improvement stores.
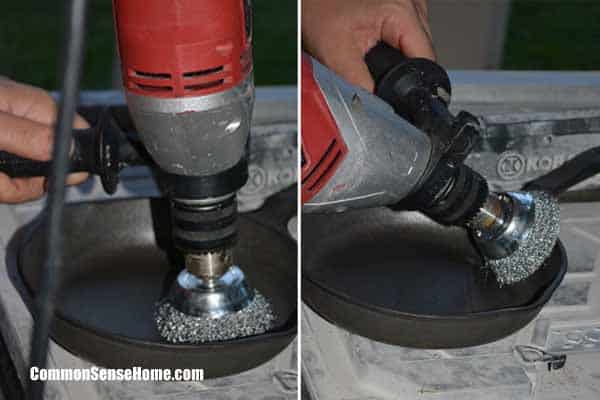
You’ll want to run the drill over the cooking surface several times to smooth out the cookware. That’s basically all there is to getting the cookware ready to re-season. Be sure to wash your cookware again after you use the wire brush on it.
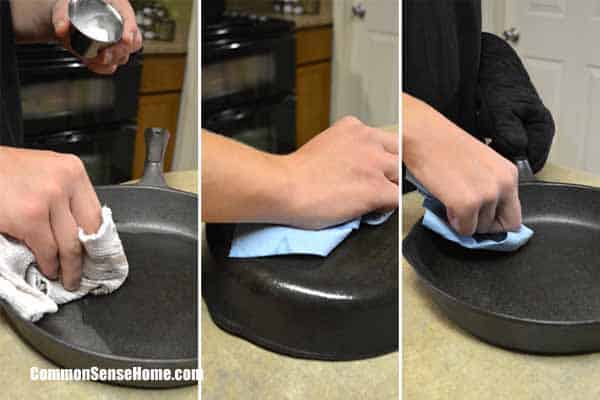
Seasoning the Cast Iron Skillet
To re-season cast iron, coat with a high heat oil. Wipe off all the oil with a lint-free cloth. Place in a 300 °F oven for 15 minutes and then take out your pieces and wipe all the oil off again (don’t skip this step or the oil might pool on the cookware).
Then place the pieces back in a 400 °F oven for 2 hours. To learn more about re-seasoning cast iron cookware go here.
Would you like to save this?
The Difference Between Old and New
At the same yard sale where I found the more recently manufactured pieces I also found these pieces. One is an unknown but the other two are old Wagners. So I thought I would show you the difference.
I’m not going to go into great detail about how to “collect” cast iron. There are entire websites devoted to the subject and I’m really not an expert.
However, to find one of those super smooth pans that eggs or pancakes won’t stick to you might have to either spend a lot of time with the drill brush or look for a pan that was manufactured in the 1960’s or before.
So let me show you the difference. First you might notice that these pans are in better shape than the first set. Someone obviously took care of them for awhile and cooked with them too. However, they do need to be stripped because of rust and sticky spots.
Also, I’d just feel better getting down to the bare metal. Who knows what’s been cooking in them… yes, I’m a little bit of a germaphobe.
You can see right away that the patina was much thicker on these pans than the first set. This is a shot right after the self-clean cycle.
Here are the cleaned-up unseasoned pans. The cheaper, more recently manufactured set on the left and the older ones on the right. Even in this picture you can see the difference in the smoothness of the cooking surface.
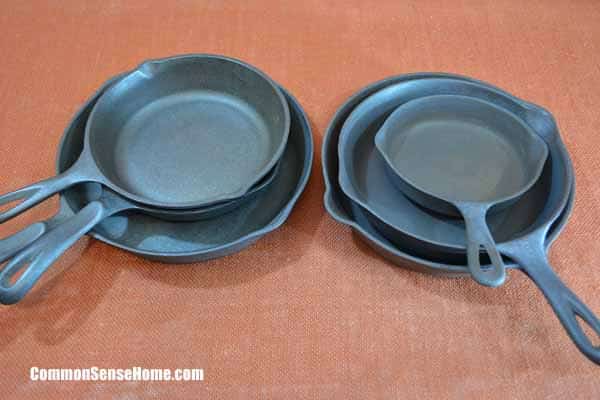
Modern Cast Iron
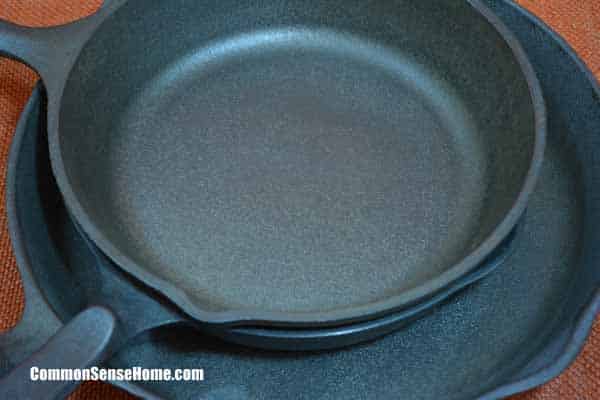
Here is a close up of the recently manufactured pans. The cooking surface is rough. The pans are a lot smoother after being hit with the wire brush on the drill but it will take a while to get them smooth enough for eggs not to stick to them.
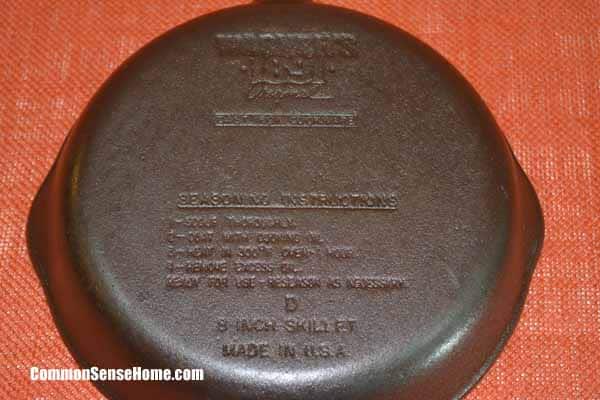
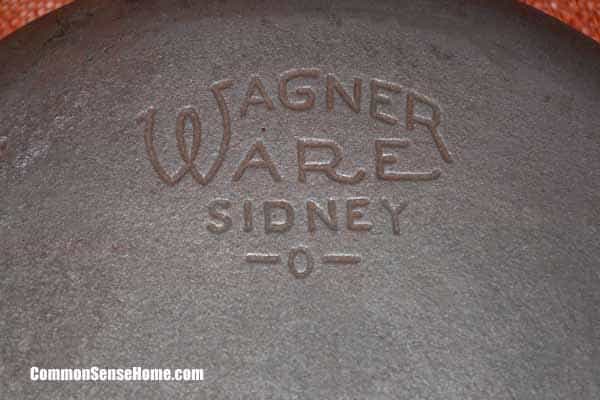
Here is the back of the recently manufactured Wagner. You can identify most cast iron from the markings on the back.
The fun part is when you encounter a piece that is in such bad shape that you can’t make out the markings. Then you have a mystery on your hands.
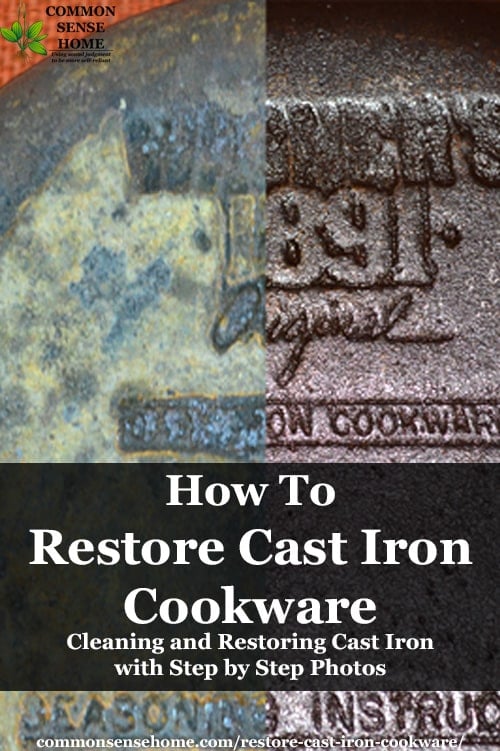
You could get lucky or you could be a little less fortunate. Even though this says 1891 it was actually manufactured in the 1990’s.
Vintage Cast Iron
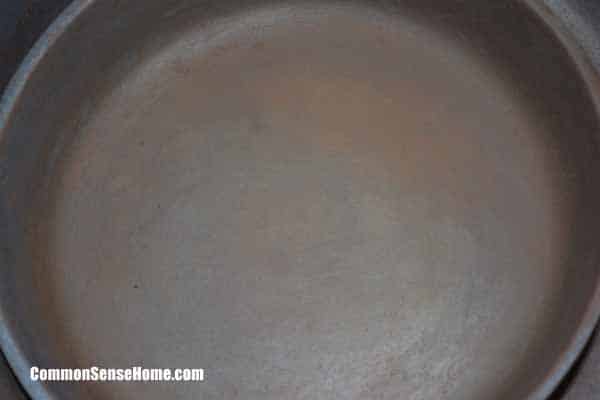
Here is the surface of the older pans. It’s pretty smooth. There are still remnants of the old patina even after heavy scrubbing so I might give them another round of the self-clean cycle in the oven.
See the difference in the logo? It still says Wagner but it’s a different older style logo.
Restoring Cast Iron is Not That Difficult!
Restoring cast iron is really not that difficult. You just need a little patience and some elbow grease. Restoring an old piece of cast iron can save you a few bucks, since people who own pieces in need of restoring are often anxious to get rid of them. (Their trash is your treasure!)
Restoring cast iron keeps old pieces out of landfills, so it’s a green choice. Not to mention, a restored piece makes a great gift. Plus, if you are like my husband, and just enjoy the hunt to find great pieces, it’s fun to take a piece home and clean it up to see if you have collectible. I almost forgot to mention – he doesn’t soak cast iron anymore. We fixed that problem.
You may also enjoy the post Natural Stove Cleaners and the other posts in this series:
- Cast Iron Cooking – What You Need to Know – Care and Cooking Tips
- How to Season Cast Iron Cookware
- Getting Started with Dutch Oven Cooking

This is a guest post by Jennifer Osuch. Jennifer has been prepping, homesteading (suburban style) and pursuing a self-reliant lifestyle for over 12 years.
She is the mother of three very active and wonderful boys, but insists that as many of her possessions as possible be the color pink to remind her house full of boys there is a lady a living among them.
Jennifer enjoys writing, gardening, and the outdoors. She blogs with her husband at the Seed to Pantry School about urban homesteading and becoming self-reliant. You can also find her on Facebook, Pinterest, and Instagram
Originally posted in 2014, updated in 2018.

It is perfectly safe to use detergents on seasoned cast iron. I clean my cast iron with water and Dawn dish detergent all the time. As for an oil being better for seasoning, that is myth. You can use ANY oil, so use the cheapest. Dont waste your money on expensive flax seed oil. I use the cheapest store brand vegetable oil and get a shiny dark black season after 2 coats. No matter what oil you use, if it doesnt come out black, you didnt have the heat high enough. There is no need to oil your pans after cleaning. First off, if your pan rusts, simply put, you didnt season it properly. Secondly, the oil will cause dirt to stick to the piece. Thirdly, if sitting long enough they can start to smell. Another myth about cast iron is that smooth it better. If you smooth your cast iron, you will regret it. The whole point of seasoning is to leave a layer of carbon on the surface of the cast iron. The bond between the carbon and the iron is very weak and by smoothing the surface, you make it even more difficult for that bond to form, as well as make it easier for the carbon to flake off.
I bought three pans from Taiwan. Are they worth the work or do I need to toss them?
You might as well try to use them and see how they hold up.
I have a Dutch oven that was very rusty,I cleaned it really good but in the bottom of it is pitted is that a problem?
If the cooking surface is pitted, you may want to consider the wire brush option to even it out. The pitting can be a problem, because food catches in those pits.
Thanks for the great article. One quick question. My oven manual says that the racks need to be removed when using the self-clean cycle. Do you leave your racks in? If not, what do you rest the pans on?
Hmmm…. yes, we leave the racks in. Not sure what to suggest in lieu of racks.
If you have chrome plated racks and use them in the self cleaning cycle, they are likely to discolor. They can lose their shininess, or get a yellow tint.
I have my grandmother ‘s CI pans she got when she first married in 1908. Passed one to my daughter. Much better than newer ones.
Yep. Back then they knew how to make cast iron the right way.
I have run my pans thru the self cleaning oven cycle, scrubbed them and then run them thru the 2 hour 500 degree oven cycle and scrubbed again. I’m still seeing red (rust) on them which comes off on the cloth when I dry them. Can I go ahead and season them or do I need to continue scrubbing?.
The rust should come off as you are rubbing in the oil during seasoning, as long as there isn’t a ton of it.
If you have superheated your CI and keep coming away with red oxide, that may be an indication that the pan was overheated (which often happens if some previous owner tried to ‘de-season’ the pan using a campfire or fireplace) and the iron is ‘sloughing’.
It will continue to happen if left bare, but I would go ahead and season it like Laurie says, and that should keep it at bay. Just keep an eye on that spot, it may take more oil than the rest of it, and may require more frequent touch-up going forward.
Thanks, Nick.
I recently purchased some cast iron skillets from a antique store and one is very sticky inside and out. I tried scrubbing it with kosher salt and a potato but it is still sticky. If I put it in my self cleaning oven will it come clean? Would I need to re-season it afterwards?
A run through the self-cleaning cycle should take care of the stickiness, but, yes, it will likely need to be reseasoned after.
You all need to get over the “no soap on a cast iron skillet” dogma. I’ve used seasoned cast iron for years, and have washed them after each use, and the oil continues to build up.
Notwithstanding the idea that heat kills bacteria, you really don’t want to mess around with it. Perhaps you won’t get sick immediately, but food borne illnesses are terrible, believe me. Just because you get no symptoms doesn’t mean it’s safe to go without washing.
I’m 66 & RARELY use dish soap on my CI cookware – most of which was handed down to me by my elders. Even Martha Stewart says not to use soap on your CI cookware. I use scalding hot water if I feel the need for sterilization. I RARELY get sick and take ZERO medications whether OTC or RXs and careful what goes into my body.
Although I almost never give mine more than a quick hot water rinse under the sink spray nozzle followed by a paper towel wipe with a tiny amount of pretty much any fat or oil (butter, bacon grease, olive oil, rapeseed oil, …), I agree with Bo.
I believe the ‘never use soap’ advice comes from pre-detergent days when dish soap was actually soap [Ivory Soap Flakes and all the others]. Soaps are nowhere near as effective at cutting grease and oil residues as modern dish detergents; as soap did not always remove all of the grease, the soap [which could cause gastric upset on its own]/grease residue was a great breeding ground for bacteria AND their toxins which may not always destroyed by heat (old Army, Boy Scout and camping literature of the 20’s, 30’s, 40’s, and 50’s commonly mention this, particularly in reference to being trapped in the rolled edges of pots). To a lesser degree this applied to cast iron skillets, etc. unless the surface was boiled clean and then hopefully lightly greased or oiled preferably while hot; many people did this haphazardly if at all, and rust, rancidity, and/or occasional gastric upset ensued giving rise to the never use soap advice. By the 60’s detergents ruled the sink and soaps went out of use by and large, but the old advice never died.
Modern-day detergents, while almost never needed to clean a seasoned pan, do no harm to pan or seasoning if properly rinsed, dried and oiled [preferably over heat to essentially mini re-season on the stove] as is good practice anyway.
I have a glass cook top. I have been told not to use case iron skillets on it. Is this true or is there a way to use them?
The weight and rough surface of the cast iron is likely to scratch the glass cook top, so using them is not recommended on that surface.
I also have a glass cooktop range. I use my cast iron on I haven’t had a problem. I a careful not to drag or slide them across the stove though.
An electrolysis bath is more thorough, and less scrubbing is required afterwards. YouTube how. It’s easy.
Also, you should ALWAYS fully dry the pan after the final soapy cleaning BEFORE you do the first layer of seasoning. Always. 215 degrees for 20 minutes in the oven. That will dry it. THEN is the first layer of oil to season.
Our family does the first layer at 350 for 1 hour, second layer at 350 for one 1 then the third and final layer at 500 for 1 hour.
my oven doesn’t have a self cleaning cycle but it does have a 500*F setting. You said that was the temp needed to burn off the old patina. Is there something else the cleaning cycle does or would it work to pop it in at this temp?
That should work. Just make sure you have good ventilation.
Just put my skillet through a self clean oven cycle! It’s in the oven seasoning. How many times will you do the rub on oil and put in the oven for 400 degrees for 2 hrs? Just the once or a few times before first use?
Jennifer likes to do it three times. You can read more about seasoning your cast iron at https://commonsensehome.com/season-cast-iron-cookware/
saw the picture of your old unmarked skillet that was put through the self cleaning oven and still had the burnt residue left on, I could see the underside of the handle and I can tell you that it is an unmarked BSR – Birmingham Stove & Range, no matter if marked or not, all the handles are the same and that is with the underside having a ridge line from the side of the skillet to the opening eyelet at the end, those are just as good as any Griswold or Wagner, might even be a bit better, they have a very smooth cooking surface. That one is a good find at a garage sale.
I have also tried using electrolysis and it worked very well. I just checked on its progress every day to see how it was coming along. If interested do a search and make your own setup!
I love my cast iron skillets. Got my very first one at age 13 from one of my grandmothers. I am now 69. My biggest ones are covered on the outside with what I call crud. No worries about inside. Don’t have a fireplace. Any suggestions about alternate removal of said crud?
Mom used to set hers on fire every once in a blue moon… sometimes on purpose, sometimes not. Removed the crud pretty well.
My cast iron is chipping. Why?
What kind of cast iron is it, and how are you using it?
I have an unmarked skillet that has strong sentimental value for me. It has a ridge, which may mean that it’s old.
I want to strip it down and properly season it to give it to my daughter. What is the risk the skillet will crack when put through the oven self-cleaning cycle?
Also, if I found a place that would sand blast it, how much metal will be removed, thinning the skillet. One of the advantages of old cast iron skillets is that they were thicker than new skillets.
Thanks to everyone for a fine thread.
Kit
Hi Kit,
Does the skillet really need to be re-seasoned? Can you give it to your daughter in it’s current condition? Unfortunately, there is always a risk when you put something under a lot of stress. Maybe you could find someone in your area that is a collector and regularly restores older pieces to really access the risk. Although I feel like I have some experience with restoring cast iron, I don’t consider myself an expert in all the different methods of restoration. If I were in your shoes I would seek out an expert to take your piece to, so they could look at your cookware and give you a more educated assessment.
Hi. Im no expert either but i think the ridge you speak of is a heat ring. Common in older CI. You an Google it for more info. There is a website called the cadt iron collector. Check it out, those people are definitely experts. Lol. Good luck
I think someone may have used soap?on my near perfect iron skillet there is no rust but what looks like splotches on inside like,well I don’t know. makes the pan look “broke”it was my moms and at 97 she no longer cooks and I’d love to save any suggestions? thanks ps guess everyone knows if you have liver disease never use iron or copper cookware..so Ive heard
Hi Deb,
It’s hard to know without seeing a picture. It sounds like the seasoning is not even. Maybe you could rub some extra oil over those spots after you use it each time. If you continue to use it they should even out.
Whose got a SandBlaster???
Good info on stripping and re-seasoning, though.
I don’t have a sand blaster, but I have friends with sand blasters. 🙂
Something easier. Air compressor plus sandblaster. Done in a 15 minutes!
From everything I’ve read, when cleaning an oven, they say to take out the shelving. I’m assuming the shelving is welded and shouldn’t be in a 500 degree oven. It might fall apart. So with no shelving, what do you do?
I have a GE oven, and on the GE website, they state that:
“As a general rule, you may leave self clean racks in your oven, but you must remove stainless steel racks. Read your Owners Manual to determine which racks have been provided with your oven.”
I picked up some racks off a stove sitting roadside waiting for refuse pick up. They weren’t wide enough to fit into the runners on the sides of my oven but I saved some 4 empty tin cans with the labels & ends removed to use as supports for the 4 corners of the racks. By using 8 tin cans, I can stack the racks atop one another, if needed. Works beautifully. I simply find a place to store them until future use.
I inherited several Iron pans from my after her death. They had been used nearly a half century. There was a lot of crud on the outside of the pan, the inside was perfect. I had fire in the fire place, no flames but a huge coal base, I put the pans on the log rack, closed the door. The next morning I checked and all the crud, the cleaned the pans and good for a fifty years.
Very nice. What a great thing to keep in the family.
THREW OUT A CAST IRON PAN !!! lol I’ve heard t quite a few times … I grew up with them , as far back as I can remember … My Grandmothers , Mother , Aunts … I ALSO remember at a very young age “DO NOT PUT SOAP IN MY PANS !!!” , ( ‘about’ the same with soaking them … I have a dozen or so that I use all the time , have taught both of my sons about ’em AND , bought the wife a set of Calphalons , so she WON’T use mine … lol ( She just can’t seem to ‘get’ it … [ a few more minutes AFTER you use them works wonders … ] 😉 There a re a few different ways to care for them , season them , yours are good . Love your tips ideas , keep posting , I’ll keep reading . Thank you for taking the time to share , Dale . 🙂
Nothing like soap on cast iron to make a person cringe. 😉
Thanks for taking time to share your story.
Nothing wrong with a mild dish soap to remove grease from the pan, just go easy and do not scour with powders or scratchy pads. Best to clean while still warm (not screaming hot). To remove tough stuck on food or debris warm the pan and use kosher salt and a little oil with a good wad of paper towels. Been using and cleaning them 50+ years.
In my question above I forgot to ask my second question, I’m sorry. :{ We also have a new Lodge preseasoned grill pan, with the deep grooves. How do you suggest stripping this? As best we can with the drill brush and the rest by hand?
LOVE these posts about CI! We are just getting started with CI in our (suburban) homesteading journey. I inadvertently ordered Lodge Preseasoned CI because I didn’t even realize there was an option to buy seasoned or non seasoned. So now before I start cooking with them my husband & I want to strip the preseason off – should we follow these same instructions, even though we have brand new CI?
If you want to strip and reseason, yes, the process would be pretty much the same.
Will this work if the pan has some rust on it? I inherited a pan from my mother recently that was my grandmother’s and had been in storage since her death in 1990.
I have a question about letting the oil pool. I started cleaning and reseasoning my pans and I accidentally left them in the oven to cool down before I wiped them. I turned on my oven to preheat for dinner the other night and the smell was not very appetizing because of the oil I’d left in them. Do I start all over or is there something I can do from this point to season them?
Hi Stephanie,
You can try heating up the pans then buffing the spots where the oil pooled. Depending on how much oil was left on the pan it might take a lot of buffing. So it might be easier to start again.
Not to worry … no need to strip back to metal, unless you’re entering your pan in a “most perfect pan contest”!
I suggest using a cloth or potato to scrub some coarse salt around (done regularly, over months or years, this will even out imperfections in the cooking surface until it is glass smooth). The salt scrub will take the sticky pooled oil off & leave any good seasoning. Rinse, warm on stove or in oven, then continue to season as before.
Or… just get cooking bacon or cornbread etc etc!
I like to season them upside down so the oil doesn’t pool in the bottom. Use a sheet pan to catch the drippings. I had the same problem til I read about doing it this way.
Hello! We just recently got started with CI cookware with a grilling pan and we seem to usually end up with burnt meat between the grooves which makes it difficult to wash off. The pan works wonderfully though! Far more convenient than the outdoor grill. On to my question though, you mention in this article a separate article on how to wash the CI yet that link takes me to the “How to season…” which I did read and glad of it (we only seasoned ours once…). Will you be posting the washing tips soon?
Thanks for your homesteading blog!
Hi Celica,
I’m sorry for the confusion. When I put that link in the post I was referring to washing unseasoned CI.The previous post was on how to season your CI which includes washing it. Here is the link to my first post on CI https://commonsensehome.com/cooking-cast-iron-get-started/. I think for the problem you are describing I would try using a non-scratch brush, maybe a toothbrush. And be sure to wash the pan right away before the drippings have a chance to hardened.
Try cutting a potato in half, then sprinkle some coarse sea/rock salt (as an abrasive medium) into the pan and onto the newly opened side of the potato, then pushing the potato down, scrub along the grooves.
A ten minute soak in warm water will soften much if the cooking debris prior to cleaning.
WARNING – do not add cold water to a hot pan – it risks cracking the pan because if the violent change in temperature. Let the pan cool for five to ten minutes – I add hot water from a kettle, return the pan to the hob, bring back to simmering, turn off the heat & leave to cool to safe handling temperatue – then scrub with a course (natural/non synthetic) bristle brush – rinse, dry with lint free cloth or kitchen towel, warm on stove (to completely dry + open the pores of the iron). Finally, oil the pan (while still warm) for storage.
If necessary, follow the seasoning cycle again.
Lodge sell a plastic scraper suitable for scraping their grooved grill pans.
I wanted to say TY very much for this! I have 2 pans in the oven on “clean” as I type. I have never read how to reseason CI this way & I am really hoping I will be able to get use out of my 2 pans. We have a larger family & never have enough pans (we have 2 stainless ones), yet there are 2 CI pans that just sit here because I have failed at reseasoning them for the past 3 years, which now I know is partly because of the old seasoning on them & partly because of pooling oil. I also had a relative WASH & SOAK one of the pans w/soap & water, when THEY themselves told me NOT to, & the pan has never been the same since. I know washing is okay, but it has to be done properly which they did not. It would be a blessing to have 2 more pans, no matter if they are tiny or not, because the SAFE non-stick feature will make them very useful for quick cooking & won’t have to be soaked after like our 2 stainless pans, so I can use them w/out down time. TY again!
You’re very welcome. Glad to be able to help.
I have used a campfire to strip the old patina off as well. You just have to remember to not touch it till it is 100% cool.
So glad to see someone post how my mom edid it in a fire outside. She would have my dad build a wood fire in the outdoor fireplace he built and she would put her cast iron in the fire to burn off the build up. Then reseason after they cooled. No fancy self-clean ovens back then!. I still use her skillets and I am past 70. Good old fashion healthy way to cook!