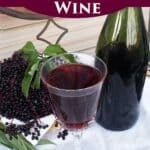
How to Make Old Fashioned Elderberry Wine
This post may contain affiliate links. Read my full disclosure here.
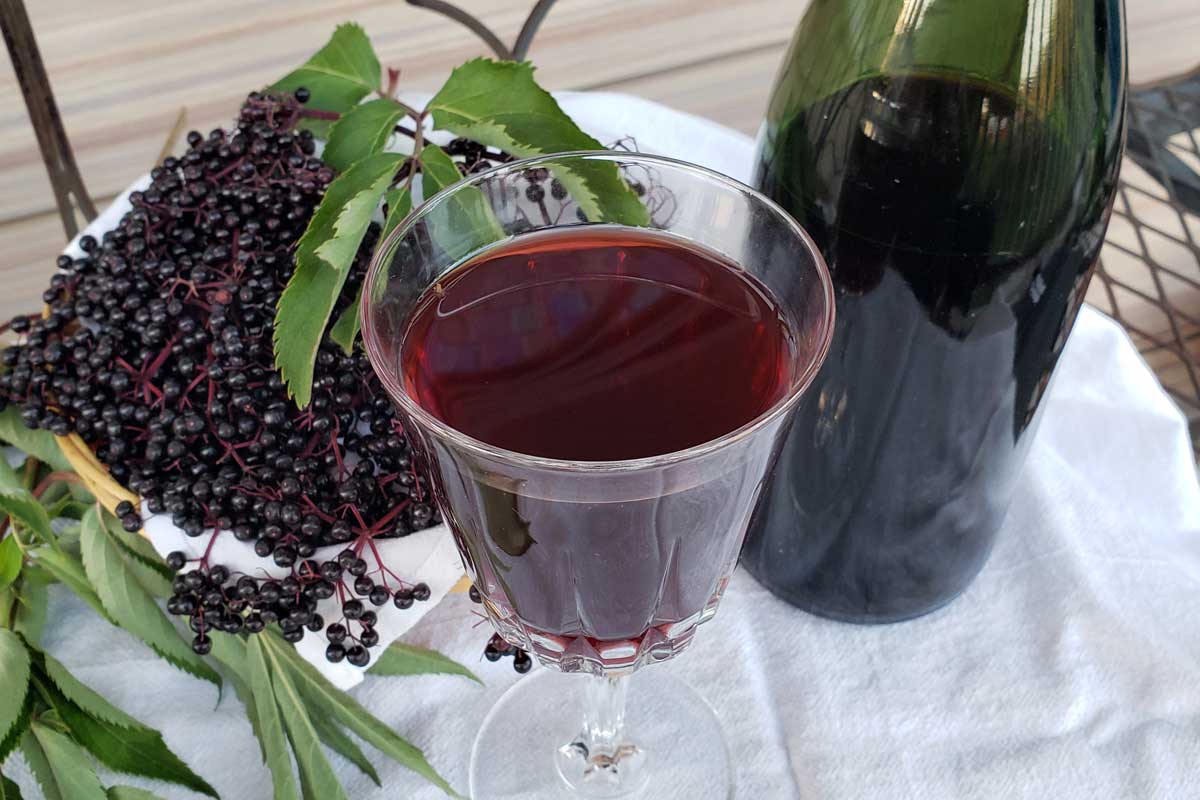
These simple elderberry wine recipes are perfect for beginning home winemakers. One uses natural yeast and the other uses commercial wine yeast. Each one creates a robust red wine. The sun wine is a little sweeter with less alcohol, and the country wine is a little heartier with higher alcohol content.
We’ll take you through the process, from gathering berries to bottling your finished product.
Side note – I’ve wanted to make homemade elderberry wine ever since I saw Monty Python’s Quest for the Holy Grail. It turned out to be a fun and tasty project.
Gathering Elderberries
When I first made elderberry wine, we went foraging for wild berries. Now we have our own elderberry patch. For making wine, use any of the following:
- American Black Elderberry – Sambucus canadensis
- Black elderberry, Sambucus nigra
- Western blue elderberry, Sambucus mexicana
Do not make wine from red elderberries, which are toxic. For help with identification, see, “What does an elderberry plant look like?“. For those who prefer white wines, you can turn the blossoms into elderflower wine.
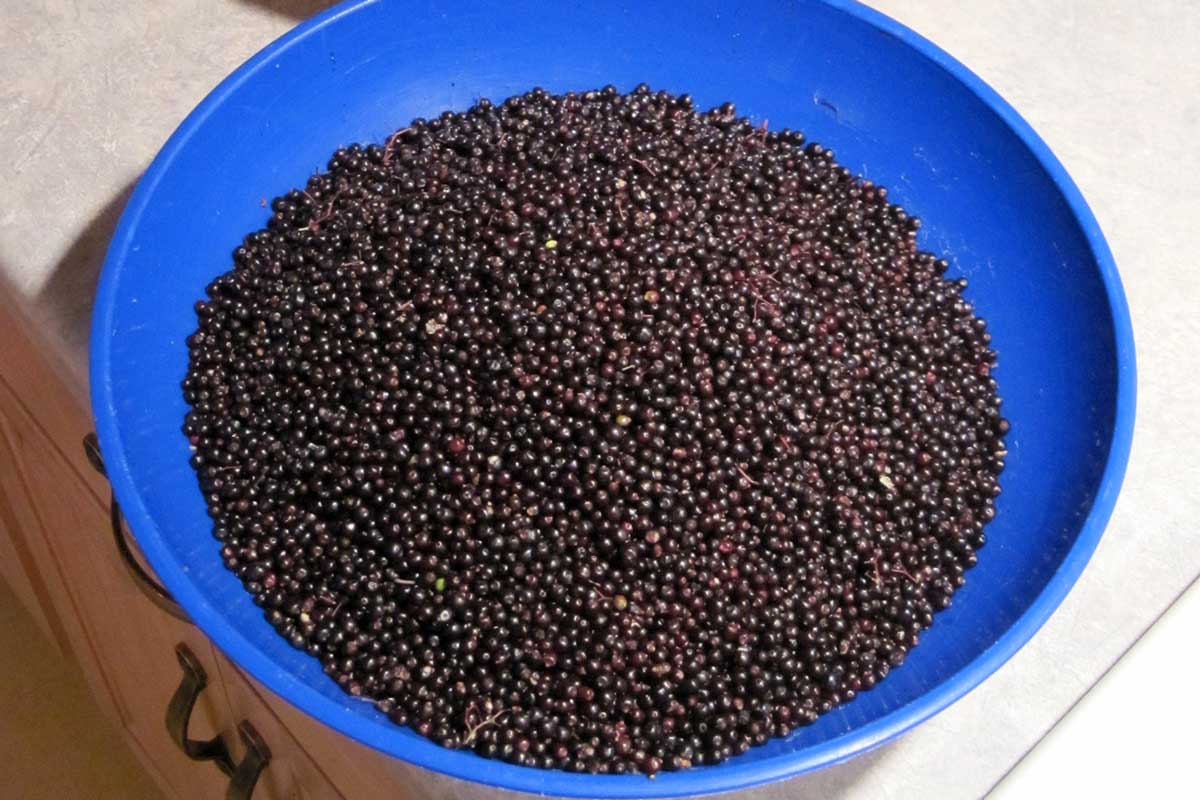
Harvest the berries by snipping off the clumps and gathering them in a bucket. They stain if smashed, so trying to strip off individual berries is asking for a mess. I like to tie a bucket around my waist and wade right in.
How to Clean and Process Elderberries
Once you have enough berries, strip them from the stems. A few stems is fine, but you don’t want a lot of them because they contain cyanide-inducing glycoside. (These are compounds that give rise to cyanide as the metabolism processes them.)
Elderberries are sticky, and will coat your hands and your fermenting vessels. The stems are bitter, and high in tannins. You can wear rubber gloves, but they make it a bit harder to clean the berries. Rubbing alcohol or Goo Gone will help remove the sticky coating.
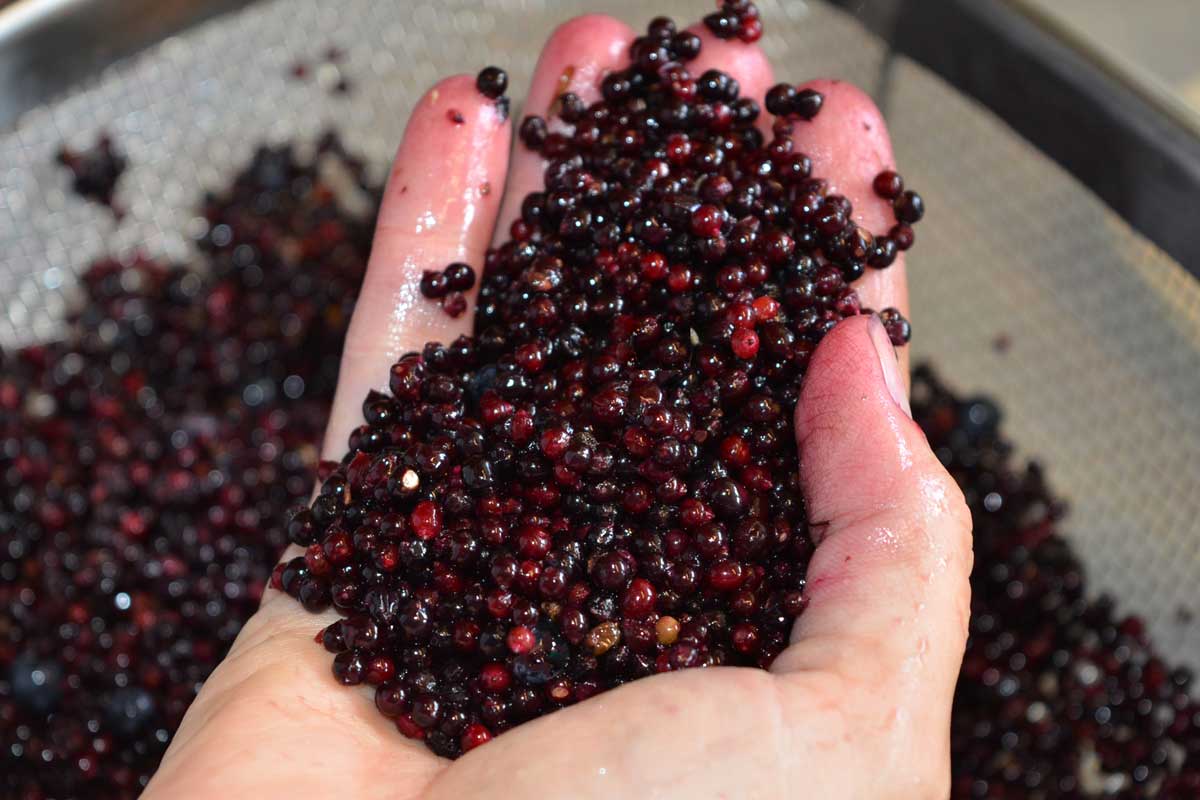
You can strip the berries off the stems with a wide-toothed comb, or use your hands. Some people freeze them before stripping the berries. If you freeze the berries first, take out a small portion at a time to process. They thaw quickly and elderberry juice can be messy.
Dried elderberries are another option. Use 5 cups of dried elderberries for one gallon of wine.
How to Make Elderberry Wine – 2 Recipes
Both of these recipes are simple country wines made with minimal ingredients and basic equipment. For the sun extracted wine, you need a gallon glass jar. For both wines, I recommend:
- 2 gallon crock, to allow room for the fermentation bubbles, or other food safe container
- gallon carboy with airlock
- 4-5 wine bottles
- a wine corker and corks
I don’t use campden tablets to stabilize our homemade wine because we are sensitive to sulfites. Campden tablets typically contain sodium metabisulfite or potassium metabisulfite. We are careful to check that fermentation has stopped before bottling.
Sun Extracted Elderberry Wine Recipe
This recipe is adapted from the book “How to Make Wine in Your Own Kitchen” from 1963. I love this little book because the recipes are so simple. The author uses common kitchen ingredients to make wine from fruit, flowers, and vegetables. It’s a fun and creative book.
This recipe is made in stages. In stage one, you steep the elderberries in water; in stage two, you add the sugar and raisins. Most natural yeasts only have an alcohol tolerance of 5-6%, so this wine has less alcohol by volume.
Ingredients
- 4 quarts loosely packed elderberries (be sure they are dark ripe)
- 2 quarts boiling water
- 6 cups cane sugar
- 1 cup of chopped raisins
Directions
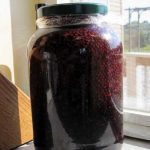
Remove elderberries from stems and pack in a gallon glass jar. Bring two quarts of water to a boil. Make sure your jar is warm (you can set it in a tub of warm water) to prevent breakage.
Would you like to save this?
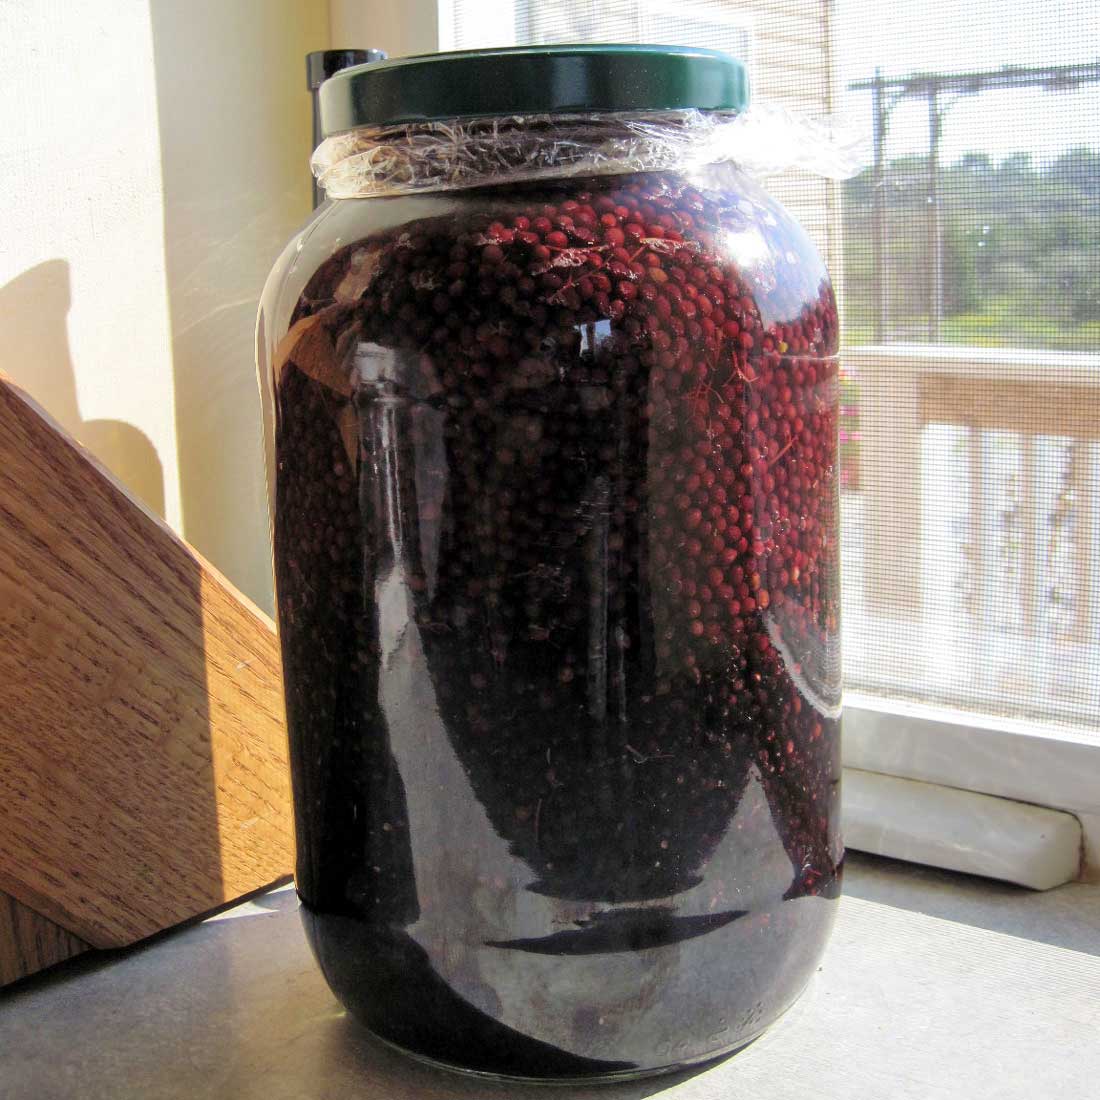
Pour the boiling water over the elderberries. Leave a healthy inch of space at the top, because they will swell and expand.
Make a plastic liner for the metal cover. Put the cover on loosely (enough to keep the bugs out, but loose enough that it can vent). Set in a sunny place outside for three days.
After three days, strain the berries through a jelly bag or flour sack towel, squeezing out as much of the liquid as possible. Pour juice back into the glass jar or a one gallon crock.
Stir in the sugar, making sure it is all dissolved. Add chopped raisins. Cover loosely and keep in a warm place indoors to continue fermentation for three more weeks.
At the end of this time period, strain the wine. Use several layers of cheesecloth, or a flour sack towel or old cotton t-shirt. Transfer the wine into a one gallon carboy with airlock. Let the wine age in the carboy for six months.
Siphon the wine the wine into bottles and allow to age until it is at least a year old. Unlike most fruit wines, elderberry benefits from longer fermentation. If you have the patience to age some of the wine longer, you will taste the difference. (See Easy Cleaning and Sanitizing and Wine Siphoning Instructions.)
Elderberry Sun Wine Notes
I set my berry jar in a sunny window, then out on the deck in various spots, and then brought it inside at night. We had a groundhog visiting the deck at night, at I didn’t want it getting in the hooch. The liquid should be bright red in color after three days in the sun.
You’ll note that this recipe has no added yeast. This made me a little nervous, since wild yeast can be less reliable. The raisins introduce wild yeast when they are added with the sugar.
If you don’t see bubbles within a couple of days, you can add commercial yeast so your wine doesn’t spoil or turn into vinegar.
PrintSun Extracted Elderberry Wine
An easy elderberry wine with just four ingredients, brewed in the sun.
Ingredients
- 4 quarts loosely packed elderberries (be sure they are dark ripe)
- 2 quarts boiling water
- 6 cups cane sugar
- 1 cup of chopped raisins
Instructions
- This recipe is made in stages. In stage one, you steep the elderberries in water; in stage two, you add the sugar and raisins.
- Remove elderberries from stems and pack in a gallon glass jar. Bring two quarts of water to a boil. Make sure your jar is warm to prevent breakage. Pour the boiling water over the elderberries. Leave a healthy inch of space at the top, because they will swell and expand.
- Make a plastic liner for the metal cover. Put the cover on loosely (enough to keep the bugs out, but loose enough that it can vent). Set in a sunny place outside for three days.
- After three days, strain the berries through a jelly bag or flour sack towel, squeezing out as much of the liquid as possible. Pour juice back into the glass jar or one gallon crock. Stir in the sugar, making sure it is all dissolved. Add chopped raisins. Cover loosely and keep in a warm place indoors to continue fermentation for three more weeks.
- At the end of this time period, strain the wine. Use several layers of cheesecloth, or a flour sack towel or old cotton t-shirt. Transfer the wine into a one gallon carboy with airlock.
- Let the wine age in the carboy for six months. Siphon the wine the wine into bottles and allow to age until it is at least a year old. Unlike most fruit wines, elderberry benefits from longer fermentation.
Picking a Commercial Yeast
In some old school recipe books, they use bread making yeast to ferment wine. This will work in a pinch, as yeasts eat sugar, no matter what the sugar source.
Now, there are many different types of yeast strains specifically for wine making. Choosing a different yeast strain allows you to adjust the alcohol content of the final product.
Yeast is available as dry yeast and liquid yeast. The dry yeasts are less expensive and good for the beginning home brewer. Some recipes include yeast nutrient, which is a mixture of nutrients that nourish yeast cells. Sometimes I use it, but I usually don’t.
Some dry yeast options for homemade elderberry wine:
- Lavlin Red Wine RC-212 – 12% – 14% alcohol
- Lavlin Champagne EC-1118 – 18% – creates a sparkling wine
- Red Star – Premier Rouge – 16%
- Vintner’s Harvest Saccharomyces Cerevisiae VR21 – 15%
- Vintner’s Harvest Saccharomyces Cerevisiae SN9 – 18%


Country Elderberry Wine
A robust red wine that’s good for sipping and as a cooking wine. Adapted from the book Wild Wine Making..
Ingredients
- 3 pounds elderberries
- 1 gallon water
- 3 pounds granulated cane sugar
- 1 package wine yeast
Instructions
- Mash the elderberries and place them in the fermentation vessel.
- Bring the water to a boil in a large pot. Add the sugar and bring back to a boil, stirring to dissolve the sugar. Add the boiling sugar water to the mixture in the fermentation vessel. Cover and let cool.
- Stir in the yeast and cover. Stir twice a day until fermentation slows, 7 to 10 days.
- Press out the pulp, pour the wine into your secondary fermentation jug, and secure the air lock. Check it the next day; if there is a deep layer of lees, rack and filter the wine. Rack again ever 2 to 3 months.
- The wine should be ready to drink in 9 to 12 months. Let it age for as long as possible before bottling, at least 9 months, and preferably a year or longer.
Notes
If desired, add 2 cups of raisins, finely chopped, with the elderberries to increase sweetness and add body.
Savoring the Elderberry Harvest
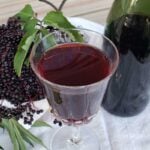
Both of these wines are rich, sweet and fruity. Heating the elderberries really brings out the berry scent, and once the yeast kicks into action it fills the kitchen with earthy, yeasty goodness.
To me it smells like abundance. If I have enough fruit for wine, then it’s a bountiful year. I’m not much of a drinker, but it’s nice to have the option to share a special brew with friends and family. Wine is quite forgiving, and so far my home wine making results have been pretty good.
We have our own elderberry patch, so we have enough berries to share with friends and try different recipes. These are some of our favorites:
- Elderberry syrup with fresh or dried berries
- Easy Elderberry Gummy Recipe
- How to Make Elderberry Jam
- Elderberry Jelly – Low Sugar and Traditional Recipes

This article is written by Laurie Neverman. Laurie was raised on a small dairy farm in northwest Wisconsin, where she gathered wildflowers from the woods and pastures. She and her family now live in northeast Wisconsin, where they combine intentional plantings and semi-wild areas. Every season is a new opportunity to learn more about working with wild plants.
Originally published in August 2012, updated in 2024.
Sounds like an easy wine project. I’m curious as to know how you can get a start of the elderberry plant to grow in your backyard?? Plant some of the berries and hope for volunteers to grow up?? I’d like to try to grow some myself. Thanks Laurie!! Love your work and recipes!!
One typically starts grows elderberries by starting plants, and by taking cuttings and using those to start a new plant. You can learn more at https://commonsensehome.com/how-to-grow-elderberries/
I wonder if it is possible to decrease the sugar to make a dryer wine. I’m not a fan of sweet wines. I have 3 elderberry bushes in my yard and would like to try wine making.
I have not tried this (we drink only a small amount of wine, so I don’t make a lot of it), but it should certainly be possible to make a drier wine.
I’d cut the sugar to 5 cups, and add a teaspoon of acid blend powder for more tartness (or a tablespoon of lemon juice). You may also want to select a wine yeast specifically recommended for dry wines, like this Red Star Cote des Blancs.
I think something went horribly wrong with my first attempt of elderberry wine making. I just pulled the two one gallon jars I have on the second ferment and find little spots of mold on the top. Will this be going to the compost pile or is it salvageable and okay to bottle at this time? Please advise. Thank you.
If there’s mold I would compost it.
Did you have an airlock on top of the gallon jugs, and was the fluid level close to the top? To prevent mold during the second fermentation, the top of the bottle should be filled with the carbon dioxide from the fermentation, and not open to the air.
As far as yeast and natural fermentation goes, I think you should choose organic raisins. There are natural and healthy yeasts in raisins and grapes, but commercial raisins are often sulphated or otherwise preserved.
Try a couple of batches with organic raisins and you may not have to use commercial brewers or wine yeast.
Keith
Hey, Laurie! Would you happen to have any suggestions how to remove those tiny worms in elderberries? Shame on me but I can’t get past the ick factor but don’t want to waste the bumper crop we have this year.
I think I can soak them but in what and how much?
I suspect you’re dealing with drosophila larvae (fruit flies), and I don’t know any way offhand of getting them out, since they have a self-contained lunch buffet safely sealed inside the berries.
You could try a vinegar water or salt water soak, but unlike broccoli, they’re hiding inside, not outside the produce, so this makes them harder to remove.
We had issues with them last fall in the raspberries. It was so wet that the fruit got soft and spoiled quickly. When I kept up picking them every couple of days it was better, but the chickens got quite a few berries. I know elderberries often ripen in one flush, so that might not be an option.
Thanks! I did try the salt bath and that did remove some.
One more question, please..
I dried a second round of berries. They aren’t all black like the first batch. It’s looking like I might have “almost ripe but not quite” berries mixed in with the proper black ones. They’re not green but a burgundy color and not black. I wish I could attach a photo. Are they going to be safe to boil down with the rest? I’m my mind I’m thinking they’re not ripe enough. What’s the consensus on that?
The berries don’t all ripen evenly in the clusters, but as long as they are not completely green, I wouldn’t worry about it.
To easily remove elderberries from stems, place berries in plastic bags then put in the freezer. Once frozen cut a small hole in the bottom corner of the bag. Shake bag hard. Berries come off and you can pour them out of the bag into your pot. A few stems might come out but easy to pick out a few.
why don’t you put the weights and liquids in lbs and ozs or metric.
which home winemakers use instead of ”CUPS”
thanks
kind regards
j.jones
Because the original recipes that I used were in these measurements, and I have the measuring instruments in the kitchen, so I use “cups” all the time.
If you need a specific conversion, there are many online unit conversion tools, such as http://www.onlineconversion.com/.
I’m sorry the flowers are called Queen Anne’s Lace. Thanks
But Queen Ann’s Lace isn’t a tree. It’s a plant about 3-4 feet at the most. I think you may have sambuca which is what elderberries are and some of the flower clusters look like queen Ann’s lace. Look it up. There are lots of varieties.