Wheat Thins Recipe – Easy Homemade Crackers
This post may contain affiliate links. Read my full disclosure here.
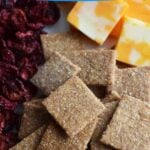
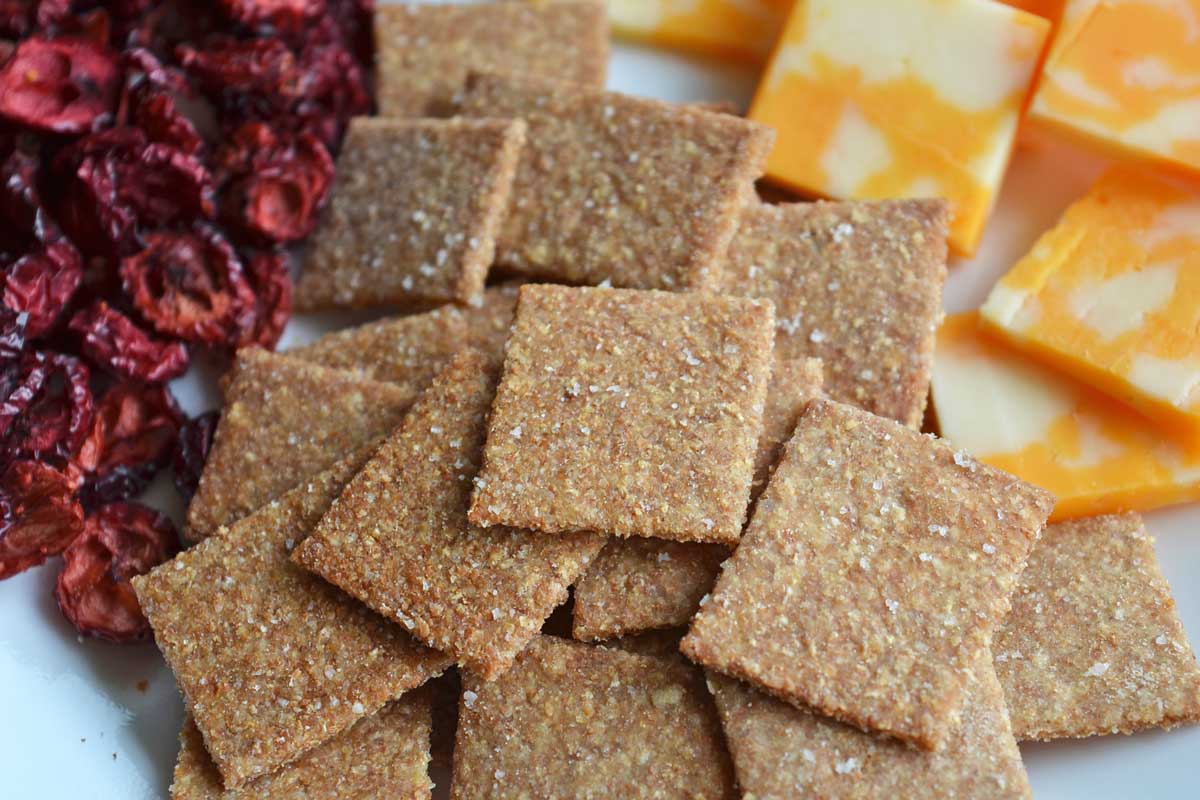
Our family loves homemade crackers. Sometimes we make sourdough crackers, but we also like homemade wheat thins. Salty with a hint of sweetness, these are great with cheese or other toppings, or on their own.
How to Make Homemade “Wheat Thins” Crackers
Adapted from King Arthur Flour Whole Grain Baking Cookbook, these are a great alternative to store bought wheat thins.
Ingredients
- 1 ¼ cups whole wheat flour
- 1 ½ Tablespoons honey (or sugar)
- ½ teaspoon salt
- ¼ teaspoon paprika
- 4 Tablespoons butter
- ¼ cup water
- ¼ teaspoon vanilla
- salt for topping
For the flour, I use freshly ground whole wheat flour from my Nutrimill. You can learn more about Nutrimill grain mills here. Starting with whole wheat flour works, too. Just remember that whole wheat flour spoils more quickly than refined flour, so you want to make sure your flour is fresh.
Spelt, Kamut, white or red wheat is fine. Each type of wheat berry adds its own unique flavor. Palouse brand stocks a good variety of bulk sustainably raised wheat berries.
Honey adds more sweetness than sugar, so you may want to use a bit less. Don’t skip the salt topping. It really adds to the flavor of the crackers. Feel free to try other flavors like garlic powder or other herbs along with the salt, too.
Directions
Preheat oven to 400 °F (205 °C).
In a medium bowl, blend dry ingredients (except topping salt). Cut in butter with a knife or pastry blender and blend until evenly mixed. Combine the water, honey and vanilla. Add to flour mixture and blend until smooth.
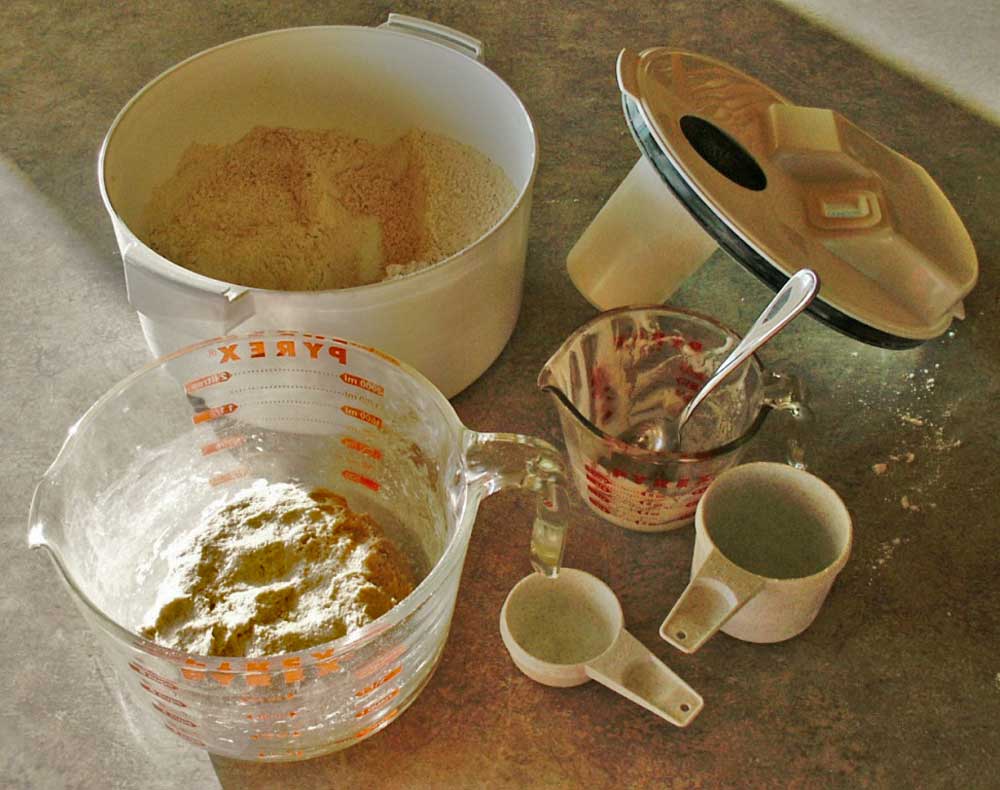
Chill the dough for an hour to make it less sticky, or roll out immediately. Dust the dough with flour as you roll the crackers to reduce sticking.
Divide the dough into four pieces and work with one piece at a time. Use a rolling pin to roll out the dough on parchment paper or directly on your baking sheet. Try to get the dough as thin as possible, about 1/16 inch thick and 12 inches square.
I roll out the crackers on reusable parchment paper, and then move the paper to Airbake cookie sheets.
Use a pizza cutter or sharp knife to cut into squares about 1 1/2 inch wide. The pizza cutter is easier, if you have one available. If you want to make the crackers look fancier, you can press dimples into them with fork tines. (I admit, I don’t bother.)
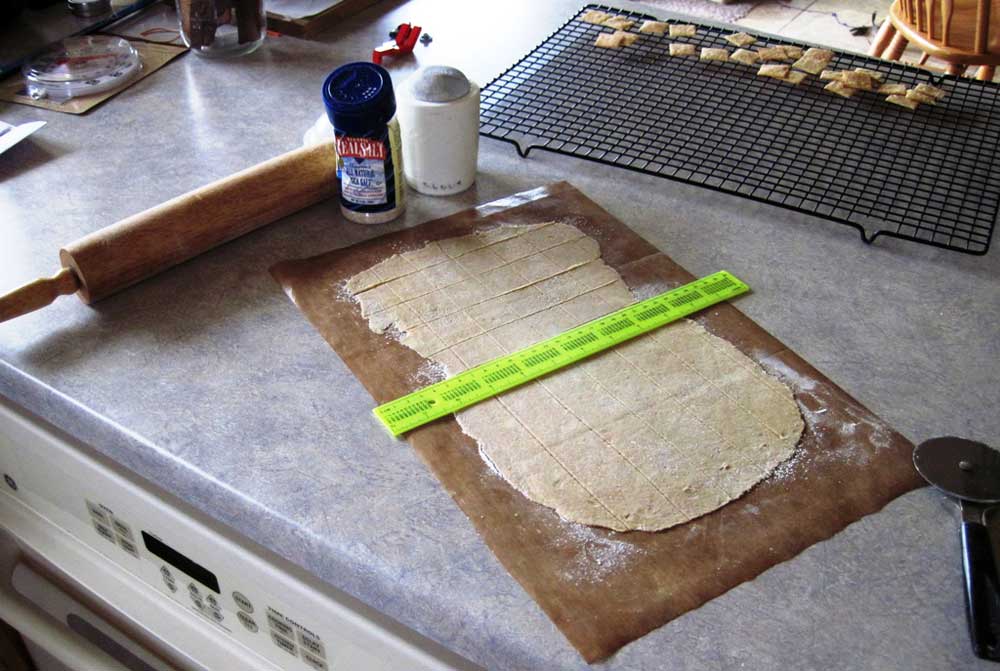
Sprinkle lightly with salt. The crackers don’t expand while baking, so you don’t need to move them apart. You can save the scraps and reroll them one time, if desired. We usually eat the uneven crackers to save time, as they all taste the same.
Baking & Storing your Wheat Thins
Bake the crackers, one sheet at a time, until crisp and browned, 5 to 10 minutes. (Airbake pans help avoid burning, but take closer to ten minutes to bake the crackers.)
Watch your homemade crackers closely during baking. They can burn fairly quickly because they are so thin. You can remove edge crackers from the pan if they start getting too dark and return the rest to the oven to bake. This is more likely if your dough is uneven.
Would you like to save this?
Remove the crackers from the oven when they are almost crispy, but not too brittle. They crisp more as they cool. If they are underbaked, they will be softer and less crackerlike. You can throw them in the dehydrator to dry them out, but the oven works best to get that tasty browning.
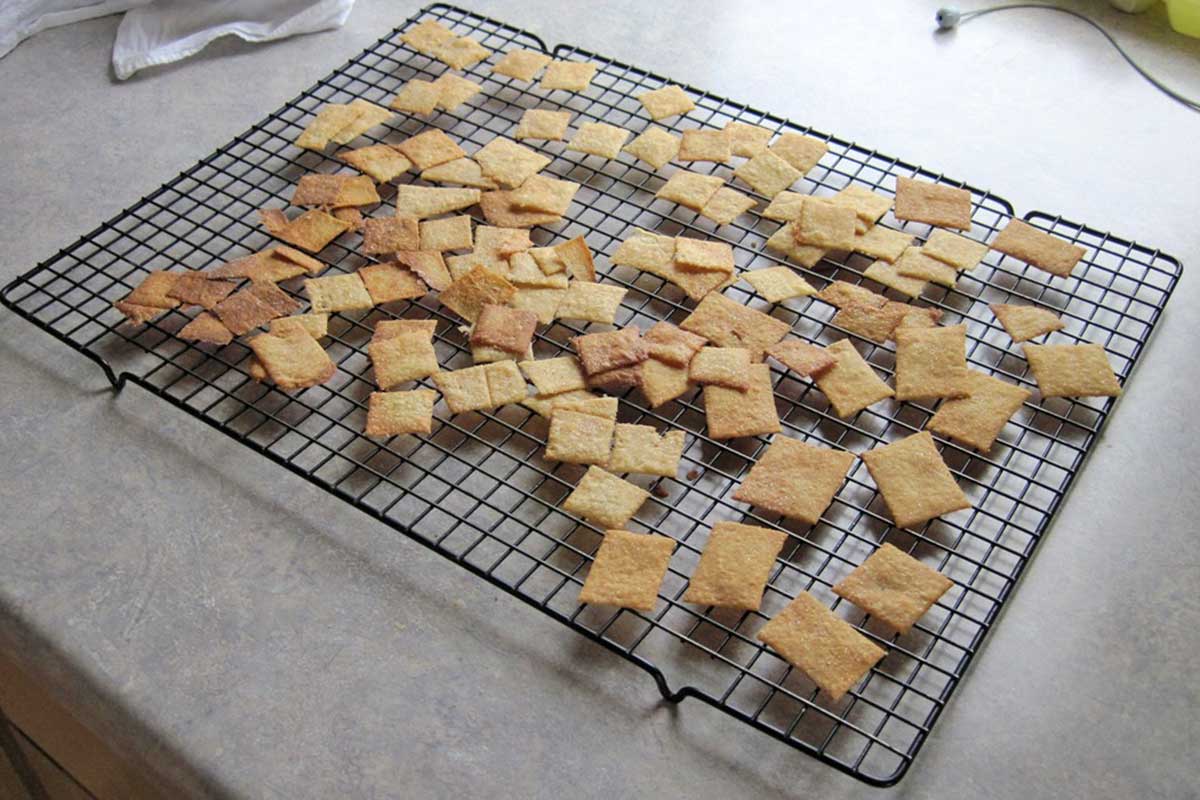
Cool completely and store in airtight containers (if they last long enough to store). For best quality, use within a week or two.
Prep Ahead Option to Reduce Phytates
Whole wheat flour contains phytates (phytic acid). Phytates has positive and negative effects. They may act as an antioxidant, but can also decrease absorption of some minerals.
To reduce phytates (and make the dough less sticky), we prep the dough a day ahead with a slight recipe change. Wait to add the salt until right before you roll out the dough, as it may inhibit fermentation.
Then, substitute whey for 1 tsp to the entire 1/4 cup of water. I put whatever whey I have available into my measuring cup, then add water to reach 1/4 cup. Place the dough in an airtight container and let it rest at room temperature for 12-24 hours.
Why make homemade crackers?
Homemade crackers like these wheat thins aren’t complicated, but they do take some time to make. It’s easier to crack open a box from the store.
The problem is, many store crackers have ingredients we try to avoid. Original Wheat Thins crackers contain genetically modified canola oil, cornstarch and malt syrup. Other crackers contain ingredients like bromated vegetable oil, MSG, preservatives, and other junk.
You can buy better quality crackers, but like many products, the price keeps going up. You can buy good quality ingredients in bulk and make homemade crackers for less money.
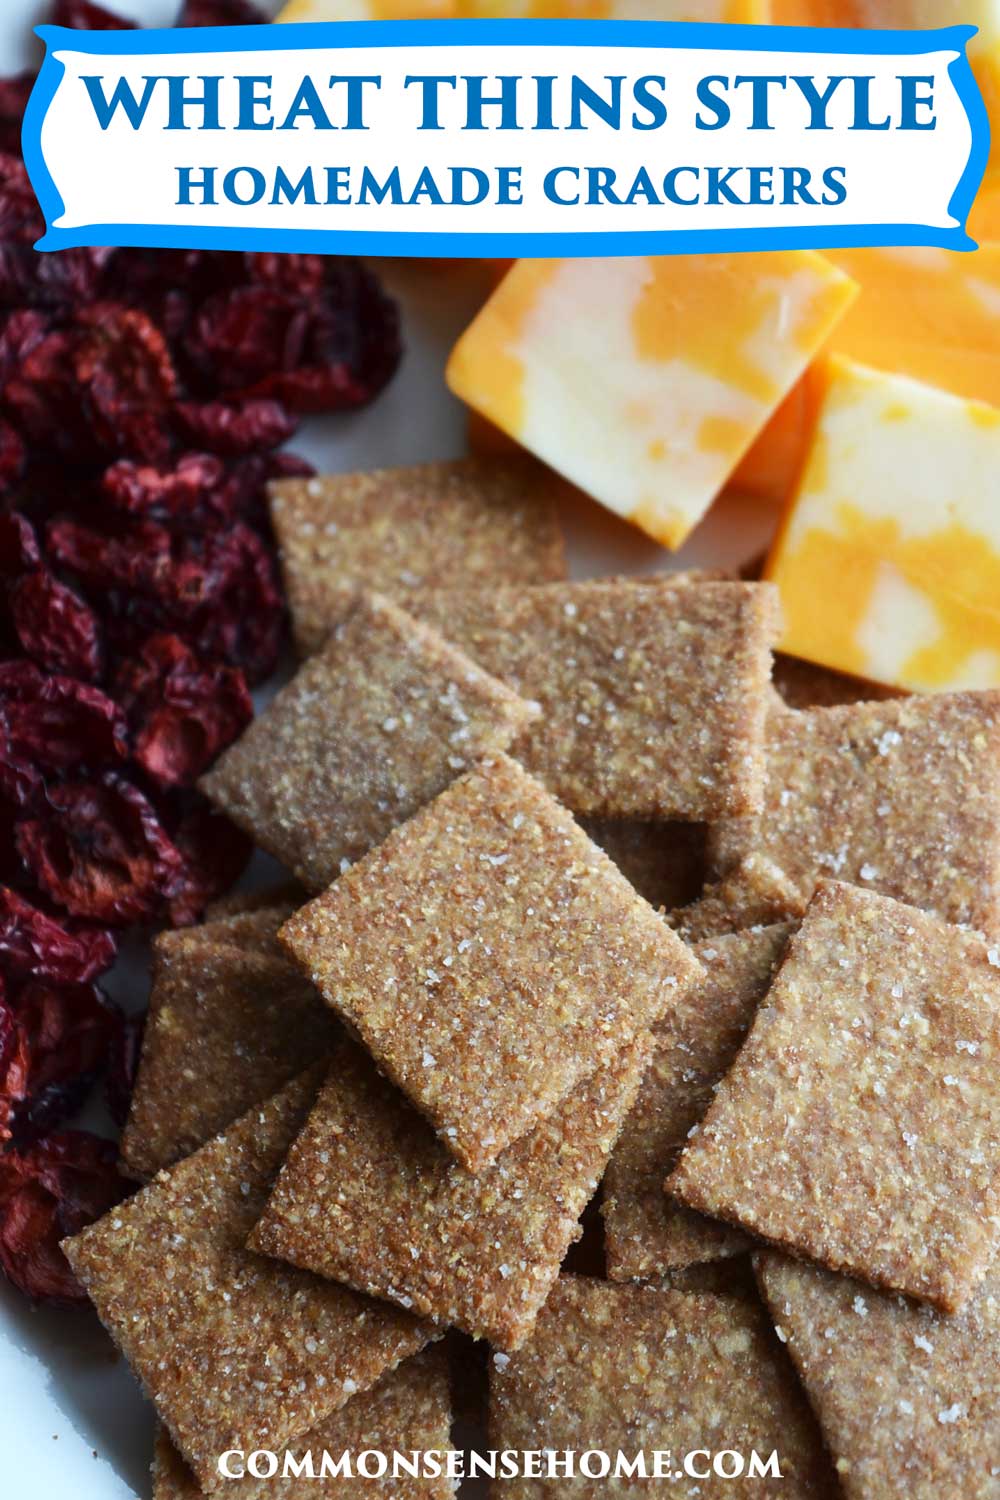
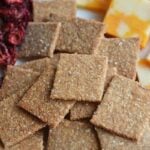
Homemade Wheat Thin Style Crackers
A simple and delicious homemade cracker recipe.
- Prep Time: 15 minutes
- Rest Time: 60 minutes
- Cook Time: 5 minutes
- Total Time: 1 hour 20 minutes
- Yield: 10 servings 1x
- Category: Snack
Ingredients
- 1 1/4 cups whole wheat flour
- 1 1/2 Tbsp honey (or sugar)
- 1/2 tsp salt
- 1/4 tsp paprika
- 4 Tbsp butter
- 1/4 cup water
- 1/4 tsp vanilla
- salt for topping
Instructions
- Preheat oven to 400 °F (205 °C).
- In a medium bowl, blend dry ingredients (except topping salt). Cut in butter with a knife or pastry blender and blend until evenly mixed.
- Combine the water, honey and vanilla. Add to flour mixture and blend until a smooth dough forms.
- Chill the dough for an hour to make it less sticky, or roll out immediately. Dust the dough with flour as you roll the crackers to reduce sticking.
- Divide the dough into four pieces and work with one piece at a time. Use a rolling pin to roll out the dough on parchment paper or directly on your baking sheet. Try to get the dough as thin as possible, about 1/16 inch thick and 12 inches square. Use a pizza cutter or sharp knife to cut into squares about 1 1/2 inch wide.
- Sprinkle lightly with salt and press in dimples with fork tines, if desired.
- Bake the crackers, one sheet at a time, until crisp and browned, 5 to 10 minutes. You can remove edge crackers from the pan if they start getting too dark and return the rest to the oven to bake.
- Crackers are done when they are crispy but not too brittle. They will crisp more as they cool. Cool completely and store in airtight containers. Use within a week or two for best quality.
Notes
Prep Ahead Option to Reduce Phytates
To reduce phytates (and make the dough less sticky), we prep the dough a day ahead with a slight recipe change. Wait to add the salt until right before you roll out the dough, as it may inhibit fermentation.
Then, substitute whey for 1 tsp to the entire 1/4 cup of water. I put whatever whey I have available into my measuring cup, then add water to reach 1/4 cup. Place the dough in an airtight container and let it rest at room temperature for 12-24 hours.
More Homemade Snack Recipes
Whether you prefer salty or sweet snacks, we have you covered. Here are some of our family favorites.
Ground Beef Jerky (for Dehydrator or Oven)
Liver Pate with Bacon (because everything is better with bacon)
Grape Gummies made with real juice

This article is written by Laurie Neverman. Laurie grew up in the kitchen, learning baking and home cooking from her momma. At age 15, she and her mom and two sisters created Irene’s Custom Cakes & Catering, which was her summer job through most of high school and college.
Originally published in 2011, last updated in 2024.
Yeah! I hope your crackers turn out well and that they agree with you. I'm thinking about getting a sourdough starter and experimenting with that next.
Laurie, my food test show gluten to NOT be a problem so I am looking forward to trying your crackers!!! Yeah! I even have some sprouted wheat that I did previously and can't wait to try! Thanks.
Annette – I haven't tried sprouted flour yet – it's on my to-do list. I've been eating a lot less grains overall recently, so it's not something I've made time for just yet. I may end up eventually going completely gluten free for my thyroid. I haven't been able to find any good references on whether or not soaked or sprouted grains are less problematic, but I expect that as long as they contain gluten, it could still be a problem.
I haven't had any trouble soaking when I use recipes that others have proofed (some I have tried straight from NT have given less than stellar results – I've had much better luck with those I've found online). I love my Real food blogger friends. 🙂
These are amazing crackers – I love that entire cookbook (KAF), it's full of things like this! I found it was really hard to soak overnight so I switched to sprouted flour which is surprisingly simple to make yourself if you have a grinder. Have you ever tried doing that Laurie? Thanks so much for sharing this! xo, Annette
So glad to find someone using all the Nourishing Tradition ways of thinking!
We are well. Still trying to decide whether to move or not. Picked up some butchered roosters from a friend of mine today. She's got dozens and dozens of baby peeps in her basement and kitchen. Planning to get my seed orders in soon, but I don't need too much. Friend visiting next week from out of town. Feeling a bit of the mid-winter "blahs", but otherwise all is fine.
Thanks Laurie, for your take on Katie's. I like her site, also.
Thanks for your comment on my blog. I am doing good. Busy! The internet break was great. We kept up via Facebook and I am not doing it anymore. So blog only I guess. I'll miss you, Diane, Cyn bloggers I enjoyed via Facebook. But it became to distracting.
My 27 chickens are getting their real voices. Will butcher most of the roosters soon. Keeping one only..we should have around 15 layers.
Been trying new bread recipes, setting up area for furniture refinishing and we just installed a new used stainless slide in range that was practically in mint condition, picked up at Habitat Restore. And, picked up my autoharp & mountain dulcimer again after not touching them for quite sometime.
How's all with you?
Pam
They look very yummy..
Oh WOW they look so YUM! REally and it's not because I haven't eaten anything but chicken soup w/ rice for 10 days! I wish I could say that I will try them….but I'll just have to dream about them. Wheat thins were always one of my favorite crackers. WERE!
These are beautiful and look just like wheat thins, we made "cheez-its" a couple days ago, and I cannot wait to try these.
shortystylee – Probably the best mechanical substitute for the pastry blender would be a food processor used on "pulse", if you have that available. (Alton Brown always uses this technique on Good Eats.) If you try the stand mixer, please let me know how it works. I prefer my pastry blender for any time I am incorporating a firm fat (butter, lard, coconut oil) into a dry mixture because:
It's quiet
Doesn't use electricity
Give me mini arm workout 😉
and (the biggie) – Doesn't heat the dough or overmix it.
When you keep your fats nice and cold, they form tiny little pockets in the dough, this, combined with minimal working of the gluten in the flour by doing a minimal amount of mixing, makes for a lighter, crisper end product. My momma always said, "Don't overwork your crust or you'll make it tough."
I bet these would be good sprinkled with cheese powder or finely grated cheese, or possibly incorporating some cheese into the dough. My eldest son is a huge Cheez-it fan, and he couldn't get enough of these as is.
Did you need to use a pastry blender for this or do you think you could use a stand mixer on low to blend the butter in? I'm really knew to any baking endeavors and I never know what is right 🙁
In any case, they look super yummy. My husband eats a ton of Cheez-it like crackers, so he would probably love these.
Jessica