How to Make Cottage Cheese (Large Curd, From Scratch)
This post may contain affiliate links. Read my full disclosure here.
When we had a herd share, I regularly made up simple homemade cheeses. 30 minute mozzarella cheese and fromage blanc were favorites, but cottage cheese and cheese curds were also yummy. In this article I’m sharing how to make cottage cheese two ways.
With a culture and rennet, you can use skim milk and get large curds. We like this because then we can use the cream for other recipes. If you’re in a hurry or don’t have access to cheesemaking supplies, you can make a simpler version with whole milk, vinegar, and salt. This type creates a smaller, softer curd.
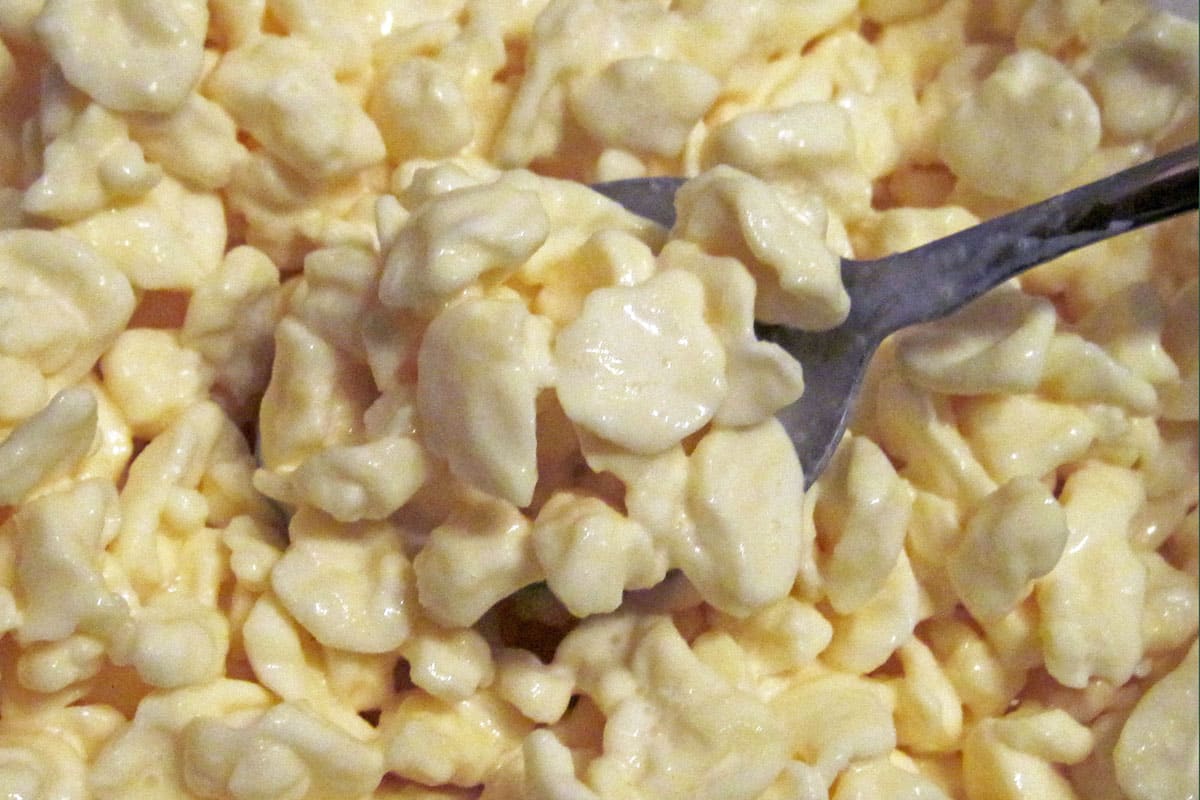
Table of Contents
What Is Cottage Cheese?
Cottage cheese is a fresh, unripened cheese with curds and whey. The curds are drained, lightly washed, and eaten fresh. It was traditionally made in cottages (small homes) using leftover milk after cream was skimmed off for butter.
Our first variation is a modern twist that produces a large, firm curd. The second recipe is more traditional, with a smaller, softer curd.
Avoid ultra-pasteurized (UHT) milk—it won’t form curds properly. Fresh, local milk produces the best texture, but standard grocery-store milk works well if it’s not UHT. The large curd cottage cheese in this article was made with Guernsey milk, which has a golden-yellow color.
Homemade Cottage Cheese Recipe – Large Curd
This recipe is adapted from the large curd cottage cheese in the book Home Cheese Making by Ricki Carroll. This is a wonderful book for home cheese makers.
*Note: This cheese needs to sit for several hours to culture, so make sure you plan ahead so you have enough time.
Ingredients
- 1 gallon pasteurized milk, skim or whole
- 1/8 teaspoon calcium chloride diluted in 1/4 cup water (if using store bought milk)*
- 1 package direct-set mesophilic starter, 1/4 teaspoon bulk mesophilic starter or 4 ounces prepared mesophilic starter
- 1/4 teaspoon liquid rennet (or 1/4 rennet tablet) dissolved in 1/4 cup cool water
- cheese salt (optional)
- cream, 1-2 tablespoons (optional)
- herbs (optional)
Cultures for Health has a handy packet with mesophilic starter and rennet tablets.


Instructions
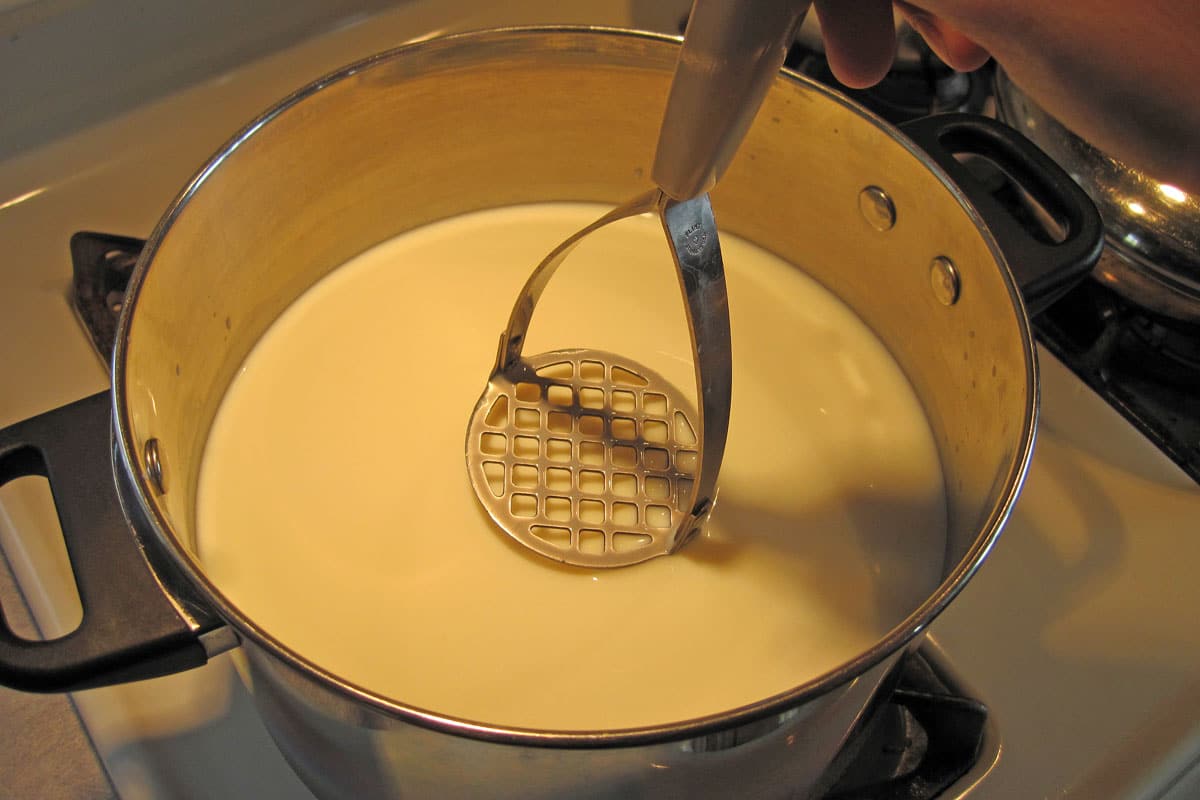
1. Warm the milk to 72°F. If using calcium chloride*, add it now. Add the starter and mix thoroughly.
I make this cheese in a large, stainless steel pot with a very thick bottom. If you have a large double boiler, that would be great for even, gentle heat. Simmer Mats are another option for avoiding scorching.
Making the Curd
2. Add 1 tablespoon of the diluted rennet and mix thoroughly with a gentle up and down motion. I use my potato masher to blend the rennet up and down through the milk. Cover and let set at 72°F for 4-8 hours, or until the curd coagulates. The curd will be rather soft.
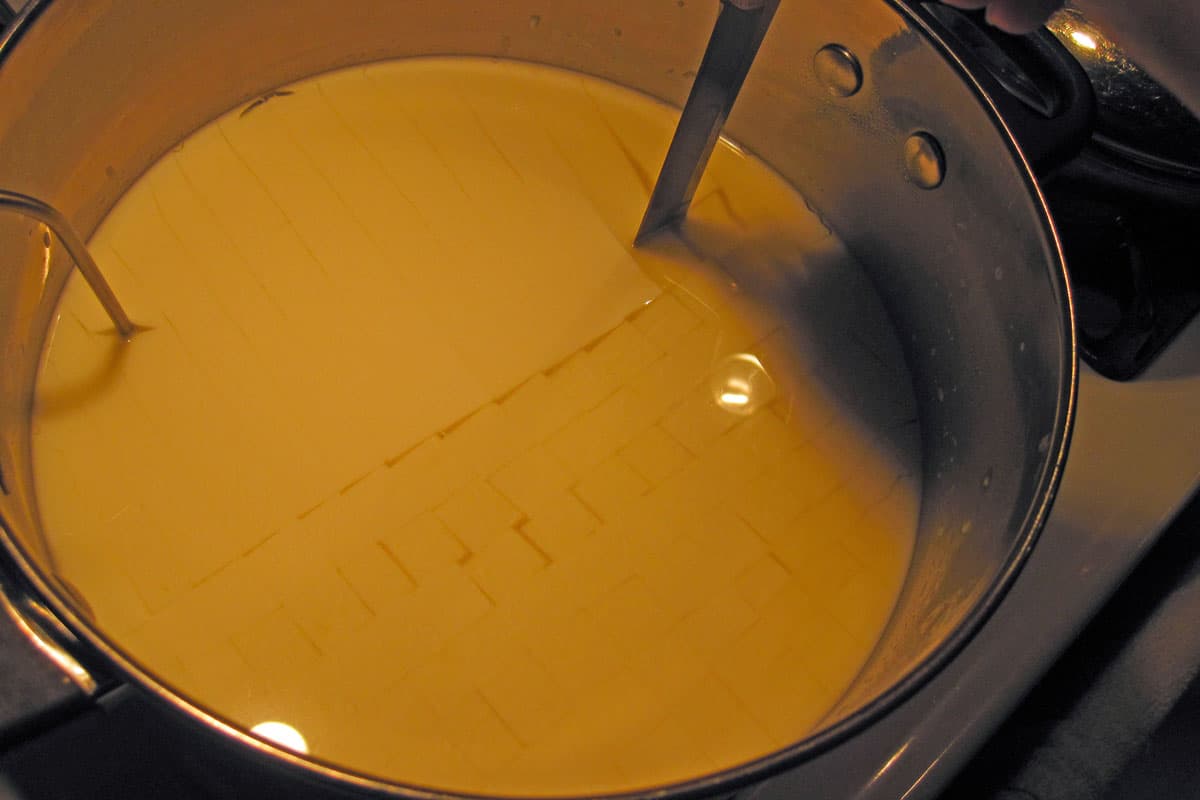
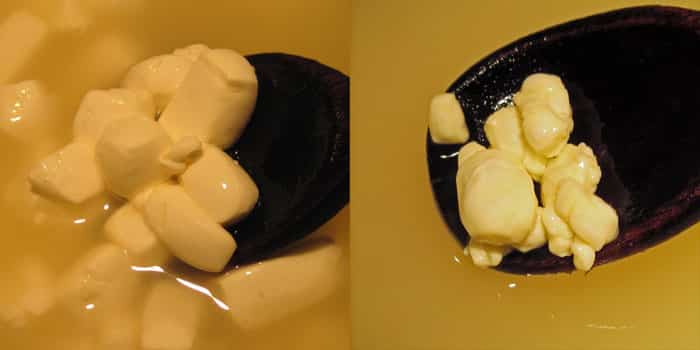
3. Cut the curd into 1/2 inch cubes. Allow to set, undisturbed, for 10 minutes. use a long knife that reaches all the way to the bottom of your pan, and move smoothly and gently – don’t tear the curd. Try to keep your cubes as uniform as possible so your cheese cooks evenly.
4. Place the pot on low heat. Increase the heat by two degrees every 5 minutes, until the temperature reaches 80°F. Stir gently to prevent the curds from matting.
I use my smallest burner set to 1 or 2, and set my kitchen timer for five minutes. Then I watch, stir, and adjust the heat accordingly.
5. Increase the heat by three degrees every 5 minutes, until the temperature reaches 90°F. Stir gently to prevent the curds from matting.
6. Increase the heat by one degree per minute, until the temperature reaches 110°F, stirring gently to keep the curds from matting. Again, watch your heat and try not to heat too fast. Slow, gentle cooking makes for a more tender curd.
7. Maintain the temperature at 110°F for 20 minutes. The curds should be sufficiently cooked and no longer have a custard-like interior. Gently stir every few minutes.
8. When the curds are sufficiently cooked, let them settle to the bottom of the pot for 5 minutes.
Draining and Finishing the Cottage Cheese
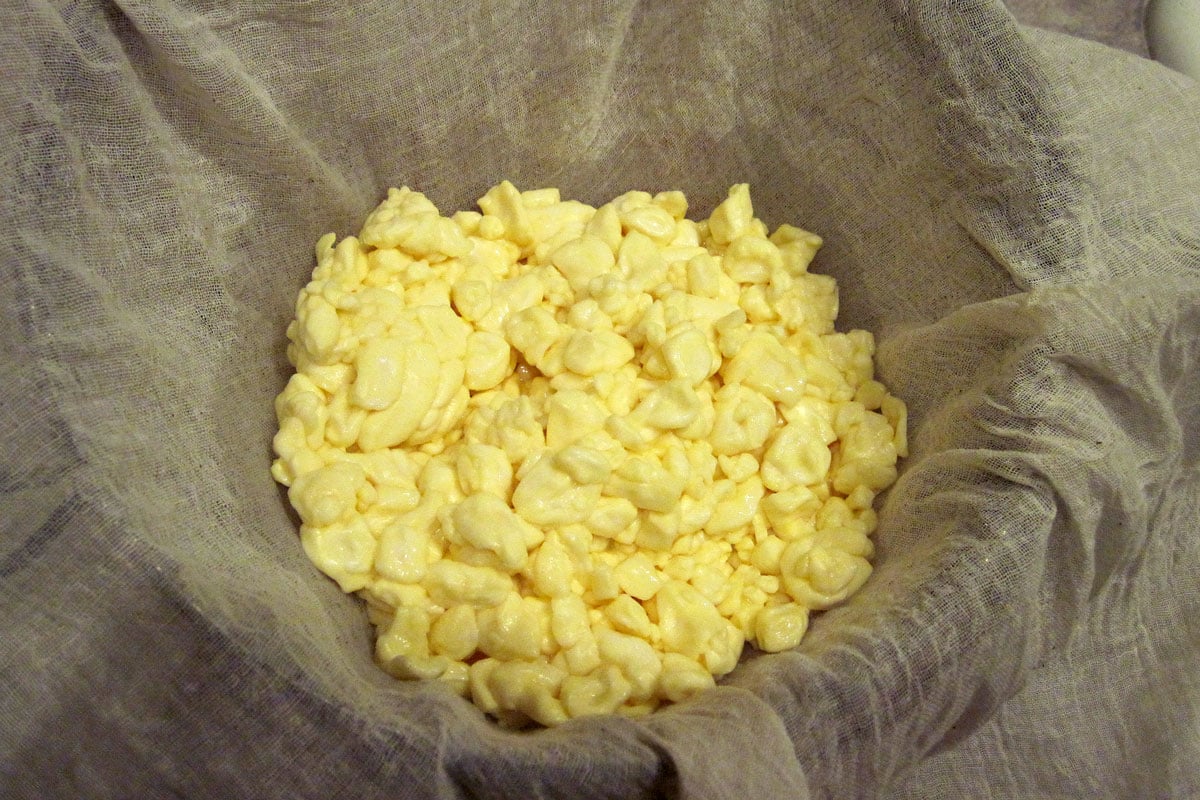
9. Pour off the whey. Pour the curds into a colander lined with cheesecloth. Tie the corners of the cheesecloth into a knot. If a less sour cottage cheese is desired, wash the curds by dipping the bag several times into a bowl of cool water.
Would you like to save this?
10. Let the bag drain for several minutes.
11. Rinse the bag in a bowl of ice water to cool and place the bag in a colander to drain for 5 minutes.
12. Untie the bag and place the curds in a bowl. Break up any pieces that have matted. If desired, add the heavy cream to produce a creamier texture. (I always add the cream, but the cream free cheese will be lower in lactose.)
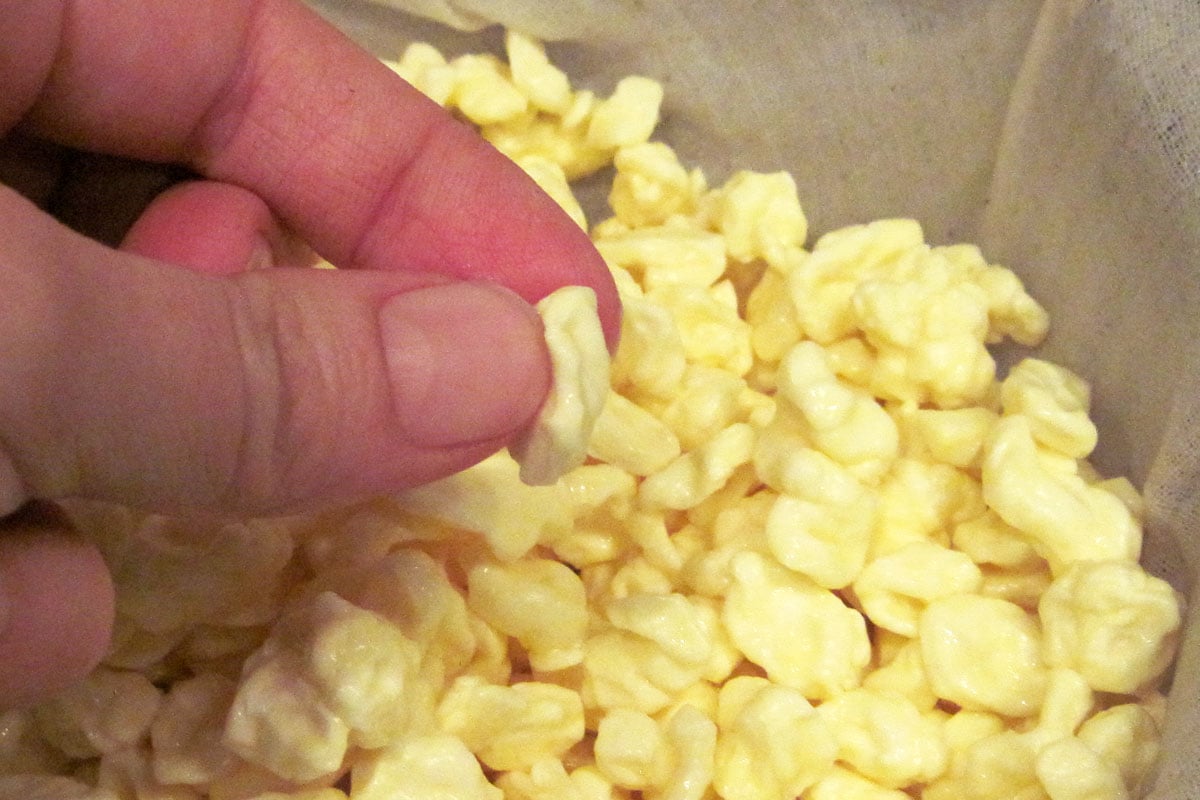
As you can see from the photos, this makes a LARGE curd cottage cheese, which we prefer.
13. Add the salt and herbs to taste, if desired.
14. Store in a covered container in the refrigerator for up to one week.
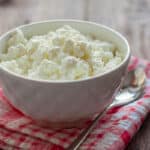
Yield: 1 1/2 pounds, about 2-3 cups of cottage cheese, plus leftover whey. Leftover whey is good for baking, soaking grains, or feeding animals.
This cheese takes about 6-10 hours from start to finish, with the 4-8 hour rest time. The fresh curds (right out of the pot) squeak, but by the next day the squeak disappears. I usually make this when I have other tasks to do in the kitchen so I can check on it as needed. It doesn’t require constant attention.
About Calcium Chloride and Pasteurization
We add calcium chloride to commercially pasteurized milk because the heating process decreases the amount of calcium in the milk. This negatively affects the coagulation of the milk (so the rennet can’t do its job as well).
To pasteurize milk at home, heat the milk in a clean non-reactive pot to 145°F and hold for 30 minutes. Then chill in an ice bath to 40°F and refrigerate until ready to use. I never bothered to pasteurize the milk for this recipe and it has worked just fine for me.
For those who are a little more daring, you may be able to use nettle rennet in this cheese with good results, but I have not tried it yet.
I hope you’ll give this recipe a try. It’s a good way to use up skimmed milk (I prefer full fat for most recipes and drinking). Let me know what you think, and if there are other recipes you’d really like to see.
How to Store Homemade Cottage Cheese
Store in an airtight container in the refrigerator for up to 5–7 days. Stir gently before serving. Because it contains no preservatives, homemade cottage cheese won’t last as long as store-bought.
PrintHomemade Cottage Cheese – Large Curd

Rich, large curd cottage cheese with a firm texture and creamy finish.
Ingredients
- 1 gallon pasteurized milk, skim or whole
- 1/8 teaspoon calcium chloride diluted in 1/4 cup water (if using store bought milk)*
- 1 package direct-set mesophilic starter, 1/4 teaspoon bulk mesophilic starter or 4 ounces prepared mesophilic starter
- 1/4 teaspoon liquid rennet (or 1/4 rennet tablet) dissolved in 1/4 cup cool water
- cheese salt (optional)
- cream, 1-2 tablespoons (optional)
- herbs (optional)
Instructions
- Warm the milk to 72°F. If using calcium chloride*, add it now. Add the starter and mix thoroughly.
- Add 1 tablespoon of the diluted rennet and mix thoroughly with a gentle up and down motion. Cover and let set at 72°F for 4-8 hours, or until the curd coagulates. The curd will be soft.
- Cut the curd into 1/2 inch cubes. Allow to set, undisturbed, for 10 minutes. Use a long knife that reaches all the way to the bottom of your pot, and move smoothly and gently – don’t tear the curd. Try to keep your cubes as uniform as possible so your cheese cooks evenly.
- Place the pot on low heat. Increase the heat by two degrees every 5 minutes, until the temperature reaches 80°F. Stir gently to prevent the curds from matting.
- Increase the heat by three degrees every 5 minutes, until the temperature reaches 90°F, stirring gently to prevent the curds from matting.
- Increase the heat by one degree per minute, until the temperature reaches 110°F, stirring gently to keep the curds from matting. Watch your heat and try not to heat too fast. Slow, gentle cooking makes for a more tender curd.
- Maintain the temperature at 110°F for 20 minutes, or until the curds are sufficiently cooked and no longer have a custardlike interior. Stir gently every few minutes.
- When the curds are sufficiently cooked, let them settle to the bottom of the pot for 5 minutes.
- Pour off the whey. Pour the curds into a colander lined with cheesecloth. Tie the corners of the cheesecloth into a knot. If a less sour cottage cheese is desired, wash the curds by dipping the bag several times into a bowl of cool water.
- Let the bag drain for several minutes.
- Rinse the bag in a bowl of ice water to cool and place the bag in a colander to drain for 5 minutes.
- Untie the bag and place the curds in a bowl. Break up any pieces that have matted. If desired, add the heavy cream to produce a creamier texture. (I always add the cream, but the cream free cheese will be lower in lactose.)
- Add the salt and herbs to taste, if desired.
- Store in a covered container in the refrigerator for up to one week.
How to Make Cottage Cheese – Quick Recipe
This recipes uses vinegar or lemon juice to curdle the milk. I suggest white vinegar for more neutral flavor, but apple cider will do in a pinch. For best results, use whole milk for this one.

Cottage Cheese – Small Curd, Vinegar Based
Rustic cottage cheese made with basic kitchen ingredients.
Ingredients
- 1 gallon whole milk (not ultra-pasteurized)
- 1/4 cup white vinegar (or lemon juice)
- 1/2–3/4 teaspoon salt, to taste
- 1/2 cup heavy cream or half-and-half (optional, for dressing)
Instructions
- Pour the milk into a large pot and heat slowly over medium-low heat, stirring occasionally to prevent scorching. Target temperature: 185–190°F. Do not boil.
- Once the milk reaches temperature, remove it from heat. Slowly drizzle in the vinegar while gently stirring just once or twice. Then stop stirring. It should separate into curds and whey. If curds don’t form right away, add another tablespoon of acid and wait another minute.
- Cover the pot and let it rest for 10–15 minutes. This resting period allows the curds to firm up, making them easier to cut and handle without disintegrating.
- Using a long knife, cut the curds into a ¾-inch grid, slicing vertically and then horizontally. After cutting, let the curds rest for 5 minutes so whey can release naturally.
- Return the pot to low heat. Now comes one of the most important steps: gently stir the curds for about 5–10 minutes. The curds will firm up and shrink as the whey releases. Stop heating when desired texture is reached.
- Pour the contents of the pot into a colander lined with a clean towel or cheesecloth. Let drain for 5–10 minutes, depending on how moist you prefer your cottage cheese. At this point, the curds will still taste sharp—that’s normal.
- Rinse the curds under cold running water, gently turning them with your hands or a spoon. Continue rinsing until curds are cool and taste pleasantly mild.
- Transfer curds to a bowl and sprinkle with salt. Gently toss. Add salt and cream to taste.
Troubleshooting Common Cottage Cheese Problems
If your cottage cheese doesn’t turn out quite like you expect, these are some common issues. The cheese should still be edible. If the texture isn’t quite as I like it, I’ll substitute it for ricotta in a batch of lasagna.
Curds Are Too Small
- Milk may have been stirred too vigorously
- Curds cut too small
- Acid added too quickly
Cottage Cheese Is Too Sour
- Curds not rinsed long enough
- Too much acid added
Curds Didn’t Form
- Milk was ultra-pasteurized
- Milk wasn’t hot enough
- Acid quantity insufficient

This article is written by Laurie Neverman. Laurie grew up in the kitchen, learning baking and home cooking from her momma. At age 15, she and her mom and two sisters created Irene’s Custom Cakes & Catering. This was her summer job through most of high school and college.
Originally published in 2012, last updated in 2025.
Laurie, is it possible to use clabber culture instead of mesophilic culture in the large curd recipe? I use clabber almost exclusively in all my cheese recipes but I’m unsure about this particular one. I really love a large curd cottage cheese and the only time I’ve tried it with raw milk it produced a really small, hard curd that didn’t impress.
Clabber can be used for cottage cheese, and I think it’s more likely to hold up with larger curds than the quick vinegar sour method because the naturally formed curd has had time to firm up. I’m not 100% sure where the curd size will hit.
It is expensive to ship cultures/rennet to my location, so I do not want to waste. Your recipe calls for 1/4 tsp rennet in 1/4 cp water, and then only uses a tablespoon. Would it be possible to just use 2 or 3 drops of rennet instead?
The rennet should be diluted in water to help it dilute more evenly in the milk, but you can cut amounts proportionally. For instance, use only 2 tablespoons water and 1/8 teaspoon rennet, then measure out one tablespoon to use in the recipe.
You’re welcome.I’m cheese lover
I used to have a recipe for whey bread, but can’t find it now. I’m sure it could be googled. All the pets I’ve ever had love it, when it results from renneted cheese, not so much from the lemon juice/vinegar cheese though.
You can sub whey for water in pretty much any bread recipe. The cats aren’t too fond of whey.
i made ricotta from the whey.. but there is still whey left after you made the ricotta.. what to do with the leftover ..leftover whey??
What do I do? Wellll….I usually pitch it, because my fridge is busting at the seems and I’ve got no room to stash it. I tried to water plants with it, and some critter came and dug up my flower bed looking for the cheese. You can use it in soups and stews, in smoothies, feed it to critters, or drink it straight or with flavoring.
Whey is also good if you make fermented vegetables. Most recipes call for about a tablespoon to kick start the fermentation process.
When I making cultured veggies, I typically use whey from yogurt or kefir because the cultures are more active, but this might do in a pinch since it’s only heated to 110F.
Make amazing homemade mayonnaise, fertilize plants, feed pigs and chickens, ferment most anything. Whey is extremely valuable and versatile in the kitchen.
I’m a big fan of Ricki Carroll’s books and kits – still trying to make the 30 minute mozz, but even the milks not marked UHT or Ultra-Pasteurized are letting me down. Any ideas?
I think almost all dairy is now UHT now, even when it’s not marked. You could double check with the milk producer to be sure. I’ve only made it with raw milk, and that’s almost a no-brainer. If you can find a smaller, local brand in glass bottles – by us we have Lamers Dairy – they tend to be the only ones who still use the lower temp pasteurization anymore. UHT is faster. There’s a bottled organic brand that is low temp pasteurized, too. I think Kaloma may be low temp, if you can find that in your area.
Glad you mentioned you’ve never pasteurized at the end. It’s been years since I’ve made cottage cheese but the book I used ( which I don’t have anymore because a friend borrowed it, and loaned it out and lost it ) didn’t call for pasteurizing, just use raw milk. It worked well every time.
As long as you’ve got clean milk from a source you trust, I think raw milk is the better option, but not everyone has it available.
How much cottage cheese does this recipe yield?
Phyllis – it yields about 1 1/2 pounds, which fills my four cup pyrex storage container a little over half full.
This is great! I’ve been wanting to learn how to make my own cottage cheese! Thank you for sharing this!
You’re welcome.
Laurie, you mentioned that the curds squeaked the first day. I’m wondering if you didn’t add the cream, are they sort of a drier/firmer curd? Like rather than cottage cheese you would buy in a container at the grocery store, are they more like little rounded chunks of cheese? I ask because in Quebec, they use fresh cheese curds to make poutine, which is too delicious not to do at home if you can and although you can buy cheese curds at our grocery stores from time to time, making them yourself would be so much better. In your pictures it looks like you could pick up those curds and they’d be kind of solid, which is why I ask.
Rosalyn, I’ve never had poutine, but I think from people’s descriptions that when this cheese is fresh, it’s quite similar. Once it sits (even a few hours), the curds become much softer, more like standard cottage cheese.