Strawberry-Banana Gummy Candy Recipe
This post may contain affiliate links. Read my full disclosure here.
My friend, Jessica from Delicious Expressions, recommended the book, The Gelatin Secret. As she’s pretty savvy on all things health related, I ordered a copy. It was easily one of the best e-books I’ve read, with a nice balance of detailed information and readability.
I knew good quality gelatin and bone broth were good for you, but I had no idea how many ways your body could put them to use. And I know Sylvie isn’t just making up stuff to sell a book, because there are links to studies to back up everything she shares. Big thumbs up.
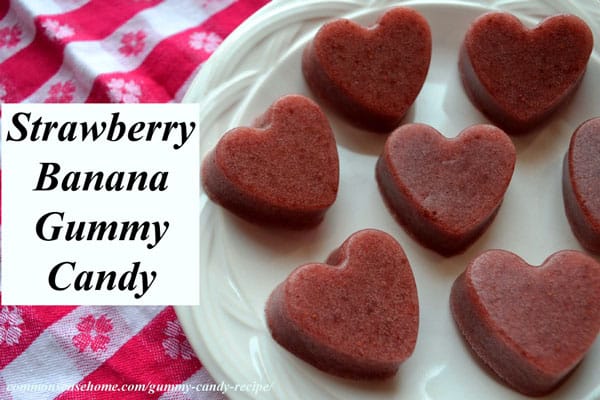
From helping with autoimmune disorders (like my Hashimoto’s Thyroiditis), to bone building, brain health and weight loss, gelatin is a great budget friendly food to help nourish my no-so-young-as-I-used-to-be self.
We’re bumping up the homemade bone broth consumption, but I figured keeping homemade gummy candy on hand would be a great way to encourage the whole family to jump on the gelatin bandwagon.
I made Sylvie’s strawberry-lemonade gummies, and they were good, but tart. Since I had very ripe bananas on hand, I decided to put them to use in the next batch and came up with this recipe for strawberry-banana gummy candy.
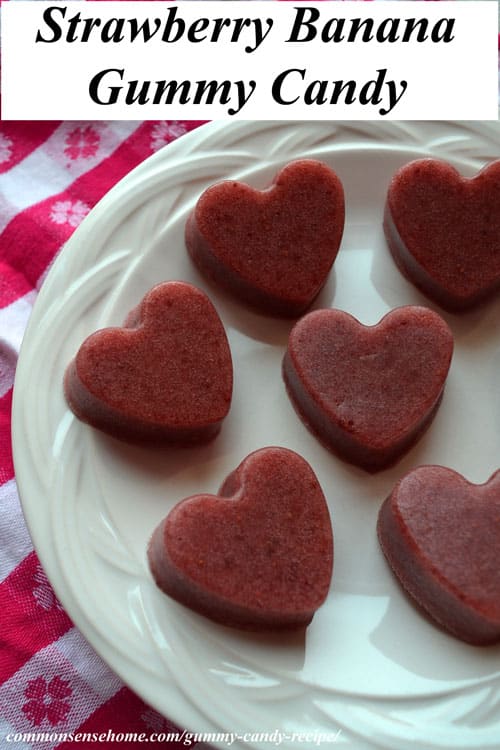
These treats are naturally sweetened and easy to make. You can pour them into a 9×9 glass baking dish, and then slice them into cubes for serving.
You can also have some fun with them and use candy molds or silicone baking molds to make them into different shapes, like the holiday shapes I’ve included in this post. Either way, they’re healthy and kid (and grumpy husband) friendly.
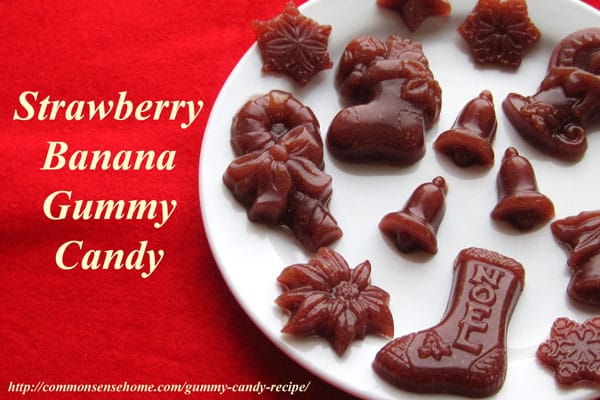
Homemade Strawberry-Banana Gummy Candy Recipe
Adapted from The Gelatin Secret – Strawberry Lemonade Gummies
Ingredients
1 banana plus enough pureed strawberries to make 2 2/3 cups pureed fruit total
4 Tablespoons raw honey
3/4 cup grass fed gelatin
Directions
Would you like to save this?
Pour strawberry-banana puree and honey into a medium sauce pot on low/medium heat. Mix well until warm. Don’t boil, as it will break down the enzymes in the raw honey.
Add gelatin slowly, sprinkling over the top of the puree and stirring with a whisk after each addition. Keep stirring until gelatin is completely dissolved.
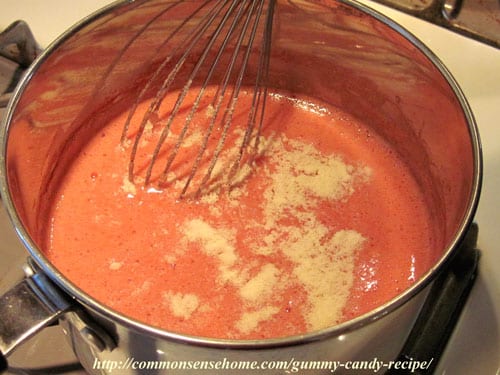
Pour mixture into candy molds or baking dish. If you’re filling molds, it may be easier to fill them with a spoon or use a measuring cup with a pour spout.
Place in the refrigerator for 1-2 hours, until well set.
Remove from molds, or slice into cubes and remove from baking dish and serve. Store leftovers, if any, in a sealed container in the refrigerator for up to a week.
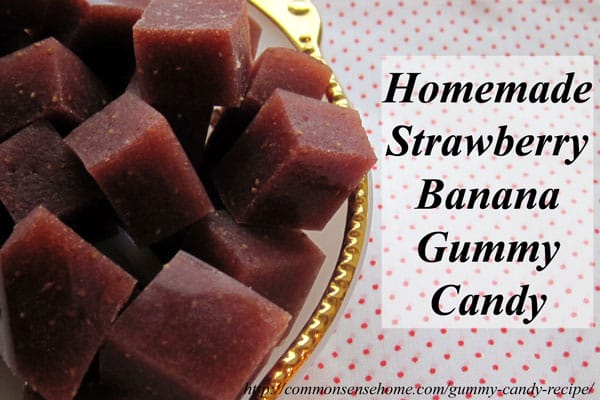
The recipe is simple enough that even teenage boys can make it without a fuss. When buying gelatin, do look for beef gelatin – grass-fed is best. Many budget grocery store gelatins are made from pig skins instead of bones, and lack the full range of nutrients of a better quality beef gelatin.
Perfect Bovine Gelatin is a product I use and recommend. Don’t get a Collagen Hydrolysate for this recipe. It’s processed so that it doesn’t gel.
PrintStrawberry-Banana Gummy Candy Recipe
Yummy strawberry banana gummy candies made with real fruit.
- Prep Time: 5 minutes
- Chill time: 60 minutes
- Total Time: 1 hour 5 minutes
- Yield: 30 servings 1x
- Category: Snack
Ingredients
- 1 banana plus enough pureed strawberries to make 2 2/3 cups pureed fruit total
- 4 Tablespoons raw honey
- 3/4 cup grass fed gelatin
Instructions
- Pour strawberry-banana puree and honey into a medium sauce pot on low/medium heat. Mix well until warm. Don’t boil, as it will break down the enzymes in the raw honey.
- Add gelatin slowly, sprinkling over the top of the puree and stirring with a whisk after each addition. Keep stirring until gelatin is completely dissolved.
- Pour mixture into candy molds or baking dish. If you’re filling molds, it may be easier to fill them with a spoon or use a measuring cup with a pour spout.
- Place in the refrigerator for 1-2 hours, until well set.
- Remove from molds, or slice into cubes and remove from baking dish and serve. Store leftovers, if any, in a sealed container in the refrigerator for up to a week.

This article is written by Laurie Neverman. Laurie grew up in the kitchen, learning baking and home cooking from her momma. At age 15, she and her mom and two sisters created Irene’s Custom Cakes & Catering, which was her summer job through most of high school and college.
Originally posted in 2014, last updated in 2024.



What an awesome recipe I just ordered the powder and heart molds will make my valentine gift to hubby sweet thanks for the Amazon link made it so easy if you have a book out I’d be interested thanks again God bless
Lovely recipé, but gelatine is basically bone powder. Yuck! Given that we live in the worlds that is moving more and more towards veganism and sustainability. Maybe, agar-agar is a nice option?
You could certainly substitute agar agar if you prefer, but given that it is harvested from our increasing polluted oceans, it may have associated concerns.
I prefer grassfed beef gelatin, as grass based agriculture can be a critical part of ecosystem restoration and is a much preferred alternative to factory farming. Also, if one harvests an animal for food, it should be done with respect, wasting no part of the animal. In the circle of life, no creature exists in isolation, and the continuing use of grassfed products means those animals will continue to be raised, as they serve a purpose. Avoiding animal products means condemning them to extinction.
Is there a vegan alternative to gelatin and bone broth that will provide a similar nutritional value?
Although I haven’t tried it, you should be able to substitute agar agar powder (seaweed derived) for the gelatin.
Nutrient comparison from FitDay The Nutrition of Agar:
To the best of my knowledge, there are no vegan substitutes with similar nutritional profiles. Carrageenan (another seaweed) and Vegan Jel (plant gum based) are other options.
Can you omit the honey?
Yes, you can, but they will be quite tart. If you like sour gummies, they may be perfect.
I made these this evening and they are not coming out of the pan very well. Do you dust the pan with something or spray it to keep the gummies from sticking? That would be good info to include in the recipe. I’m really wondering how I am going to get them out of the candy molds as I used both molds and a baking dish.
No, I don’t pretreat the pan or molds at all. To get them out of the pan, I use a thin metal spatula. For the molds, they just pop right out.
Hi, I tried this recipe, but found the gummies to be very, very firm – pretty hard to chew. I double checked my measurements and do not *believe* I made an error. Is the 3/4 c + 2T absolutely correct? I would like to try it again, but not sure how much to decrease the gelatin. Thanks!
That is the correct measurement based on the original recipe, and it is meant to be a firm candy, not a finger jello type sweet. That said, I’ve found that different gelatin brands cook up a little firmer than others, and dropping the 2 extra tablespoons still makes a pretty firm candy. (We’ve been experimenting with different fruit combinations, too.) As such, I’m modifying the recipe to drop the gelatin a bit.
Thanks for your quick response. I meant to say that I used Great lakes gelatin. I do like my gummies a little on the firm side side, too, but mine are just too firm this time. I will try again with just the 3/4 cup and see how it goes. I definitely like using the pureed fruit instead of juice as other recipes call for. Thanks again!!
For my taste, 3/4 cup is plenty, and if that’s too chewy, just decrease a little more until you get a texture you like.
My husband has become very motivated to reverse a health problem involving inflammation. He mentioned to me that gelatin is helpful with joint pain, and I am always keen to recommend a more holistic alternative to him. He also loves sweets, so I did an immediate search for your Gummy Candy recipe and the pasture raised version of gelatin. He loves the idea of his special health candy. Your recipes are so on-target for a healthy home. Thanks!
I keep a container of a variation of these in the fridge most of the time now. I’m more likely to nibble on these than to remember to take bone broth.
What if you don’t have enough gelatin will it still sit.
With less gelatin it will not be as firm, but if there is enough gelatin it should still set up more like jello or finger jello instead of gummy candy.
We love to make recipes using gelatin. We’ve made jello kombucha before with gelatin, but it’s always great to come upon new recipes. I love that kids and grownups both could enjoy this and prepare together!
I am really excited to learn about the book The Gelatin Secret, which I didn’t know about before. I would like to explore it! This recipe you published looks delicious and I will share your post with our Nourishing Our Children community members. I like the fact that the recipe is simply enough for children to get involved in. I don’t have a strong sweet tooth. I think I could try this recipe without honey, taste it and decide if it is sweet enough for my palette.
Where would I find grass-fed gelatin?
Both of the brands listed in the post are from grassfed beef. Buy Great Lakes Unflavored Grassfed Beef Gelatin or Vital Proteins Grassfed Beef Gelatin
 now.
now.
These look awesome!! Have made Gummies before, going to be giving this recipe a try. Thank you for sharing!-Danielle
What kinds of banana good for this recipe?
I used a ripe Cavendish, but any ripe, sweet banana would do.
Love this recipe, I will be making it for my granddaughter when she comes to stay, thanks:)