Easter Ideas – Bunnies, Chicks and Eggs
This post may contain affiliate links. Read my full disclosure here.
Back in 2004, my sister Lois and I had an Easter themed brunch menu featured in Taste of Home magazine with a Spring Ahead Brunch Bake, Bavarian Cream Bonnet (rich Bavarian creme decorated to look like an Easter bonnet) and mom’s cinnamon rolls. One of the things I didn’t mention in the recipe posts were the cute little Easter bunnies and chicks that we made out of hard boiled eggs, and some quick and easy Easter crafts and egg decorating ideas. My mom loved tinkering with craft projects, too, so taking time for Easter ideas like these helps me to remember the many happy memories we had together.
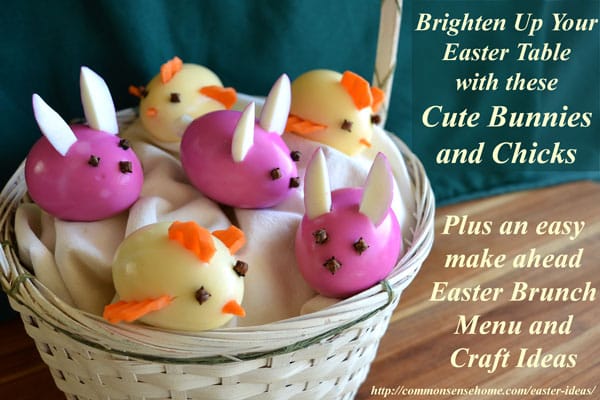
Easter Bunnies and Chicks
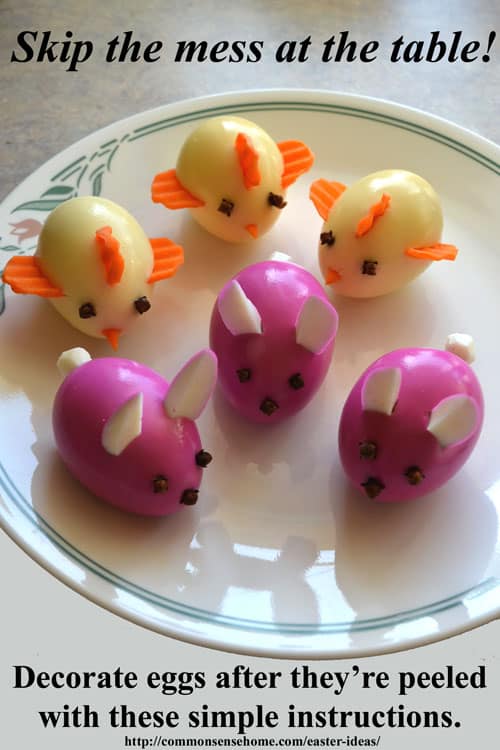
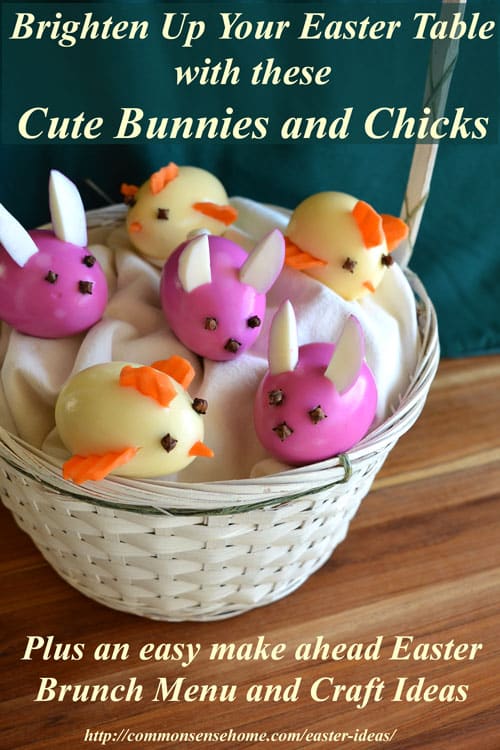
These Easter bunnies and chicks made out of hard boiled eggs are a little different than most, because they’re dyed and decorated after the eggs are peeled. This makes them easier to eat for kids because they don’t have to peel the eggs.
First, boil and peel the eggs. (See How to Boil an Egg for egg boiling and peeling tips.) For really fresh eggs, steaming the eggs is another option. You can use a kitchen steamer, a steamer insert or a metal colander. Steam eggs for 20 minutes, then cool in cold/ice water for 15 minutes before peeling.
One the eggs are boiled, dip eggs in the food coloring liquid. You can use natural egg dying kits, gel colors diluted in water, or other natural color option like pickled beet juice for pink or turmeric for yellow. You can make each animal from a single boiled egg, but it’s helpful to boil and color one extra egg for every three bunnies, as I’ll explain in a minute.
For the Easter Chicks
You will need:
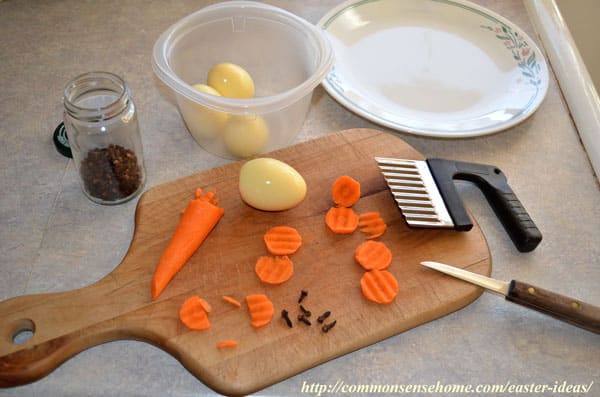
- One large carrot
- 3 whole cloves per chick
- One hard boiled egg per chick
- A small, sharp knife
- Crinkle cutter (optional)
Instructions
Peel the carrot. Now you can make the carrot into wings, a beak and a comb for your chick. Using a crinkle cutter or knife, slice thin, round cross sections from the carrot. The crinkle cutter is optional, but I like the way it gives a rippled look to the comb and wings. Slice the carrot very thinly, as these slices are slid into the boiled egg and a thick slice would pop your egg right open.
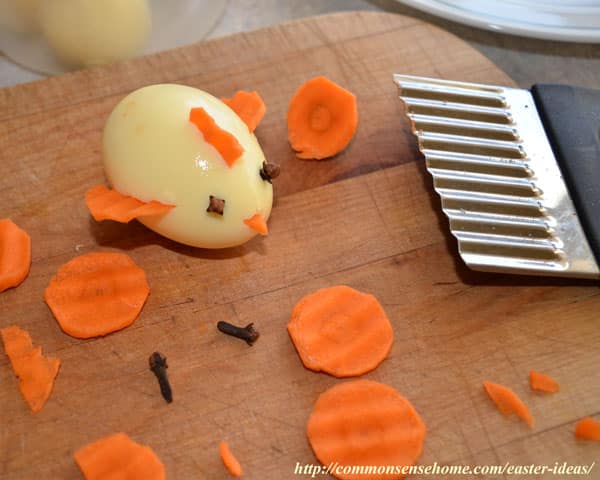
Cut one of the cross sections in half to make two wings. Cut another cross section in half. Trim the half to make it into a comb for the chicken. Slice a small triangular beak out of the carrot. Remember to make the beak a little longer than you want the finished beak to appear because part of it will be poked into the boiled egg.
Now assemble the chick. Pick out two whole cloves that are close in size. Gently push the cloves into the front of the egg for eyes. Poke the beak into the egg. To place the wings and comb, make slits in the side and top of the chicken and slide the carrot slices into the slits.
For the Easter Bunnies
You will need:
- 3 whole cloves per bunny
- 1 boiled egg per bunny
- 1 extra boiled egg for parts (optional)
- 1 toothpick per bunny
- A small, sharp knife
Would you like to save this?
Instructions
The ears and tail of the bunny are made from boiled egg. To form these parts, you can remove a slice from the bottom of the egg, or you can boil up an extra egg just to cut parts from. Using a spare egg makes it quite a bit easier because there is a lot more material to worth with. I used one extra egg for every three rabbits.
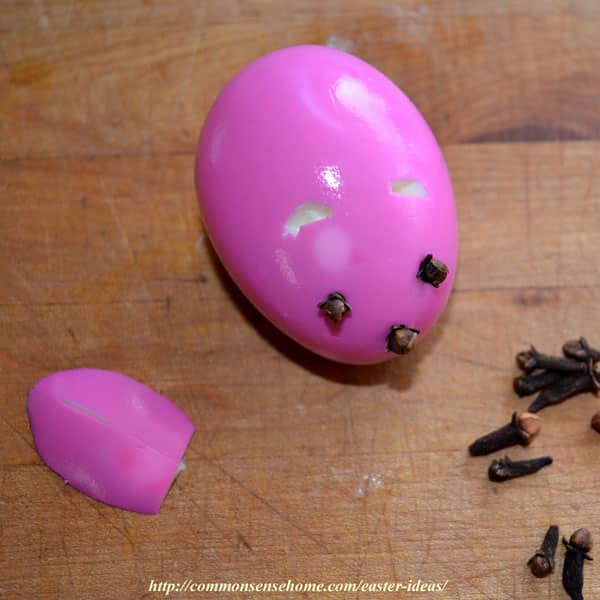
Gently push cloves into “front” end of bunny in a triangular formation to make the nose and eyes.
Carve the ears by making an oblong shape with a flat bottom for where it goes into the egg. To attach the ears to the rabbit, carve small “sockets” that the ears can slide into. Insert the ears into the notches.
Carve a piece of egg into a round shape for the bunny tail. Attach the tail to the hind end of the rabbit by shoving in a toothpick to the backside of the rabbit, leaving a short amount of the toothpick exposed. Skewer the egg tail onto the exposed toothpick.
Easter Egg Decorations from Your Seed Catalogs
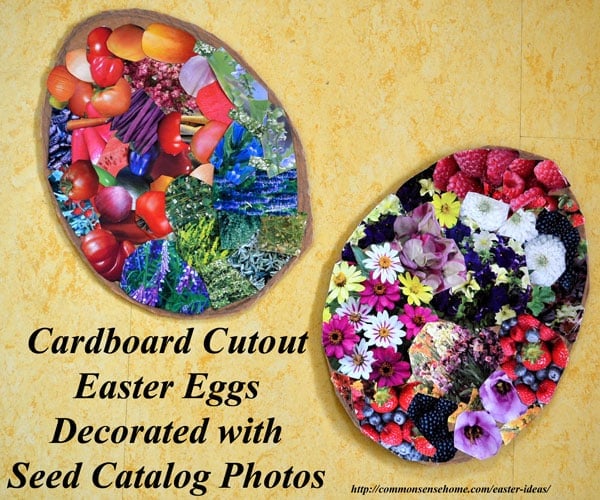
If you’re anything like me, you get a ton of seed catalogs stacked up from previous years and/or from companies that you don’t order from. Repurpose them for Easter decorations! When the boys were younger, I had them each cut out an egg shape from cardboard and decorate it with clippings from the seed catalogs. I think they turned out pretty nice, and I still put them up each year to remind me of when they were littler.
Easter Eggs with Leaf Prints
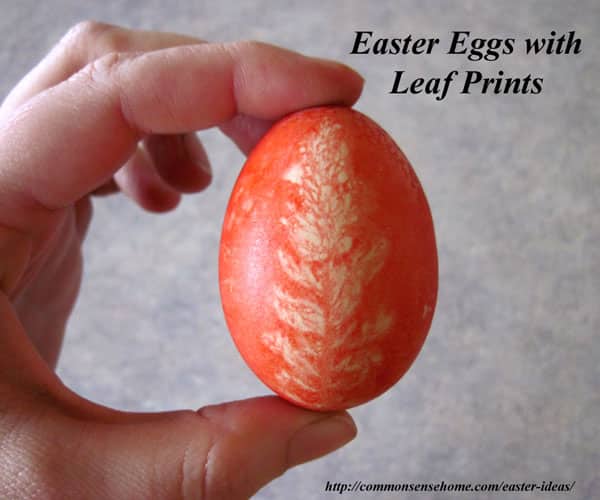
If you want to mix up your egg dying a little, you can try adding leaf prints to your Easter eggs. Just position your leaf of choice on the egg – leaves with multiple section like ferns tend to work best – secure the leaf in place by slipping an old nylon stocking over the egg and knotting or closing it with a rubber band. Dip the egg/leaf/stocking into your dye. Remove when desired color is reached and place on drying towel. Allow to dry completely, then remove stocking and leaf.
This is just a snippet of some of the things we’ve tried over the years. I hope you enjoy the Easter ideas and recipes, and I’d love to hear about your Easter traditions and craft projects.
You may also enjoy:
P.S. Need more Easter ideas? Check out the Common Sense Home Crafts board on Pinterest.



Cute idea!!!
Oh man…the cuteness is unbearable! Thanks for sharing these fun ideas…my daughter will *love them 🙂
You’re welcome!