
Polish Doughnuts – My Grandmother’s Recipe for Homemade Doughnuts

This post may contain affiliate links. Read my full disclosure here.

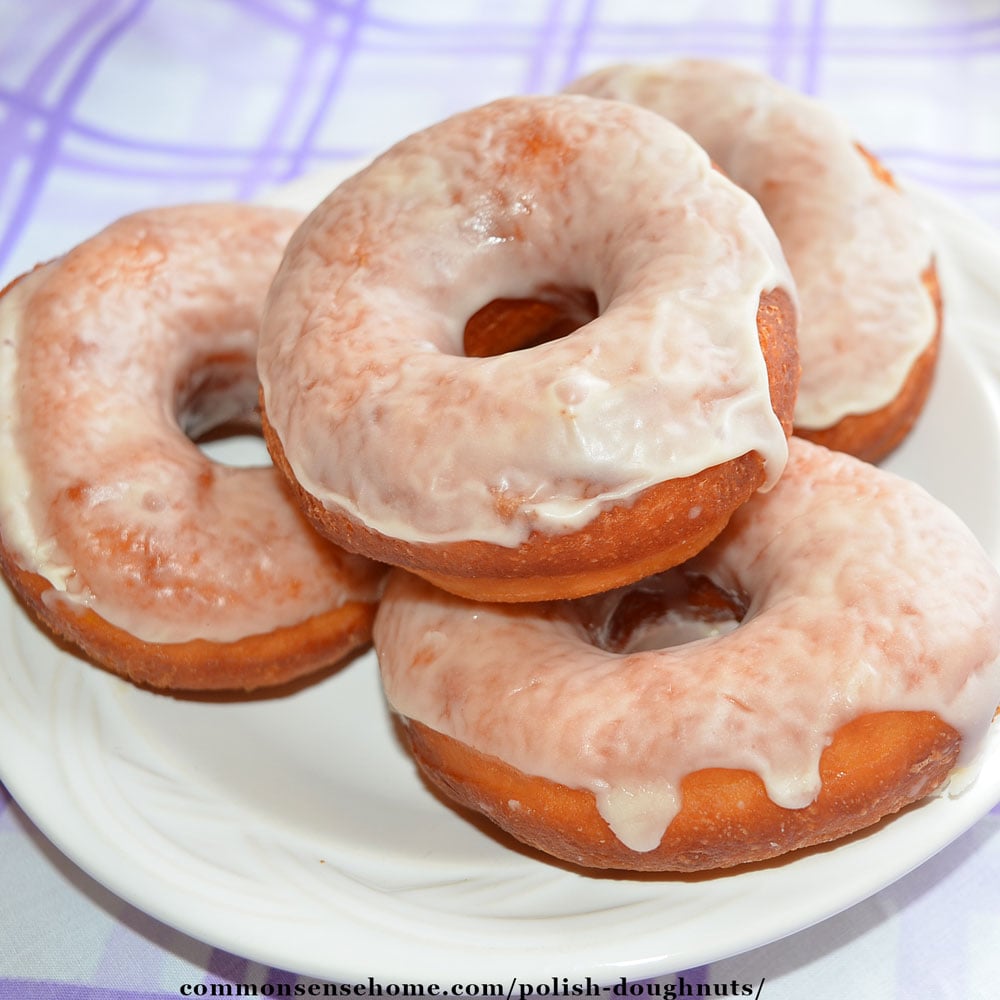
These homemade Polish doughnuts were made from the recipe that my mother used for probably close to 50 years of church bake sales. When I was still at home as a girl and a teenager, I used to help out with the Easter Bake Sale, where mom and the other ladies from the parish would bake tens of dozens of these beauties. (Think multiple 50 pound bags of flour and 4+ large folding tables full of finished homemade doughnuts.) People would come from all over the surrounding area just to get “those good doughnuts”.
Would you like to save this?
I hadn’t made doughnuts in years, since I moved to the other side of the state, but luckily my sister still had mom (grandma’s) recipe.
Polish Doughnuts Recipe
Ingredients
- Pint of Milk, warm or scalded
- ½ cup butter
- 1 package (2 ¼ teaspoons) dry active yeast
- 6-7 cups all-purpose flour, divided
- 4 eggs yolks
- 1 egg
- ½ cup sugar
- 1 tsp salt
- 1 tsp vanilla extract
Directions
Scald the milk. To scald milk: Place milk in a heavy-bottomed pan on low heat. Stir occasionally until milk is just hot with steam and small bubbles appear around the edges; do not boil. Remove from the heat.
Add butter to warm milk and stir until melted. Allow butter and milk to cool until it is just warm (around 110-115°F). Add yeast and 2 cups flour. Mix well.
Allow to rest for around 10 minutes to give the yeast time to “proof” or activate. The mix should be starting to bubble.
Pour flour/milk mix into mixing bowl. Add egg, yolks, sugar, salt and vanilla. Mix well.
Start adding the rest of the flour, one cup at a time, mixing after each addition, until you have slightly sticky dough. Dump dough onto lightly floured countertop to knead in the last of the flour.
Depending on the humidity levels, you may not need all the flour called for in the recipe. You want the dough to be soft and elastic, not too stiff. Don’t overwork it or you’ll develop the gluten too much and your doughnuts will be tougher.
Grease your bowl and gently coat your dough with oil. Cover and set in a warm place and let rise until double.
Frying your Polish Doughnuts
While dough is rising, prep your frying oil. A deep fryer is great if you have one. I use an eight quart heavy bottom pot. I put in enough local, non-hydrogenated lard to fill the pot around 3-4 inches deep.
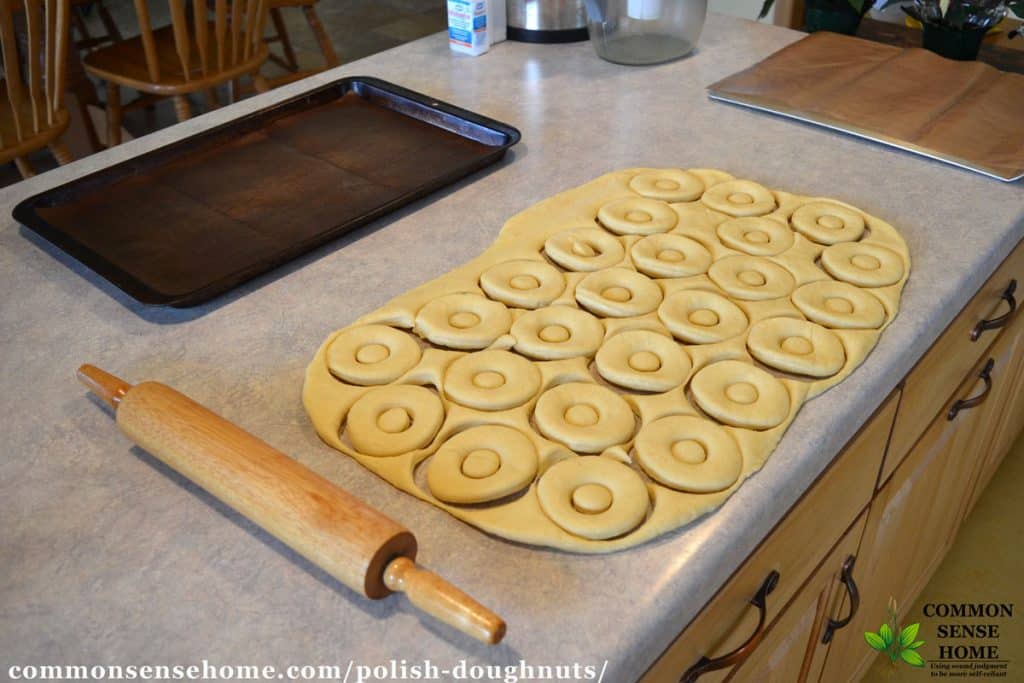
When the dough has doubled in size, roll out to about 1/3 inch thick and cut out doughnuts. We used a large glass for the doughnut and an empty decorator sprinkle container for the holes. Let rise until double in size.
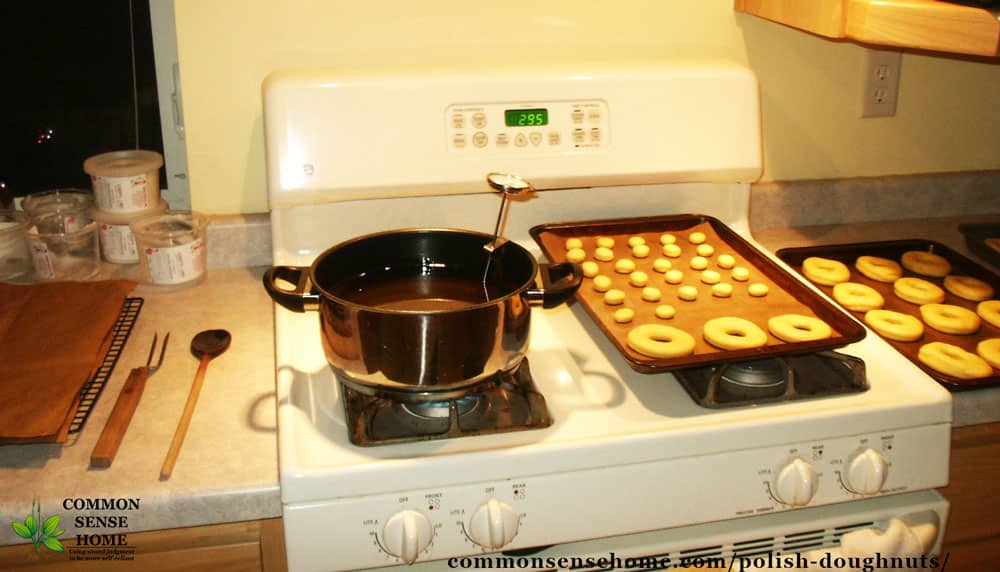
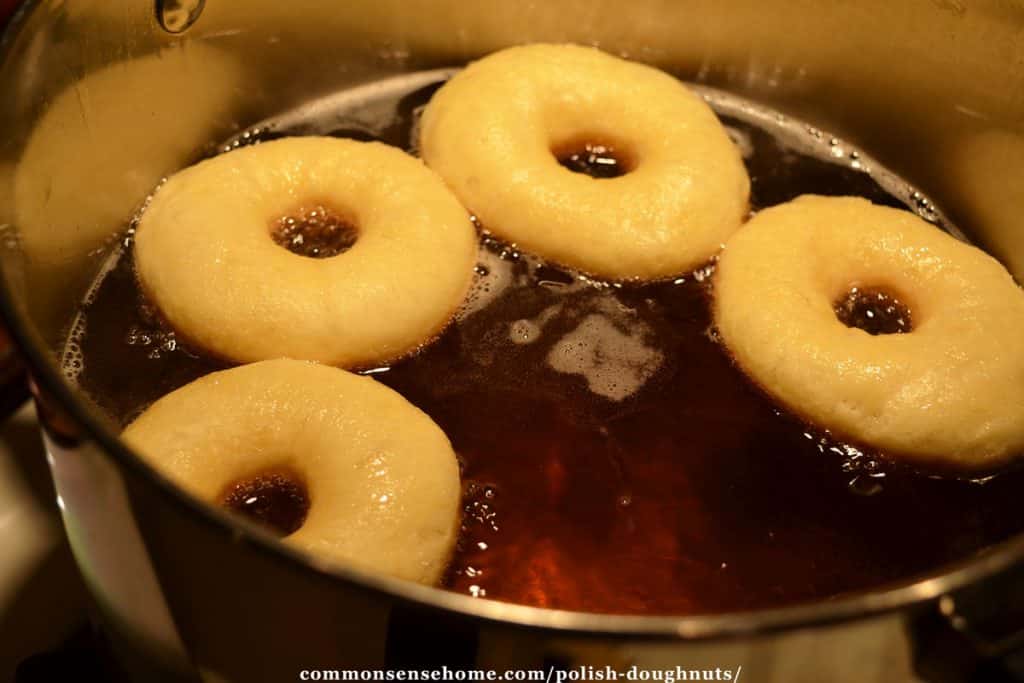
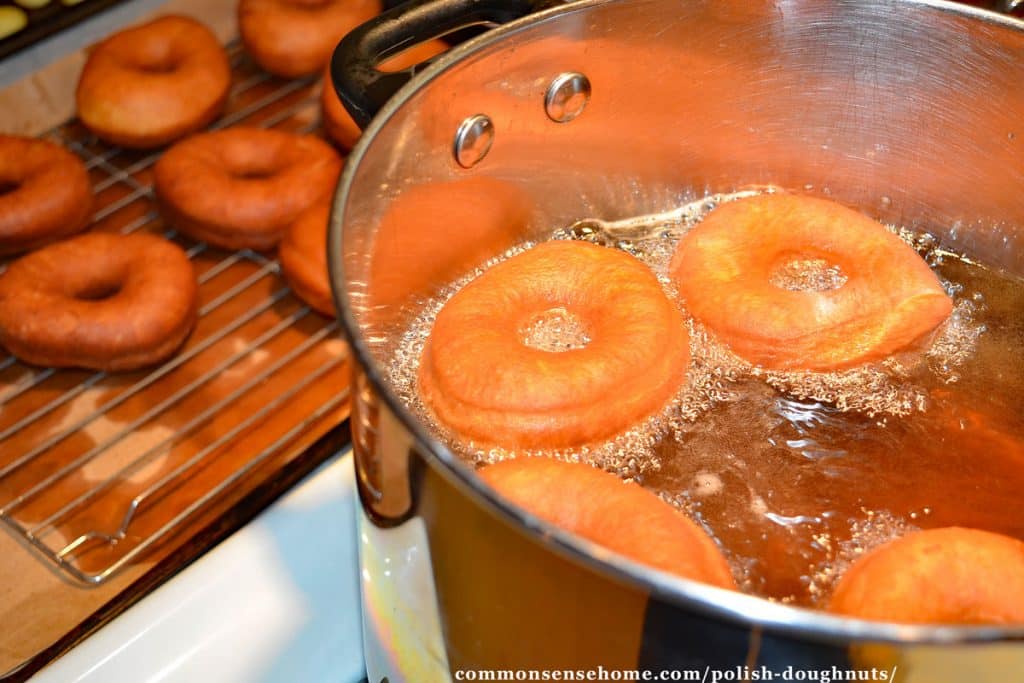
Heat lard to 340-365°F for frying (use a clip on thermometer to watch the temp if you don’t have a deep fryer). Drop 3-4 doughnuts into the frying oil, keeping an eye on your frying temp. Cook until brown on one side, flip and brown on the other side.

Remove doughnuts from frying oil and place to drain on a wire rack sitting oven a paper grocery bag. Dip in glaze or sugar while still warm, if desired.
Doughnut Glaze
- 1 cup powdered sugar
- 2-3 tablespoons milk
- 1 ½ teaspoons vanilla extract
Mix all ingredients together.
As you may have guessed from the smile on Duncan’s face, grandma’s Polish doughnuts didn’t last very long, but everyone had a nice treat. I know it’ll be sooner than 20 years before I tackle doughnuts again.

Grandma’s Polish Doughnuts

Delicious homemade Polish doughnuts featuring the recipe my mom used for over 50 years of church bake sales that was known throughout the countryside.
Ingredients
Doughnut Dough
- Pint of Milk, warm or scalded
- 1/2 cup butter
- 1 package (2 1/4 teaspoons) dry active yeast
- 6–7 cups all-purpose flour, divided
- 4 eggs yolks
- 1 egg
- 1/2 cup sugar
- 1 tsp salt
- 1 tsp vanillla
Glaze
- 1 cup powdered sugar
- 2–3 teaspoons milk
- 1 1/2 teaspoons vanilla extract
Instructions
- Scald the milk. To scald milk: Place milk in a heavy-bottomed pan on low heat. Stir occasionally until milk is just hot with steam and small bubbles appear around the edges; do not boil. Remove from the heat.
- Add butter to warm milk and stir until melted.
- Allow butter and milk to cool until it is just warm (around 110-115°F). Add yeast and 2 cups flour. Mix well.
- Allow to rest for around 10 minutes to give the yeast time to “proof” or activate. The mix should be starting to bubble.
- Pour flour/milk mix into mixing bowl. Add egg, yolks, sugar, salt and vanilla. Mix well.
- Start adding the rest of the flour, one cup at a time, mixing after each addition, until you have slightly sticky dough. Dump dough onto lightly floured countertop to knead in the last of the flour.
- Depending on the humidity levels, you may not need all the flour called for in the recipe. You want the dough to be soft and elastic, not too stiff. Don’t overwork it or you’ll develop the gluten too much and your doughnuts will be tougher.
- Grease your bowl and gently coat your dough with oil. Cover and set in a warm place and let rise until double.
- While dough is rising, prep your frying oil. A deep fryer is great if you have one. I use an eight quart heavy bottom pot. I put in enough local, non-hydrogenated lard to fill the pot around 3-4 inches deep.
- When the dough has doubled in size, roll out to about 1/3 inch thick and cut out doughnuts. We used a large glass for the doughnut and an empty decorator sprinkle container for the holes. Let rise until double in size.
- Heat lard to 340-365°F for frying. Drop 3-4 doughnuts into the frying oil, keeping an eye on your frying temp. Cook until brown on one side, flip and brown on the other side.
- Remove doughnuts from frying oil and place to drain on a wire rack sitting oven a paper grocery bag. Dip in glaze or sugar while still warm, if desired.
- For glaze, simply mix all ingredients together.
You may also enjoy:
This recipe and many other family recipes are featured in my book, “Never Buy Bread Again – 20+ Homemade Bread Recipes“, now available in Print and E-book formats here.
P.S. If you’re looking for a healthier doughnut recipe, see Jenny’s recipe for Sprouted Grain Doughnuts.


Originally published in 2010, updated 2016, 2018.
27 Comments