Old Fashioned Church Dinner Chicken – Just Like Mom Used to Make
This post may contain affiliate links. Read my full disclosure here.
Recently I received an email from someone from my hometown that included: “Your family was a huge part of the St Peter and Paul church dinners, correct? I so miss that church dinner chicken. Do you recall how it was prepared by any chance?”
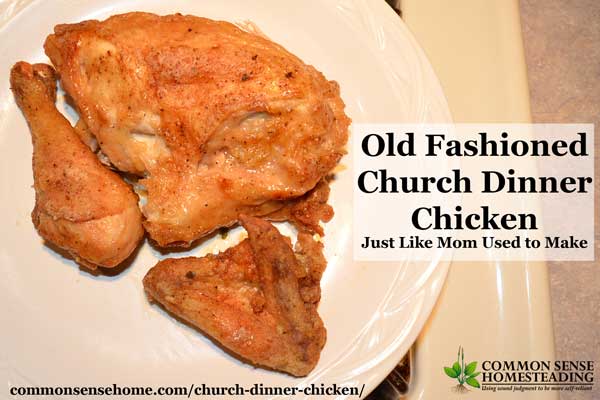
Working for church dinners and other church fundraisers such as the Easter bake sale (featuring grandma’s doughnut recipe) was definitely a huge part of growing up in our small town. My mom used the same recipe at home for chicken as we did for the family catering business and the church dinners, and I still use that same recipe today.
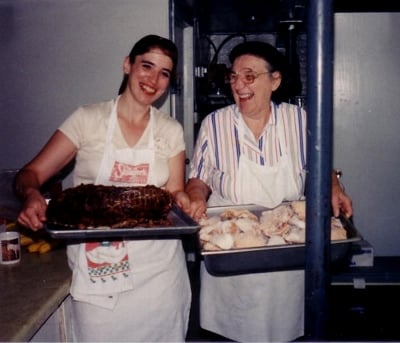
History sidenote – My summer job through high school and college was catering. My mom, my two sisters and I created Irene’s Custom Cakes and Catering. We served everything from candlelight dinners for two to buffet style picnics for several hundred. Here’s a shot of my mom, Irene (right), and my sister Lois, otherwise known as Alfie.
We served a lot of food over the years, but our chicken dinner was by far the most requested menu. Since the catering business has long since closed its doors, I can now reveal to you the family secret recipe for quite possibly the tastiest chicken you’ve ever eaten. This chicken is browned off on the stove top before being finished in the oven to moist and tender perfection.
Our special spice blend was named after my sister, and referred to as “Alfie’s Chicken Sh*t” at the catering business. (What can I say? Things were pretty rowdy cooking and baking for weeks on end.) At church it was just called the chicken coating.
Church Dinner Chicken Recipe
Makes enough for one whole chicken
Ingredients
- 3/4 cup flour (or gluten free flour blend such as Namaste)
- 1 teaspoon season salt
- 1/2 teaspoon garlic powder
- 1/2 teaspoon onion powder
- pinch thyme
- pinch poultry seasoning
- 1 teaspoon paprika
- 1/2 teaspoon dried parsley flakes
- salt and pepper to taste
- One whole chicken, cut into pieces
- Oil for frying such as lard, refined coconut oil or palm shortening
Mix all dry ingredients in a gallon baggie or bowl.
Rinse your chicken well and cut your chicken into pieces for frying. If you don’t know how to do this, this video provides a great step by step tutorial for how to cut up a chicken.
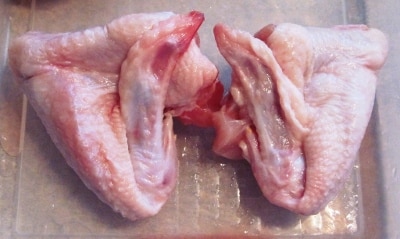
Don’t forget to tuck the wing tips in before frying to help them cook evenly.
Would you like to save this?
Preheat your oven to 350°F, and prepare a medium roasting pan by placing a stalk or two of roughly chopped celery and a little water in the bottom.
Place about 1 inch of frying oil (I prefer refined coconut oil, lard, palm shortening or schmaltz) in a large skillet and heat to around 350-375°F.
I never use a thermometer. I just set my burner to medium heat and keep an eye on it. When the oil melts, you’re getting closer. When you can flick a few drops of water into the fat and get a nice “sizzle”, it’s ready. Smoke is bad – too hot. Instantaneous vaporization of liquid equals too hot. No sizzle equals too cold. I usually get the oil heating while I prep the chicken.
As the oil heats, coat your chicken in the seasoning mixture, either by shaking it in the gallon bag or dredging it in a bowl. Shake off excess coating. I like to keep one hand messy and one hand clean. For example, I grab and dredge the chicken with my right hand and work the tongs with my left. Work from left to right or right to left, whichever is easiest for you in your kitchen, so you’re not crossing back and forth through your work area. I dredge right, fry center, and place finished pieces in pan on left.
Place piece skin side down in the hot oil.
You can see there’s some nice bubbling action as the chicken fries. You want the oil hot enough so it cooks without absorbing excess oil, but not so hot that it burns. As more solids accumulate in the bottom of the pan, the pieces will brown more quickly. You’re going for a light, golden brown color.
When the first side is nicely browned, flip over and repeat on other side.
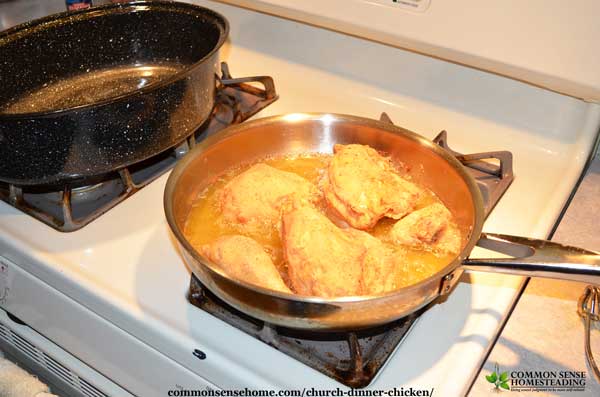
Placed browned pieces into roasting pan. Continue process until all pieces are browned.
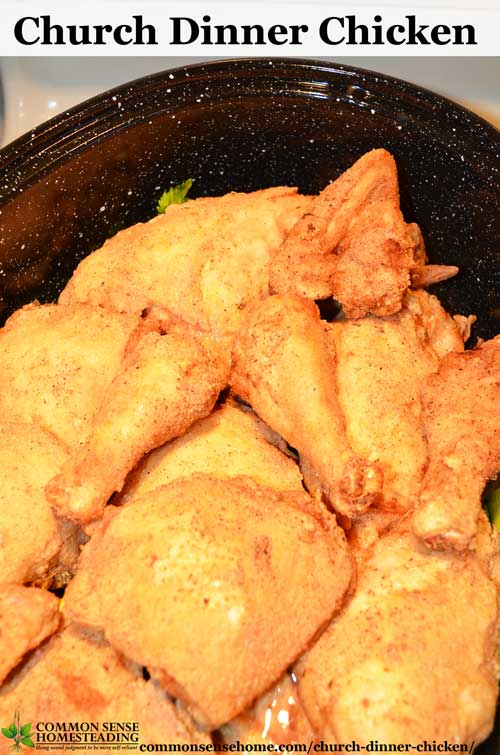
Cover and roast in oven at around 350°F for one to one and half hours. Chicken should be tender enough to fall easily from the bone.
And there you have it! Moist, tender baked chicken just like my momma used to make.
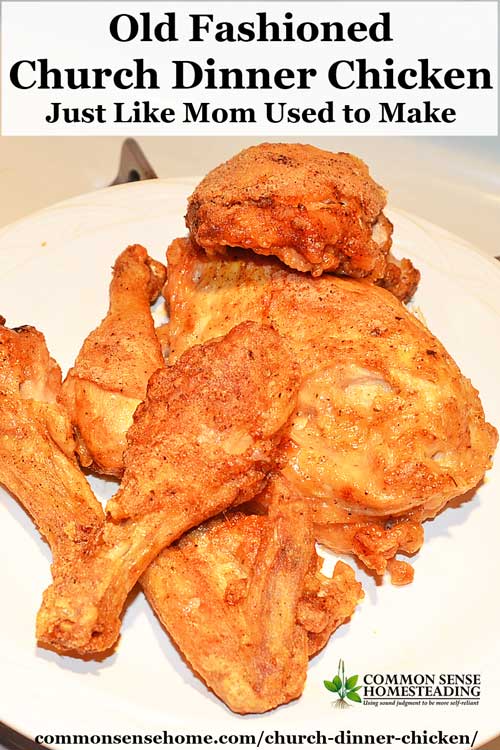
Do you have a favorite recipe that you grew up with that you still use? Let me know in the comments section.
PrintChurch Dinner Chicken
This “church dinner chicken” is just like the recipe mom used to make – tender and juicy, nicely spiced and cooked until falling off the bone.
Ingredients
- 3/4 cup flour (or gluten free flour blend such as Namaste)
- 1 teaspoon season salt
- 1/2 teaspoon garlic powder
- 1/2 teaspoon onion powder
- pinch thyme
- pinch poultry seasoning
- 1 teaspoon paprika
- 1/2 teaspoon dried parsley flakes
- salt and pepper to taste
- 1 chicken, cut up
- Oil for frying such as lard, refined coconut oil or palm shortening
Instructions
- Mix all dry ingredients in a gallon baggie or bowl.
- Rinse your chicken well and cut your chicken into pieces for frying.
- Preheat your oven to 350°F, and prepare a medium roasting pan by placing a stalk or two of roughly chopped celery and a little water in the bottom.
- Place about 1 inch of frying oil in a large skillet and heat to around 350-375°F.
- As the oil heats, coat your chicken in the seasoning mixture, either by shaking it in the gallon bag or dredging it in a bowl. Shake off excess coating.
- Place piece skin side down in the hot oil.
- When the first side is nicely browned, flip over and repeat on other side.
- Placed browned pieces into roasting pan. Continue process until all pieces are browned.
- Cover and roast in oven at around 350°F for one to one and half hours. Chicken should be tender enough to fall easily from the bone.
You may also enjoy:
- Never Buy Bread Again – 14 Homemade Bread Recipes
- Schmaltz – How to Render Chicken Fat, and What to Do With It
- Beautiful Broth – How to Make Homemade Chicken Broth
Originally published May 2011, updated May 2016.

The picture of you Mom reminds me of my Mom laughing, So cute!
Catering was a lot of work, but we had some laughs, too. Thanks for taking time to share your thoughts.
Do I have to subscribe in order to have the images show in the recipe?
No, they should be loading. There have been issues with internet speed in some areas of the country this week and I think that may be having an impact. I just tested it, and everything is functioning, it’s just loading slower than normal.
Saved this to my Pinterest folders and will try to imitate. Reading through the article I followed up on info about schmaltz{I render just about everything}. Did not know chicken fat called schmaltz. I found nutrition info @ nutritionvalue.org. Free range will accumulate vit D in fat and this site gives excellent breakdown of percent of omega fats by name.
This may not be the correct venue but I’d love to know the name of the Natural vision improvement book that you are reading .
I enjoy your site , thank you .
Hi Dianne.
The book I’m currently reading is called “The Power Behind Your Eyes”. It’s part of the work I’ve been doing on improving my eyesight over the last couple of years. You can read the whole story in the article “How to Improve Vision Naturally“.
My mom made cornbread dressing every year for Thanksgiving. The first time I noticed it, I thought it looked disgusting, said I wouldn’t eat it. Tried it and have loved it ever since. She made cornbread in a cast iron skillet, mixed the cornbread with cream of chicken soup, chopped onion and powdered sage. Still make this every year.
What do you think of finishing this in an Instapot? (Or whichever brand lol) high or low pressure? How many minutes you think? I love this as is, but I mess around with the seasonings lol I was out of season salt so I used goya Sazon with the red in it.. it’s in oven now, we’ll see how it is! Smells GREAT!
I personally wouldn’t finish the chicken in an Instant Pot, because I suspect you’d lose the crispiness to the coating that is retained in the oven. If you adapt it successfully, I’d love to hear about it.
We call our version Picnic. Chicken: Shake chicken pieces in a bag with seasoned flour (seasoning your choice), brown in fry pan (iron skillet best). After browning place on rack in oven on flat roasting pan. Bake @ 325 or 375 degrees about 45 minutes or an hour. This allows the chicken to remain crisp and dissipates all fat.
Years ago I worked at a restaurant that made broasted chicken in a “broaster”. I actually did the cooking. Because of my experience with this and where I lived, I was actually able to purchase a broaster for use at home. Its an actual deep fryer for use with oil! I’ve since lost the instructions for using it but still have the “fryer”. It’s called a “Wear-ever”chicken bucket! However, I don’t know if you can still purchase one these days.
My Swedish grandmother made chicken every Sunday, but no one remembers the recipe. It was bone in, skin on, chicken pieces, fried in a cast iron skillet. I think in butter. Then heavy cream was poured on top and cooked until it thickened to gravy. Any help identifying spices, cooking times, or measurements would be appreciated.
I’ve never heard of a dish quite like this, but I can share with the community and see if others have heard of it.
My Mon’s sweet fried chicken: Frying chicken about three pounds cut in pieces, dredge with seasoned flour with plenty of black pepper, vegetable oil or butter flavored shortening, iron skillet. Brown pieces on both sides, add a bit of water and simmer til tender. I do not know why chicken tastes sweet with this method but it does and the white meat is really moist. You can remove the lid for the last 15 minutes or so. Another favorite is to dredge the chicken with a mixture of bread crumbs and flour, brown and finish chicken on rack in 375 degree oven. This method has a crisper skin.
Oops! Put chicken on rack over a lined xcookie sheet.
Sounds good!
Tried this yesterday with bone-in thighs I pulled from the freezer. Husband really liked. I’ll be making more of this in the future. My two oldest sons’ families are large 6 and 7 kids each so this would feed them all. Is there a quick method for the browning part…I’m just imagining large quantities would take standing over the skillet for a long time. Any other recipes for feeding large families without too much stress would be appreciated!
I tend to work on another kitchen task while I’m waiting for the chicken to brown, like peeling potatoes, making bread or slicing carrots. Monika oven roasting at high heat for a shorter amount of time might give good results for larger batches, but I haven’t tried it. You would have to rotate the pans and probably bake a little longer to get multiple pans to cook through.
Back at the church dinners, waaaaaaay back before they got busted by the food police, they used to do the frying one day, let it sit overnight in the Nesco roasters in a cool basement storage room, and then baked it thoroughly the next day. Now they have a walk in cooler. This might be helpful for a larger gathering.
At the catering business, we would have two stove tops with several fry pans each, and you could pretty much fry as fast as you could flip. We used bulk peanut oil for frying because it was a little less expensive. We’d do the frying the day before the event, store in the walk in cooler overnight, and bake the next day.
is this what is now known as “broasted” chicken? we have been trying to find a recipe…it looks like what we have had in restaurants that have “country cooking”…looking forward to testing 🙂
Broasting is a trademarked cooking process from a company in Beloit, WI, and is not available to the home cook. The texture of the meat using this cooking method is similar, but the coating is a little less crunchy.
From MissVickie.com:
I love how the recipe calls for a pinch of this & a pinch of that. This was how I was taught to cook everything! When In my late teens I decided to take on the task of sorting thru my Mom’s main recipe book & box (which contained recipes going all the way back to my Great-Grandmother!). When asked for more specifics than “just a pinch” in my quest to save the tattered & faded recipes I was told, “You do it til it looks/smells/feels right!” for each one LOL. I soon learned what she meant & I think it’s the sign of a down home,small-town country-fied cook!
That’s the way I cook most of our meals – which makes it tricky to share recipes!
Your recipe is very similar to mine – minus one step. I use the same basic ingredients for the ‘coating’ but I place the chicken pieces, skin side down on a cookie sheet/baking pan and place in the oven at 425 degrees. After 30 minutes I flip the chicken to skin side up and bake for another 30 minutes. Sooooo very very good. Thanks for sharing your wonderful ideas and recipes. Have an awesome day.
Thank you for sharing your method. It sounds quick and easy. I’m pretty sure that mom’s method was used by the church because they could get the nice browning in the fry pan, then finish the cooking in nesco roasters, since they didn’t have enough regular oven space for all the chicken they made.
This is just like my mom made, it is delicious and takes a little time but really easy and well worth it.
Our small local church cooked up dozens of roasters of a similar recipe for every church dinner. People always raved about the chicken. 🙂
There you go! Cook it like you mean it! 😉
I'm drooling on my keyboard, ooh weeeee! Can't wait to fry up some of this chicken in my Griswold No. 8 cast iron pan!
I bet your mom's recipe is much different than mine, but still delicious. Get those recipes while you can – time passes too quickly.
yes mum's the best (: once i get back to singapore for summer, i'm going to grill her for all her recipes!
shelby – I've only fried chicken on the stop top once. My husband and I made a buttermilk chicken recipe and fried it in lard. It was tasty, but much messier and more fuss than this. I could only fit so many pieces in the pan at one time, and hubby had to stand over the stove the whole time. (I was making french fries next to him in grassfed beef tallow. It was "deep fried goodness" night.)
By comparison, this is a little messy, but once you put them in the oven you're done until it's time to serve. We served this at hundreds of gatherings, and it always drew compliments.
Good luck! If you give it a try, please stop back and let me know how it worked out.
Oh my goodness…this looks sooooo yummy!!! For some reason fried chicken makes me nervous. I tried making it once and apparently I didn't cook it all the way through…ever since then…I am so leary about trying it again. You have given me hope. Thank you!
Thanks, and thanks for sharing your recipe. 🙂
I just found your site today, through a link on Kitchen Stewardship. I've already subscribed to your blog. Thanks for the excellent tips!