Spring Cleaning – 6 Steps to a Clean and Organized Kitchen
Spring cleaning, like many tasks, is pleasant for some and annoying for others. The amount of time you spend spring cleaning depends on a variety of factors including:
- How much help you have
- The level of cleanliness you desire, and
- How much maintenance cleaning you do throughout the year
For some, spring cleaning means scrubbing every square inch. For others, it means chasing out the biggest dust bunnies, clearing some cobwebs, and donating a few items that are no longer of use.
Even if you don’t enjoy the act of cleaning, the end result – a clean home – will probably improve your mood. Studies have linked clutter with an inability to focus and depression. Clear your space, clear your mind.
Where to Start
Make spring cleaning more manageable by breaking it into tasks. Take a few minutes to think about your cleaning goals and jot them down. This helps you to have a clear focus on what you want to achieve. It also makes it clear what the desired result is for anyone who helps. I recommend starting with one small task and moving forward from there.
Check off your goals as you complete them. If you like, reward yourself with something when tasks get done. It doesn’t have to be extravagant. Sometimes a hot shower is better than anything money can buy, especially when you're covered in grime.
Gather your cleaning supplies and helpers. Get a few boxes for sorting. Sorting categories for items may include:
- Donate
- Return (if borrowed)
- Throw away
- Recycle
- Relocate
When you begin cleaning, start with a corner or one enclosed area and move on from there. This could mean starting in the pantry, the refrigerator, or tidying up under the sink. Don’t get overwhelmed by the amount of work that needs to be done. Remember – once begun, half done.
For cleaning products that you can mix at home, check out, “DIY How to Make Your Own Natural Cleaners“.
Spring Cleaning Your Kitchen
I think the kitchen is one of the easiest places to clean and de-clutter, because you know what gets used frequently and what doesn’t. Make sure you have your boxes ready to go – first up is the pantry.
#1 – Pantry
Clear everything off of the pantry shelves, either all at once or one shelf at a time. Sort food into categories, such as:
- Good – Use at Home
- Good – Donate
- Close to Expired
- Expired
Outdated food may not be fit for human consumption, but can be tasty treats for chickens and goats. Old crackers, noodles, and vegetables go into the animal treat bin. Outdated cans of soup, aging home-canned goods, and some pre-cooked meals get cooked for the chickens.
Once the food is off the shelf, wipe down the shelves. Check for mold and signs of unwanted critters, and clean thoroughly.
When replacing the food, first, group like items together. Our family groupings are as follows:
- Canned tomatoes and tomato products, canned vegetables, canned beans, and canned tuna
- Wheat and other gluten containing flours and products
- Gluten free flours and products
If you have family members with allergies or food intolerances, grouping safe and unsafe items separately makes accidental consumption less likely. It makes it easy to see at a glance what’s available to make, and what needs to be purchased.
Once the food is replaced on the shelves, sort non-food items by usage. Frequently used items can stay in the pantry, while those used less than a handful of times throughout a whole year may be relocated. (See below.)
#2 – Cupboards
Empty and clean cupboards one section at a time. Before putting items back into the cupboard, note if they are used and how often. Donate unused items. If space is tight, consider storing infrequently used items in clear totes in another area of the home.
In our home, decorative plates, fancy coffee cups, paper plates and products, and extra silverware went into one tote. Round cake pans, pie plates, and extra ice cube trays went into another tote. If you only use items a few times a year, it doesn’t make sense to keep them in the kitchen when space is limited.
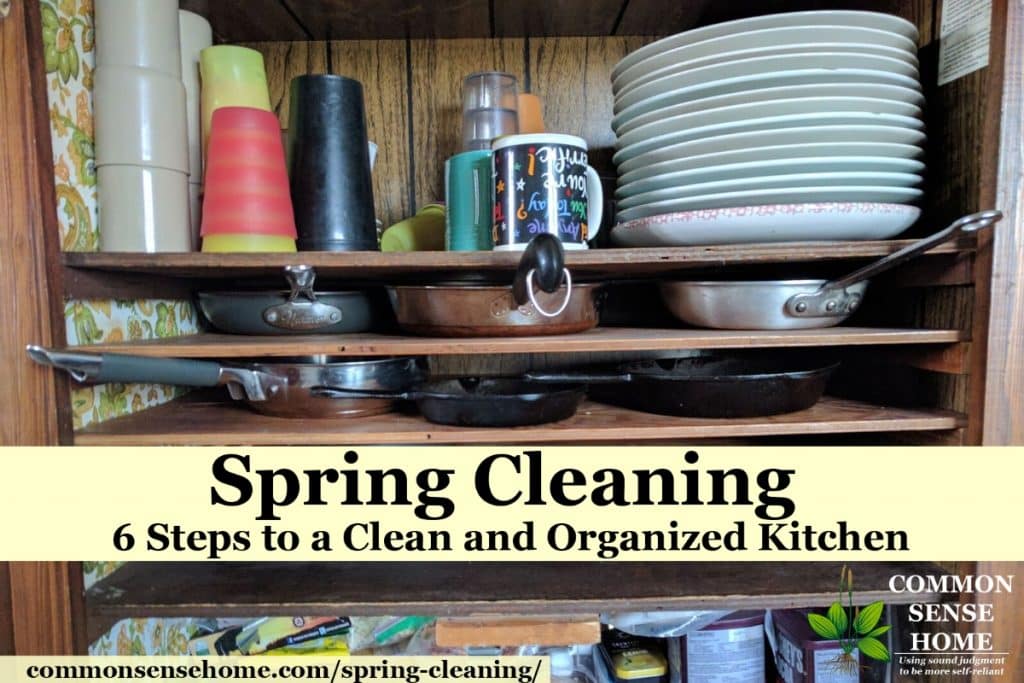
If you need extra cupboard space, consider slide-in shelf organizers to subdivide cabinets. We made wood inserts to subdivide shelves for glass baking pans, food containers, and casserole dishes. I wish we had done it sooner, as it makes things easier to find. It also makes it less likely to break the glass, since each item has it's own spot.
We used another divider to house our frying pans, especially the heavy cast iron skillets. They don’t hang well due to their weight, plus they could hurt someone if they fell.
#3 – Finding Space
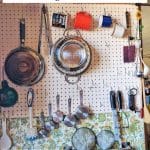
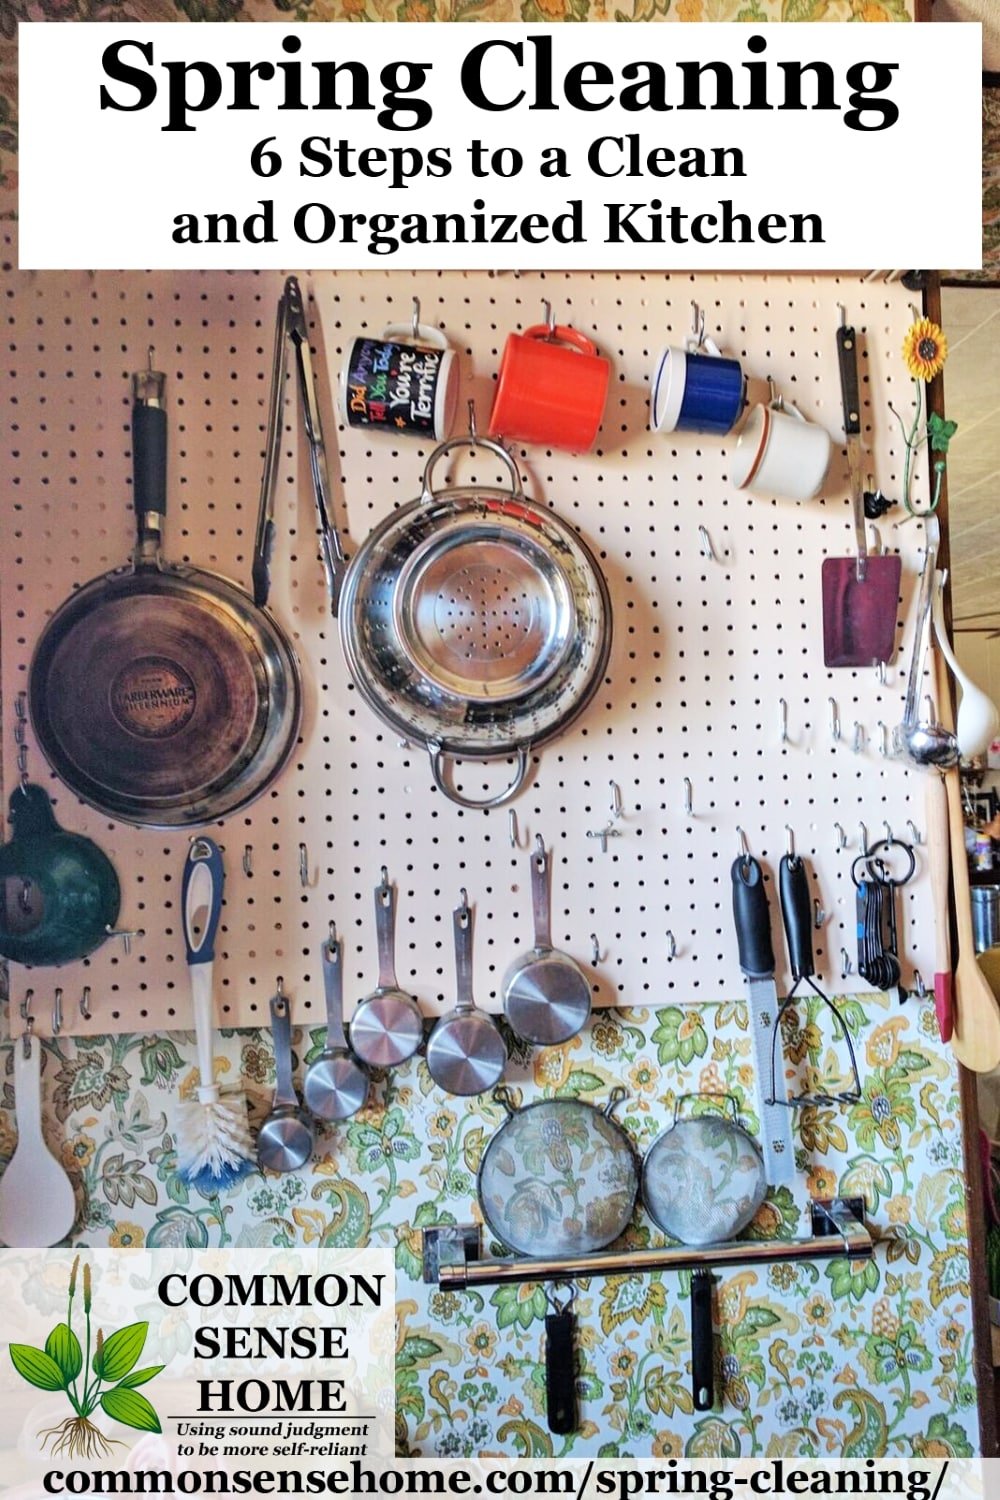
If your cupboards are maxxed out, consider a hanging basket that attaches to the underside of upper cupboards. These are handy for odd items that don't need to be on the shelf or items that need to be kept separate to prevent breakage. Get an Under Shelf Basket Rack here.
We also put a pegboard up that allowed us to hang measuring cups, cooking utensils, grilling tongs, mugs, and a few of the smaller frying pans. This freed up a lot of space and made it easier to find items that we use on a daily basis.
#4 – Refrigerator
As with the pantry and cupboards, empty the refrigerator completely. Make sure you do a thorough scrubbing and check for any signs of mold. If you find mold, treat with a mold killer such as concrobium mold killer, as bleach does not prevent the growth of mold. Don't forget to clean the outside of the fridge, too.
Carefully go through items and throw out food that is no longer safe to eat. Organize by food types and frequency of use as you repack.
To help keep your fridge organized, consider a chart on the fridge with rows for each day of the week and a blank area below the day of the week for keeping track of leftovers. In our house it has helped us to know at a glance, what’s in the fridge that needs to be eaten and how long it has been in there.
We use fine tip dry erase markers that have magnets on the back, and write right on the fridge. Another option is this magnetic dry erase board that comes with markers. We’re prone to losing slips of paper around here so we also created a section on the fridge for keeping track of groceries that need to be purchased.
#5 – Countertops
We have had messy, cluttered counters for as long as I can remember, so breaking this habit has been one of the hardest. Often times we find ourselves slipping back into piling things on kitchen counters. Once we started keeping counters clean we found it easier to cook and much less stressful — especially when we spilled since there wasn’t anything to clean besides the counter.
Small appliances and dishes kept on the counter can be re-homed to the pantry, the cupboard, the basement, or the donation pile. Keeping the counters clean is not an easy task, but it is certainly worth it when there are multiple dishes cooking – and multiple cooks!
Have everyone in your home get into the habit of cleaning the counters off before bed and immediately after a project is completed. Sometimes the counters still end up with a pile of items on them, but for the most part cleaning them off is not a time consuming task.
#6 – Floors, Windows and Walls
You’ll also want to scrub the floor, windows, and maybe take a light rag to the walls. If there are little hands that want to help or need to be kept busy, give them a vinegar solution in a bucket with a special scrubbing rag and make a big deal about how much fun it is to scrub the walls, the floor, or whatever task you give them.
When I was little, I loved picking out a few sock rags from the rag drawer and getting them wet with soapy water to scrub the floor for my mom. The best part is my sisters and I would run around the linoleum, have tons of fun, and still accomplish our task of scrubbing the floor. Sometimes cleaning CAN be fun!
Spring Cleaning Doesn't Have to Be Overwhelming!
Start small, break things into easy tasks, and remember to take breaks as needed. If you have little kids, don’t be afraid to involve them. Hard work is rewarding and the sooner they start learning responsibility the better it will be for all of you. It may slow down progress in some areas, but it will also make memories and instill values in your children.
If the task seems daunting don’t be afraid to ask for help from willing friends and family. Cleaning doesn’t have to be miserable and, just maybe, if you’re able to set some new habits, future cleaning will be a breeze.
This is a guest post by Dorothy Flaig. A farm girl at heart but an organizer by inclination, Dorothy works to keep things running smoothly for the extended family in their bustling farmhouse. She enjoys experimenting in the kitchen to develop new recipes and adapt old favorites to be allergy friendly.
You may also enjoy:
- 12+ Easy Homemaking Tips for the Busy Homesteader
- 35+ Handy Kitchen Substitutions – Printable Cheat Sheet
- Natural Stove Cleaners
I didn’t realize that studies showed that clutter could impact your ability to focus and depression. I think it’s important for us to not only be sure to keep our homes and offices clean, but also to feel empowered to keep them clean. It helps to have the right tools and supplies in order to be motivated to get those cleaning jobs done well.
Wonderful ideas! Happy spring cleaning!