Our main outbuilding is a combination of garden shed and chicken coop. The main human door is a screened patio door, which opens to the inside of the building. The chicken door was a custom build. As we were building, we left an opening in the wall for the chicken door, but didn't have a chicken door design we really liked. Through trial and error, searching the internet and talking with neighbors, we came up with a solution we believe will work for most chicken coops.
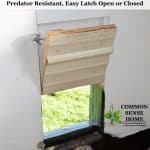
How to Build a Predator Resistant Chicken Door
How big should a chicken door be?
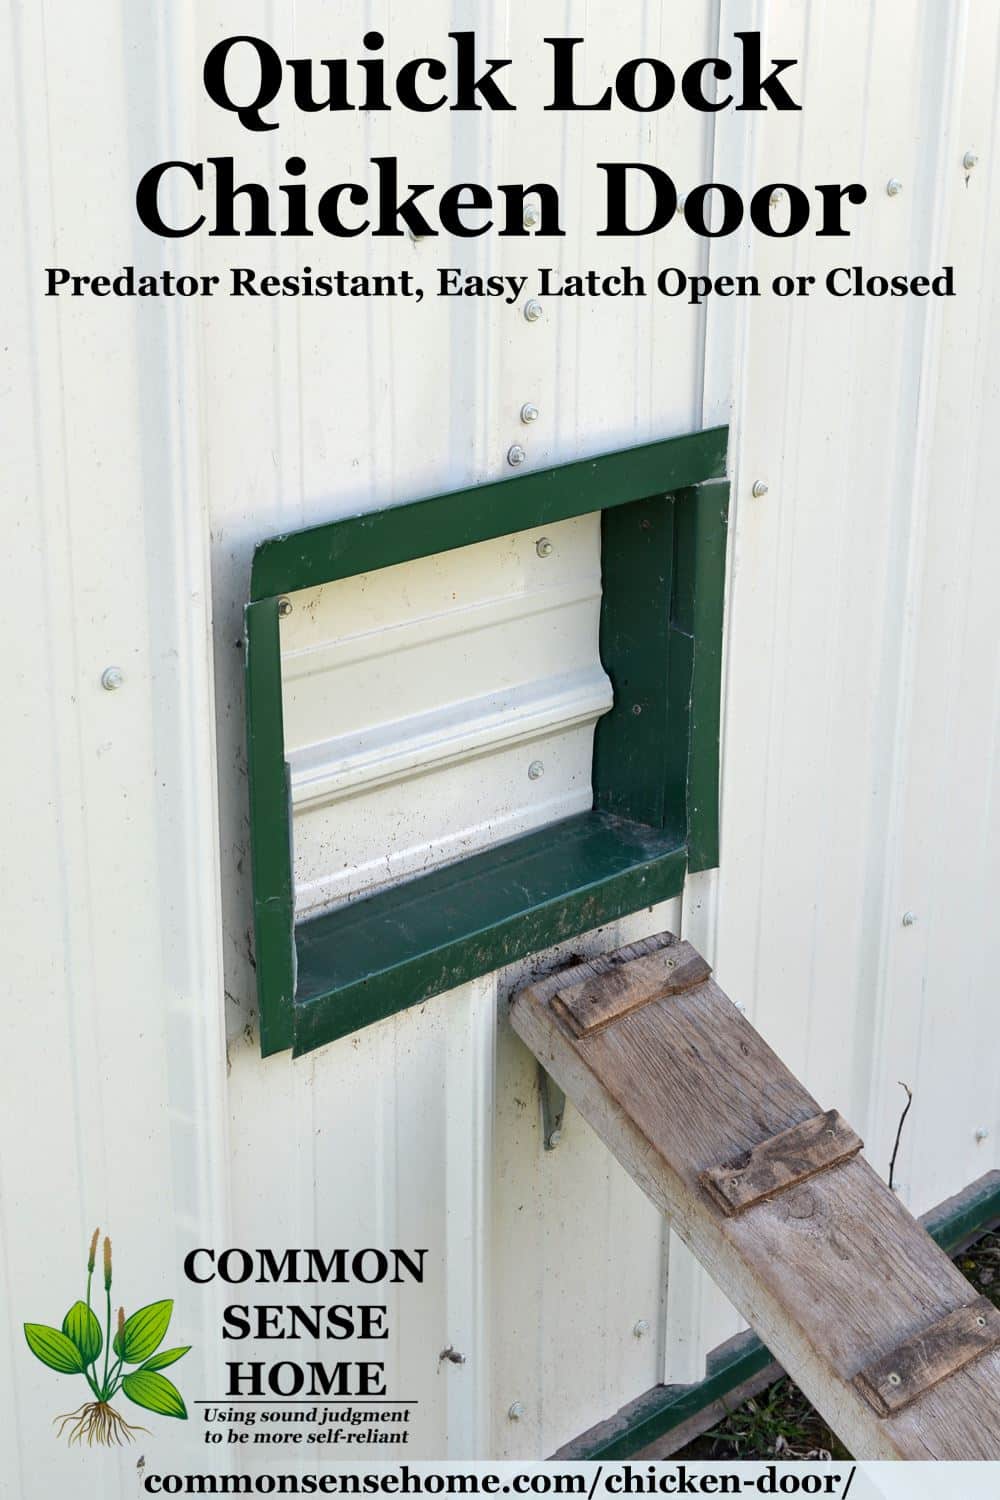
Make a fairly large opening depending on the type of bird you have. Ours is 14 inches tall by 16 inches wide. You can vary that (the original opening was slightly larger before the flashing was installed). Some folks use sizes as small as 5″x5′ for bantam chickens, up to 12″ x20″ for bigger breeds and more air circulation. Most breeds should fit through a 12″x12″ door, but we wanted to have plenty of room for chunky meat birds.
Supplies & Tools Needed
You will need metal tin snips, sharpie marker, tape measure, 2×4 boards and other scrap lumber in 2×8 or 2×10 boards (or a lot of small 2 x 4 as filler), screws, electric drill and sheet metal or metal siding. Flex seal Paint (or similar product – white or black) and caulk.
1. Frame the Door Opening
Each side of the chicken door frame should be double 2 x 4 stud. The human doorway was built double stud also, and windows with stud support and header. The double studs around the chicken door are for added strength. A stronger frame can resist foxes, raccoons and other predators – so don't skimp around the door.
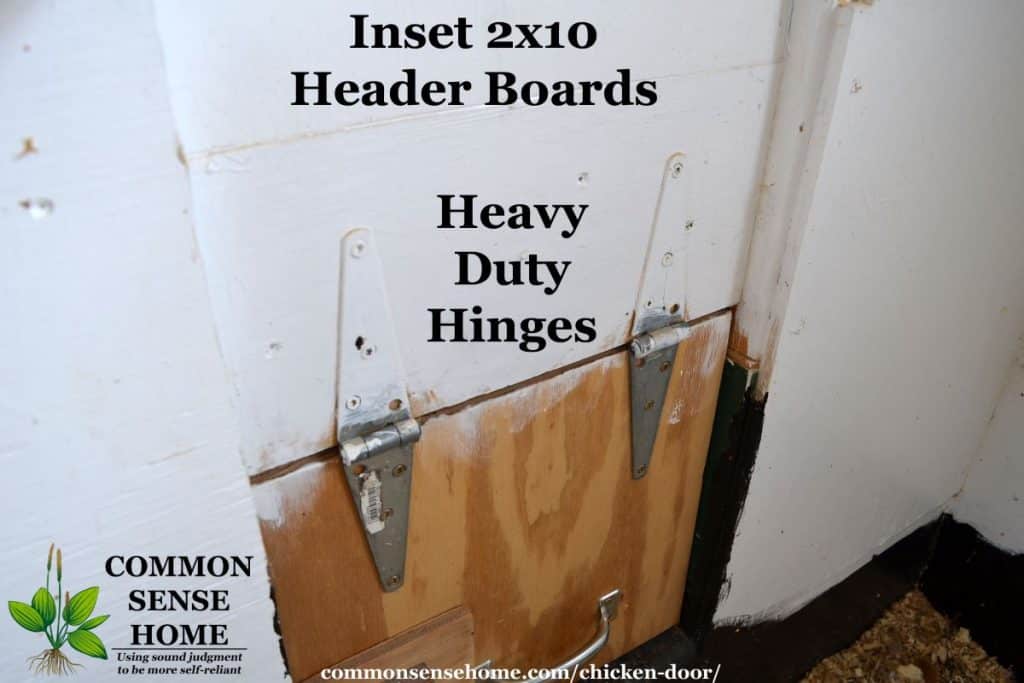
We used leftover 2 x 10 lumber from the other human door headers to create a mini header. To get it flush, we used some plywood and shims. That 2 x 10 is what the hinges connect to.
There are triple studs to the left of the door and double to the right. The left is triple because there is a window above. The right side extends past the top of the door for extra support.
The bottom edge of the opening has two levels – higher outside and lower inside. When closed, the latch holds the door snugly pressed against the higher outside edge so it can't swing past the wall. This edge is framed with a 2×8 and plywood to create the correct spacing.
The threshold, the bottom piece of wood the chickens walk out through needs to be slightly tilted out so that water flows down the face toward the OUTSIDE of the coop. This is very important because the water will leak under the flashing without this tilt. We did the bottom in two pieces one 2×3 double as the sill (bottom) and below that another piece of fill lumber so that the wall was FLUSH completely and reinforced.
The area where the door swings need to be set back enough to keep the door from moving left and right and the door needs to be able to overlap enough to allow the door to completely cover the opening.
The board under the opening should also be slightly sloped INTO the coop, so that material doesnt build up and block the door. So the upper main sill angles out and lower interior ledge angles in. It also needs to be well sealed as the droppings and mess can build up along that small ledge.
2. Pre-Fit Metal Sheathing
Once you have the frame done you will need to sheath the entire area. Each piece is effectively a U the length of the side plus overlap on the top and bottom.
**Note – Don't screw in anything till you can dry fit them all. **
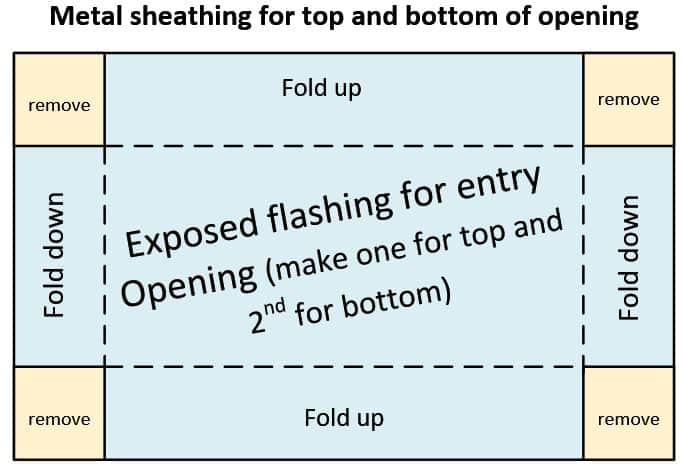
Top. The top is a U piece. It is bent to fit the space. It is designed to have the long sides bent “up”. Four Corners Cut and then the short ends folded down. It is under the siding on the outside. The left and right sides bend down along the inside of the opening.
Bottom. The bottom is a reverse of the top but the width will vary (so it wont be exactly the same as the top). It is bent to fit the space. It is designed to have the long sides bent DOWN. Four Corners cut and the the short ends folded UP. It is under the siding on the outside. The left and right sides bend UP along the inside of the opening.
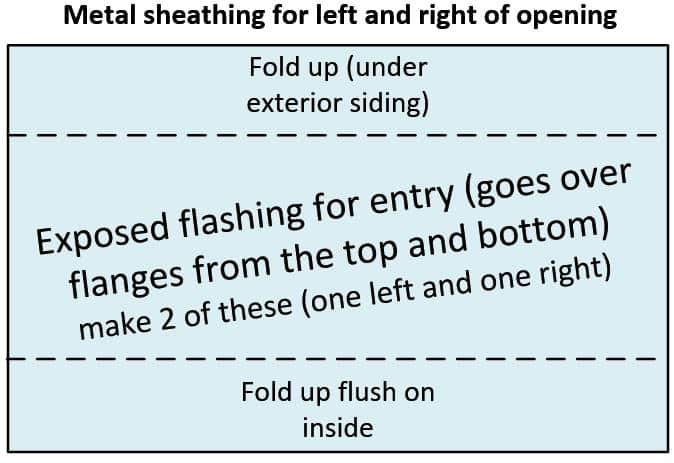
Left and Right. These cover the short flashing at the bottom and the top on the left and right side of the opening, again not leaving a seam to be clawed at. These are a simple fold matching the opening and flashing inside over the opening surface and outside under the siding.
Cut and dry fit four short pieces of J channel to match a standard window frame flashing for the exterior.
3. Finish the Sheathing
Now that you have all the pieces set you can caulk and screw them in place. We used screws to reduce the chance of a nail working loose and reducing the chance of a point being available for a claw to dig into.
AT EACH STEP, CAULK UNDERNEATH AND BETWEEN PIECES – we also used Flex Seal on the lower part to totally seal the wood and the meet point where the bottom metal sheathing meets up with the wood.
For each step, we started on the inside, holding the piece of metal sheathing tightly in place. Inside then through the double stud then through the siding.
First, screw the top piece in place.
Second, screw the bottom exterior piece in place.
Third, screw the bottom interior piece in place.
Finally, screw the left and right pieces in place.
Notes: The way we fit things together, the left and right flashing goes OVER the bottom (so water can't easily get into the gap). We were still concerned about that, so we sealed it with caulk all the way around inside and out. This is also why the sill (bottom of opening) angles down, so water flows OUT of the opening to exterior (not toward the inside)
In the pictures you will notice we used more than 4 pieces (top, bottom, left and right). We didn't have a big enough piece of green metal siding, so we used multiple smaller ones to create the same effect. Also, we didn't have extra J channel so we bent the green flashing to create a space similar to the J channel. It would have been better to keep it UNDER the siding like we note in the instructions and have a separate piece of J channel around the opening like a standard window.
4. Rough out the Chicken Door
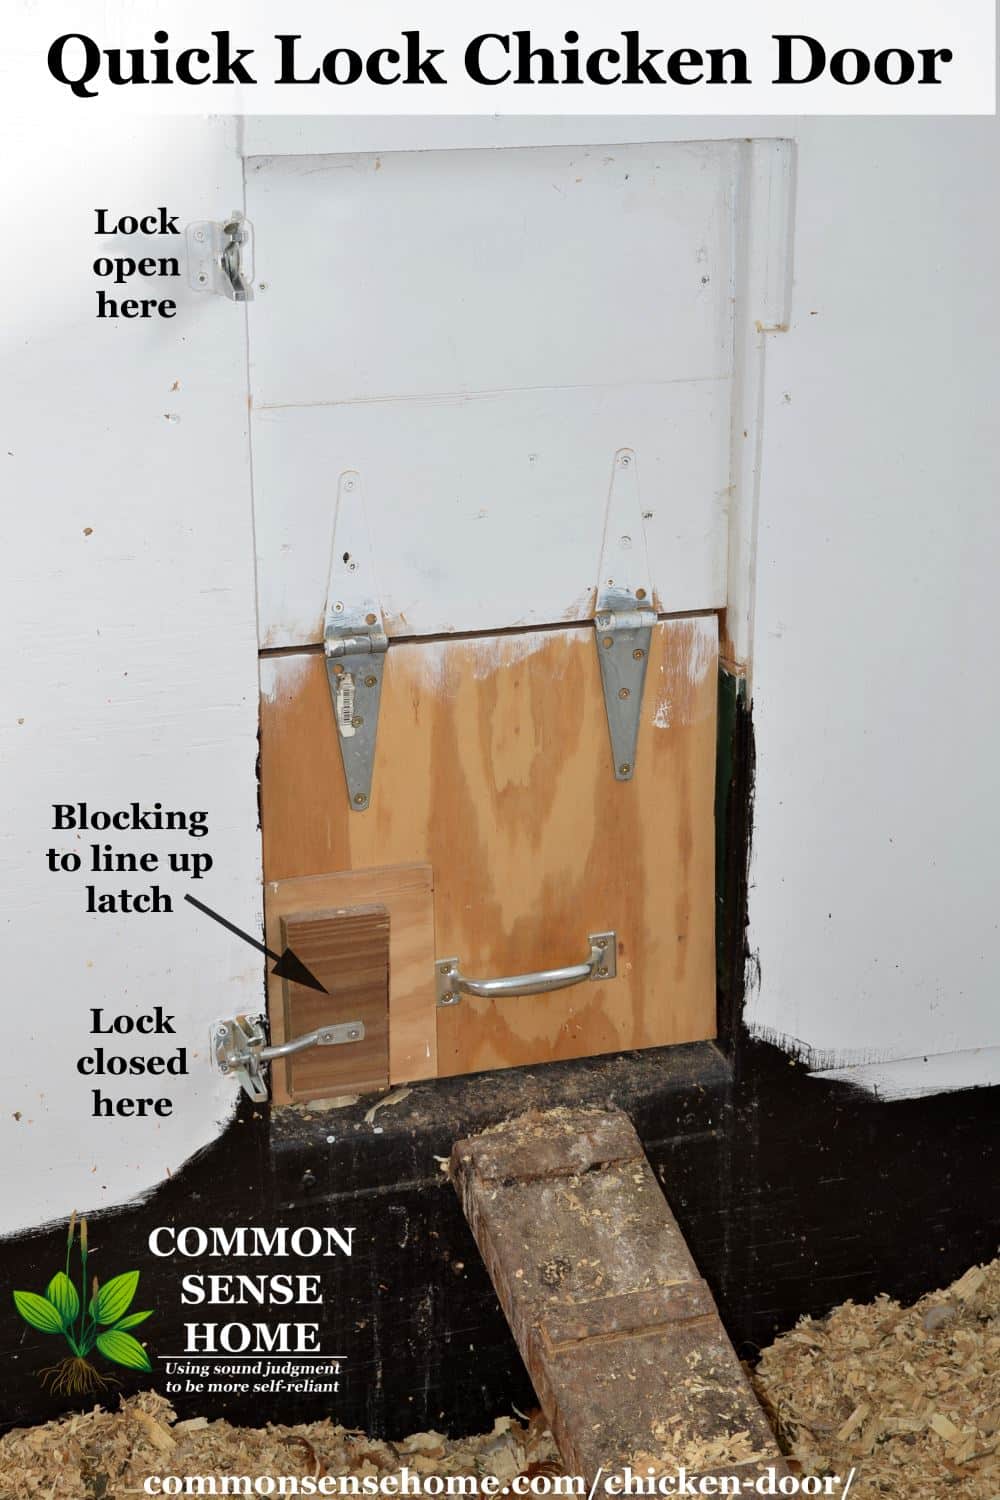
Cut a piece of 3/4 ply to match the inside opening but DOWN to the area below the opening so that it fully blocks the opening. We measured it left right and top and bottom and found the opening wasnt exactly square but it didnt matter as long as we cut it correctly and lined it up correctly. We added matching metal siding (from scrap) on the “outside” and have scrap wood blocks on the inside to allow the hinges and lock to line up (that small block allows the door to align with the CLOSED locking block. and it sticks out a bit on the door so it doesn't hit the wall when its in the OPEN locking block.
5. Attach the Door Hardware
Hinges. Two heavy duty hinges are needed so the door is solid in its connection on the top. We used two Stanley heavy duty galvanized strap hinges. We used the the siding to eliminate any point a claw could get dig in and allow the door or frame to be torn open or the door itself to be damaged. The hinges are overkill from a weight perspective BUT are big because they might receive the weight/pressure of the predator. Attach both hinges at once with just the top screw to ensure smooth open and close, and then add the final screws (normal dual hinge installation).
The Chicken Door Latch (Lock). Buy at least two of the same gate latches. We used two of the Stanley galvanized gate latches. The 1st lock mount goes above, to allow the door to be locked open. The second lock mount lines up so the door is securely kept shut. The other half of the lock mounts on the door (you only need one lock bar), so you will have parts left over. It needs to be shimmed out with a piece of 2×4 or other lumber cut to match.
You will need to add shims, plywood, 2x4s and/or 2x6s to anchor the hinges and make the locks line up. Unfortunately, this is a trial and error process and you will likely need to cut small chunks of lumber to get the right widths.
Finish the Door
Now you have the door, the hinges and locks in place, tighten the screws and confirm it is operational. If you want to be able to operate it from the outside, you'll need a line to “lift” the latch. The easiest is an eye hook and string with a hole through the wall wherever you want it above the door. Because our coop has metal siding, we opted to skip further wall penetrations.
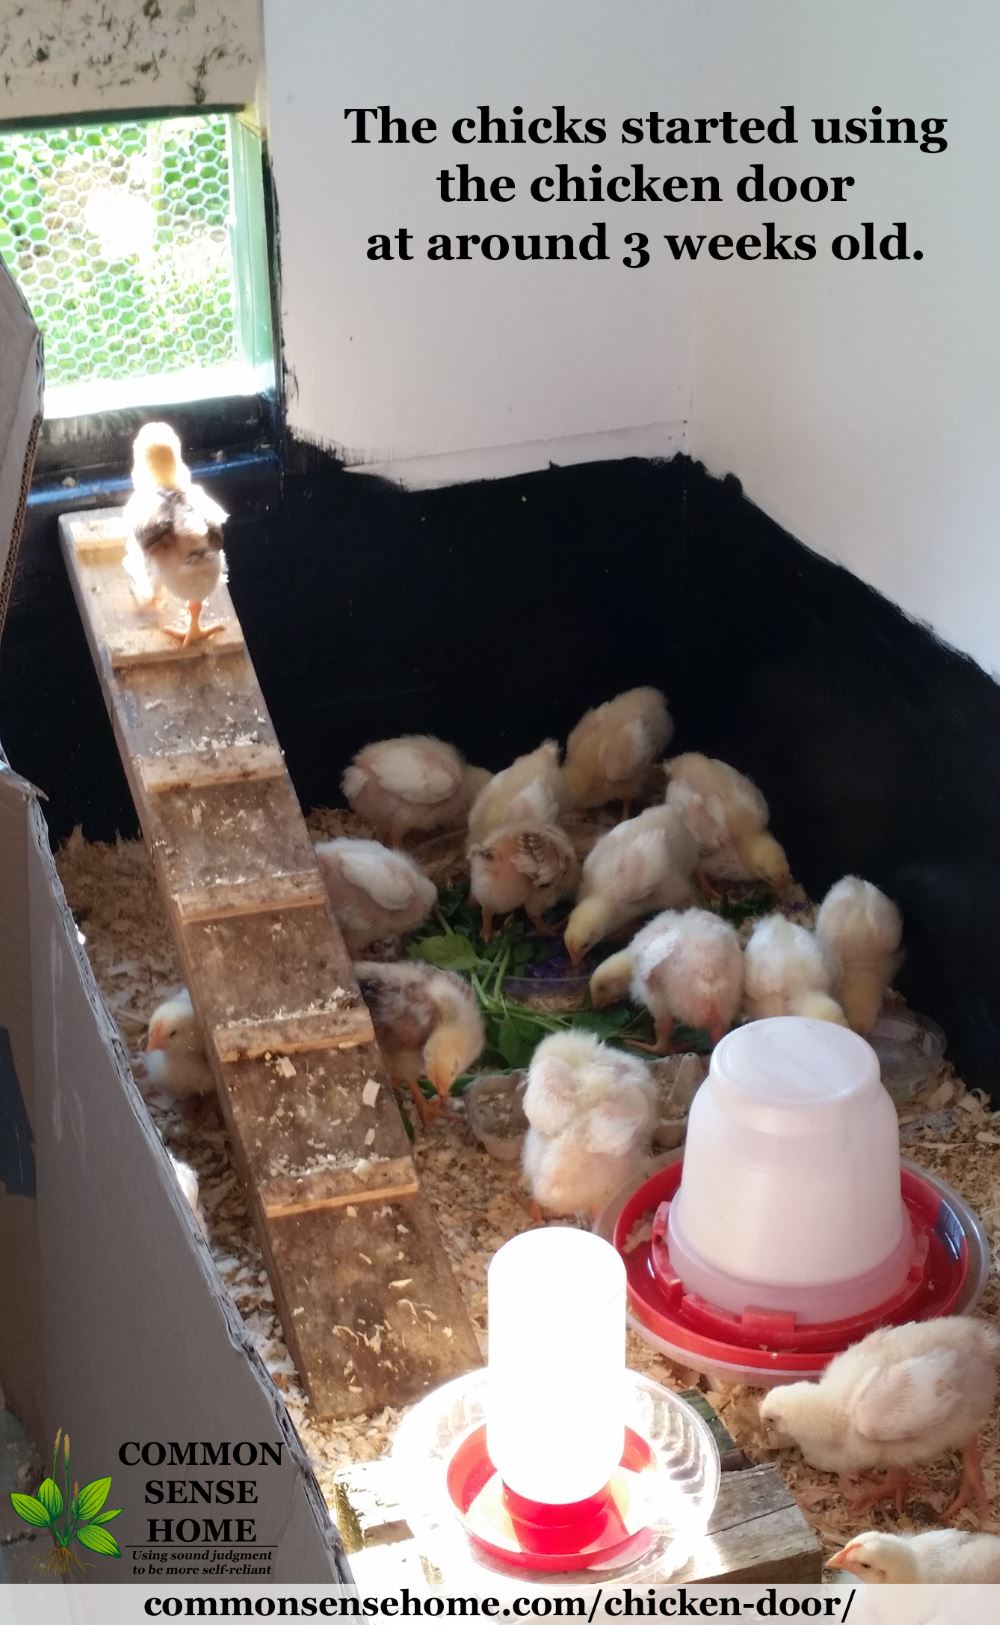
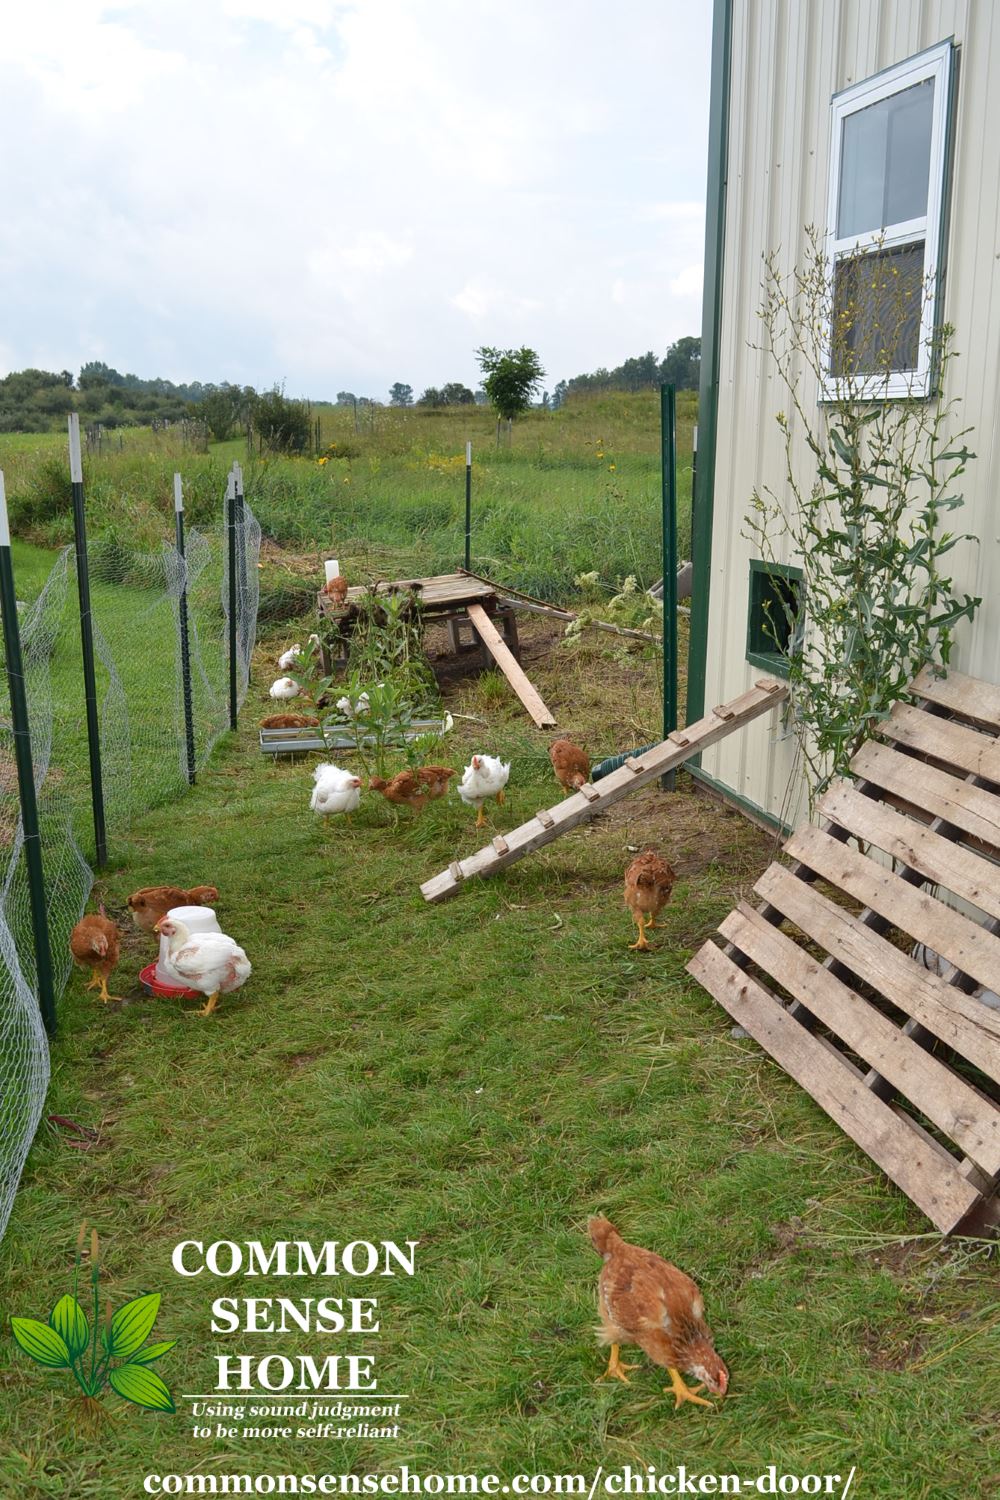
To help the chickens get in and out of the raised door, we built chicken ramps made out of 1×6 or 1×8 with strips of plywood for traction. Once the chicken door was in place, we mounted the ramps and were ready for chooks.
“This sturdy chicken door design is easy to use…” appears no less than NINE times in this article! (after nearly EVERY single paragraph). There are no pictures to help in building it, only a video at the end. This post appears to be more of a first draft than a final post…..Wonder if something went wrong? I’d like to be able to read and actually build this for my coop, it does seem like it would be a great addition to a coop design.
For some reason you were seeing the alternative text for the images (what shows up if someone tries to pin an image). Not sure why it didn’t load correctly the first time, but glad it did eventually.


OK< AFTER I posted the above, the article came up complete! Not sure WHY it wouldn't load completely BEFORE I posted the comment?
“This sturdy chicken door design is easy to use…” appears no less than NINE times in this article! (after nearly EVERY single paragraph). There are no pictures to help in building it, only a video at the end. This post appears to be more of a first draft than a final post…..Wonder if something went wrong? I’d like to be able to read and actually build this for my coop, it does seem like it would be a great addition to a coop design.
For some reason you were seeing the alternative text for the images (what shows up if someone tries to pin an image). Not sure why it didn’t load correctly the first time, but glad it did eventually.