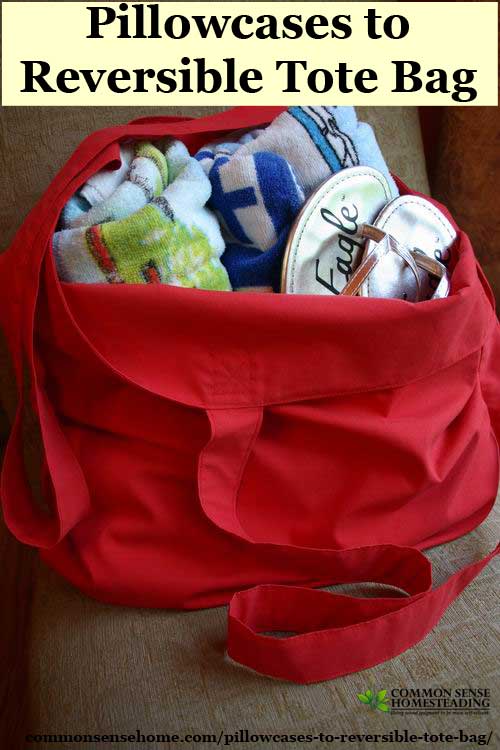
Pillowcases to Reversible Tote Bag Upcycle Project
This is a fun and easy pillowcases to reversible tote bag upcycle project that you can complete in just a couple of hours (at the most) with the added bonus of teaching you an awesome sewing skill – making a bag with a lining, or making it reversible!
Sewing Level – Beginner
Time to Complete – About Two hours
Materials/Equipment needed:
- Two standard size pillowcases
- Matching or coordinating thread
- Pins
- Scissors
- A chalk marker or fabric pen (the kind with the disappearing ink)
- A sewing machine
- A measuring tape or ruler
- An iron and ironing board
*Note: Since we will be upcycling previously used items, be sure to check for tears in the fabric and stitching. Either repair the defects or use something else for this bag. After the inspection, press both pillowcases flat with an iron.
The Pillowcases
Step 1
Start by cutting off the hemmed opening of both pillowcases. Mine have a nice deep hem (about 4 inches) but yours may not be as deep. Cut off at least 4 inches of pillowcase end (4” folded, 8” unfolded) and set these pieces aside for later.
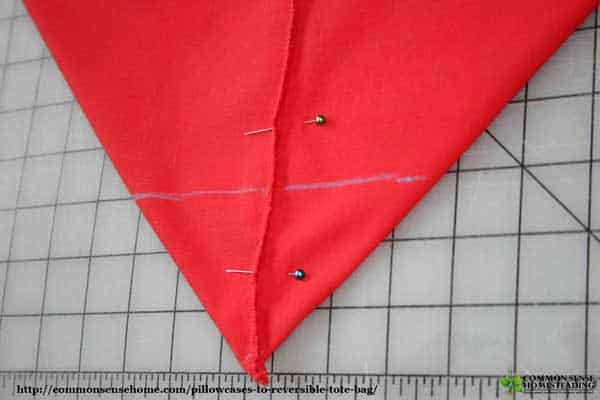
Step 2
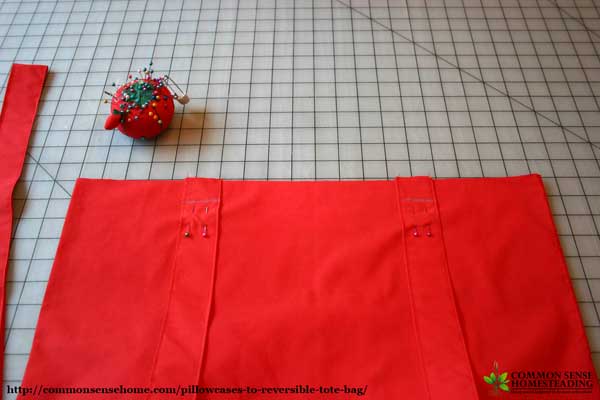
Now you need to turn the pillowcases inside out and line up the bottom seam at the corner with the side seam at the corner. Line up the seams and smooth out the material around the seams. Measure 3 inches up from the point and draw a line perpendicular to the seam. Pin in place and sew along the line. Do the same thing on the other corner and to the other pillow case. Cut off the excess fabric. This step will give the finished bag a flat bottom. If you don’t want a flat bottom, just skip this step.
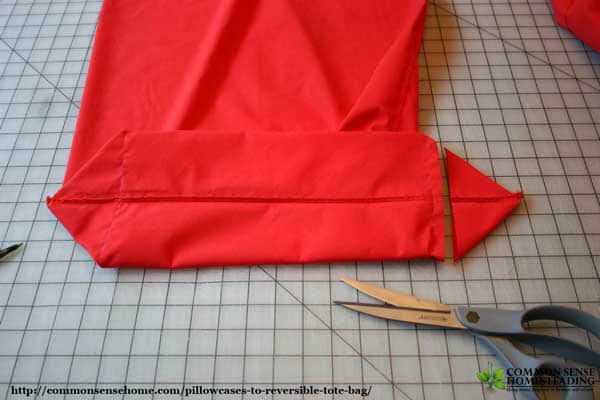
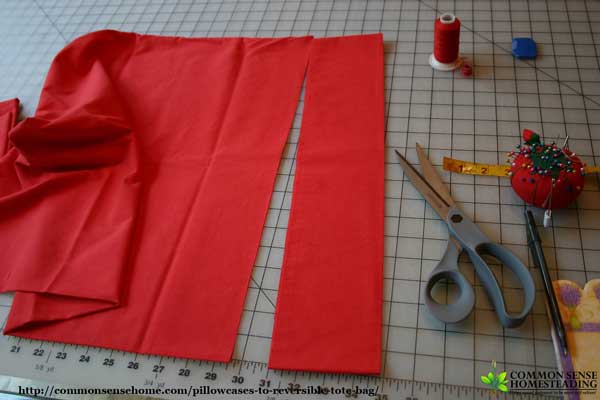
The Straps
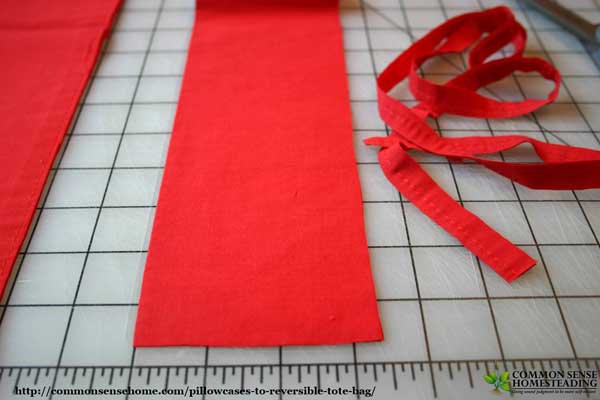
Step 3
Cut off the seam and the stitching leaving a three inch wide fabric strip (folded in half on the original fold line of the pillowcase hemmed opening). Do not cut the fold.
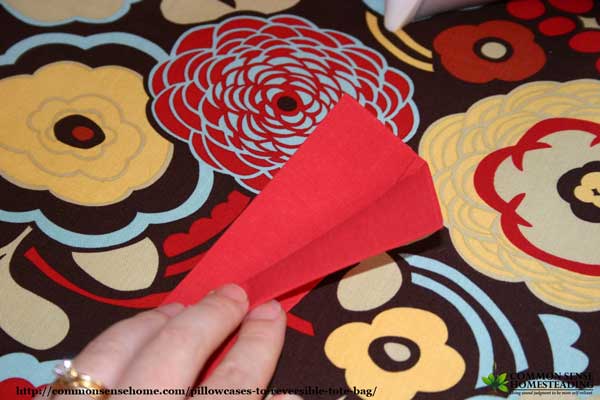
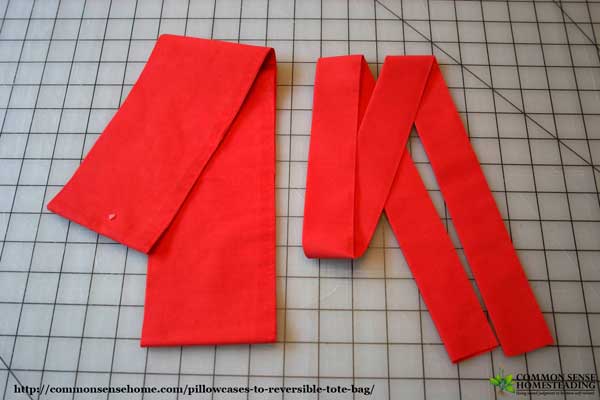
Step 4
On your ironing board or other iron safe surface, open the strap fold. Fold each cut edge to the center and iron. Then fold the strap back in half and iron again. Stitch each side as close to the edge as possible. Leave the ends unfinished since they will be concealed inside of the bag lining and will not be seen.
Stop And Think
Step 5
Before going on, decide how deep you want your bag to be and how long you want your handles to be. A typical shoulder bag handle is approximately 24 inches so that it will pass the “elbow test”. If you can pick up a bag by the straps and put it up on your shoulder with just that one hand, then the bag passes the “elbow test”. Trim the bag and handles to your desired size leaving 2 extra inches on the top of the bag, and 2 extra inches of length on EACH END of the straps.
Attach Your Straps
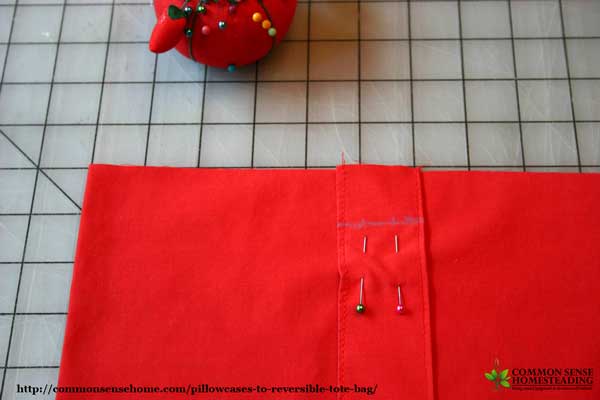
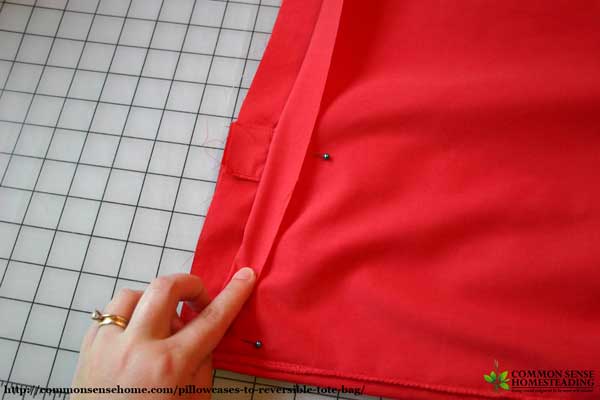
Step 6
On the right side of your pillowcase (meaning it is NOT inside-out), measure in 4.5 inches from the side and pin the strap in place being careful not to twist them. Measure down 1 inch and mark a line. Sew along the line. Do this for both straps.
Attach The Lining
Step 7
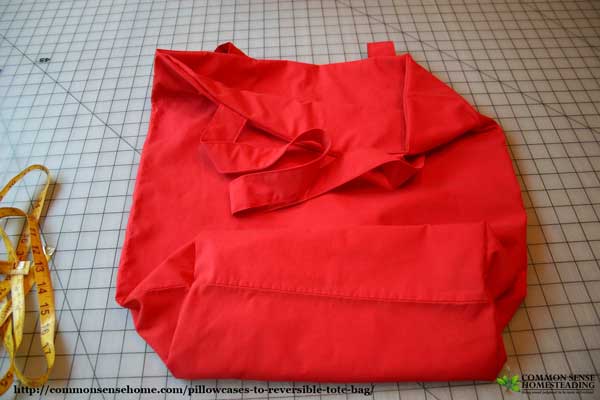
Take the pillowcase that does not have the straps sewn to it and turn it inside-out. Put the pillowcase that DOES have the straps sewn to it INSIDE the pillowcase that is inside-out so that the right sides, or the sides that will show on your finished bag, are facing each other. Also, tuck the straps in and line up the seams. Pin the lining in place.
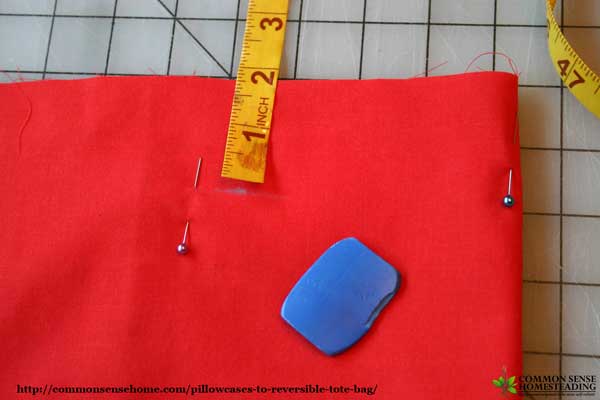
Step 8
Measure 1 ¾ inches to 2 inches down from the top of the pillowcase and mark this measurement all the way around the top. You want to make sure that you sew down far enough so that the stitch holding the straps in place does not show.
Step 9
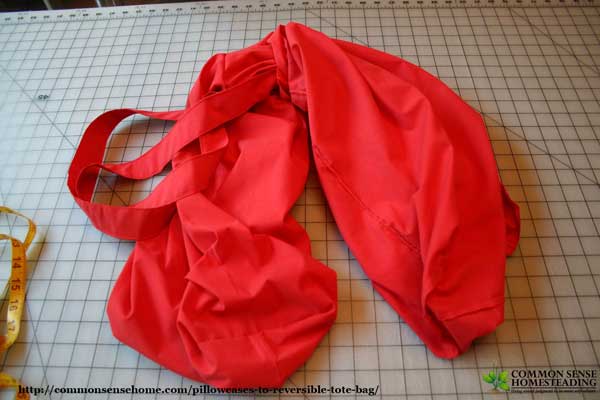
Sew around the top of the pillowcase starting near the side seam leaving an opening a few inches wide. Using that opening, pull the inside bag to the outside and turn the lining right-side out. Then you do the hokey-pokey…. just kidding. You will know if you did it right when the sewn raw edges and the seams of the outside of the pillowcases are not showing. I know, it makes my head hurt too… but once you’ve done it, you will know what I mean.
Finishing
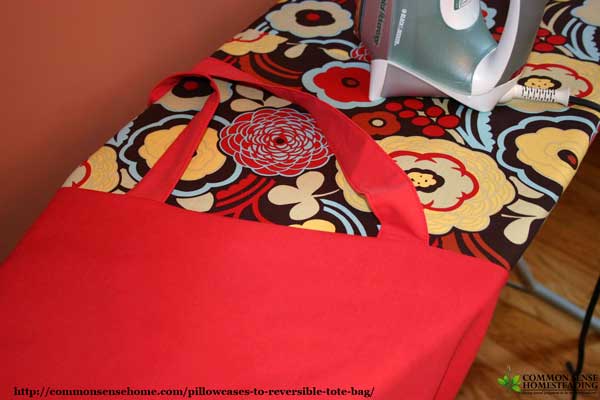
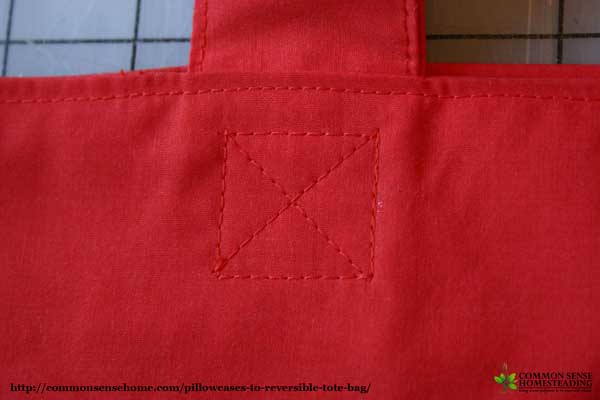
Step 10
Iron the opening around the straps and top stitch all the way around the top to close that opening. Reinforce the straps (if desired) with a square that has an X inside of it and you’re done!
I hope that you have some prettier pillowcases to work with… but this plain red pillowcase can be tie-dyed or screenprinted or decorated with jewels or whatever. I would just make sure that it remains washable! The best part of mastering this easy tutorial is that you can apply it to ANY bag that you make that you want to have a lining.


This is a guest post by Heather Teeters of “CelloRaisen – Design Your Life's Style“. Heather's bio states: “Mom of two and wife to my best friend who is a wonderfully handy man. Vegetable gardener, vermicomposter, scrapbooker, seamstress, and decorator. I enjoy the challenge of making something new out of something old, making my own clothing, trying out healthy recipes, and coming up with decorating ideas for my kid's rooms. Oh yeah, and I have this little gig on the side called a full-time job!”
Originally published in 2012, updated April 2016.
Thank you so much for a great tutorial! I am a very beginner sewing and I have made two bags already!
Just a quick question , do I attach the handles to the lining or the outer? Both time I’ve made this tonight, the handles have ended up trapped on the inside and I’ve had to unpick them. When you sew the liner and the outer together, do you leave gaps for the handles?
Many many thanks!
Sorry for the delay in replying to your question! It’s back-to-school time in Georgia and it’s been a busy couple weeks with my son starting kindergarten.
You should sew the straps to the right (or correct) side of the outer fabric. By “right side” I mean the side of the fabric that has the print on it or the side that you want showing when the bag is done. Then you turn the lining part of the bag in-side-out. Then put the “outer fabric” bag inside the lining bag so that both the outer and the lining “right sides of the fabric” are facing each other. This is also commonly called “right sides together”. When they are together you should not be able to see the handles at all. Then continue with step 8. Hope this helps!
-Heather